devops完整搭建教程(gitlab、jenkins、harbor、docker)
文章目录
- devops完整搭建教程(gitlab、jenkins、harbor、docker)
- 1.简介:
- 2.工作流程:
- 3.优缺点
- 4.环境说明
- 5.部署前准备工作
- 5.1.所有主机永久关闭防火墙和selinux
- 5.2.配置yum源
- 5.3.配置主机名与IP地址解析
- 6.部署gitlab主机
- 6.1.安装gitlab
- 6.2.配置gitlab
- 6.3.破解gitlab管理员密码
- 6.4.查看gitlab的web页面
- 7.部署jenkins主机
- 7.1.部署tomcat
- 7.2.安装jenkins
- 7.3.访问jenkins的web页面
- 7.4.安装git、maven、docker
- 7.5.安装docker
- 7.6.配置Jenkins主机可以从harbor主机拉取镜像,以及免密登录
- 8.部署harbor.com主机
- 8.1.安装harbor前需先安装docker及docker-compose
- 8.2.安装harbor.com
- 进入harbor官网,拉取harbor二进制包
- 执行install.sh文件
- 将harbor设置为开机自启
- 9.部署docker主机
- 9.1.安装docker服务
- 9.2.制作一个基础的tomcat镜像,并上传到私有镜像仓库
- 10.项目代码完整发布流程
- 10.1.将代码上传到gitlab主机
- 10.2.2.在Jenkins创建流水线项目,并运行项目
- 11.最终测试(在docker主机上测试)
- 11.错误排查报告
1.简介:
DevOps(Development Operations)是一种软件开发方法论和工作流程,旨在促进软件开发团队和运维团队之间的协作与沟通,以实现更高效的软件交付和运营。
2.工作流程:
- 持续集成(Continuous Integration,CI):开发团队将代码频繁地集成到共享存储库中,确保代码的一致性和稳定性。
- 持续交付(Continuous Delivery,CD):自动化构建、测试和部署流程,以快速将代码交付到生产环境。
- 自动化测试(Automated Testing):使用自动化测试工具和技术,确保软件的质量和稳定性。
- 自动化部署(Automated Deployment):自动化部署工具的使用,以快速、准确地部署软件到目标环境。
- 监控与日志(Monitoring and Logging):实时监测和记录系统的运行状态和日志,帮助快速发现和解决问题。
3.优缺点
优点:
- 加快交付速度:通过自动化流程和协作,加快软件的交付速度和发布周期。
- 提高质量和稳定性:自动化测试和部署流程能够提高软件的质量和稳定性。
- 促进协作与沟通:DevOps强调开发团队和运维团队之间的协作与沟通,改善工作效率和团队合作。
- 减少错误和故障:自动化流程和实时监控能够减少人为错误和系统故障的发生。
缺点:
- 学习成本高:实施和运营DevOps需要一定的学习和实践成本,对团队和组织提出了技术和文化上的要求。
- 依赖自动化工具:DevOps依赖于各种自动化工具和技术,需要投入一定的资源和成本进行选型、集成和维护。
- 组织变革需求:DevOps要求开发团队和运维团队之间的协作与沟通,可能需要进行组织结构和文化上的变革。
总体而言,DevOps通过将开发和运维整合在一起,以协作和自动化的方式,提高软件交付效率和质量,同时促进团队协作和沟通。
4.环境说明
| 主机名 | IP地址 | 充当角色 | 所需安装的软件 | 系统版本 |
|---|---|---|---|---|
| gitlab | 192.168.195.133 | 本地代码仓库 | gitlab-ce | centos8 |
| jenkins | 192.168.195.134 | 编译代码、打包镜像,项目发布 | jenkins、docker、git、maven | centos8 |
| harbor.com | 192.168.195.135 | 本地容器镜像仓库(存储镜像) | harbor、docker-compose、docker | centos8 |
| docker | 192.168.195.136 | 制作镜像、上传镜像,测试环境(项目发布在此主机) | docker | centos8 |
想要了解gitlab、jenkins、harbor的详细安装步骤,请阅读下列相关内容:
版本控制 gitlab 安装部署流程及其常用管理操作
tomcat部署jenkins
Harbor私有仓库
5.部署前准备工作
5.1.所有主机永久关闭防火墙和selinux
以gitlab主机演示:
//永久关闭防火墙
[root@gitlab ~]# systemctl disable --now firewalld.service
//永久关闭selinux
[root@gitlab ~]# setenforce 0
[root@gitlab ~]# sed -i 's/^SELINUX=enforcing/SELINUX=disabled/g' /etc/selinux/config
5.2.配置yum源
所有主机配置对应系统的yum源
以gitlab主机演示:
[root@gitlab ~]# rm -rf /etc/yum.repos.d/*
[root@gitlab ~]# curl -o /etc/yum.repos.d/CentOS-Base.repo
https://mirrors.aliyun.com/repo/Centos-vault-8.5.2111.repo
[root@gitlab ~]# yum clean all
[root@gitlab ~]# yum makecache
5.3.配置主机名与IP地址解析
将所有主机的IP地址及其主机名写入到/etc/hosts文件中
以gitlab主机演示:
[root@gitlab ~]# vim /etc/hosts
[root@gitlab ~]# cat /etc/hosts
127.0.0.1   localhost localhost.localdomain localhost4 localhost4.localdomain4
::1         localhost localhost.localdomain localhost6 localhost6.localdomain6192.168.195.133 tomcat
192.168.195.134 jenkins
192.168.195.135 harbor.com
192.168.195.136 docker
6.部署gitlab主机
6.1.安装gitlab
//安装git
[root@gitlab ~]# yum -y install git//安装依赖包
[root@gitlab ~]# yum -y install curl openssh-server openssh-clients postfix cronie policycoreutils-python perl
安装步骤略 . . .//上述安装依赖包成功则不需要进行这一步,上述出现错误可查看排错报告
[root@gitlab ~]# rpm -ivh --nodeps policycoreutils-python-2.5-34.el7.x86_64.rpm
warning: policycoreutils-python-2.5-34.el7.x86_64.rpm: Header V3 RSA/SHA256 Signature, key ID f4a80eb5: NOKEY
Verifying...                          ################################# [100%]
Preparing...                          ################################# [100%]
Updating / installing...1:policycoreutils-python-2.5-34.el7################################# [100%]//启动postfix服务并设置开机自启
[root@gitlab ~]# systemctl enable --now postfix.service
Created symlink /etc/systemd/system/multi-user.target.wants/postfix.service → /usr/lib/systemd/system/postfix.service.
[root@gitlab ~]# ss -antl      //查看25号端口是否开启
State             Recv-Q            Send-Q                       Local Address:Port                       Peer Address:Port
LISTEN            0                 128                                0.0.0.0:22                              0.0.0.0:*
LISTEN            0                 100                              127.0.0.1:25                              0.0.0.0:*
LISTEN            0                 128                                   [::]:22                                 [::]:*
LISTEN            0                 100                                  [::1]:25 //下载gitlab的rpm包
[root@gitlab ~]# wget https://mirrors.tuna.tsinghua.edu.cn/gitlab-ce/yum/el7/gitlab-ce-16.4.1-ce.0.el7.x86_64.rpm
--2023-10-07 14:50:24--  https://mirrors.tuna.tsinghua.edu.cn/gitlab-ce/yum/el7/gitlab-ce-16.4.1-ce.0.el7.x86_64.rpm
Resolving mirrors.tuna.tsinghua.edu.cn (mirrors.tuna.tsinghua.edu.cn)... 101.6.15.130, 2402:f000:1:400::2
Connecting to mirrors.tuna.tsinghua.edu.cn (mirrors.tuna.tsinghua.edu.cn)|101.6.15.130|:443... connected.
HTTP request sent, awaiting response... 200 OK
Length: 1295805808 (1.2G) [application/x-redhat-package-manager]
Saving to: ‘gitlab-ce-16.4.1-ce.0.el7.x86_64.rpm’gitlab-ce-16.4.1-ce.0.el7.x86_64. 100%[===========================================================>]   1.21G  20.3MB/s    in 81s     2023-10-07 14:51:45 (15.2 MB/s) - ‘gitlab-ce-16.4.1-ce.0.el7.x86_64.rpm’ saved [1295805808/1295805808][root@gitlab ~]# ls
anaconda-ks.cfg  gitlab-ce-16.4.1-ce.0.el7.x86_64.rpm
[root@gitlab ~]# rpm -ivh gitlab-ce-16.4.1-ce.0.el7.x86_64.rpm
warning: gitlab-ce-16.4.1-ce.0.el7.x86_64.rpm: Header V4 RSA/SHA1 Signature, key ID f27eab47: NOKEY
Verifying...                          ################################# [100%]
Preparing...                          ################################# [100%]
Updating / installing...1:gitlab-ce-16.4.1-ce.0.el7        ################################# [100%]
It looks like GitLab has not been configured yet; skipping the upgrade script.*.                  *.***                 ********               *****.******             ***************            ********,,,,,,,,,***********,,,,,,,,,,,,,,,,,,,,*********,,,,,,,,,,,.,,,,,,,,,,,*******,,,,,,,,,,,,,,,,,,,,,*****,,,,,,,,,.,,,,,,,****,,,,,,.,,,***,,,,,*,._______ __  __          __/ ____(_) /_/ /   ____ _/ /_/ / __/ / __/ /   / __ `/ __ \/ /_/ / / /_/ /___/ /_/ / /_/ /\____/_/\__/_____/\__,_/_.___/Thank you for installing GitLab!
GitLab was unable to detect a valid hostname for your instance.
Please configure a URL for your GitLab instance by setting `external_url`
configuration in /etc/gitlab/gitlab.rb file.    //此处告诉我们该服务配置文件的位置
Then, you can start your GitLab instance by running the following command:sudo gitlab-ctl reconfigureFor a comprehensive list of configuration options please see the Omnibus GitLab readme
https://gitlab.com/gitlab-org/omnibus-gitlab/blob/master/README.mdHelp us improve the installation experience, let us know how we did with a 1 minute survey:
https://gitlab.fra1.qualtrics.com/jfe/form/SV_6kVqZANThUQ1bZb?installation=omnibus&release=16-4
//出现上述的狐狸标识则表示安装成功
6.2.配置gitlab
//修改配置文件
[root@gitlab ~]# vim /etc/gitlab/gitlab.rb
[root@gitlab ~]# grep '^external_url' /etc/gitlab/gitlab.rb
external_url 'http://192.168.195.133'    //将此处设为gitlab的服务器ip地址亦或域名
[root@gitlab ~]# grep '8080' /etc/gitlab/gitlab.rbgitlab_workhorse['auth_backend'] = "http://localhost:8080"  //将两处8080端口的行取消注释puma['port'] = 8080 //重载配置文件并重启gitlab
[root@gitlab ~]# gitlab-ctl reconfigure
[root@gitlab ~]# gitlab-ctl restart
ok: run: alertmanager: (pid 2767) 1s
ok: run: gitaly: (pid 2777) 0s
ok: run: gitlab-exporter: (pid 2793) 0s
ok: run: gitlab-kas: (pid 2806) 0s
ok: run: gitlab-workhorse: (pid 2816) 1s
ok: run: logrotate: (pid 2827) 0s
ok: run: nginx: (pid 2833) 0s
ok: run: node-exporter: (pid 2841) 1s
ok: run: postgres-exporter: (pid 2847) 0s
ok: run: postgresql: (pid 2857) 0s
ok: run: prometheus: (pid 2866) 0s
ok: run: puma: (pid 2882) 1s
ok: run: redis: (pid 2887) 0s
ok: run: redis-exporter: (pid 2895) 0s
ok: run: sidekiq: (pid 2908) 0s//查看当前的gitlab版本
[root@gitlab ~]# head -1 /opt/gitlab/version-manifest.txt
gitlab-ce 16.4.1//查看端口号
[root@gitlab ~]# ss -antl
State          Recv-Q         Send-Q                   Local Address:Port                   Peer Address:Port
LISTEN         0              1024                         127.0.0.1:9093                        0.0.0.0:*
LISTEN         0              1024                         127.0.0.1:9100                        0.0.0.0:*
LISTEN         0              1024                         127.0.0.1:9229                        0.0.0.0:*
LISTEN         0              1024                         127.0.0.1:8080                        0.0.0.0:*
LISTEN         0              128                          127.0.0.1:9168                        0.0.0.0:*
LISTEN         0              511                            0.0.0.0:80                          0.0.0.0:*
LISTEN         0              128                          127.0.0.1:8082                        0.0.0.0:*
LISTEN         0              1024                         127.0.0.1:9236                        0.0.0.0:*
LISTEN         0              1024                         127.0.0.1:8150                        0.0.0.0:*
LISTEN         0              128                            0.0.0.0:22                          0.0.0.0:*
LISTEN         0              1024                         127.0.0.1:8151                        0.0.0.0:*
LISTEN         0              1024                         127.0.0.1:8153                        0.0.0.0:*
LISTEN         0              100                          127.0.0.1:25                          0.0.0.0:*
LISTEN         0              1024                         127.0.0.1:8154                        0.0.0.0:*
LISTEN         0              1024                         127.0.0.1:8155                        0.0.0.0:*
LISTEN         0              128                          127.0.0.1:8092                        0.0.0.0:*
LISTEN         0              511                            0.0.0.0:8060                        0.0.0.0:*
LISTEN         0              1024                         127.0.0.1:9121                        0.0.0.0:*
LISTEN         0              1024                         127.0.0.1:9090                        0.0.0.0:*
LISTEN         0              1024                         127.0.0.1:9187                        0.0.0.0:*
LISTEN         0              1024                                 *:9094                              *:*
LISTEN         0              128                              [::1]:9168                           [::]:*
LISTEN         0              128                               [::]:22                             [::]:*
LISTEN         0              100                              [::1]:25                             [::]:*
6.3.破解gitlab管理员密码
方法一:
(仅适用于初次安装服务)
[root@note1 ~]# cd /etc/gitlab/
[root@note1 gitlab]# ls
gitlab.rb  gitlab-secrets.json  initial_root_password  trusted-certs
[root@note1 gitlab]# cat initial_root_password
# WARNING: This value is valid only in the following conditions
#          1. If provided manually (either via `GITLAB_ROOT_PASSWORD` environment variable or via `gitlab_rails['initial_root_password']` setting in `gitlab.rb`, it was provided before database was seeded for the first time (usually, the first reconfigure run).
#          2. Password hasn't been changed manually, either via UI or via command line.
#
#          If the password shown here doesn't work, you must reset the admin password following https://docs.gitlab.com/ee/security/reset_user_password.html#reset-your-root-password.Password: 0h2AiLpPTnvB921far8MtZYmL3blSz9bMms7E3xqnVs=   //此条长代码就是我们的临时密码# NOTE: This file will be automatically deleted in the first reconfigure run after 24 hours.方法二
(没有受限范围,直接通过破解密码进行登录)
[root@gitlab ~]# gitlab-rails console -e production
--------------------------------------------------------------------------------Ruby:         ruby 3.0.6p216 (2023-03-30 revision 23a532679b) [x86_64-linux]GitLab:       16.4.1 (e6801ed8d44) FOSSGitLab Shell: 14.28.0PostgreSQL:   13.11
------------------------------------------------------------[ booted in 21.58s ]
Loading production environment (Rails 7.0.6)
irb(main):001:0> user = User.where(id: 1).first    //id为1的是超级管理员
=> #<User id:1 @root>
irb(main):002:0> user.password = 'redhat123'       //密码必须至少8个字符
=> "redhat123"
irb(main):003:0> user.password_confirmation = 'redhat123'  //再次输入密码
=> "redhat123"
irb(main):004:0> user.save!  //保存修改,若无问题将返回true
=> true
irb(main):005:0> exit   //退出
6.4.查看gitlab的web页面
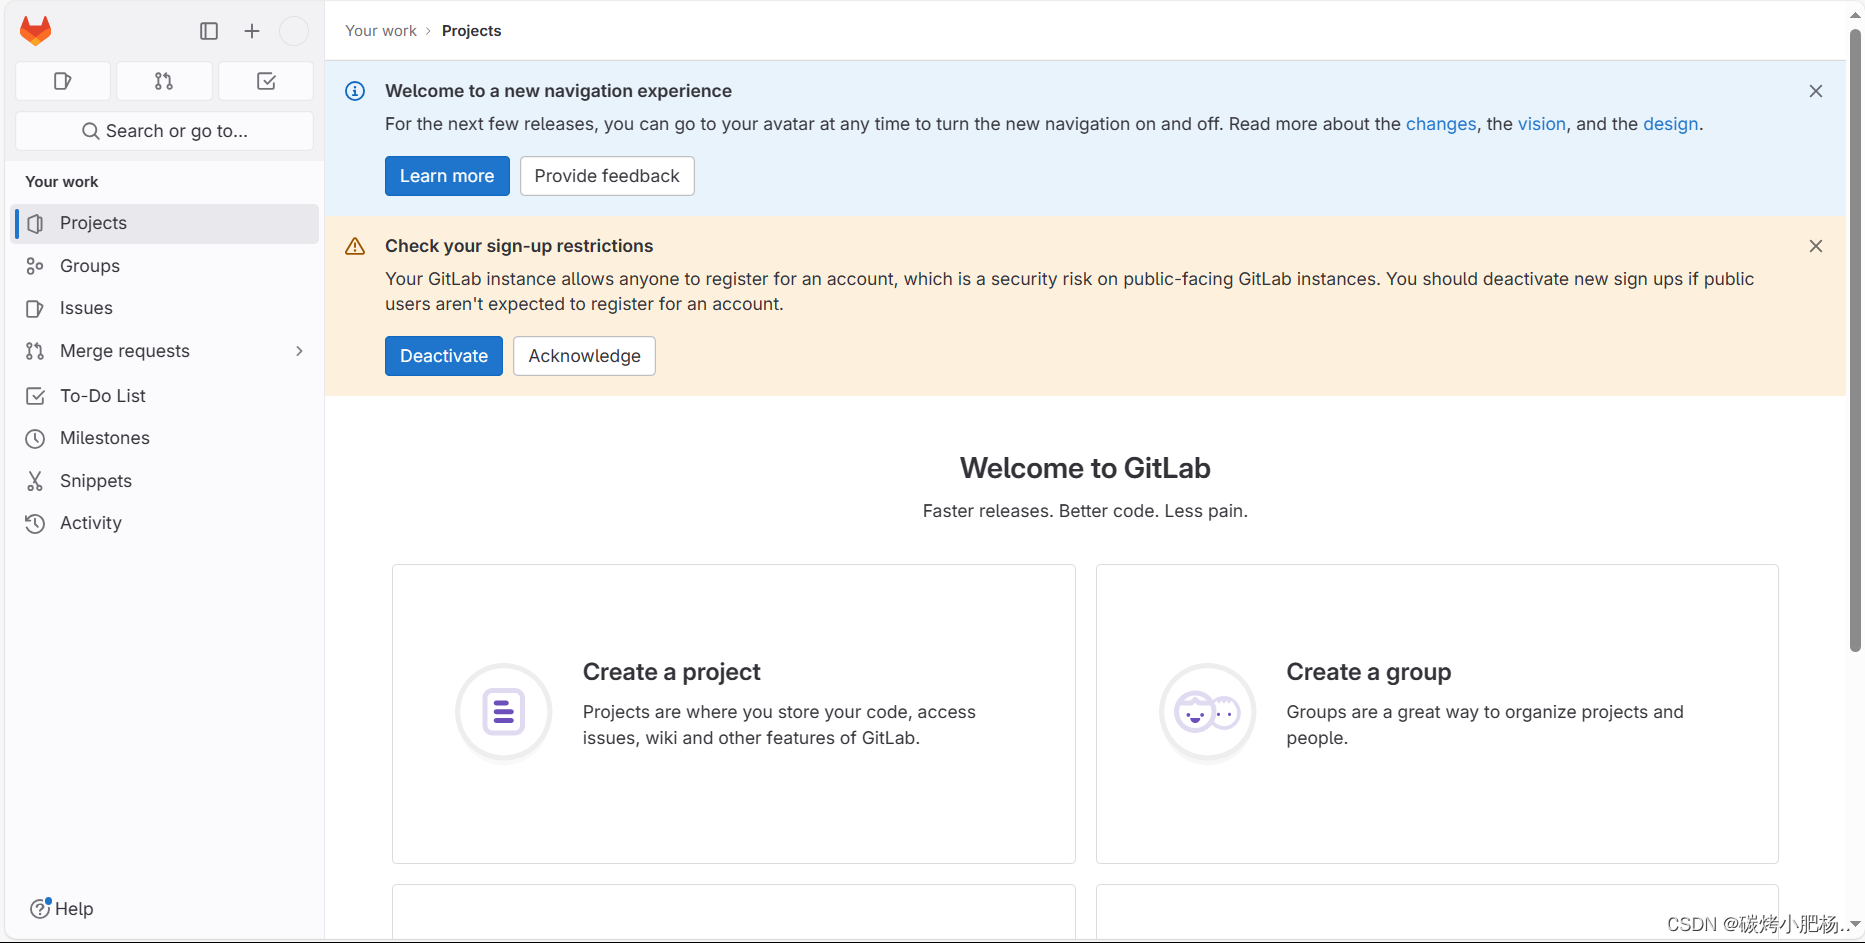
部署gitlab完成
7.部署jenkins主机
7.1.部署tomcat
Jenkins是一个Java程序,所以要依赖tomcat
//安装java环境
[root@jenkins ~]# yum -y install java-1.8.0-openjdk java-1.8.0-openjdk-devel wget vim//查看安装的版本,能够查看到版本则说明安装成功
[root@jenkins ~]# java -version
openjdk version "1.8.0_312"
OpenJDK Runtime Environment (build 1.8.0_312-b07)
OpenJDK 64-Bit Server VM (build 25.312-b07, mixed mode)//拉取tomcat软件包
[root@jenkins ~]# wget https://archive.apache.org/dist/tomcat/tomcat-9/v9.0.80/bin/apache-tomcat-9.0.80.tar.gz
--2023-10-10 13:41:29-- https://archive.apache.org/dist/tomcat/tomcat-9/v9.0.80/bin/apache-tomcat-9.0.80.tar.gz
Resolving archive.apache.org (archive.apache.org)... 65.108.204.189, 2a01:4f9:1a:a084::2
Connecting to archive.apache.org (archive.apache.org)|65.108.204.189|:443... connected.
HTTP request sent, awaiting response... 200 OK
Length: 11692853 (11M) [application/x-gzip]
Saving to: ‘apache-tomcat-9.0.80.tar.gz’apache-tomcat-9.0.80.tar.gz 100%[===============================================>] 11.15M 25.2KB/s in 5m 55s 2023-10-10 13:47:25 (32.1 KB/s) - ‘apache-tomcat-9.0.80.tar.gz’ saved [11692853/11692853][root@jenkins ~]# ls
anaconda-ks.cfg apache-tomcat-9.0.80.tar.gz//解压至指定目录
[root@jenkins ~]# tar xf apache-tomcat-9.0.80.tar.gz -C /usr/local/
[root@jenkins ~]# ls /usr/local/
apache-tomcat-9.0.80 bin etc games include lib lib64 libexec sbin share src//设置tomcat软链接,方便后续如果更换tomcat版本后也能直接使用
[root@jenkins ~]# cd //usr/local/
[root@jenkins local]# ll
total 0
drwxr-xr-x 9 root root 220 Oct 10 13:49 apache-tomcat-9.0.80
drwxr-xr-x. 2 root root 6 Aug 12 2018 bin
drwxr-xr-x. 2 root root 6 Aug 12 2018 etc
drwxr-xr-x. 2 root root 6 Aug 12 2018 games
drwxr-xr-x. 2 root root 6 Aug 12 2018 include
drwxr-xr-x. 2 root root 6 Aug 12 2018 lib
drwxr-xr-x. 2 root root 6 Aug 12 2018 lib64
drwxr-xr-x. 2 root root 6 Aug 12 2018 libexec
drwxr-xr-x. 2 root root 6 Aug 12 2018 sbin
drwxr-xr-x. 5 root root 49 Jul 20 11:24 share
drwxr-xr-x. 2 root root 6 Aug 12 2018 src
[root@jenkins local]# ln -s apache-tomcat-9.0.80 tomcat
[root@jenkins local]# ll
total 0
drwxr-xr-x 9 root root 220 Oct 10 13:49 apache-tomcat-9.0.80
drwxr-xr-x. 2 root root 6 Aug 12 2018 bin
drwxr-xr-x. 2 root root 6 Aug 12 2018 etc
drwxr-xr-x. 2 root root 6 Aug 12 2018 games
drwxr-xr-x. 2 root root 6 Aug 12 2018 include
drwxr-xr-x. 2 root root 6 Aug 12 2018 lib
drwxr-xr-x. 2 root root 6 Aug 12 2018 lib64
drwxr-xr-x. 2 root root 6 Aug 12 2018 libexec
drwxr-xr-x. 2 root root 6 Aug 12 2018 sbin
drwxr-xr-x. 5 root root 49 Jul 20 11:24 share
drwxr-xr-x. 2 root root 6 Aug 12 2018 src
lrwxrwxrwx 1 root root 20 Oct 10 13:51 tomcat -> apache-tomcat-9.0.80
[root@jenkins local]# cd tomcat/
[root@jenkins tomcat]# pwd
//usr/local/tomcat
[root@jenkins tomcat]# ls
bin conf lib logs README.md RUNNING.txt webapps
BUILDING.txt CONTRIBUTING.md LICENSE NOTICE RELEASE-NOTES temp work
[root@jenkins tomcat]# ls bin/
bootstrap.jar ciphers.sh daemon.sh setclasspath.bat startup.sh version.bat
catalina.bat commons-daemon.jar digest.bat setclasspath.sh tomcat-juli.jar version.sh
catalina.sh commons-daemon-native.tar.gz digest.sh shutdown.bat tomcat-native.tar.gz
catalina-tasks.xml configtest.bat makebase.bat shutdown.sh tool-wrapper.bat
ciphers.bat configtest.sh makebase.sh startup.bat tool-wrapper.sh上述的bin目录中我们能够用到的catalina.sh、shutdown.sh、version.sh、startup.sh、configtest.sh
这几个执行文件,用途分别是:
catalina.sh 能够关闭和开启服务(常用)
shutdown.sh 只能关闭服务(不是关闭主机)
startup.sh 只能开启服务
version.sh 查看tomcat版本
configtest.sh 测试配置文件是否存在错误,检查配置文件//将tomcat的lib位置存放在/etc/ld.so.conf/d/下面,命名一个自身名字的文件,方便查找
[root@jenkins tomcat]# ls
bin conf lib logs README.md RUNNING.txt webapps
BUILDING.txt CONTRIBUTING.md LICENSE NOTICE RELEASE-NOTES temp work
[root@jenkins tomcat]# vim /etc/ld.so.conf.d/tomcat.conf
[root@jenkins tomcat]# cat /etc/ld.so.conf.d/tomcat.conf
/usr/local/tomcat/lib
[root@jenkins tomcat]# ldconfig -v
ldconfig: Can't stat /libx32: No such file or directory
ldconfig: Path `/usr/lib' given more than once
ldconfig: Path `/usr/lib64' given more than once
ldconfig: Can't stat /usr/libx32: No such file or directory
/usr/lib64//bind9-export:libisccfg-export.so.163 -> libisccfg-export.so.163.0.4libisc-export.so.1104 -> libisc-export.so.1104.0.0libirs-export.so.161 -> libirs-export.so.161.0.0libdns-export.so.1107 -> libdns-export.so.1107.1.0
/usr/local/tomcat/lib:
/lib:
/lib64://使用绝对路径执行/usr/local/tomcat/bin/下面的脚本,tomcat不能写进环境变量,放置后续更改tomcat版本后环境变量仍是之前的tomcat版本
[root@jenkins tomcat]# pwd
//usr/local/tomcat
[root@jenkins tomcat]# cd bin
[root@jenkins bin]# pwd
/usr/local/tomcat/bin
[root@jenkins bin]# ./catalina.sh start
Using CATALINA_BASE: //usr/local/tomcat
Using CATALINA_HOME: //usr/local/tomcat
Using CATALINA_TMPDIR: //usr/local/tomcat/temp
Using JRE_HOME: /usr
Using CLASSPATH: //usr/local/tomcat/bin/bootstrap.jar://usr/local/tomcat/bin/tomcat-juli.jar
Using CATALINA_OPTS:
Tomcat started.
[root@jenkins bin]# ss -antl
State Recv-Q Send-Q Local Address:Port Peer Address:Port
LISTEN 0 128 0.0.0.0:22 0.0.0.0:*
LISTEN 0 1 [::ffff:127.0.0.1]:8005 *:*
LISTEN 0 100 *:8080 *:*
LISTEN 0 128 [::]:22 [::]:*
[root@jenkins bin]# ps -ef | grep tomcat //查看tomcat进程
root 1585 1 0 14:02 pts/0 00:00:06 /usr/bin/java -Djava.util.logging.config.file=//usr/local/tomcat/conf/logging.properties -Djava.util.logging.manager=org.apache.juli.ClassLoaderLogManager -Djdk.tls.ephemeralDHKeySize=2048 -Djava.protocol.handler.pkgs=org.apache.catalina.webresources -Dorg.apache.catalina.security.SecurityListener.UMASK=0027 -Dignore.endorsed.dirs= -classpath //usr/local/tomcat/bin/bootstrap.jar://usr/local/tomcat/bin/tomcat-juli.jar -Dcatalina.base=//usr/local/tomcat -Dcatalina.home=//usr/local/tomcat -Djava.io.tmpdir=//usr/local/tomcat/temp org.apache.catalina.startup.Bootstrap start
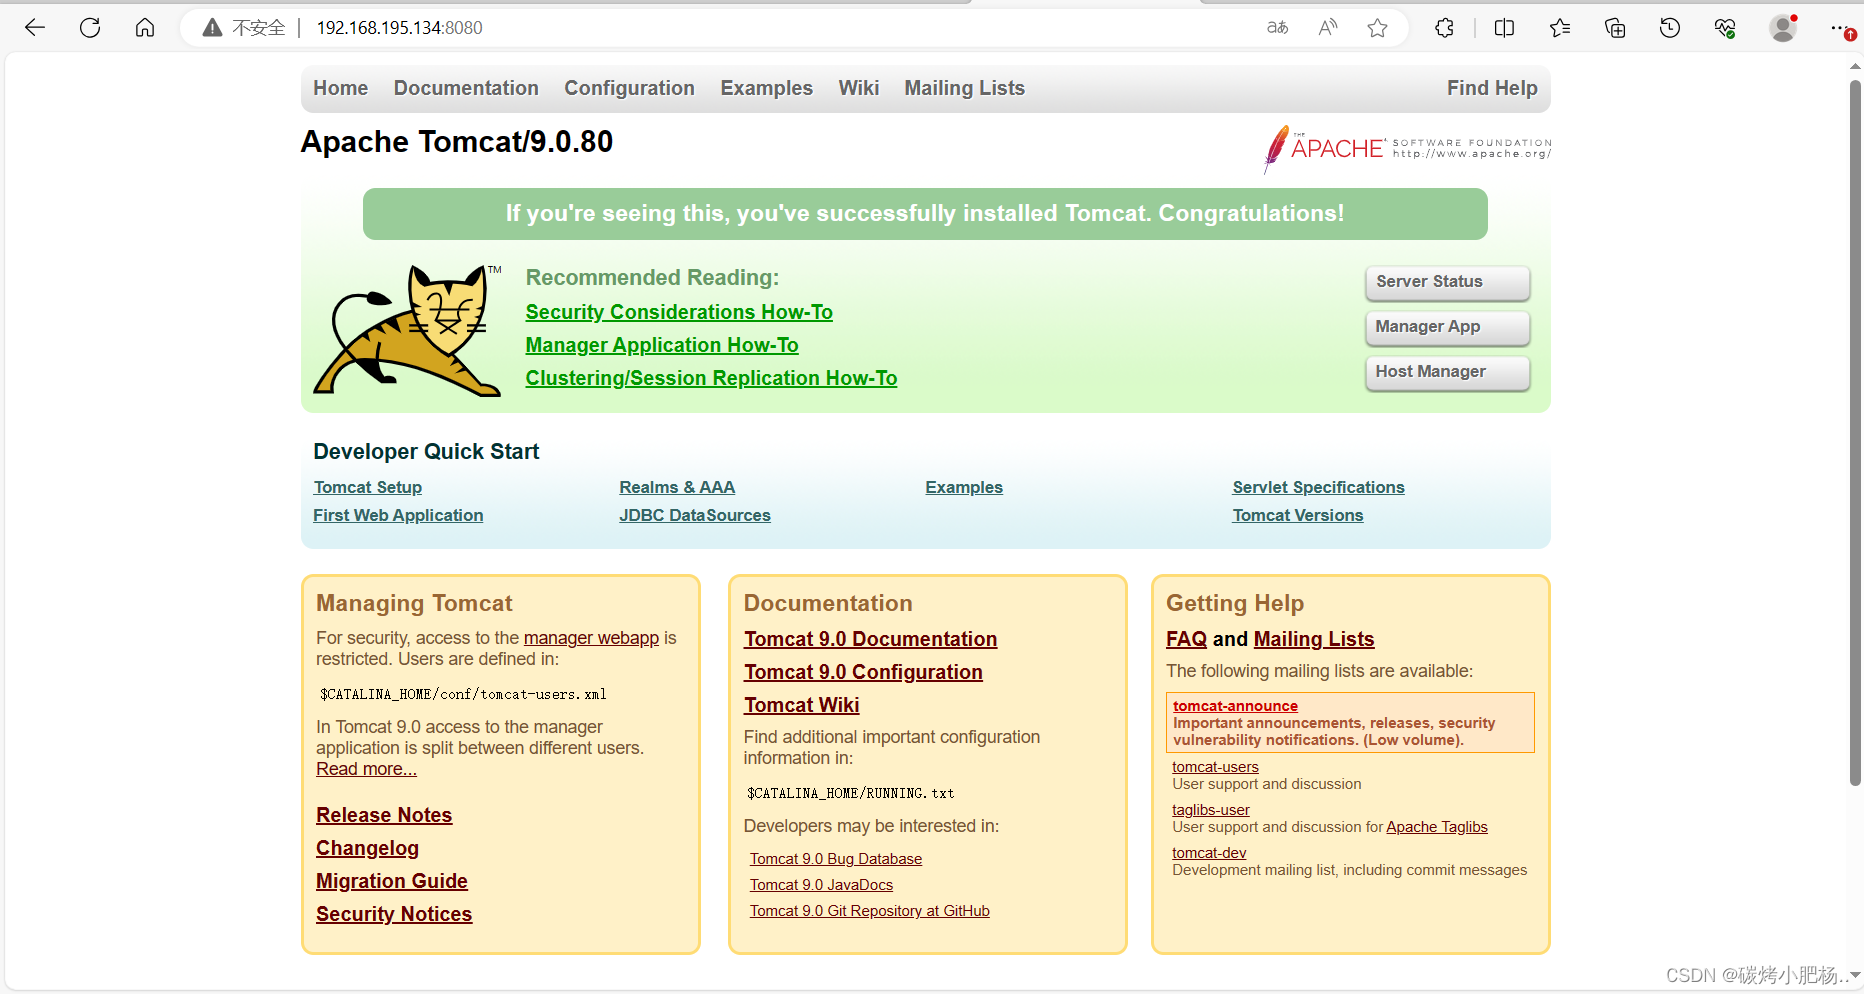
root 1640 1455 0 14:22 pts/0 00:00:00 grep --color=auto tomcat服务启动成功
访问tomcat的web页面
7.2.安装jenkins
Jenkins官网https://www.jenkins.io/download/
///安装Jenkins所需要的Java-17-openjdk
[root@jenkins local]# cd jenkins/
[root@jenkins jenkins]# yum -y install java-17-openjdk java-17-openjdk-devel//由于安装tomcat时安装的Java1.8,但是Jenkins需要Java17,为了防止版本冲突,需要配置jdk的优先级,从而能够同时使用这两个版本
[root@jenkins jenkins]# alternatives --config java //优先使用java-17-openjdkThere are 2 programs which provide 'java'.Selection Command
-----------------------------------------------1 java-17-openjdk.x86_64 (/usr/lib/jvm/java-17-openjdk-17.0.1.0.12-2.el8_5.x86_64/bin/java)
*+ 2 java-1.8.0-openjdk.x86_64 (/usr/lib/jvm/java-1.8.0-openjdk-1.8.0.312.b07-2.el8_5.x86_64/jre/bin/java)Enter to keep the current selection[+], or type selection number: 1 //优先选择java-17
[root@jenkins ~]# bash //bash使其生效 //下载jenkins.war的包
[root@jenkins ~]# wget wget https://get.jenkins.io/war-stable/2.414.2/jenkins.war
[root@jenkins ~]# ls
anaconda-ks.cfg apache-tomcat-9.0.80.tar.gz jenkins.war////将Jenkins包复制到我们为其准备的其中一个tomcat的/usr/local/jenkins/webapps/目录中去,也就是我们前面复制的jenkins中去
[root@jenkins ~]# cp jenkins.war /usr/local/tomcat/webapps/
[root@jenkins ~]# cd /usr/local/tomcat/webapps/
[root@jenkins webapps]# ls
docs examples host-manager jenkins.war manager ROOT//重启服务后,则会自动解压jenkins.war
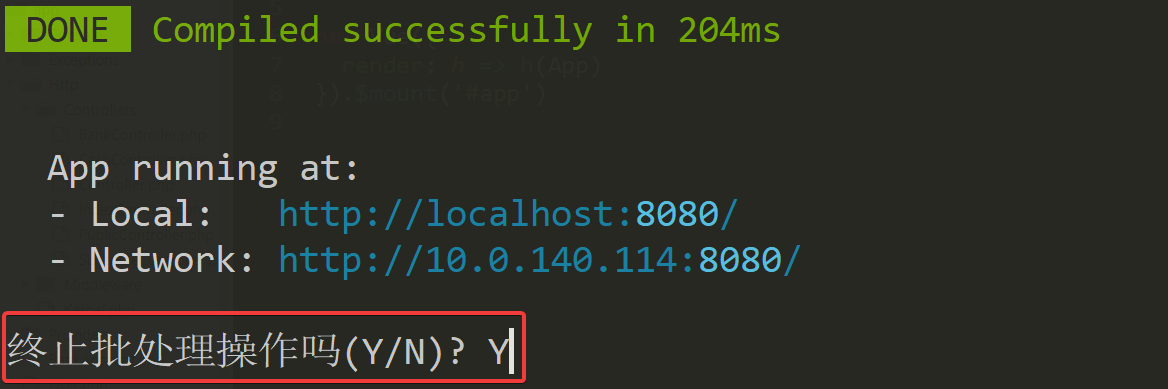
[root@jenkins webapps]# ../bin/catalina.sh stop
Using CATALINA_BASE: /usr/local/jenkins
Using CATALINA_HOME: /usr/local/jenkins
Using CATALINA_TMPDIR: /usr/local/jenkins/temp
Using JRE_HOME: /usr
Using CLASSPATH: /usr/local/jenkins/bin/bootstrap.jar:/usr/local/jenkins/bin/tomcat-juli.jar
Using CATALINA_OPTS:
NOTE: Picked up JDK_JAVA_OPTIONS: --add-opens=java.base/java.lang=ALL-UNNAMED --add-opens=java.base/java.io=ALL-UNNAMED --add-opens=java.base/java.util=ALL-UNNAMED --add-opens=java.base/java.util.concurrent=ALL-UNNAMED --add-opens=java.rmi/sun.rmi.transport=ALL-UNNAMED
[root@jenkins webapps]# ../bin/catalina.sh start
Using CATALINA_BASE: /usr/local/jenkins
Using CATALINA_HOME: /usr/local/jenkins
Using CATALINA_TMPDIR: /usr/local/jenkins/temp
Using JRE_HOME: /usr
Using CLASSPATH: /usr/local/jenkins/bin/bootstrap.jar:/usr/local/jenkins/bin/tomcat-juli.jar
Using CATALINA_OPTS:
Tomcat started.
[root@jenkins webapps]# ss -antl
State Recv-Q Send-Q Local Address:Port Peer Address:Port
LISTEN 0 128 0.0.0.0:22 0.0.0.0:*
LISTEN 0 128 [::]:22 [::]:*
LISTEN 0 1 [::ffff:127.0.0.1]:8005 *:*
LISTEN 0 100 *:8080 *:*
[root@jenkins webapps]# ls //jenkins自动解压
docs examples host-manager jenkins jenkins.war manager ROOT
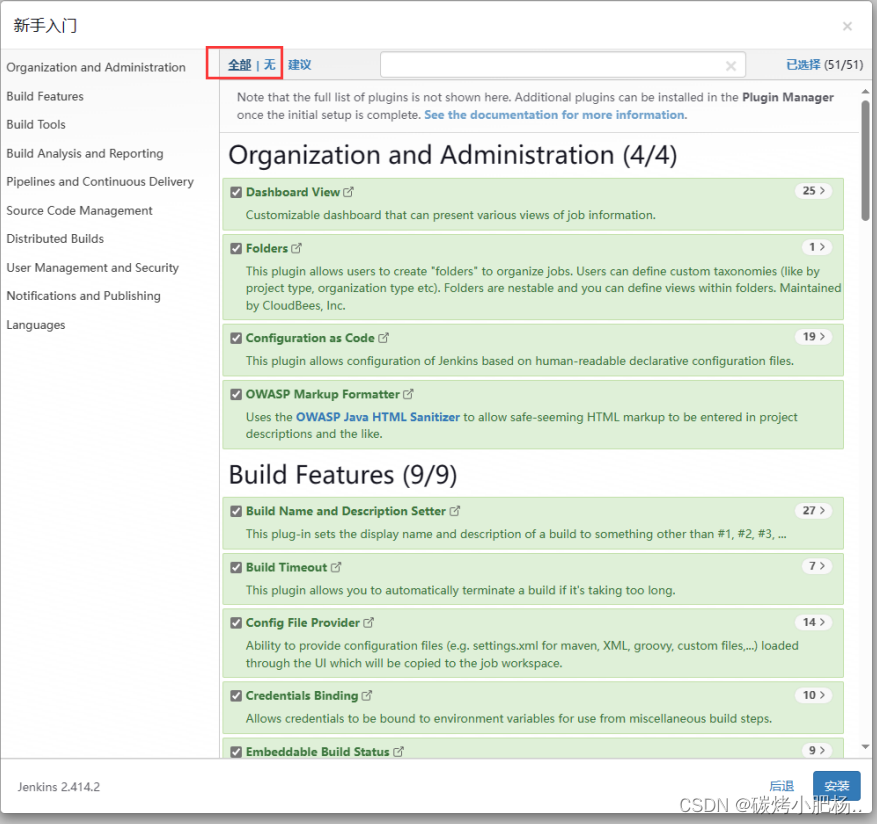
7.3.访问jenkins的web页面
查看临时密码,登录进去,后面会重新设置一个管理员密码的
[root@jenkins webapps]# cat /root/.jenkins/secrets/initialAdminPassword
16e8260f352948819f217725970af6d2
建议直接安装全部插件
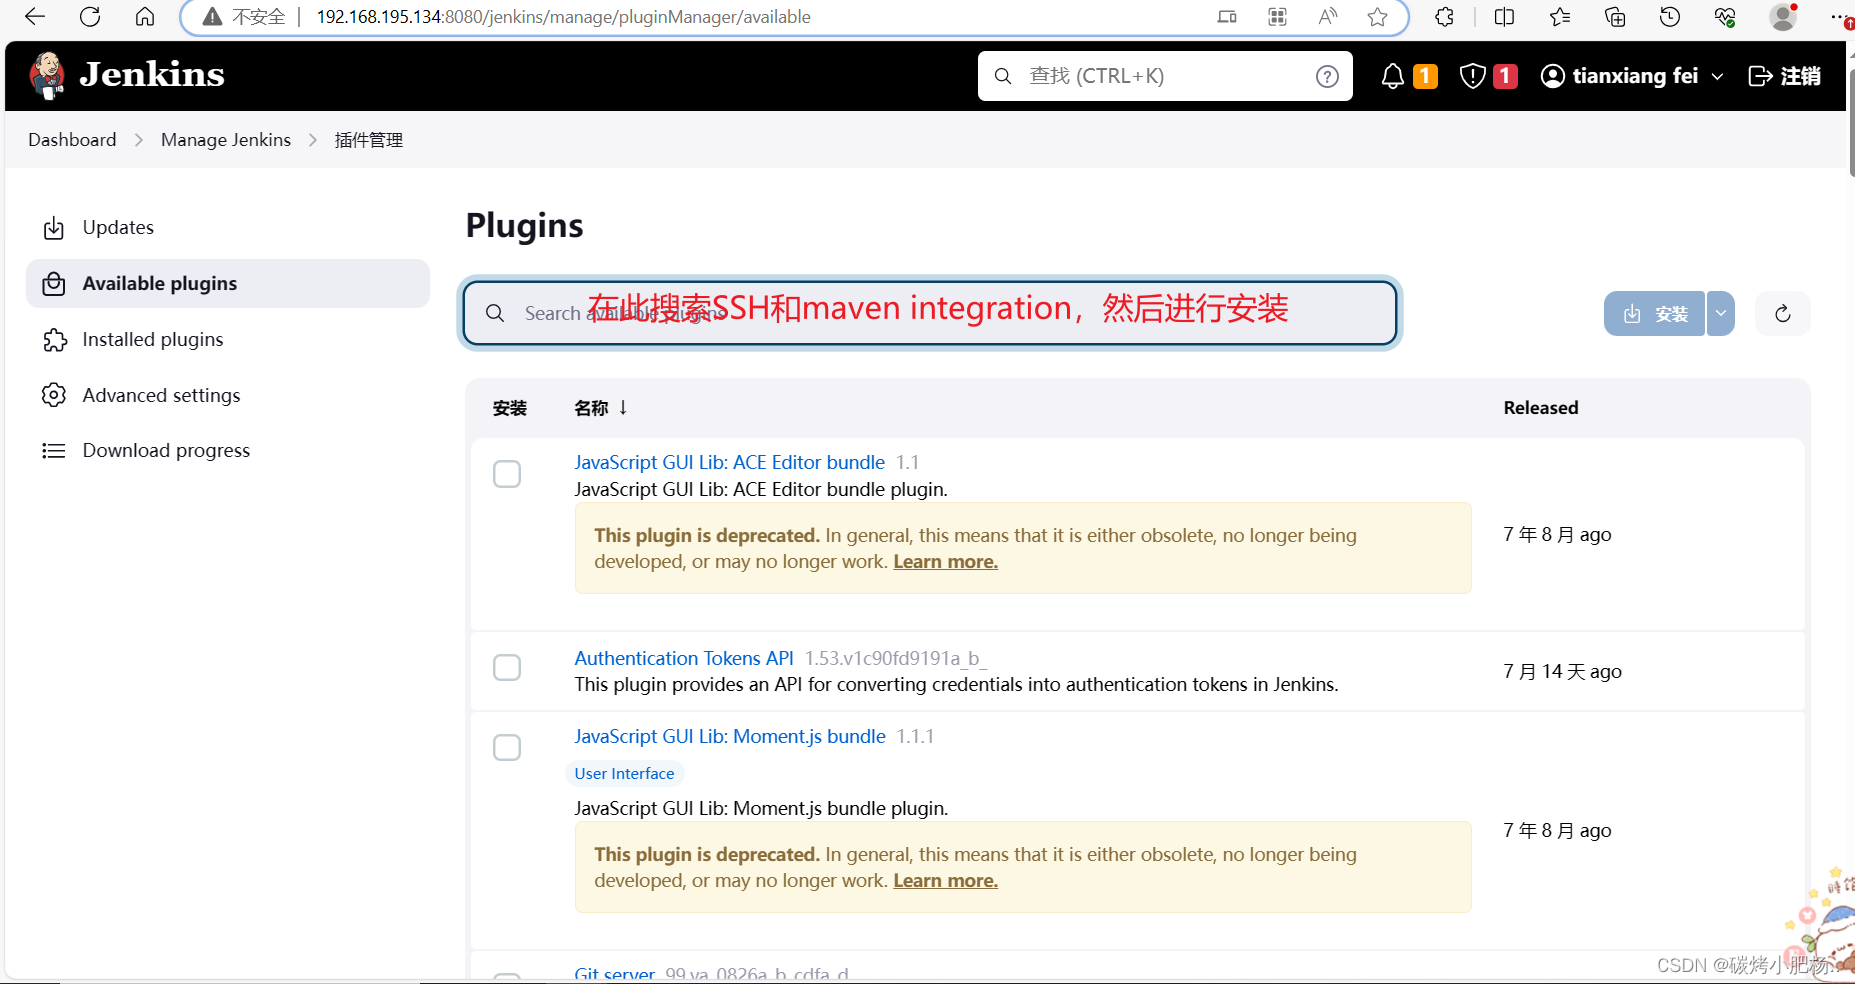
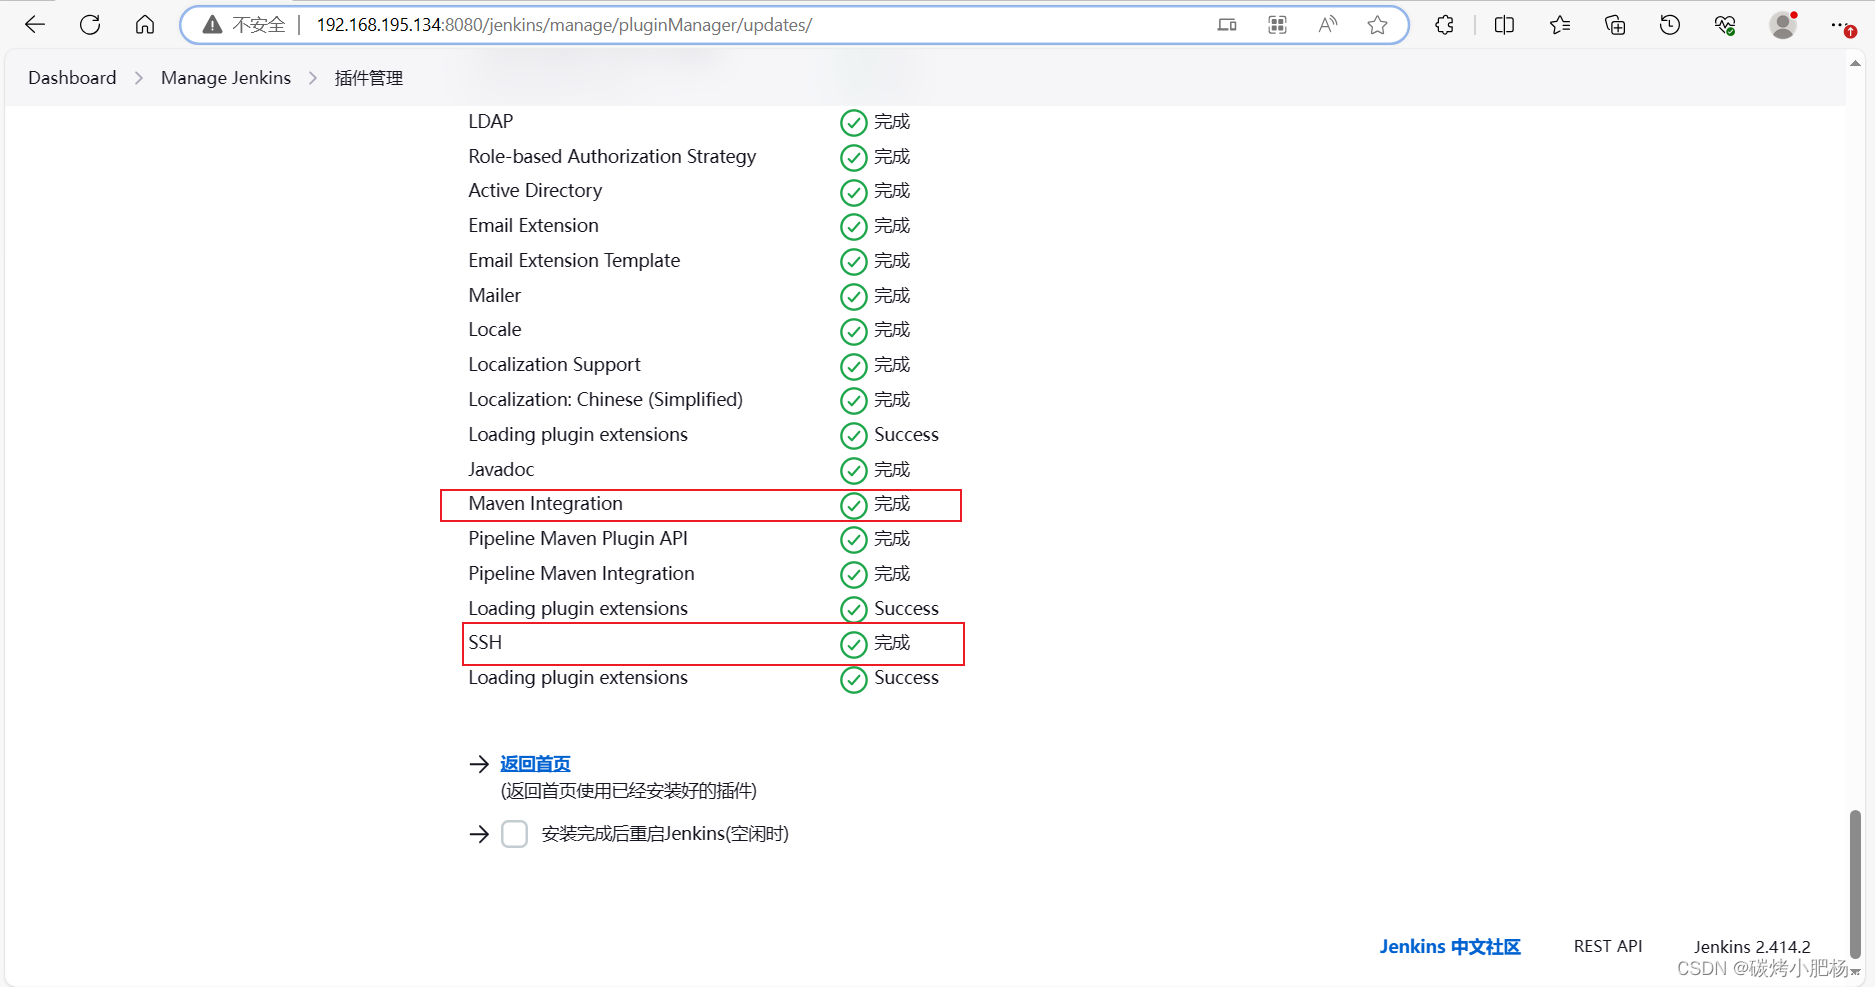
7.4.安装git、maven、docker
//安装git
[root@jenkins ~]# yum -y install git
//安装maven
[root@jenkins ~]# yum -y install maven
//验证
[root@jenkins ~]# mvn -v
Apache Maven 3.5.4 (Red Hat 3.5.4-5)
Maven home: /usr/share/maven
Java version: 1.8.0_312, vendor: Red Hat, Inc., runtime: /usr/lib/jvm/java-1.8.0-openjdk-1.8.0.312.b07-2.el8_5.x86_64/jre
Default locale: en_US, platform encoding: UTF-8
OS name: "linux", version: "4.18.0-193.el8.x86_64", arch: "amd64", family: "unix"
7.5.安装docker
[root@jenkins ~]# dnf config-manager --add-repo=https://download.docker.com/linux/centos/docker-ce.repo
[root@jenkins ~]# dnf repolist -v  //查看是否启用
[root@jenkins ~]# dnf list docker-ce --showduplicates | sort -r //查看可安装版本
[root@jenkins ~]# yum -y install docker-ce-24.0.6-1.el8 --allowerasing
[root@jenkins ~]# systemctl enable --now docker.service
7.6.配置Jenkins主机可以从harbor主机拉取镜像,以及免密登录
//配置可以拉取harbor的镜像
[root@jenkins ~]# vim /etc/docker/daemon.json
[root@jenkins ~]# cat /etc/docker/daemon.json
{
"insecure-registries": ["harbor.com"]
}[root@jenkins ~]#//配置免密登录,先生成密钥对
[root@jenkins webapps]# ssh-keygen -t rsa
Generating public/private rsa key pair.
Enter file in which to save the key (/root/.ssh/id_rsa):
Created directory '/root/.ssh'.
Enter passphrase (empty for no passphrase):
Enter same passphrase again:
Your identification has been saved in /root/.ssh/id_rsa.
Your public key has been saved in /root/.ssh/id_rsa.pub.
The key fingerprint is:
SHA256:vzUKGKdNcdU+1HrNg9AG/16CvAafso9l/z/4GXZI+Yg root@jenkins
The key's randomart image is:
+---[RSA 3072]----+
|           .+. . |
|           o.oo .|
|        . . o+.o.|
|         o . o=o+|
|      . S . o ++o|
|       B . o =.=.|
|      o o o E ++o|
|         . @ +..+|
|          =.. o+=|
+----[SHA256]-----+
[root@jenkins webapps]# ssh-copy-id root@192.168.195.133
/usr/bin/ssh-copy-id: INFO: Source of key(s) to be installed: "/root/.ssh/id_rsa.pub"
The authenticity of host '192.168.195.133 (192.168.195.133)' can't be established.
ECDSA key fingerprint is SHA256:KtCxYXSsV732izj+QL2uzJDCS2G/X1MOMV+uUkriDno.
Are you sure you want to continue connecting (yes/no/[fingerprint])? yes
/usr/bin/ssh-copy-id: INFO: attempting to log in with the new key(s), to filter out any that are already installed
/usr/bin/ssh-copy-id: INFO: 1 key(s) remain to be installed -- if you are prompted now it is to install the new keys
root@192.168.195.133's password: Number of key(s) added: 1Now try logging into the machine, with:   "ssh 'root@192.168.195.133'"
and check to make sure that only the key(s) you wanted were added.[root@jenkins webapps]# ssh-copy-id root@192.168.195.135
/usr/bin/ssh-copy-id: INFO: Source of key(s) to be installed: "/root/.ssh/id_rsa.pub"
The authenticity of host '192.168.195.135 (192.168.195.135)' can't be established.
ECDSA key fingerprint is SHA256:rX8qo9h9J++q89dUg33ZnWDL7KT30i/It603EM37Mic.
Are you sure you want to continue connecting (yes/no/[fingerprint])? yes
/usr/bin/ssh-copy-id: INFO: attempting to log in with the new key(s), to filter out any that are already installed
/usr/bin/ssh-copy-id: INFO: 1 key(s) remain to be installed -- if you are prompted now it is to install the new keys
root@192.168.195.135's password: Number of key(s) added: 1Now try logging into the machine, with:   "ssh 'root@192.168.195.135'"
and check to make sure that only the key(s) you wanted were added.[root@jenkins webapps]# ssh-copy-id root@192.168.195.136
/usr/bin/ssh-copy-id: INFO: Source of key(s) to be installed: "/root/.ssh/id_rsa.pub"
The authenticity of host '192.168.195.136 (192.168.195.136)' can't be established.
ECDSA key fingerprint is SHA256:+4lBR7hgzjFe6gOp4we1Rd6lJJiHWgVeIQIN308d1gU.
Are you sure you want to continue connecting (yes/no/[fingerprint])? yes
/usr/bin/ssh-copy-id: INFO: attempting to log in with the new key(s), to filter out any that are already installed
/usr/bin/ssh-copy-id: INFO: 1 key(s) remain to be installed -- if you are prompted now it is to install the new keys
root@192.168.195.136's password: Number of key(s) added: 1Now try logging into the machine, with:   "ssh 'root@192.168.195.136'"
and check to make sure that only the key(s) you wanted were added.[root@jenkins webapps]#
8.部署harbor.com主机
8.1.安装harbor前需先安装docker及docker-compose
[root@harbor ~]# curl -SL https://github.com/docker/compose/releases/download/v2.23.0/docker-compose-linux-x86_64 -o /usr/local/bin/docker-compose% Total    % Received % Xferd  Average Speed   Time    Time     Time  CurrentDload  Upload   Total   Spent    Left  Speed0     0    0     0    0     0      0      0 --:--:--  0:00:16 --:--:--     0
curl: (52) Empty reply from server
[root@harbor ~]# chmod +x /usr/local/bin/docker-compose   //添加执行权限
[root@harbor ~]# ln -s /usr/local/bin/docker-compose /usr/bin/docker-compose //将其链接到/usr/bin/下面
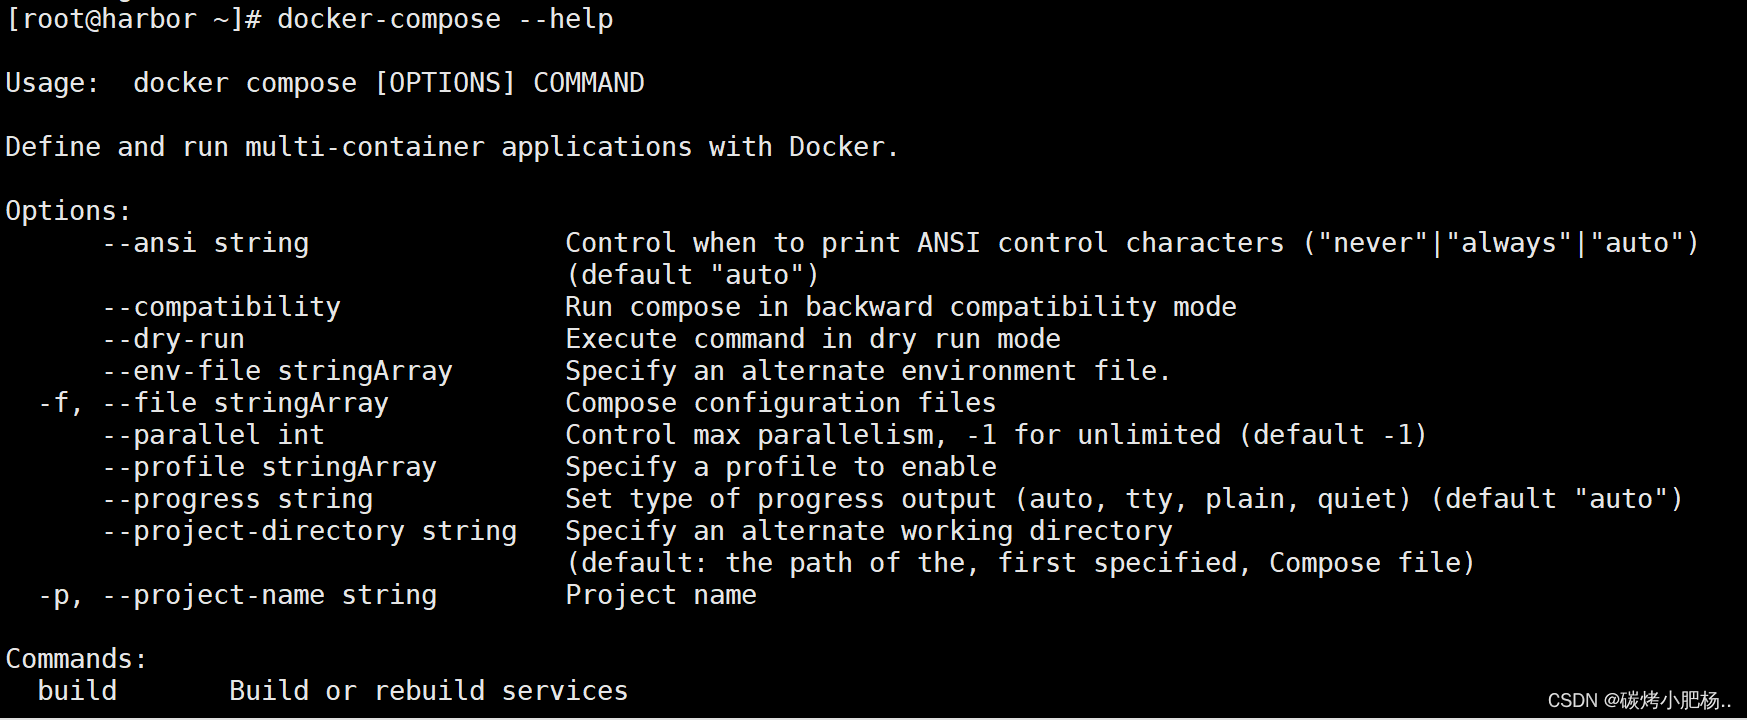
能够使用docker-compose --help则表示成功
8.2.安装harbor.com
进入harbor官网,拉取harbor二进制包
[Harbor官方文档](Releases · goharbor/harbor (github.com))
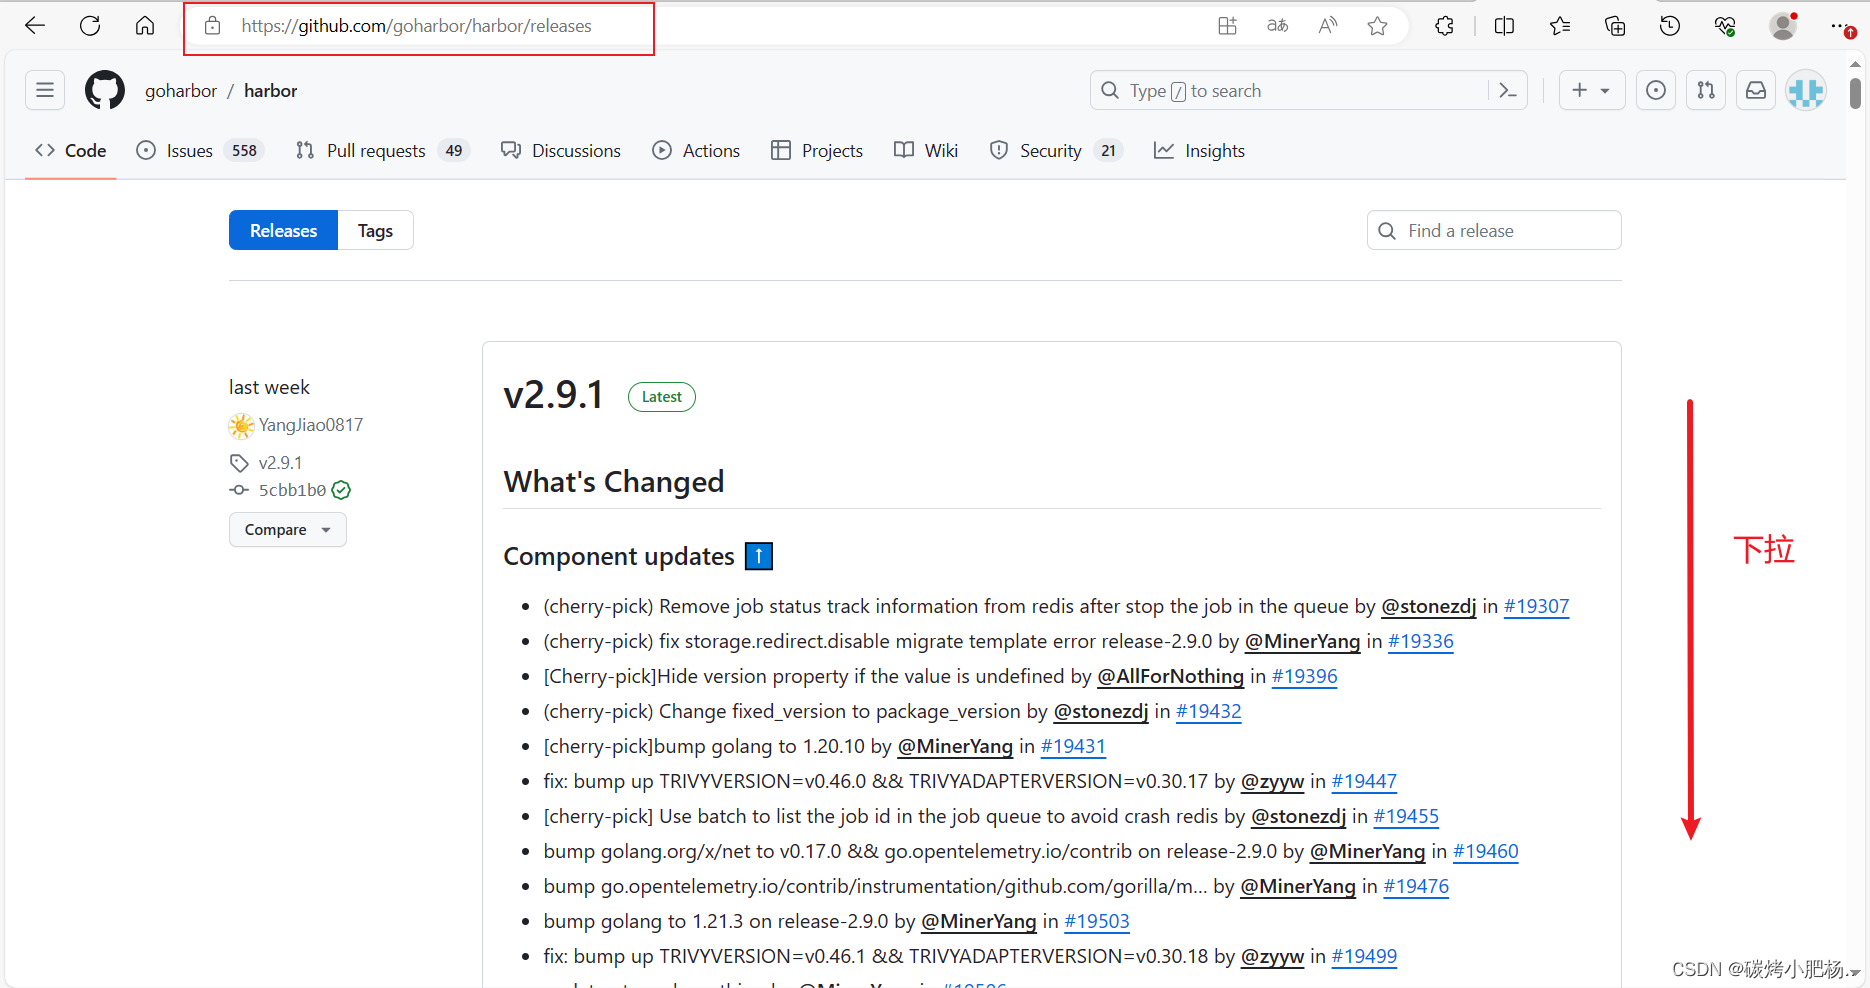
下载完成后,将该压缩包传到harbor.com主机中
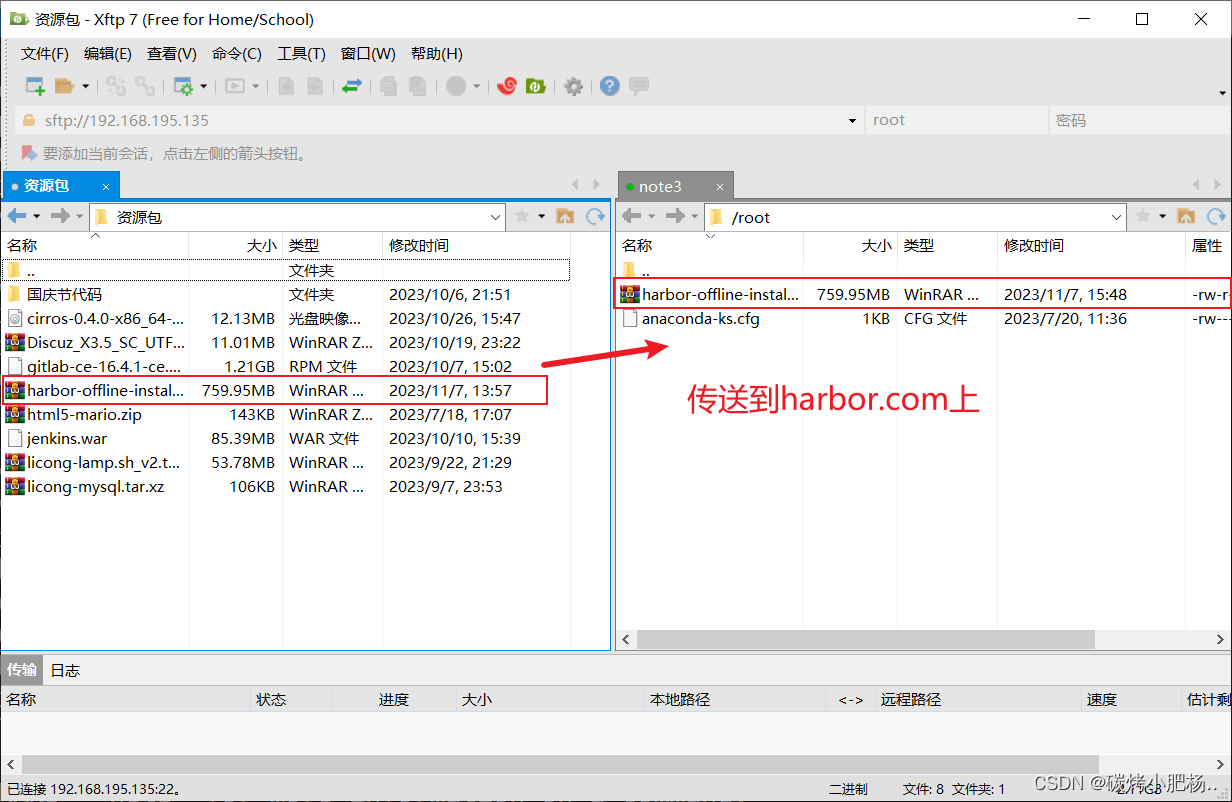
[root@harbor ~]# ls
anaconda-ks.cfg  harbor-offline-installer-v2.9.1.tgz//解压压缩包
[root@harbor harbor]# tar xf harbor.v2.9.1.tar.gz -C /usr/local/
复制出一份harbor.yml文件,编辑/usr/local/harbor/下的harbor.yml文件
执行install.sh文件
[root@harbor harbor]# ./install.sh [Step 0]: checking if docker is installed ...Note: docker version: 24.0.7[Step 1]: checking docker-compose is installed ...Note: Docker Compose version v2.21.0[Step 2]: loading Harbor images ...
Loaded image: goharbor/harbor-jobservice:v2.9.1
Loaded image: goharbor/harbor-registryctl:v2.9.1
Loaded image: goharbor/harbor-core:v2.9.1
Loaded image: goharbor/harbor-log:v2.9.1
Loaded image: goharbor/harbor-db:v2.9.1
Loaded image: goharbor/harbor-exporter:v2.9.1
Loaded image: goharbor/redis-photon:v2.9.1
Loaded image: goharbor/nginx-photon:v2.9.1
Loaded image: goharbor/registry-photon:v2.9.1
Loaded image: goharbor/trivy-adapter-photon:v2.9.1
Loaded image: goharbor/prepare:v2.9.1
Loaded image: goharbor/harbor-portal:v2.9.1[Step 3]: preparing environment ...[Step 4]: preparing harbor configs ...
prepare base dir is set to /usr/local/harbor
WARNING:root:WARNING: HTTP protocol is insecure. Harbor will deprecate http protocol in the future. Please make sure to upgrade to https
Clearing the configuration file: /config/portal/nginx.conf
Clearing the configuration file: /config/log/logrotate.conf
Clearing the configuration file: /config/log/rsyslog_docker.conf
Clearing the configuration file: /config/nginx/nginx.conf
Clearing the configuration file: /config/core/env
Clearing the configuration file: /config/core/app.conf
Clearing the configuration file: /config/registry/passwd
Clearing the configuration file: /config/registry/config.yml
Clearing the configuration file: /config/registry/root.crt
Clearing the configuration file: /config/registryctl/env
Clearing the configuration file: /config/registryctl/config.yml
Clearing the configuration file: /config/db/env
Clearing the configuration file: /config/jobservice/env
Clearing the configuration file: /config/jobservice/config.yml
Generated configuration file: /config/portal/nginx.conf
Generated configuration file: /config/log/logrotate.conf
Generated configuration file: /config/log/rsyslog_docker.conf
Generated configuration file: /config/nginx/nginx.conf
Generated configuration file: /config/core/env
Generated configuration file: /config/core/app.conf
Generated configuration file: /config/registry/config.yml
Generated configuration file: /config/registryctl/env
Generated configuration file: /config/registryctl/config.yml
Generated configuration file: /config/db/env
Generated configuration file: /config/jobservice/env
Generated configuration file: /config/jobservice/config.yml
loaded secret from file: /data/secret/keys/secretkey
Generated configuration file: /compose_location/docker-compose.yml
Clean up the input dirNote: stopping existing Harbor instance ...
[+] Running 10/10✔ Container harbor-jobservice  Removed                                                                          0.3s ✔ Container nginx              Removed                                                                          0.3s ✔ Container registryctl        Removed                                                                          0.3s ✔ Container harbor-portal      Removed                                                                          0.2s ✔ Container harbor-core        Removed                                                                          0.2s ✔ Container redis              Removed                                                                          0.2s ✔ Container harbor-db          Removed                                                                          0.2s ✔ Container registry           Removed                                                                          0.2s ✔ Container harbor-log         Removed                                                                         10.1s ✔ Network harbor_harbor        Removed                                                                          0.1s [Step 5]: starting Harbor ...
[+] Running 10/10✔ Network harbor_harbor        Created                                                                          0.1s ✔ Container harbor-log         Started                                                                          0.0s ✔ Container harbor-portal      Started                                                                          0.0s ✔ Container harbor-db          Started                                                                          0.0s ✔ Container redis              Started                                                                          0.0s ✔ Container registryctl        Started                                                                          0.0s ✔ Container registry           Started                                                                          0.0s ✔ Container harbor-core        Started                                                                          0.0s ✔ Container nginx              Started                                                                          0.0s ✔ Container harbor-jobservice  Started                                                                          0.0s
✔ ----Harbor has been installed and started successfully.----
[root@harbor harbor]#//查看启动的容器
[root@harbor harbor]# docker ps
CONTAINER ID   IMAGE                                COMMAND                  CREATED         STATUS                   PORTS                                   NAMES
350ca8862054   goharbor/harbor-jobservice:v2.9.1    "/harbor/entrypoint.…"   5 minutes ago   Up 5 minutes (healthy)                                           harbor-jobservice
b72bc2f82a68   goharbor/nginx-photon:v2.9.1         "nginx -g 'daemon of…"   5 minutes ago   Up 5 minutes (healthy)   0.0.0.0:80->8080/tcp, :::80->8080/tcp   nginx
44f7ef47465b   goharbor/harbor-core:v2.9.1          "/harbor/entrypoint.…"   5 minutes ago   Up 5 minutes (healthy)                                           harbor-core
1b21077159ba   goharbor/harbor-portal:v2.9.1        "nginx -g 'daemon of…"   5 minutes ago   Up 5 minutes (healthy)                                           harbor-portal
e806f3263cd6   goharbor/registry-photon:v2.9.1      "/home/harbor/entryp…"   5 minutes ago   Up 5 minutes (healthy)                                           registry
e88001619f8b   goharbor/harbor-db:v2.9.1            "/docker-entrypoint.…"   5 minutes ago   Up 5 minutes (healthy)                                           harbor-db
3b0dc2c89b77   goharbor/harbor-registryctl:v2.9.1   "/home/harbor/start.…"   5 minutes ago   Up 5 minutes (healthy)                                           registryctl
dd19f6c1fbfa   goharbor/redis-photon:v2.9.1         "redis-server /etc/r…"   5 minutes ago   Up 5 minutes (healthy)                                           redis
e6ebc7e08482   goharbor/harbor-log:v2.9.1           "/bin/sh -c /usr/loc…"   5 minutes ago   Up 5 minutes (healthy)   127.0.0.1:1514->10514/tcp               harbor-log//镜像存放位置,镜像都存放在我们指定的/data目录下面
[root@harbor harbor]# ls /data
ca_download  database  job_logs  redis  registry  secret
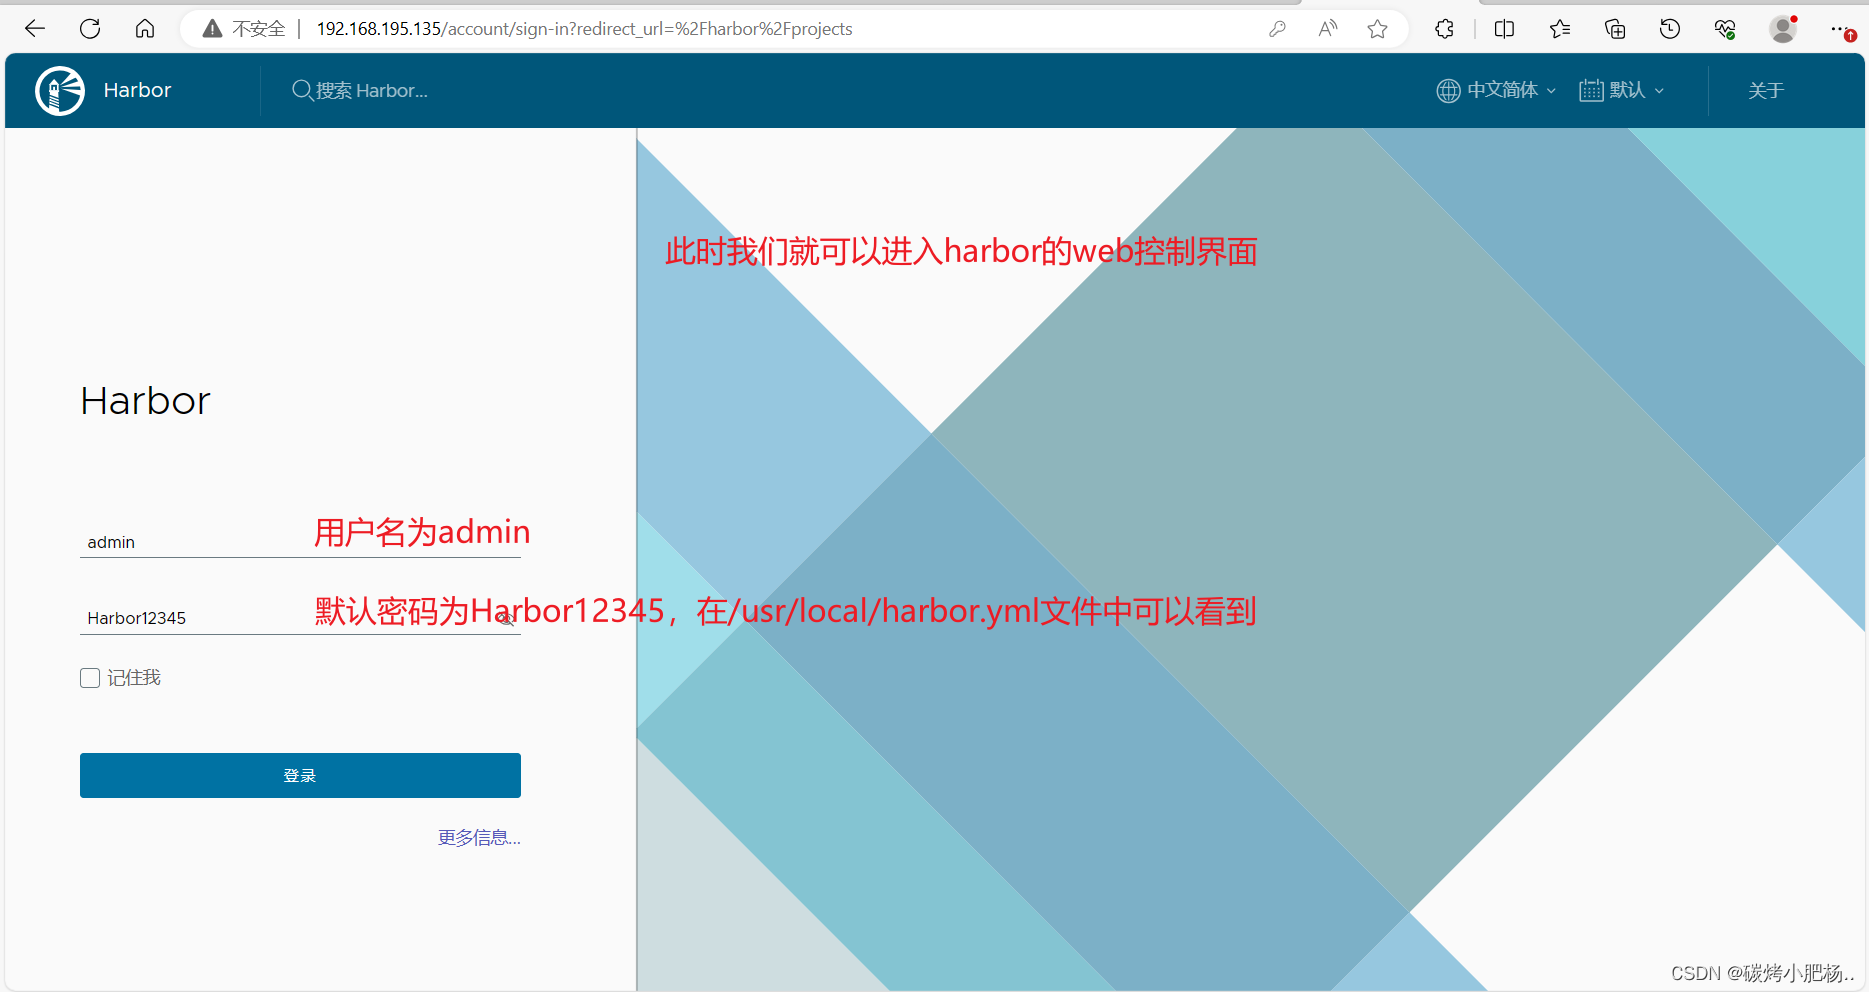
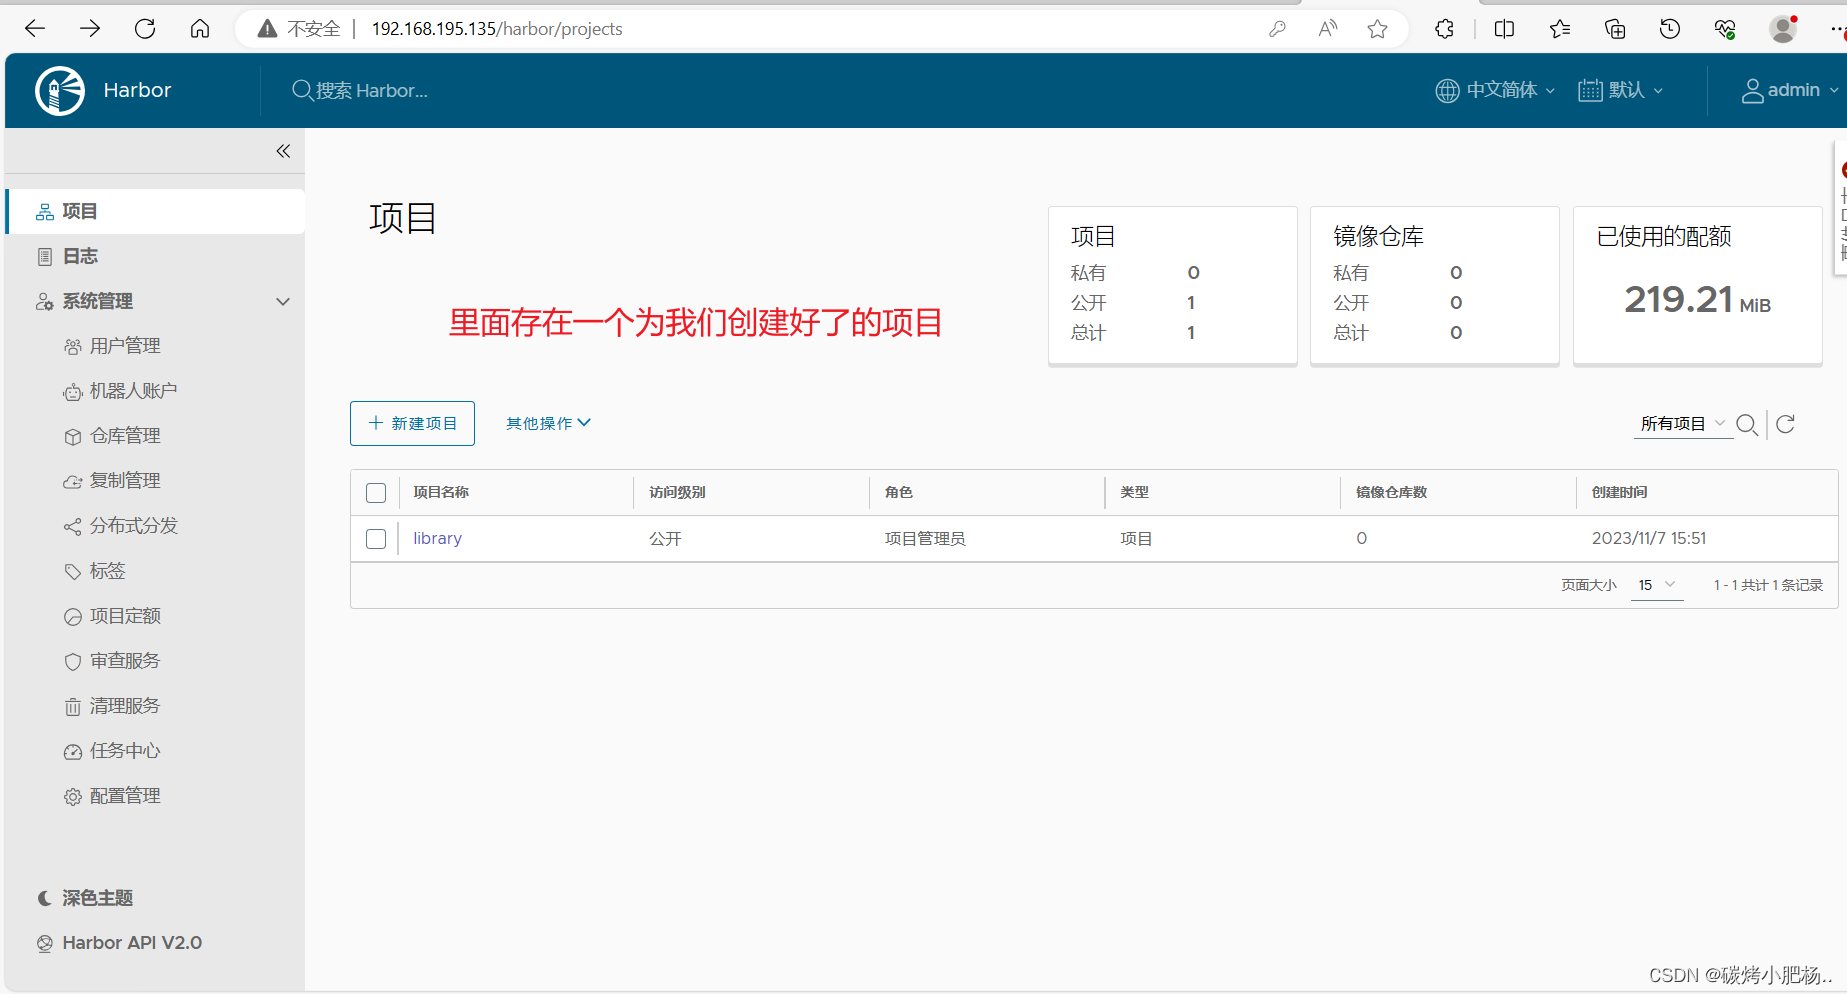
通过IP访问harbor的web界面
使用Harbor的注意事项:
- 在客户端上传镜像时一定要记得执行docker login进行用户认证,否则无法直接push
- 在客户端使用的时候如果不是用的https则必须要在客户端的/etc/docker/daemon.json配置文件中配置insecure-registries参数
- 数据存放路径应在配置文件中配置到一个容量比较充足的共享存储中
- Harbor是使用docker-compose命令来管理的,如果需要停止Harbor也应用docker-compose stop来停止,其他参数请–help
将harbor设置为开机自启
//由于想要关闭或开启harbor需要进入到有docker-compose.yml文件的目录下执行,所以我们将该命令放到虚拟机启动最后执行的一个文件中去,也就是/etc/rc.local文件中[root@harbor harbor]# vim /etc/rc.local
[root@harbor harbor]# head -5 /etc/rc.local
#!/bin/bash
cd /usr/local/harbor/ && docker-compose start
# THIS FILE IS ADDED FOR COMPATIBILITY PURPOSES
#
# It is highly advisable to create own systemd services or udev rules
[root@harbor harbor]# ll /etc/rc.local
lrwxrwxrwx. 1 root root 13 Mar 24  2020 /etc/rc.local -> rc.d/rc.local
[root@harbor harbor]# chmod +x /etc/rc.d/rc.local
[root@harbor harbor]# ll /etc/rc.d/rc.local
-rwxr-xr-x. 1 root root 520 Nov  7 22:29 /etc/rc.d/rc.local//将cd /usr/local/harbor/ && docker-compose start写入到这个文件中后,他就会在开启这个虚拟机的时候执行进入/usr/local/harbor/目录中执行开启harbor的命令
9.部署docker主机
9.1.安装docker服务
[root@docker ~]# dnf config-manager --add-repo=https://download.docker.com/linux/centos/docker-ce.repo
[root@docker ~]# dnf repolist -v  //查看是否启用
[root@docker ~]# dnf list docker-ce --showduplicates | sort -r //查看可安装版本
[root@docker ~]# yum -y install docker-ce-24.0.6-1.el8 --allowerasing
[root@docker ~]# systemctl enable --now docker.service
9.2.制作一个基础的tomcat镜像,并上传到私有镜像仓库
//制作tomcat镜像,并上传到harbor.com主机
[root@docker ~]# mkdir tomcat
[root@docker ~]# ls
anaconda-ks.cfg ansible tomcat
[root@docker ~]# cd tomcat/
[root@docker tomcat]# vim dockerfile
[root@docker tomcat]# cat dockerfile
FROM centos:8RUN rm -rf /etc/yum.repos.d/* && \
curl -o /etc/yum.repos.d/CentOS-Base.repo https://mirrors.aliyun.com/repo/Centos-vault-8.5.2111.repo && \
sed -i -e '/mirrors.cloud.aliyuncs.com/d' -e '/mirrors.aliyuncs.com/d' /etc/yum.repos.d/CentOS-Base.repo && \
yum clean all && \
yum makecache && \
yum -y install java-1.8.0-openjdk java-1.8.0-openjdk-devel && \
yum -y install wget && \
wget https://archive.apache.org/dist/tomcat/tomcat-9/v9.0.80/bin/apache-tomcat-9.0.80.tar.gz && \
tar -xf apache-tomcat-9.0.80.tar.gz && \
mv apache-tomcat-9.0.80 /usr/local/tomcat && \
/usr/local/tomcat/bin/startup.shCMD ["/usr/local/tomcat/bin/catalina.sh","run"][root@docker tomcat]# docker images
REPOSITORY TAG IMAGE ID CREATED SIZE
harbor.com/library/tomcat v1.0 e49ab8188d29 7 hours ago 539MB//配置连接harbor.com私有镜像仓库
[root@docker ~]# vim /etc/docker/daemon.json
[root@docker ~]# cat /etc/docker/daemon.json
{
"insecure-registries": ["harbor.server"]
}
[root@docker ~]# systemctl daemon-reload
[root@docker ~]# systemctl restart docker.service//上传镜像到私有仓库harbor.com主机
[root@docker ~]# docker login harbor.com //登录到私有镜像仓库
Username: admin
Password: //此处密文密码为Harbor.com
Authenticating with existing credentials...
WARNING! Your password will be stored unencrypted in /root/.docker/config.json.
Configure a credential helper to remove this warning. See
https://docs.docker.com/engine/reference/commandline/login/#credentials-storeLogin Succeeded //登录成功
[root@docker ~]#//上传到私有镜像仓库
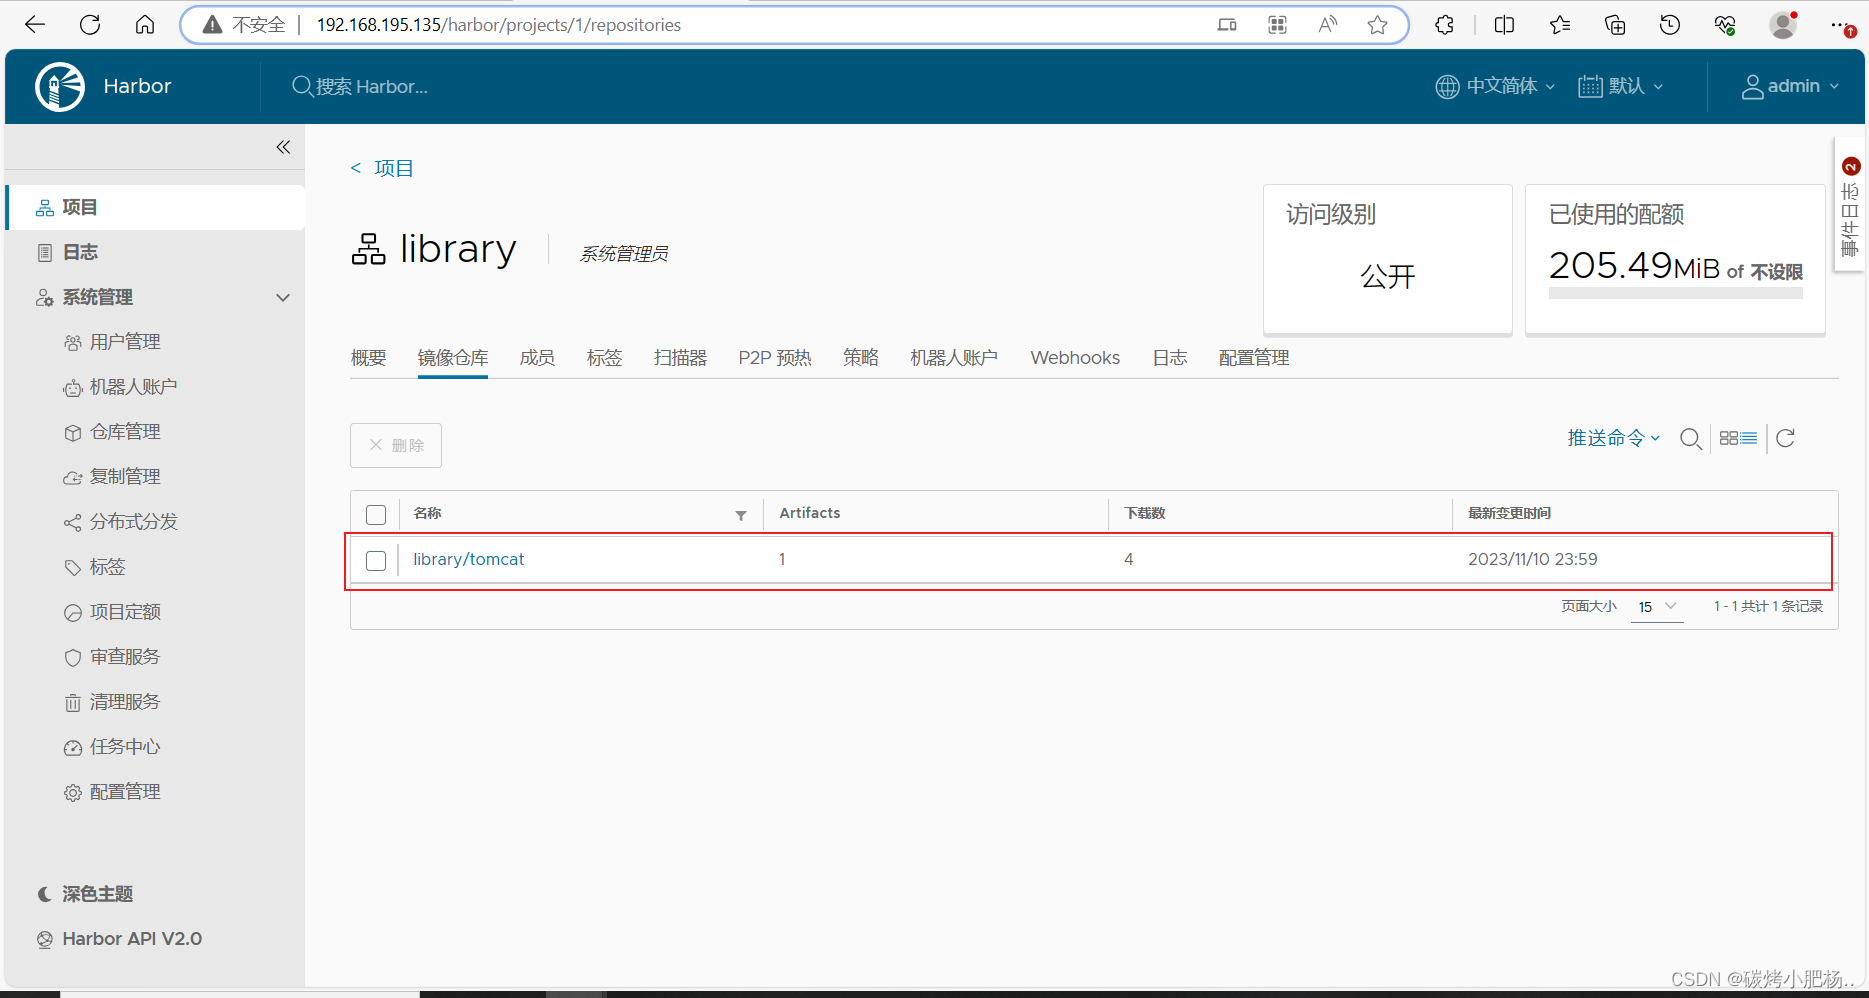
[root@docker ~]# docker push harbor.server/library/tomcat:v1.0
10.项目代码完整发布流程
10.1.将代码上传到gitlab主机
首先需要在gitlab代码仓库新建一个空项目
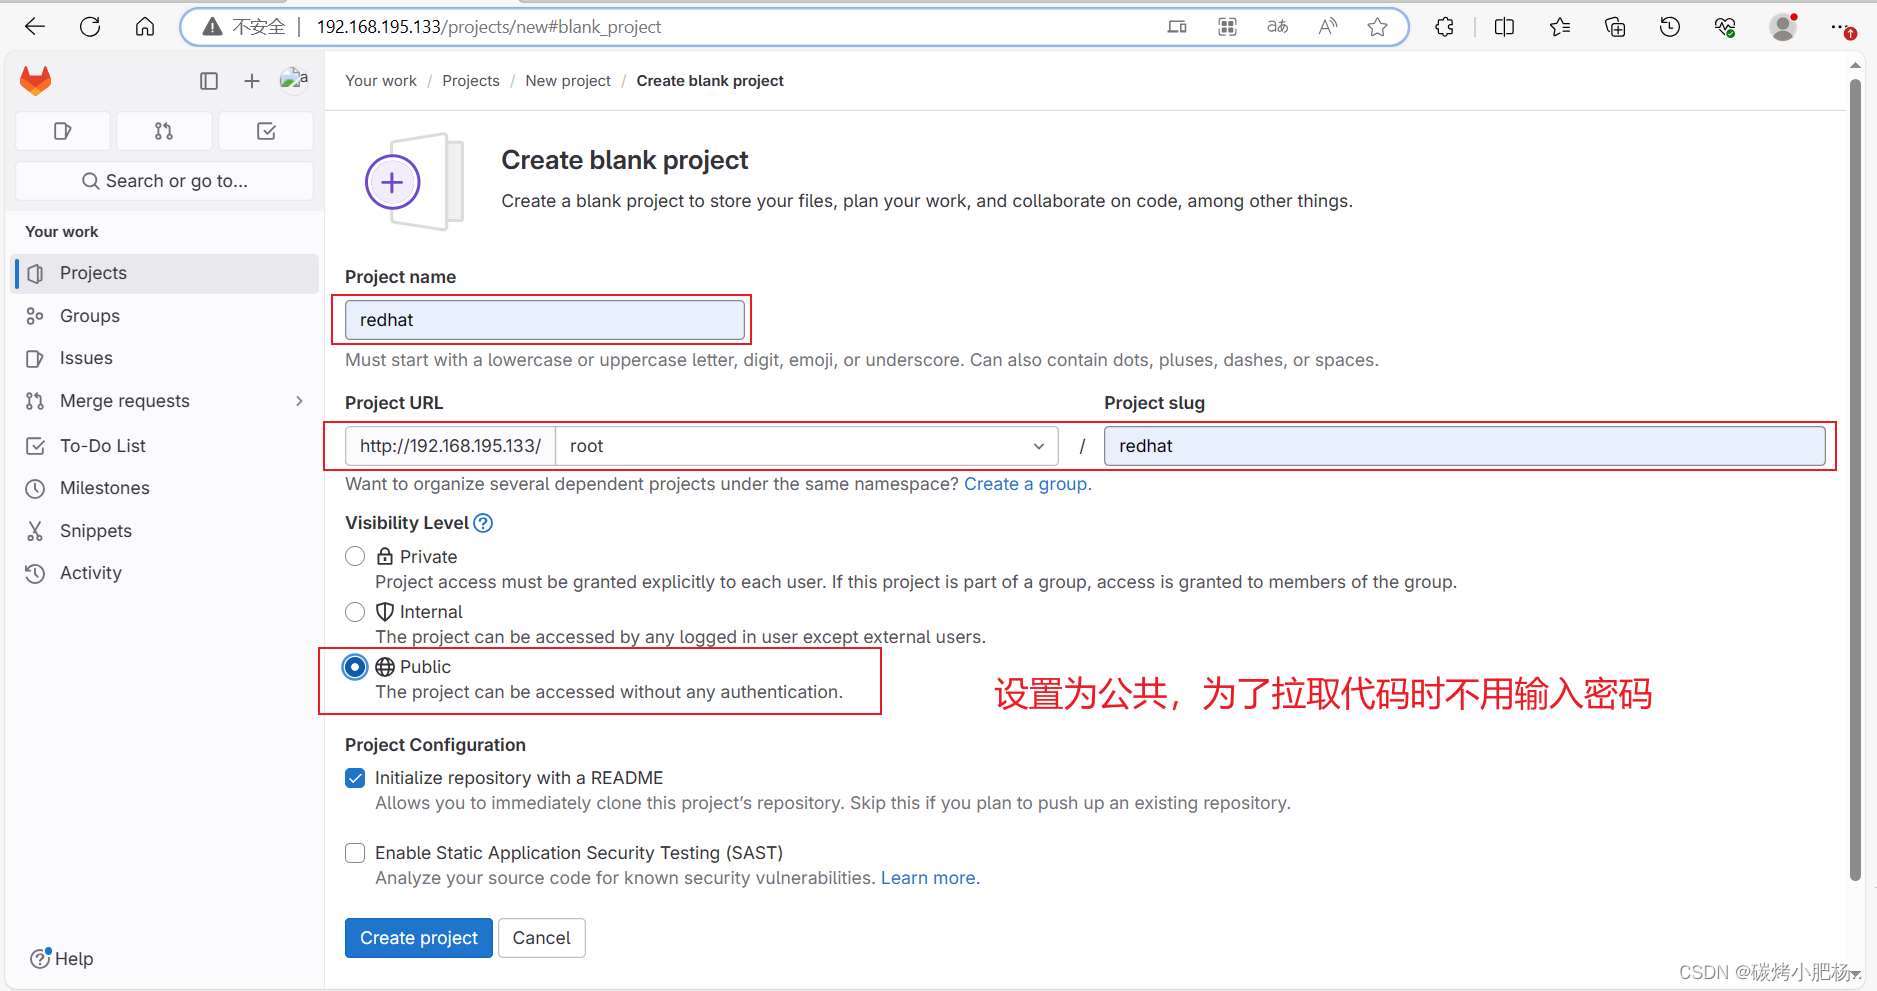
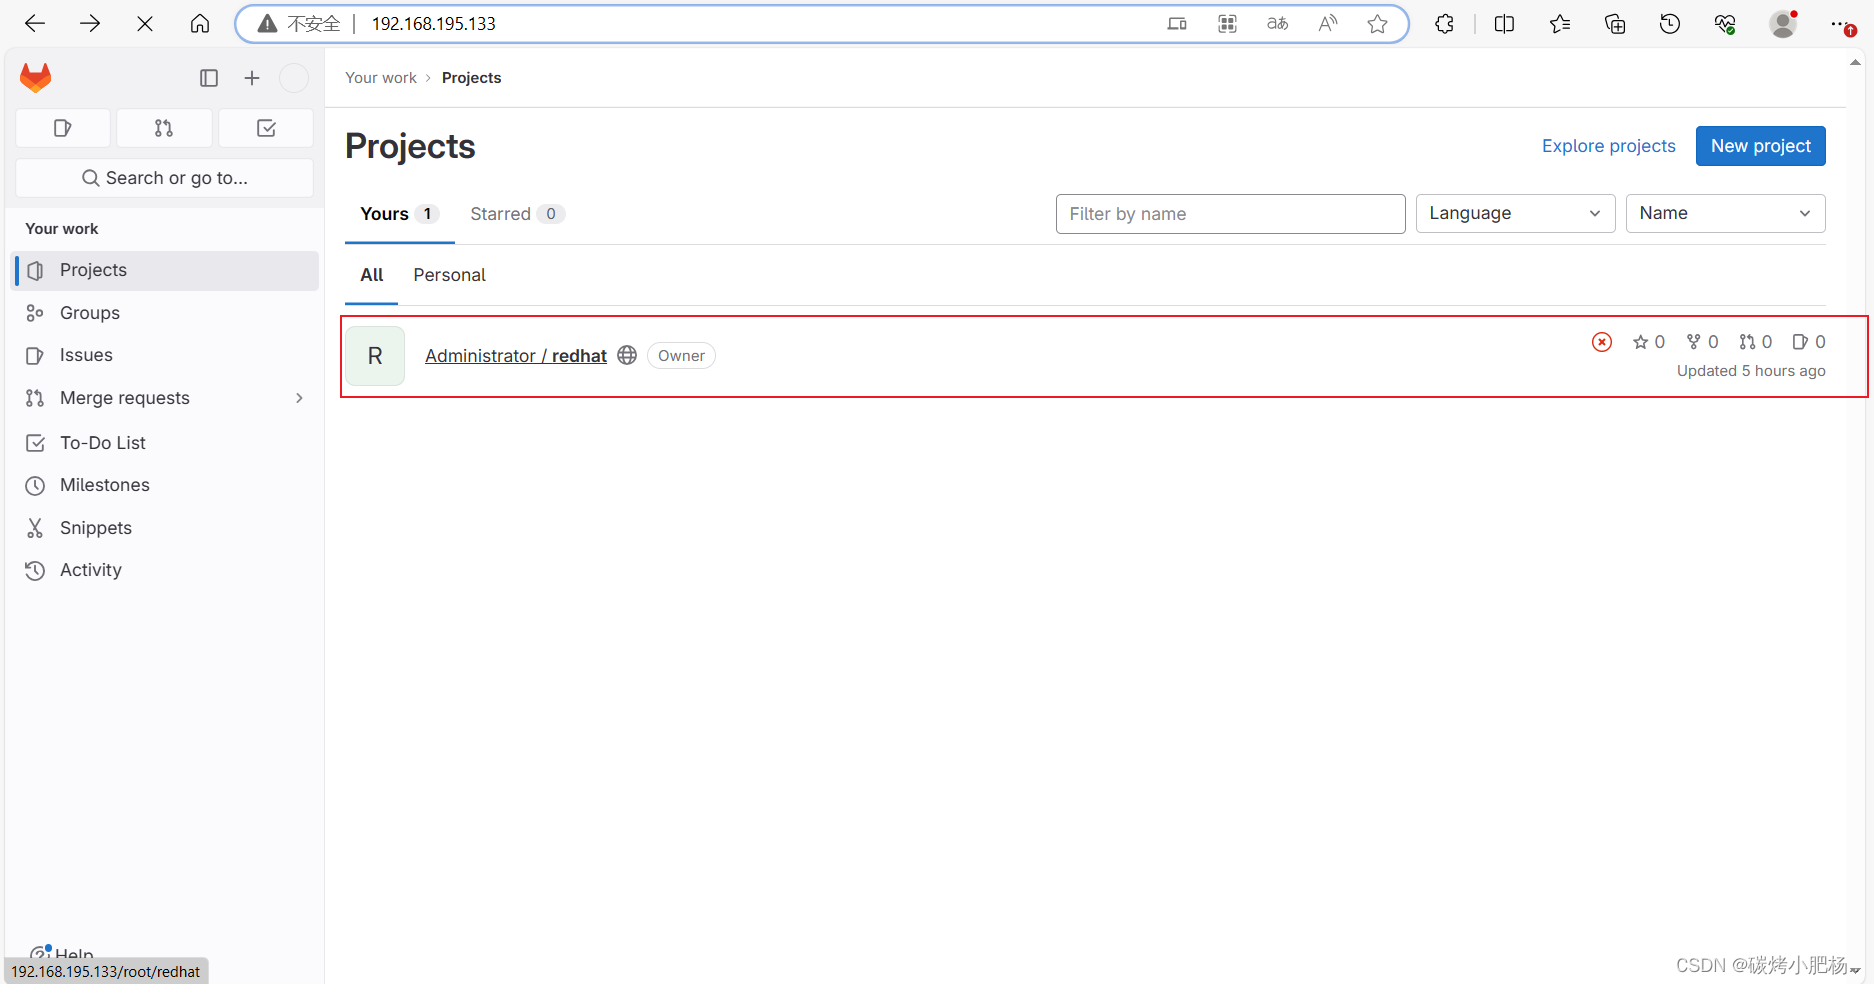
//从公共代码仓库拉取需要的代码
[root@gitlab ~]# git clone 'https://gitee.com/forgotten/tomcat-java-demo.git'
//上传代码到本地代码仓库的操作
[root@gitlab ~]# git config --global user.name "root"
[root@gitlab ~]# git config --global user.email "2046807065@qq.com"
[root@gitlab ~]# git clone http://192.168.195.133/root/redhat
[root@gitlab ~]# mv tomcat-java-demo/* redhat/
mv: overwrite 'wanf/README.md'? y
[root@gitlab ~]# cd redhat/
[root@gitlab wanf]# ls
db deploy.yaml Dockerfile jenkinsfile LICENSE pom.xml README.md src
[root@gitlab redhat]#
[root@gitlab redhat]# git add *
[root@gitlab redhat]# git commit -m "test"
[root@gitlab redhat]# git push --set-upstream origin
Username for 'http://192.168.195.133': root
Password for 'http://root@192.168.195.133': //此处为自己破解密码时设置的密码
Enumerating objects: 849, done.
Counting objects: 100% (849/849), done.
Compressing objects: 100% (754/754), done.
Writing objects: 100% (847/847), 649.86 KiB | 7.30 MiB/s, done.
Total 847 (delta 228), reused 0 (delta 0), pack-reused 0
remote: Resolving deltas: 100% (228/228), done.
To http://192.168.179.13/root/wanf.git
3d32c31..58d6311 main -> main
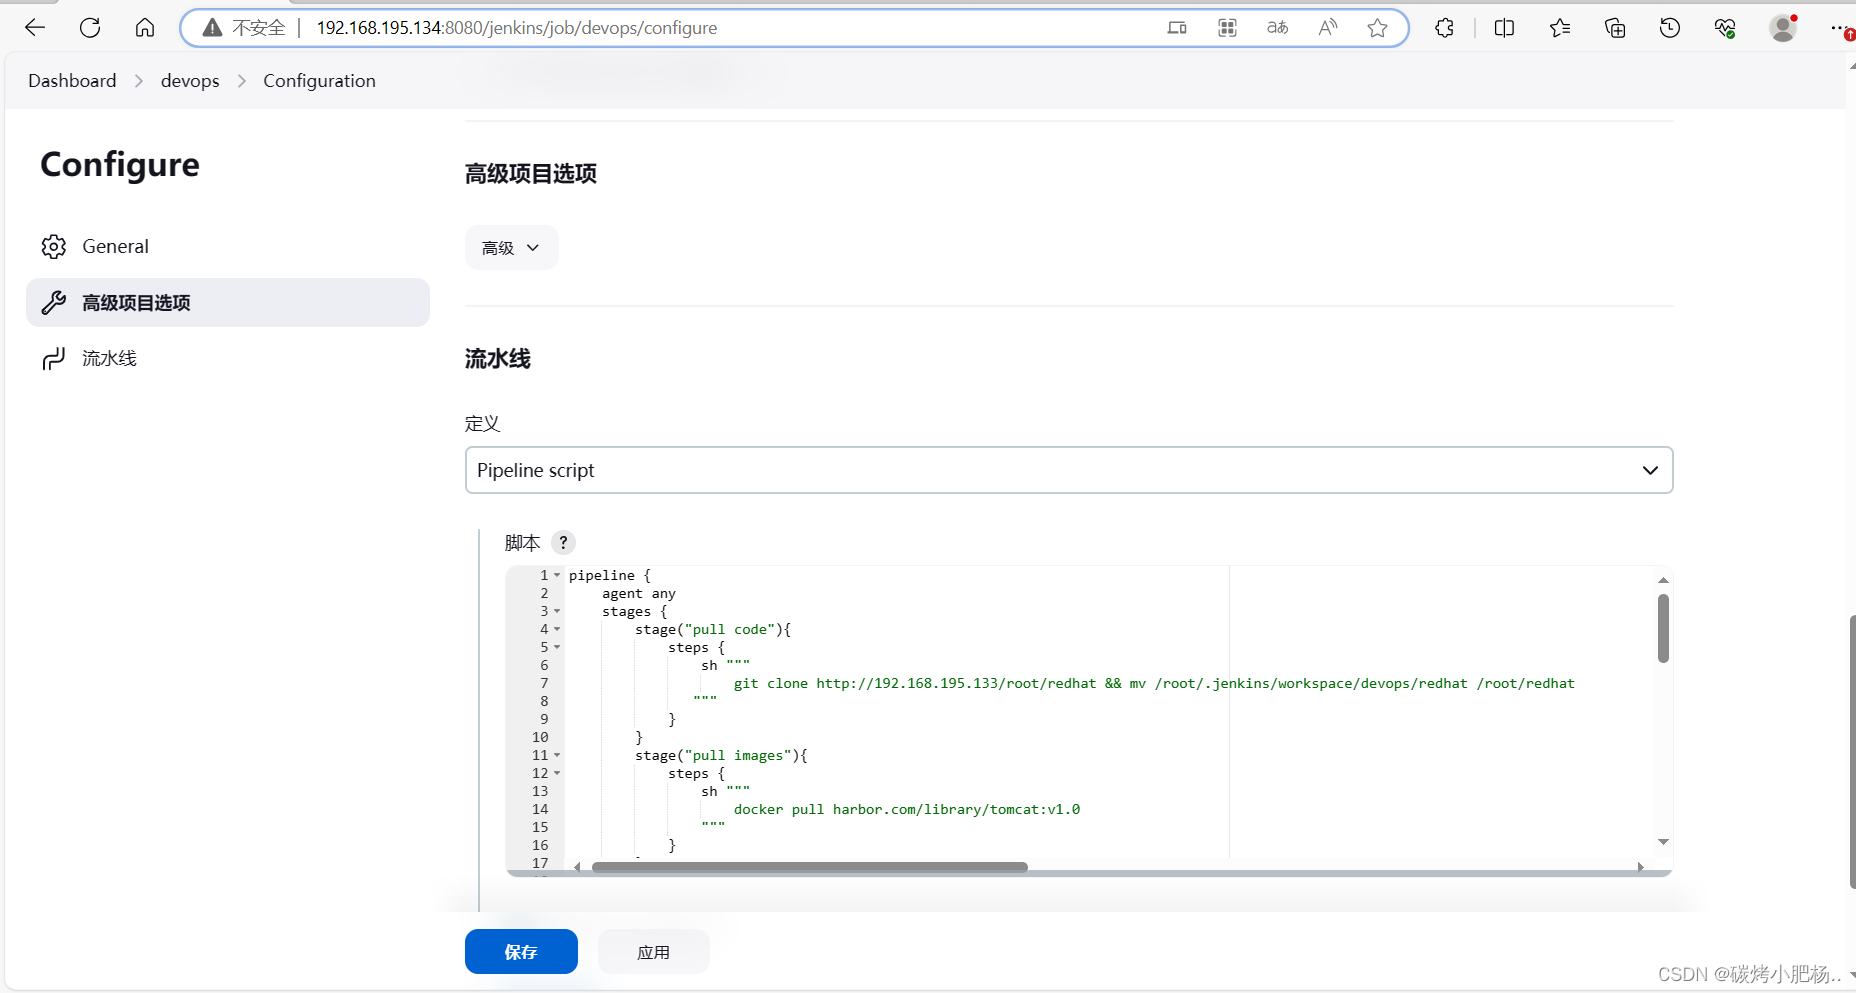
Branch 'main' set up to track remote branch 'main' from 'origin'.10.2.2.在Jenkins创建流水线项目,并运行项目
jenkins流水线代码如下:
pipeline {agent anystages {stage("pull code"){steps {sh """git clone http://192.168.195.133/root/redhat && mv /root/.jenkins/workspace/devops/redhat /root/redhat"""}}stage("pull images"){steps {sh """docker pull harbor.com/library/tomcat:v1.0"""}}stage("make .war pkgs"){steps {sh """cd /root/redhat && mvn clean package -Dmaven.test.skip=true && mv /root/redhat/target/ly-simple-tomcat-0.0.1-SNAPSHOT.war /root/test.war"""}}stage("vim dockerfile"){steps {sh """echo "FROM harbor.com/library/tomcat:v1.0" >> /root/dockerfile && echo "RUN rm -rf /usr/local/tomcat/webapps/ROOT" >> /root/dockerfile && echo "COPY ./test.war /usr/local/tomcat/webapps/ROOT.war" >> /root/dockerfile && echo 'CMD ["/usr/local/tomcat/bin/catalina.sh","run"]' >> /root/dockerfile"""}}stage("make new images"){steps {sh """cd /root && docker build -t harbor.com/library/tomcat:v0.2 ."""}}stage("push images"){steps {sh """docker login harbor.com -u admin -p Harbor12345 && docker push harbor.com/library/tomcat:v0.2"""}}stage("webs pull and run"){steps {sh """ssh docker "docker pull harbor.com/library/tomcat:v0.2" && ssh docker "docker run -d --name test -p 80:8080 -it harbor.com/library/tomcat:v0.2""""}}}
}

11.最终测试(在docker主机上测试)
[root@docker tomcat]# docker ps
CONTAINER ID   IMAGE                            COMMAND                  CREATED       STATUS       PORTS                                   NAMES
085340cd4f6e   harbor.com/library/tomcat:v0.2   "/usr/local/tomcat/b…"   5 hours ago   Up 5 hours   0.0.0.0:80->8080/tcp, :::80->8080/tcp   test
在浏览器上访问docker主机IP地址

成功部署
11.错误排查报告
问题一
//出现一下问题,表示我们的源中没有policycoreutils-python这个软件包
[root@gitlab yum.repos.d]# yum -y install curl openssh-server openssh-clients postfix cronie policycoreutils-python
Updating Subscription Management repositories.
Unable to read consumer identity
This system is not registered to Red Hat Subscription Management. You can use subscription-manager to register.
Last metadata expiration check: 0:02:46 ago on Sat 07 Oct 2023 02:11:07 PM CST.
Package curl-7.61.1-12.el8.x86_64 is already installed.
Package openssh-server-8.0p1-4.el8_1.x86_64 is already installed.
Package openssh-clients-8.0p1-4.el8_1.x86_64 is already installed.
Package cronie-1.5.2-4.el8.x86_64 is already installed.
No match for argument: policycoreutils-python
Error: Unable to find a match: policycoreutils-python
解决方法:
在https://pkgs.org/这个网站中下载这个包
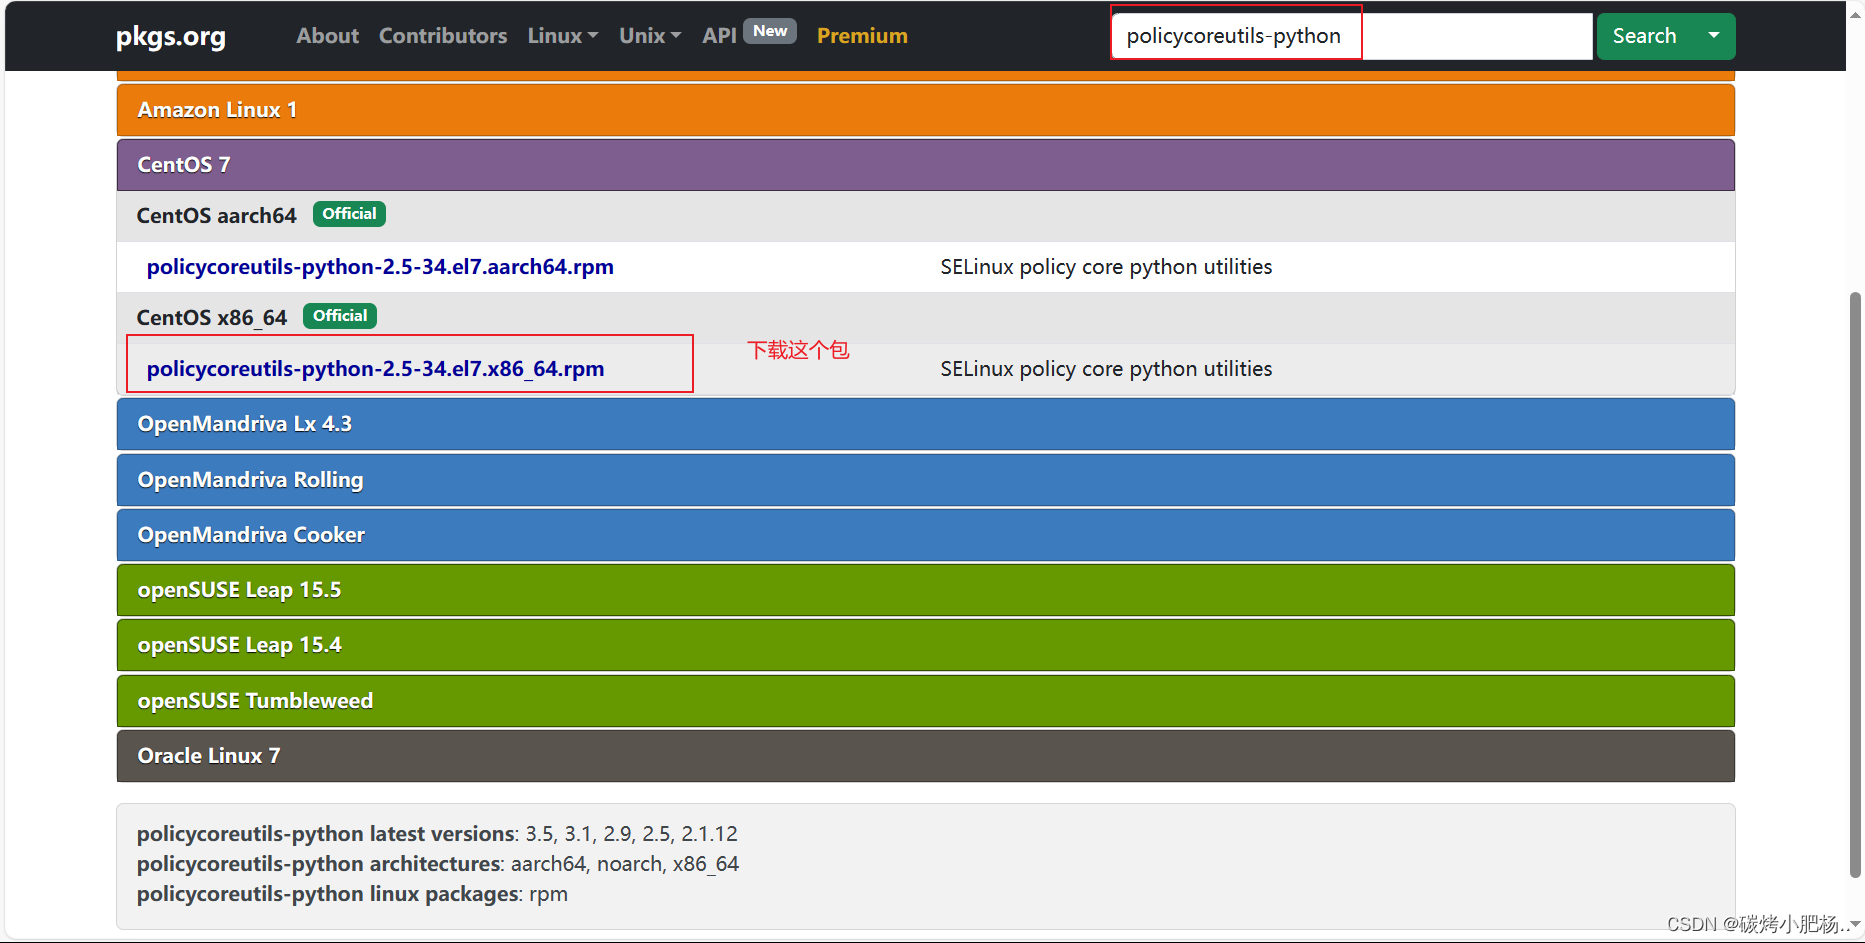
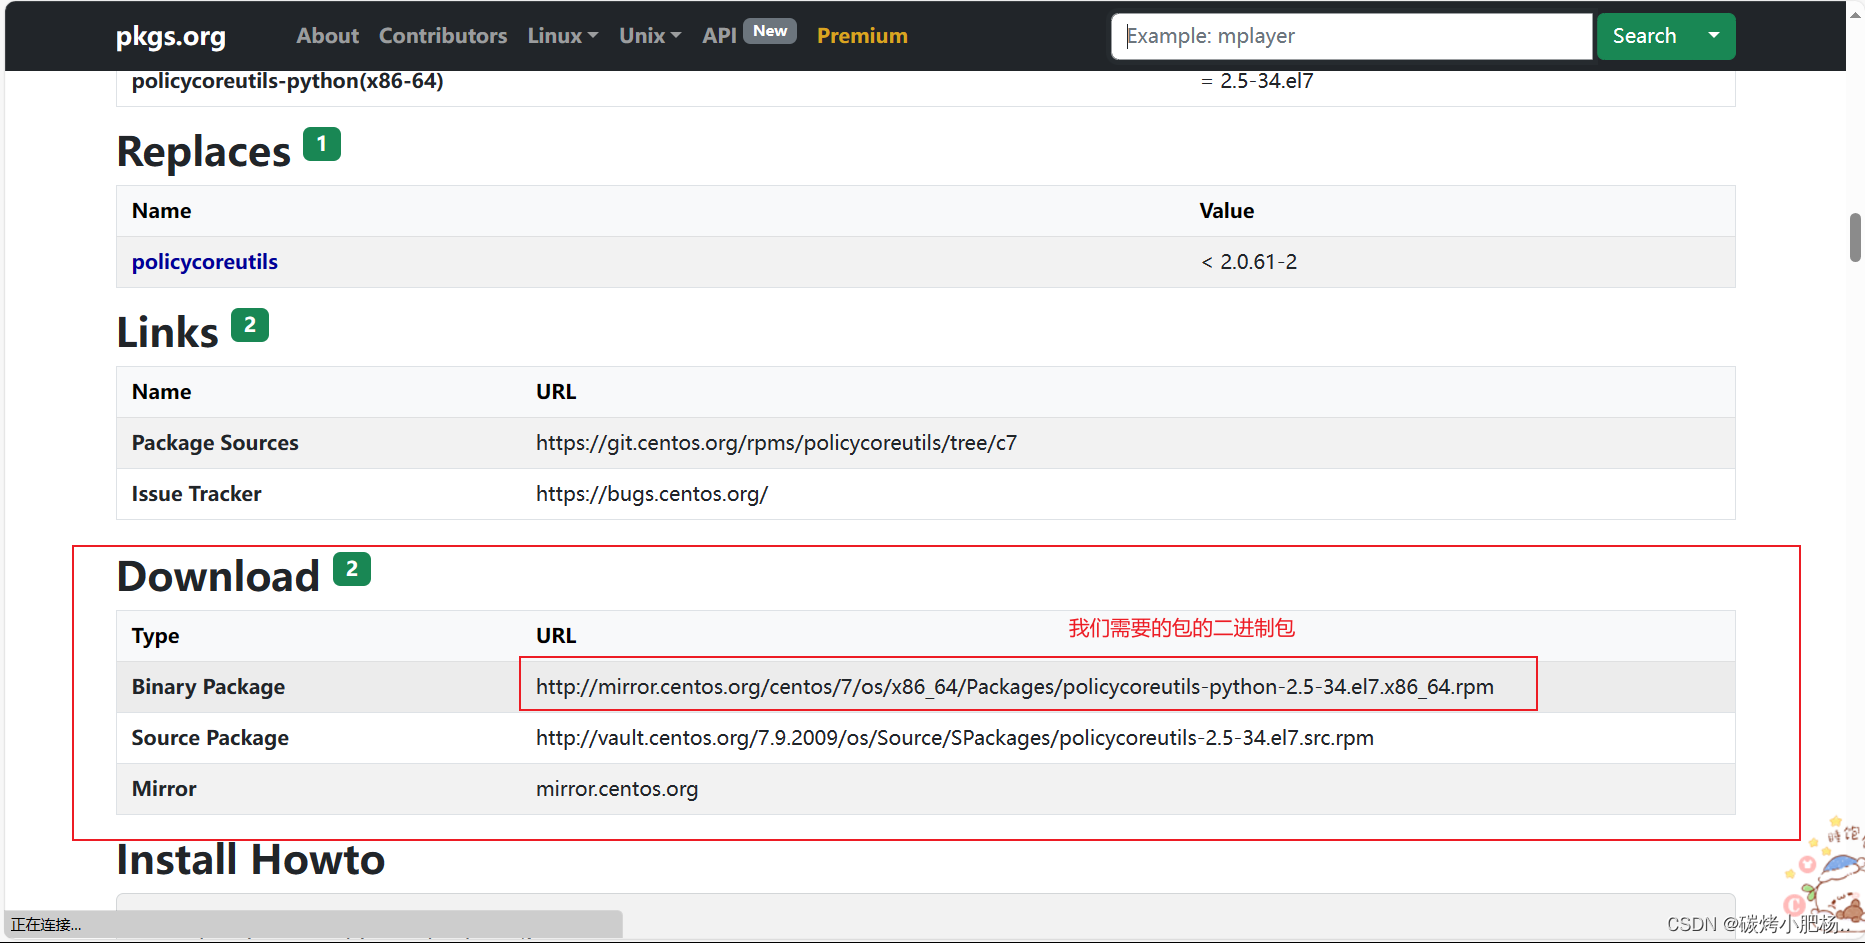
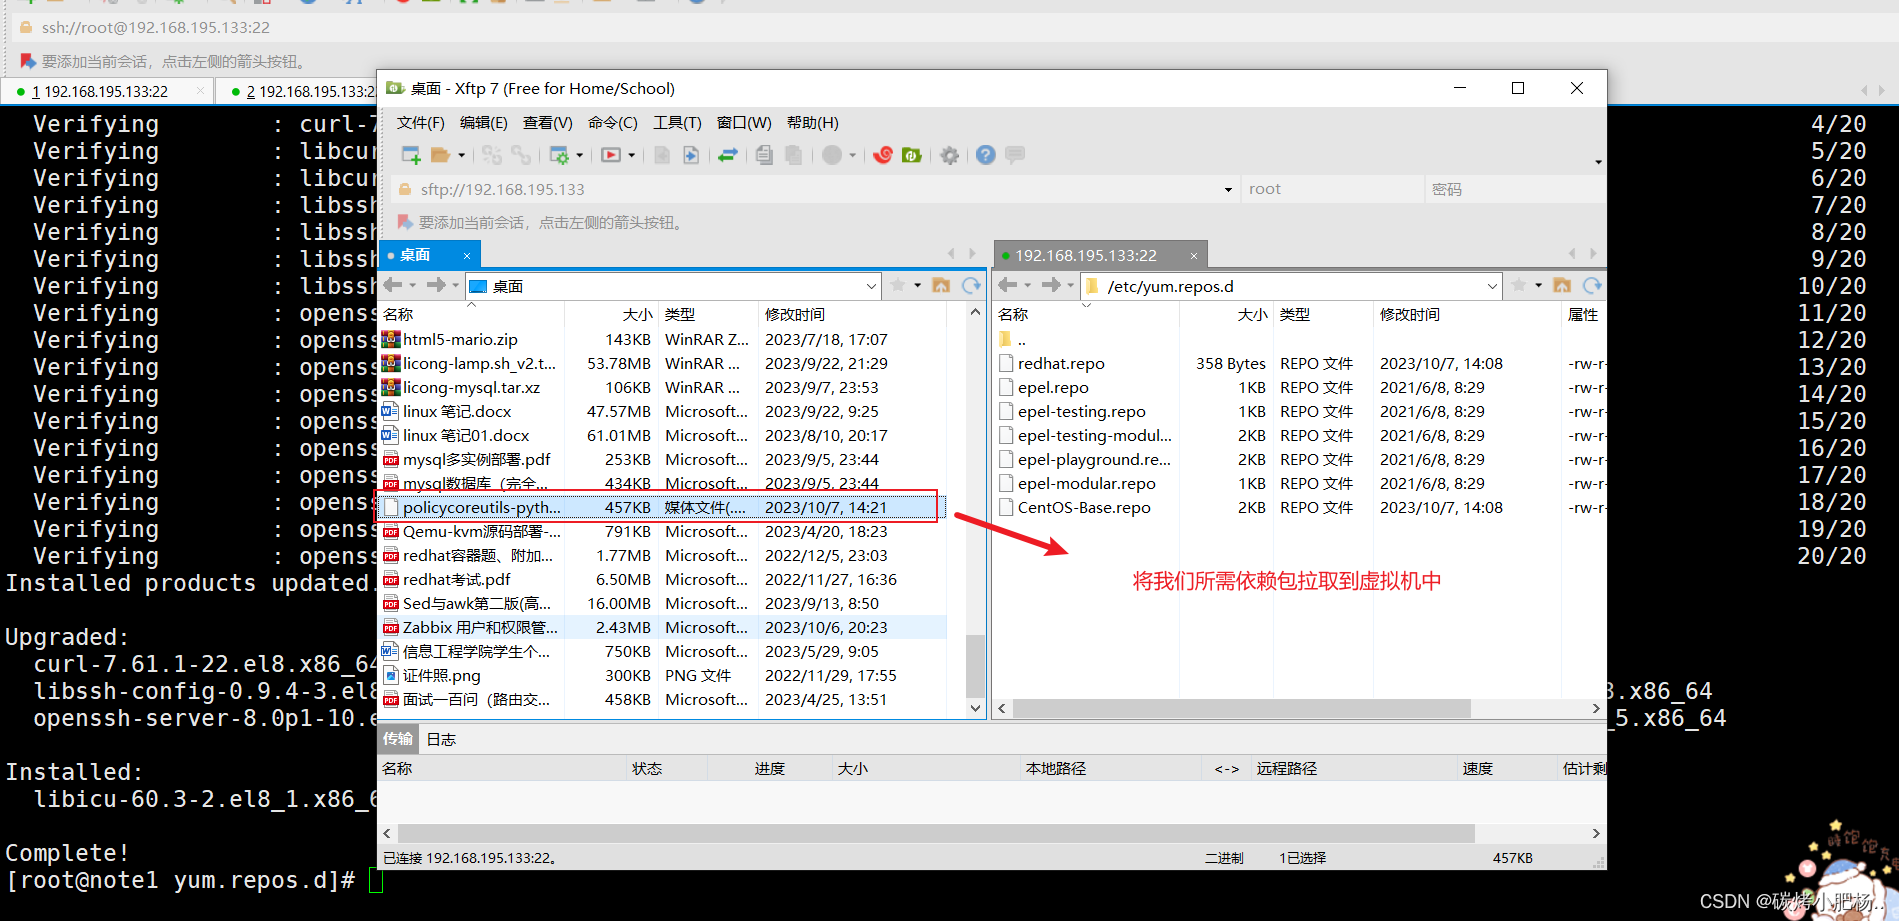
上传过去后使用rpm的方式安装即可:
[root@gitlab yum.repos.d]# rpm -ivh --nodeps policycoreutils-python-2.5-34.el7.x86_64.rpm
warning: policycoreutils-python-2.5-34.el7.x86_64.rpm: Header V3 RSA/SHA256 Signature, key ID f4a80eb5: NOKEY
Verifying...                          ################################# [100%]
Preparing...                          ################################# [100%]
Updating / installing...1:policycoreutils-python-2.5-34.el7################################# [100%]
问题二
//若出现下列错误,则表示文件/usr/share/man/ru/man8/semodule_package.8.gz从安装policycoretils -python-2.5-34.el7。X86_64与包policycoretils -2.9-9.el8. X86_64中的文件冲突[root@gitlab yum.repos.d]# rpm -ivh --nodeps policycoreutils-python-2.5-34.el7.x86_64.rpm
warning: policycoreutils-python-2.5-34.el7.x86_64.rpm: Header V3 RSA/SHA256 Signature, key ID f4a80eb5: NOKEY
Verifying...                          ################################# [100%]
Preparing...                          ################################# [100%]file /usr/bin/semodule_package from install of policycoreutils-python-2.5-34.el7.x86_64 conflicts with file from package policycoreutils-2.9-9.el8.x86_64file /usr/share/man/ru/man8/semodule_package.8.gz from install of policycoreutils-python-2.5-34.el7.x86_64 conflicts with file from package policycoreutils-2.9-9.el8.x86_64//解决方法
[root@gitlab yum.repos.d]# rpm -e policycoreutils-2.9-9.el8.x86_64
![[PHP]Kodexplorer可道云 v4.47](https://img-blog.csdnimg.cn/532b538062ec407b85784c9884eef039.png)