定义
装饰模式(Decorator Pattern)是一种结构型设计模式,它允许通过将对象包装在装饰器类的实例中来动态地添加新的行为和责任。这种模式可以在不修改现有代码的情况下,灵活地扩展对象的功能。
示例
考虑一个咖啡店的场景,有不同种类的咖啡,你可以选择添加不同的配料,比如牛奶、糖和巧克力。使用装饰模式可以动态地为咖啡添加不同的配料,而不需要修改咖啡类的代码。
类结构
- Component(组件): 定义了一个抽象接口,用于具体组件和装饰器共享。
- ConcreteComponent(具体组件): 实现了Component接口的具体类,是被装饰的对象。
- Decorator(装饰器): 也实现了Component接口,并持有一个Component对象的引用,这是装饰的核心。
- ConcreteDecorator(具体装饰器): 扩展了Decorator类,负责具体的装饰操作。
代码实现
#include <iostream>
#include <string>// Step 1: Component(组件)
class Coffee {
public:virtual std::string getDescription() const = 0;virtual double cost() const = 0;
};// Step 2: ConcreteComponent(具体组件)
class SimpleCoffee : public Coffee {
public:std::string getDescription() const override {return "简单咖啡";}double cost() const override {return 5.0;}
};// Step 3: Decorator(装饰器)
class CoffeeDecorator : public Coffee {
protected:Coffee* coffee;public:CoffeeDecorator(Coffee* c) : coffee(c) {}std::string getDescription() const override {return coffee->getDescription();}double cost() const override {return coffee->cost();}
};// Step 4: ConcreteDecorator(具体装饰器)
class MilkDecorator : public CoffeeDecorator {
public:MilkDecorator(Coffee* c) : CoffeeDecorator(c) {}std::string getDescription() const override {return coffee->getDescription() + ",加牛奶";}double cost() const override {return coffee->cost() + 2.0;}
};class SugarDecorator : public CoffeeDecorator {
public:SugarDecorator(Coffee* c) : CoffeeDecorator(c) {}std::string getDescription() const override {return coffee->getDescription() + ",加糖";}double cost() const override {return coffee->cost() + 1.0;}
};int main() {// 创建一个简单咖啡Coffee* myCoffee = new SimpleCoffee();std::cout << "描述:" << myCoffee->getDescription() << ",价格:" << myCoffee->cost() << "元" << std::endl;// 使用装饰器动态添加牛奶myCoffee = new MilkDecorator(myCoffee);std::cout << "描述:" << myCoffee->getDescription() << ",价格:" << myCoffee->cost() << "元" << std::endl;// 使用装饰器再添加糖myCoffee = new SugarDecorator(myCoffee);std::cout << "描述:" << myCoffee->getDescription() << ",价格:" << myCoffee->cost() << "元" << std::endl;// 释放内存delete myCoffee;return 0;
}
结构图示
在这个示例中,Coffee是组件,SimpleCoffee是具体组件,CoffeeDecorator是装饰器,MilkDecorator和SugarDecorator是具体装饰器。通过不同的组合,我们可以动态地扩展咖啡的描述和价格,而无需修改原始的咖啡类。这就是装饰模式
适用场景
动态地添加或修改对象的功能
当需要动态地为一个对象添加额外的功能,而且希望这些功能可以灵活组合时,装饰模式是一个很好的选择。这样可以避免使用大量子类来实现所有可能的组合,而是使用装饰器来动态地添加这些功能。
避免使用继承导致的类爆炸
经常会发现在类的层次结构中添加新功能导致的子类爆炸问题。装饰模式通过将功能分离到单独的装饰器类中,避免了这种情况的发生。
保持类的简单性和单一责任原则
使用装饰模式可以将一些复杂的功能分离到单独的装饰器类中,使得原始类保持简单和具有单一职责。
在运行时动态地添加或删除功能
装饰模式允许在运行时动态地添加或删除对象的功能,这对于某些情况下的配置和扩展非常有用。
经典使用方案
Java I/O库中的输入输出流
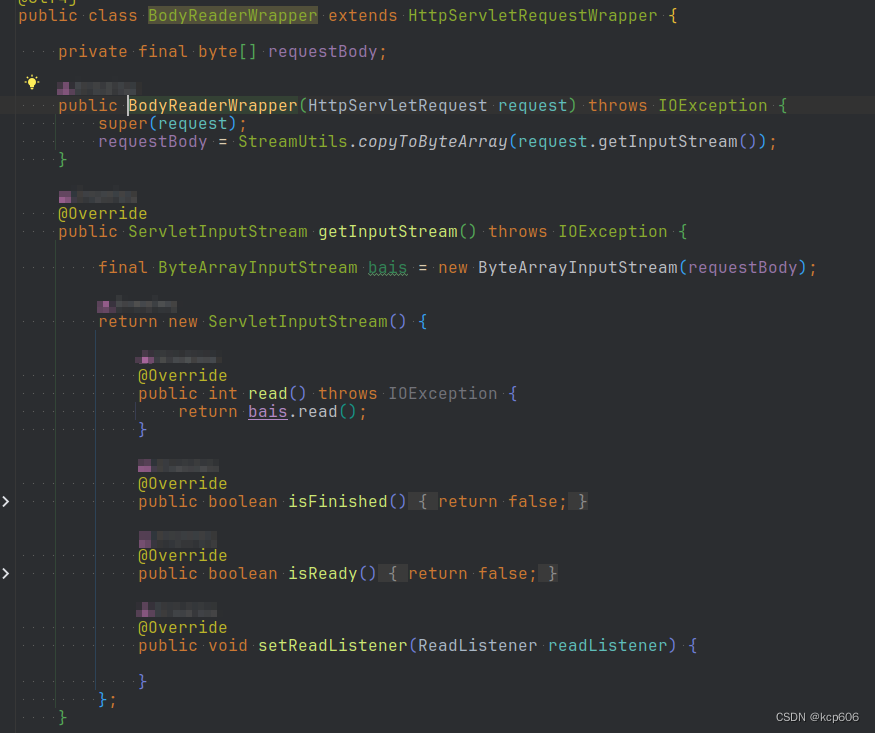
Java中的输入输出流就是一个典型的装饰器模式的例子。基本的InputStream或OutputStream可以通过添加额外的功能,比如缓冲、加密或压缩等,而无需修改它们的代码。
GUI界面组件
在GUI编程中,经常需要动态地添加新的功能或外观到用户界面组件上。比如,一个简单的文本框可以通过装饰模式来添加滚动条、边框、背景色等功能,而无需修改原始文本框类的代码。
Web开发中的过滤器
在Web开发中,过滤器常常用于对请求或响应进行处理,比如身份验证、日志记录、数据压缩等。使用装饰模式可以轻松地添加新的过滤功能,同时保持代码的灵活性和可维护性。
这些都是装饰模式在实际应用中的经典场景
示例说明使用装饰模式的好处
#include <iostream>
#include <memory>// 抽象组件
class Component {
public:virtual void operation() = 0;virtual ~Component() {}
};// 具体组件
class ConcreteComponent : public Component {
public:virtual void operation() override {std::cout << "ConcreteComponent operation\n";}
};// 抽象装饰器
class Decorator : public Component {
protected:std::shared_ptr<Component> component;public:Decorator(std::shared_ptr<Component> comp) : component(comp) {}virtual void operation() override {if (component != nullptr) {component->operation();}}
};// 具体装饰器 A
class ConcreteDecoratorA : public Decorator {
public:ConcreteDecoratorA(std::shared_ptr<Component> comp) : Decorator(comp) {} //这里初始化了基类 virtual void operation() override {Decorator::operation();// 调用了基类的public函数addedBehavior();}void addedBehavior() {std::cout << "Added Behavior by ConcreteDecoratorA\n";}
};// 具体装饰器 B
class ConcreteDecoratorB : public Decorator {
public:ConcreteDecoratorB(std::shared_ptr<Component> comp) : Decorator(comp) {}virtual void operation() override {Decorator::operation();addedState();}void addedState() {std::cout << "Added State by ConcreteDecoratorB\n";}
};int main() {// 创建具体组件对象std::shared_ptr<Component> component = std::make_shared<ConcreteComponent>();// 添加装饰器 Astd::shared_ptr<Component> decoratedA = std::make_shared<ConcreteDecoratorA>(component);decoratedA->operation();std::cout << "------\n";// 添加装饰器 Bstd::shared_ptr<Component> decoratedB = std::make_shared<ConcreteDecoratorB>(component);decoratedB->operation();std::cout << "------\n";// 动态组合装饰器 A 和 Bstd::shared_ptr<Component> decoratedAB = std::make_shared<ConcreteDecoratorA>(decoratedB);decoratedAB->operation();return 0;
}
在这个示例中,我们有一个抽象组件 Component,它定义了操作的接口。然后有一个具体的组件 ConcreteComponent 实现了这个接口。然后我们有一个抽象装饰器 Decorator,它也实现了 Component 接口,并持有一个指向 Component 对象的指针。具体的装饰器类 ConcreteDecoratorA 和 ConcreteDecoratorB 继承自 Decorator,并添加了额外的行为或状态。
在 main() 函数中,我们可以看到如何动态地添加或组合装饰器。通过创建具体组件对象,然后将其传递给不同的装饰器来添加不同的行为或状态。这展示了装饰模式的灵活性和动态性。
编译运行
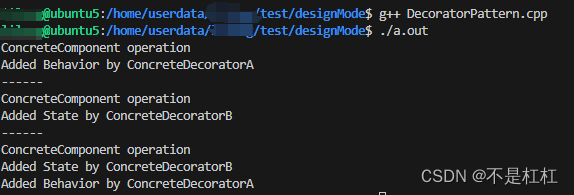
分析
动态地添加或修改对象的功能
这里实现了灵活添加组件
// 添加装饰器 A
std::shared_ptr<Component> decoratedA = std::make_shared<ConcreteDecoratorA>(component);
decoratedA->operation();
避免使用继承导致的类爆炸
上述例子,通过组件通过添加装饰类的方式,将装饰功能分离,而不需要使用继承或者组合的方式,解耦了功能的扩展,新的装饰添加时,不需要改动组件,只要添加新的装饰类即可,避免了需要不断继承带来的风险和大量继承类。
保持类的简单性和单一责任原则
这里通过将装饰功能的分离,保持类的简单性和单一责任原则。
![[OpenAI]继ChatGPT后发布的Sora模型原理与体验通道](https://img-blog.csdnimg.cn/direct/6f21b60b46e84e9aaec5932e802046ae.jpeg)

