一、代码
#---------------------------------------------------#
#   检测图片
#---------------------------------------------------#
def detect_image(self, image, count=False, name_classes=None):#---------------------------------------------------------##   在这里将图像转换成RGB图像,防止灰度图在预测时报错。#   代码仅仅支持RGB图像的预测,所有其它类型的图像都会转化成RGB#---------------------------------------------------------#image       = cvtColor(image)#---------------------------------------------------##   对输入图像进行一个备份,后面用于绘图#---------------------------------------------------#old_img     = copy.deepcopy(image)orininal_h  = np.array(image).shape[0]orininal_w  = np.array(image).shape[1]#---------------------------------------------------------##   给图像增加灰条,实现不失真的resize#   也可以直接resize进行识别#---------------------------------------------------------#image_data, nw, nh  = resize_image(image, (self.input_shape[1],self.input_shape[0]))#---------------------------------------------------------##   添加上batch_size维度#---------------------------------------------------------#image_data  = np.expand_dims(np.transpose(preprocess_input(np.array(image_data, np.float32)), (2, 0, 1)), 0)with torch.no_grad():images = torch.from_numpy(image_data)if self.cuda:images = images.cuda()#---------------------------------------------------##   图片传入网络进行预测#---------------------------------------------------#pr = self.net(images)[0]#---------------------------------------------------##   取出每一个像素点的种类#---------------------------------------------------#pr = F.softmax(pr.permute(1,2,0),dim = -1).cpu().numpy()#--------------------------------------##   将灰条部分截取掉#--------------------------------------#pr = pr[int((self.input_shape[0] - nh) // 2) : int((self.input_shape[0] - nh) // 2 + nh), \int((self.input_shape[1] - nw) // 2) : int((self.input_shape[1] - nw) // 2 + nw)]#---------------------------------------------------##   进行图片的resize#---------------------------------------------------#pr = cv2.resize(pr, (orininal_w, orininal_h), interpolation = cv2.INTER_LINEAR)#---------------------------------------------------##   取出每一个像素点的种类#---------------------------------------------------#pr = pr.argmax(axis=-1)seg_img = np.reshape(np.array(self.colors, np.uint8)[np.reshape(pr, [-1])], [orininal_h, orininal_w, -1])#------------------------------------------------##   将新图片转换成Image的形式#------------------------------------------------#image   = Image.fromarray(np.uint8(seg_img))#------------------------------------------------##   将新图与原图及进行混合#------------------------------------------------#image   = Image.blend(old_img, image, 0.7)
二、代码逐步debug调试
(1)读图
#---------------------------------------------------------#
#   在这里将图像转换成RGB图像,防止灰度图在预测时报错。
#   代码仅仅支持RGB图像的预测,所有其它类型的图像都会转化成RGB
#---------------------------------------------------------#
image       = cvtColor(image)

(2) Letterbox
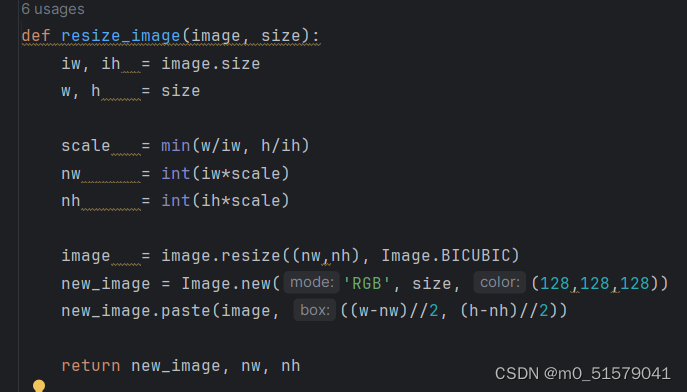
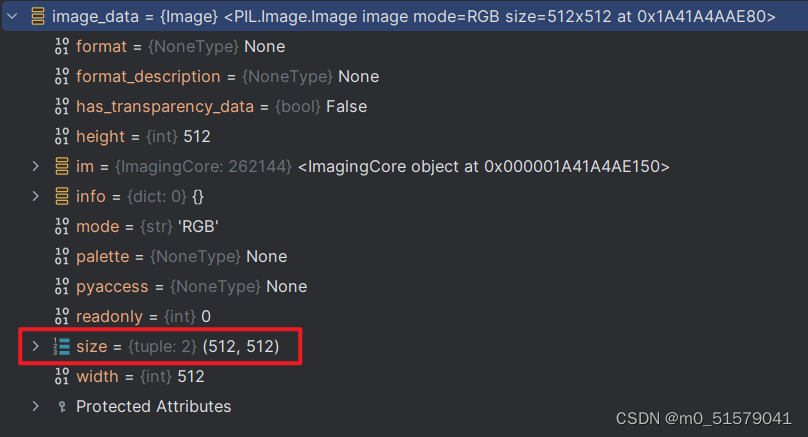
无论输入的图片尺寸多大,都会经过letter_box后,变为512x512尺寸
(3) 归一化、HWC 转 CHW,并expand维度到NCHW,转tensor
def preprocess_input(image):image /= 255.0return image#---------------------------------------------------------#
#   添加上batch_size维度
#---------------------------------------------------------#
image_data  = np.expand_dims(np.transpose(preprocess_input(np.array(image_data, np.float32)), (2, 0, 1)), 0)

(4) 前向传播
#---------------------------------------------------#
#   图片传入网络进行预测
#---------------------------------------------------#
pr = self.net(images)[0]

21个channel代表(20+1)个类别,512x512为模型输入及输入尺寸
(5) softmax 计算像素类别概率
#---------------------------------------------------#
#   取出每一个像素点的种类
#---------------------------------------------------#
pr = F.softmax(pr.permute(1,2,0),dim = -1).cpu().numpy()

经过softmax后,512x512的mask图中,每个位置(x,y)对应的21个channel的值和为1。
(6) 截取灰条部分,并resize到原图尺寸(逆letter_box)
#--------------------------------------## 将灰条部分截取掉#--------------------------------------#pr = pr[int((self.input_shape[0] - nh) // 2) : int((self.input_shape[0] - nh) // 2 + nh), \int((self.input_shape[1] - nw) // 2) : int((self.input_shape[1] - nw) // 2 + nw)]#---------------------------------------------------## 进行图片的resize#---------------------------------------------------#pr = cv2.resize(pr, (orininal_w, orininal_h), interpolation = cv2.INTER_LINEAR)
pr类型是np,array,所以可以通过这种方式进行逆letter_box操作,将mask的宽高,还原到原始输入图片的宽高。
(7) 利用argmax,计算每个像素属于的类别
#---------------------------------------------------#
#   取出每一个像素点的种类
#---------------------------------------------------#
pr = pr.argmax(axis=-1)
返回最后一个维度(channel)中,最大值所对应的索引,即类别。例如,像素点(x1,y1)所对应的21个channel中,第5个channel的值最大,则像素点(x1,y1)对应类别则是class=5。
(8) 可视化
seg_img = np.reshape(np.array(self.colors, np.uint8)[np.reshape(pr, [-1])], [orininal_h, orininal_w, -1])
#------------------------------------------------#
#   将新图片转换成Image的形式
#------------------------------------------------#
image   = Image.fromarray(np.uint8(seg_img))
#------------------------------------------------#
#   将新图与原图及进行混合
#------------------------------------------------#
image   = Image.blend(old_img, image, 0.7)
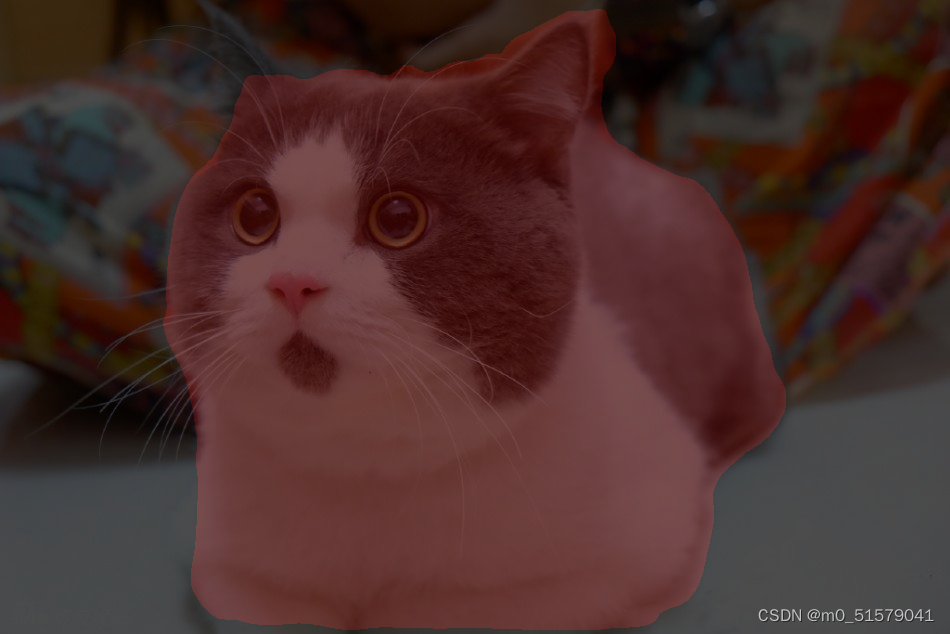
将预测的结果与原图进行混合。
