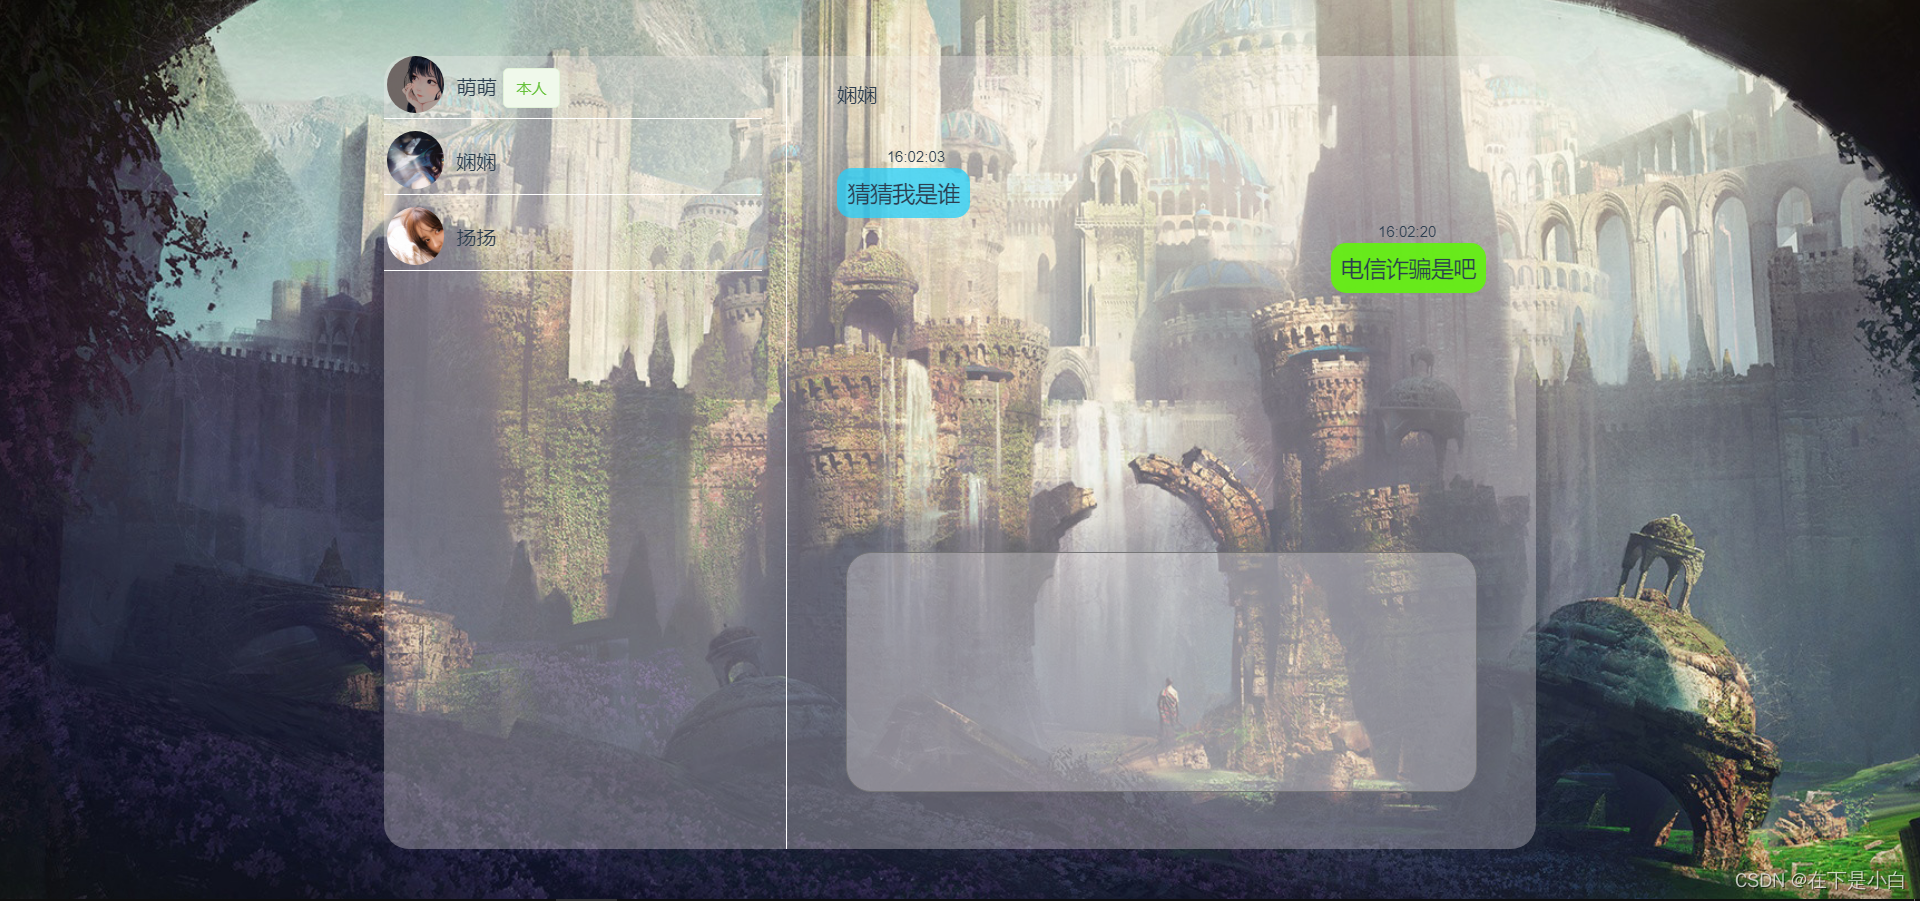
先看看这个使用websocket实现的聊天室,因为前端是使用websocket,和下面的demo的前端差不多就不解释实现原理,所以建议还是看看(要是会websocket的大佬请忽略)
springboot+websocket+vue聊天室
目录
- 一、实现内容
- 二、代码实现
- 1.后端
- 2.前端
- 源码
一、实现内容
- http://localhost:8080/netty?uid=1
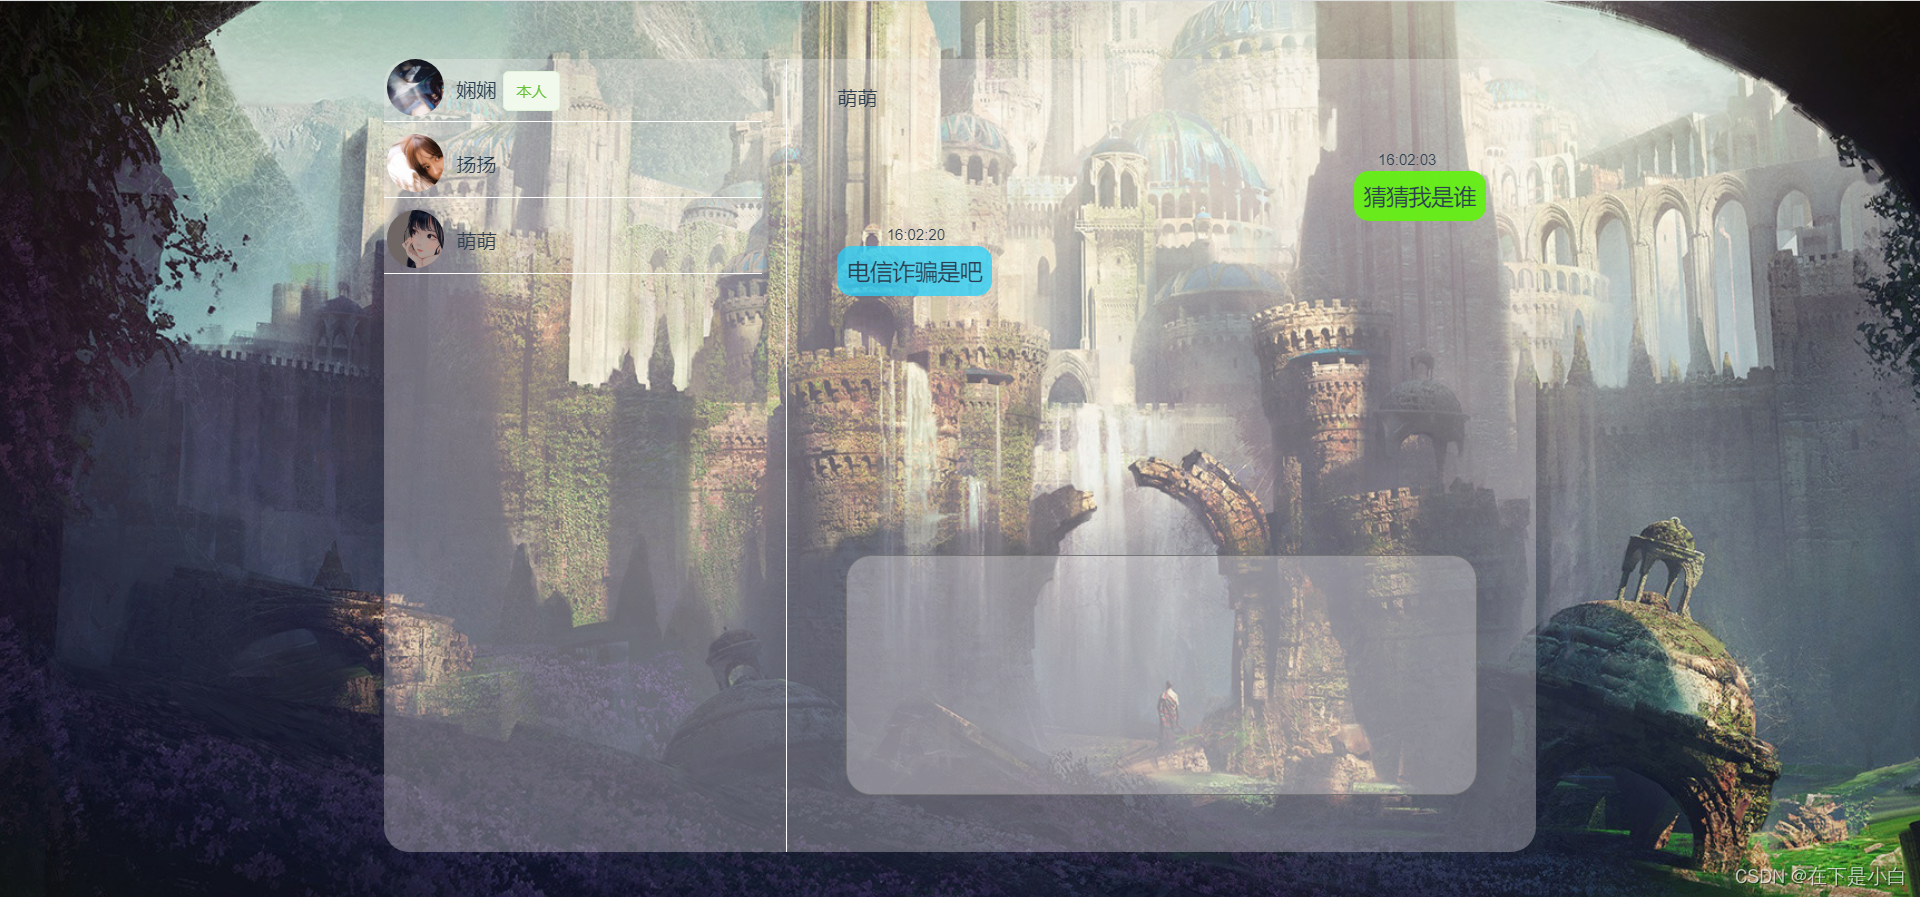
- http://localhost:8080/netty?uid=2
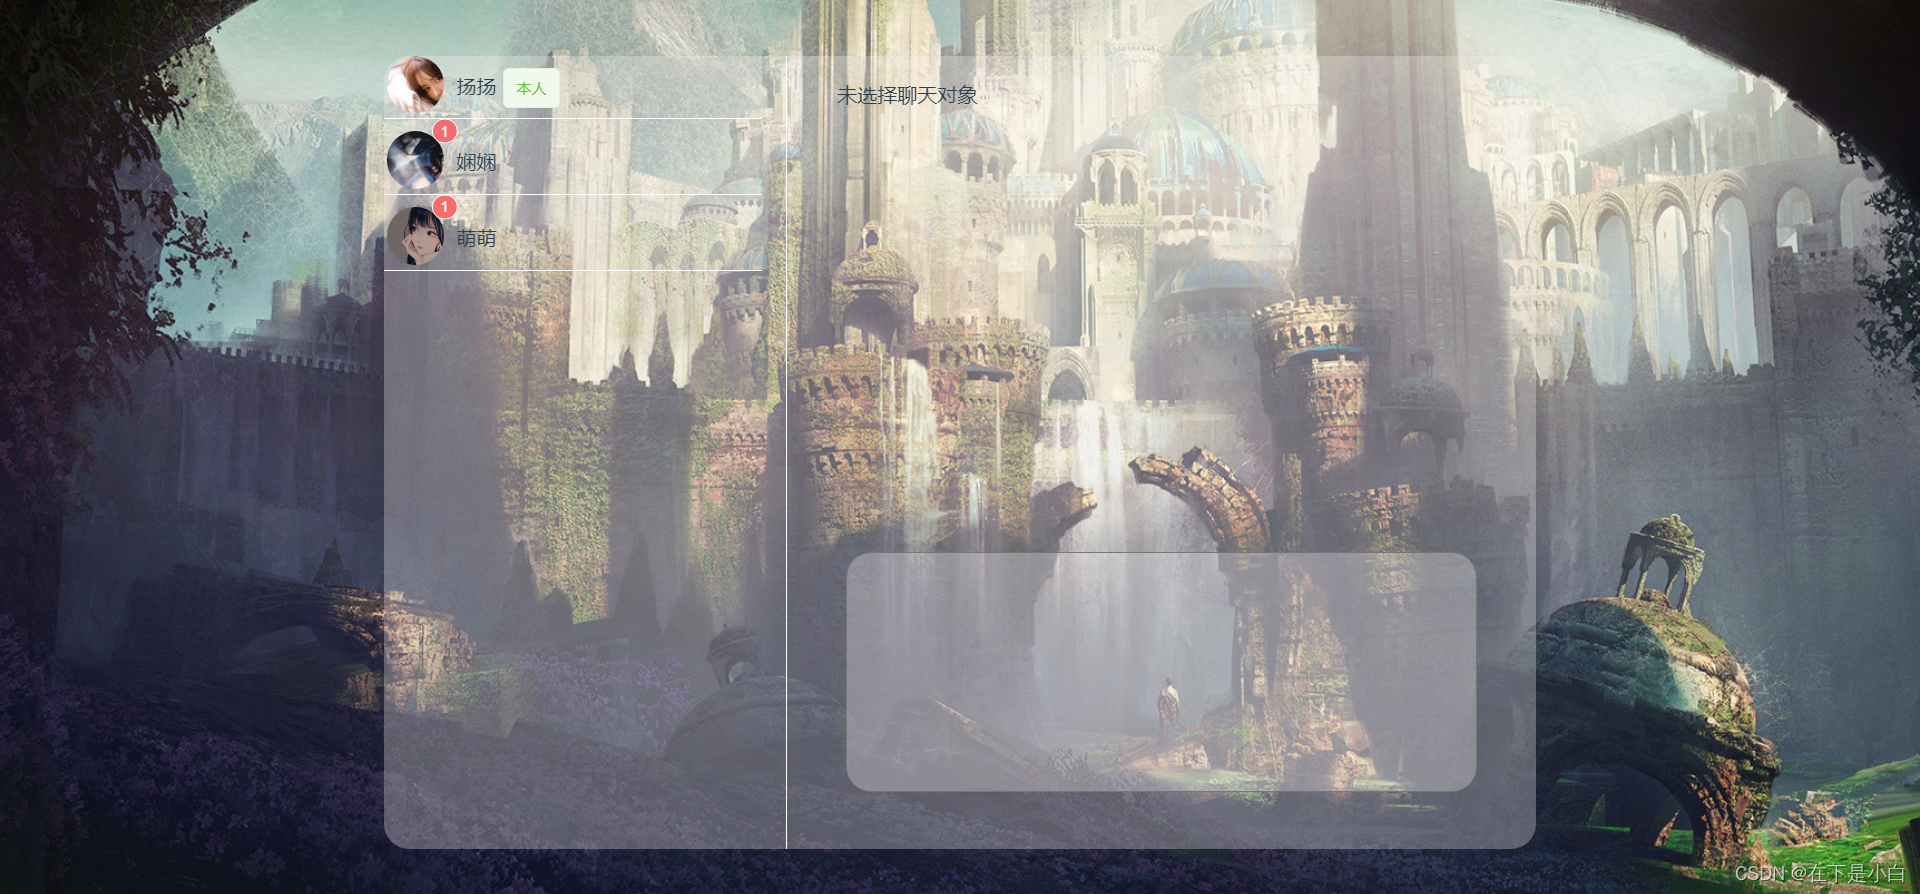
- http://localhost:8080/netty?uid=3
二、代码实现
1.后端
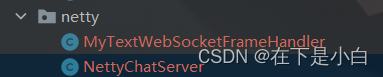
- netty服务端
@Component("NettyChatServer")
public class NettyChatServer {//主线程池:处理连接请求private static NioEventLoopGroup boss = new NioEventLoopGroup(2);//工作线程池:接收主线程发过来的任务,完成实际的工作private static NioEventLoopGroup worker = new NioEventLoopGroup(6);//创建一个服务器端的启动对象ServerBootstrap serverBootstrap=null;@Autowired//自定义handler、处理客户端发送过来的消息进行转发等逻辑MyTextWebSocketFrameHandler myTextWebSocketFrameHandler = new MyTextWebSocketFrameHandler();public void run() {serverBootstrap= new ServerBootstrap().group(boss, worker).channel(NioServerSocketChannel.class)//连接的最大线程数.option(ChannelOption.SO_BACKLOG, 128)//长连接,心跳机制.childOption(ChannelOption.SO_KEEPALIVE, true).childHandler(new ChannelInitializer<NioSocketChannel>() {@Overrideprotected void initChannel(NioSocketChannel nioSocketChannel) throws Exception {//因为基于http协议,使用http的编码和解码器nioSocketChannel.pipeline().addLast(new HttpServerCodec());//是以块方式写,添加ChunkedWriteHandler处理器nioSocketChannel.pipeline().addLast(new ChunkedWriteHandler());/*** 说明*   1. http数据在传输过程中是分段, HttpObjectAggregator ,就是可以将多个段聚合*   2. 这就就是为什么,当浏览器发送大量数据时,就会发出多次http请求*/nioSocketChannel.pipeline().addLast(new HttpObjectAggregator(8192));/*** 说明*    1. 对应websocket ,它的数据是以帧(frame,基于TCP)形式传递*    2. 可以看到WebSocketFrame下面有六个子类*    3. 浏览器请求时 ws://localhost:8888/wechat 表示请求的uri*    4. WebSocketServerProtocolHandler 核心功能是将 http协议升级为 ws协议 , 保持长连接*    5. 是通过一个 状态码 101*/nioSocketChannel.pipeline().addLast(new WebSocketServerProtocolHandler("/wechat"));//自定义handler、处理客户端发送过来的消息进行转发等逻辑nioSocketChannel.pipeline().addLast(myTextWebSocketFrameHandler);}});//server监听接口try {ChannelFuture channelfuture = serverBootstrap.bind(8888).sync();// 添加注册监听,监控关心的事件,当异步结束后就会回调监听逻辑channelfuture.addListener(new ChannelFutureListener() {@Overridepublic void operationComplete(ChannelFuture channelFuture) throws Exception {if (channelFuture.isSuccess()){System.out.println("监听端口8888成功");}else{System.out.println("监听端口8888失败");}}});//关闭通道和关闭连接池(不是真正关闭,只是设置为关闭状态)channelfuture.channel().closeFuture().sync();} catch (InterruptedException e) {e.printStackTrace();}finally {//EventLoop停止接收任务、任务结束完毕停掉线程池boss.shutdownGracefully();worker.shutdownGracefully();}}
}- 自定义handler,处理业务逻辑
@Component
@ChannelHandler.Sharable
public class MyTextWebSocketFrameHandler extends SimpleChannelInboundHandler<TextWebSocketFrame> {//记录客户端和channel的绑定private static Map<Integer, Channel> channelMap=new ConcurrentHashMap<Integer, Channel>();@Overrideprotected void channelRead0(ChannelHandlerContext channelHandlerContext, TextWebSocketFrame textWebSocketFrame) throws Exception {//将发过来的内容进行解析成 自定义的MessageMessage message = JSON.parseObject(textWebSocketFrame.text(), Message.class);//绑定对应用户和channelif (!channelMap.containsKey(message.getFromUid())){channelMap.put(message.getFromUid(),channelHandlerContext.channel());}else{channelMap.replace(message.getFromUid(),channelHandlerContext.channel());}//发送给对应的客户端对应的channelif(channelMap.containsKey(message.getToUid())){//因为连接成功会发送一次注册消息(注册消息message.getToUid()== message.getFromUid())if(message.getToUid()!= message.getFromUid()){//不能重用之前的textWebSocketFramechannelMap.get(message.getToUid()).writeAndFlush(new TextWebSocketFrame(textWebSocketFrame.text()));}}else{//该用户暂未在线,先将消息存进数据库(这里没实现)System.out.println("该用户暂未在线,先将消息存进数据库");}//计数-1(计数法来控制回收内存)channelHandlerContext.fireChannelRead(textWebSocketFrame.retain());}
}
- netty整合到springboot
@SpringBootApplication
public class OnlinechatApplication {public static void main(String[] args) {ConfigurableApplicationContext context = SpringApplication.run(OnlinechatApplication.class, args);NettyChatServer nettyChatServer = (NettyChatServer)context.getBean("NettyChatServer");nettyChatServer.run();}}
2.前端
- 和weocket的demo区别发送的ws协议uri不同,
ws://localhost:8888/wechat - 还有就是,websocket建立连接之后就先发送一次绑定消息到服务器端(将用户和channel的关系对应起来)
<template><div class="bg"><el-container class="wechat"><el-aside width="35%" style="border-right: 1px solid #fff"><!-- 自己 --><div class="item"><el-avatar:size="46":src="user.avatarUrl"style="float: left; margin-left: 2px"></el-avatar><div class="name">{{ user.nickname}}<el-tag style="margin-left: 5px" type="success">本人</el-tag></div></div><!-- 在线用户 --><divclass="item"v-for="(item1, index) in userlist":key="item1.uid"@click="selectUser(index)"><!-- 新数消息 --><el-badge:value="new_message_num[index]":max="99":hidden="!new_message_num[index] > 0"style="float: left; margin-left: 2px"><el-avatar :size="46" :src="item1.avatarUrl"></el-avatar></el-badge><div class="name">{{ item1.nickname }}</div></div></el-aside><el-main><el-container class="wechat_right"><!-- 右边顶部 --><el-header class="header">{{anotherUser != null && anotherUser.uid > 0? anotherUser.nickname: "未选择聊天对象"}}</el-header><!-- 聊天内容 --><el-main class="showChat"><div v-for="item2 in messageList[index]" :key="item2.msg"><!-- 对方发的 --><div class="leftBox" v-if="item2.FromUid == anotherUser.uid"><span style="font-size: 4px">{{ item2.time }}</span>{{ item2.msg }}</div><div class="myBr" v-if="item2.FromUid == anotherUser.uid"></div><!-- 自己发的 --><div class="rightBox" v-if="item2.FromUid == user.uid"><span style="font-size: 4px">{{ item2.time }}</span>{{ item2.msg }}</div><div class="myBr" v-if="item2.FromUid == user.uid"></div></div></el-main><!-- 输入框 --><el-main class="inputValue"><textarea v-model="inputValue" id="chat" cols="26" rows="5"></textarea><!-- 发送按钮 --><el-buttonv-if="anotherUser != null && anotherUser.uid > 0 && inputValue != ''"type="success"size="mini"roundid="send"@click="senMessage">发送</el-button></el-main></el-container></el-main></el-container></div>
</template><script>
export default {data() {return {//自己user: {},//要私信的人anotherUser: {},//在线的用户userlist: [],//要私信的人在userlist的索引位置index: 0,//消息队列集合 [本人和第一个人之间的消息集合、本人和第二个人之间的消息集合、...]messageList: [],//新消息个数集合new_message_num: [],//将要发送的内容inputValue: "",//websocketwebsocket: null,};},methods: {//获取自己被分配的信息getYourInfo(uid) {let params = new URLSearchParams();this.$axios.post("/user/getYourInfo/" + uid, params).then((res) => {this.user = res.data.data;if (res.data.code == 200) {//获取在线用户this.getUserList();}}).catch((err) => {console.error(err);});},//获取在线用户getUserList() {let params = new URLSearchParams();this.$axios.post("/user/getUserList", params).then((res) => {this.userlist = res.data.data.filter(//去掉自己(user) => user.uid !== this.user.uid);//填充消息数据 messagelist:[[]、[]...]  并且将新消息队列置为0for (let i = 0; i < this.userlist.length; i++) {this.messageList.push([]);this.new_message_num.push(0);}//将当前的客户端和服务端进行连接,并定义接收到消息的处理逻辑this.init(this.user.uid);}).catch((err) => {console.error(err);});},//选择聊天对象selectUser(index) {this.anotherUser = this.userlist[index];this.index = index;//将新消息置为0this.new_message_num[index] = 0;},//将当前的客户端和服务端进行连接,并定义接收到消息的处理逻辑init(uid) {var self = this;if (typeof WebSocket == "undefined") {console.log("您的浏览器不支持WebSocket");return;}//清除之前的记录if (this.websocket != null) {this.websocket.close();this.websocket = null;}//-----------------------连接服务器-----------------------let socketUrl = "ws://localhost:8888/wechat";//开启WebSocket 连接this.websocket = new WebSocket(socketUrl);//指定连接成功后的回调函数this.websocket.onopen = function () {console.log("websocket已打开");//发送一次注册消息(使后端先绑定channel和用户的关系,以至于找到对应的channel转发消息)let message = {FromUid: uid,ToUid: uid,msg: uid + "的绑定消息",time: new Date().toLocaleTimeString(),};self.websocket.send(JSON.stringify(message));};//指定连接失败后的回调函数this.websocket.onerror = function () {console.log("websocket发生了错误");};//指定当从服务器接受到信息时的回调函数this.websocket.onmessage = function (msg) {//消息体例如{"FromUid":1,"ToUid":2,"msg":"你好","time":"00:07:03"} => message对象let data = JSON.parse(msg.data);//添加到对应的消息集合中let index = data.FromUid > uid ? data.FromUid - 2 : data.FromUid - 1;self.messageList[index].push(data);//新消息数+1self.new_message_num[index]++;};//指定连接关闭后的回调函数this.websocket.onclose = function () {console.log("websocket已关闭");};},//发送信息senMessage() {//消息体例如{"FromUid":1,"ToUid":2,"msg":"你好","time":"00:07:03"}let message = {FromUid: this.user.uid,ToUid: this.anotherUser.uid,msg: this.inputValue,time: new Date().toLocaleTimeString(),};//将消息插进消息队列,显示在前端this.messageList[this.index].push(message);//将消息发送至服务器端再转发到对应的用户this.websocket.send(JSON.stringify(message));//清空一下输入框内容this.inputValue = "";},},created() {let uid = this.$route.query.uid;if (uid != undefined) {//获取被分配的用户信息this.getYourInfo(uid);}},
};
</script><style>
/*改变滚动条 */
::-webkit-scrollbar {width: 3px;border-radius: 4px;
}::-webkit-scrollbar-track {background-color: inherit;-webkit-border-radius: 4px;-moz-border-radius: 4px;border-radius: 4px;
}::-webkit-scrollbar-thumb {background-color: #c3c9cd;-webkit-border-radius: 4px;-moz-border-radius: 4px;border-radius: 4px;
}
.bg {background: url("https://s1.ax1x.com/2022/06/12/Xgr9u6.jpg") no-repeat top;background-size: cover;background-attachment: fixed;width: 100%;height: 100%;position: fixed;top: 0;left: 0;right: 0;bottom: 0;
}
.wechat {width: 60%;height: 88%;margin: 3% auto;border-radius: 20px;background-color: rgba(245, 237, 237, 0.3);
}
/*聊天框左侧 */
.item {position: relative;width: 94%;height: 50px;margin-bottom: 3%;border-bottom: 1px solid #fff;
}
.item .name {line-height: 50px;float: left;margin-left: 10px;
}
/*聊天框右侧 */.wechat_right {position: relative;width: 100%;height: 100%;
}
.header {text-align: left;height: 50px !important;
}
.showChat {width: 100%;height: 65%;
}
.inputValue {position: relative;margin: 0;padding: 0;width: 100%;height: 50%;
}
.inputValue #chat {font-size: 18px;width: 96%;height: 94%;border-radius: 20px;resize: none;background-color: rgba(245, 237, 237, 0.3);
}
#send {position: absolute;bottom: 12%;right: 6%;
}
/*展示区 */
.leftBox {float: left;max-width: 60%;padding: 8px;position: relative;font-size: 18px;border-radius: 12px;background-color: rgba(40, 208, 250, 0.76);
}
.rightBox {float: right;max-width: 60%;padding: 8px;font-size: 18px;border-radius: 12px;position: relative;background-color: rgba(101, 240, 21, 0.945);
}
.myBr {float: left;width: 100%;height: 20px;
}
.leftBox > span {left: 3px;width: 120px;position: absolute;top: -16px;
}
.rightBox > span {width: 120px;position: absolute;right: 3px;top: -16px;
}
</style>
源码
源代码


![[每周一更]-(第100期):介绍 goctl自动生成代码](https://img-blog.csdnimg.cn/direct/a12ecf2f35644037adb8209605eccf85.jpeg#pic_center)