文章目录
- 配置镜像源
- 下载Pytorch
- 验证
- 使用Pytorch进行数字识别
配置镜像源
Anaconda下载完毕之后,有两种方式下载pytorch,一种是用页面可视化的方式去下载,另一种方式就是直接用命令行工具去下载。

但是由于默认的Anaconda走的是外网,所以下载很慢,我们得首先配置镜像源,这里推荐用清华的,之前用中科大的出问题了,换成清华马上就好了。。。
打开Termial或者iTerm2
输入如下命令
conda config --add channels http://mirrors.tuna.tsinghua.edu.cn/anaconda/pkgs/main
conda config --add channels http://mirrors.tuna.tsinghua.edu.cn/anaconda/pkgs/free
conda config --add channels http://mirrors.tuna.tsinghua.edu.cn/anaconda/pkgs/r
conda config --add channels http://mirrors.tuna.tsinghua.edu.cn/anaconda/pkgs/pro
conda config --add channels http://mirrors.tuna.tsinghua.edu.cn/anaconda/pkgs/msys2
然后输入如下命令查看是否ok了
conda config --show channels在输入如下命令
conda config --set show_channel_urls yes
这个时候你的配置基本就完成了,接下来你就可以开始下载了
下载Pytorch
pytorch官网
进入到官网,然后基于你的机器配置选择命令
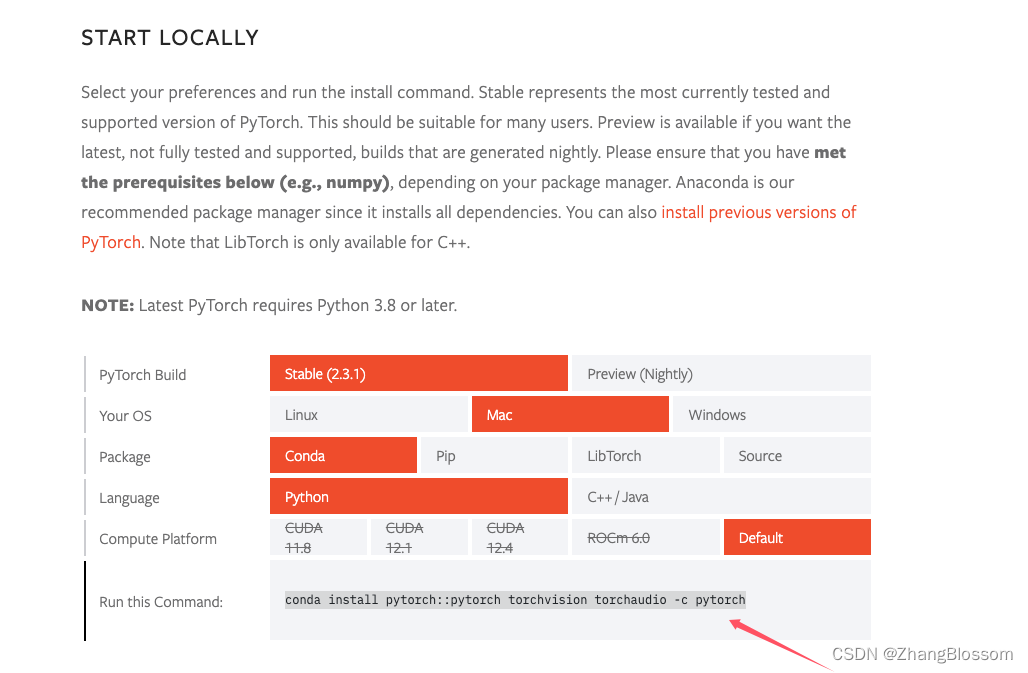
然后将命令放入到命令行中进行运行。
特别注意!!!
这里一定要把梯子等工具都关掉,不然会出现HTTP相关的异常。
可以考虑使用如下命令处理一下
conda config --set ssl_verify false
如果踩坑了,从如下几个地方思考:
- 镜像源问题,换镜像源
- ssl验证关闭,使用上面的命令
- 别开梯子!!!!!!!
验证
使用如下命令就可以查看是否安装成功了
conda list | grep pytorch

使用Pytorch进行数字识别
import torch
from torch.utils.data import DataLoader
from torchvision import transforms
from torchvision.datasets import MNIST
import matplotlib.pyplot as plt
from PIL import Image# 定义神经网络模型
class Net(torch.nn.Module):def __init__(self):super().__init__()self.fc1 = torch.nn.Linear(28*28, 64)  # 第一个全连接层,将输入从784维映射到64维self.fc2 = torch.nn.Linear(64, 64)     # 第二个全连接层,将输入从64维映射到64维self.fc3 = torch.nn.Linear(64, 64)     # 第三个全连接层,将输入从64维映射到64维self.fc4 = torch.nn.Linear(64, 10)     # 第四个全连接层,将输入从64维映射到10维(对应10个类别)def forward(self, x):x = torch.nn.functional.relu(self.fc1(x))  # 应用ReLU激活函数x = torch.nn.functional.relu(self.fc2(x))  # 应用ReLU激活函数x = torch.nn.functional.relu(self.fc3(x))  # 应用ReLU激活函数x = torch.nn.functional.log_softmax(self.fc4(x), dim=1)  # 应用log_softmax激活函数return x# 定义数据加载函数
def get_data_loader(is_train):to_tensor = transforms.Compose([transforms.ToTensor()])  # 定义数据转换data_set = MNIST("", is_train, transform=to_tensor, download=True)  # 加载MNIST数据集return DataLoader(data_set, batch_size=15, shuffle=True)  # 创建数据加载器# 定义模型评估函数
def evaluate(test_data, net):n_correct = 0n_total = 0with torch.no_grad():  # 禁用梯度计算for (x, y) in test_data:outputs = net.forward(x.view(-1, 28*28))  # 前向传播计算输出for i, output in enumerate(outputs):if torch.argmax(output) == y[i]:  # 比较预测结果与真实标签n_correct += 1n_total += 1return n_correct / n_total  # 返回准确率# 定义模型保存函数
def save_model(net, path="mnist_model.pth"):torch.save(net.state_dict(), path)  # 保存模型权重到文件# 定义模型加载函数
def load_model(net, path="mnist_model.pth"):net.load_state_dict(torch.load(path))  # 从文件加载模型权重# 定义图像预测函数
def predict_image(image, net):net.eval()  # 设置为评估模式with torch.no_grad():  # 禁用梯度计算output = net(image.view(-1, 28*28))  # 前向传播计算输出predicted = torch.argmax(output, dim=1)  # 获取预测结果return predicted.item()  # 返回预测类别# 定义图像加载函数
def load_image(image_path):image = Image.open(image_path).convert('L')  # 打开图像并转换为灰度图transform = transforms.Compose([transforms.Resize((28, 28)), transforms.ToTensor()])  # 定义图像转换image = transform(image)  # 应用转换return image  # 返回处理后的图像def main():train_data = get_data_loader(is_train=True)  # 加载训练数据test_data = get_data_loader(is_train=False)  # 加载测试数据net = Net()  # 初始化神经网络模型# 训练模型optimizer = torch.optim.Adam(net.parameters(), lr=0.001)  # 定义Adam优化器for epoch in range(2):  # 训练2个epochfor (x, y) in train_data:net.zero_grad()  # 清零梯度output = net.forward(x.view(-1, 28*28))  # 前向传播计算输出loss = torch.nn.functional.nll_loss(output, y)  # 计算损失loss.backward()  # 反向传播计算梯度optimizer.step()  # 更新模型参数print("epoch", epoch, "accuracy:", evaluate(test_data, net))  # 打印每个epoch后的准确率# 保存模型save_model(net)# 加载模型net = Net()  # 初始化新的神经网络模型load_model(net)  # 加载已保存的模型权重print("Loaded model accuracy:", evaluate(test_data, net))  # 打印加载模型后的准确率# 使用模型预测新图像image_path = "path_to_your_image.png"  # 替换为你要预测的图像路径image = load_image(image_path)  # 加载并预处理图像prediction = predict_image(image, net)  # 使用模型进行预测print(f"Predicted digit: {prediction}")  # 打印预测结果if __name__ == "__main__":main()  # 运行main函数
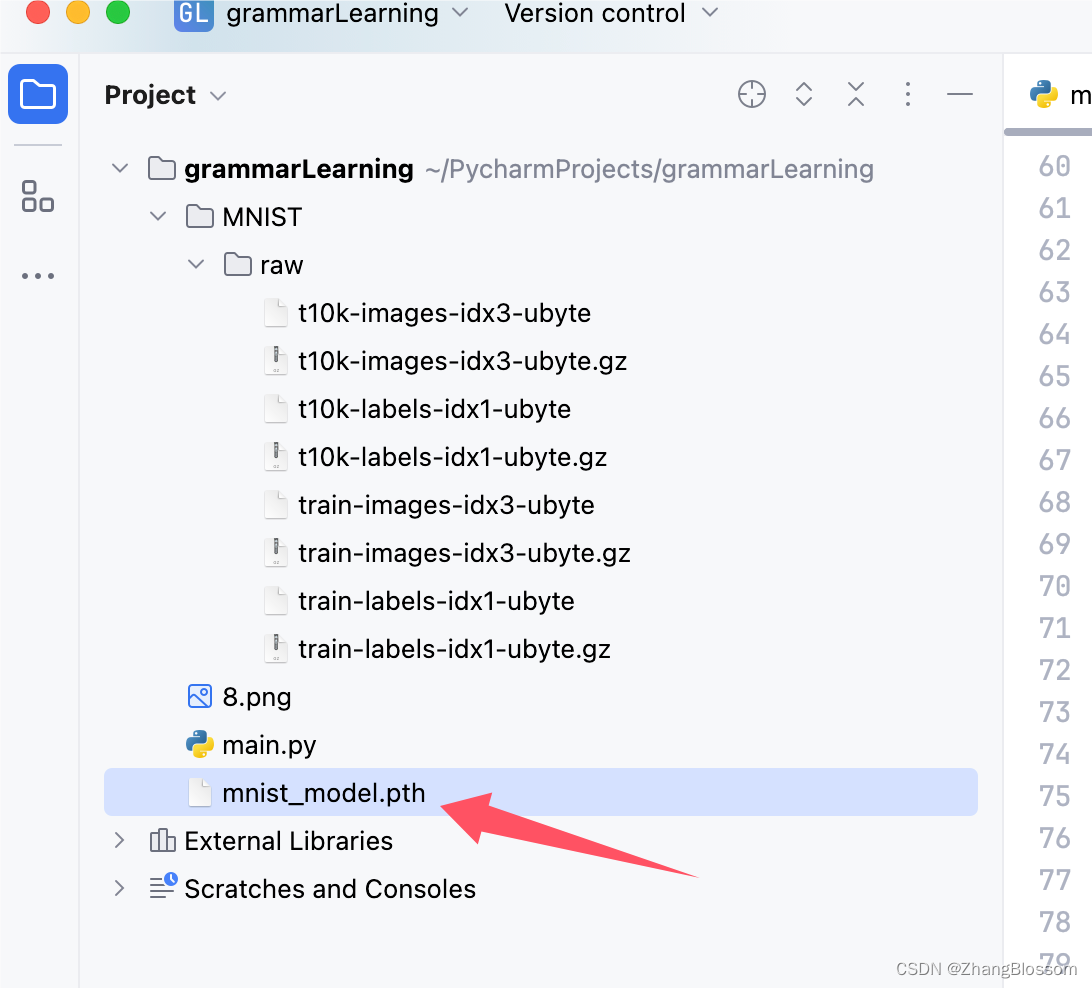
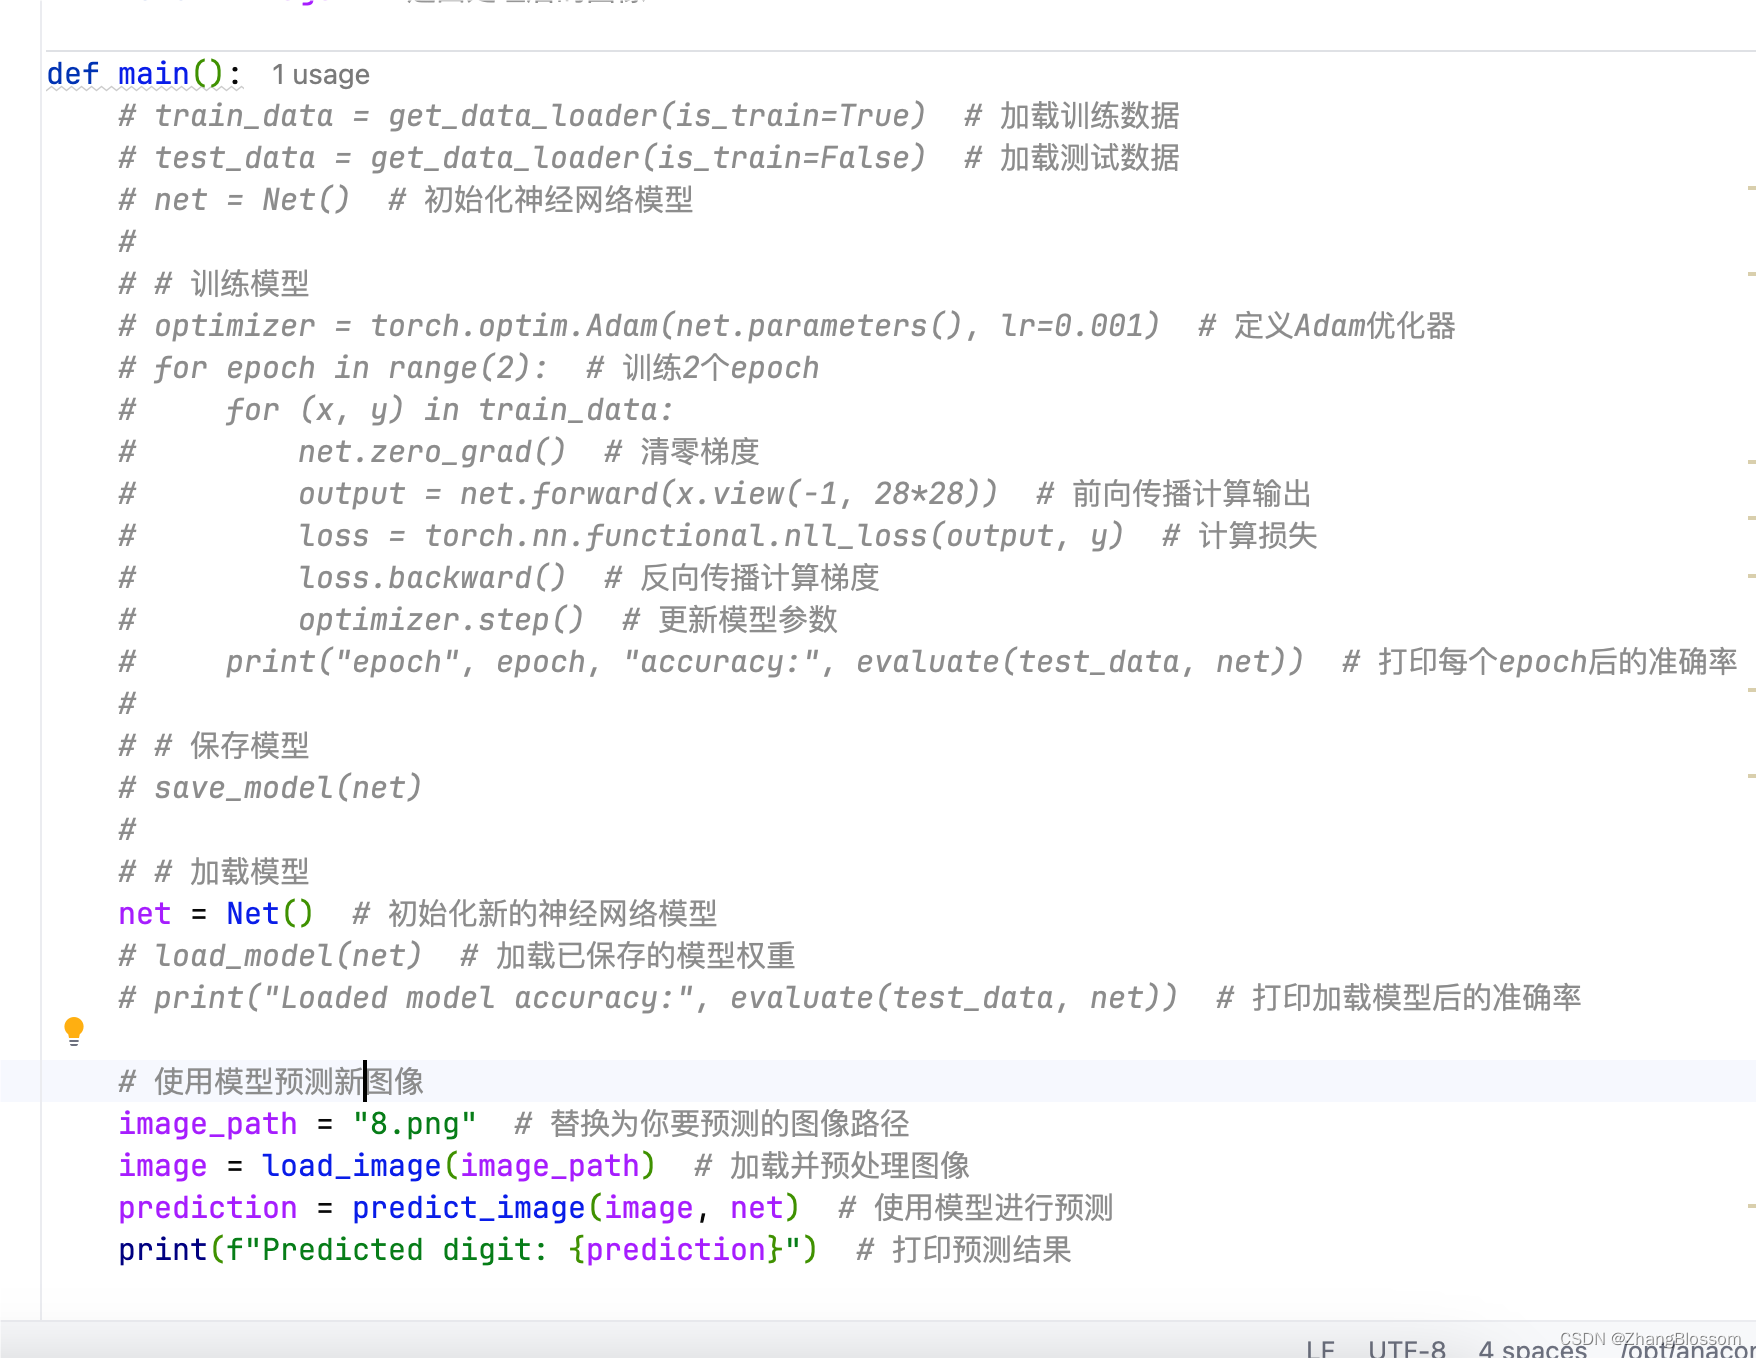
第一次运行的时候,会加载数字识别模型到本地,第二次运行的时候,你就可以把训练过程的代码都注释掉了,直接使用这个最终的模型
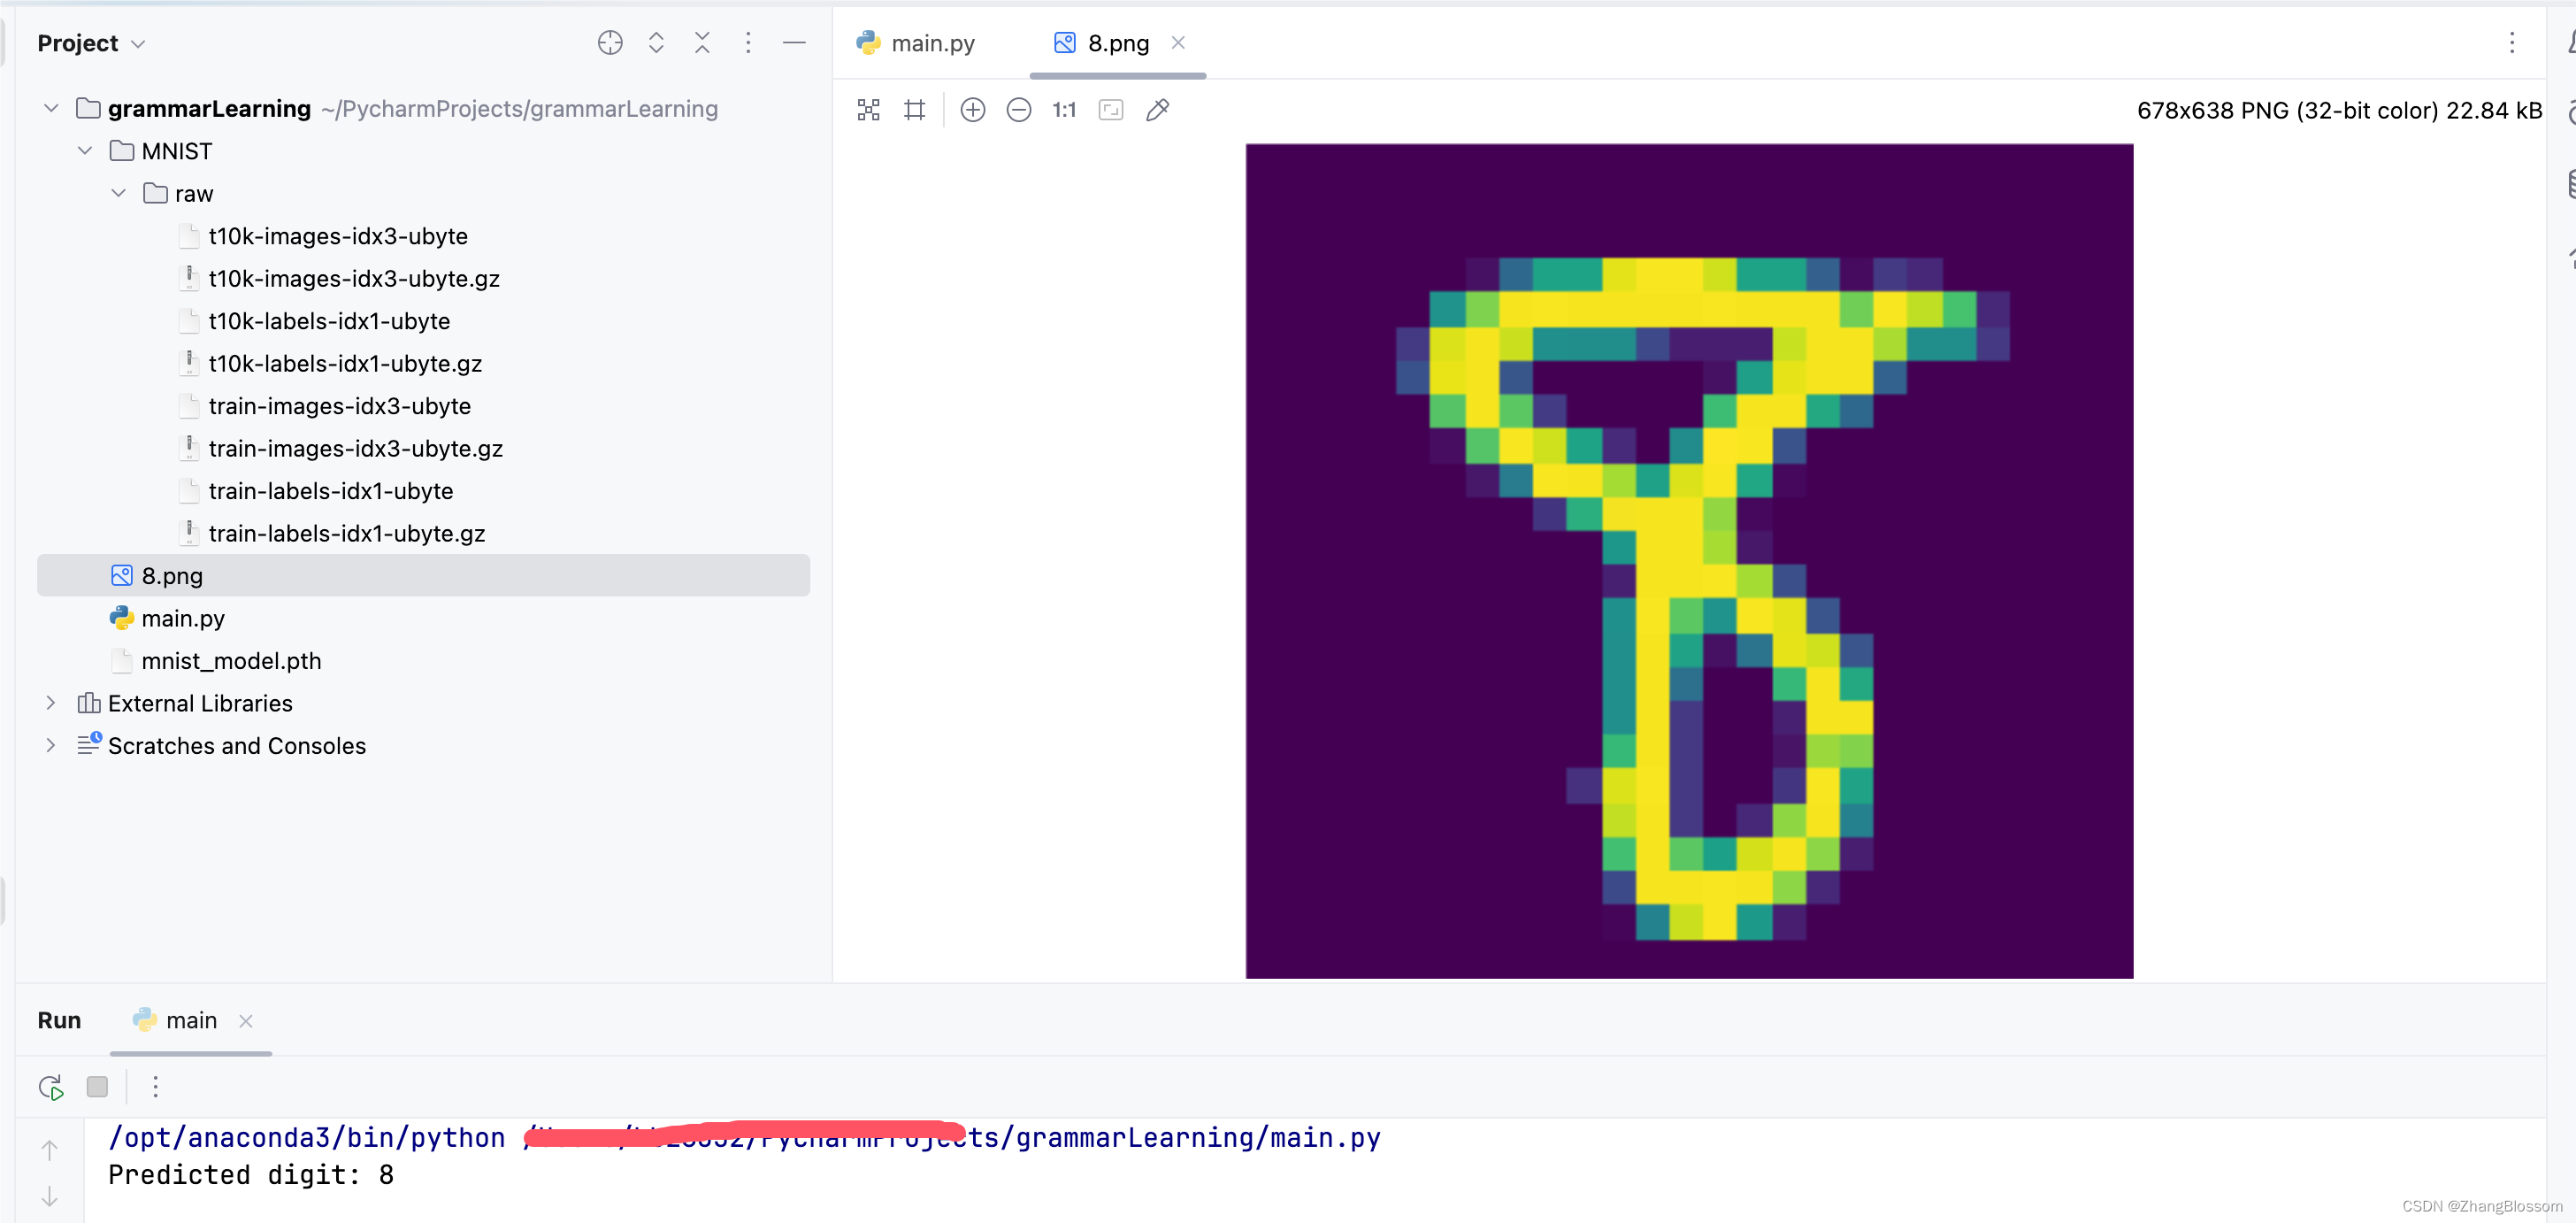
第二次运行
你的模型就是这个pth文件
