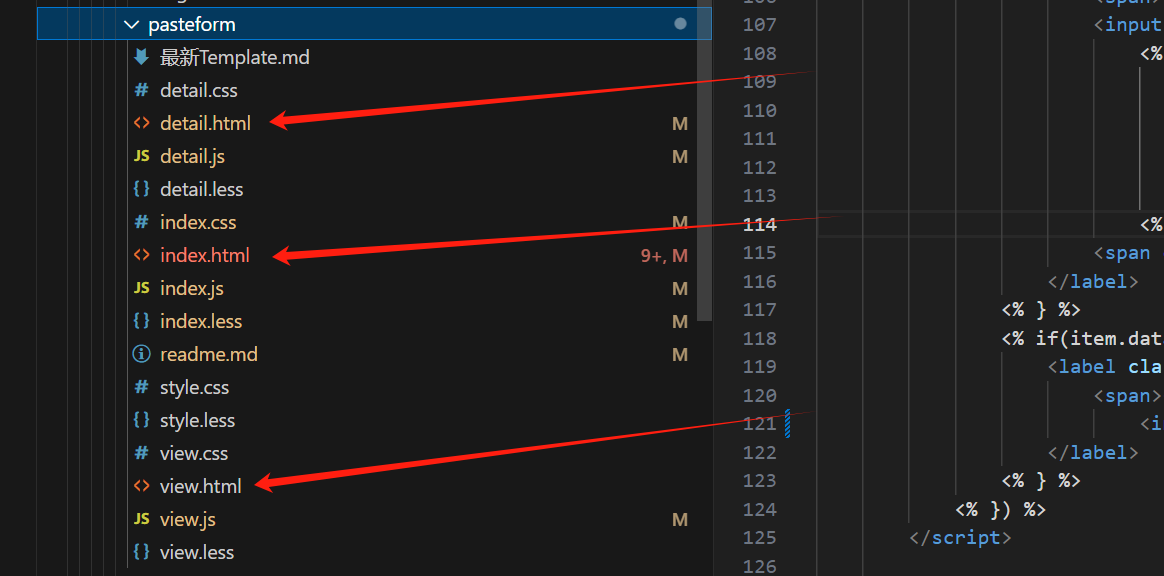
VS复制项目
在使用VS的过程中,有的时候我们需要复制我们已经存在的项目.

我们可以先创建一个新的项目.

接着把需要复制的项目的文件复制粘贴到新的项目文件夹中.

不要忘记添加现有项目.
CFrameLessWidgetBase.h
#pragma once
#include <QWidget>
class CFrameLessWidgetBase : public QWidget{QOBJECT_Hpublic:CFrameLessWidgetBase(QWidget* p = nullptr);~CFrameLessWidgetBase();
private:protected:bool nativeEvent(const QByteArray& eventType, void* message, qintptr* result) override;private:int m_nBorderWidth = 10;
};
CFrameLessWidgetBase.cpp
#include "CFrameLessWidgetBase.h"
#include <qt_windows.h>
#include <windows.h>
#include <windowsx.h>#pragma comment(lib, "user32.lib")
#pragma comment(lib,"dwmapi.lib")CFrameLessWidgetBase::CFrameLessWidgetBase(QWidget* p):QWidget(p) {this->setWindowFlags(Qt::FramelessWindowHint);
}
CFrameLessWidgetBase:: ~CFrameLessWidgetBase() {};bool CFrameLessWidgetBase::nativeEvent(const QByteArray& eventType, void* message, qintptr* result) {MSG* param = static_cast<MSG*>(message);switch (param->message) {case WM_NCHITTEST:{/*int nX = GET_X_LPARAM(param->lParam) - this->geometry().x();int nY = GET_Y_LPARAM(param->lParam) - this->geometry().y();*/QPoint globalPos = QCursor::pos(); // 获取鼠标的全局坐标QPoint localPos = this->mapFromGlobal(globalPos); // 转换为窗口坐标int nX = localPos.x(); // 现在的 nX 应该是相对于窗口的坐标int nY = localPos.y();//if (childAt(nX, nY) != nullptr)//	return QWidget::nativeEvent(eventType, message, result);if (nX > m_nBorderWidth && nX < this->width() - m_nBorderWidth &&nY > m_nBorderWidth && nY < this->height() - m_nBorderWidth) {if (childAt(nX, nY) != nullptr)return QWidget::nativeEvent(eventType, message, result);}if ((nX > 0) && (nX < m_nBorderWidth))*result = HTLEFT;if ((nX > this->width() - m_nBorderWidth) && (nX < this->width()))*result = HTRIGHT;if ((nY > 0) && (nY < m_nBorderWidth))*result = HTTOP;if ((nY > this->height() - m_nBorderWidth) && (nY < this->height()))*result = HTBOTTOM;if ((nX > 0) && (nX < m_nBorderWidth) && (nY > 0)&& (nY < m_nBorderWidth))*result = HTTOPLEFT;if ((nX > this->width() - m_nBorderWidth) && (nX < this->width())&& (nY > 0) && (nY < m_nBorderWidth))*result = HTTOPRIGHT;if ((nX > 0) && (nX < m_nBorderWidth)&& (nY > this->height() - m_nBorderWidth) && (nY < this->height()))*result = HTBOTTOMLEFT;if ((nX > this->width() - m_nBorderWidth) && (nX < this->width())&& (nY > this->height() - m_nBorderWidth) && (nY < this->height()))*result = HTBOTTOMRIGHT;return true;}}return false;
}
将相关的代码放到一个类里面.


将主widget继承这个类.
CTitleBar.h
#pragma once
#include <QWidget>
#include <QLabel>
#include <QPushButton>
class CTitleBar : public QWidget
{Q_OBJECTpublic:CTitleBar(QWidget* p = nullptr);~CTitleBar();private:void initUI();private:void mousePressEvent(QMouseEvent* event) override;void mouseDoubleClickEvent(QMouseEvent* event) override;private slots:void onClicked();signals:void sig_close();private:QLabel* Label_mpLogo;QLabel* Label_mpTitleText;QPushButton* Btn_mpSet;QPushButton* Btn_mpMin;QPushButton* Btn_mpMax;QPushButton* Btn_mpClose;};
void mouseDoubleClickEvent(QMouseEvent* event) override;鼠标双击事件.
private slots: void onClicked();自定义槽函数.
signals: void sig_close();自定义信号.
CTitleBar.cpp
#include "CTitleBar.h"
#include <QHBoxLayout>
#include <QVBoxLayout>
#include <qt_windows.h>
#include <QPushButton>CTitleBar::CTitleBar(QWidget* p):QWidget(p) {initUI();
}CTitleBar::~CTitleBar() {}void CTitleBar::initUI() {setAttribute(Qt::WA_StyledBackground);this->setStyleSheet("background-color:rgb(156,156,156)");this->setFixedHeight(32);Label_mpLogo = new QLabel(this);Label_mpTitleText = new QLabel(this);Btn_mpSet = new QPushButton(this);Btn_mpMin = new QPushButton(this);Btn_mpMax = new QPushButton(this);Btn_mpClose = new QPushButton(this);Label_mpLogo->setStyleSheet("border-image:url(:/MainWidget/resources/titlebar/title_icon.png);");Btn_mpSet->setStyleSheet("border-image:url(:/MainWidget/resources/titlebar/set.svg);");Btn_mpMin->setStyleSheet("border-image:url(:/MainWidget/resources/titlebar/min.svg);");Btn_mpMax->setStyleSheet("border-image:url(:/MainWidget/resources/titlebar/normal.svg);");Btn_mpClose->setStyleSheet("border-image:url(:/MainWidget/resources/titlebar/close.svg);");Label_mpLogo->setFixedSize(24, 24);Label_mpTitleText->setText("我是标题");Label_mpTitleText->setFixedWidth(120);Btn_mpSet->setFixedSize(24, 24);Btn_mpMin->setFixedSize(24, 24);Btn_mpMax->setFixedSize(24, 24);Btn_mpClose->setFixedSize(24, 24);QHBoxLayout* Layout_pHTitle = new QHBoxLayout(this);Layout_pHTitle->addWidget(Label_mpLogo);Layout_pHTitle->addWidget(Label_mpTitleText);Layout_pHTitle->addStretch();Layout_pHTitle->addWidget(Btn_mpSet);Layout_pHTitle->addWidget(Btn_mpMin);Layout_pHTitle->addWidget(Btn_mpMax);Layout_pHTitle->addWidget(Btn_mpClose);Layout_pHTitle->setContentsMargins(5, 5, 5, 5);connect(Btn_mpSet, &QPushButton::clicked, this, &CTitleBar::onClicked);connect(Btn_mpMin, &QPushButton::clicked, this, &CTitleBar::onClicked);connect(Btn_mpMax, &QPushButton::clicked, this, &CTitleBar::onClicked);connect(Btn_mpClose, &QPushButton::clicked, this, &CTitleBar::onClicked);
}void CTitleBar::mousePressEvent(QMouseEvent* event) {//实现窗口可拖拽if (ReleaseCapture()) {QWidget* pWindow = this->window();if (pWindow->isTopLevel()) {SendMessage(HWND(pWindow->winId()), WM_SYSCOMMAND, SC_MOVE + HTCAPTION, 0);}}
}void CTitleBar::mouseDoubleClickEvent(QMouseEvent* event) {Btn_mpMax->click();
}void CTitleBar::onClicked() {QPushButton* btn_ptemp = qobject_cast<QPushButton*>(sender());QWidget* widget_window = this->window();if (btn_ptemp == Btn_mpMin) {widget_window->showMinimized();} else if (btn_ptemp == Btn_mpMax) {if (widget_window->isMaximized()) {widget_window->showNormal();} else {widget_window->showMaximized();}} else if (btn_ptemp == Btn_mpClose) {emit sig_close();}}
图片自适应控件
Label_mpLogo->setStyleSheet("border-image:url(:/MainWidget/resources/titlebar/title_icon.png);");Btn_mpSet->setStyleSheet("border-image:url(:/MainWidget/resources/titlebar/set.svg);");Btn_mpMin->setStyleSheet("border-image:url(:/MainWidget/resources/titlebar/min.svg);");Btn_mpMax->setStyleSheet("border-image:url(:/MainWidget/resources/titlebar/normal.svg);");Btn_mpClose->setStyleSheet("border-image:url(:/MainWidget/resources/titlebar/close.svg);");
使用border-image:这个属性可以让你设置控件的边框图像,并且可以在控件大小变化时保持图像的比例和位置。
信号槽连接
connect(Btn_mpSet, &QPushButton::clicked, this, &CTitleBar::onClicked);connect(Btn_mpMin, &QPushButton::clicked, this, &CTitleBar::onClicked);connect(Btn_mpMax, &QPushButton::clicked, this, &CTitleBar::onClicked);connect(Btn_mpClose, &QPushButton::clicked, this, &CTitleBar::onClicked);
这四个按钮的点击信号全部链接相同的函数.在这一个函数中我们需要怎样区分信号的来源?
区分信号来源
void CTitleBar::onClicked() {QPushButton* btn_ptemp = qobject_cast<QPushButton*>(sender());QWidget* widget_window = this->window();if (btn_ptemp == Btn_mpMin) {widget_window->showMinimized();} else if (btn_ptemp == Btn_mpMax) {if (widget_window->isMaximized()) {widget_window->showNormal();} else {widget_window->showMaximized();}} else if (btn_ptemp == Btn_mpClose) {emit sig_close();}}
函数结构
void CTitleBar::onClicked() {QPushButton* btn_ptemp = qobject_cast<QPushButton*>(sender());
void CTitleBar::onClicked():这是CTitleBar类中的槽函数,处理按钮点击事件。QPushButton* btn_ptemp = qobject_cast<QPushButton*>(sender());:使用sender()获取发送信号的对象,并尝试将其转换为QPushButton*类型。qobject_cast安全地进行类型转换,如果转换失败,则返回nullptr。
获取窗口
QWidget* widget_window = this->window();
QWidget* widget_window = this->window();:获取当前标题栏所属的窗口(父窗口)指针。
按钮点击处理
if (btn_ptemp == Btn_mpMin) {widget_window->showMinimized();
} else if (btn_ptemp == Btn_mpMax) {if (widget_window->isMaximized()) {widget_window->showNormal();} else {widget_window->showMaximized();}
} else if (btn_ptemp == Btn_mpClose) {emit sig_close();
}
-
最小化按钮:
if (btn_ptemp == Btn_mpMin):检查点击的按钮是否是最小化按钮。widget_window->showMinimized();:调用窗口的showMinimized()方法,将窗口最小化。
-
最大化按钮:
else if (btn_ptemp == Btn_mpMax):检查是否是最大化按钮。if (widget_window->isMaximized()):判断窗口是否已经最大化。widget_window->showNormal();:如果是最大化,则恢复窗口到正常状态。widget_window->showMaximized();:如果不是,则将窗口最大化。
-
关闭按钮:
else if (btn_ptemp == Btn_mpClose):检查是否是关闭按钮。emit sig_close();:发出sig_close信号,通常用于通知其他部分关闭窗口。
MainWidget.cpp
#include "MainWidget.h"
#include "QVBoxLayout"
#include <qt_windows.h>
#include <windows.h>
#include <windowsx.h>
#include <QMessageBox>#pragma comment(lib, "user32.lib")
#pragma comment(lib,"dwmapi.lib")MainWidget::MainWidget(QWidget* parent): CFrameLessWidgetBase(parent) {//this->setWindowFlags(Qt::FramelessWindowHint |Qt::WindowMinMaxButtonsHint );this->setWindowFlags(Qt::FramelessWindowHint);initUI();
}MainWidget::~MainWidget() {}void MainWidget::initUI() {CTitleBar_mp = new CTitleBar(this);QWidget* Widget_Main = new QWidget(this);Widget_Main->setMinimumSize(600, 400);QVBoxLayout* Layout_pVMain = new QVBoxLayout(this);Layout_pVMain->addWidget(CTitleBar_mp);Layout_pVMain->addWidget(Widget_Main);Layout_pVMain->setContentsMargins(0, 0, 0, 0);setLayout(Layout_pVMain);connect(CTitleBar_mp, &CTitleBar::sig_close, this, &MainWidget::on_closeSlot);}void MainWidget::on_closeSlot() {close();
}
连接自定义信号和槽函数
connect(CTitleBar_mp, &CTitleBar::sig_close, this, &MainWidget::on_closeSlot);
信号和槽连接
connect(CTitleBar_mp, &CTitleBar::sig_close, this, &MainWidget::on_closeSlot);
connect(...):这是 Qt 的信号和槽机制,用于将一个对象的信号与另一个对象的槽连接起来。CTitleBar_mp:这是CTitleBar类的一个实例,通常是一个自定义的标题栏控件。&CTitleBar::sig_close:这是CTitleBar类中定义的信号。当这个信号被发出时,连接的槽会被调用。this:指向当前对象(MainWidget的实例)。&MainWidget::on_closeSlot:这是MainWidget类中的槽函数。当sig_close信号被发出时,on_closeSlot()函数将被调用。
槽函数实现
void MainWidget::on_closeSlot() {close();
}
close();:调用close()方法,该方法会关闭当前窗口(MainWidget实例)。
总结
当用户在 CTitleBar 中点击关闭按钮时,会发出 sig_close 信号,随后 MainWidget 的 on_closeSlot 槽函数被调用,执行 close() 方法,从而关闭主窗口。这是 Qt 信号和槽机制的一种常见用法,用于实现不同组件之间的通信。
结尾
最后,感谢您阅读我的文章,希望这些内容能够对您有所启发和帮助。如果您有任何问题或想要分享您的观点,请随时在评论区留言。
同时,不要忘记订阅我的博客以获取更多有趣的内容。在未来的文章中,我将继续探讨这个话题的不同方面,为您呈现更多深度和见解。
谢谢您的支持,期待与您在下一篇文章中再次相遇!


![[云服务器18] 搭建AIGC APP?AI绘图不神秘!](https://img-blog.csdnimg.cn/img_convert/eb03df6d7fa12b28a083eec4ed5aa33a.png)