====================
快速跳转:
我的个人博客主页👉:Reuuse博客
新开专栏👉:Vue3专栏
参考文献👉:uniapp官网
免费图标👉:阿里巴巴矢量图标库
❀ 感谢支持!☀
==================
前情提要
🔺从现在开始呢,我们就要开始真正的实现一个完整的项目了!❀❀❀
⭐在实现项目的过程中,会将一些比较重要的点进行讲解,确保基础薄弱的宝子们都能够理解!本次博客的开始也算是为了一边学一边做项目❗
那么话不多说我们开始吧
vue
- 前情提要
- 引言
- 一、项目结构和基础概念
- 二、轮播图板块
- 三、公告栏板块
- 四、每日推荐板块
- 五、每日专题板块
- 六、样式和布局
- 结语
引言
在前端开发的世界里,uni-app是一个强大的框架,它允许开发者使用Vue.js开发跨平台应用。本文将通过一个实际的uni-app项目案例,带领大家了解如何构建一个具有轮播图、公告栏、每日推荐和专题精选等功能的页面。
一、项目结构和基础概念
-
uni-app介绍:uni-app允许开发者使用Vue.js开发所有前端应用的框架,编译到iOS、Android、Web(响应式)、以及各种小程序(微信/支付宝/百度/头条/飞书/QQ/快手/钉钉/淘宝)、快应用等多个平台。
-
Vue.js基础:uni-app使用Vue.js作为底层框架,因此了解Vue.js的基本指令和组件系统是必要的。
-
组件化开发:uni-app鼓励组件化开发,这有助于代码的复用和维护。
-
模板语法:了解Vue.js的模板语法,如
v-for、v-bind等。 -
样式作用域:
scoped属性确保组件内的样式不会泄露到外部。
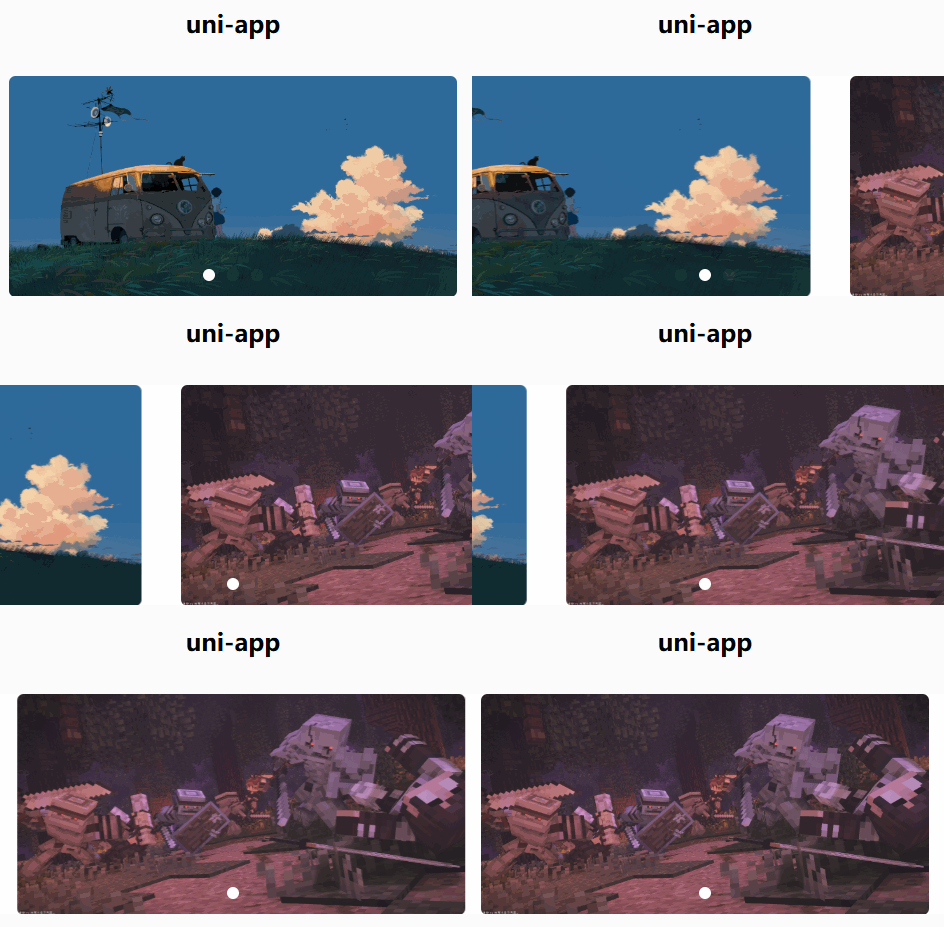
二、轮播图板块
-
swiper组件:uni-app中的
swiper组件用于创建轮播图。 -
自动播放:
autoplay属性使轮播图自动播放。 -
循环播放:
circular属性允许轮播图循环播放。 -
指示点:
indicator-dots属性显示轮播图的指示点。 -
自定义指示点颜色:
indicator-color和indicator-active-color属性用于自定义指示点的颜色。 -
图片填充模式:
mode="scaleToFill"使图片填充整个容器。 -
响应式设计:使用
rpx单位确保布局在不同设备上的适应性。
代码附赠
== html ==
<view class="banner"><swiper indicator-dots indicator-color="rgba(255,255,255,.05)"indicator-active-color="#fff" autoplay circular><swiper-item ><image src="../../common/image/1.png" mode="scaleToFill"></image></swiper-item><swiper-item ><image src="../../common/image/2.png" mode="scaleToFill"></image></swiper-item><swiper-item><image src="../../common/image/3.jpg" mode="scaleToFill"></image></swiper-item></swiper></view>
== scss ==
.banner{width: 750rpx;padding:30rpx 0;swiper{width: 750rpx;height: 340rpx;&-item{height:100%;width: 100%;padding:0 30rpx;image{width: 100%;height: 100%;border-radius: 10rpx;}}}}
三、公告栏板块

-
垂直滚动:
swiper的vertical属性使轮播图垂直滚动。 -
公告内容:使用
v-for指令循环生成公告内容。 -
图标组件:
uni-icons组件用于显示图标。 -
文本样式:通过CSS设置文本的颜色、大小和粗细。
-
布局:使用
flex布局来安排公告栏的结构。 -
溢出处理:
overflow、white-space和text-overflow属性用于处理文本溢出。
代码附赠
== html ==
<view class="notice"><view class="left"><uni-icons type="sound-filled" size="20" color="#28b389"></uni-icons><text class="text">公告</text></view><view class="center"><swiper vertical autoplay interval="1500" duration="300" circular><swiper-item v-for="item in 4">公告内容</swiper-item></swiper></view><view class="right"><uni-icons type="right" size="16" color="#333"></uni-icons></view></view>
== scss ==
.notice{width: 690rpx;height: 80rpx;line-height: 80rpx;background: #f9f9f9;margin: 0 auto;border-radius: 80rpx;display: flex;.left{width: 140rpx;display: flex;align-items: center;justify-content: center;.text{color: #28b389;font-weight: 600;font-size: 28rpx;}}.center{flex:1;swiper{height: 100%;&-item{height:100%;font-size: 30rpx;color: #666;overflow: hidden;white-space: nowrap;text-overflow: ellipsis;}}}.right{width: 70rpx;display: flex;align-items: center;justify-content: center;}}
四、每日推荐板块
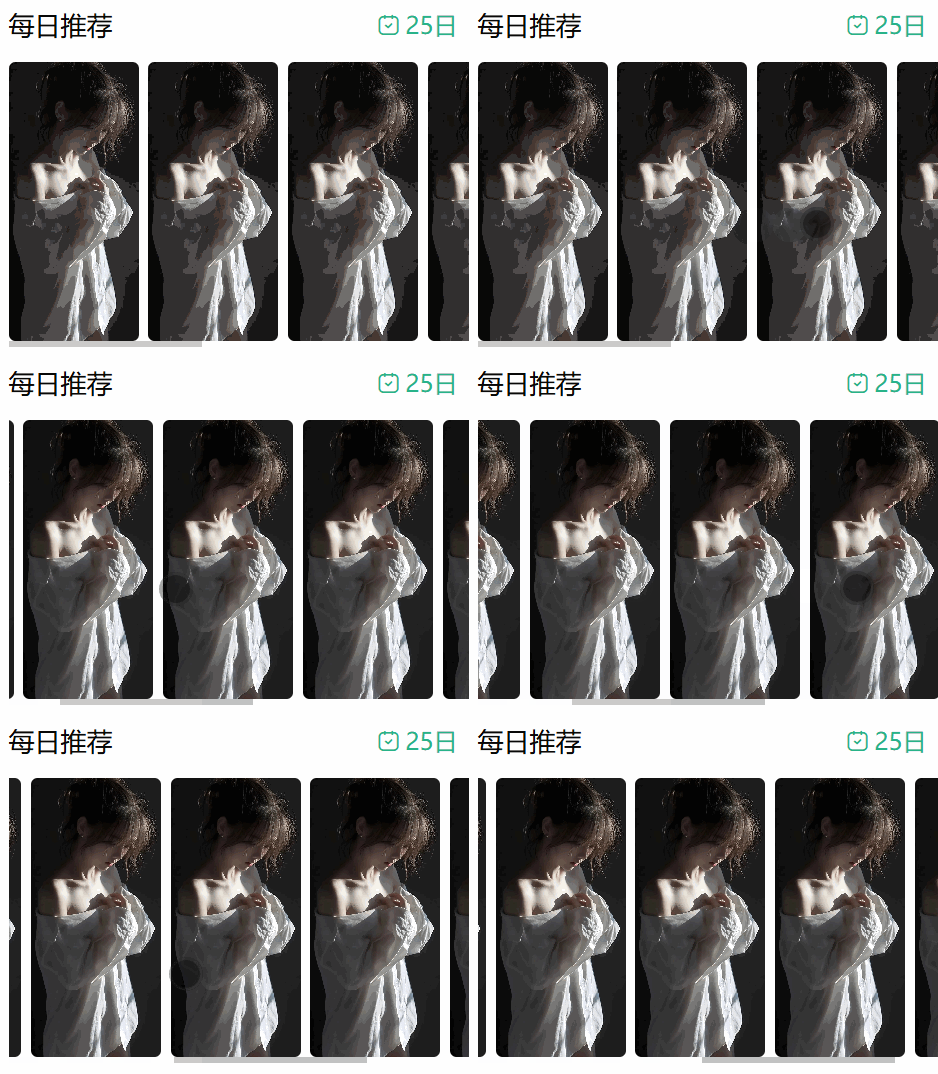

在这里这个图标和获取日期的组件,涉及到外部组件引入,方法很简单:
下载官网链接
-
水平滚动视图:
scroll-view组件的scroll-x属性创建水平滚动视图。 -
图片列表:使用
v-for指令循环生成图片列表。 -
图片裁剪模式:
mode="aspectFill"保持图片的宽高比同时填充容器。 -
日期显示:
uni-dateformat组件用于格式化和显示日期。 -
自定义组件:
<common-title>可能是一个自定义组件,用于显示标题。
代码附赠
== html ==
<!-- 每日推荐 --><view class="select"><common-title><template #name>每日推荐</template><template #custom><view class="date"><uni-icons type="calendar" size="18" color="#28b389"></uni-icons><view class="text"><uni-dateformat :date="Date.now()" format="dd日"></uni-dateformat></view></view></template></common-title><view class="content"><scroll-view scroll-x><view class="box" v-for="item in 8"><image src="../../common/image/4.jpg" mode="aspectFill"></image></view></scroll-view></view></view>
== scss ==
.select{padding-top: 50rpx;.date{color:#28b389;display: flex;align-items: center;.text{margin-left: 5rpx;}}.content{width: 720rpx;margin-left: 30rpx;margin-top: 30rpx;scroll-view{white-space: nowrap;.box{width: 200rpx;height: 430rpx;display: inline-block;margin-right: 15rpx;image{width: 100%;height: 100%; border-radius: 10rpx;}}.box:last-child{margin-right: 30rpx;}}}}
五、每日专题板块
-
导航链接:
navigator组件用于创建页面间的导航链接。 -
更多功能:通过
More+链接引导用户探索更多内容。
代码附赠
== html ==
<!-- 每日专题 --><view class="theme"><common-title><template #name>专题精选</template><template #custom><navigator url="" class="more">More+</navigator></template></common-title></view>
== scss ==
.theme{padding-top:50rpx;.more{font-size: 32rpx;color: #888;}}
六、样式和布局
-
全局样式:使用SCSS预处理器编写更简洁的样式。
-
布局:通过
flex布局实现响应式和灵活的布局。 -
边距和填充:使用
margin和padding来调整元素间的间距。 -
圆角:
border-radius属性用于创建圆角效果。 -
颜色和字体:通过CSS设置元素的颜色和字体样式。
结语
通过本文的介绍,我们了解了如何在uni-app中构建一个具有丰富功能的页面。从轮播图到公告栏,再到每日推荐和专题精选,每一个板块都是前端开发技能的体现。希望本文能够帮助初学者快速入门uni-app开发,探索更多的可能性。
🌼那么今天就到这里吧!
▲后续会陆续跟新vue系列。再后来会逐渐成熟,向大家展现更简洁明了的知识汇总!
一个小小的赞是对我最大的鼓励!
感谢你们看到这里,下次见~


