前言
uniapp,碰到新需求,反转摄像头,需要在打卡的时候对上传图片加上水印,拍照前就显示当前时间日期+地点,拍摄后在呈现刚才拍摄的图加上水印,最好还需要将图片上传到阿里云。
声明
水印部分代码是借鉴的这位博主的博客,剩下的是我根据自己的需求加上的。水印部分看原博主博客就行。
小晗同学 - 原小程序拍照+水印绘制博主博客链接跳转
效果预览
拍摄前预览
右上角切换前后摄像头
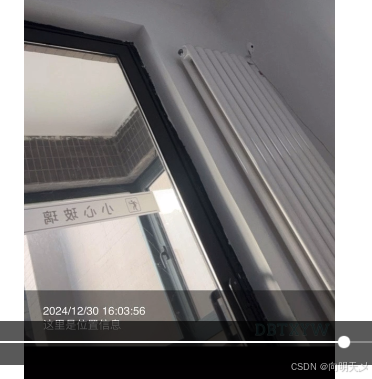
底部时间和位置信息,这里位置替换掉真实位置了,代码里没变

拍摄后效果

水印组件代码
<template><view class="camera-wrapper"><!-- 拍照 --><template v-if="!snapSrc"><!-- 相机 --><camera :device-position="cameraPosition" flash="off" @error="handleError" class="image-size"><view class="photo-btn" @click="handleTakePhoto">拍照</view><view class="iconfont icon-qiehuanshexiangtou switch-camera-btn" @click="handleSwitchCamera"></view><view class="time-wrap"><view>{{ new Date().toLocaleString() }}</view><view>{{ location_data }}</view><!-- <view>这里是位置信息,</view> --></view></camera><!-- 水印 --><canvas canvas-id="photoMarkCanvas" id="photoMarkCanvas" class="mark-canvas":style="{ width: canvasWidth + 'px', height: canvasHeight + 'px' }" /></template><!-- 预览 --><template v-else><!-- <view class="re-photo-btn btn" @click="handleRephotograph">重拍</view> --><!-- <view class="re-fanhui-btn btn" @click="fanhui">返回</view> --><image class="image-size" :src="snapSrc"></image></template></view>
</template>
<script>
const util_two = require('../../static/utils/util_two.js')
const upload = require('../../static/utils/upload.js')
export default {name: 'CameraSnap',props: {// 照片地址(若传递了照片地址,则默认为预览该照片或添加水印后预览)photoSrc: {type: String,default: ""},// 水印类型markType: {type: String,default: "fixed", // 定点水印 fixed,背景水印 background},// 水印文本列表(支持多行)markList: {type: Array,default: () => []},textColor: {type: String,default: "#FFFFFF"},textSize: {type: Number,default: 32},// 定点水印的遮罩(为了让水印更清楚)useTextMask: {type: Boolean,default: true}},data() {return {snapSrc: "",canvasWidth: "",canvasHeight: "",cameraPosition: 'back', // 默认为后置摄像头inputText: "", // 用户输入的文本location: null, // 存储位置信息location_data: "",photocount: 10,hasUserInfo: false,productInfo: [],fileurl: [],prveImgInfo: [],imgs: [],arrImg: [],imgQueRemData: [],//确实上传数据源// 位置和时间日期}},watch: {photoSrc: {handler: function (newValue, oldValue) {if (newValue) {this.getWaterMarkImgPath(newValue)}},immediate: true}},mounted() {uni.getLocation({type: 'wgs84', // 获取经纬度坐标success: (res) => {this.location = res;setTimeout(() => {this.GetMapData();}, 1000);},fail: (err) => {console.error('获取位置信息失败', err);}});},methods: {closeCamera() {this.$emit('close'); // 发送一个事件通知父组件关闭 CameraSnap 组件},handleTakePhoto() {// const that = thisconst ctx = uni.createCameraContext();ctx.takePhoto({quality: 'high',success: (res) => {const imgPath = res.tempImagePathif (this.markList.length) {this.getWaterMarkImgPath(imgPath)this.$emit('watermarkPath', this.snapSrc);} else {this.snapSrc = imgPath;this.$emit('complete', imgPath)this.$emit('watermarkPath', this.snapSrc);}}});},handleRephotograph() {this.snapSrc = ""},handleSwitchCamera() {this.cameraPosition = this.cameraPosition === 'front' ? 'back' : 'front'; // 切换摄像头},handleError(err) {uni.showModal({title: '警告',content: '若不授权使用摄像头,将无法使用拍照功能!',cancelText: '不授权',confirmText: '授权',success: (res) => {if (res.confirm) {// 允许打开授权页面,调起客户端小程序设置界面,返回用户设置的操作结果uni.openSetting({success: (res) => {res.authSetting = { "scope.camera": true }},})} else if (res.cancel) {// 拒绝打开授权页面uni.showToast({ title: '您已拒绝授权,无法进行拍照', icon: 'error', duration: 2500 });}}})},setWaterMark(context, image) {const listLength = this.markList?.lengthswitch (this.markType) {case 'fixed':const spacing = 6 // 行间距const paddingTopBottom = 60 // 整体上下间距// 默认每行的高度 = 字体高度 + 向下间隔const lineHeight = this.textSize + spacingconst allLineHeight = lineHeight * listLength// 矩形遮罩的 Y 坐标const maskRectY = image.height - allLineHeight// 绘制遮罩层if (this.useTextMask) {context.setFillStyle('rgba(0,0,0,0.4)');context.fillRect(0, maskRectY - paddingTopBottom, image.width, allLineHeight + paddingTopBottom)}// 文本与 x 轴之间的间隔const textX = 40// 文本一行的最大宽度(减去 20 是为了一行的左右留间隙)const maxWidth = image.width - 20context.setFillStyle(this.textColor)context.setFontSize(this.textSize)this.markList.forEach((item, index) => {// 因为文本的 Y 坐标是指文本基线的 Y 轴坐标,所以要获取文本顶部的 Y 坐标const textY = maskRectY - paddingTopBottom / 2 + this.textSize + lineHeight * indexcontext.fillText(item, textX, textY, maxWidth);})break;case 'background':context.translate(0, 0);context.rotate(30 * Math.PI / 180);context.setFillStyle(this.textColor)context.setFontSize(this.textSize)const colSize = parseInt(image.height / 6)const rowSize = parseInt(image.width / 2)let x = -rowSizelet y = -colSize// 循环绘制 5 行 6 列 的文字for (let i = 1; i <= 6; i++) {for (let j = 1; j <= 5; j++) {context.fillText(this.markList[0], x, y, rowSize)// 每个水印间隔 20x += rowSize + 20}y += colSizex = -rowSize}break;}context.save();},getWaterMarkImgPath(src) {const _this = thisuni.getImageInfo({src,success: (image) => {this.canvasWidth = image.widththis.canvasHeight = image.heightconst context = uni.createCanvasContext("photoMarkCanvas", this)context.drawImage(src, 0, 0, image.width, image.height)// 设置水印this.setWaterMark(context, image)// 若还需其他操作,可在操作之后叠加保存:context.restore()// 将画布上的图保存为图片context.draw(false, () => {setTimeout(() => {uni.canvasToTempFilePath({destWidth: image.width,destHeight: image.height,canvasId: 'photoMarkCanvas',fileType: 'jpg',success: function (res) {console.log("将画布上的图保存为图片", JSON.parse(JSON.stringify(res)));_this.snapSrc = res.tempFilePathconst tempFilePath = res.tempFilePath;const tempFilePathArray = [tempFilePath];_this.uploadimg({path: tempFilePathArray //这里是选取的图片的地址数组});_this.$emit('complete', _this.snapSrc)}},_this);}, 200)});}})},fanhui() {this.closeCamera();},sendUploadedImagesToParent() {this.$emit('imagesUploaded', this.prveImgInfo);// prveImgInfo  imgs},//多张图片上传  服务器uploadimg: function (data) {// 这两个是对应的,传递的就是这个路径var that = this;// var orderid = that.XmID;//项目idvar orderid = '';// var gsid = '';let photocount = 9;var i = data.i ? data.i : 0; //当前上传的哪张图片var success = data.success ? data.success : 0; //上传成功的个数var fail = data.fail ? data.fail : 0; //上传失败的个数//上传到阿里云util_two.request(uni.$baseUrlweb + '/api/xcx/oss/fankui').then(function (result) {if (result.code == 0) {// var filePath = data.path;var filePath = data.path[i];var filename = result.dir + orderid + upload.calculate_object_name(filePath, '');uni.uploadFile({url: result.host,filePath: filePath,name: "file",/**上传的参数**/formData: {'key': filename, // 文件名'policy': result.policy,'OSSAccessKeyId': result.accessid,'success_action_status': "200",'signature': result.signature,'callback': result.callback},success: (resp) => {if (resp.statusCode == "200") {success++; //图片上传成功,图片上传成功的变量+1photocount--;var show_url = result.host + '/' + filename + result.style1;var productInfo = that.productInfo;productInfo.push(show_url);var prve_url = result.host + '/' + filename + result.style2;var prveImgInfo = that.prveImgInfo;prveImgInfo.push(prve_url);that.sendUploadedImagesToParent();var up_url = filename;var fileurl = that.fileurl;fileurl.push(up_url);let n = i + 1;uni.showLoading({title: n + '/' + data.path.length + '上传成功', //这里打印出 上传成功})}},fail: (res) => {fail++; //图片上传失败,图片上传失败的变量+1uni.showLoading({title: (i + 1) + '/' + data.path.length + '上传失败', //这里打印出 上传成功})},complete: (res) => {i++; //这个图片执行完上传后,开始上传下一张if (i == data.path.length) { //当图片传完时,停止调用     // 添加上传数据that.imgQueRemData.push(filename)// 添加到展示数组const path = result.host + '/' + filename + result.style1that.arrImg.push(path)that.imgs.push(path)uni.hideLoading();that.closeCamera();if (success == i) {uni.showToast({title: '组图上传完成', //这里打印出 上传成功icon: 'success',duration: 1000})} else {uni.showModal({title: '组图上传失败', //这里打印出 上传成功content: '请稍后再试',showCancel: false})}} else { //若图片还没有传完,则继续调用函数data.i = i;data.success = success;data.fail = fail;that.uploadimg(data);}}});}})},// 获取具体位置信息async GetMapData() {const res = await this.$axios("work/getMap", {lat: this.location.latitude,lon: this.location.longitude});if (res.data.code == 0) {this.location_data = res.data.result;} else {uni.showToast({title: res.data.msg,icon: 'none',duration: 1000})}},}
}
</script>
<style lang="scss" scoped>
.icon-qiehuanshexiangtou {font-size: 30px;
}.camera-wrapper {position: relative;
}.switch-camera-btn {position: absolute;top: 20px;right: 20px;color: #fff;font-size: 16px;cursor: pointer;
}.mark-canvas {position: absolute;/* 将画布移出展示区域 */top: -200vh;left: -200vw;
}.image-size {width: 100%;height: 100vh;
}.photo-btn {position: absolute;bottom: 120rpx;left: 50%;transform: translateX(-50%);width: 140rpx;height: 140rpx;line-height: 140rpx;text-align: center;background-color: #000000;border-radius: 50%;border: 10rpx solid #ffffff;color: #fff;
}.btn {padding: 10rpx 20rpx;background-color: #000000;border-radius: 10%;border: 6rpx solid #ffffff;color: #fff
}.re-photo-btn {position: absolute;bottom: 150rpx;right: 40rpx;}.re-fanhui-btn {position: absolute;bottom: 150rpx;right: 180rpx;}.re-fanhui-tijao {position: absolute;bottom: 150rpx;right: 320rpx;}.time-wrap {position: absolute;left: 1rem;bottom: 1rem;color: white;
}
</style>
使用水印相机组件代码
<template><view><view class="qianDao_img"><view class="imgs"><view style="margin-right: 10px;">照片:</view><view @click="paizhao" class="paizhao"><view class="iconfont icon-paizhao1"></view></view></view><view class="img_wrap"><image v-for="(item, index) in shuiyinImg" :key="index" :src="item" mode="scaleToFill"@click="SYpreviewImage(index)" @longpress="SYdeleteImage(index)" /></view></view><!-- <button @click="paizhao">拍照</button> --><view class="full-screen" v-if="paizhaoType"><CameraSnap @imagesUploaded="handleImagesUploaded" @close="paizhaoType = false":mark-list="[new Date().toLocaleString(), location_data]" textSize="24" useTextMask /></view><view class="Bom_Btn"><view @click="BaoCunAction" class="Bom_Btn_log"><view>提交</view></view></view></view>
</template><script>import CameraSnap from '../CameraSnap.vue'export default {data() {return {paizhaoType: false,location: null, // 存储位置信息location_data: "",// 水印图片shuiyinImg: '',};},components: {CameraSnap,},onLoad(options) {uni.getLocation({type: 'wgs84', // 获取经纬度坐标success: (res) => {this.location = res;setTimeout(() => {this.GetMapData();}, 1000);},fail: (err) => {console.error('获取位置信息失败', err);}});},methods: {// 这里是水印图片handleImagesUploaded(images) {console.log("成功上传的图片数据:", images);this.shuiyinImg = [...this.shuiyinImg, ...images];},paizhao() {this.paizhaoType = true;},// 获取具体位置信息async GetMapData() {const res = await this.$axios("work/getMap", {lat: this.location.latitude,lon: this.location.longitude});if (res.data.code == 0) {this.location_data = res.data.result;} else {uni.showToast({title: res.data.msg,icon: 'none',duration: 1000})}},// 水印图片预览SYpreviewImage(index) {uni.previewImage({urls: this.shuiyinImg,current: index, // 当前显示图片的索引loop: true // 是否开启图片轮播});},// 长按删除水印图片SYdeleteImage(index) {uni.showModal({title: '提示',content: '确定要删除这张图片吗?',success: (res) => {if (res.confirm) {this.shuiyinImg.splice(index, 1);}}});},}
}
</script><style lang="scss" scoped>
.full-screen {position: fixed;top: 0;left: 0;width: 100vw;height: 100vh;// background-color: rgba(0, 0, 0, 0.5); /* 半透明背景 */z-index: 9999;/* 确保在最顶层显示 */
}// 签到图片
.qianDao_img {// padding: 15px;border-top: 1px solid #dddddf;background-color: white;// 图片.imgs {padding: 15px;display: flex;align-items: center;flex-wrap: wrap;}.img_wrap {padding: 10px;display: flex;// justify-content: space-around;flex-wrap: wrap;image {width: 80px;height: 80px;margin-bottom: 5px;margin: 4px;}}// 上传图片.paizhao {width: 80px;height: 80px;// border: 1px solid red;margin: 10px 0;background-color: #f7f8fa;.icon-paizhao1 {// border: 1px solid red;width: 50%;font-size: 22px;padding-left: 25px;padding-top: 25px;}}
}.Bom_Btn {width: 100%;padding: 10px;position: absolute;bottom: 0;left: 0;border-top: 1px solid #ededed;background-color: white;z-index: 2;.Bom_Btn_log {width: 70%;// display: flex;// align-items: center;// justify-content: center;// margin: auto;padding: 10px 0;margin: auto;}view {border-radius: 5px;text-align: center;color: white;background-color: #1989fa;}
}
</style>
只能说勉强够用,算不上精细,凑合看把,引入的两个js文件 都是辅助上传阿里云图片的,就是格式啥的进行校验,就没必要上传了,看懂整个思路就行,具体代码肯定还是需要根据自己的情况进行改动的


![sentinel集成nacos启动报[check-update] get changed dataId error, code: 403错误排查及解决](https://i-blog.csdnimg.cn/direct/bfd260bba9dd422e9ac50bb018ac8f39.png)


