创建docker compose 目录
[root@localhost ~]# mkdir -p /compose_lnmt
编写nginx的dockerfile文件
创建目录
[root@localhost compose_lnmt]# mkdir -p nginx
编写nginx配置文件
[root@localhost nginx]# vim nginx.conf
user  root;         #运行身份#nginx自动设置进程数量
worker_processes  auto;#指定错误日志文件的位置和日志级别。在此示例中,错误日志被记录到logs/error.log文件中,并且只记录信息级别的日志。
error_log  logs/error.log  info;pid        logs/nginx.pid; events {use epoll;
}#定义了HTTP模块相关配置。
http {#引入mime.types文件,用于定义MIME类型映射。include       mime.types;#设置默认MIME类型为application/octet-stream。default_type  application/octet-stream;#定义日志格式。log_format  main '$remote_addr - $remote_user [$time_local] "$request" ''$status $body_bytes_sent "$http_referer" ''"$http_user_agent" "$http_x_forwarded_for"';# 配置访问日志文件路径和格式。access_log logs/access.log main;sendfile        on;                    #开启sendfile功能以提高文件传输效率。keepalive_timeout  65;                 #设置keepalive连接超时时间为65秒。upstream tomcat_8080 {                  # 定义了名为tomcat_8080的upstream组,并指定两个后端服务器地址和端口号。server tomcat1:8080; server tomcat2:8080;}
#定义了一个虚拟主机配置,监听80端口,并设置代理转发规则。server {listen 80;server_name localhost;location ~  / {proxy_pass http://tomcat_8080;proxy_set_header Host $host;proxy_set_header X-Real-IP $remote_addr;proxy_set_header X-Forwarded-For $proxy_add_x_forwarded_for;# When setting up Harbor behind other proxy, such as an Nginx instance, remove the below line if the proxy already has similar settings.proxy_set_header X-Forwarded-Proto $scheme;proxy_buffering off;proxy_request_buffering off;}}
}
[root@localhost nginx]# vim Dockerfile
#基于的基础镜像
FROM centos:7
#
##镜像作者信息
MAINTAINER Crushlinux <crushlinux@163.com>
#
##安装相关依赖包
RUN yum install -y wget proc-devel net-tools gcc zlib zlib-devel make openssl-devel
#
##下载并解压nginx源码包
RUN wget http://nginx.org/download/nginx-1.19.0.tar.gz && tar zxf nginx-1.19.0.tar.gz
##编译安装nginx
RUN cd nginx-1.19.0 && ./configure --prefix=/usr/local/nginx && make && make install
ENV PATH /usr/local/nginx/sbin:$PATH
#
##开启 80 和 443 端口
EXPOSE 80
#
##修改 Nginx 配置文件,以非 daemon 方式启动
#RUN echo "daemon off;">>/usr/local/nginx/conf/nginx.conf
#
##定义时区
#RUN ln -sf /usr/share/zoneinfo/Asia/Shanghai /etc/localtime
#
#复制服务启动脚本并设置权限
#ADD run.sh /run.sh
#RUN chmod 775 /run.sh
ENTRYPOINT ["nginx"]
CMD ["-g","daemon off;"]
创建数据存放目录
[root@localhost compose_lnmt]# mkdir -p /var/www/html/
编写tomcat的dockerfile
[root@localhost compose_lnmt]# mkdir -p tomcat
[root@localhost compose_lnmt]# cd tomcat/
下载安装包
[root@localhost tomcat]# wget http://www.oracle.com/technetwork/java/javase/downloads/jdk8-downloads-2133151.html
--2023-08-04 16:37:12-- http://www.oracle.com/technetwork/java/javase/downloads/jdk8-downloads-2133151.html
正在解析主机 www.oracle.com (www.oracle.com)... 23.202.224.60, 2600:1417:76:798::a15, 2600:1417:76:7a0::a15
正在连接 www.oracle.com (www.oracle.com)|23.202.224.60|:80... 已连接。
已发出 HTTP 请求,正在等待回应... 301 Moved Permanently
位置:https://www.oracle.com/technetwork/java/javase/downloads/jdk8-downloads-2133151.html [跟随至新的 URL]
--2023-08-04 16:37:13-- https://www.oracle.com/technetwork/java/javase/downloads/jdk8-downloads-2133151.html
正在连接 www.oracle.com (www.oracle.com)|23.202.224.60|:443... 已连接。
已发出 HTTP 请求,正在等待回应... 301 Moved Permanently
位置:https://www.oracle.com/java/technologies/javase/javase-jdk8-downloads.html [跟随至新的 URL]
--2023-08-04 16:37:15-- https://www.oracle.com/java/technologies/javase/javase-jdk8-downloads.html
正在连接 www.oracle.com (www.oracle.com)|23.202.224.60|:443... 已连接。
已发出 HTTP 请求,正在等待回应... 301 Moved Permanently
位置:./downloads/#java8 [跟随至新的 URL]
--2023-08-04 16:37:16-- https://www.oracle.com/java/technologies/javase/downloads/
再次使用存在的到 www.oracle.com:443 的连接。
已发出 HTTP 请求,正在等待回应... 301 Moved Permanently
位置:https://www.oracle.com/java/technologies/javase-downloads.html [跟随至新的 URL]
--2023-08-04 16:37:16-- https://www.oracle.com/java/technologies/javase-downloads.html
再次使用存在的到 www.oracle.com:443 的连接。
已发出 HTTP 请求,正在等待回应... 301 Moved Permanently
位置:./downloads/ [跟随至新的 URL]
--2023-08-04 16:37:17-- https://www.oracle.com/java/technologies/downloads/
再次使用存在的到 www.oracle.com:443 的连接。
已发出 HTTP 请求,正在等待回应... 200 OK
长度:未指定 [text/html]
正在保存至: “jdk8-downloads-2133151.html”
[ <=> ] 112,559 137KB/s 用时 0.8s
2023-08-04 16:37:18 (137 KB/s) - “jdk8-downloads-2133151.html” 已保存 [112559]
[root@localhost tomcat]# wget http://tomcat.apache.org/
--2023-08-04 16:37:33-- http://tomcat.apache.org/
正在解析主机 tomcat.apache.org (tomcat.apache.org)... 151.101.2.132, 2a04:4e42::644
正在连接 tomcat.apache.org (tomcat.apache.org)|151.101.2.132|:80... 已连接。
已发出 HTTP 请求,正在等待回应... 301 Moved Permanently
位置:https://tomcat.apache.org/ [跟随至新的 URL]
--2023-08-04 16:37:37-- https://tomcat.apache.org/
正在连接 tomcat.apache.org (tomcat.apache.org)|151.101.2.132|:443... 已连接。
已发出 HTTP 请求,正在等待回应... 200 OK
长度:17702 (17K) [text/html]
正在保存至: “index.html”
100%[=============================================================>] 17,702 113KB/s 用时 0.2s
2023-08-04 16:37:38 (113 KB/s) - 已保存 “index.html” [17702/17702])
下载tomcat的dockers文件
https://mirrors.bfsu.edu.cn/apache/tomcat/tomcat-8/v8.5.59/bin/apache-tomcat-8.5.59.tar.gz
如果这一步做了下面就不用了
这里上一步做了 就可以跳过
在tomcat目录下放一个apache包
[root@localhost tomcat]# ll
总用量 9600
-rw-r--r--. 1 root root 9690027 7月 17 2020 apache-tomcat-8.5.40.tar.gz
[root@localhost tomcat]# vim Dockerfile
[root@localhost tomcat]# cat Dockerfile
# this docker file
# VERSION 1.0
# author: shichao# email: shichao@scajy.cn
FROM centos:7
MAINTAINER  shichao@scajy.cn
ENV VERSION=8.5.40                  看这里根据版本号写
RUN yum install -y gcc gcc-c++ make gd-devel libxml2-devel libcurl-devel libjpeg-devel libpng-devel openssl-devel net-tools wget curl unzip iproute java-1.8.0-openjdk && yum clean all  && rm -rf /var/cache/yum/*
ADD apache-tomcat-${VERSION}.tar.gz /usr/local/
RUN mv /usr/local/apache-tomcat-${VERSION}   /usr/local/tomcat &&\sed -i '1a JAVA_OPTS="-Djava.security.egd=file:/dev/./urandom"' /usr/local/tomcat/bin/catalina.sh && \ln -sf /usr/share/zoneinfo/Asia/Shanghai /etc/localtime
ENV PATH /usr/local/tomcat/bin:$PATH
WORKDIR /usr/local/tomcatEXPOSE 8080CMD ["catalina.sh", "run"]
拷贝tomcat数据到容器目录下
mkdir -p /var/www/tomcat
cp -a /usr/local/tomcat/webapps/* /var/www/tomcat/
如果没有
apache-tomcat-8.5.40.tar.gz 把一个apache包解压把文件放到/var/www/tomcat/
[root@localhost tomcat]# ll /var/www/tomcat/
总用量 8
drwxr-x---. 14 root root 4096 8月 4 16:52 docs
drwxr-x---. 6 root root 83 8月 4 16:52 examples
drwxr-x---. 5 root root 87 8月 4 16:52 host-manager
drwxr-x---. 5 root root 103 8月 4 16:52 manager
drwxr-x---. 3 root root 4096 8月 4 16:52 ROOT
切换目录
编写docker compose配置文件
[root@localhost tomcat]# cd ..
[root@localhost compose_lnmt]# cat docker-compose.yml
version: '3'
services:nginx:hostname: nginxbuild:context: ./nginxdockerfile: Dockerfileports:- 80:80networks:- lnmtvolumes:- /var/www/html:/usr/local/nginx/html- ./nginx/nginx.conf:/usr/local/nginx/conf/nginx.conftomcat1:hostname: tomcat1build:context: ./tomcatdockerfile: Dockerfilenetworks:- lnmtports:  - "8080:8080"command: ["catalina.sh", "run"]volumes:- /var/www/tomcat:/usr/local/tomcat/webappstomcat2:hostname: tomcat2build:context: ./tomcatdockerfile: Dockerfilenetworks:- lnmtports:- "8081:8080"command: ["catalina.sh", "run"]volumes:- /var/www/tomcat:/usr/local/tomcat/webappsmysql:hostname: mysqlimage: mysql:5.6ports:- 3307:3306networks:- lnmtvolumes:- ./mysql/conf:/etc/mysql/conf.d- ./mysql/data:/var/lib/mysqlcommand: --character-set-server=utf8environment:MYSQL_ROOT_PASSWORD: 123456MYSQL_DATABASE: tomcatMYSQL_USER: tomcatMYSQL_PASSWORD: tomcat123
networks:lnmt:
构建启动lnmt环境
[root@localhost compose_lnmt]# /root/docker-compose -f docker-compose.yml up -d
Building nginx
Step 1/9 : FROM centos:7
---> f31fca55b7fb
Step 2/9 : MAINTAINER Crushlinux <crushlinux@163.com>
---> Using cache
---> 83b5a758b0fc
Step 3/9 : RUN yum install -y wget proc-devel net-tools gcc zlib zlib-devel make openssl-devel
---> Using cache
---> d3e03fc7ad3c
Step 4/9 : RUN wget http://nginx.org/download/nginx-1.19.0.tar.gz && tar zxf nginx-1.19.0.tar.gz
---> Using cache
---> 89974cef8e72
Step 5/9 : RUN cd nginx-1.19.0 && ./configure --prefix=/usr/local/nginx && make && make install
---> Using cache
---> a8714c890132
Step 6/9 : ENV PATH /usr/local/nginx/sbin:$PATH
---> Running in bbb45b0a836f
Removing intermediate container bbb45b0a836f
---> 9bada7c394eb
Step 7/9 : EXPOSE 80
---> Running in 3b0e33a9736b
Removing intermediate container 3b0e33a9736b
---> 463315793fa6
Step 8/9 : ENTRYPOINT ["nginx"]
---> Running in 3ed88b7b34de
Removing intermediate container 3ed88b7b34de
---> 8da0735f0bf6
Step 9/9 : CMD ["-g","daemon off;"]
---> Running in c1f164f4064c
Removing intermediate container c1f164f4064c
---> f97e665ec70f
Successfully built f97e665ec70f
Successfully tagged compose_lnmt_nginx:latest
WARNING: Image for service nginx was built because it did not already exist. To rebuild this image you must use `docker-compose build` or `docker-compose up --build`.
Creating compose_lnmt_tomcat2_1 ... done
Creating compose_lnmt_tomcat1_1 ... done
Creating compose_lnmt_mysql_1 ... done
Creating compose_lnmt_nginx_1 ... done
查看容器是否正常
[root@localhost compose_lnmt]# /root/docker-compose ps
Name Command State Ports
-------------------------------------------------------------------------------------------------------
compose_lnmt_mysql_1 docker-entrypoint.sh --cha ... Up 0.0.0.0:3307->3306/tcp,:::3307->3306/
tcp
compose_lnmt_nginx_1 nginx -g daemon off; Up 0.0.0.0:80->80/tcp,:::80->80/tcp
compose_lnmt_tomcat1_1 catalina.sh run Up 0.0.0.0:8080->8080/tcp,:::8080->8080/
tcp
compose_lnmt_tomcat2_1 catalina.sh run Up 0.0.0.0:8081->8080/tcp,:::8081->8080/
tcp
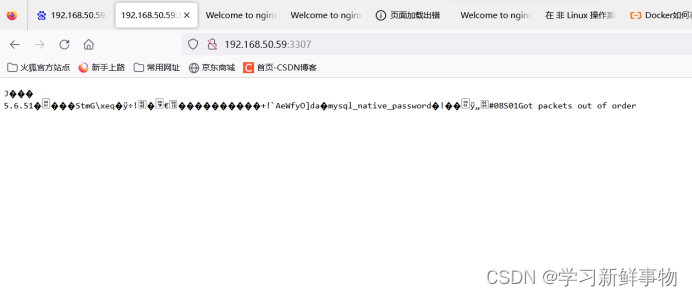
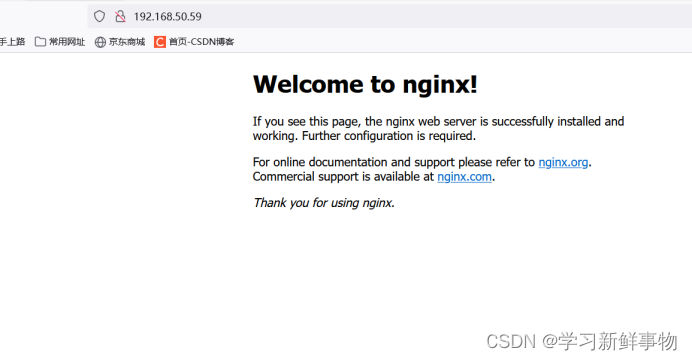
浏览器访问
nginx
 tomcat1

tomcat2
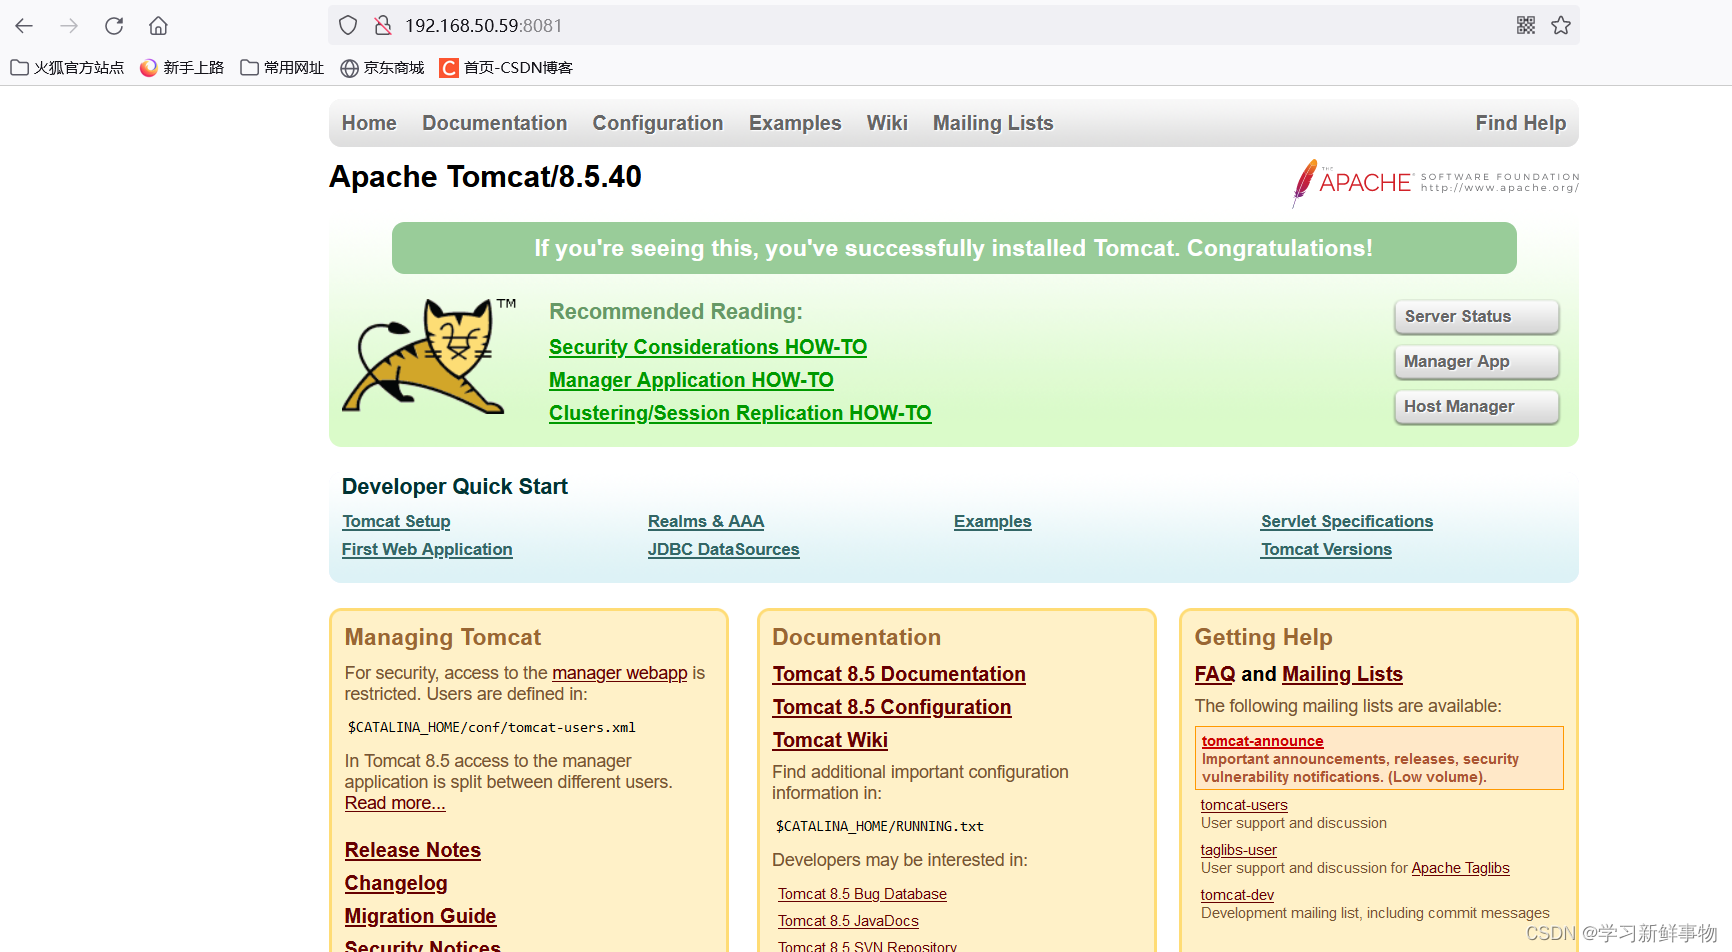
mysql