正文
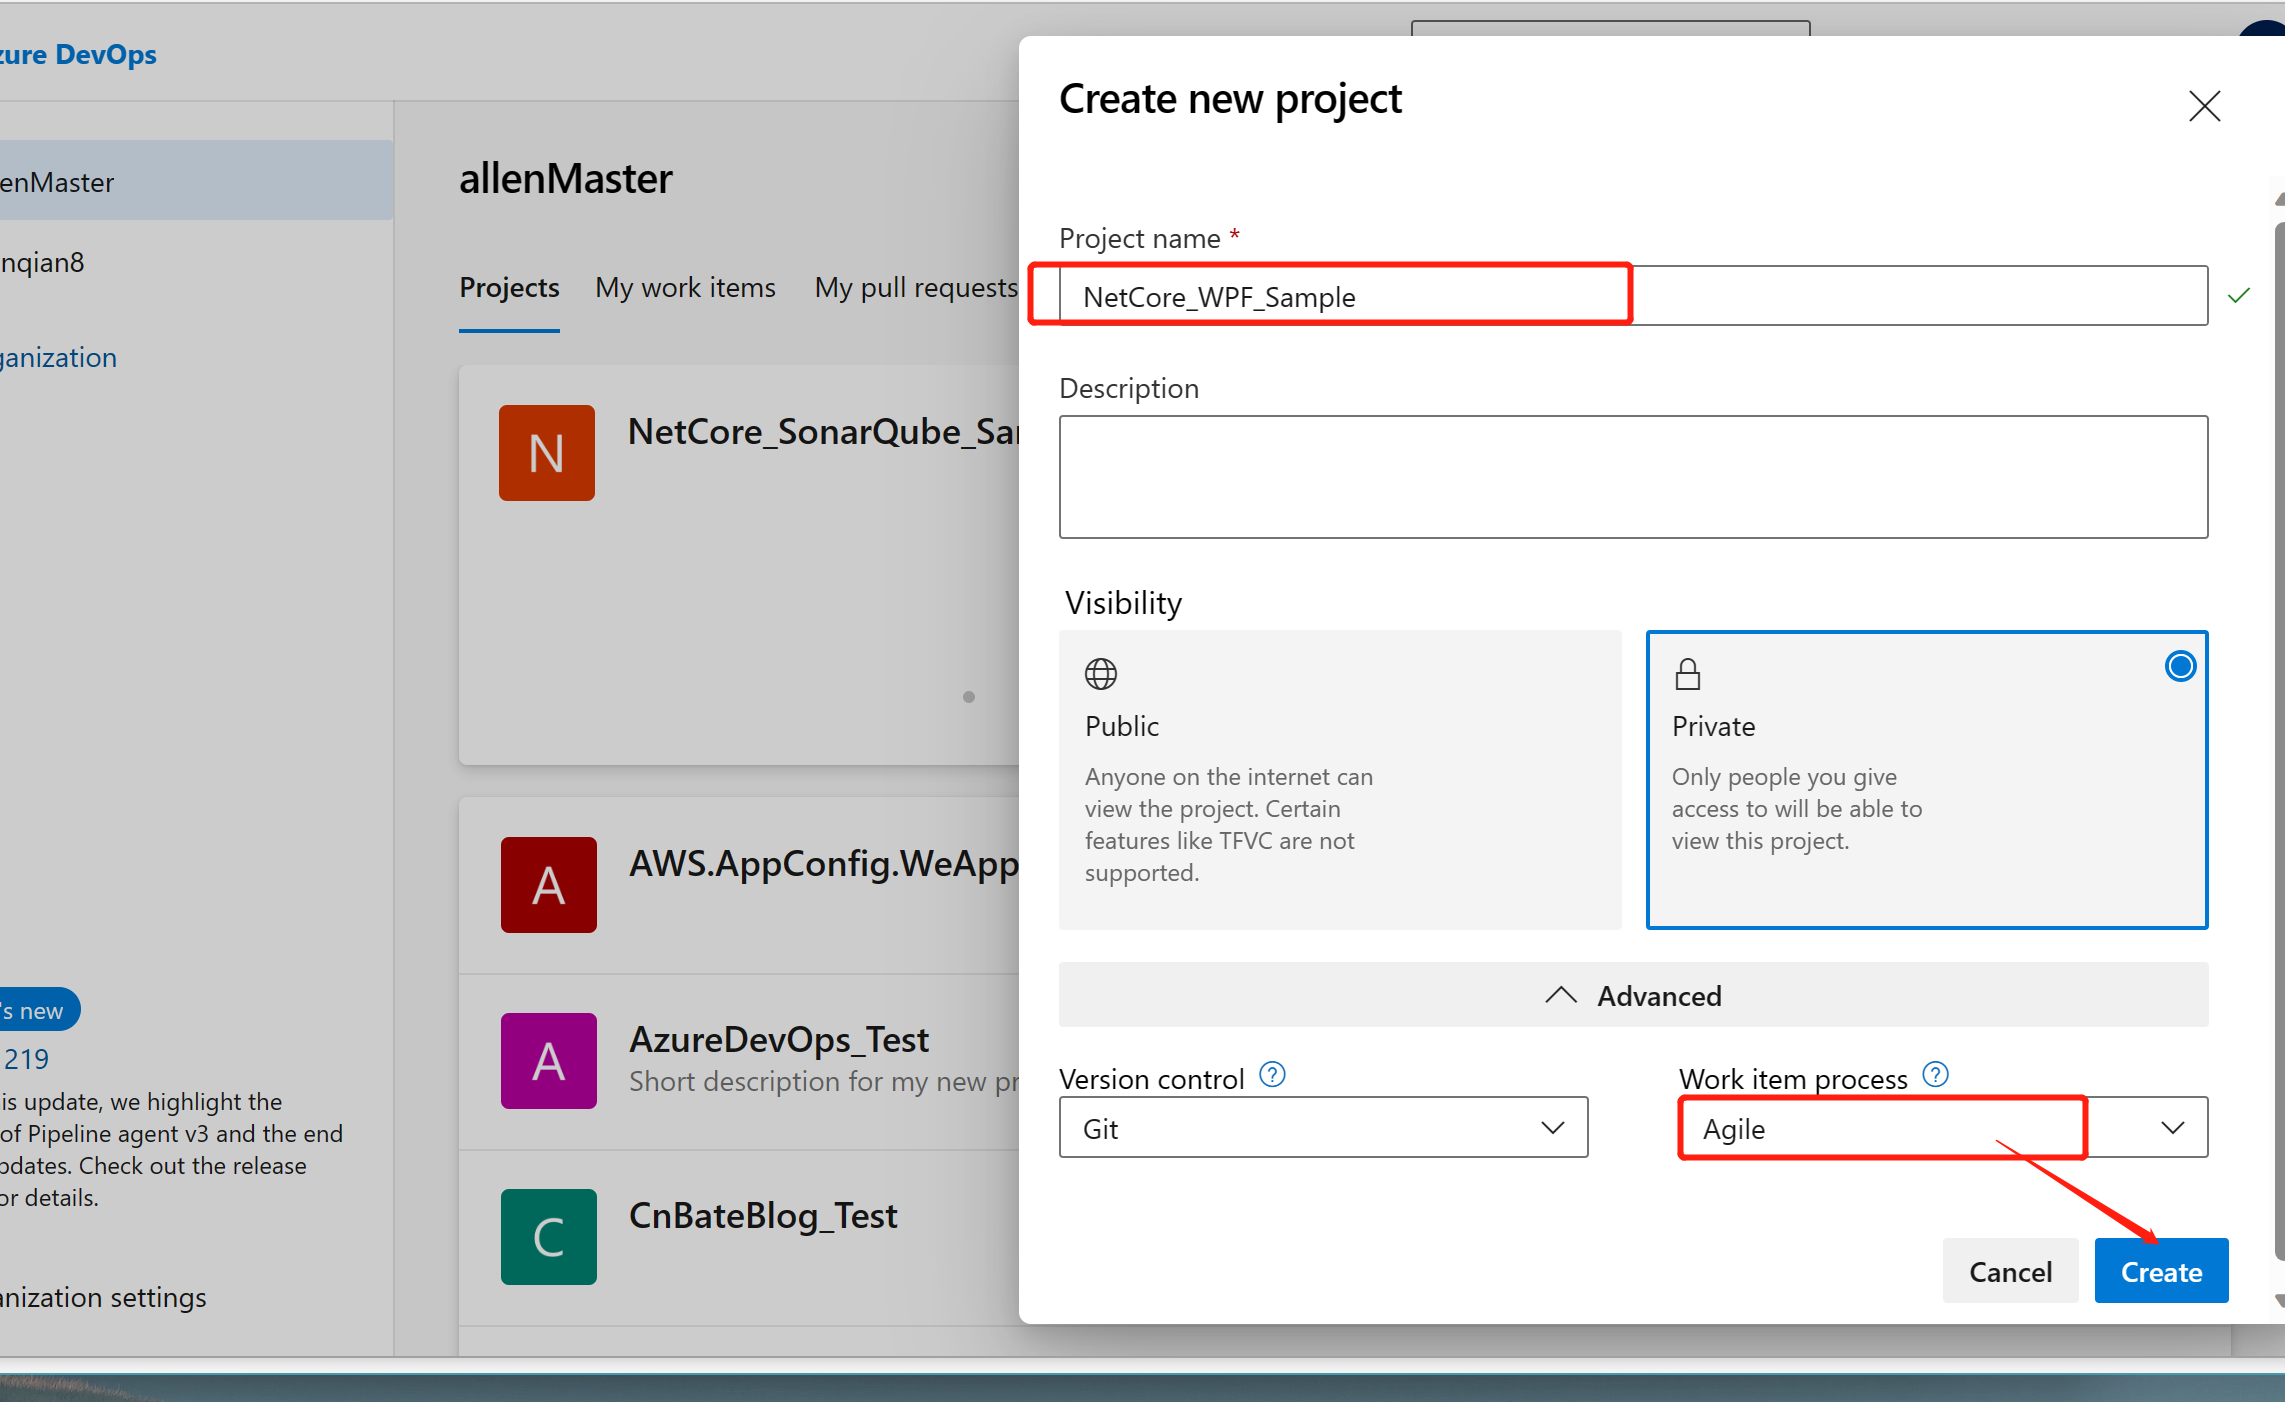
1, Azure DevOps 创建项目
Project name:”NetCore_WPF_Sample“
Visibility:”Private“(根据实际项目需求)
Version control:”Git“
Work item process:”Agile“
点击 ”Create“ 创建新的项目
2,配置 Azure DevOps 流水线
选择 ”Pipelines =》“pepelines“,点击 ”Create Pipeline“ 创建持续集成管道

选择 ”GitHUb“ Yaml

选择好需要项目,开始配置 ”azure-pipelines.yml“
![]()
# .NET Desktop
# Build and run tests for .NET Desktop or Windows classic desktop solutions.
# Add steps that publish symbols, save build artifacts, and more:
# https://docs.microsoft.com/azure/devops/pipelines/apps/windows/dot-nettrigger:
- masterpool:vmImage: 'windows-latest'variables:solution: '**/*.sln'buildPlatform: 'Any CPU'buildConfiguration: 'Release'steps:
- task: NuGetToolInstaller@1- task: NuGetCommand@2inputs:restoreSolution: '$(solution)'- task: VSBuild@1inputs:solution: '$(solution)'platform: '$(buildPlatform)'configuration: '$(buildConfiguration)'clean: true- task: VSTest@2inputs:platform: '$(buildPlatform)'configuration: '$(buildConfiguration)'- task: PublishSymbols@2displayName: 'Publish symbols path'inputs:SearchPattern: '**\bin\**\*.pdb'PublishSymbols: falsecontinueOnError: true- task: CopyFiles@2displayName: 'Copy Files to: $(build.artifactstagingdirectory)'inputs:SourceFolder: 'Standard.Tool.Platform'Contents: '**\bin\$(BuildConfiguration)\**'TargetFolder: '$(build.artifactstagingdirectory)'condition: succeededOrFailed()
![]()
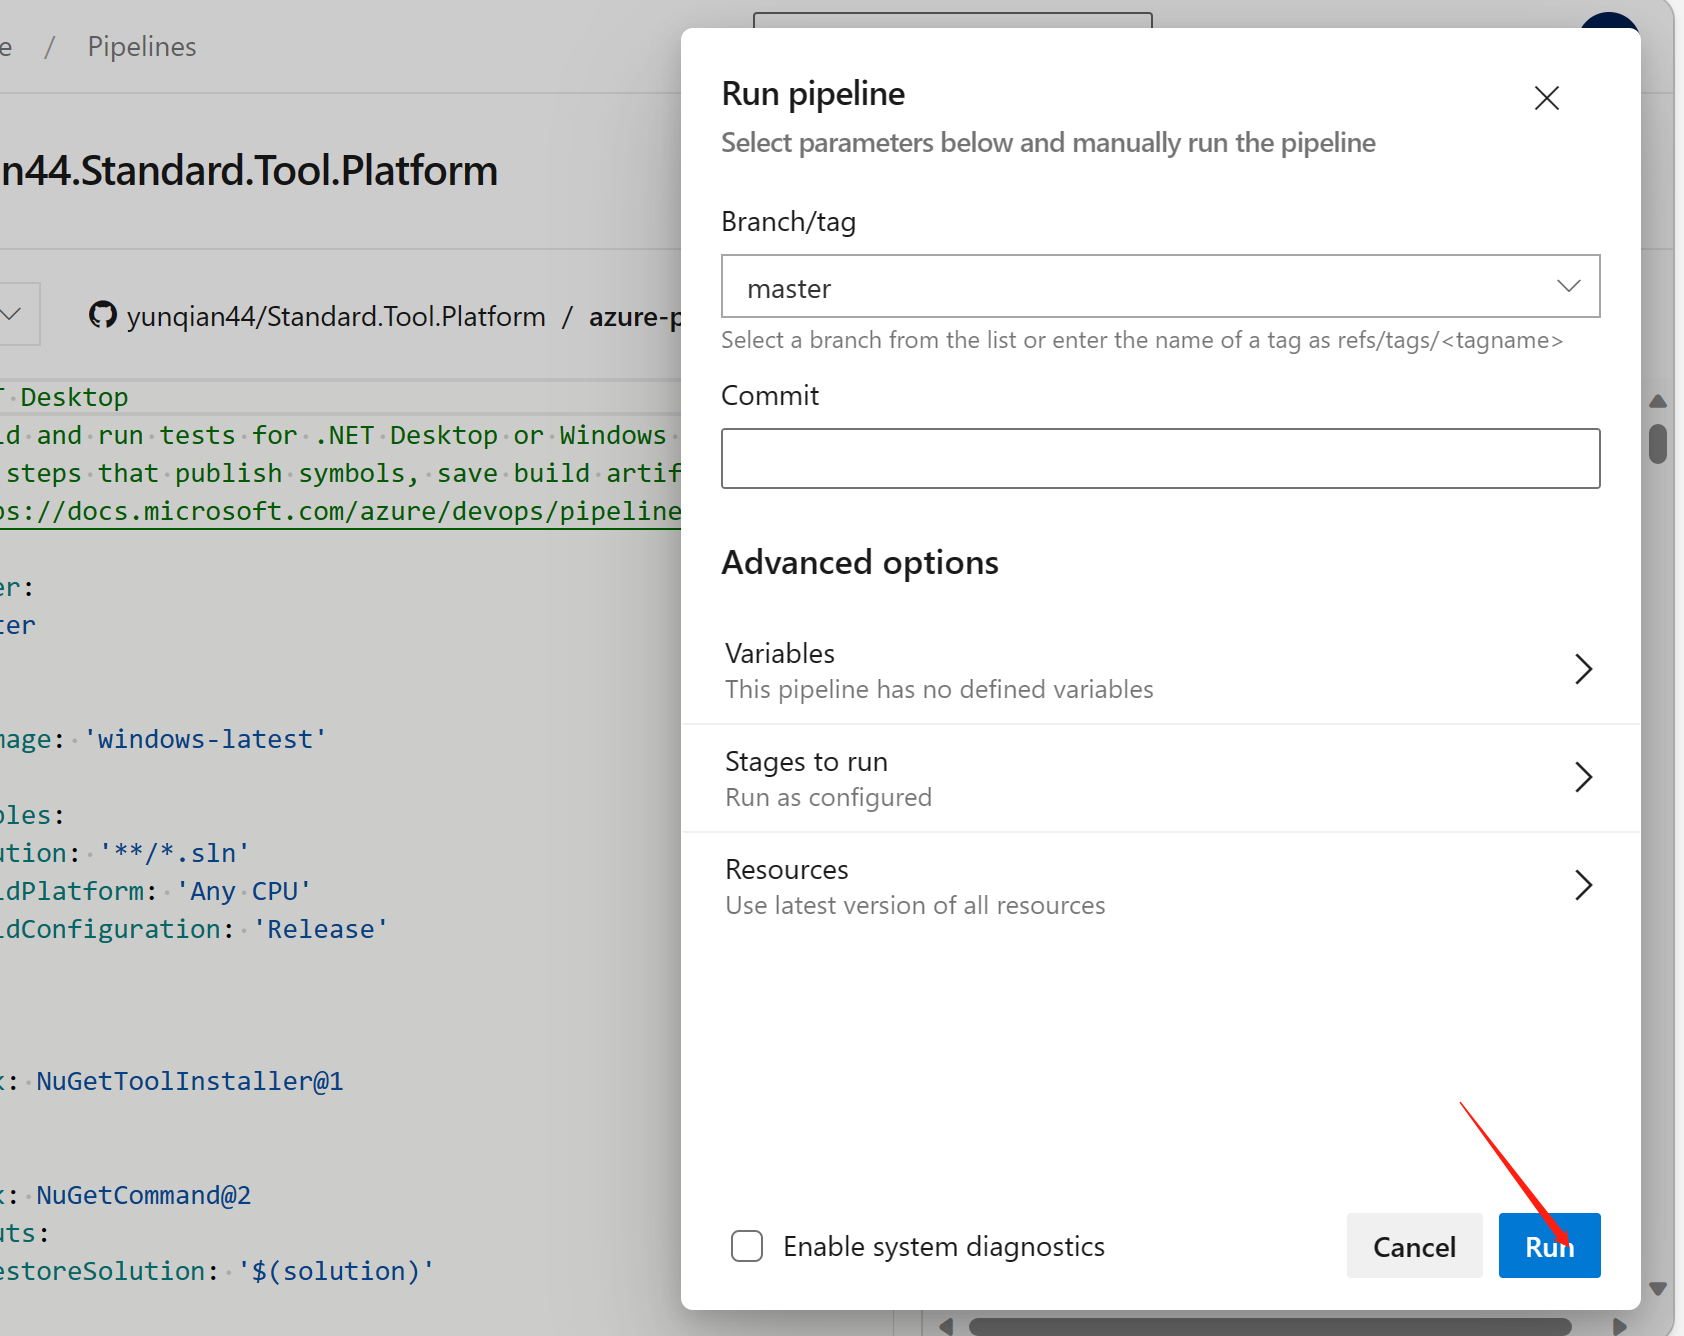
调整完 yml 文件后,点击 ”Run“ 执行 pipeline

点击 ”Run“ 开始执行
此时我们的 pipeline 任务正在执行,我们可以点击 ”Job“ 查看详细作业
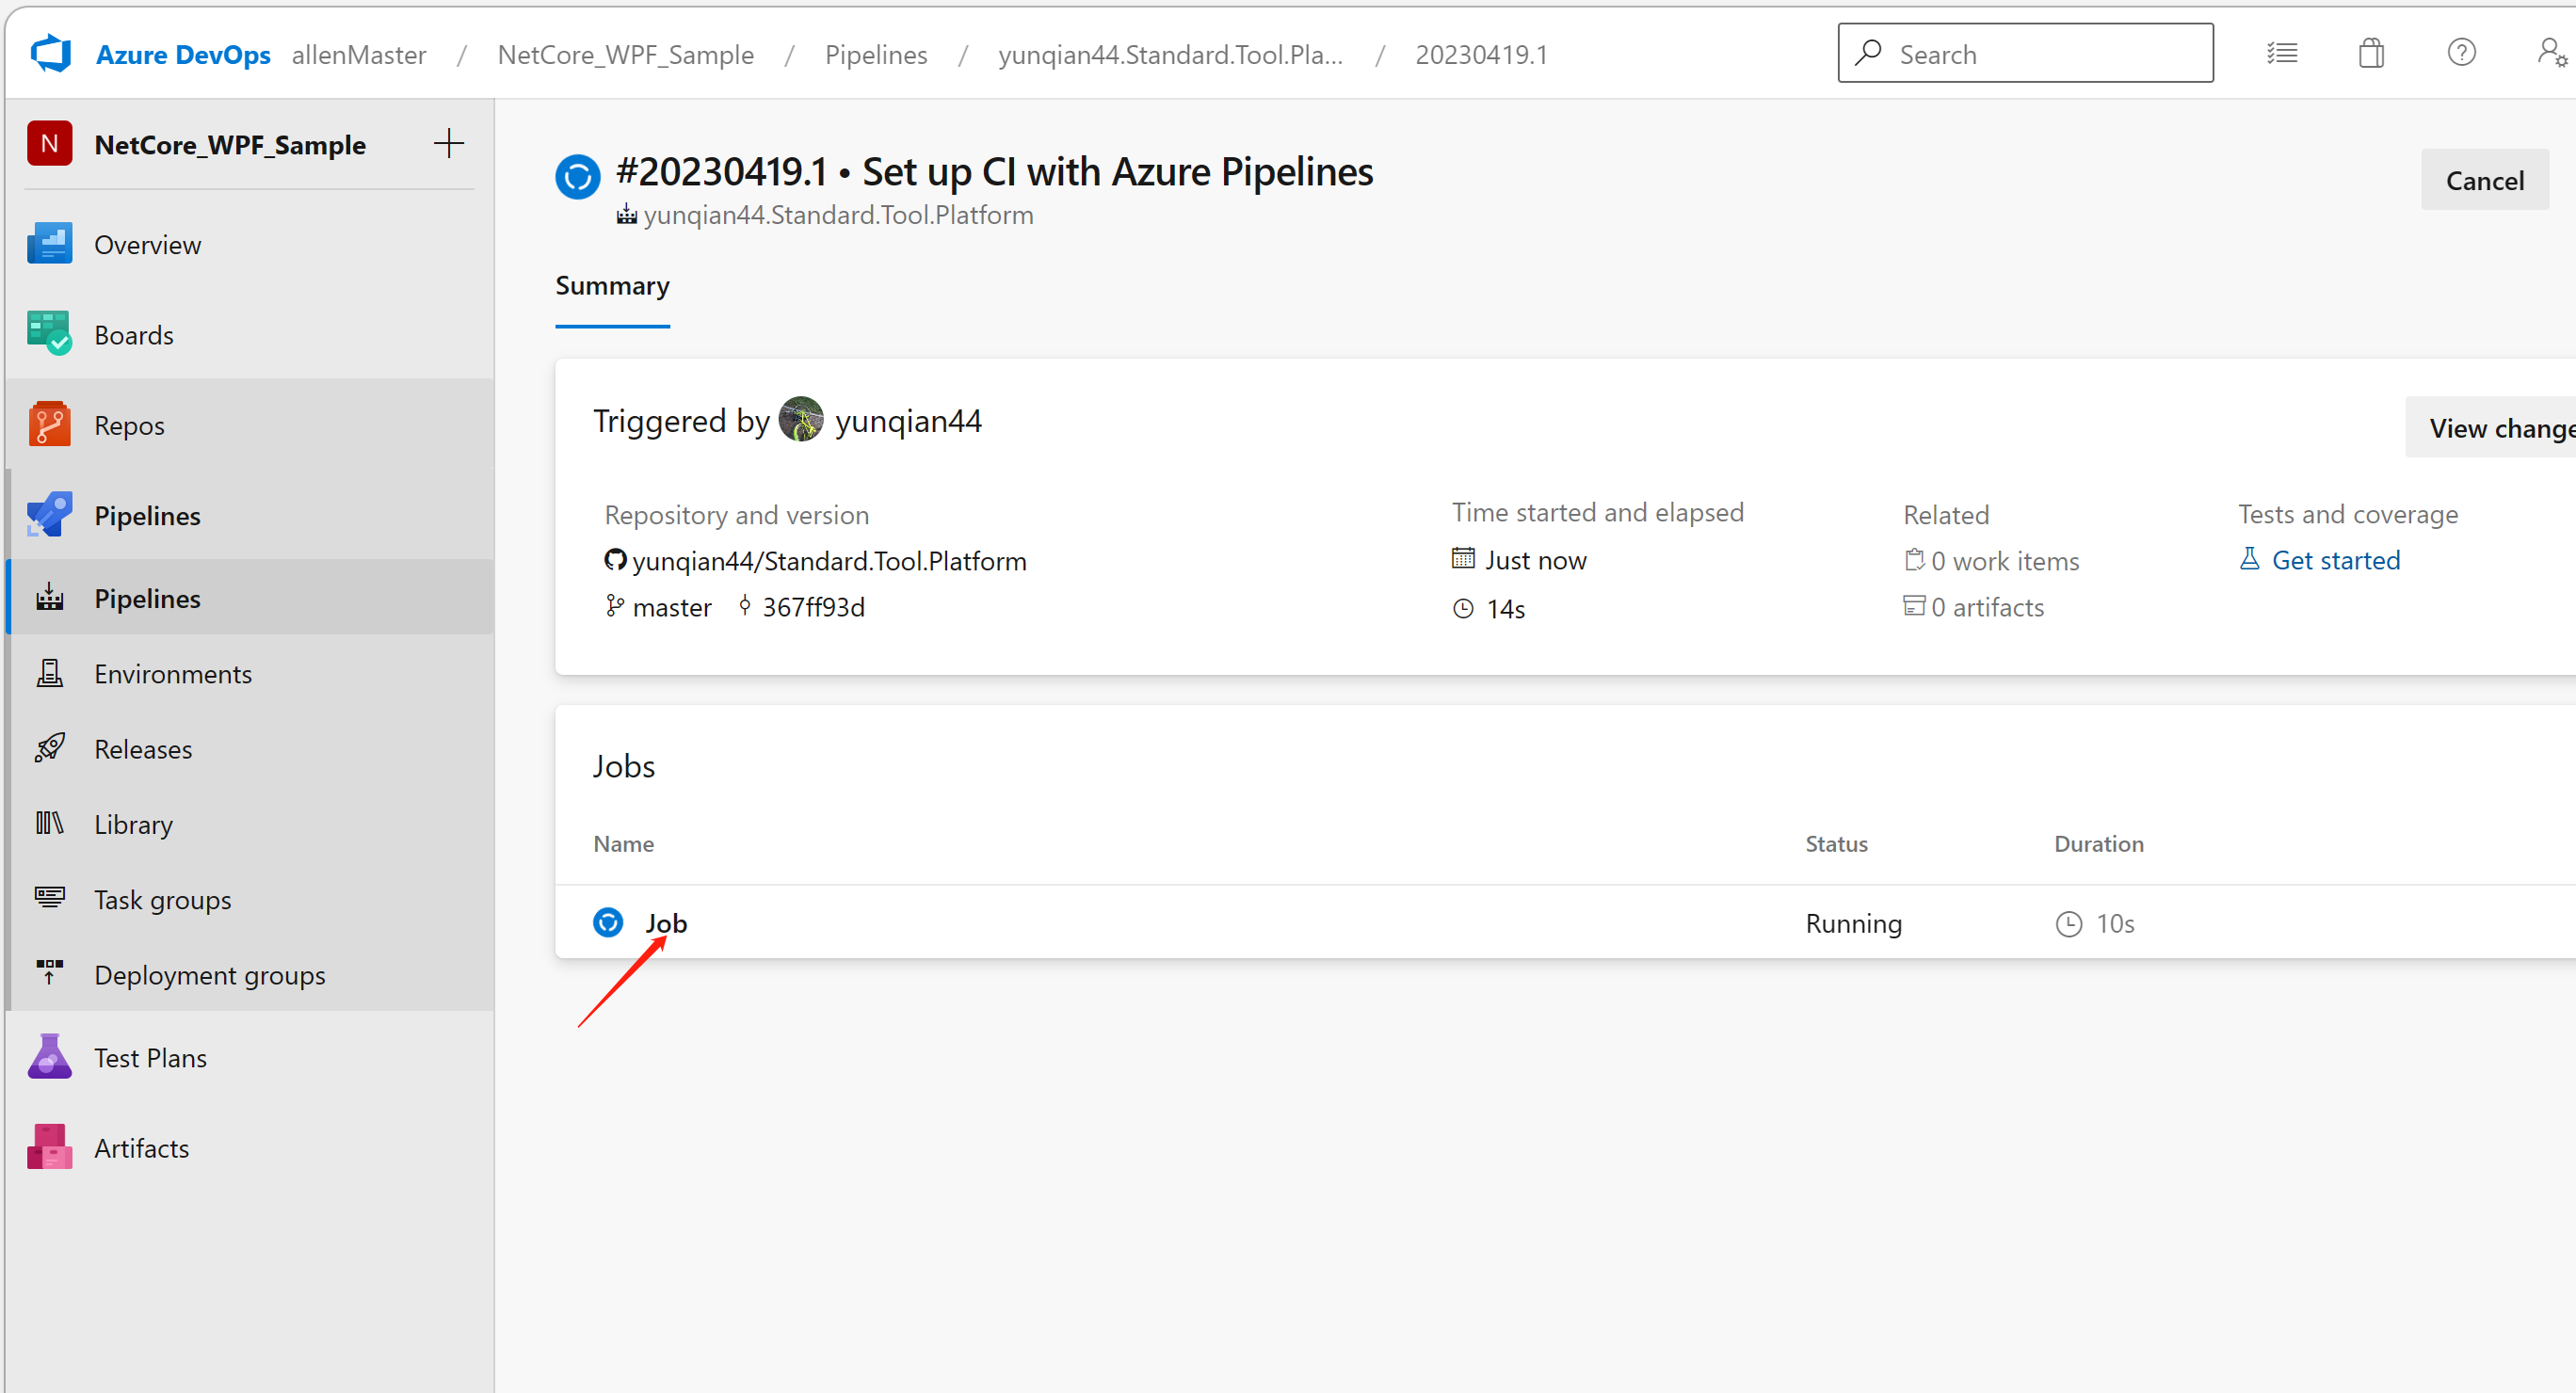
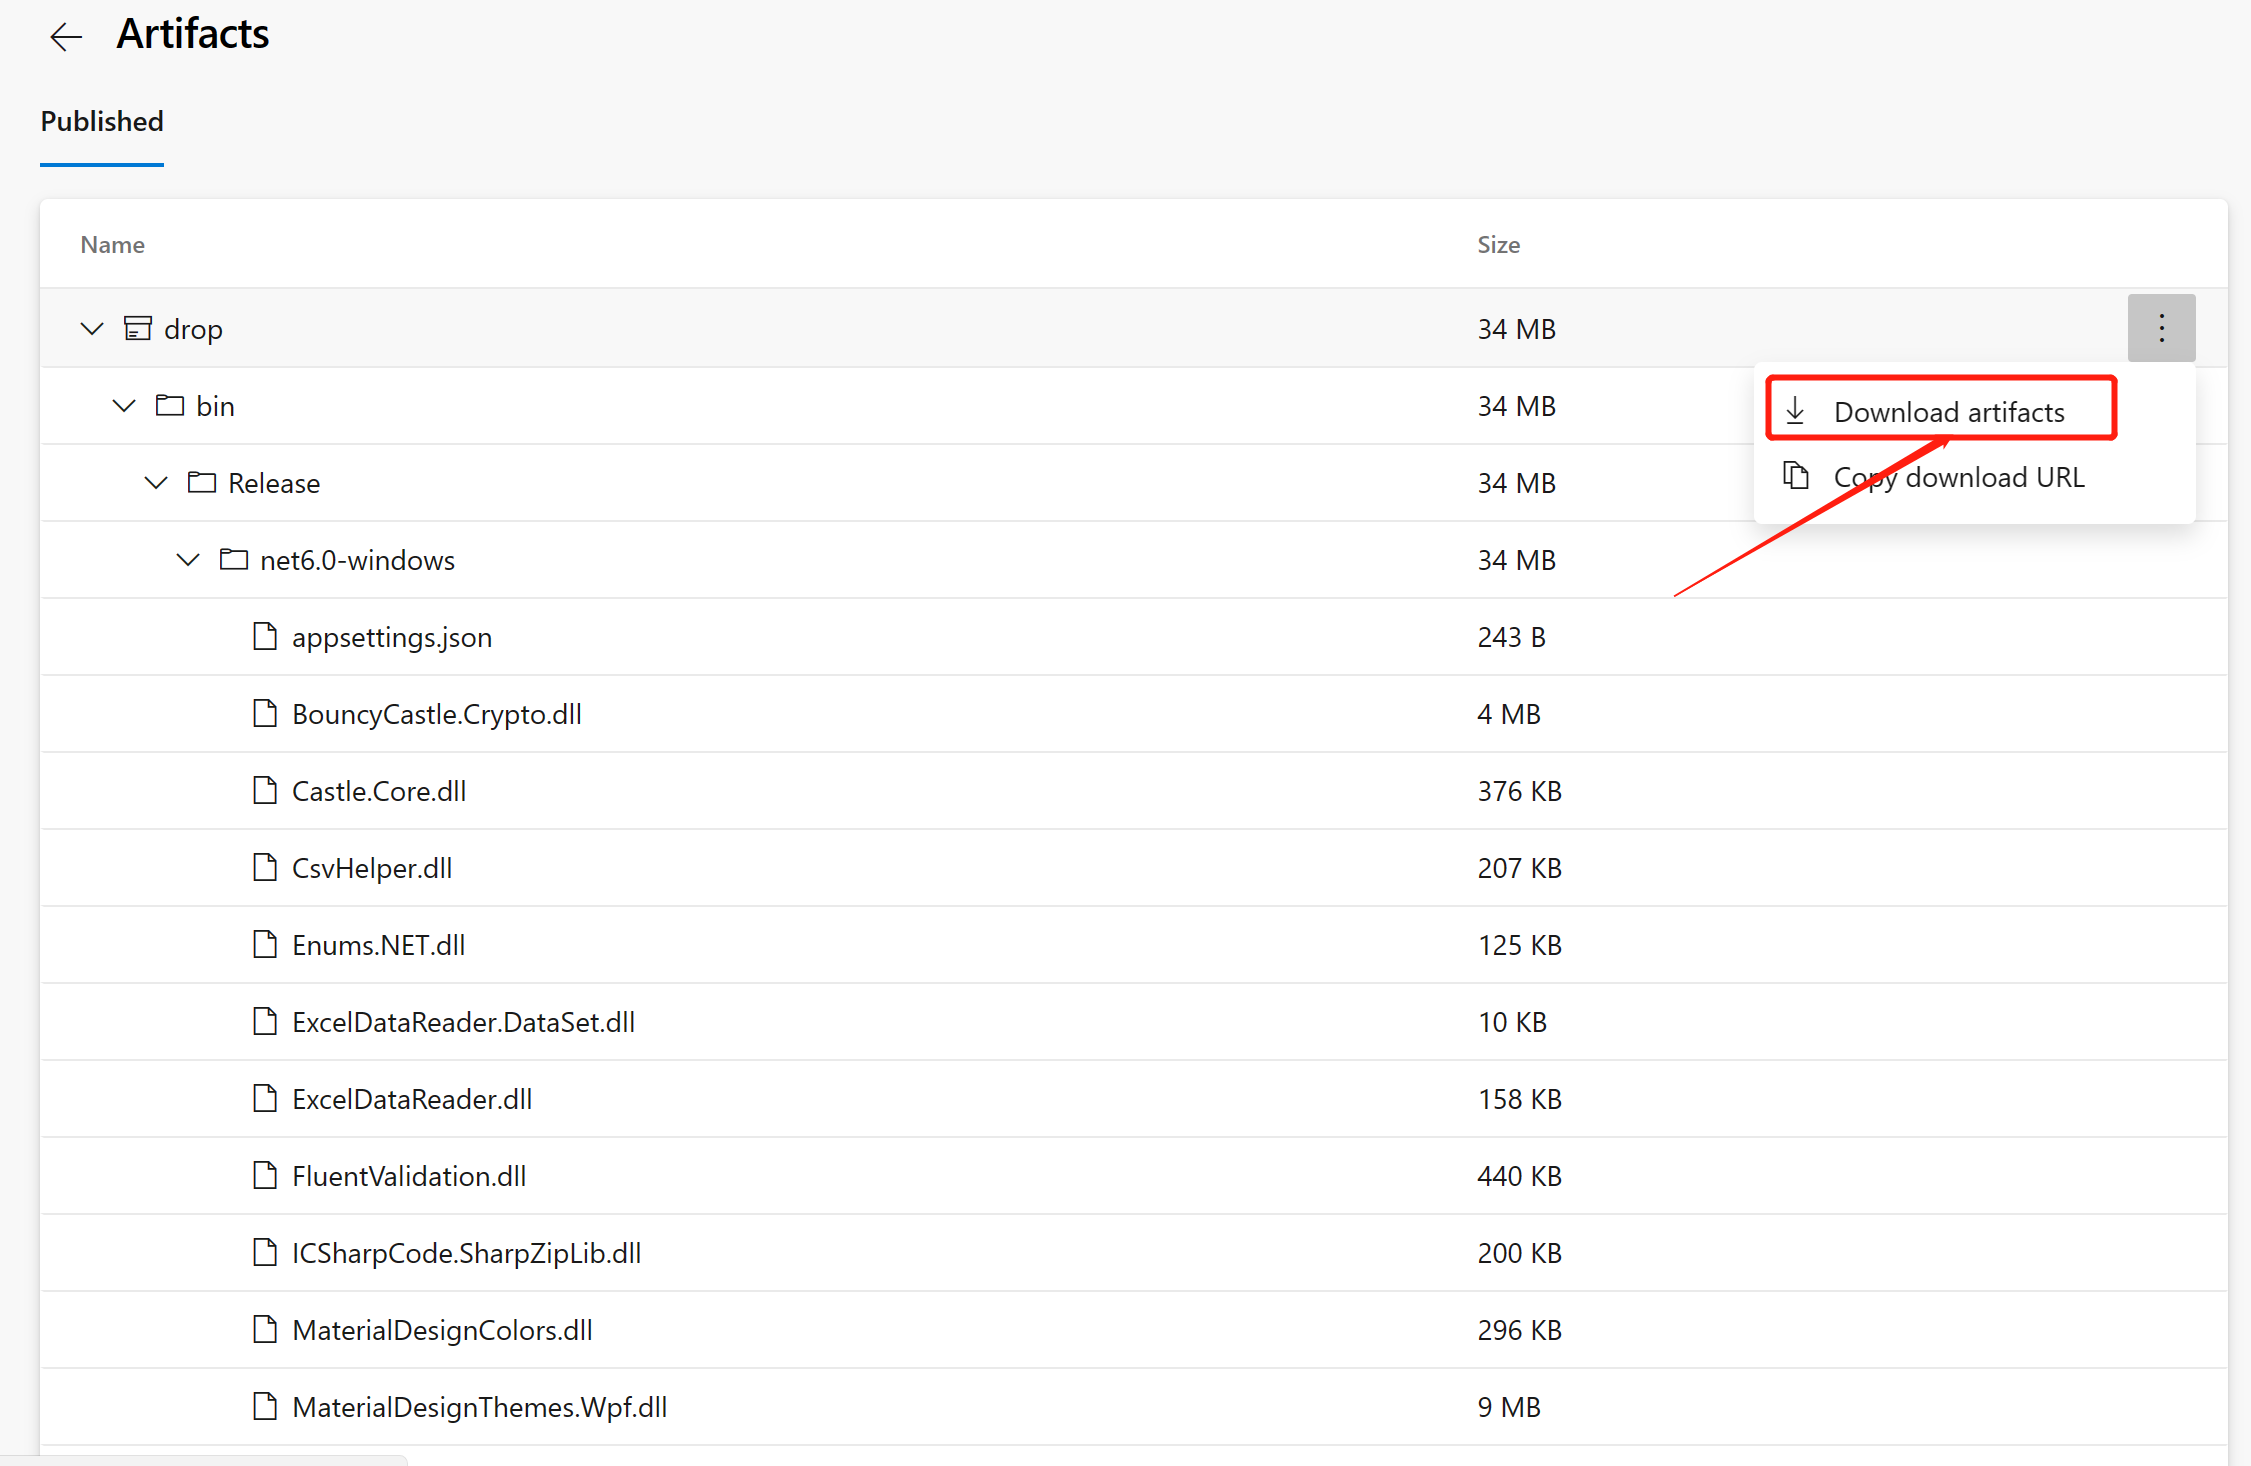
作业完成后,我们就可以看到编译好的程序包

点击 ”Download artifacts“ 直接下载编译好的二进制程序包
Bingo!!!🎉✌️🎉✌️🎉✌️🎉✌️
此演示步骤实现了 NET 的桌面应用程序的持续集成与持续编译,当我们 pipeline 监测到 master 分支有变动后,就会立即执行管道作业,可以确保我们不必再人工拉取代码,编译,发布二进制程序包了。
三,结尾
通过 Azure DevOps 的 Pipeline 实现的开发团队协助是一个不错的选择。今天的内容也主要是实战操作,大家也多多练习。熟能生巧。本文所分享的内容也存在着很多我自己的一些理解,有理解不到位的,还希望多多包涵,并且指出不足之处。
github:GitHub - yunqian44/Standard.Tool.Platform
