ASCII:一个简单的字符编码方案
pillow模块:读取图像,访问底层数据
numpy模块:计算平均值
import sys, random, argparse
import numpy as np
import math
from PIL import Image
定义灰度等级和网格
定义两种灰度等级作为全局值,用于将亮度值转换为ASCII 字符
从最黑暗变到最亮
# 70 levels of gray
gscale1 = "$@B%8&WM#*oahkbdpqwmZO0QLCJUYXzcvunxrjft/\|()1{}[]?-_+~<>i!lI;:,\"^`'. "# 10 levels of gray
gscale2 = '@%#*+=-:. '
http://paulbourke.net/dataformats/asciiart/
准备图像,并分割成网格
cols = 80
scale = 0.43# open the image and convert to grayscale
image = Image.open('youling.png').convert("L")
# store the image dimensions  # image.size
W, H = image.size[0], image.size[1]
# compute the tile width  根据用户给定列数(cols)计算每个网格的宽度
w = W/cols
# compute the tile height based on the aspect ratio and scale of the font
h = w/scale
# compute the number of rows to use in the final grid
rows = int(H/h)
w网格的宽 = W图片的宽 / cols列数
h网格的高度 = w网格的宽 / 垂直比例系数scale
rows行 总共有多少行
Pillow模块里的convert()函数可以将图像从一种模式转换为另一种模式
convert(‘L’)将原始图像转换为灰度图像 L is luminance:是图像亮度的单位
convert(‘1’)将原始图像转换为黑白模式
convert(‘P’, palette=Image.ADAPTIVE, colors=1)将原始图像转换为使用颜色调色板的单色模式,colors=2,图片只有2种颜色
还有RGB、RGBA,CMYK,LAB,HSV,YCbCr、XYZ等等模式
CMYK代表青、洋红、黄和黑色,是一种用于印刷的颜色模式。它是印刷过程中使用的四种油墨颜色的缩写,包括青色(Cyan)、洋红色(Magenta)、黄色(Yellow)和黑色(Key),通过它们的不同组合可以得到各种颜色和色调。相对于RGB颜色模式(红、绿、蓝),CMYK颜色模式更适合印刷。
计算平均亮度
计算灰度图像中每一小块的平均亮度
def getAverageL(image):# get the image as a numpy arrayim = np.array(image)# get the dimensionsw,h = im.shape# get the averagereturn np.average(im.reshape(w*h))
将 image 转换成一个 numpy数组,此时 im 成为一个二维数组,包含每个像素的亮度
保存该图像的尺寸
numpy.average()计算该图像中的亮度平均值,做法是用 numpy.reshape()先将维度为宽和高(w,h)的二维数组转换成扁平的一维,其长度是宽度乘以高度(w*h)。然后 numpy.average()调用对这些数组值求和并计算平均值
从图像生成 ASCII 内容
# an ASCII image is a list of character strings
aimg = []
# generate the list of tile dimensions
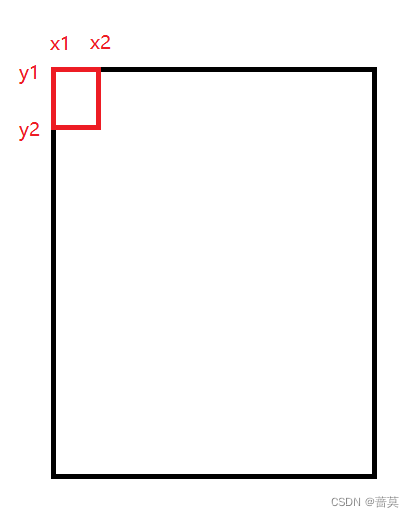
for j in range(rows):# 计算每个图像小块的起始和结束 y 坐标y1 = int(j*h)y2 = int((j+1)*h)# correct the last tileif j == rows-1:y2 = H# append an empty stringaimg.append("")for i in range(cols):# crop the image to fit the tilex1 = int(i*w)x2 = int((i+1)*w)# correct the last tileif i == cols-1:x2 = W# crop the image to extract the tile into another Image objectimg = image.crop((x1, y1, x2, y2))# get the average luminance # 获取网格的平均亮度值avg = int(getAverageL(img))# look up the ASCII character for grayscale value (avg)if moreLevels:# 将平均亮度值[0,255]对用到70级灰度[0,69]gsval = gscale1[int((avg*69)/255)]else:# 将平均亮度值[0,255]对用到10级灰度[0,9]gsval = gscale2[int((avg*9)/255)]# append the ASCII character to the stringaimg[j] += gsval
int((avg69)/255)
if avg = 255,可得int((avg69)/255)=69,在该字符串中最后一个索引是69
命令行选项
接下来,为程序定义一些命令行选项。这段代码使用内置的 argparse 类:
parser = argparse.ArgumentParser(description="descStr")
# add expected arguments
parser.add_argument('--file', dest='imgFile', required=True)
parser.add_argument('--scale', dest='scale', required=False)
parser.add_argument('--out', dest='outFile', required=False)
parser.add_argument('--cols', dest='cols', required=False)
parser.add_argument('--morelevels', dest='moreLevels', action='store_true')
包含指定图像文件输入的选项(唯一必须的参数)
设置垂直比例因子
设置输出文件名
设置 ASCII 输出中的文本列数
添加–morelevels 选项,让用户选择更多层次的灰度梯度
将 ASCII 文本图形字符串写入文本文件
最后,将生成的 ASCII 字符串列表,写入一个文本文件:
# open a new text file
f = open(outFile, 'w')
# write each string in the list to the new file
for row in aimg:f.write(row + '\n')
# clean up
f.close()
完整代码
import sys, random, argparse
import numpy as np
import math
from PIL import Image# 70 levels of gray
gscale1 = "$@B%8&WM#*oahkbdpqwmZO0QLCJUYXzcvunxrjft/\|()1{}[]?-_+~<>i!lI;:,\"^`'. "# 10 levels of gray
gscale2 = '@%#*+=-:. 'def getAverageL(image):# get the image as a numpy arrayim = np.array(image)# get the dimensionsw,h = im.shape# get the averagereturn np.average(im.reshape(w*h))def covertImageToAscii(fileName, cols, scale, moreLevels):"""Given Image and dimensions (rows, cols), returns an m*n list of Images"""# declare globalsglobal gscale1, gscale2# open image and convert to grayscaleimage = Image.open(fileName).convert('L')# store the image dimensionsW, H = image.size[0], image.size[1]print("input image dims: %d x %d" % (W, H))# compute tile widthw = W/cols# compute tile height based on the aspect ratio and scale of the fonth = w/scale# compute number of rows to use in the final gridrows = int(H/h)print("cols: %d, rows: %d" % (cols, rows))print("tile dims: %d x %d" % (w, h))# check if image size is too smallif cols > W or rows > H:print("Image too small for specified cols!")exit(0)# an ASCII image is a list of character stringsaimg = []# generate the list of tile dimensionsfor j in range(rows):# 计算每个图像小块的起始和结束 y 坐标y1 = int(j*h)y2 = int((j+1)*h)# correct the last tileif j == rows-1:y2 = H# append an empty stringaimg.append("")for i in range(cols):# crop the image to fit the tilex1 = int(i*w)x2 = int((i+1)*w)# correct the last tileif i == cols-1:x2 = W# crop the image to extract the tile into another Image objectimg = image.crop((x1, y1, x2, y2))# get the average luminance # 获取网格的平均亮度值avg = int(getAverageL(img))# look up the ASCII character for grayscale value (avg)if moreLevels:# 将平均亮度值[0,255]对用到70级灰度[0,69]gsval = gscale1[int((avg*69)/255)]else:# 将平均亮度值[0,255]对用到10级灰度[0,9]gsval = gscale2[int((avg*9)/255)]# append the ASCII character to the stringaimg[j] += gsval# return text imagereturn aimg# main() function
def main():# create parserdescStr = "This program converts an image into ASCII art."parser = argparse.ArgumentParser(description=descStr)# add expected argumentsparser.add_argument('--file', dest='imgFile', required=True)parser.add_argument('--scale', dest='scale', required=False)parser.add_argument('--out', dest='outFile', required=False)parser.add_argument('--cols', dest='cols', required=False)parser.add_argument('--morelevels', dest='moreLevels', action='store_true')# parse argumentsargs = parser.parse_args()imgFile = args.imgFile# set output fileoutFile = 'out.txt'if args.outFile:outFile = args.outFile# set scale default as 0.43, which suits a Courier fontscale = 0.43if args.scale:scale = float(args.scale)# set colscols = 80if args.cols:cols = int(args.cols)print('generating ASCII art...')# convert image to ASCII textaimg = covertImageToAscii(imgFile, cols, scale, args.moreLevels) # open a new text filef = open(outFile, 'w')# write each string in the list to the new filefor row in aimg:f.write(row + '\n')# clean upf.close()print("ASCII art written to %s" % outFile)# call main
if __name__ == '__main__':main()
https://github.com/electronut/pp/blob/master/ascii/ascii.py
将完整代码保存到py文件中
打开终端,切换到ascii.py目录
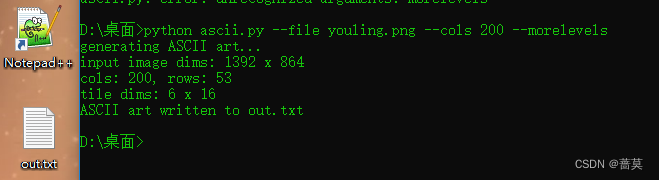
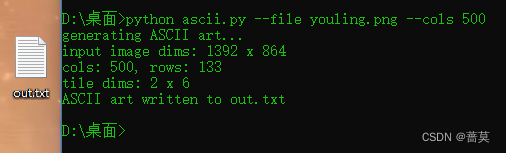
输入下面代码
$ python ascii.py --file data/robot.jpg --cols 100
将 data/robot.jpg 替换为你想使用的图像文件的相对路径
使用vscode打开out.txt文件,使用Ctrl±可以缩小,可以看到全屏,只能看10灰度等级
还可使用notepad查看out.txt文件

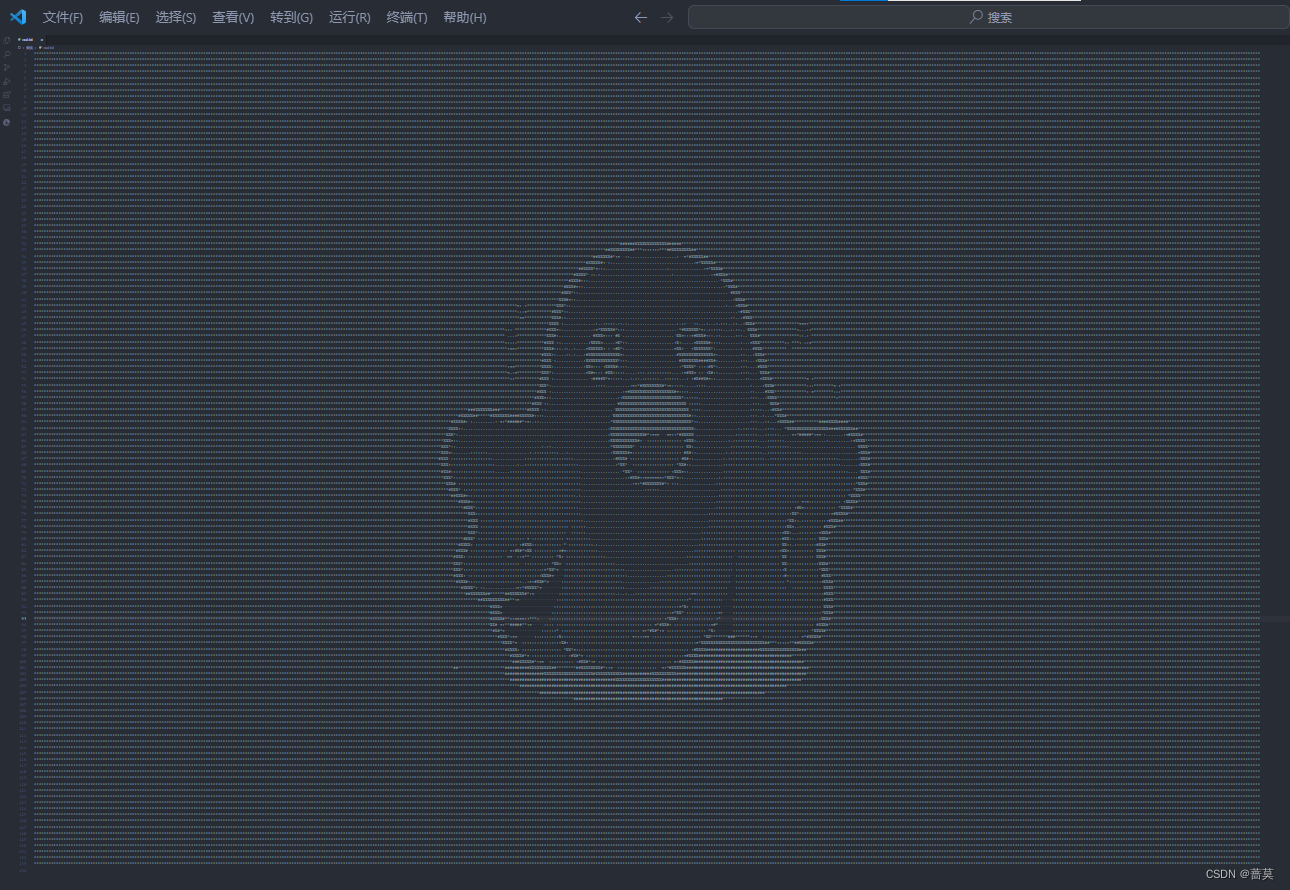

–morelevels就是70灰度等级