文章目录
- 【Unity】终极移动指南-注解(从移动、抓钩到贪吃蛇)
- 观前提醒
- 链接地址:
- 内容
- 一、 transform移动操作
- 【1】`transform.position`变换位置
- 【2】`transform.Translate`平移
- 【3】`transform.position +=`类似平移的操作
- 【4】定向矢量
- 【5】停在指定位置(未旋转与已旋转的游戏对象不同操作下的区别)
- 二、移动距离、方向和目的地
- 【1】查找两个对象之间的距离
- 【2】找到两个物体之间的方向
- 【3】使用 `MoveTowards` 移动到目的地
- 三、 `Lerp`
- 【1】使用 `Mathf Lerp` 移动
- 【2】`Lerp` 缓入
- 【3】 `Lerp` 缓出
- 【4】`Lerp` 反弹
- 四、`Rigidbody`控制移动操作
- 【1】如何使用键盘移动
- 【2】使用 `AddForce` 移动刚体
- 【3】使用`AddForce` 跳跃
- 【4】恒定速度移动
- 【5】使用 `MovePosition` 移动刚体
- 五、运动学平台
- 【1】unity操作
- 【2】`Transform`的写法:
- 【3】刚体的写法:
- 总结:`Rigidbody`和`transform`的不同
- 六、四元数
- 【1】使用四元数欧拉旋转
- 【2】使用 `LookRotation` 旋转查看移动对象
- 【3】使用 `FromToRotation` 旋转查看移动对象
- 【4】使用四元数 `AngleAxis` 旋转
- 【5】 `RotateAround` 围绕另一个对象旋转
- 七、`Camera`(**复刻简单的`cinemachine`插件**)
- 【1】相机跟随玩家
- 【2】使用 `SmoothDamp` 顺畅地跟随带有相机的玩家
- 【3】设置相机边界
- 八、子弹发射与弹道轨迹射线提示
- 【1】简单的子弹发射
- 【2】使用物理模拟脚本的弹道轨迹
- 【3】按键控制子弹发射(Debug的过程)
- 【4】具有独立物理场景的射弹轨迹(让子弹变得像弹夹一样)
- 【5】为对象添加弹性(化为无情的网球发射机)
- 【6】带点的射弹轨迹线:(03:56)
- 【7】物体处的射弹轨迹停止线
- 【8】给子弹添加渲染
- 【9】弹道长度和射弹速度
- 【10】用鼠标改变和长度速度
- 九、磁铁/抓钩
- 【1】射出磁铁
- 【2】取回磁铁
- 【3】用磁铁拉住另一个物体
- 【4】创建抓钩
- 十、贪吃蛇
- 【1】拾起范围内的物体
- 【2】跟随物体,蛇形运动
- 【3】吃东西时跟随物体,蛇运动并长出蛇
- 【4】使用电影机`cinemachine`跟踪蛇头
- 【5】使用带边界的电影机跟踪对象
- 【6】贪吃蛇游戏,空格增加移动速度
【Unity】终极移动指南-注解(从移动、抓钩到贪吃蛇)
观前提醒
链接地址:
https://www.bilibili.com/video/BV15L411y7a3
https://www.youtube.com/watch?v=OHJS44fIDCU
完整项目|:https://github.com/MemoryLeakHub/MovementUnity
感悟:
为什么我打开项目,什么都没有啊!(¬д¬。)
弄这个项目时,因为视频是机翻的,看得很难受,每次出现bug,我就不得不去猜它unity的操作,猜我是拆的不对,还是项目本身的问题,但是所幸,我在看了很多文档+ChatGpt的帮助,这些问题都解决了。
内容
一、 transform移动操作
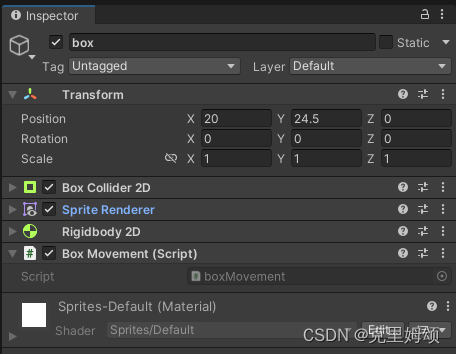
假设我们自己定好了一名游戏对象,并搭建好了场地。
之后配上该有的组件,已经设置好初始位置
Position,还有重力和精灵图等等,而本章所涉及到的代码都在BoxMovement.cs脚本操作,现在就让我们在unity中跟随着摄像机镜头一起学习unity中有关于移动的操作。
具体如下:
【1】transform.position变换位置
transform.position表示当前物体的位置,包含三维坐标轴,因此我们下面这段脚本的操作其实就是修改X坐标轴出现的位置,而由于我们目前在2D项目中操作,所以就可以直接修改前两个值即可,而不用管Z轴。
void Update(){float nowX = 22.5f;transform.position = new Vector3(10, transform.position.y);
}
transform.position.y就表示当前y轴的值只会跟跟随当前游戏对象的受力发生改变(因为我加了刚体组件),而不同于X轴已经修改了值。
【2】transform.Translate平移
transform.Translate(X, 0, 0);表示只修改X轴上的移动,X是指定的移动量。
void Update(){float X = 0.01f;transform.Translate(X, 0, 0);
}
它是以每秒移动0.01单位进行操作的,也即transform.Translate(X/1.0f, 0, 0)(只为方便理解),秒不同于帧,帧是每秒的渲染帧数,比如我想游戏以60FPS运行,就意味着每秒渲染60帧。
【3】transform.position +=类似平移的操作
将当前物体沿X轴方向移动,但这个移动是与时间
Time.deltaTime有关的,+=则将当前物体的位置与右边的向量相加,从而改变了物体的位置。
public float X = 0.1f;
void Update(){transform.position += new Vector3(X * Time.deltaTime, 0);
}
该脚本就意味着我们目前是以每帧移动0.1个单位,因此你会发现它比之前的transform.Translate(X, 0, 0);移动缓慢。
【4】定向矢量
它是【3】的简短写法,
Vector3.right是一个单位向量,表示X轴的正方向,也就是(1, 0, 0),会让每帧下的物体位置向右移动,而移动的速度由X控制,并且移动速度会在不同的帧率下保持一致。
public float X = 0.1f;
void Update(){transform.position += Vector3.right * X * Time.deltaTime;
}
Unity中移动涉及到的方向向量主要是单位向量,表示在三维空间中的各种方向。
| 方向向量 | 向量值 | 描述 |
|---|---|---|
| Vector3.forward | (0, 0, 1) | 物体正面(Z轴正方向)的单位向量 |
| Vector3.back | (0, 0, -1) | 物体背面(Z轴负方向)的单位向量 |
| Vector3.right | (1, 0, 0) | 物体右侧(X轴正方向)的单位向量 |
| Vector3.left | (-1, 0, 0) | 物体左侧(X轴负方向)的单位向量 |
| Vector3.up | (0, 1, 0) | 物体上方(Y轴正方向)的单位向量 |
| Vector3.down | (0, -1, 0) | 物体下方(Y轴负方向)的单位向量 |
| Vector3(1.0f, 1.0f, 1.0f).normalized | (1, 1, 1).normalized | 对角线上方向的单位向量 |
需要注意的是,这些向量通常需要标准化(normalized),以确保它们的长度为1,这样它们才是单位向量。
【5】停在指定位置(未旋转与已旋转的游戏对象不同操作下的区别)
根据前面所学的知识,可知稍微改进一下【2】、【3】、【4】的内容就可以实现,而
StopX就是我们要停下来的最终X轴位置。
public float X = 0.1f;
void Update(){float StopX = 22.0f;if(transform.position.x >= StopX) return;transform.position += Vector3.right * X * Time.deltaTime;//[4]//transform.position += new Vector3(X * Time.deltaTime);//[3]//transform.Translate(Vector3.right * X * Time.deltaTime);//[2]
}
结论(在游戏对象没有刚体组件的情况下):
如果是移动旋转后的游戏对象,
[3]和[4]的移动操作不会影响它已经旋转的结果,它最终仍会移动到指定的X轴和Y轴位置。但是
[2]的平移X轴的移动操作则会考虑它已经旋转的问题,到达终点Y轴的位置会发生变化,与[3]和[4]的操作结果不同,而X轴的值仍旧保持不变。
这就是平移与改变位置的操作的不同。
二、移动距离、方向和目的地
【1】查找两个对象之间的距离
可以通过简单的双方减去矢量的位置,就能计算相互之间的距离了。
public class BoxMovement : MonoBehaviour
{public float X = 0.1f;private GameObject redBox;private void Start(){// 移除GameObject的类型声明redBox = GameObject.Find("redBox");}void Update(){if (redBox != null) // 检查redBox是否被正确找到{Vector3 heading = redBox.transform.position - transform.position;var distance = heading.magnitude;Debug.Log(distance);//显示距离transform.position += Vector3.right * X * Time.deltaTime;}else{Debug.LogError("redBox not found!"); // 如果找不到redBox,记录错误消息}}
}
①获取游戏对象的两种方式
- 使用
GameObject.Find("GameObject");,注意私有变量表示内部重新声明了,这就会导致无法在Update()种访问该变量,因此要按如上脚本的写法,添加对游戏对象判断是否为空的检查,否则unity将会引发异常。 - 公开引用或者序列化操作。
②Vector3.magnitude是什么?
一个用于计算三维向量长度(模)的属性,即数学公式 ( x 2 + y 2 + z 2 ) \sqrt(x^2+y^2+z^2) (x2+y2+z2)
【2】找到两个物体之间的方向
在一中【4】,我们就讲过向量的用法,通过对**二中【1】**的改造,获得两个游戏对象的向量,然后归一化,就可以得到两个物体之间的方向。
Vector3 heading = redBox.transform.position - transform.position;
var distance = heading.magnitude;
var direction = heading.normalized;
transform.Translate(direction * X * Time.deltaTime);
后续如果需要改变最终目的地redBox的Y轴位置,则只需修改heading.y的值,完全看自己的需求。
而上面的X值也可以进行修改,变为速度 s p e e d = d i s t a n c e t o t a l t i m e speed=\frac{distance}{totaltime} speed=totaltimedistance,控制物体以特定的速度到达目的地,也即我们希望通过修改 totaltime \text{totaltime} totaltime在特定时间内移动到目的地。
【3】使用 MoveTowards 移动到目的地
使用
Vector2.MoveTowards函数逐渐将物体从当前位置移动到target位置,每一帧移动的距离由step决定,以实现平滑移动的效果,同时没必要对是否到达目的地这个条件进行判断了。
var speed = 2;
var step = speed * Time.deltaTime;
var target = redBox.transform.position;
transform.position = Vector2.MoveTowards(transform.position, target, step);
在视频当中,作者使用Vector3.Distance计算两个Vector3类型的点之间的距离。它的用法如下:
float distance = Vector3.Distance(pointA, pointB);
因此后续补上,用来停止作者自己写的计时器,另外距离的单位通常与你的游戏场景的单位一致,例如米或厘米,这取决于你的游戏设置。
if(Vector3.Distance(transform.position,target)<0.001f) return;
三、 Lerp
box带有刚体2D(bodyType为动态,重力0)、碰撞体2D、sprite Render组件
redBox带有刚体2D(bodyType为静态,重力0)、碰撞体2D、sprite Render组件
【1】使用 Mathf Lerp 移动
通过
Mathf.Lerp(线性插值)返回在给定的时间timeElapsed/totalTime(插值因子t)从起始值this.transform.position.x到目标值target.x之间的一个新值x。
public GameObject redBox;private float timeElapsed = 0.0f;private void Update(){timeElapsed += Time.deltaTime;var target = redBox.transform.position;var totalTime = 1.5f;var time = timeElapsed / totalTime;var boxStartPosition = this.transform.position;this.transform.position = Vector3.Lerp(boxStartPosition, target, time);if (this.transform.position.x >= redBox.transform.position.x){return;}}
Mathf.Lerp有以下用途:
-
平滑移动:
Mathf.Lerp来平滑地移动物体或相机从一个位置到另一个位置,而不是瞬间跳转。 -
颜色渐变:
Mathf.Lerp在两种颜色之间进行插值,以创建颜色渐变效果。 -
动画: 在动画制作中,
Mathf.Lerp可用于插值关键帧之间的值,以创建流畅的动画效果,如移动、旋转和缩放。 -
过渡效果: 用于创建过渡效果,例如淡入淡出效果或过渡画面之间的混合效果。
注意:插值因子t通常在0到1之间,表示从起始值到结束值的插值程度。例如,t为0.5表示取起始值和结束值的中间值。
可以用var timeElapsed+= Time.deltaTime;更好地表示已经过去时间这个含义。
【2】Lerp 缓入
使用
Vector3.Lerp函数,根据缓动函数EaseIn的返回值,逐渐将当前游戏对象的位置向target移动。Lerp函数通过插值将两个位置之间的中间值计算出来,根据时间的增加,游戏对象的位置会逐渐靠近目标位置,具有缓动效果。
private float EaseIn(float k)是一个自定义的缓动函数,使用了一个简单的缓动函数k * k * k,它实现了一种缓慢开始的效果,使物体开始时移动速度较慢,然后逐渐加速。
private void Update(){timeElapsed += Time.deltaTime;var target = redBox.transform.position;var totalTime = 1.5f;var time = timeElapsed / totalTime;var boxStartPosition = this.transform.position;this.transform.position = Vector3.Lerp(boxStartPosition, target, EaseIn(time));if (this.transform.position.x >= redBox.transform.position.x){return;}
}private float EaseIn(float k){return k * k * k;
}
【3】 Lerp 缓出
这个函数接受一个时间参数
k,值在范围[0, 1]内,表示经过的时间占总时间的比例。函数返回一个经过缓动计算的值,该值会在输入时间k接近1时迅速增加,以实现缓慢结束的效果。
private float EaseOut(float k){return 1f+((k -= 1f)*k*k);
}
优先级拆分:
k -= 1f:首先,将k减去1,这是为了将时间范围从 [0, 1] 映射到 [-1, 0]。k * k * k,然后求立方。1f + ...:最后,将上述计算的结果与1相加,以将值的范围映射回 [0, 1],并使得在输入时间k靠近1时值迅速增加,从而实现了缓慢结束的效果。
【4】Lerp 反弹
看自己怎么写的吧,下面这里就示范模拟不同阶段造成不同程度的反弹效果,也要考虑Lerp里面的插值因子
t的值大小,这真的太TM难调了,在X轴方向上很难看到效果, 在Y轴方向上因为加入了重力的影响,所以会有一个细微的不断反弹,然后最后平稳至固定位置。
下面的效果还是固定time变量值的情况,如果考虑到timeElapsed不断增大,那么最终box物体就能固定到redBox位置(总之要自行调好time的大小,不然看不到效果)
private float BounceIn (float k) {return 1f - BounceOut(1f - k);}private float BounceOut (float k) { if (k < (1f/2.75f)) {return 7.5625f*k*k; }else if (k < (2f/2.75f)) {return 7.5625f*(k -= (1.5f/2.75f))*k + 0.75f;}else if (k < (2.5f/2.75f)) {return 7.5625f *(k -= (2.25f/2.75f))*k + 0.9375f;}else {return 7.5625f*(k -= (2.625f/2.75f))*k + 0.984375f;}}private float BounceInOut (float k) {if (k < 0.5f) return BounceIn(k*2f)*0.5f;return BounceOut(k*2f - 1f)*0.5f + 0.5f;}
四、Rigidbody控制移动操作
【1】如何使用键盘移动
使用
Input.GetAxis来获取玩家输入的水平和垂直轴上的值。通常,这对应于键盘上的方向键(左右和上下箭头)或游戏手柄的摇杆输入。
Vector2 movementDirection = new Vector2(Input.GetAxis("Horizontal"), Input.GetAxis("Vertical"));
transform.Translate(movementDirection * 2 *Time.deltaTime);
【2】使用 AddForce 移动刚体
通过刚体组件实现物体的一个任意方向上的移动。
注意:如果不能实现移动,就检查刚体组件是否需要加物理材质。
public class BoxMovement : MonoBehaviour
{private Rigidbody2D rb;private void Start(){rb = GetComponent<Rigidbody2D>();}void Update(){var speed = 10f;Vector2 movementDirection = new Vector2(Input.GetAxis("Horizontal"), Input.GetAxis("Vertical"));rb.AddForce(movementDirection * speed);}
}
【3】使用AddForce 跳跃
检测玩家是否按下了"上箭头"键(Up Arrow key),如果按下了,就给物体应用一个向上的冲量来使其跳跃。
ForceMode2D.Impulse是一个枚举值,表示应用冲量的方式。在这里,使用Impulse模式,表示应用一个瞬时的冲量,即瞬间增加速度。
if (Input.GetKeyDown(KeyCode.UpArrow)){var amount = 6f;rb.AddForce(Vector2.up * amount, ForceMode2D.Impulse);
}
【4】恒定速度移动
rb.velocity表示物体的速度,即它以恒定的速度移动,下面操作不同于AddForce有一个施加力,物体会立即改变速度,没有物理模拟效果。
var speed = 10f;
Vector2 movementDirection = new Vector2(Input.GetAxis("Horizontal"), Input.GetAxis("Vertical"));
rb.velocity = movementDirection * speed;
【5】使用 MovePosition 移动刚体
MovePosition会直接改变位置,因此就通过当前帧的增量做到移动的效果,但是它改变的非常平滑,直接到某个位置,没有看到一个渐变的效果,这是它不同于AddForce的地方。
var speed = 10f;
Vector2 movementDirection = new Vector2(Input.GetAxis("Horizontal"), Input.GetAxis("Vertical"));
rb.MovePosition(
(Vector2)transform.position +
(movementDirection * speed * Time.deltaTime));
| 区别 | MovePosition | AddForce |
|---|---|---|
| 移动方式 | 修改位置,这方面是非物理特性的(其他方面不改变) | 施加力改变速度和位置 |
| 适用场景 | 运动学平台移动、摄像机移动等等 | 物体爆炸效果、角色加速,等 |
| 平滑性 | 高,无速度渐变 | 低,模拟惯性 |
五、运动学平台
【1】unity操作
给我们红色平台加入运动学BodyType
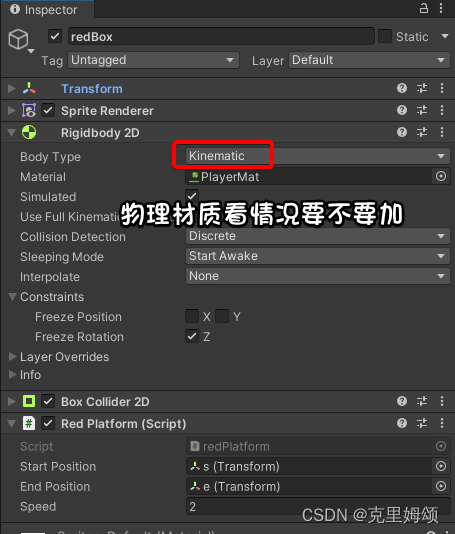
自己引用开始的位置和结束的位置,也可以自己设置数值

不同Body Type的适用范围
-
Dynamic(动态刚体):
-
bodyType设置为Dynamic时,刚体会受到物理引擎的模拟,包括重力、碰撞、力和速度等。 -
动态刚体会自由地响应外部力,例如重力、施加的力等,并根据物理规则进行模拟,可以在物理世界中产生真实的动力学行为。
-
适用于需要物理模拟的物体,如角色、子弹、球体等。这些物体可以受到外力的影响,并与其他物体发生碰撞。
-
-
Kinematic(运动学刚体):
-
bodyType设置为Kinematic时,刚体不受物理引擎的力的影响(角色对象就推不动),但仍然可以与其他物体发生碰撞。 -
运动学刚体通常由开发者手动控制,可以通过脚本来移动,但不会受到物理引擎的力和重力的影响。
-
适用于需要精确控制位置和移动的物体,如平台、门、电梯等。它们可以与其他物体交互,但不会受到外部力的干扰。
-
-
Static(静态刚体):
-
bodyType设置为Static时,刚体被视为静态,不会受到任何外部力的影响,也不会移动。 -
静态刚体通常用于固定的物体,如墙壁、地板、建筑等。它们不会响应物理引擎的模拟,不参与碰撞响应,只是作为静态的环境元素存在。
-
【2】Transform的写法:
Mathf.PingPng(t,length);实现循环效果,t参数代表一个随时间变化的值,而length代表循环的周期。
public class redPlatform : MonoBehaviour
{public Transform startPosition;public Transform endPosition;public float speed = 3f;private void Update(){float time = Mathf.PingPong(Time.time * speed, 1);Vector3 position = Vector3.Lerp(startPosition.position, endPosition.position, time);transform.position = position;}
}
【3】刚体的写法:
上面的【2】和这里的【3】的效果是一致的。
public class redPlatform : MonoBehaviour
{public Transform startPosition;public Transform endPosition;public float speed = 3f;private Rigidbody2D rb;private void Start(){rb = GetComponent<Rigidbody2D>();}private void Update(){float time = Mathf.PingPong(Time.time * speed, 1);Vector3 position = Vector3.Lerp(startPosition.position, endPosition.position, time);rb.MovePosition(position);}
}
总结:Rigidbody和transform的不同
Rigidbody移动:
-
物理模拟:当使用刚体移动时,物体会受到物理引擎的模拟,包括重力、碰撞和其他力的影响,同时它也会带有着这些物理性质,与周围的环境交互。
-
碰撞检测:刚体会自动进行碰撞检测和响应,避免物体穿越其他物体。
-
物理引擎:刚体移动是由物理引擎控制的,通常用于需要物理交互和模拟的情况,如角色控制、物体受力推动等。
Transform移动:
- 非物理模拟:直接改变Transform的位置是非物理性的移动方式,物体会立即到达新的位置,不受物理引擎的影响。
- 无碰撞检测:Transform移动不会自动进行碰撞检测和响应,这意味着物体可以穿越其他物体,可能导致不自然的现象。
- 控制简单:Transform移动更容易控制,可以用于一些简单的情况,如UI元素移动、相机跟随、物体的初始位置设置等。
防止混淆:
MovePosition和velocity,它们类似于Transform组件的移动,但也有物理特性。
身边趣闻:
人类的本质就是装逼和抄袭,我经常听到某群的大佬们说Unity自带的物理效果太烂了!不如自己造轮子,然后他们中就有人就直接拿蔚蓝的开源代码研究有没有物理特性了。
( ゚Д゚)b (・ω・)b (o^-')b (* ̄▽ ̄)d
六、四元数
本章总结:
都是在讲轴向量与欧拉角不同的方式实现旋转这个目标。
【1】使用四元数欧拉旋转
2D旋转的原理(欧拉角实现,改变局部坐标轴的Z轴)
Quaternion.Euler方法来创建一个绕着Z轴旋转degrees度的四元数。Vector3.forward代表了世界坐标系中的Z轴方向,因此Vector3.forward * degrees表示绕着Z轴旋转指定角度的旋转。
transform.rotation = ...:将计算出的四元数赋值给物体的旋转属性
void Update(){var degrees = 30;transform.rotation = Quaternion.Euler(Vector3.forward * degrees);
}
效果如下:

简单了解四元数:
四元数是一种复数扩展到三维空间的数学概念,用于表示旋转,可以避免万向锁问题(Gimbal Lock)
它由一个标量(实部)和一个三维向量(虚部)组成,可以表示为q = s + xi + yj + zk,其中s是标量部分,x、y、z是虚部分。
更多的内容请看这篇文章四元数-欧拉角-万向锁 - 知乎 (zhihu.com)
【2】使用 LookRotation 旋转查看移动对象
vectorToTarget计算的是从当前物体到redBox的位置向量
rotateVectorToTarget旋转了vectorToTarget向量,使其旋转90度(也就是微调,会使得transform的值跟不微调的值不一样,但是最后由于用了LookRotation函数,所以看到的效果是一致)。
Quaternion.LookRotation(Vector3.forward, rotateVectorToTarget)创建了一个四元数,该四元数会使当前物体的X轴指向rotateVectorToTarget,使物体朝向redBox位置。
总结:box朝向另一个物体 redBox 的位置,但是朝向时会旋转90度。
public class BoxMovement : MonoBehaviour
{public GameObject redBox;void Update(){Vector3 vectorToTarget = redBox.transform.position - transform.position;Vector3 rotateVectorToTarget = Quaternion.Euler(0, 0, 90) * vectorToTarget;transform.rotation = Quaternion.LookRotation(Vector3.forward, rotateVectorToTarget);}
}
效果如下:
再次复述一遍原理,在这个2D场景中,我们一个全局坐标轴是不会发生任何改变的,改变的是局部坐标轴,即Transform的Z轴值会发生变化,从而模拟出一个物体旋转的效果,下图显示的是全局(没显示的话,就点击游戏对象后,按W键)
想理解更多原理就请看以下两篇:
理解Quaternion.LookRotation()_quaternion.lookrotation(,)_keneyr的博客-CSDN博客
https://devpress.csdn.net/game/6462fb0b6618ef1144e308d8.html
【3】使用 FromToRotation 旋转查看移动对象
我看到的效果跟上面【2】的例子一致,局部坐标轴的改动也是类似,一开始我想不明白为什么unity要多次一举,他们到底有什么地方不同?后面看了一下VS的文档注释。
void Update(){Vector3 vectorToTarget = redBox.transform.position - transform.position;transform.rotation = Quaternion.FromToRotation(Vector3.right, vectorToTarget);
}
根据Unity官方文档,Quaternion.FromToRotation 和 Quaternion.LookRotation 都用于设置一个四元数来旋转一个物体以使其朝向目标方向,但它们的用途略有不同:
-
Quaternion.FromToRotation:Quaternion.FromToRotation用于创建一个将一个向量从一个方向旋转到另一个方向的四元数。- 你需要提供两个向量作为参数,分别是原始方向和目标方向。
- 这个函数不考虑物体的当前朝向,它只计算从一个方向旋转到另一个方向所需的旋转。这意味着它通常用于在不考虑当前旋转的情况下将对象朝向某个方向。
-
Quaternion.LookRotation:Quaternion.LookRotation用于创建一个四元数,将物体的前方(通常是Z轴)指向目标方向。- 你需要提供两个参数:一个用于指定物体的"上方"方向(通常是Y轴),另一个用于指定目标方向(2D项目,我们并不需要改动Y轴)
- 这个函数考虑了物体当前的旋转,以确保物体的"上方"与指定的方向保持一致,同时前方指向目标方向。这通常用于将对象朝向某个目标,但保持物体当前的"上方"方向。
结论:
在unity的显示当中,它们的局部坐标轴的变化效果都是一致,都是旋转Z轴,令
X轴指向移动的目标,两个不同的函数区别在于改变Z轴旋转的方式是不一样的,因此你就会发现transform.rotation当中的Z轴值完全不一致。
【4】使用四元数 AngleAxis 旋转
通过轴向量实现旋转,不同于欧拉角,方式不一样,结果跟【1】一致。
void Update(){var degree = 30;transform.rotation = Quaternion.AngleAxis(degree, Vector3.forward);
}
【5】 RotateAround 围绕另一个对象旋转
Transform.RotateAround是Unity中的一个方法,用于围绕指定点执行旋转。
point:旋转的中心点,即物体绕其旋转的点的坐标。
axis:旋转轴,指定物体绕哪个轴进行旋转。
angle:旋转的角度,以度为单位,表示物体将围绕旋转轴旋转的角度。
void Update(){var rotationSpeed = 30;transform.RotateAround(blueBox.transform.position,Vector3.forward, rotationSpeed * Time.deltaTime);
}
效果如下(3D观察,不会强制改变某个轴的指向另一个物体):
RotateAround 顺时针旋转
transform.RotateAround(blueBox.transform.position,Vector3.back, rotationSpeed * Time.deltaTime);
举一反三
如果想要完成实现
box单方面去面向blueBox,就参考【2】提前微调即可。
问题①:那么两个旋转的游戏对象怎么相互注视?
提示:
Vector3.back和LookRotation这两个怎么用
问题②:怎么制作一个小型太阳系?
其实不就是多个不同星球绕着同一个太阳嘛,速度和距离不一样罢了。
七、Camera(复刻简单的cinemachine插件)
【1】相机跟随玩家
其实就是修改摄像机的position属性,另外注意Z值,不要只看视频瞎写成0。
public class Box : MonoBehaviour
{private Rigidbody2D boxPhysicsRb;private Vector2 movementDirection;public GameObject camera;private void Start(){boxPhysicsRb = GetComponent<Rigidbody2D>();}private void Update(){movementDirection = new Vector2(Input.GetAxis("Horizontal"), Input.GetAxis("Vertical"));var speed = 10f;boxPhysicsRb.MovePosition((Vector2)this.transform.position +(movementDirection * speed * Time.deltaTime));camera.transform.position = new Vector3(this.transform.position.x,this.transform.position.y, -4);}
}
【2】使用 SmoothDamp 顺畅地跟随带有相机的玩家
Vector3.SmoothDamp 是Unity中的一个函数,用于平滑地将一个向量从一个位置移动到另一个位置。它经常用于摄像机跟随、平滑移动物体等场景,以避免突兀的移动效果。以下是 Vector3.SmoothDamp 的基本用法和参数解释:
Vector3 SmoothDamp(Vector3 current, Vector3 target, ref Vector3 currentVelocity, float smoothTime, float maxSpeed = Mathf.Infinity, float deltaTime = Time.deltaTime);
-
current:当前位置,即从哪里开始移动。 -
target:目标位置,即要移动到的位置。 -
currentVelocity:引用参数,用于存储当前速度。通常,你需要在外部定义一个变量来存储速度,然后将其传递给SmoothDamp函数,以便函数在每帧中更新速度。 -
smoothTime:平滑时间,表示从current移动到target所需的时间。较小的值会导致更快的平滑移动,较大的值会导致更慢的平滑移动。 -
maxSpeed(可选):最大速度限制,以确保移动不会太快。默认情况下,它被设置为正无穷大,可以根据需要进行调整。 -
deltaTime(可选):每帧的时间间隔。通常,你可以使用Time.deltaTime作为这个参数,以便平滑效果与帧率无关。
public class Box : MonoBehaviour
{private Rigidbody2D boxPhysicsRb;private Vector2 movementDirection;public GameObject camera;private void Start(){boxPhysicsRb = GetComponent<Rigidbody2D>();}private void Update(){movementDirection = new Vector2(Input.GetAxis("Horizontal"), Input.GetAxis("Vertical"));var speed = 10f;boxPhysicsRb.MovePosition((Vector2)this.transform.position +(movementDirection * speed * Time.deltaTime));}void LateUpdate(){Vector3 velocity = Vector3.zero;//获取摄像机位置Vector3 targetPosition = new Vector3(boxPhysicsRb.transform.position.x, boxPhysicsRb.transform.position.y, camera.transform.position.z);camera.transform.position = Vector3.SmoothDamp(camera.transform.position, targetPosition, ref velocity, 0.06f);}
}
Lerp也是可以的
camera.transform.position = Vector3.Lerp(camera.transform.position, targetPosition, 10f * Time.deltaTime);
【3】设置相机边界
①移动到特定距离后才移动摄像机:
用
Vector3.Distance(摄像机位置,刚体位置),然后条件判断就是了。缺点:一些细致的边界问题处理麻烦
void LateUpdate(){Vector3 targetPosition = new Vector3(boxPhysicsRb.transform.position.x, boxPhysicsRb.transform.position.y, camera.transform.position.z);Vector3 velocity = Vector3.zero;var distance = Vector3.Distance(camera.transform.position,targetPosition);if (distance > 2f){camera.transform.position = Vector3.SmoothDamp(camera.transform.position,targetPosition, ref velocity, 0.06f);}}
②使用 Matf.Clamp 设置相机边界(移动出范围后,摄像机就不移动了)
Mathf.Clamp是一个常用的数学函数,用于将一个值限制在指定的范围内。它的作用是确保一个值不会超出最小值和最大值之间的范围。具体来说,Mathf.Clamp接受三个参数:
第一个参数是要限制的值。
第二个参数是范围的最小值。
第三个参数是范围的最大值。
void LateUpdate(){Vector3 velocity = Vector3.zero;Vector3 bounds = new Vector3(Mathf.Clamp(boxPhysicsRb.gameObject.transform.position.x, -4f, 4f),Mathf.Clamp(boxPhysicsRb.gameObject.transform.position.y, -4f, 4f),camera.transform.position.z);camera.transform.position = Vector3.SmoothDamp(camera.transform.position, bounds, ref velocity, 0.06f);}
注意:按照Mathf.Clamp的意思,超出范围了,摄像机就不管了,不同于①的意思,所以在实际的游戏中,还要额外设置边界碰撞体,挺麻烦的
八、子弹发射与弹道轨迹射线提示
【1】简单的子弹发射
用键盘旋转角色
public float rotationSpeed = 90f;
void Update(){float horizontalInput = Input.GetAxis("Horizontal");transform.Rotate(Vector3.back * rotationSpeed * Time.deltaTime * horizontalInput);
}
Instantiate 是Unity中的一个函数,用于在游戏运行时(运行时实例化)创建新的游戏对象(GameObject)的副本。
public static Object Instantiate(Object original, Vector3 position, Quaternion rotation);
-
original:要实例化的原始对象。通常是一个预制体(Prefab),也可以是其他可实例化的对象,如音频剪辑、材质等。 -
position:新实例的位置。即要将新实例放置在场景中的位置。 -
rotation:新实例的旋转。即要将新实例旋转到的方向。 -
Instantiate函数将返回一个Object类型的引用。
步骤:
新建子弹预制体,带有刚体组件和在该预制体脚本中的Start()生命周期实现刚体初速度,
public float speed = 10f;
public Rigidbody2D rb;
void Start(){rb.velocity = transform.right * speed;
}
然后在box中新建对象即可,自己需要确定shotGo子弹生成的位置,另外注意刚体的动力学与动态之间的不同。
Instantiate(bulletPref, shootGo.transform.position, rb.gameObject.transform.rotation);
效果如下:
【2】使用物理模拟脚本的弹道轨迹
var bullet = Instantiate(bulletPref, shootGo.transform.position, rb.gameObject.transform.rotation);
bullet.GetComponent<Bullet>().Shoot(force);
接着就稍微改进一下,变成子弹脚本,变成可以公共函数调用即可。
box.cs
var bullet = Instantiate(bulletPref, shootGo.transform.position, rb.gameObject.transform.rotation);
var bs = bullet.GetComponent<BulletScript>();
bs.Test(10);
bulletScript.cs
public class BulletScript : MonoBehaviour
{public float speed = 10f;public Rigidbody2D rb;void Start(){//rb.velocity = transform.right * speed;}public void Test(float speed){Debug.Log("Test"+speed);rb.velocity = transform.right * speed;}
}
然后给box加入LineRender组件,这样就能描绘一条弹道射线(按如下的视频写法确实可以,但是子弹不能发射了)
有问题的代码
public class Box : MonoBehaviour
{public Rigidbody2D rb;public float rotationSpeed = 90f;public GameObject bulletPref;public Transform shootGo;public LineRenderer boxLineRenderer;private void Start(){boxLineRenderer.positionCount = 0;}void Update(){float horizontalInput = Input.GetAxis("Horizontal");transform.Rotate(Vector3.back * rotationSpeed * Time.deltaTime * horizontalInput);var bullet = Instantiate(bulletPref, shootGo.transform.position, rb.gameObject.transform.rotation);var bs = bullet.GetComponent<BulletScript>();bs.Test(10);DrawTrail(bullet);}private void DrawTrail(GameObject bullet){Vector3[] points = new Vector3[50];boxLineRenderer.positionCount = points.Length;float accumulatedTime = 0f;Physics2D.simulationMode = SimulationMode2D.Script;for (int i = 0; i < points.Length; i++){accumulatedTime += Time.fixedDeltaTime;Physics2D.Simulate(accumulatedTime);points[i] = bullet.transform.position;}Physics2D.simulationMode = SimulationMode2D.FixedUpdate;boxLineRenderer.SetPositions(points);Destroy(bullet.gameObject);}
}
因为Physics2D.simulationMode = SimulationMode2D.Script会与我们的子弹发射逻辑产生冲突,那么问题变成了只能自己写物理模拟了。
开玩笑的呢,其实就是改个逻辑就好,不让物理模拟和子弹发射的代码逻辑出现在同一个局部作用域(问题:如果我们的逻辑过于复杂、不控制出现的过多子弹数,性能会很差,看你后续是否需要【3】的需求)。
private float previousBoxRotation = -1f;
void Update(){//...if (previousBoxRotation != this.transform.rotation.eulerAngles.z){DrawTrail(bullet);previousBoxRotation = this.transform.rotation.eulerAngles.z;}
}
【3】按键控制子弹发射(Debug的过程)
我们在上面有问题的代码基础上改进,按住空格键前显示射线,松开就抛出子弹,这也符合我们玩游戏的逻辑。
public class Box : MonoBehaviour
{public Rigidbody2D rb;public float rotationSpeed = 90f;public GameObject bulletPref;public Transform shootGo;public LineRenderer boxLineRenderer;private void Start(){boxLineRenderer.positionCount = 0;}void Update(){float horizontalInput = Input.GetAxis("Horizontal");transform.Rotate(Vector3.back * rotationSpeed * Time.deltaTime * horizontalInput);FireBullet();}private void FireBullet(){GameObject bullet = null;if (Input.GetKeyDown(KeyCode.Space)){bullet = Instantiate(bulletPref, shootGo.transform.position, rb.gameObject.transform.rotation);DrawTrail(bullet);}else if(Input.GetKeyUp(KeyCode.Space)){bullet = Instantiate(bulletPref, shootGo.transform.position, rb.gameObject.transform.rotation);bullet.GetComponent<BulletScript>().Test(5f);}}private void DrawTrail(GameObject bullet){Vector3[] points = new Vector3[50];float accumulatedTime = 0f;Physics2D.simulationMode = SimulationMode2D.Script;for (int i = 0; i < points.Length; i++){accumulatedTime += Time.fixedDeltaTime;Physics2D.Simulate(accumulatedTime);points[i] = bullet.transform.position;}Physics2D.simulationMode = SimulationMode2D.FixedUpdate;boxLineRenderer.positionCount = points.Length;boxLineRenderer.SetPositions(points);Destroy(bullet.gameObject);}
}
效果如下:
意外,这是因为没有改射线的属性。
public class Box : MonoBehaviour
{public Rigidbody2D rb;public float rotationSpeed = 90f;public GameObject bulletPref;public Transform shootGo;public LineRenderer boxLineRenderer;private bool isDrawingTrajectory = false;private GameObject bullet = null;void Update(){float horizontalInput = Input.GetAxis("Horizontal");transform.Rotate(Vector3.back * rotationSpeed * Time.deltaTime * horizontalInput);FireLogic();}private void FireLogic(){if (Input.GetKeyDown(KeyCode.Space)){StartDrawingTrajectory();}else if(Input.GetKeyUp(KeyCode.Space)){LaunchBullet();}if (isDrawingTrajectory){bullet = Instantiate(bulletPref, shootGo.transform.position, rb.gameObject.transform.rotation);DrawTrail(bullet);}}private void StartDrawingTrajectory(){isDrawingTrajectory = true;boxLineRenderer.enabled = true;boxLineRenderer.positionCount = 1;boxLineRenderer.SetPosition(0, shootGo.position);}private void LaunchBullet(){isDrawingTrajectory = false;boxLineRenderer.enabled = false;bullet = Instantiate(bulletPref, shootGo.transform.position, rb.gameObject.transform.rotation);bullet.GetComponent<BulletScript>().Test(5f);}private void DrawTrail(GameObject bullet){Vector3[] points = new Vector3[50];float accumulatedTime = 0f;Physics2D.simulationMode = SimulationMode2D.Script;for (int i = 0; i < points.Length; i++){accumulatedTime += Time.fixedDeltaTime;Physics2D.Simulate(accumulatedTime);points[i] = bullet.transform.position;}Physics2D.simulationMode = SimulationMode2D.FixedUpdate;boxLineRenderer.positionCount = points.Length;boxLineRenderer.SetPositions(points);Destroy(bullet.gameObject);}
}
效果如下:
累了,毁灭吧。
下面就是最终效果了(自己写物理效果,各位也可以看需要修改)
public class Box : MonoBehaviour
{// 存储子弹的预制体(Prefab)public GameObject bulletPrefab;// 存储发射点的Transform对象public Transform shootGo;// 用于绘制轨迹的线渲染器public LineRenderer boxLineRenderer;// 游戏对象的旋转速度public float rotationSpeed = 90f;// 子弹发射的力量public float launchForce = 10f;// 绘制轨迹的持续时间public float timeToDrawTrajectory = 2f;// 子弹的生存时间public float bulletLifeTime = 3f;private bool isDrawingTrajectory = false;private void Update(){// 检测并处理旋转CheckRotate();// 处理子弹发射逻辑和轨迹绘制FireWithTrajectory();}private void CheckRotate(){// 获取水平输入(通常是键盘上的左右箭头或A/D键)float horizontalInput = Input.GetAxis("Horizontal");// 根据输入旋转游戏对象transform.Rotate(Vector3.back * rotationSpeed * Time.deltaTime * horizontalInput);}private void FireWithTrajectory(){// 计算从发射点到鼠标位置的方向向量Vector2 dir = (Camera.main.ScreenToWorldPoint(Input.mousePosition) - shootGo.position).normalized;if (Input.GetMouseButtonDown(0)){// 当鼠标左键按下时,开始绘制轨迹StartDrawingTrajectory();}else if (Input.GetMouseButtonUp(0)){// 当鼠标左键释放时,发射子弹LaunchBullet(dir);}if (isDrawingTrajectory){// 如果正在绘制轨迹,继续绘制DrawTrajectory(dir);}}private void StartDrawingTrajectory(){// 开始绘制轨迹isDrawingTrajectory = true;// 启用线渲染器boxLineRenderer.enabled = true;// 设置线渲染器的起始点boxLineRenderer.positionCount = 1;boxLineRenderer.SetPosition(0, shootGo.position);}private void DrawTrajectory(Vector2 dir){// 绘制子弹的轨迹Vector2 currentPosition = shootGo.position;Vector2 currentVelocity = dir * launchForce;float elapsedTime = 0f;int pointCount = 50; // 要绘制的点的数量Vector3[] trajectoryPoints = new Vector3[pointCount];trajectoryPoints[0] = currentPosition;for (int i = 1; i < pointCount; i++){float timeStep = timeToDrawTrajectory / pointCount;elapsedTime += timeStep;currentPosition += currentVelocity * timeStep;// 应用重力currentVelocity += Physics2D.gravity * timeStep;trajectoryPoints[i] = currentPosition;}// 设置线渲染器的点boxLineRenderer.positionCount = pointCount;boxLineRenderer.SetPositions(trajectoryPoints);}private void LaunchBullet(Vector2 dir){// 发射子弹isDrawingTrajectory = false;// 关闭线渲染器boxLineRenderer.enabled = false;// 获取子弹的方向Vector2 direction = dir;// 实例化子弹对象GameObject bullet = Instantiate(bulletPrefab, shootGo.position, Quaternion.identity);// 获取子弹上的BulletScript组件var bs = bullet.GetComponent<BulletScript>();// 调用子弹脚本的Test方法,传递方向和发射力bs.Test(direction, launchForce);// 启动协程,在一定时间后销毁子弹,模拟子弹的生命周期StartCoroutine(DestroyBulletAfterTime(bullet, bulletLifeTime));}private IEnumerator DestroyBulletAfterTime(GameObject bullet, float lifetime){// 等待一定时间后销毁子弹yield return new WaitForSeconds(lifetime);Destroy(bullet);}
}
效果如下(终于成功了):
【4】具有独立物理场景的射弹轨迹(让子弹变得像弹夹一样)
我们继续【2】的部分内容,暂时不理会有bug的部分。
CreatePhysicsScene_Trajectory()方法:
- 用于创建一个新的物理场景来模拟子弹的轨迹。
- 创建名为"PhysicsTrajectorySimulation"的新场景,并设置其物理模式为LocalPhysicsMode.Physics2D。
- 获取新场景的2D物理场景引用。
- 遍历
physicsSceneObjects列表中的每个Transform对象,实例化对应的游戏对象,并将其移动到新场景中。- 如果游戏对象(指的是地面引用)的标签是"StopBullet",则将其Collider2D组件添加到
stopBulletColliders列表中,这样的做法用于确保在物理模拟中,特别是子弹与地面交互时,能够识别带有"StopBullet"标签的地面对象,从而实现特殊的碰撞或物理行为。
public class Box : MonoBehaviour
{public Rigidbody2D rb;public float rotationSpeed = 90f;public GameObject bulletPref;public Transform shootGo;public LineRenderer boxLineRenderer;public List<Transform> physicsSceneObjects = new();public GameObject physicsGround;private float previousBoxRotation = -1f;private Scene sceneSimulation;private PhysicsScene2D physicsScene;private List<Collider2D> stopBulletColliders = new();private void Start(){boxLineRenderer.positionCount = 0;physicsSceneObjects.Add(physicsGround.transform);CreatePhysicsScene_Trajectory();}void Update(){float horizontalInput = Input.GetAxis("Horizontal");transform.Rotate(Vector3.back * rotationSpeed * Time.deltaTime * horizontalInput);var bullet = Instantiate(bulletPref, shootGo.transform.position, rb.gameObject.transform.rotation);var bs = bullet.GetComponent<BulletScript>();bs.Test(10);if (previousBoxRotation != this.transform.rotation.eulerAngles.z){DrawTrail(bullet);previousBoxRotation = this.transform.rotation.eulerAngles.z;}}private void DrawTrail(GameObject bullet){Vector3[] points = new Vector3[50];boxLineRenderer.positionCount = points.Length;float accumulatedTime = 0f;Physics2D.simulationMode = SimulationMode2D.Script;for (int i = 0; i < points.Length; i++){accumulatedTime += Time.fixedDeltaTime;Physics2D.Simulate(accumulatedTime);points[i] = bullet.transform.position;}Physics2D.simulationMode = SimulationMode2D.FixedUpdate;boxLineRenderer.SetPositions(points);Destroy(bullet.gameObject);}private void CreatePhysicsScene_Trajectory(){sceneSimulation = SceneManager.CreateScene("PhysicsTrajectorySimulation",new CreateSceneParameters(LocalPhysicsMode.Physics2D));physicsScene = sceneSimulation.GetPhysicsScene2D();foreach (Transform obj in physicsSceneObjects){var physicsObject = Instantiate(obj.gameObject, obj.position, obj.rotation);if (physicsObject.tag == "StopBullet"){stopBulletColliders.Add(physicsObject.GetComponent<Collider2D>());}SceneManager.MoveGameObjectToScene(physicsObject, sceneSimulation);}}
}
【5】为对象添加弹性(化为无情的网球发射机)
就是新建2D物理材质,然后添加到我们的子弹中去,这样就能反弹了。
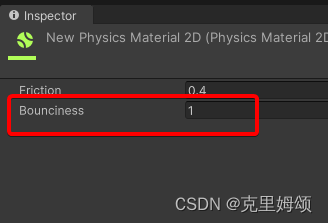
记得材质要设置弹力范围[0,1],可以看到我们的轨道发生改变了。
【6】带点的射弹轨迹线:(03:56)
这一块的原理我不懂,暂时跳过
实现步骤:
从代码链接中获取DotLineMaterial.mat和DottedLineShader.shader这两个文件,然后通过给材质添加对应的Shader实现,接着就到我们box游戏对象的lineRender组件中修改材质属性即可。
【7】物体处的射弹轨迹停止线
识别弹道射线在带有Tag="StopBullet"情况下,不可以反射,其他Tag就能反射
public class Box : MonoBehaviour
{// 刚体组件,用于控制物体的物理行为public Rigidbody2D rb;// 游戏对象的旋转速度public float rotationSpeed = 90f;// 子弹的预制体public GameObject bulletPref;// 子弹发射点的Transformpublic Transform shootGo;// 用于绘制轨迹的线渲染器public LineRenderer boxLineRenderer;// 存储物理场景中的对象public List<Transform> physicsSceneObjects = new List<Transform>();// 物理地面的游戏对象public GameObject physicsGround;// 上一次游戏对象的旋转角度private float previousBoxRotation = -1f;// 场景模拟private Scene sceneSimulation;// 物理场景private PhysicsScene2D physicsScene;// 用于停止子弹的碰撞体列表private List<Collider2D> stopBulletColliders = new List<Collider2D>();private void Start(){// 初始化线渲染器的位置点数量boxLineRenderer.positionCount = 0;// 将物理地面添加到物理场景对象列表中physicsSceneObjects.Add(physicsGround.transform);// 创建用于轨迹模拟的物理场景CreatePhysicsScene_Trajectory();}void Update(){// 获取水平输入来旋转游戏对象float horizontalInput = Input.GetAxis("Horizontal");transform.Rotate(Vector3.back * rotationSpeed * Time.deltaTime * horizontalInput);// 实例化子弹var bullet = Instantiate(bulletPref, shootGo.transform.position, rb.gameObject.transform.rotation);// 将子弹对象移到模拟场景中SceneManager.MoveGameObjectToScene(bullet.gameObject, sceneSimulation);var bs = bullet.GetComponent<BulletScript>();bs.Test(10);// 当游戏对象旋转时,绘制轨迹if (previousBoxRotation != this.transform.rotation.eulerAngles.z){DrawTrail(bullet);previousBoxRotation = this.transform.rotation.eulerAngles.z;}}private void DrawTrail(GameObject bullet){var bulletCollider2D = bullet.GetComponent<Collider2D>();Vector3[] points = new Vector3[50];var pointsBeforeCollision = 0;for (int i = 0; i < points.Length; i++){// 模拟物理场景physicsScene.Simulate(Time.fixedDeltaTime);// 如果子弹与停止碰撞体相撞,退出循环if (isBulletToichingStopCollider(bulletCollider2D)){break;}pointsBeforeCollision++;points[i] = bullet.transform.position;}// 设置线渲染器的位置点boxLineRenderer.positionCount = pointsBeforeCollision;boxLineRenderer.SetPositions(points);// 销毁子弹对象Destroy(bullet.gameObject);}private bool isBulletToichingStopCollider(Collider2D bulletCollider2D){ var pos = bulletCollider2D.gameObject.transform.position;foreach (Collider2D collider in stopBulletColliders){var distance = (pos - collider.transform.position).magnitude;// 如果子弹与停止碰撞体相撞,返回trueif (collider.IsTouching(bulletCollider2D)){return true;}}// 子弹未与停止碰撞体相撞,返回falsereturn false;}private void CreatePhysicsScene_Trajectory(){// 创建用于轨迹模拟的场景sceneSimulation = SceneManager.CreateScene("PhysicsTrajectorySimulation", new CreateSceneParameters(LocalPhysicsMode.Physics2D));physicsScene = sceneSimulation.GetPhysicsScene2D();foreach (Transform obj in physicsSceneObjects){// 实例化物理场景中的物体var physicsObject = Instantiate(obj.gameObject, obj.position, obj.rotation);if (physicsObject.tag == "StopBullet"){// 如果物体标签是"StopBullet",则将其碰撞体添加到停止碰撞体列表中stopBulletColliders.Add(physicsObject.GetComponent<Collider2D>());}// 将物体移到模拟场景中SceneManager.MoveGameObjectToScene(physicsObject, sceneSimulation);}}
}
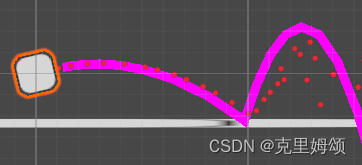
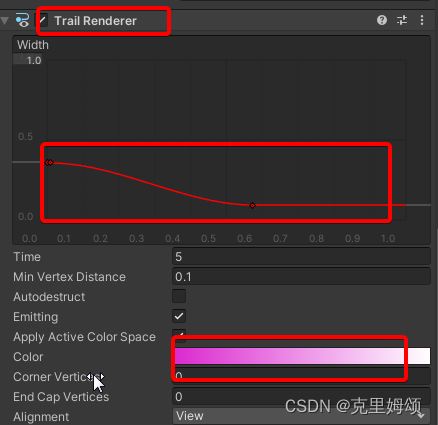
【8】给子弹添加渲染
其实就是给子弹这个预制体添加下图的组件,改射线的宽度和 颜色,让子弹的效果更炫酷。
【9】弹道长度和射弹速度
其实就是按空格键来蓄力,实现弹道长度的增加,同时改变子弹的蓄力速度。
public class Box : MonoBehaviour
{public Rigidbody2D rb;public float rotationSpeed = 90f;public GameObject bulletPref;public Transform shootGo;public LineRenderer boxLineRenderer;public List<Transform> physicsSceneObjects = new();public GameObject physicsGround;public float bulletForce = 10f;private float previousBoxRotation = -1f;private Scene sceneSimulation;private PhysicsScene2D physicsScene;private List<Collider2D> stopBulletColliders = new();private float speedLerp = 0f;private float speedTimeElapsed = 0.0f;private bool isHoldingSpace = false;private void Start(){boxLineRenderer.positionCount = 0;physicsSceneObjects.Add(physicsGround.transform);CreatePhysicsScene_Trajectory();}void Update(){if (Input.GetKeyDown(KeyCode.Space)){speedTimeElapsed = 0;isHoldingSpace = true;}if (Input.GetKeyUp(KeyCode.Space)){isHoldingSpace = false;}if (isHoldingSpace){speedTimeElapsed += Time.deltaTime;}float horizontalInput = Input.GetAxis("Horizontal");var totalTime = 2f;speedLerp = Mathf.Lerp(0, bulletForce, speedTimeElapsed / totalTime);transform.Rotate(Vector3.back * rotationSpeed * Time.deltaTime * horizontalInput);var bullet = Instantiate(bulletPref, shootGo.transform.position, rb.gameObject.transform.rotation);SceneManager.MoveGameObjectToScene(bullet.gameObject, sceneSimulation);var bs = bullet.GetComponent<BulletScript>();bs.Test(speedLerp);ShowTrajectoryBouncyPhysicsScene(bullet);}public void ShowTrajectoryBouncyPhysicsScene(GameObject bullet){Vector3[] points = new Vector3[50];boxLineRenderer.positionCount = points.Length;for (int i = 0; i < points.Length; i++){physicsScene.Simulate(Time.fixedDeltaTime);points[i] = bullet.transform.position;}boxLineRenderer.SetPositions(points);Destroy(bullet.gameObject);}private void CreatePhysicsScene_Trajectory(){sceneSimulation = SceneManager.CreateScene("PhysicsTrajectorySimulation",new CreateSceneParameters(LocalPhysicsMode.Physics2D));physicsScene = sceneSimulation.GetPhysicsScene2D();foreach (Transform obj in physicsSceneObjects){var physicsObject = Instantiate(obj.gameObject, obj.position, obj.rotation);if (physicsObject.tag == "StopBullet"){stopBulletColliders.Add(physicsObject.GetComponent<Collider2D>());}SceneManager.MoveGameObjectToScene(physicsObject, sceneSimulation);}}
}
效果如下图:
【10】用鼠标改变和长度速度
手感超级怪!是我拆的不对嘛?
public class Box : MonoBehaviour
{public Rigidbody2D rb;public float rotationSpeed = 90f;public GameObject bulletPref;public Transform shootGo;public LineRenderer boxLineRenderer;public List<Transform> physicsSceneObjects = new();public GameObject physicsGround;public float bulletForce = 10f;private float previousBoxRotation = -1f;private Scene sceneSimulation;private PhysicsScene2D physicsScene;private List<Collider2D> stopBulletColliders = new();private bool dragging = false;private Vector3 mouseStartDragPosition;private Vector3 mouseCurrentDragPosition;private void Start(){boxLineRenderer.positionCount = 0;physicsSceneObjects.Add(physicsGround.transform);CreatePhysicsScene_Trajectory();}void Update(){if (Input.GetMouseButtonDown(0)){mouseStartDragPosition = Camera.main.ScreenToWorldPoint(Input.mousePosition);mouseCurrentDragPosition = mouseStartDragPosition;dragging = true;}else if (Input.GetMouseButtonUp(0)){dragging = false;}float horizontalInput = Input.GetAxis("Horizontal");transform.Rotate(Vector3.back * rotationSpeed * Time.deltaTime * horizontalInput);if (dragging){var rotationSpeed = 20f;var mousePosition = Camera.main.ScreenToWorldPoint(Input.mousePosition);mouseCurrentDragPosition = mousePosition;float yAxis = mousePosition.y * rotationSpeed;transform.Rotate(Vector3.forward * yAxis * Time.deltaTime);}if (previousBoxRotation != transform.rotation.eulerAngles.z){var maxDrag = 2f;var maxSpeed = 10f;var drag = Mathf.Clamp(mouseStartDragPosition.x - mouseCurrentDragPosition.x, 0, maxDrag);var currentSpeed = drag / maxDrag * maxSpeed;ShowTrajectoryBouncyCollisionPhysicsScene(currentSpeed);previousBoxRotation = transform.rotation.eulerAngles.z;      }}public void ShowTrajectoryBouncyCollisionPhysicsScene(float force){var bullet = Instantiate(bulletPref, shootGo.transform.position, rb.gameObject.transform.rotation);SceneManager.MoveGameObjectToScene(bullet.gameObject, sceneSimulation);bullet.GetComponent<BulletScript>().Test(force);var bulletCollider2D = bullet.GetComponent<Collider2D>();Vector3[] points = new Vector3[50];var pointsBeforeCollision = 0;for (int i = 0; i < points.Length; i++){physicsScene.Simulate(Time.fixedDeltaTime);if (isBulletToichingStopCollider(bulletCollider2D)){break;}pointsBeforeCollision++;points[i] = bullet.transform.position;}boxLineRenderer.positionCount = pointsBeforeCollision;boxLineRenderer.SetPositions(points);Destroy(bullet.gameObject);}private bool isBulletToichingStopCollider(Collider2D bulletCollider2D){var pos = bulletCollider2D.gameObject.transform.position;foreach (Collider2D collider in stopBulletColliders){var distance = (pos - collider.transform.position).magnitude;if (collider.IsTouching(bulletCollider2D)){return true;}}return false;}private void CreatePhysicsScene_Trajectory(){sceneSimulation = SceneManager.CreateScene("PhysicsTrajectorySimulation",new CreateSceneParameters(LocalPhysicsMode.Physics2D));physicsScene = sceneSimulation.GetPhysicsScene2D();foreach (Transform obj in physicsSceneObjects){var physicsObject = Instantiate(obj.gameObject, obj.position, obj.rotation);if (physicsObject.tag == "StopBullet"){stopBulletColliders.Add(physicsObject.GetComponent<Collider2D>());}SceneManager.MoveGameObjectToScene(physicsObject, sceneSimulation);}}
}
效果如下:
说实话,效果很糟糕,至少对于PC来说,手感非常差。

九、磁铁/抓钩
【1】射出磁铁
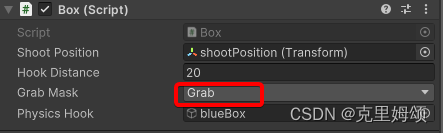
public class Box : MonoBehaviour
{public Transform shootPosition;public float hookDistance = 20f;public LayerMask grabMask;public GameObject physicsHook;private Rigidbody2D physicsHookRb;private Vector2 movementDirection;private RaycastHit2D raycastHit2D;private bool shoot = false;private float hookTimeElapsed = 0.0f;private Rigidbody2D rb;private void Start(){rb = this.GetComponent<Rigidbody2D>();physicsHookRb = physicsHook.GetComponent<Rigidbody2D>();}void Update(){movementDirection = new Vector2(Input.GetAxis("Horizontal"), Input.GetAxis("Vertical"));if (Input.GetKeyDown(KeyCode.Space)){hookTimeElapsed = 0;Example_Shoot_Hook();}hookTimeElapsed += Time.deltaTime;}void FixedUpdate(){var shootDistance = Vector3.Distance(shootPosition.transform.position, raycastHit2D.point);var hookSpeed = 2;var totalTime = shootDistance / hookSpeed;var time = hookTimeElapsed / totalTime;if (shoot && raycastHit2D.collider != null){var push = Vector3.Lerp(shootPosition.transform.position, raycastHit2D.point, time);physicsHookRb.MovePosition(push);}MovePhysicsBox(2);}private void MovePhysicsBox(float speed){rb.velocity = movementDirection * speed;}private void Example_Shoot_Hook(){RaycastHit2D hit = Physics2D.Raycast(shootPosition.transform.position, Vector3.right, hookDistance, grabMask);if (hit.collider != null){shoot = true;raycastHit2D = hit;}else{shoot = false;physicsHook.transform.localPosition = new Vector2(0, 0);}}
}
给我们的redBox添加名为Grab的Layer,就能保证之后能够抓取,具体如下,自行额外添加对应的刚体和碰撞体吧。
效果如下:
【2】取回磁铁
//...
private bool toggleOnClick = false;
private float mouseTimeElapsed = 0.0f;void Update(){if (Input.GetMouseButtonDown(0)){toggleOnClick = !toggleOnClick;mouseTimeElapsed = 0;}if (toggleOnClick){mouseTimeElapsed += Time.deltaTime;}//...
}void FixedUpdate(){//...if (toggleOnClick){var pullTime = mouseTimeElapsed / totalTime;var pull = Vector3.Lerp(physicsHookRb.transform.position, shootPosition.transform.position, pullTime);physicsHookRb.MovePosition(pull);shoot = false;}MovePhysicsBox(2);
}
效果如下:
空格键发射,然后鼠标键第一次就回到发射点,而要按下第二次才能重新空格键发射,需要注意的是我让
box为动态,而redBox为静态,blueBox为动态。
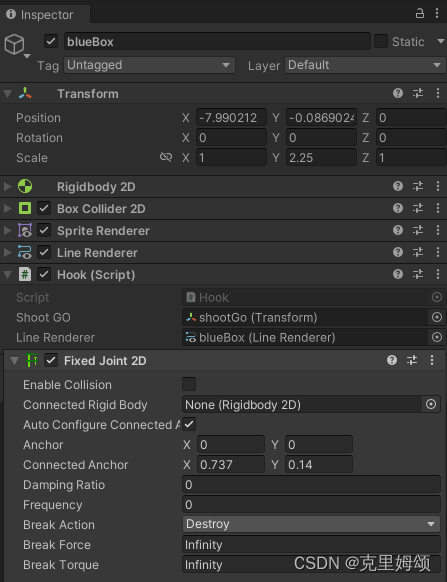
【3】用磁铁拉住另一个物体
public class Box : MonoBehaviour
{// 存储射击位置的游戏对象public GameObject shootPosition;// 钩子的最大伸展距离public float hookDistance = 20f;// 用于射击和抓取物体的层级掩码public LayerMask grabMask;// 物理钩子的游戏对象public GameObject physicsHook;// 用于存储玩家移动方向的向量private Vector2 movementDirection;// 用于射击的射线命中信息private RaycastHit2D raycastHit2D;// 标志是否进行射击private bool shoot = false;// 钩子射出后的时间累计private float hookTimeElapsed = 0.0f;// 鼠标点击状态的标志private bool toggleOnClick = false;// 鼠标按下后的时间累计private float mouseTimeElapsed = 0.0f;// 物理钩子的固定关节组件private FixedJoint2D physicsHookFixedJoint;// 物理钩子的碰撞器组件private Collider2D physicsHookCollider;// 射击位置的碰撞器组件private Collider2D shootPositionCollider;// 标志是否完成了物体拉取private bool finishedPull = false;// 玩家自身的刚体组件private Rigidbody2D rb;// 物理钩子的刚体组件private Rigidbody2D physicsHookRb;private void Start(){// 获取玩家自身的刚体组件rb = this.GetComponent<Rigidbody2D>();// 获取物理钩子的刚体组件physicsHookRb = physicsHook.GetComponent<Rigidbody2D>();// 获取物理钩子的碰撞器组件physicsHookCollider = physicsHook.GetComponent<Collider2D>();// 获取射击位置的碰撞器组件shootPositionCollider = shootPosition.GetComponent<Collider2D>();// 获取物理钩子的固定关节组件physicsHookFixedJoint = physicsHook.GetComponent<FixedJoint2D>();}void Update(){// 获取玩家的输入以确定移动方向movementDirection = new Vector2(Input.GetAxis("Horizontal"), Input.GetAxis("Vertical"));if (Input.GetMouseButtonDown(0)){// 切换鼠标点击状态并重置时间toggleOnClick = !toggleOnClick;mouseTimeElapsed = 0;finishedPull = false;}if (toggleOnClick){// 鼠标点击状态下,累计时间mouseTimeElapsed += Time.deltaTime;}if (Input.GetKeyDown(KeyCode.Space)){// 重置钩子时间并射出钩子hookTimeElapsed = 0;Example_Shoot_Hook_2();}hookTimeElapsed += Time.deltaTime;}void FixedUpdate(){// 计算钩子的速度和总时间var shootDistance = Vector3.Distance(shootPosition.transform.position, raycastHit2D.point);var hookSpeed = 20;var totalTime = shootDistance / hookSpeed;var time = hookTimeElapsed / totalTime;if (shoot && raycastHit2D.collider != null){// 将钩子向命中点推进var push = Vector3.Lerp(shootPosition.transform.position, raycastHit2D.point, time);physicsHookRb.MovePosition(push);}if (raycastHit2D.collider != null&& physicsHookCollider.IsTouching(shootPositionCollider)&& physicsHookCollider.IsTouching(raycastHit2D.collider)){// 钩子与物体碰撞,标志物体已被拉取finishedPull = true;}if (raycastHit2D.collider != null &&!physicsHookCollider.IsTouching(shootPositionCollider) &&physicsHookCollider.IsTouching(raycastHit2D.collider) &&!finishedPull &&!toggleOnClick){// 如果钩子与物体碰撞,但尚未完成拉取且不在点击状态下,固定物体var redBox = raycastHit2D.collider.gameObject.GetComponent<Rigidbody2D>();physicsHookFixedJoint.connectedBody = redBox;         }if (toggleOnClick && !finishedPull){// 如果在点击状态下且尚未完成拉取,将物理钩子收回var pullTime = mouseTimeElapsed / totalTime;var pull = Vector3.Lerp(physicsHookRb.transform.position, shootPosition.transform.position, pullTime);physicsHookRb.MovePosition(pull);shoot = false;}// 移动物理盒子MovePhysicsBox(2);}private void MovePhysicsBox(float speed){// 移动玩家物体rb.velocity = movementDirection * speed;}private void Example_Shoot_Hook_2(){// 射出钩子,检测是否命中可抓取物体RaycastHit2D hit = Physics2D.Raycast(shootPosition.transform.position, Vector3.right, hookDistance, grabMask);if (hit.collider != null){// 标志已射出钩子,并存储射线命中信息shoot = true;raycastHit2D = hit;// 断开物理钩子的连接physicsHookFixedJoint.connectedBody = null;}else{// 如果未命中物体,标志未射出钩子,并将物理钩子重置shoot = false;physicsHook.transform.localPosition = new Vector2(0, 0);}}
}
这里的关键就是要保证引用不出错、bodyType不要设置错误,具体如下,另外redBox选择刚体为动态:
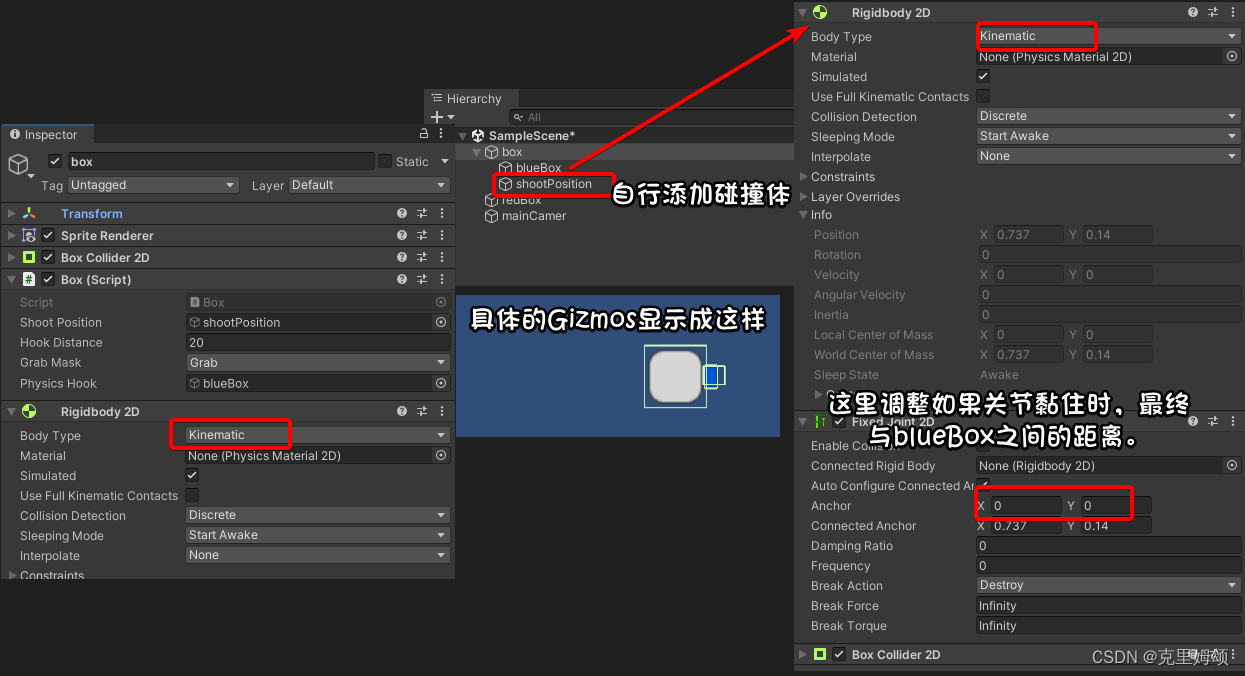
效果如下:
当我们空格射出blueBox后
TIP:如果游戏对象刚体的BodyType是动态,加入这个组件Fixed Join 2D后,就不能移动了,因为它会强制将其变成静态。
【4】创建抓钩
其实就是【3】的基础上加条绳子,做法是让lineRender模拟成绳子,如果不能调颜色的话,就选择添加材质再修改即可。
public class Hook : MonoBehaviour
{public Transform shootPosition;public LineRenderer lineRenderer;void Update(){lineRenderer.SetPosition(0, shootPosition.transform.position);lineRenderer.SetPosition(1, transform.position);}
}
十、贪吃蛇
【1】拾起范围内的物体
box.cs
public class Box : MonoBehaviour
{private Vector2 movementDirection;public LayerMask collectMask;void Update(){movementDirection = new Vector2(Input.GetAxis("Horizontal"), Input.GetAxis("Vertical"));}void FixedUpdate(){var rotationSpeed = 150f;var moveSpeed = 1.5f;this.transform.Translate(Vector2.right * moveSpeed * Time.fixedDeltaTime, Space.Self);this.transform.Rotate(Vector3.forward * - movementDirection.x * rotationSpeed * Time.fixedDeltaTime);var radius = 3f;Collider2D[] hitColliders = Physics2D.OverlapCircleAll((Vector2)this.transform.position, radius, collectMask);Debug.Log(hitColliders);foreach (var hitCollider in hitColliders){var collect = hitCollider.gameObject.GetComponent<Collect>();if (!collect.isCollecting){collect.StartCollecting(this.transform);}}}private void OnDrawGizmos(){Gizmos.color = Color.yellow;Gizmos.DrawWireSphere((Vector2)this.transform.position, 1.5f);}
}
collect.cs
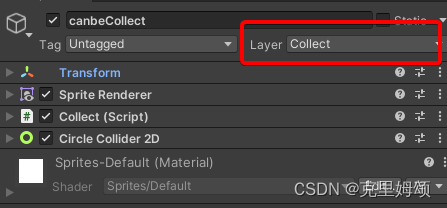
我们要让被收集的物体挂载该脚本,然后让其具有碰撞体组件即可,对被收集的游戏对象添加上要被
box识别的Collect的Layer。
public class Collect : MonoBehaviour
{private bool isCollected;private float timeElapsed = 0;public bool isCollecting = false;private Transform character;void Update(){timeElapsed += Time.deltaTime;if (isCollecting){var speed = 2; // secondsvar step = speed * Time.deltaTime;var target = character.transform.position;//实现一个被吃的效果就是移动+销毁gameObject.transform.position = Vector2.MoveTowards(gameObject.transform.position, target, step);if (Vector3.Distance(gameObject.transform.position, target) < 0.001f){isCollecting = false;Destroy(gameObject);}}}public void StartCollecting(Transform target){timeElapsed = 0;isCollecting = true;character = target;}
}
效果如下:
【2】跟随物体,蛇形运动
脚本
box.cs
using UnityEngine;public class Box : MonoBehaviour
{private Vector2 movementDirection;public GameObject followPartPref;public GameObject bodyParts;private void Start(){//实例体的父类也是需要被实例化的,不然会报错,不要按视频的写法来var bodyPartsInit = Instantiate(bodyParts);GameObject part1 = CreateFollowPart(this.transform,bodyPartsInit);GameObject part2 = CreateFollowPart(part1.transform, bodyPartsInit);}void Update(){movementDirection = new Vector2(Input.GetAxis("Horizontal"), Input.GetAxis("Vertical"));}void FixedUpdate(){var rotationSpeed = 150f;var moveSpeed = 1.5f;this.transform.Translate(Vector2.right * moveSpeed * Time.fixedDeltaTime, Space.Self);this.transform.Rotate(Vector3.forward * -movementDirection.x * rotationSpeed * Time.fixedDeltaTime);}private GameObject CreateFollowPart(Transform followTarget,GameObject bodyPartsInit){var spaceBetween = 2f;var bodyPart = Instantiate(followPartPref, FollowPosition(followTarget, spaceBetween), Quaternion.identity);bodyPart.transform.parent = bodyPartsInit.transform;BodyPart bodyPartComponent = bodyPart.GetComponent<BodyPart>();bodyPartComponent.FollowTarget = followTarget;bodyPartComponent.SpaceBetween = spaceBetween;return bodyPart;}private Vector3 FollowPosition(Transform target, float spaceBetween){var position = target.position;return position - target.right * spaceBetween;}
}
BodyPart.cs
public class BodyPart : MonoBehaviour
{// 要跟随的目标对象public Transform FollowTarget;// 跟随部件之间的间隔距离public float SpaceBetween = 10f;// 默认移动速度private float defaultSpeed = 1.5f;// 当前移动速度private float speed = 1.5f;// 用于处理速度变化的方法public void ChangeSpeed(bool isHoldingSpace){// 根据是否按住空格键来改变速度if (isHoldingSpace){speed = defaultSpeed * 2;}else{speed = defaultSpeed;}}// 每帧执行的方法private void Update(){// 计算向目标对象移动的向量Vector3 vectorToTarget = FollowTarget.position - transform.position;// 旋转向量以确保部件始终面向前方Vector3 rotateVectorToTarget = Quaternion.Euler(0, 0, 90) * vectorToTarget;transform.rotation = Quaternion.LookRotation(Vector3.forward, rotateVectorToTarget);// 计算到目标对象的距离var distanceToHead = (transform.position - FollowTarget.position).magnitude;// 如果距离超过指定的间隔距离,则向前移动if (distanceToHead > SpaceBetween){transform.Translate(Vector3.right * speed * Time.deltaTime);}}
}
unity操作
这个BodyParts需要规范操作,此外需要设为实例体的父类时,更是需要实例化(看注释)。

【3】吃东西时跟随物体,蛇运动并长出蛇
脚本
box.cs
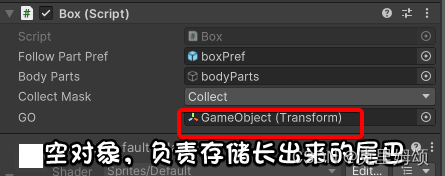
public class Box : MonoBehaviour
{private Vector2 movementDirection;public GameObject followPartPref;public GameObject bodyParts;public LayerMask collectMask;private int count;public Transform GO;private void Start(){GameObject part1 = CreateFollowPart(this.transform);GameObject part2 = CreateFollowPart(part1.transform);count = GO.childCount;}void Update(){movementDirection = new Vector2(Input.GetAxis("Horizontal"), Input.GetAxis("Vertical"));}void FixedUpdate(){var rotationSpeed = 150f;var moveSpeed = 1.5f;this.transform.Translate(Vector2.right * moveSpeed * Time.fixedDeltaTime, Space.Self);this.transform.Rotate(Vector3.forward * -movementDirection.x * rotationSpeed * Time.fixedDeltaTime);var radius = 1.5f;Collider2D[] hitColliders = Physics2D.OverlapCircleAll((Vector2)this.transform.position, radius, collectMask);foreach (var hitCollider in hitColliders){var collect = hitCollider.gameObject.GetComponent<Collect>();collect.callback = OnEat;if (!collect.isCollecting){collect.Eat(this.transform);}}}private GameObject CreateFollowPart(Transform followTarget){var spaceBetween = 2f;var bodyPartsInit = Instantiate(bodyParts);var bodyPart = Instantiate(followPartPref, FollowPosition(followTarget, spaceBetween), Quaternion.identity);bodyPart.transform.parent = bodyPartsInit.transform;BodyPart bodyPartComponent = bodyPart.GetComponent<BodyPart>();bodyPartComponent.FollowTarget = followTarget;bodyPartComponent.SpaceBetween = spaceBetween;//这里的效果就类似负责存放蛇尾巴的编号bodyPart.transform.parent  = GO;return bodyPart;}private Vector3 FollowPosition(Transform target, float spaceBetween){var position = target.position;return position - target.right * spaceBetween;}private void OnEat(){if (count > 0){//Debug.Log(count);Transform previousPart = GO.GetChild(count - 1);CreateFollowPart(previousPart);count += 1;}else{Debug.Log("WITHOUT");}}
}
Collect.cs
public class Collect : MonoBehaviour
{private bool isCollected; // 标志物体是否已被收集private float timeElapsed = 0; // 记录时间的累计public bool isCollecting = false; // 标志物体是否正在被收集public bool isEaten = false; // 标志物体是否被吃掉private Transform character; // 与物体交互的角色的Transform组件public Action callback; // 当物体被吃掉后要执行的回调函数void Update(){timeElapsed += Time.deltaTime; // 更新时间累计if (isCollecting){var speed = 2; // 移动速度,单位:秒var step = speed * Time.deltaTime; // 计算每帧的移动步长var target = character.transform.position; // 目标位置// 将物体向目标位置移动gameObject.transform.position = Vector2.MoveTowards(gameObject.transform.position, target, step);// 如果物体接近目标位置,停止收集并销毁物体if (Vector3.Distance(gameObject.transform.position, target) < 0.001f){isCollecting = false;Destroy(gameObject);}}if (isEaten){var speed = 4; // 移动速度,单位:秒var step = speed * Time.deltaTime; // 计算每帧的移动步长var target = character.transform.position; // 目标位置// 将物体向目标位置移动gameObject.transform.position = Vector2.MoveTowards(gameObject.transform.position, target, step);// 如果物体接近目标位置,停止吃掉并销毁物体,然后执行回调函数if (Vector3.Distance(gameObject.transform.position, target) < 0.001f){isCollecting = false;Destroy(gameObject);callback();}}}// 启动收集物体的方法public void StartCollecting(Transform target){timeElapsed = 0; // 重置时间累计isCollecting = true; // 标志物体正在被收集character = target; // 设置与物体交互的角色Transform}// 吃掉物体的方法public void Eat(Transform target){timeElapsed = 0; // 重置时间累计isEaten = true; // 标志物体已被吃掉character = target; // 设置与物体交互的角色Transform}
}
unity操作:
视频代码问题真是太令人生艹。
效果如下:
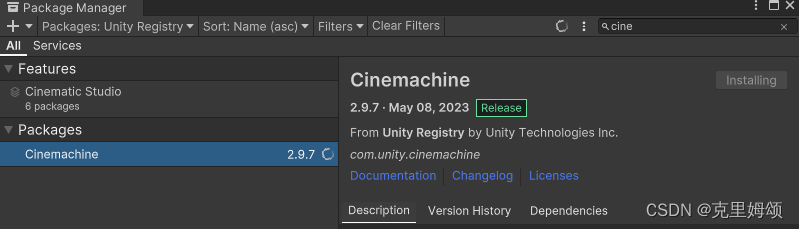
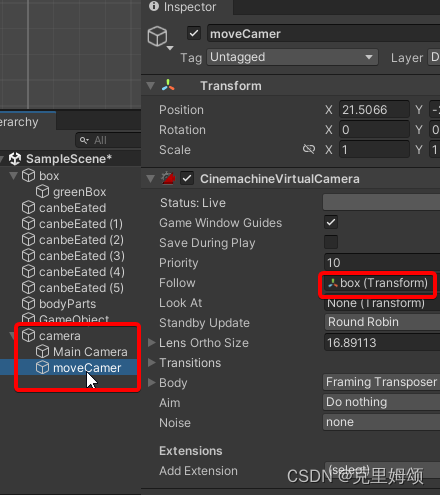
【4】使用电影机cinemachine跟踪蛇头
下载插件cinemachine
然后就在Hierarchy中右键该电影机游戏对象,接着就这样弄到同一个父空对象中去,然后Follow我们的蛇头即可。
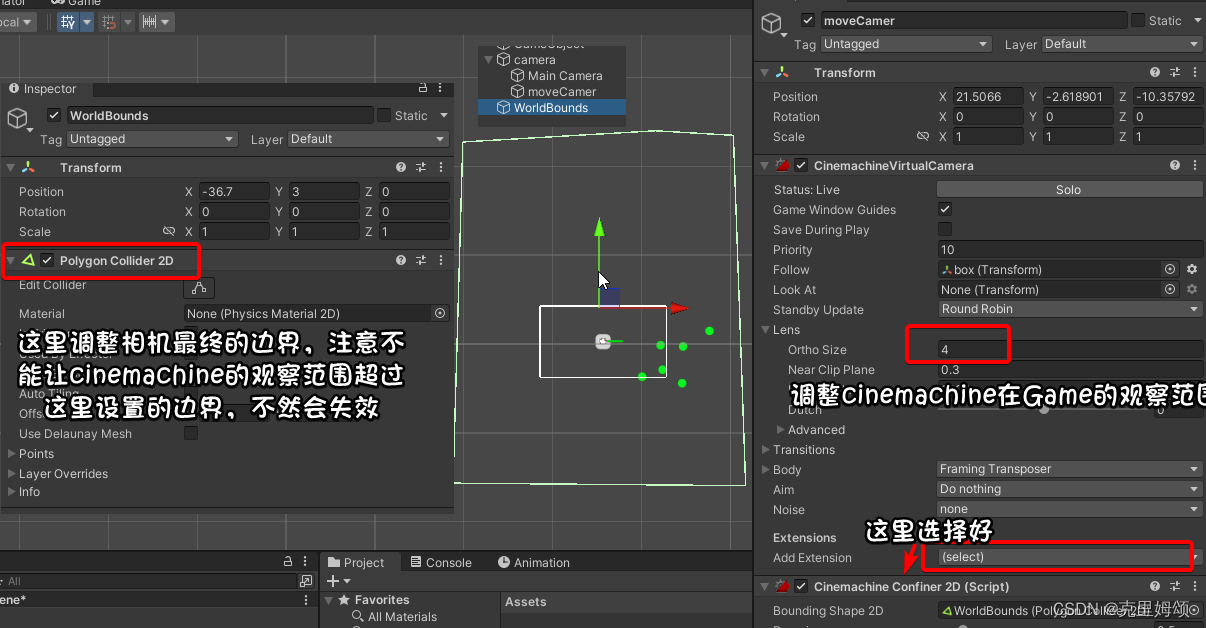
【5】使用带边界的电影机跟踪对象
这里的带边界,意思是指当我们的蛇头运动到我们划定的好的多边形边界后,我们的cinemachine并不会跟谁蛇头出这个边界,而蛇头也会因为碰撞体的缘故无法物理上出界。
【6】贪吃蛇游戏,空格增加移动速度
球的生成的位置和数量设置的挺不合理的(懒得改bug了),空格加速,这个简易的贪吃蛇就弄完了,另外没有失败判断。
box.cs
委托是一种代表方法的类型,它可以用来存储对这些方法的引用并随后调用它们。
下面的代码中,委托被定义为OnSpeedChangeDelegate,该委托接受一个 bool 类型的参数。随后,onSpeedChangeDelegate 被声明为一个具有相同委托类型的静态变量。
此委托的目的是存储对一个或多个具有相同参数签名的方法的引用。然后,在代码的其他部分,可以使用 onSpeedChangeDelegate 来调用这些方法,而无需明确知道这些方法的名称或实现。
public class Box : MonoBehaviour
{// 存储玩家的移动方向向量private Vector2 movementDirection;// 用于跟随的游戏对象预制体public GameObject followPartPref;// 身体部件的父对象public GameObject bodyParts;// 用于收集的层级掩码public LayerMask collectMask;// 身体部件的数量private int count;// 用于生成普通食物的预制体public GameObject normalBulletCollisionPref;// 存储生成的食物的容器对象public GameObject cleanBucket;// 用于处理速度变化的委托private delegate void OnSpeedChangeDelegate(bool isHoldingSpace);private static OnSpeedChangeDelegate onSpeedChangeDelegate;private bool isHoldingSpace = false;private float spawnElapsedTime;private List<Collider2D> allColliders = new List<Collider2D>();private void Start(){// 创建初始的跟随部件GameObject part1 = CreateFollowPart(this.transform);GameObject part2 = CreateFollowPart(part1.transform);// 获取子对象数量count = GO.childCount;}void Update(){// 计算生成食物的时间累计spawnElapsedTime += Time.deltaTime;// 获取玩家的输入以确定移动方向movementDirection = new Vector2(Input.GetAxis("Horizontal"), Input.GetAxis("Vertical"));if (Input.GetKeyDown(KeyCode.Space)){// 按下空格键时标志正在按住空格键isHoldingSpace = true;}if (Input.GetKeyUp(KeyCode.Space)){// 松开空格键时取消标志isHoldingSpace = false;}}void FixedUpdate(){var seconds = 0.5f;if (spawnElapsedTime * seconds >= seconds){// 生成食物spawnElapsedTime = 0;var height = Camera.main.orthographicSize;var width = height * Camera.main.aspect;var foodPosition = new Vector2(UnityEngine.Random.Range(width, -width),UnityEngine.Random.Range(height, -height));NormalBulletCollision(foodPosition);}var rotationSpeed = 150f;var moveSpeed = 1.5f;if (isHoldingSpace){// 如果按住空格键,加快移动速度moveSpeed *= 2;}onSpeedChangeDelegate(isHoldingSpace);// 移动玩家this.transform.Translate(Vector2.right * moveSpeed * Time.fixedDeltaTime, Space.Self);this.transform.Rotate(Vector3.forward * -movementDirection.x * rotationSpeed * Time.fixedDeltaTime);var radius = 1.5f;// 检测碰撞区域内的可收集物体Collider2D[] hitColliders = Physics2D.OverlapCircleAll((Vector2)this.transform.position, radius, collectMask);foreach (var hitCollider in hitColliders){var collect = hitCollider.gameObject.GetComponent<Collect>();collect.callback = OnEat;if (!collect.isCollecting){// 收集可收集物体collect.Eat(this.transform);}}}private GameObject CreateFollowPart(Transform followTarget){// 创建跟随部件var spaceBetween = 2f;var bodyPartsInit = Instantiate(bodyParts);var bodyPart = Instantiate(followPartPref, FollowPosition(followTarget, spaceBetween), Quaternion.identity);bodyPart.transform.parent = bodyPartsInit.transform;BodyPart bodyPartComponent = bodyPart.GetComponent<BodyPart>();bodyPartComponent.FollowTarget = followTarget;bodyPartComponent.SpaceBetween = spaceBetween;bodyPart.transform.parent  = GO;onSpeedChangeDelegate += bodyPartComponent.ChangeSpeed;return bodyPart;}private Vector3 FollowPosition(Transform target, float spaceBetween){// 计算跟随部件的位置var position = target.position;return position - target.right * spaceBetween;}private void OnEat(){// 当吃到食物时创建新的跟随部件if (count > 0){Transform previousPart = GO.GetChild(count - 1);CreateFollowPart(previousPart);count += 1;}else{Debug.Log("WITHOUT");}}private void NormalBulletCollision(Vector2 position){// 生成普通食物GameObject bulletCollision = (GameObject)Instantiate(normalBulletCollisionPref.gameObject, position, Quaternion.identity);bulletCollision.transform.parent = cleanBucket.transform;var collider = bulletCollision.GetComponent<Collider2D>();allColliders.Add(collider);}
}