目录
1.算法流程简介
2.算法核心代码
3.算法效果展示
1.算法流程简介
"""
1.设定退火算法的基础参数
2.设定需要优化的函数,求解该函数的最小值/最大值
3.进行退火过程,随机产生退火解并且纠正,直到冷却
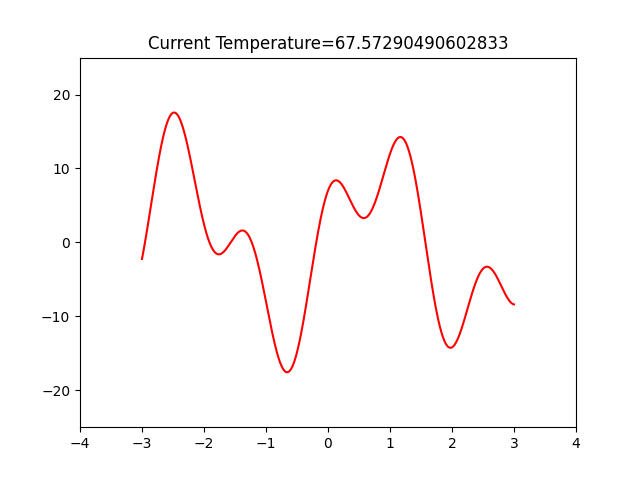
4.绘制可视化图片进行了解退火整体过程
"""
2.算法核心代码
#利用退火算法求解函数的极值(优化问题)
import numpy as np
from random import random
import random
import math
import matplotlib.pyplot as plt
#设定退火算法的基础参数
x_min,x_max=(-3,3)#x的取值范围
alpha=0.99#降温系数为0.99
bg_temp=100#起始温度
ed_temp=0.01#最终温度(可设可不设)
cycle_number=500#循环次数
#设定需要优化的函数,求解该函数的最小值
"""
需要运用的化直接修改函数即可.
不过需要注意定义域的问题,主动修改一下定义域就行
"""
def opt_fun(x):y=11*np.sin(2*x)+7*np.cos(5*x)return y
#由于没有具体的数据,我们直接随机设置值就行随机产生初始值#随机产生本次退火解
def new_result(x):x1=x+bg_temp*random.uniform(-1,1)#退火解的合理性检查并且纠正:if  x_min<=x1<=x_max:return x1elif x1<x_min:add_min=random.uniform(-1,1)return add_min*x_min+(1-add_min)*xelse:add_max=random.uniform(-1,1)return add_max*x_max+(1-add_max)*x
def draw_picture(x):plt.cla()#绘图的时候这里可以进行修改#注意这里y的取值范围[-25,25]要大体预估一下plt.axis([x_min-1,x_max+1,-25,25])m=np.arange(x_min,x_max,0.0001)plt.plot(m,opt_fun(m),color='red')plt.plot(x,opt_fun(x),marker='*',color='b',markersize='8')plt.title('Current Temperature={}'.format(T))plt.pause(0.1)#设定接受概率函数
def p(x,x1):return math.exp(-abs(opt_fun(x)-opt_fun(x1))/T)#循环退火过程,直到冷却求出最优解
def Annealing_cycle():global Tcount_number=0T=bg_tempx=random.uniform(x_min,x_max)print("*******************************************************************************************************************")while T>ed_temp:draw_picture(x)for i in range(cycle_number):x1=new_result(x)#求解最小值的过程if opt_fun(x)>=opt_fun(x1):x=x1else:if random.random()<=p(x,x1):x=x1else:continueT=T*alphacount_number=count_number+1print("当前执行第{}".format(count_number),"次退火过程","  当前退火温度为:{}".format(T),"  当前最优值:{}".format(opt_fun(x)))print("*******************************************************************************************************************")print("本次退火优化过程共执行{}".format(count_number),"次求得的最优解为:{}".format(opt_fun(x)))print("*******************************************************************************************************************")
Annealing_cycle()
3.算法效果展示
