目录
✅ 0. 需求
📂 1. 前言
🔱 2. 使用
2.1 账户体系前提
2.2 创建账户服务
2.3 操作账户-增删改查
💠 3. 源码流程
✅ 0. 需求
试想,自己去实现一个账号管理体系,该如何做呢?
——————————
最近有遇到这样一个需求:AR眼镜只支持同时与一个手机绑定,即:AR眼镜已与手机绑定过的话,不再支持与其他手机绑定;如要绑定其他手机,需要先解绑当前手机才能重新绑定。
理解一下需求,即是:眼镜端需要账号管理体系,主要用来存储已绑定过手机的token。

AR眼镜绑定手机时序图,如下所示:

📂 1. 前言
我们知道,Android的账号管理体系是用来管理用户在Android设备上的身份验证和授权的系统,包括了对账号的创建、授权、修改和删除等操作的管理。
那么,我们为什么要使用Android的账号管理体系?
——————————
尽管,我们可以自己使用SP、MMKV、文件或数据库等方式来存储、更新、删除账户、密码或AuthToken;但其实涉及到跨进程通信,实现起来其实是稍显麻烦的;并且对于数据安全,信息加密这块的可靠性也有待商榷。
另外,从本文第一张图可见,我们在架构设计中规划的账号体系服务,是寄生于Android启动时system_server开启的服务,然后通过binder方式,提供给其他进程使用。
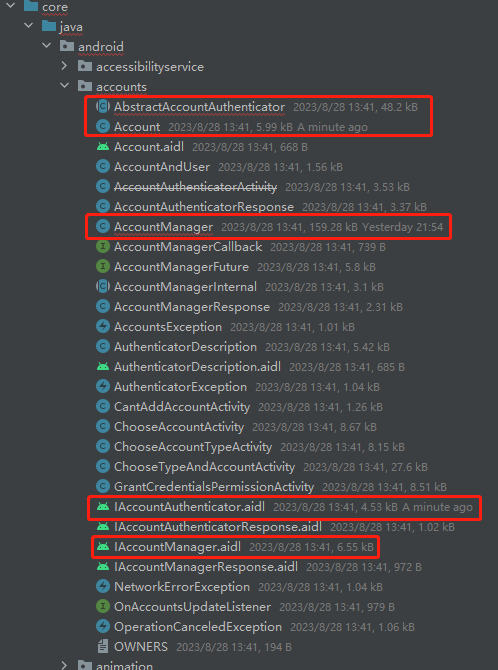
然而,在技术预研时发现,强大的Android早已想到了这点,在Android 2.0开始就加入了新包android.accounts,为我们准备好了这样一个服务ACCOUNT_SERVICE。
而且,该包功能已十分强大,我们可以直接拿来使用,功能主要包括:
- 集中式的账户管理API,可以安全地存储和访问认证的令牌和密码;
- 可以在同一个设备中管理同一应用的多个不同账号,能够自动批量的同步服务器更新账户,甚至可以和不同服务器进行数据同步和安全认证;
- 把账户的验证过程、AuthToken的获取过程分离出来,降低程序的耦合性;
- 并且会在”设置”应用中添加一个账户入口;
- 方便应用间账号共享。
🔱 2. 使用
2.1 账户体系前提
1)账号体系共享前提:使用相同的签名。
2)权限申明:
<uses-permission android:name="android.permission.GET_ACCOUNTS" />2.2 创建账户服务
步骤一:定义一个action为android.accounts.AccountAuthenticator的Intent的Service,并在meta-data的resource属性指定该Account基本显示信息的xml文件authenticator,模版代码如下:
<serviceandroid:name=".portal.feature.account.service.AccountService"android:enabled="true"android:exported="true"><intent-filter><action android:name="android.accounts.AccountAuthenticator" /></intent-filter><meta-dataandroid:name="android.accounts.AccountAuthenticator"android:resource="@xml/authenticator" />
</service>
步骤二:在res下的xml文件夹中新建authenticator.xml文件:
<?xml version="1.0" encoding="utf-8"?>
<account-authenticator xmlns:android="http://schemas.android.com/apk/res/android"android:accountType="com.agg.account"android:icon="@drawable/ic_test"android:label="AggAccount"android:smallIcon="@drawable/ic_test" />注:android:accountType表示的是Account类型,它必须是唯一的,一般是包名。
步骤三:创建继承自AbstractAccountAuthenticator的Authenticator文件,如下:
class Authenticator(context: Context) : AbstractAccountAuthenticator(context) {override fun editProperties(response: AccountAuthenticatorResponse?, accountType: String?): Bundle? {return null}override fun addAccount(response: AccountAuthenticatorResponse?,accountType: String?,authTokenType: String?,requiredFeatures: Array<out String>?,options: Bundle?): Bundle? {return null}override fun getAuthToken(response: AccountAuthenticatorResponse?,account: Account,authTokenType: String?,options: Bundle?): Bundle? {return null}override fun confirmCredentials(response: AccountAuthenticatorResponse?, account: Account?, options: Bundle?): Bundle? {return null}override fun getAuthTokenLabel(authTokenType: String?): String {return ""}override fun updateCredentials(response: AccountAuthenticatorResponse?,account: Account?,authTokenType: String?,options: Bundle?): Bundle? {return null}override fun hasFeatures(response: AccountAuthenticatorResponse?, account: Account?, features: Array<out String>?): Bundle? {return null}}步骤四:创建帐户Service,并在Service的onBind中调AbstractAccountAuthenticator的getIBinder()返回其用于远程调用的IBinder,如下所示:
class AccountService : Service() {private var authenticator: Authenticator? = nulloverride fun onCreate() {super.onCreate()authenticator = Authenticator(this)}override fun onBind(intent: Intent?): IBinder? {return authenticator?.iBinder}}注:运行起来程序后,在“设置”应用-“帐户”-“添加帐户”列表中就已可以发现自己的app了。
2.3 操作账户-增删改查
1)获取所有账号
/*** 获取所有账号*/fun getAllAccount(context: Context) {val accountManager = context.getSystemService(Context.ACCOUNT_SERVICE) as AccountManagerLog.e(TAG, "getAllAccount: size = ${accountManager.accounts.size}")for (account in accountManager.accounts) {Log.e(TAG, "getAllAccount: $account")}}2)添加账号
/*** 添加账号*/fun addAccount(context: Context, account: Account, password: String, authToken: String) {val bundle = Bundle()bundle.putString(AccountManager.KEY_ACCOUNT_NAME, account.name)bundle.putString(AccountManager.KEY_ACCOUNT_TYPE, account.type)bundle.putString(AccountManager.KEY_AUTHTOKEN, authToken)bundle.putString(AccountManager.KEY_PASSWORD, password)AccountManager.get(context).addAccountExplicitly(account, password, bundle)}3)更新某个账号
/*** 更新某个账号*/fun updateAccount(context: Context, account: Account, password: String = "", authToken: String = "") {var updatePassword = passwordvar updateAuthToken = authTokenAccountManager.get(context).apply {if (updatePassword.isEmpty()) {updatePassword = getUserData(account, AccountManager.KEY_PASSWORD)}if (updateAuthToken.isEmpty()) {updateAuthToken = getUserData(account, AccountManager.KEY_AUTHTOKEN)}removeAccountExplicitly(account)}addAccount(context, account, updatePassword, updateAuthToken)}4)删除某个账号
/*** 删除某个账号*/fun delAccount(context: Context, account: Account) {val isRemoveSuccess = AccountManager.get(context).removeAccountExplicitly(account)Log.e(TAG, "delAllAccount: isRemoveSuccess = $isRemoveSuccess, $account")}5)删除所有账号
/*** 删除所有账号*/fun delAllAccount(context: Context) {val accountManager = AccountManager.get(context)for (account in accountManager.accounts) {val isRemoveSuccess = accountManager.removeAccountExplicitly(account)Log.e(TAG, "delAllAccount: isRemoveSuccess = $isRemoveSuccess, $account")}}💠 3. 源码流程
- 从系统启动system_server进程,进而启动ACCOUNT_SERVICE服务开始;
- AccountManager是一个面向应用程序开发的组件,它提供了一套对应于IAccountManager协议的应用程序接口;
- 这组接口通过Binder机制与系统服务AccountManagerService进行通信,协作完成帐号相关的操作;
- 同时AccountManager接收authenticators提供的回调,以便在帐号操作完成之后向调用此帐号服务的业务返回对应的接口,同时触发这个业务对结果的处理。

