ElasticSearch部署
ElasticSearch资源
RabbitMQ资源
ElasticSearch服务部署
#OpenJDK环境部署
[root@Services ~]# yum clean all; yum repolist -v
...
Total packages: 8,265
[root@Services ~]# yum -y install java-1.8.0-openjdk-devel.x86_64   #安装OpenJDk
...
Complete!
[root@Services ~]#[root@Services ~]# ln -s /usr/lib/jvm/java-1.8.0-openjdk-1.8.0.332.b09-1.el8_5.x86_64/ /usr/lib/jvm/jdk                                                    #创建JDK软链接
[root@Services ~]# vim /etc/bashrc                                  #配置环境变量
[root@Services ~]# tail -3 /etc/bashrc
export JAVA_HOME="/usr/lib/jvm/jdk/"        #声明JAVA_HOME变量
export CLASSPATH=.                          #声明类库加载目录
export PATH=${JAVA_HOME}/bin/:$PATH         #声明PATH变量
[root@Services ~]# source /etc/bashrc       #刷新bash环境
[root@Services ~]# echo ${JAVA_HOME}                                #测试JAVA_HOME变量
/usr/lib/jvm/jdk/
[root@Services ~]# which java
/usr/lib/jvm/jdk/bin/java
[root@Services ~]# java -version
openjdk version "1.8.0_332"
OpenJDK Runtime Environment (build 1.8.0_332-b09)
OpenJDK 64-Bit Server VM (build 25.332-b09, mixed mode)
[root@Services ~]# #安装Elasticsearch服务
[root@Services ~]# ls elasticsearch-6.8.0.rpm
elasticsearch-6.8.0.rpm
[root@Services ~]# yum -y localinstall ./elasticsearch-6.8.0.rpm #配置Elasticsearch服务
[root@Services ~]# vim /etc/elasticsearch/elasticsearch.yml
[root@Services ~]# cat /etc/elasticsearch/elasticsearch.yml | grep -Pv "^\s*(#|$)"
node.name: Services                 #ES节点名称
path.data: /var/lib/elasticsearch   #ES数据存储路径
path.logs: /var/log/elasticsearch   #ES日志存储路径
network.host: 0.0.0.0               #监听地址
http.port: 9200                     #HTTP端口
[root@Services ~]##启动Elasticsearch服务
[root@Services ~]# systemctl enable elasticsearch.service   #设置服务开机自启动
[root@Services ~]# systemctl start elasticsearch.service    #启动Elasticsearch服务
[root@Services ~]# ss -antpul | grep java
tcp   LISTEN 0      128      *:9200      *:*    users:(("java",pid=9847,fd=209))
tcp   LISTEN 0      128      *:9300      *:*    users:(("java",pid=9847,fd=196))
[root@Services ~]# #测试Elasticsearch服务
[root@Services ~]# curl http://localhost:9200/          #访问9200端口,返回一段json数据
{"name" : "Services","cluster_name" : "elasticsearch","cluster_uuid" : "1cf7N861QBC_C0RE8gm0OA","version" : {"number" : "6.8.0","build_flavor" : "default","build_type" : "rpm","build_hash" : "65b6179","build_date" : "2019-05-15T20:06:13.172855Z","build_snapshot" : false,"lucene_version" : "7.7.0","minimum_wire_compatibility_version" : "5.6.0","minimum_index_compatibility_version" : "5.0.0"},"tagline" : "You Know, for Search"
}
ElasticSerach插件部署
#插件安装方法
#方式一:从官网下载ES插件,通常为ZIP格式,解压到/usr/share/elasticsearch/plugins/目录
#方式二:使用elasticsearch-plugin命令#elasticsearch-plugin install file://path/xx.zip#elasticsearch-plugin install http://addresss/xx#elasticsearch-plugin install ftp://address/xx
#方式三:容器
# IK分词器插件
#本地安装IK分词器插件
[root@Services ~]# /usr/share/elasticsearch/bin/elasticsearch-plugin list   #查看插件列表
[root@Services ~]# ls elasticsearch-analysis-ik-6.8.0.zip
elasticsearch-analysis-ik-6.8.0.zip
[root@Services ~]# /usr/share/elasticsearch/bin/elasticsearch-plugin install    file:///root/elasticsearch-analysis-ik-6.8.0.zip                            #安装插件
-> Downloading file:///root/elasticsearch-analysis-ik-6.8.0.zip
[=================================================] 100%
@@@@@@@@@@@@@@@@@@@@@@@@@@@@@@@@@@@@@@@@@@@@@@@@@@@@@@@@@@@
@     WARNING: plugin requires additional permissions     @
@@@@@@@@@@@@@@@@@@@@@@@@@@@@@@@@@@@@@@@@@@@@@@@@@@@@@@@@@@@
* java.net.SocketPermission * connect,resolve
See http://docs.oracle.com/javase/8/docs/technotes/guides/security/permissions.html
for descriptions of what these permissions allow and the associated risks.Continue with installation? [y/N]y
-> Installed analysis-ik
[root@Services ~]# /usr/share/elasticsearch/bin/elasticsearch-plugin list   #查看插件列表
analysis-ik
[root@Services ~]# #测试IK分词器
[root@Services ~]# systemctl restart elasticsearch.service          #重启服务加载插件[root@Services ~]#  curl -H "Content-Type: application/json" -XPOST http://localhost:9200/_analyze?pretty -d '
{
"analyzer": "standard",
"text": "华为手机"
}'                                                                  #测试标准分词
{"tokens" : [{"token" : "华","start_offset" : 0,"end_offset" : 1,"type" : "<IDEOGRAPHIC>","position" : 0},{"token" : "为","start_offset" : 1,"end_offset" : 2,"type" : "<IDEOGRAPHIC>","position" : 1},{"token" : "手","start_offset" : 2,"end_offset" : 3,"type" : "<IDEOGRAPHIC>","position" : 2},{"token" : "机","start_offset" : 3,"end_offset" : 4,"type" : "<IDEOGRAPHIC>","position" : 3}]
}
[root@Services ~]#[root@Services ~]# curl -H "Content-Type: application/json" -XPOST http://localhost:9200/_analyze?pretty -d '
{"analyzer": "ik_smart","text": "华为手机"
}'                                                                  #测试IK分词器
{"tokens" : [{"token" : "华为","start_offset" : 0,"end_offset" : 2,"type" : "CN_WORD","position" : 0},{"token" : "手机","start_offset" : 2,"end_offset" : 4,"type" : "CN_WORD","position" : 1}]
}
HEAD 插件(容器部署)
#安装podman工具
[root@Services ~]# yum clean all; yum repolist -v
...
Total packages: 8,265
[root@Services ~]# yum -y install podman #安装podman
Complete!
[root@Services ~]# podman --version #确认podman安装
podman version 4.0.2
[root@Services ~]# #导入ES-HEAD镜像
[root@Services ~]# ls elasticsearch-head.tar
elasticsearch-head.tar
[root@Services ~]# podman images #查看本地已有镜像
REPOSITORY TAG IMAGE ID CREATED SIZE
[root@Services ~]# podman load -i elasticsearch-head.tar #导入ES-HEAD插件镜像
Getting image source signatures
Copying blob 604c78617f34 done
Copying blob 60a0858edcd5 done
Copying blob b6ca02dfe5e6 done
Copying blob 0a5e2b2ddeaa done
Copying blob 53c779688d06 done
Copying blob fa18e5ffd316 done
Copying blob cf2eea3d6e04 done
Copying blob d556e03b8284 done
Copying blob 95ea76455b84 done
Copying blob ce5705289a91 done
Copying blob d09533ddfc0d done
Copying blob eb415bbb4658 done
Copying blob f418a5a1e636 done
Copying config d008a8ccd0 done
Writing manifest to image destination
Storing signatures
Loaded image(s): localhost/elasticsearch-head:latest
[root@Services ~]# podman images #确认ES-HEAD镜像已导入
REPOSITORY TAG IMAGE ID CREATED SIZE
localhost/elasticsearch-head latest d008a8ccd029 7 weeks ago 862 MB
[root@Services ~]# #启动ES-HEAD容器
[root@Services ~]# podman ps #查看有运行的容器,应为空
CONTAINER ID IMAGE COMMAND CREATED STATUS PORTS NAMES
[root@Services ~]# podman run -d --name es-head --hostname es-head -p 9100:9100 localhost/elasticsearch-head:latest #后台运行ES-HEAD容器
f222cb764271574148d31b184bd0aebda419ce3ebd43843c0ff8f1f4dc6ba53c
[root@Services ~]# podman ps #确认ES-HEAD容器已运行
CONTAINER ID IMAGE COMMAND CREATED STATUS PORTS NAMES
f222cb764271 localhost/elasticsearch-head:latest /bin/sh -c grunt ... 2 seconds ago Up 2 seconds ago 0.0.0.0:9100->9100/tcp es-head
[root@Services ~]# ss -antpul | grep 9100 #确认9100端口被监听
tcp LISTEN 0 128 0.0.0.0:9100 0.0.0.0:* users:(("conmon",pid=12651,fd=5))
[root@Services ~]# #修改Elasticsearch配置,开启跨域访问
[root@Services ~]# vim /etc/elasticsearch/elasticsearch.yml
[root@Services ~]# sed -rn '59,61p' /etc/elasticsearch/elasticsearch.yml
http.port: 9200
http.cors.enabled: true #开启HTTP跨域访问支持
http.cors.allow-origin: "*" #允许跨域的访问范围
[root@Services ~]# systemctl restart elasticsearch.service
[root@Services ~]# ss -antpul | grep java
tcp LISTEN 0 128 *:9200 *:* users:(("java",pid=12764,fd=214))
tcp LISTEN 0 128 *:9300 *:* users:(("java",pid=12764,fd=201))
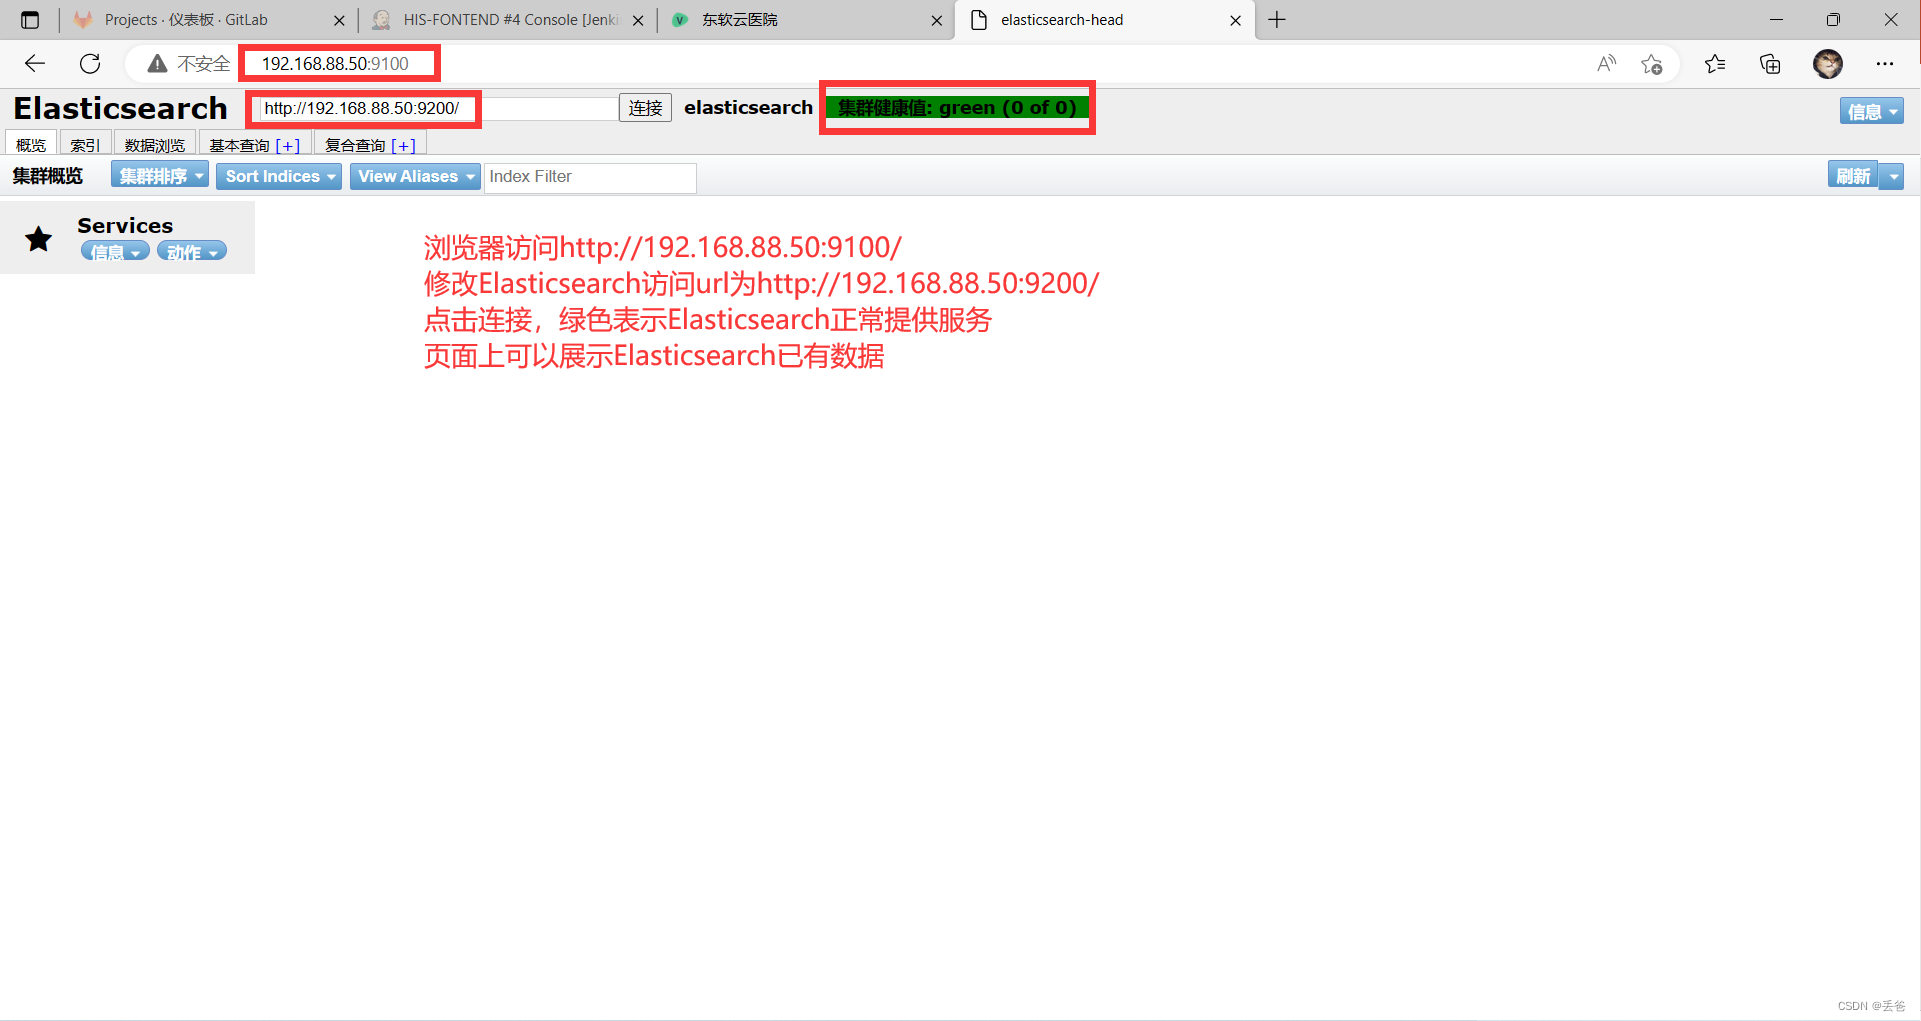
[root@Services ~]# #测试访问Elasticsearch-HEAD插件:http://192.168.88.50:9100/
Elasticsearch API
#测试指定API
[root@Services ~]# curl -H "Content-Type: application/json" -XGET http://localhost:9200/_cat/health
1677142976 09:02:56 elasticsearch green 1 1 0 0 0 0 0 0 - 100.0%
[root@Services ~]# curl -H "Content-Type: application/json" -XGET http://localhost:9200/_cat/health?v
epoch timestamp cluster status node.total node.data shards pri relo init unassign pending_tasks max_task_wait_time active_shards_percent
1677142979 09:02:59 elasticsearch green 1 1 0 0 0 0 0 0 - 100.0%
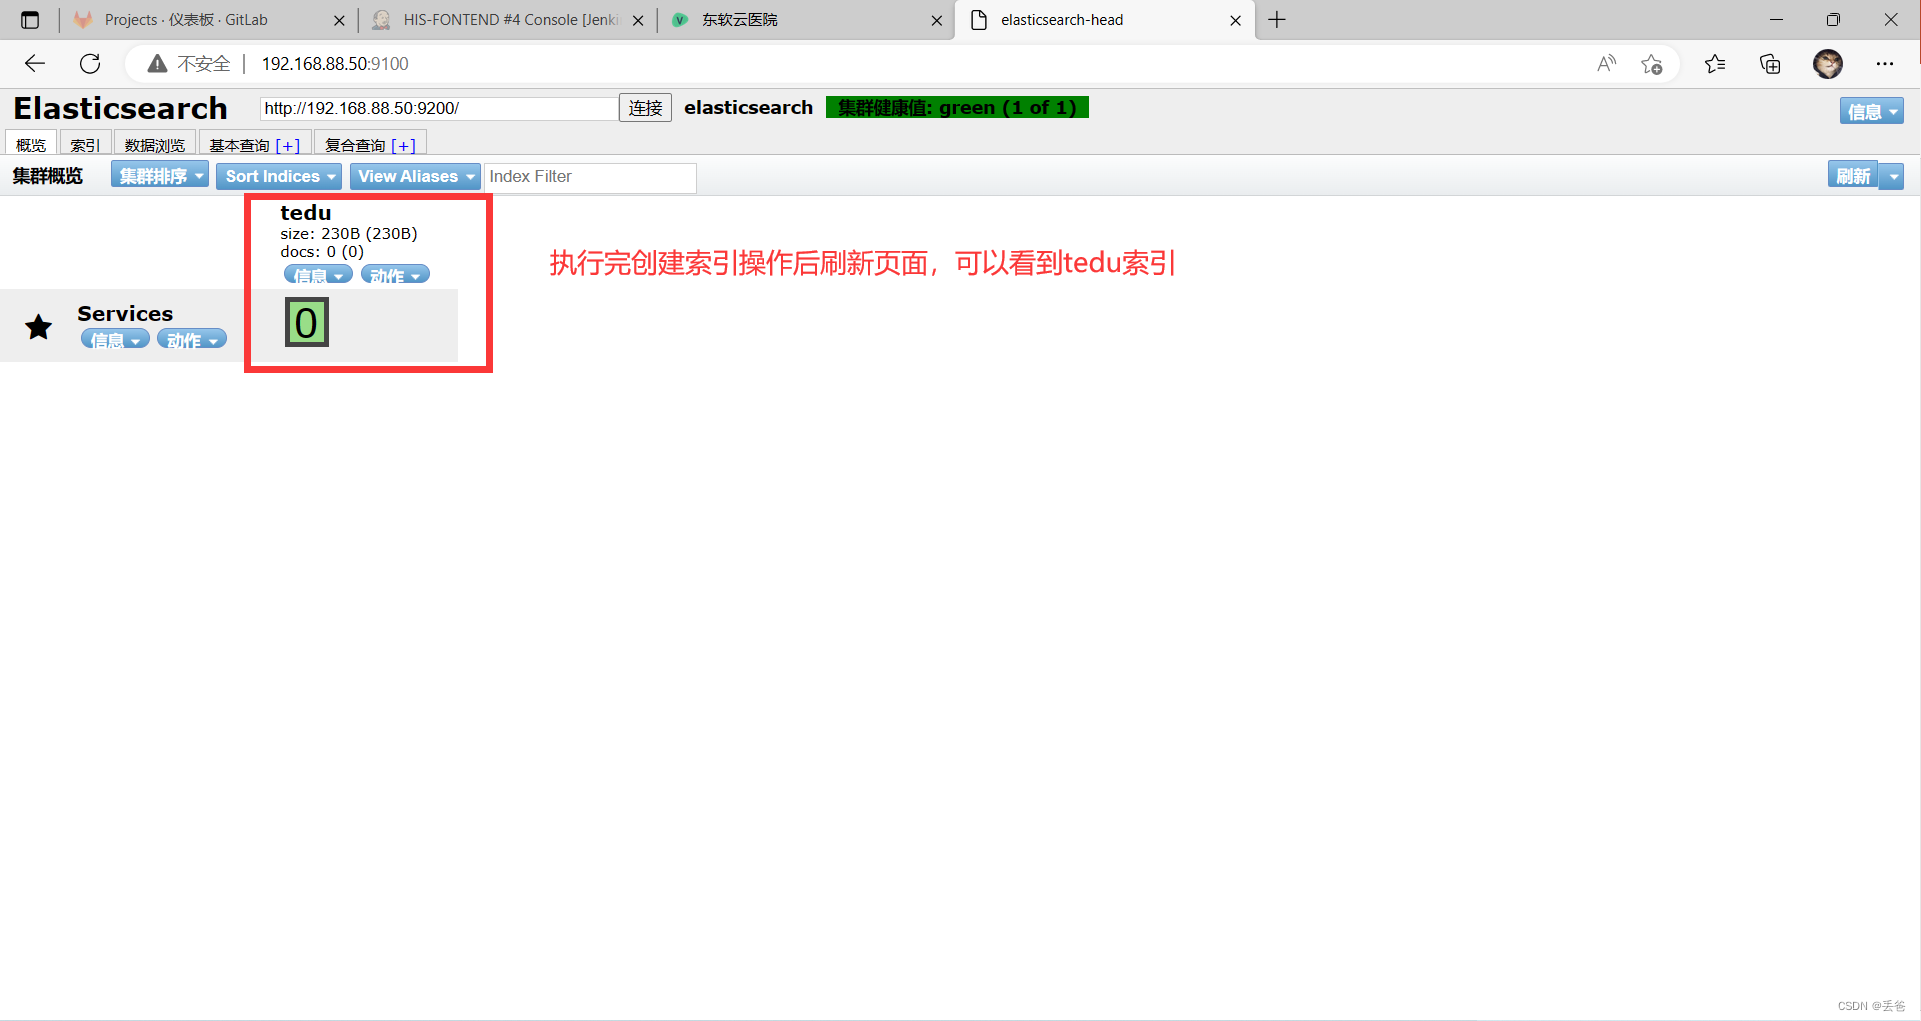
[root@Services ~]##创建索引(必做练习)
[root@Services ~]# curl -H "Content-Type: application/json" -XPUT http://localhost:9200/tedu/ -d '
{ "settings": {"index": {"number_of_shards": 1,"number_of_replicas": 0}}
}'
{"acknowledged":true,"shards_acknowledged":true,"index":"tedu"}
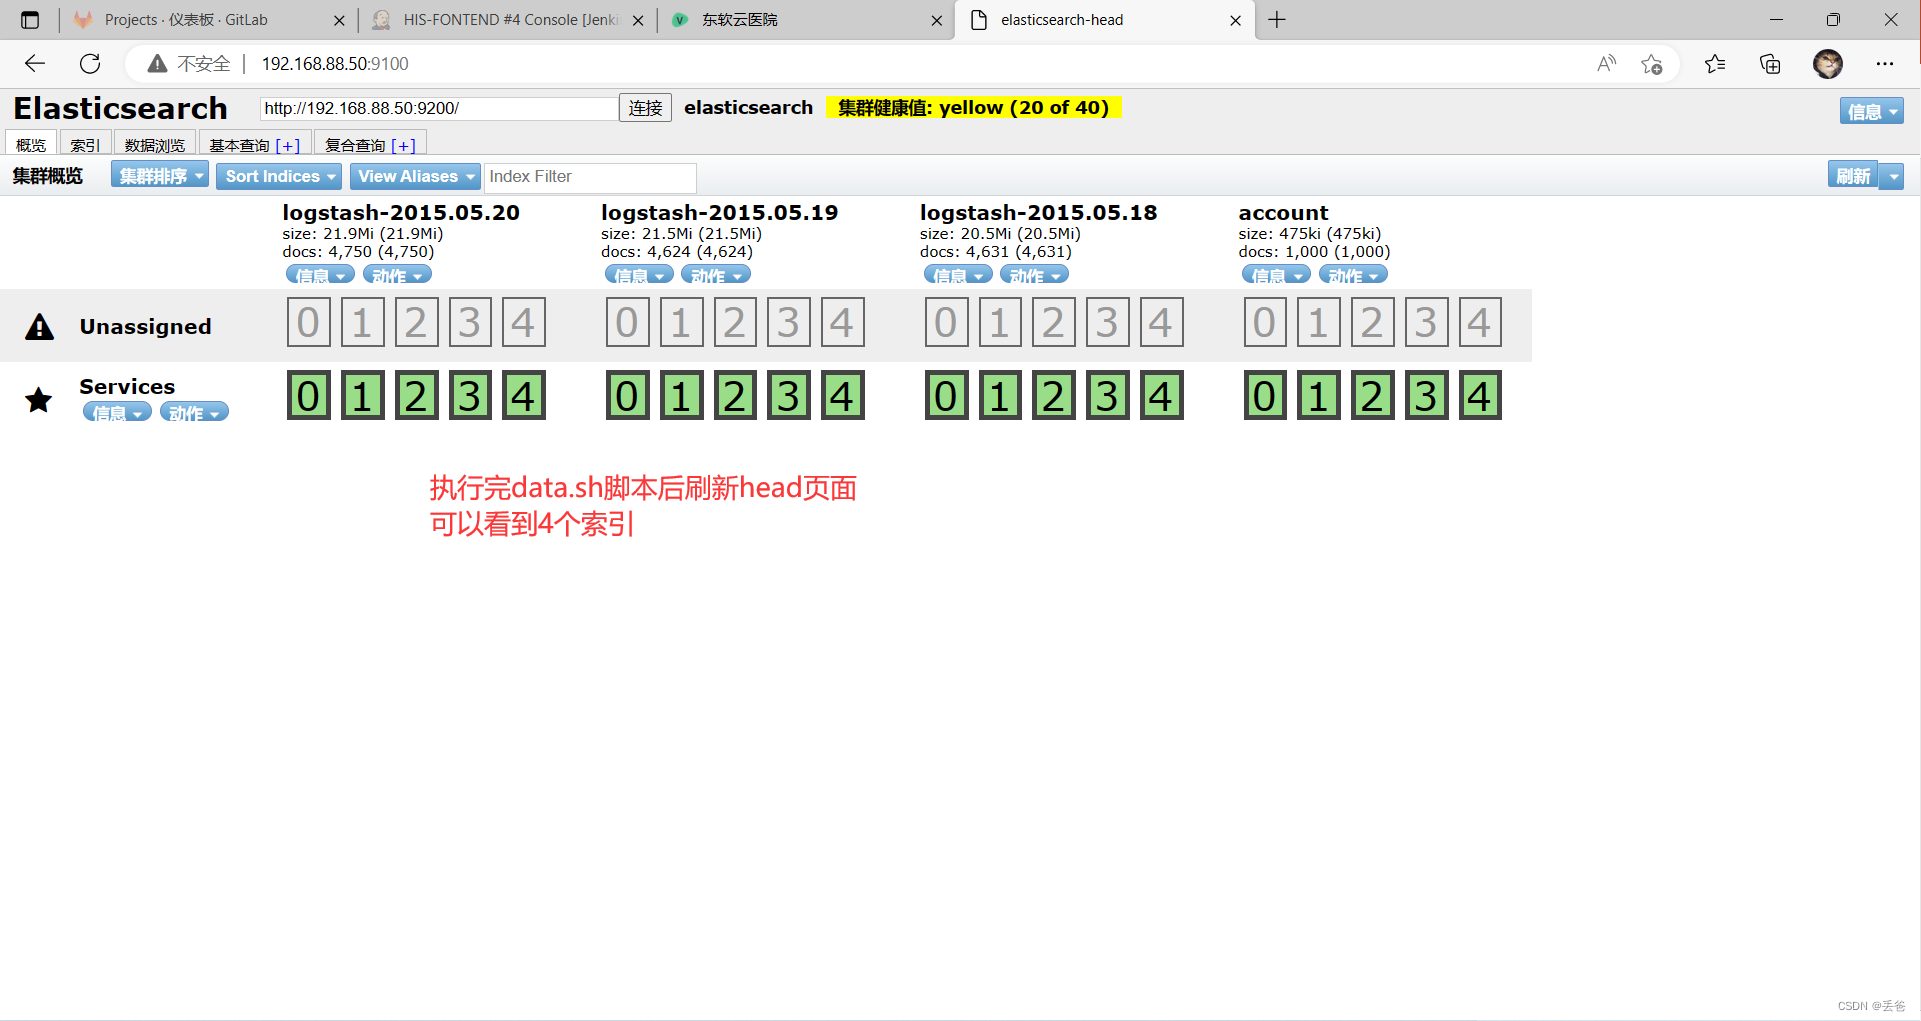
#调用API批量导入数据
[root@Services ~]# ls data.sh logs.jsonl accounts.json
accounts.json  data.sh  logs.jsonl
[root@Services ~]# cat data.sh
#!/bin/bash
curl -H "Content-Type: application/json" -XPUT http://localhost:9200/account/user/_bulk --data-binary @accounts.json
curl -H "Content-Type: application/json" -XPUT http://localhost:9200/_bulk --data-binary @logs.jsonl
[root@Services ~]# bash data.sh
RabbitMQ服务
RabbitMQ部署
#安装Erlang
[root@Services ~]# yum clean all; yum repolist -v
[root@Services ~]# ls erlang-25.2-1.el8.x86_64.rpm
erlang-25.2-1.el8.x86_64.rpm
[root@Services ~]# yum -y localinstall ./erlang-25.2-1.el8.x86_64.rpm #安装RabbitMQ
[root@Services ~]# ls rabbitmq-server-3.11.5-1.el8.noarch.rpm
rabbitmq-server-3.11.5-1.el8.noarch.rpm
[root@Services ~]# yum -y localinstall ./rabbitmq-server-3.11.5-1.el8.noarch.rpm #启动RabbitMQ服务
[root@Services ~]# systemctl enable rabbitmq-server.service #设置RabbitMQ开机自启动
[root@Services ~]# systemctl start rabbitmq-server.service #启动RabbitMQ服务
[root@Services ~]# ss -antpul | grep :5672 #确认5672端口监听
tcp LISTEN 0 128 *:5672 *:* users:(("beam.smp",pid=13298,fd=35))[root@Services ~]# rabbitmqctl status #查看RabbitMQ服务状态
Status of node rabbit@Services ...
RuntimeOS PID: 13298
OS: Linux
Uptime (seconds): 15
Is under maintenance?: false
RabbitMQ version: 3.11.5
RabbitMQ release series support status: supported
Node name: rabbit@Services
Erlang configuration: Erlang/OTP 25 [erts-13.1.3] [source] [64-bit] [smp:2:2] [ds:2:2:10] [async-threads:1] [jit:ns]
Crypto library: OpenSSL 1.1.1k FIPS 25 Mar 2021
Erlang processes: 274 used, 1048576 limit
Scheduler run queue: 1
Cluster heartbeat timeout (net_ticktime): 60PluginsEnabled plugin file: /etc/rabbitmq/enabled_plugins
Enabled plugins:Data directoryNode data directory: /var/lib/rabbitmq/mnesia/rabbit@Services
Raft data directory: /var/lib/rabbitmq/mnesia/rabbit@Services/quorum/rabbit@ServicesConfig filesLog file(s)* /var/log/rabbitmq/rabbit@Services.log* /var/log/rabbitmq/rabbit@Services_upgrade.log* <stdout>Alarms(none)MemoryTotal memory used: 0.1288 gb
Calculation strategy: rss
Memory high watermark setting: 0.4 of available memory, computed to: 1.6343 gbreserved_unallocated: 0.0809 gb (62.85 %)
code: 0.0321 gb (24.94 %)
other_proc: 0.0189 gb (14.65 %)
other_system: 0.0134 gb (10.44 %)
other_ets: 0.0027 gb (2.14 %)
atom: 0.0014 gb (1.07 %)
metrics: 0.0006 gb (0.43 %)
binary: 0.0002 gb (0.16 %)
mnesia: 0.0001 gb (0.06 %)
plugins: 0.0 gb (0.03 %)
msg_index: 0.0 gb (0.02 %)
quorum_ets: 0.0 gb (0.02 %)
quorum_queue_dlx_procs: 0.0 gb (0.0 %)
quorum_queue_procs: 0.0 gb (0.0 %)
stream_queue_procs: 0.0 gb (0.0 %)
stream_queue_replica_reader_procs: 0.0 gb (0.0 %)
allocated_unused: 0.0 gb (0.0 %)
connection_channels: 0.0 gb (0.0 %)
connection_other: 0.0 gb (0.0 %)
connection_readers: 0.0 gb (0.0 %)
connection_writers: 0.0 gb (0.0 %)
mgmt_db: 0.0 gb (0.0 %)
queue_procs: 0.0 gb (0.0 %)
queue_slave_procs: 0.0 gb (0.0 %)
stream_queue_coordinator_procs: 0.0 gb (0.0 %)File DescriptorsTotal: 2, limit: 32671
Sockets: 0, limit: 29401Free Disk SpaceLow free disk space watermark: 0.05 gb
Free disk space: 5.8313 gbTotalsConnection count: 0
Queue count: 0
Virtual host count: 1ListenersInterface: [::], port: 25672, protocol: clustering, purpose: inter-node and CLI tool communication
Interface: [::], port: 5672, protocol: amqp, purpose: AMQP 0-9-1 and AMQP 1.0
[root@Services ~]# #启用RabbitMQ网页管理插件
[root@Services ~]# rabbitmq-plugins list #列出所有插件
[root@Services ~]# rabbitmq-plugins enable rabbitmq_management #启动网页管理插件
Enabling plugins on node rabbit@Services:
rabbitmq_management
The following plugins have been configured:rabbitmq_managementrabbitmq_management_agentrabbitmq_web_dispatch
Applying plugin configuration to rabbit@Services...
The following plugins have been enabled:rabbitmq_managementrabbitmq_management_agentrabbitmq_web_dispatchstarted 3 plugins.
[root@Services ~]# rabbitmq-plugins list
Listing plugins with pattern ".*" ...Configured: E = explicitly enabled; e = implicitly enabled| Status: * = running on rabbit@Services|/
[ ] rabbitmq_amqp1_0 3.11.5
[ ] rabbitmq_auth_backend_cache 3.11.5
[ ] rabbitmq_auth_backend_http 3.11.5
[ ] rabbitmq_auth_backend_ldap 3.11.5
[ ] rabbitmq_auth_backend_oauth2 3.11.5
[ ] rabbitmq_auth_mechanism_ssl 3.11.5
[ ] rabbitmq_consistent_hash_exchange 3.11.5
[ ] rabbitmq_event_exchange 3.11.5
[ ] rabbitmq_federation 3.11.5
[ ] rabbitmq_federation_management 3.11.5
[ ] rabbitmq_jms_topic_exchange 3.11.5
[E*] rabbitmq_management 3.11.5
[e*] rabbitmq_management_agent 3.11.5
[ ] rabbitmq_mqtt 3.11.5
[ ] rabbitmq_peer_discovery_aws 3.11.5
[ ] rabbitmq_peer_discovery_common 3.11.5
[ ] rabbitmq_peer_discovery_consul 3.11.5
[ ] rabbitmq_peer_discovery_etcd 3.11.5
[ ] rabbitmq_peer_discovery_k8s 3.11.5
[ ] rabbitmq_prometheus 3.11.5
[ ] rabbitmq_random_exchange 3.11.5
[ ] rabbitmq_recent_history_exchange 3.11.5
[ ] rabbitmq_sharding 3.11.5
[ ] rabbitmq_shovel 3.11.5
[ ] rabbitmq_shovel_management 3.11.5
[ ] rabbitmq_stomp 3.11.5
[ ] rabbitmq_stream 3.11.5
[ ] rabbitmq_stream_management 3.11.5
[ ] rabbitmq_top 3.11.5
[ ] rabbitmq_tracing 3.11.5
[ ] rabbitmq_trust_store 3.11.5
[e*] rabbitmq_web_dispatch 3.11.5
[ ] rabbitmq_web_mqtt 3.11.5
[ ] rabbitmq_web_mqtt_examples 3.11.5
[ ] rabbitmq_web_stomp 3.11.5
[ ] rabbitmq_web_stomp_examples 3.11.5
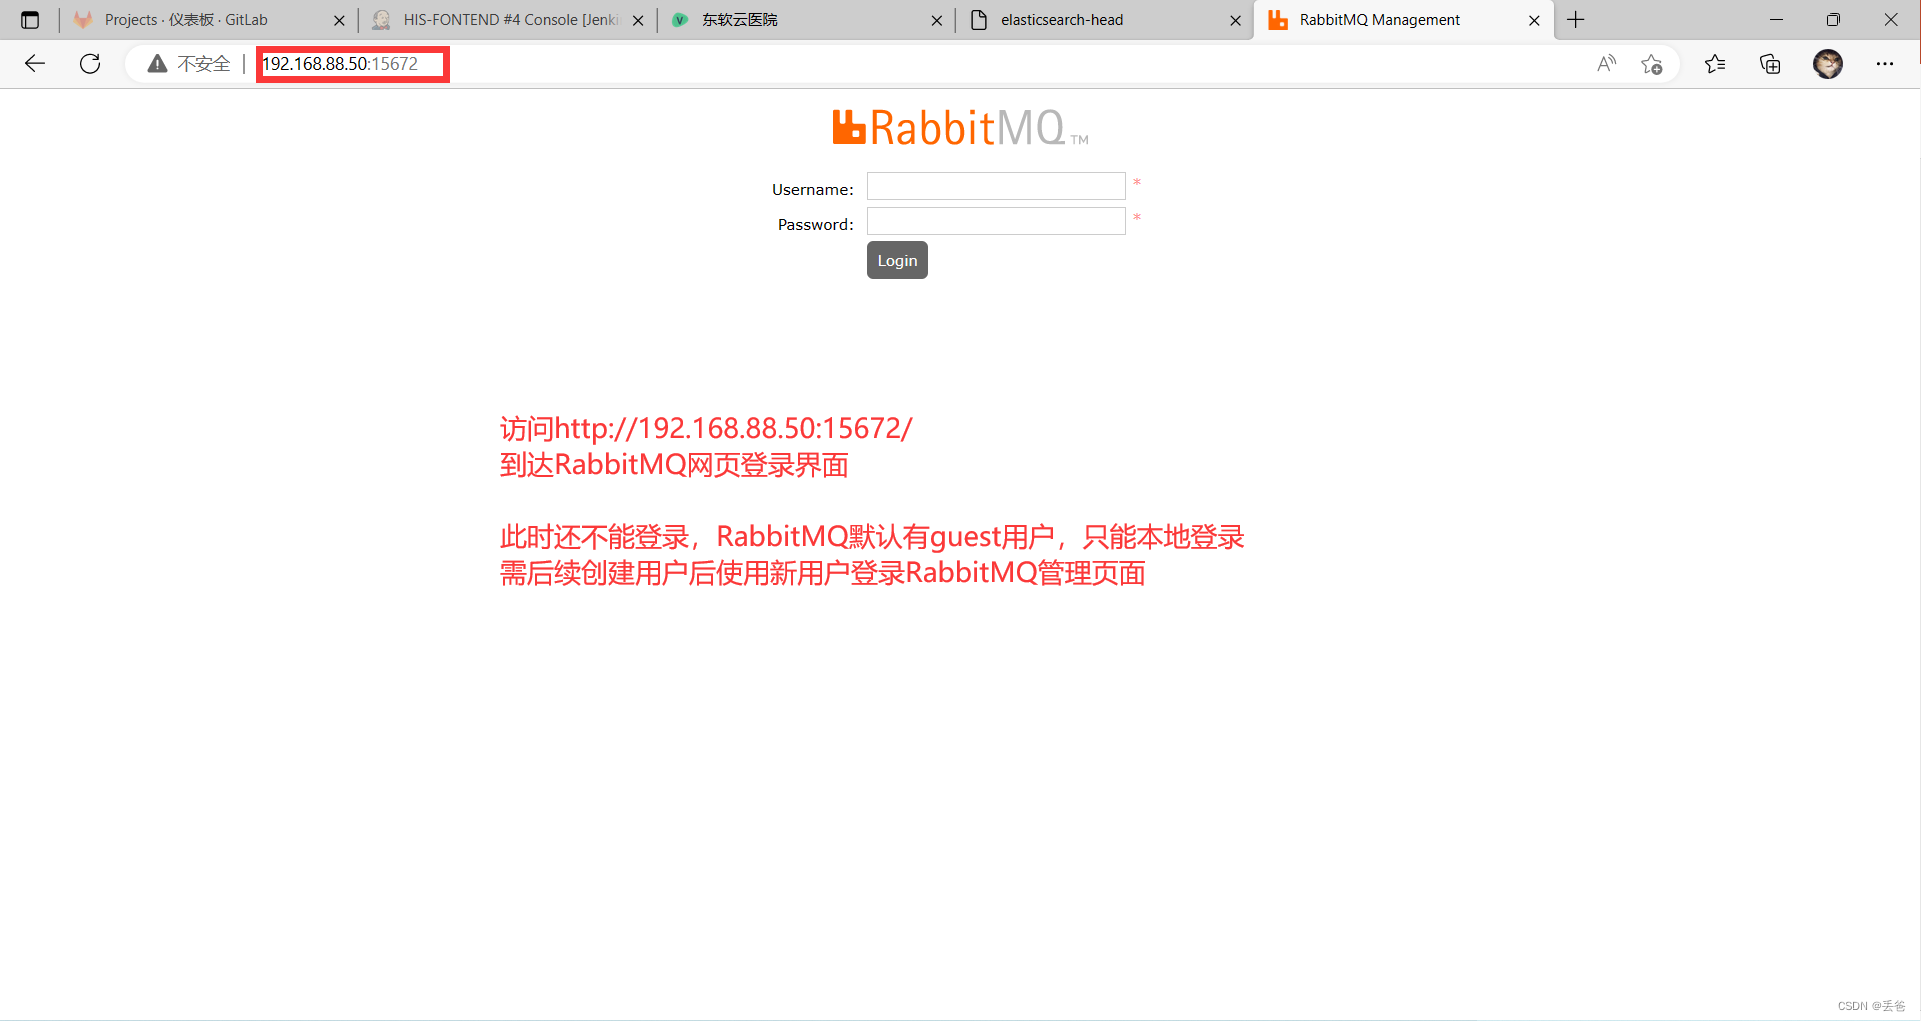
[root@Services ~]# ss -antpul | grep :15672
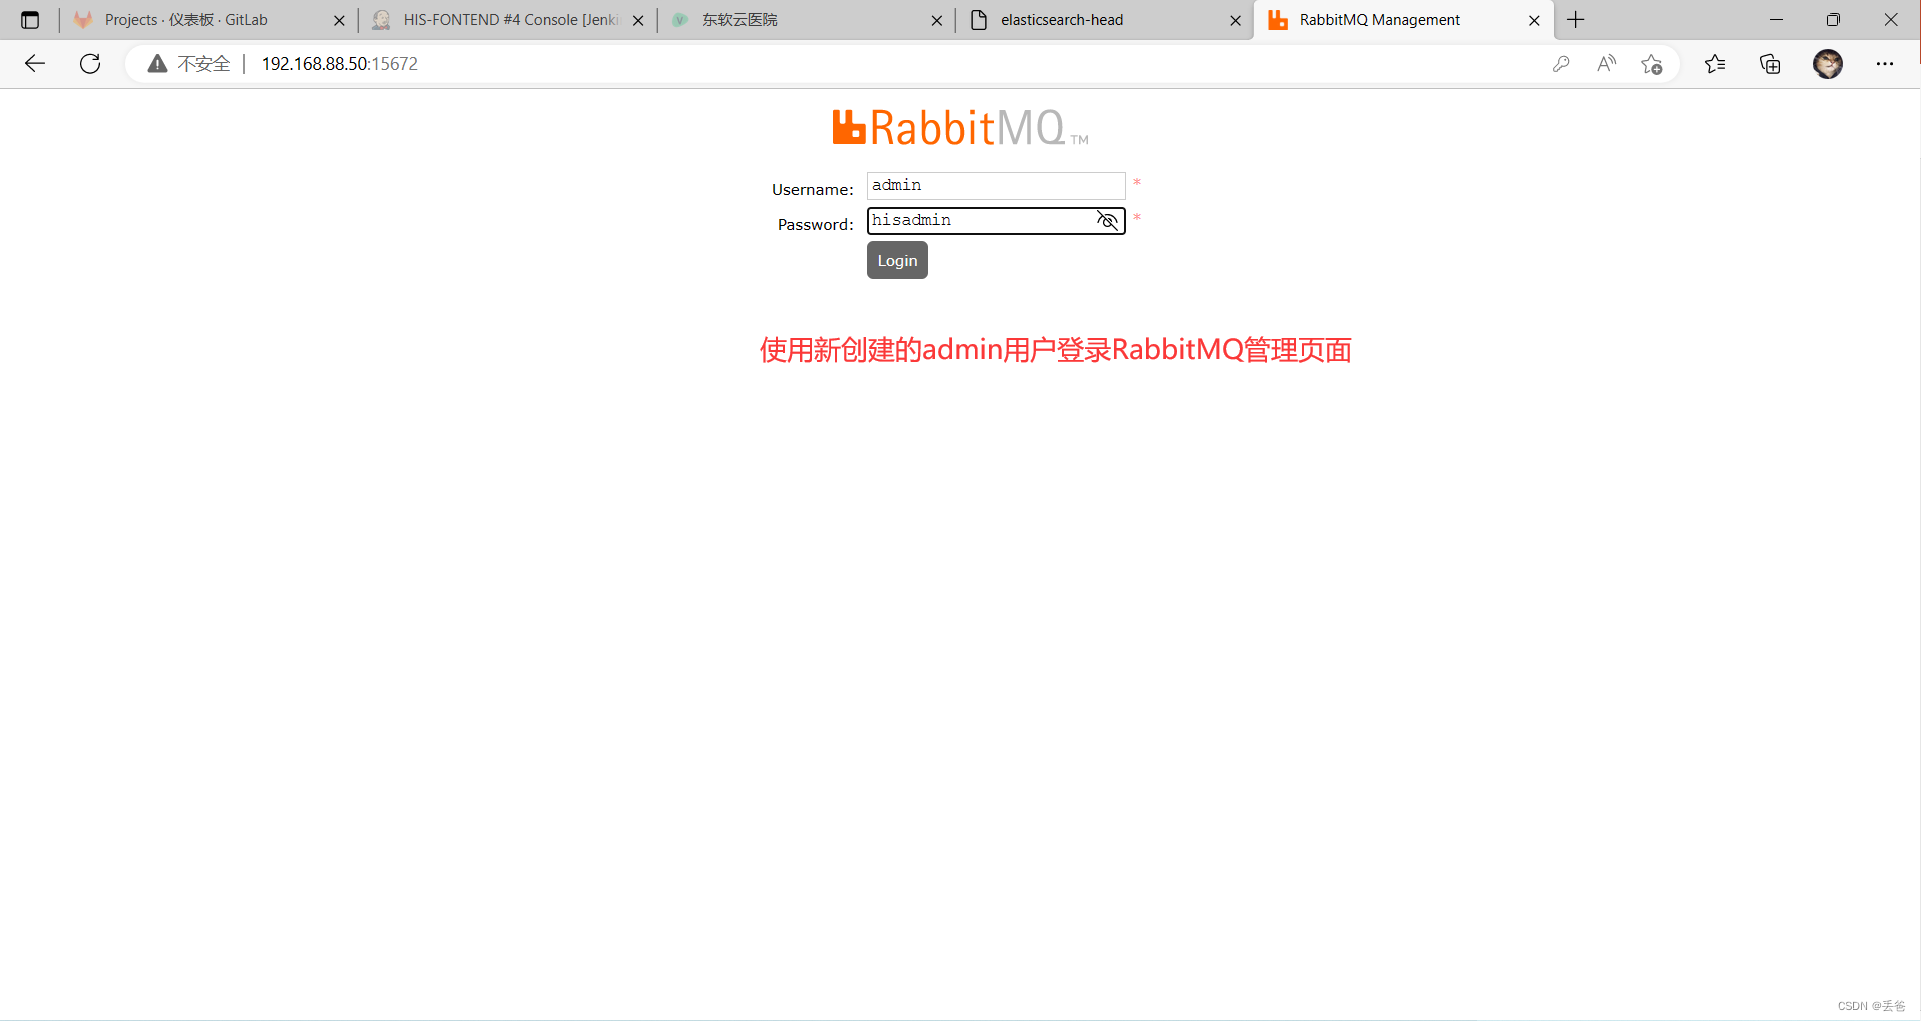
tcp LISTEN 0 128 0.0.0.0:15672 0.0.0.0:* users:(("beam.smp",pid=13298,fd=37))#访问RabbitMQ管理页面: http://192.168.88.50:15672/
RabbitMQ服务应用
#RabbitMQ创建用户
[root@Services ~]# rabbitmqctl list_users           #列出RabbitMQ已有用户
Listing users ...
user    tags
guest   [administrator]
[root@Services ~]# rabbitmqctl add_user admin       #添加admin用户
Adding user "admin" ...
Password:
hisadmin        #密码必须设置为hisadmin,为后续项目使用
Done. Don't forget to grant the user permissions to some virtual hosts! See 'rabbitmqctl help set_permissions' to learn more.
[root@Services ~]# rabbitmqctl list_users           #列出RabbitMQ已有用户
Listing users ...
user    tags
admin   []
guest   [administrator]# 用户标签管理
#RabbitMQ用户标签解析 #超级管理员(administrator)#可登陆管理控制台,可查看所有的信息,并且可以对用户,策略(policy)进行操作。#监控者(monitoring)#可登陆管理控制台,同时可以查看rabbitmq节点的相关信息(进程数,内存使用情况,磁盘使用情况等)#策略制定者(policymaker)#可登陆管理控制台, 同时可以对policy进行管理。但无法查看节点的相关信息(上图红框标识的部分)。#普通管理者(management)#仅可登陆管理控制台,无法看到节点信息,也无法对策略进行管理。#其他(guest)#无法登陆管理控制台,通常就是普通的生产者和消费者#给admin用户添加administrator标签
[root@Services ~]# rabbitmqctl set_user_tags admin administrator
Setting tags for user "admin" to [administrator] ...
[root@Services ~]# rabbitmqctl list_users
Listing users ...
user    tags
admin   [administrator]
guest   [administrator]
# 虚拟主机管理
#创建/his虚拟主机
[root@Services ~]# rabbitmqctl list_vhosts          #列出已有虚拟主机
Listing vhosts ...
name
/
[root@Services ~]# rabbitmqctl add_vhost /his       #创建/his虚拟主机,后续项目使用
Adding vhost "/his" ...
[root@Services ~]# rabbitmqctl list_vhosts          #列出已有虚拟主机
Listing vhosts ...
name
/his
/
# 设置用户访问虚拟主机权限
#设置admin用户对/his虚拟主机有所有权限
[root@Services ~]# rabbitmqctl list_user_permissions admin      #查看admin用户权限
Listing permissions for user "admin" ...
#设置权限,第一个.*表示允许操作配置虚拟机的权限,第二个".*"表示可以修改虚拟机,第三个".*"表示可以读虚拟机
[root@Services ~]# rabbitmqctl set_permissions -p /his admin ".*" ".*" ".*"
Setting permissions for user "admin" in vhost "/his" ...
[root@Services ~]# rabbitmqctl list_user_permissions admin      #查看admin用户权限
Listing permissions for user "admin" ...
vhost   configure       write   read
/his    .*              .*      .*


![孜然单授权系统V1.0[免费使用]](https://img-blog.csdnimg.cn/5d4887a2f14340c0895275802115f550.png)
