文章目录
- 0 前言
- 1 yolov5实现中国交通标志检测
- 2.算法原理
- 2.1 算法简介
- 2.2网络架构
- 2.3 关键代码
- 3 数据集处理
- 3.1 VOC格式介绍
- 3.2 将中国交通标志检测数据集CCTSDB数据转换成VOC数据格式
- 3.3 手动标注数据集
- 4 模型训练
- 5 实现效果
- 5.1 视频效果
- 6 最后
0 前言
🔥 优质竞赛项目系列,今天要分享的是
🚩 基于深度学习的中国交通标志识别算法研究与实现
该项目较为新颖,适合作为竞赛课题方向,学长非常推荐!
🥇学长这里给一个题目综合评分(每项满分5分)
- 难度系数:4分
- 工作量:4分
- 创新点:3分
🧿 更多资料, 项目分享:
https://gitee.com/dancheng-senior/postgraduate
1 yolov5实现中国交通标志检测
整个互联网基本没有国内交通标志识别的开源项目(都是国外的),今天学长分享一个中国版本的实时交通标志识别项目,非常适合作为毕业设计~
2.算法原理
2.1 算法简介
YOLOv5是一种单阶段目标检测算法,该算法在YOLOv4的基础上添加了一些新的改进思路,使其速度与精度都得到了极大的性能提升。主要的改进思路如下所示:
输入端:在模型训练阶段,提出了一些改进思路,主要包括Mosaic数据增强、自适应锚框计算、自适应图片缩放;
基准网络:融合其它检测算法中的一些新思路,主要包括:Focus结构与CSP结构;
Neck网络:目标检测网络在BackBone与最后的Head输出层之间往往会插入一些层,Yolov5中添加了FPN+PAN结构;
Head输出层:输出层的锚框机制与YOLOv4相同,主要改进的是训练时的损失函数GIOU_Loss,以及预测框筛选的DIOU_nms。
2.2网络架构
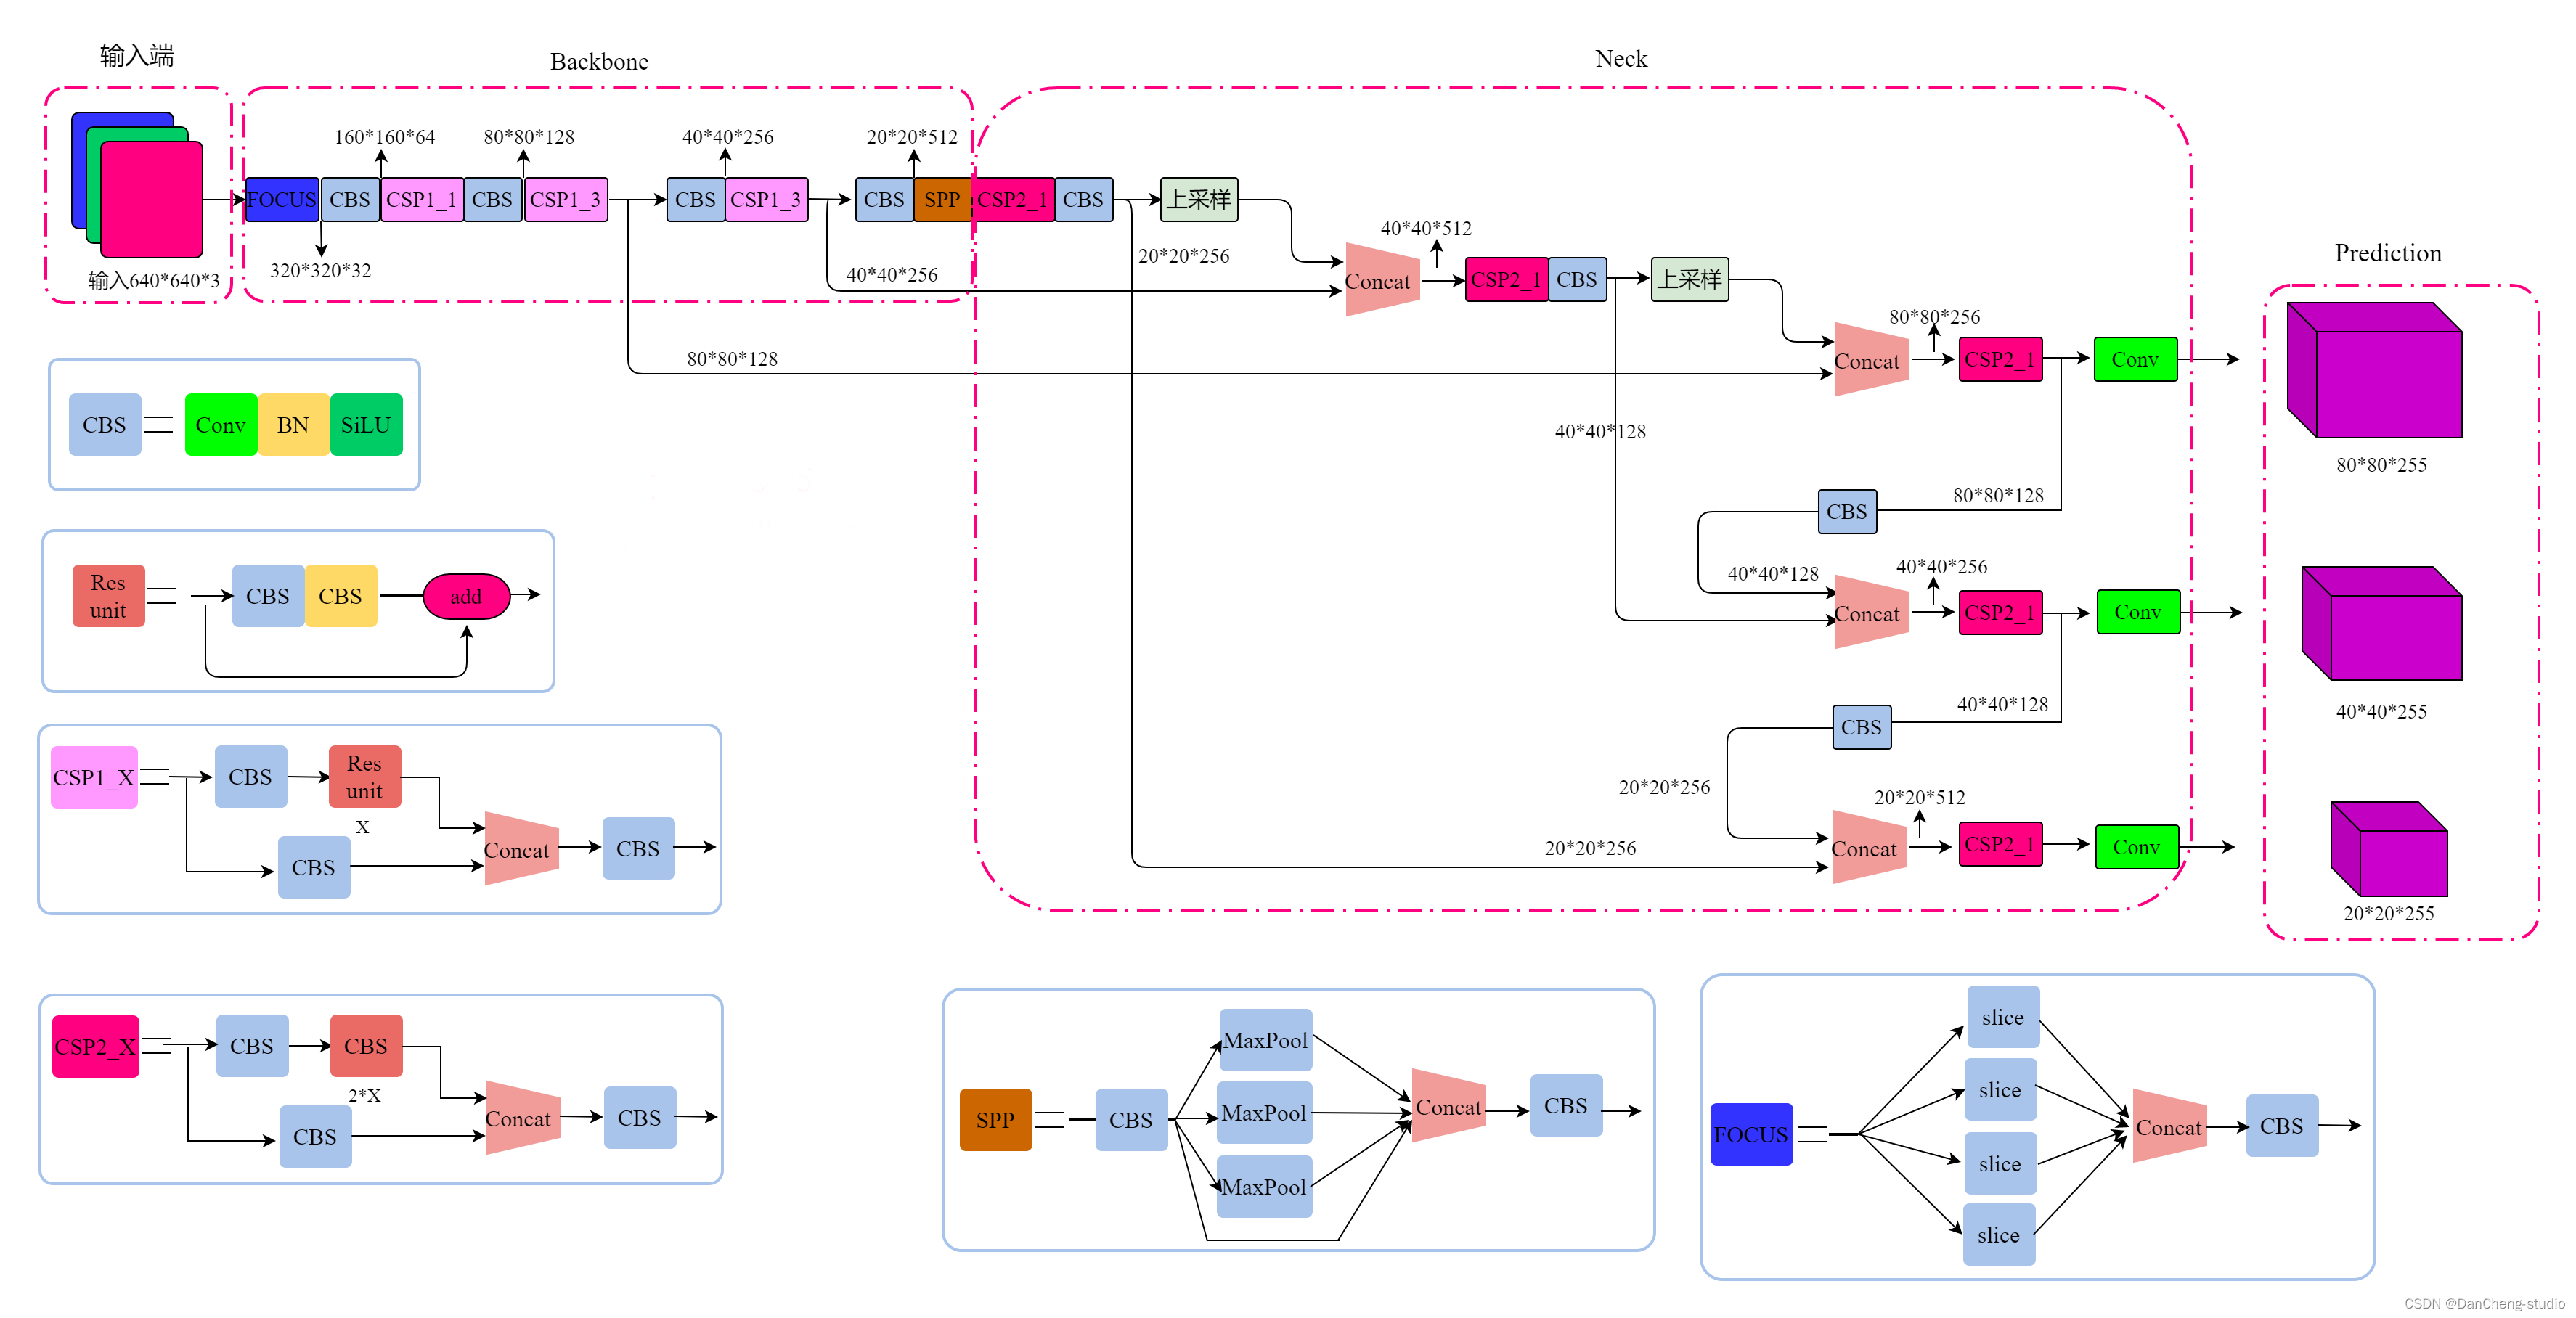
上图展示了YOLOv5目标检测算法的整体框图。对于一个目标检测算法而言,我们通常可以将其划分为4个通用的模块,具体包括:输入端、基准网络、Neck网络与Head输出端,对应于上图中的4个红色模块。YOLOv5算法具有4个版本,具体包括:YOLOv5s、YOLOv5m、YOLOv5l、YOLOv5x四种,本文重点讲解YOLOv5s,其它的版本都在该版本的基础上对网络进行加深与加宽。
- 输入端-输入端表示输入的图片。该网络的输入图像大小为608*608,该阶段通常包含一个图像预处理阶段,即将输入图像缩放到网络的输入大小,并进行归一化等操作。在网络训练阶段,YOLOv5使用Mosaic数据增强操作提升模型的训练速度和网络的精度;并提出了一种自适应锚框计算与自适应图片缩放方法。
- 基准网络-基准网络通常是一些性能优异的分类器种的网络,该模块用来提取一些通用的特征表示。YOLOv5中不仅使用了CSPDarknet53结构,而且使用了Focus结构作为基准网络。
- Neck网络-Neck网络通常位于基准网络和头网络的中间位置,利用它可以进一步提升特征的多样性及鲁棒性。虽然YOLOv5同样用到了SPP模块、FPN+PAN模块,但是实现的细节有些不同。
- Head输出端-Head用来完成目标检测结果的输出。针对不同的检测算法,输出端的分支个数不尽相同,通常包含一个分类分支和一个回归分支。YOLOv4利用GIOU_Loss来代替Smooth L1 Loss函数,从而进一步提升算法的检测精度。
2.3 关键代码
class Detect(nn.Module):stride = None # strides computed during buildonnx_dynamic = False # ONNX export parameterdef __init__(self, nc=80, anchors=(), ch=(), inplace=True): # detection layersuper().__init__()self.nc = nc # number of classesself.no = nc + 5 # number of outputs per anchorself.nl = len(anchors) # number of detection layersself.na = len(anchors[0]) // 2 # number of anchorsself.grid = [torch.zeros(1)] * self.nl # init gridself.anchor_grid = [torch.zeros(1)] * self.nl # init anchor gridself.register_buffer('anchors', torch.tensor(anchors).float().view(self.nl, -1, 2)) # shape(nl,na,2)self.m = nn.ModuleList(nn.Conv2d(x, self.no * self.na, 1) for x in ch) # output convself.inplace = inplace # use in-place ops (e.g. slice assignment)def forward(self, x):z = [] # inference outputfor i in range(self.nl):x[i] = self.m[i](x[i]) # convbs, _, ny, nx = x[i].shape # x(bs,255,20,20) to x(bs,3,20,20,85)x[i] = x[i].view(bs, self.na, self.no, ny, nx).permute(0, 1, 3, 4, 2).contiguous()if not self.training: # inferenceif self.onnx_dynamic or self.grid[i].shape[2:4] != x[i].shape[2:4]:self.grid[i], self.anchor_grid[i] = self._make_grid(nx, ny, i)y = x[i].sigmoid()if self.inplace:y[..., 0:2] = (y[..., 0:2] * 2 - 0.5 + self.grid[i]) * self.stride[i] # xyy[..., 2:4] = (y[..., 2:4] * 2) ** 2 * self.anchor_grid[i] # whelse: # for YOLOv5 on AWS Inferentia https://github.com/ultralytics/yolov5/pull/2953xy = (y[..., 0:2] * 2 - 0.5 + self.grid[i]) * self.stride[i] # xywh = (y[..., 2:4] * 2) ** 2 * self.anchor_grid[i] # why = torch.cat((xy, wh, y[..., 4:]), -1)z.append(y.view(bs, -1, self.no))return x if self.training else (torch.cat(z, 1), x)def _make_grid(self, nx=20, ny=20, i=0):d = self.anchors[i].deviceif check_version(torch.__version__, '1.10.0'): # torch>=1.10.0 meshgrid workaround for torch>=0.7 compatibilityyv, xv = torch.meshgrid([torch.arange(ny).to(d), torch.arange(nx).to(d)], indexing='ij')else:yv, xv = torch.meshgrid([torch.arange(ny).to(d), torch.arange(nx).to(d)])grid = torch.stack((xv, yv), 2).expand((1, self.na, ny, nx, 2)).float()anchor_grid = (self.anchors[i].clone() * self.stride[i]) \.view((1, self.na, 1, 1, 2)).expand((1, self.na, ny, nx, 2)).float()return grid, anchor_gridclass Model(nn.Module):def __init__(self, cfg='yolov5s.yaml', ch=3, nc=None, anchors=None): # model, input channels, number of classessuper().__init__()if isinstance(cfg, dict):self.yaml = cfg # model dictelse: # is *.yamlimport yaml # for torch hubself.yaml_file = Path(cfg).namewith open(cfg, encoding='ascii', errors='ignore') as f:self.yaml = yaml.safe_load(f) # model dict# Define modelch = self.yaml['ch'] = self.yaml.get('ch', ch) # input channelsif nc and nc != self.yaml['nc']:LOGGER.info(f"Overriding model.yaml nc={self.yaml['nc']} with nc={nc}")self.yaml['nc'] = nc # override yaml valueif anchors:LOGGER.info(f'Overriding model.yaml anchors with anchors={anchors}')self.yaml['anchors'] = round(anchors) # override yaml valueself.model, self.save = parse_model(deepcopy(self.yaml), ch=[ch]) # model, savelistself.names = [str(i) for i in range(self.yaml['nc'])] # default namesself.inplace = self.yaml.get('inplace', True)# Build strides, anchorsm = self.model[-1] # Detect()if isinstance(m, Detect):s = 256 # 2x min stridem.inplace = self.inplacem.stride = torch.tensor([s / x.shape[-2] for x in self.forward(torch.zeros(1, ch, s, s))]) # forwardm.anchors /= m.stride.view(-1, 1, 1)check_anchor_order(m)self.stride = m.strideself._initialize_biases() # only run once# Init weights, biasesinitialize_weights(self)self.info()LOGGER.info('')def forward(self, x, augment=False, profile=False, visualize=False):if augment:return self._forward_augment(x) # augmented inference, Nonereturn self._forward_once(x, profile, visualize) # single-scale inference, traindef _forward_augment(self, x):img_size = x.shape[-2:] # height, widths = [1, 0.83, 0.67] # scalesf = [None, 3, None] # flips (2-ud, 3-lr)y = [] # outputsfor si, fi in zip(s, f):xi = scale_img(x.flip(fi) if fi else x, si, gs=int(self.stride.max()))yi = self._forward_once(xi)[0] # forward# cv2.imwrite(f'img_{si}.jpg', 255 * xi[0].cpu().numpy().transpose((1, 2, 0))[:, :, ::-1]) # saveyi = self._descale_pred(yi, fi, si, img_size)y.append(yi)y = self._clip_augmented(y) # clip augmented tailsreturn torch.cat(y, 1), None # augmented inference, traindef _forward_once(self, x, profile=False, visualize=False):y, dt = [], [] # outputsfor m in self.model:if m.f != -1: # if not from previous layerx = y[m.f] if isinstance(m.f, int) else [x if j == -1 else y[j] for j in m.f] # from earlier layersif profile:self._profile_one_layer(m, x, dt)x = m(x) # runy.append(x if m.i in self.save else None) # save outputif visualize:feature_visualization(x, m.type, m.i, save_dir=visualize)return xdef _descale_pred(self, p, flips, scale, img_size):# de-scale predictions following augmented inference (inverse operation)if self.inplace:p[..., :4] /= scale # de-scaleif flips == 2:p[..., 1] = img_size[0] - p[..., 1] # de-flip udelif flips == 3:p[..., 0] = img_size[1] - p[..., 0] # de-flip lrelse:x, y, wh = p[..., 0:1] / scale, p[..., 1:2] / scale, p[..., 2:4] / scale # de-scaleif flips == 2:y = img_size[0] - y # de-flip udelif flips == 3:x = img_size[1] - x # de-flip lrp = torch.cat((x, y, wh, p[..., 4:]), -1)return pdef _clip_augmented(self, y):# Clip YOLOv5 augmented inference tailsnl = self.model[-1].nl # number of detection layers (P3-P5)g = sum(4 ** x for x in range(nl)) # grid pointse = 1 # exclude layer counti = (y[0].shape[1] // g) * sum(4 ** x for x in range(e)) # indicesy[0] = y[0][:, :-i] # largei = (y[-1].shape[1] // g) * sum(4 ** (nl - 1 - x) for x in range(e)) # indicesy[-1] = y[-1][:, i:] # smallreturn ydef _profile_one_layer(self, m, x, dt):c = isinstance(m, Detect) # is final layer, copy input as inplace fixo = thop.profile(m, inputs=(x.copy() if c else x,), verbose=False)[0] / 1E9 * 2 if thop else 0 # FLOPst = time_sync()for _ in range(10):m(x.copy() if c else x)dt.append((time_sync() - t) * 100)if m == self.model[0]:LOGGER.info(f"{'time (ms)':>10s} {'GFLOPs':>10s} {'params':>10s} {'module'}")LOGGER.info(f'{dt[-1]:10.2f} {o:10.2f} {m.np:10.0f} {m.type}')if c:LOGGER.info(f"{sum(dt):10.2f} {'-':>10s} {'-':>10s} Total")def _initialize_biases(self, cf=None): # initialize biases into Detect(), cf is class frequency# https://arxiv.org/abs/1708.02002 section 3.3# cf = torch.bincount(torch.tensor(np.concatenate(dataset.labels, 0)[:, 0]).long(), minlength=nc) + 1.m = self.model[-1] # Detect() modulefor mi, s in zip(m.m, m.stride): # fromb = mi.bias.view(m.na, -1) # conv.bias(255) to (3,85)b.data[:, 4] += math.log(8 / (640 / s) ** 2) # obj (8 objects per 640 image)b.data[:, 5:] += math.log(0.6 / (m.nc - 0.999999)) if cf is None else torch.log(cf / cf.sum()) # clsmi.bias = torch.nn.Parameter(b.view(-1), requires_grad=True)def _print_biases(self):m = self.model[-1] # Detect() modulefor mi in m.m: # fromb = mi.bias.detach().view(m.na, -1).T # conv.bias(255) to (3,85)LOGGER.info(('%6g Conv2d.bias:' + '%10.3g' * 6) % (mi.weight.shape[1], *b[:5].mean(1).tolist(), b[5:].mean()))# def _print_weights(self):# for m in self.model.modules():# if type(m) is Bottleneck:# LOGGER.info('%10.3g' % (m.w.detach().sigmoid() * 2)) # shortcut weightsdef fuse(self): # fuse model Conv2d() + BatchNorm2d() layersLOGGER.info('Fusing layers... ')for m in self.model.modules():if isinstance(m, (Conv, DWConv)) and hasattr(m, 'bn'):m.conv = fuse_conv_and_bn(m.conv, m.bn) # update convdelattr(m, 'bn') # remove batchnormm.forward = m.forward_fuse # update forwardself.info()return selfdef autoshape(self): # add AutoShape moduleLOGGER.info('Adding AutoShape... ')m = AutoShape(self) # wrap modelcopy_attr(m, self, include=('yaml', 'nc', 'hyp', 'names', 'stride'), exclude=()) # copy attributesreturn mdef info(self, verbose=False, img_size=640): # print model informationmodel_info(self, verbose, img_size)def _apply(self, fn):# Apply to(), cpu(), cuda(), half() to model tensors that are not parameters or registered buffersself = super()._apply(fn)m = self.model[-1] # Detect()if isinstance(m, Detect):m.stride = fn(m.stride)m.grid = list(map(fn, m.grid))if isinstance(m.anchor_grid, list):m.anchor_grid = list(map(fn, m.anchor_grid))return selfdef parse_model(d, ch): # model_dict, input_channels(3)LOGGER.info(f"\n{'':>3}{'from':>18}{'n':>3}{'params':>10} {'module':<40}{'arguments':<30}")anchors, nc, gd, gw = d['anchors'], d['nc'], d['depth_multiple'], d['width_multiple']na = (len(anchors[0]) // 2) if isinstance(anchors, list) else anchors # number of anchorsno = na * (nc + 5) # number of outputs = anchors * (classes + 5)layers, save, c2 = [], [], ch[-1] # layers, savelist, ch outfor i, (f, n, m, args) in enumerate(d['backbone'] + d['head']): # from, number, module, argsm = eval(m) if isinstance(m, str) else m # eval stringsfor j, a in enumerate(args):try:args[j] = eval(a) if isinstance(a, str) else a # eval stringsexcept NameError:passn = n_ = max(round(n * gd), 1) if n > 1 else n # depth gainif m in [Conv, GhostConv, Bottleneck, GhostBottleneck, SPP, SPPF, DWConv, MixConv2d, Focus, CrossConv,BottleneckCSP, C3, C3TR, C3SPP, C3Ghost]:c1, c2 = ch[f], args[0]if c2 != no: # if not outputc2 = make_divisible(c2 * gw, 8)args = [c1, c2, *args[1:]]if m in [BottleneckCSP, C3, C3TR, C3Ghost]:args.insert(2, n) # number of repeatsn = 1elif m is nn.BatchNorm2d:args = [ch[f]]elif m is Concat:c2 = sum(ch[x] for x in f)elif m is Detect:args.append([ch[x] for x in f])if isinstance(args[1], int): # number of anchorsargs[1] = [list(range(args[1] * 2))] * len(f)elif m is Contract:c2 = ch[f] * args[0] ** 2elif m is Expand:c2 = ch[f] // args[0] ** 2else:c2 = ch[f]m_ = nn.Sequential(*(m(*args) for _ in range(n))) if n > 1 else m(*args) # modulet = str(m)[8:-2].replace('__main__.', '') # module typenp = sum(x.numel() for x in m_.parameters()) # number paramsm_.i, m_.f, m_.type, m_.np = i, f, t, np # attach index, 'from' index, type, number paramsLOGGER.info(f'{i:>3}{str(f):>18}{n_:>3}{np:10.0f} {t:<40}{str(args):<30}') # printsave.extend(x % i for x in ([f] if isinstance(f, int) else f) if x != -1) # append to savelistlayers.append(m_)if i == 0:ch = []ch.append(c2)return nn.Sequential(*layers), sorted(save)3 数据集处理
中国交通标志检测数据集CCTSDB,由长沙理工大学提供,包括上万张有标注的图片
推荐只使用前4000张照片,因为后面有很多张图片没有标注,需要一张一张的删除,太过于麻烦,所以尽量用前4000张图
3.1 VOC格式介绍
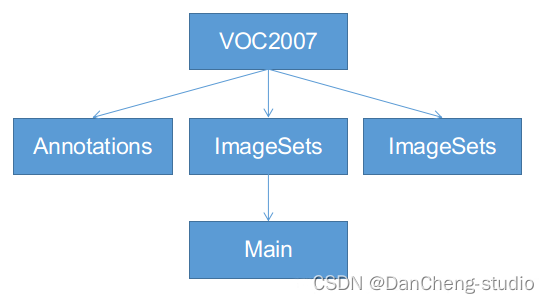
VOC格式主要包含三个文件夹Annotations,ImageSets,JPEGImages,主要适用于faster-
rcnn等模型的训练,ImageSets下面有一个Main的文件夹,如下图,一定按照这个名字和格式建好文件夹:
-
Annotations:这里是存放你对所有数据图片做的标注,每张照片的标注信息必须是xml格式。
-
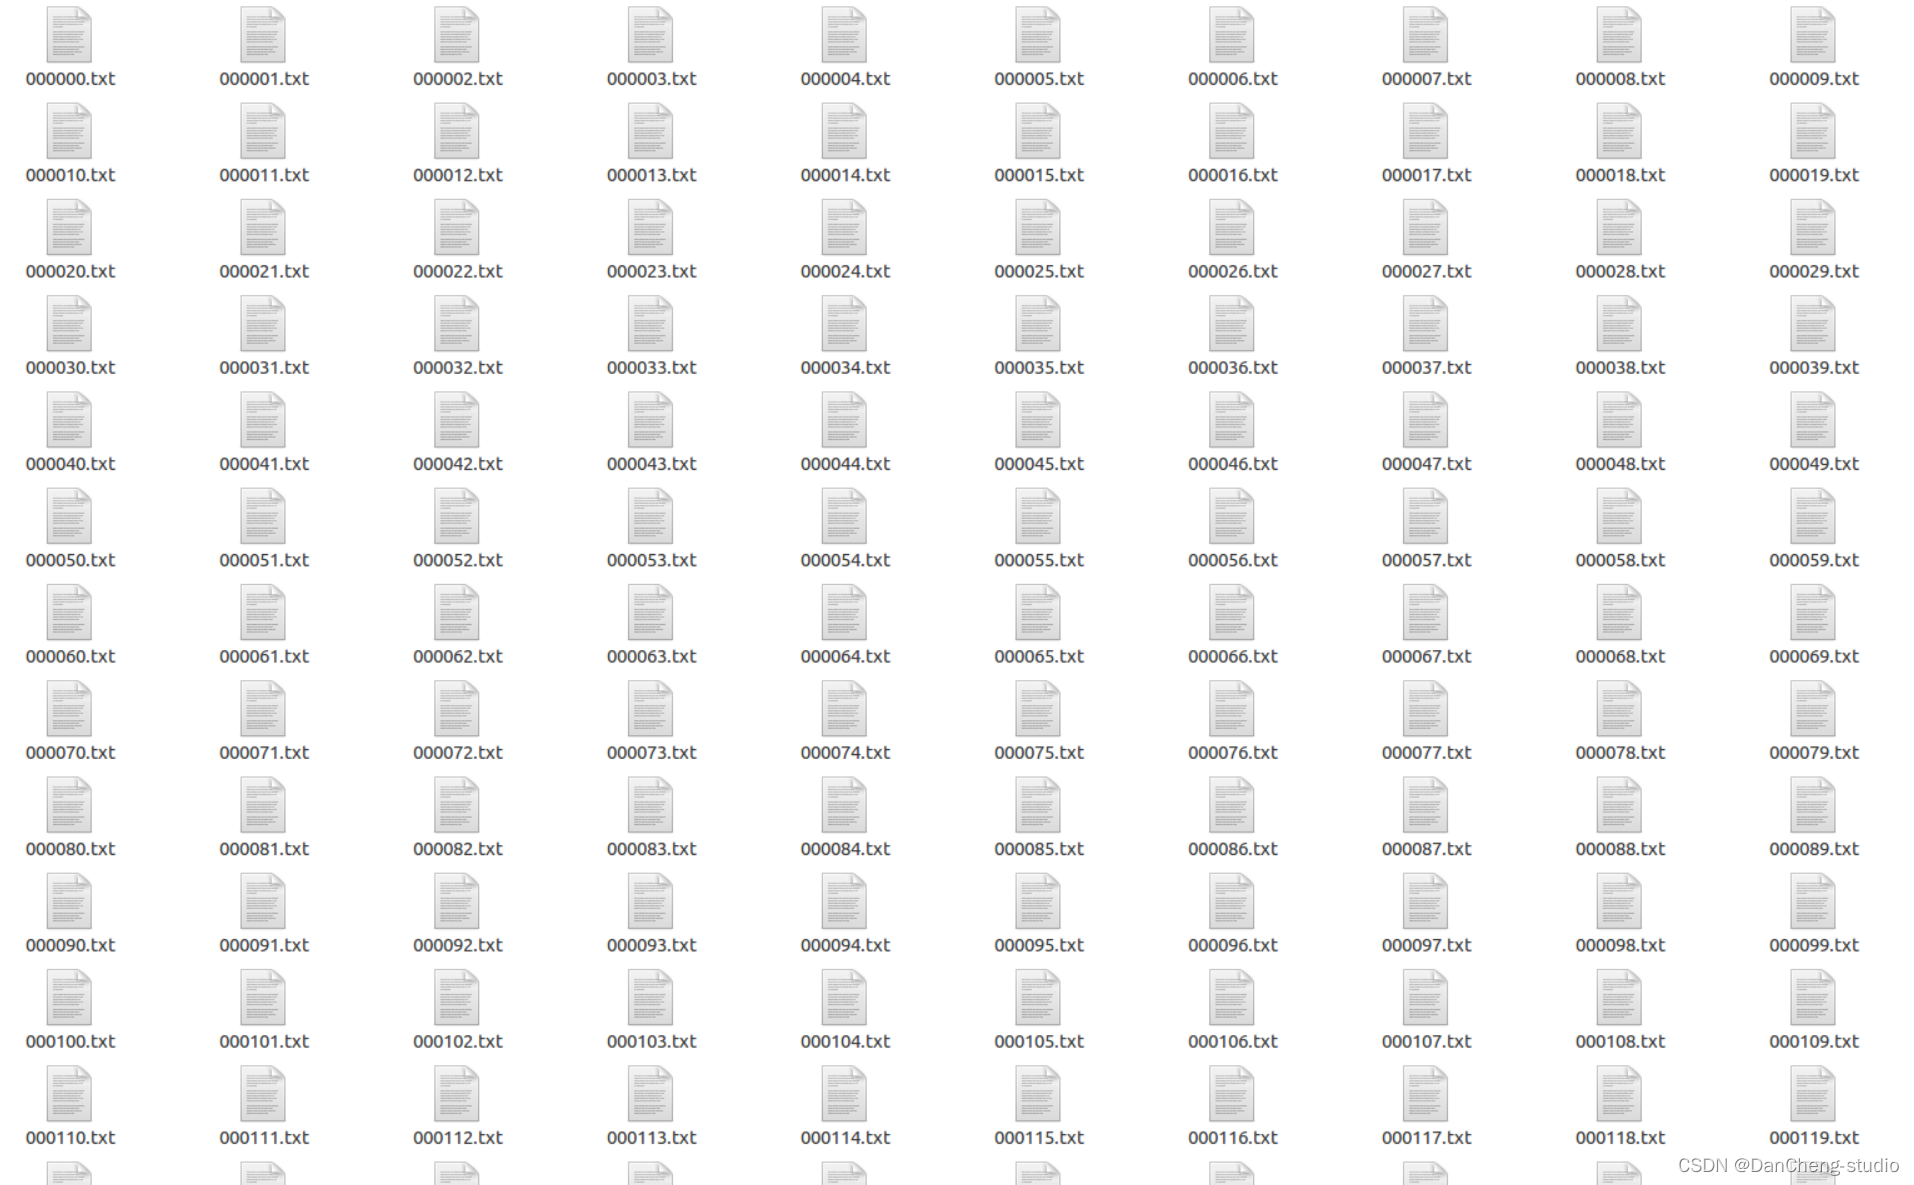
JPEGImages:用来保存你的数据图片,一定要对图片进行编号,一般按照voc数据集格式,采用六位数字编码,如000001.jpg、000002.jpg等。
-
ImageSets:该文件下有一个main文件,main文件下有四个txt文件,分别是train.txt、test.txt、trainval.txt、val.txt,里面都是存放的图片号码。
3.2 将中国交通标志检测数据集CCTSDB数据转换成VOC数据格式
将标注的数据提取出来并且排序,并将里面每一行分割成一个文件
3.3 手动标注数据集
如果为了更深入的学习也可自己标注,但过程相对比较繁琐,麻烦。
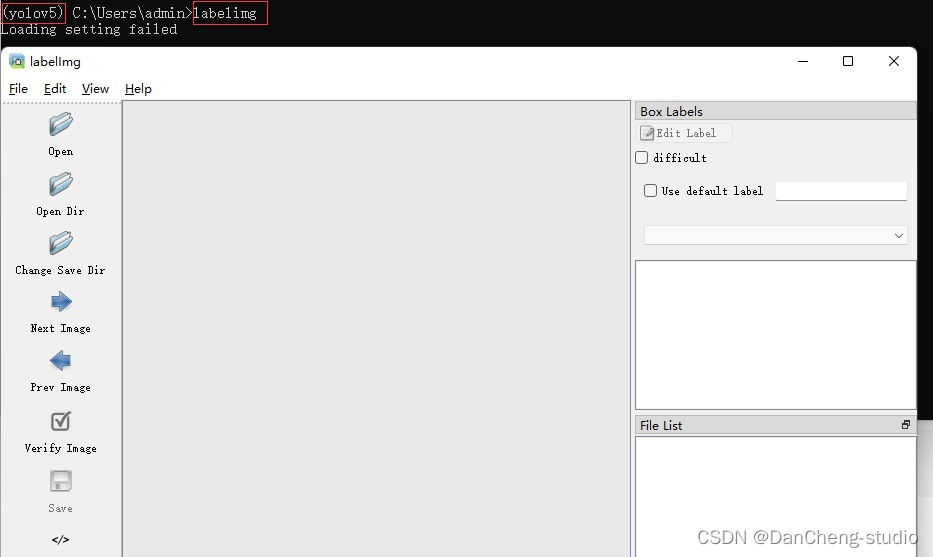
以下简单介绍数据标注的相关方法,数据标注这里推荐的软件是labelimg,通过pip指令即可安装,相关教程可网上搜索
pip install labelimg
4 模型训练
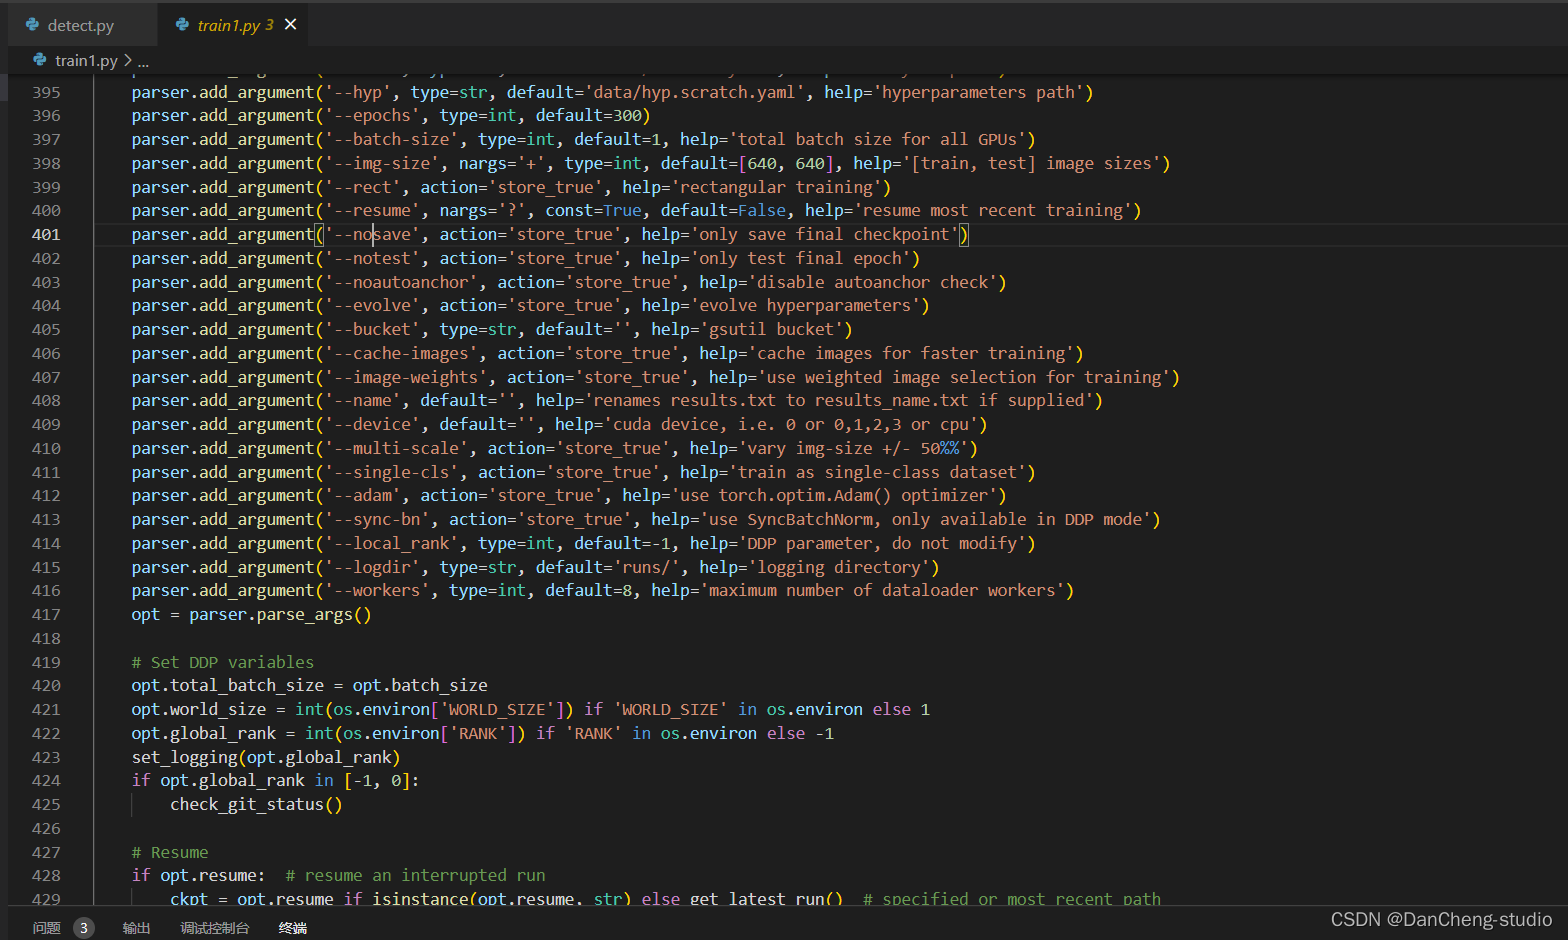
修改train.py中的weights、cfg、data、epochs、batch_size、imgsz、device、workers等参数
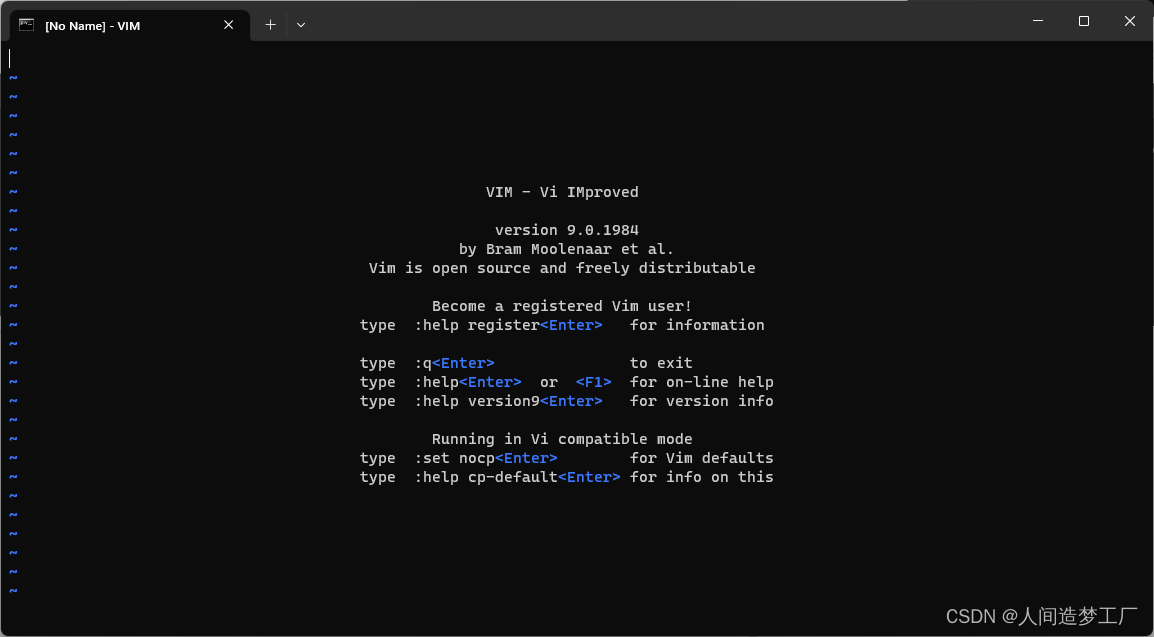
训练代码成功执行之后会在命令行中输出下列信息,接下来就是安心等待模型训练结束即可。

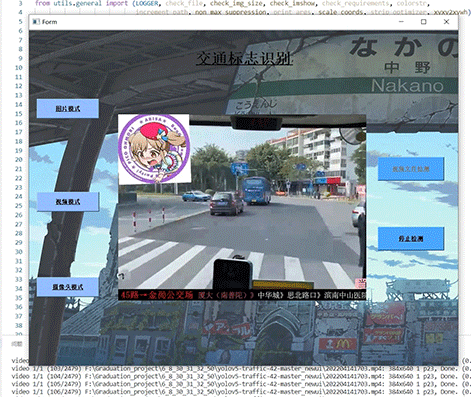
5 实现效果
5.1 视频效果
6 最后
🧿 更多资料, 项目分享:
https://gitee.com/dancheng-senior/postgraduate


![[管理与领导-113]:IT人看清职场中的隐性规则 - 10 - 看清人的行动、行为、手段、方法背后的动机与背景条件](https://img-blog.csdnimg.cn/fca4102dbffc40239847bfa53fb8e5a7.png)