1. Qt 布局详解
-
ui 设计器设计界面很方便,为什么还要手写代码?
- 更好的控制布局
- 更好的设置 qss
- 代码复用
-
完全不会写 Qt 布局,很麻烦,怎么学会手写布局?
- 看 Qt 自己怎么写
- 改良 Qt 的布局写法
1.1 水平布局
#include <QHBoxLayout>QHBoxLayout *pHLay = new QHBoxLayout(父窗口指针); // 父窗口指针通常填 this
- addWidget()
- 在布局里添加一个控件
- addLayout()
- 在布局里添加子布局
- setMargin()
- 设置水平布局最外边界与相邻控件左上右下的间隙,这时左上右下的间隙相同,如果想设置成不同,可以使用 setContentsMargins 方法
- setSpacing()
- 设置相邻控件之间的间隙,默认值大概是 7
- addSpacing()
- 在 setSpacing 的基础上进行相加
- 例如 addSpacing(-7),相当于两个控件之间没有距离,addSpacing(13) 相当于 setSpacing(20)
- addStretch()
- 在水平布局时添加一个水平的伸缩空间,在坚直布局时,添加一个坚直的伸缩空间
1.2 竖直布局
#include <QVBoxLayout>QVBoxLayout *pVLay = new QVBoxLayout(this);
1.3 栅格布局
#include <QGridLayout>QGridLayout *pGridLay = new QGridLayout(this);
1.4 综合案例

- widget.cpp
#include "widget.h"
#include <QLabel>
#include <QLineEdit>
#include <QPushButton>
#include <QCheckBox>
#include <QGridLayout>Widget::Widget(QWidget *parent) : QWidget(parent) {// Qt::FramelessWindowHint 是一个枚举值,表示窗口没有边框。即窗口将没有标题栏、窗口边框和关闭按钮,而只显示窗口的内容区域// Qt::WindowMinMaxButtonsHint 是一个枚举值,表示允许用户最小化和最大化窗口this->setWindowFlags(Qt::FramelessWindowHint | Qt::WindowMinMaxButtonsHint);// 头像QLabel* pImageLabel = new QLabel(this);QPixmap pixmap(":/resources/user_image.png");pImageLabel->setFixedSize(150, 150);pImageLabel->setPixmap(pixmap);  // 将创建的 QPixmap 对象设置为 QLabel 对象的显示图像pImageLabel->setScaledContents(true);  // 设置 QLabel 对象的内容自适应缩放,以确保图像在标签内适当地缩放显示// 用户名QLineEdit* pUserNameLineEdit = new QLineEdit(this);pUserNameLineEdit->setFixedSize(300, 50);// setPlaceholderText() 用于设置占位文本// 占位文本是在用户没有输入任何内容时显示的灰色文本,通常用于提供对输入内容的示例或提示pUserNameLineEdit->setPlaceholderText("QQ号码/手机/邮箱");// 密码QLineEdit* pPasswordLineEdit = new QLineEdit(this);pPasswordLineEdit->setFixedSize(300, 50);pPasswordLineEdit->setPlaceholderText("密码");// 设置一个 QLineEdit 对象的回显模式(Echo Mode)为密码模式// 在密码模式下,用户输入的文本内容会被以圆点符号或类似的字符进行替换,以隐藏/保护用户输入的密码或敏感信息pPasswordLineEdit->setEchoMode(QLineEdit::Password);// 找回密码QPushButton* pForgotButton = new QPushButton(this);pForgotButton->setText("找回密码");pForgotButton->setFixedWidth(80);// 记住密码QCheckBox* pRememberCheckBox = new QCheckBox(this);pRememberCheckBox->setText("记住密码");// 自动登录QCheckBox* pAutoLoginCheckBox = new QCheckBox(this);pAutoLoginCheckBox->setText("自动登录");// 登录QPushButton* pLoginButton = new QPushButton(this);pLoginButton->setFixedHeight(48);pLoginButton->setText("登录");// 注册账号QPushButton* pRegisterButton = new QPushButton(this);pRegisterButton->setFixedHeight(48);pRegisterButton->setText("注册账号");// 给以上控件添加栅格布局QGridLayout* pGridLay = new QGridLayout(this);pGridLay->addWidget(pImageLabel, 0, 0, 3, 1);pGridLay->addWidget(pUserNameLineEdit, 0, 1, 1, 2);pGridLay->addWidget(pPasswordLineEdit, 1, 1, 1, 2);pGridLay->addWidget(pForgotButton, 2, 1, 1, 1);// 行索引为 2 的位置,列索引为 2 的位置,横跨 1 行,横跨 1 列// 设置部件的对齐方式为左对齐和垂直居中pGridLay->addWidget(pRememberCheckBox, 2, 2, 1, 1, Qt::AlignLeft | Qt::AlignVCenter);pGridLay->addWidget(pAutoLoginCheckBox, 2, 2, 1, 1, Qt::AlignRight | Qt::AlignVCenter);pGridLay->addWidget(pLoginButton, 3, 1, 1, 2);pGridLay->addWidget(pRegisterButton, 4, 1, 1, 2);pGridLay->setHorizontalSpacing(20);  // 设置水平间距pGridLay->setVerticalSpacing(20);    // 设置垂直间距pGridLay->setContentsMargins(30, 30, 30, 30);
}Widget::~Widget() {}
1.5 分裂器布局

- widget.cpp
#include "widget.h"
#include <QHBoxLayout>
#include <QSplitter>
#include <QTextBrowser>Widget::Widget(QWidget *parent) : QWidget(parent) {this->setWindowTitle("Qt 分裂器布局");// 整体用水平布局QHBoxLayout *pHLay = new QHBoxLayout();// 整体的水平分裂器QSplitter *pHSplitter = new QSplitter(Qt::Horizontal, this);QWidget *pLeftWidget = new QWidget(this);pLeftWidget->setStyleSheet("background-color:rgb(54, 54, 54)");pLeftWidget->setMinimumWidth(200);// 分裂器添加 widgetpHSplitter->addWidget(pLeftWidget);// 右侧的竖直分裂器,参数 pHSplitter 表示父指针QSplitter *pVSplitter = new QSplitter(Qt::Vertical, pHSplitter);pVSplitter->setOpaqueResize(false);  // 在拖动到位并弹起鼠标后再显示分隔条QWidget *pRightTopWidget = new QWidget(this);pRightTopWidget->setStyleSheet("background-color:rgb(154, 154, 154)");// QTextBrowser 类提供一个带有超文本导航的富文本浏览器QTextBrowser *pRightBottom = new QTextBrowser(this);pVSplitter->addWidget(pRightTopWidget);pVSplitter->addWidget(pRightBottom);pHSplitter->addWidget(pVSplitter);pHLay->addWidget(pHSplitter);  // 布局添加分裂器setLayout(pHLay);  // 设置整体布局
}Widget::~Widget() { }
2. 添加右键菜单选项

-
widget.h
#ifndef WIDGET_H #define WIDGET_H#include <QWidget> #include <QMenu>QT_BEGIN_NAMESPACE namespace Ui { class Widget; } QT_END_NAMESPACEclass Widget : public QWidget {Q_OBJECTpublic:Widget(QWidget *parent = nullptr);~Widget();// 菜单事件void contextMenuEvent(QContextMenuEvent *event) override;// 初始化菜单void initMenu();private:Ui::Widget *ui;QMenu *m_pMenu = nullptr; }; #endif // WIDGET_H -
widget.cpp
#include "widget.h"
#include "ui_widget.h"
#include <QAction>
#include <QMessageBox>Widget::Widget(QWidget *parent) : QWidget(parent), ui(new Ui::Widget) {ui->setupUi(this);// 将上下文菜单策略设置为默认值,默认策略通常是在用户右键点击时显示菜单// Qt中的上下文菜单是指:在用户右键点击时弹出的菜单this->setContextMenuPolicy(Qt::DefaultContextMenu);initMenu();
}Widget::~Widget() {delete ui;
}// 打开一个菜单 m_pMenu 并将其显示在鼠标的当前位置
// QContextMenuEvent:当用户在小控件上右键点击时,就会触发一个上下文菜单事件
void Widget::contextMenuEvent(QContextMenuEvent *event) {// 使用 QCursor::pos() 获取鼠标的位置m_pMenu->exec(QCursor::pos());
}// 初始化一个包含三个动作项的菜单,并为每个动作项关联一个弹出信息的槽函数
void Widget::initMenu() {m_pMenu = new QMenu(this);// 创建分别表示菜单中的三个动作项QAction *pAc1 = new QAction("ac1");QAction *pAc2 = new QAction("ac2");QAction *pAc3 = new QAction("ac3");// 将上述三个动作项添加到菜单中m_pMenu->addAction(pAc1);m_pMenu->addAction(pAc2);m_pMenu->addAction(pAc3);// 将每个动作项的 triggered 信号与相应的槽函数关联起来connect(pAc1, &QAction::triggered, [=] {// 弹出一个信息对话框,显示相应的文本QMessageBox::information(this, "title", "ac1");});connect(pAc2, &QAction::triggered, [=] {QMessageBox::information(this, "title", "ac2");});connect(pAc3, &QAction::triggered, [=] {QMessageBox::information(this, "title", "ac3");});
}
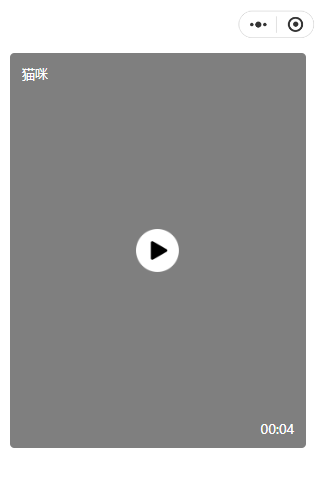
3. 多布局切换与布局删除重构

-
widget.h
#ifndef WIDGET_H #define WIDGET_H#include <QWidget> #include <QLabel> #include <QMenu>// 视频分屏类型枚举 enum VideoLayoutType {OneVideo = 0,TwoVideo,ThreeVideo,FourVideo,FiveVideo,SixVideo,SeventVideo,EightVideo,NineVideo, };class Widget : public QWidget {Q_OBJECTpublic:Widget(QWidget *parent = nullptr);~Widget();private:void initWidget(); // 初始化界面void initMenu(); // 初始化菜单void contextMenuEvent(QContextMenuEvent *event); // 菜单事件void switchLayout(VideoLayoutType type); // 切换不同布局private:// 保存视频区域QList<QLabel*> m_videoLabelList;QMenu *m_switchMenu; }; #endif // WIDGET_H -
widget.cpp
#include "widget.h"
#include <QMap>
#include <QLabel>
#include <QGridLayout>
#include <QContextMenuEvent>Widget::Widget(QWidget *parent) : QWidget(parent) {setWindowTitle("mutil layout switch");initWidget();this->resize(QSize(800, 500));this->setContextMenuPolicy(Qt::DefaultContextMenu);
}Widget::~Widget() {}void Widget::initWidget() {initMenu();// 创建 9 个带有不同背景图片的 QLabel 对象,并将它们添加到一个列表中for (int i = 0; i < 9; i++) {QLabel *label = new QLabel;// QString::arg():用于将文字和图片资源的路径拼接到样式表中// 样式表中使用了背景图片作为 QLabel 的背景,并设置了边框、背景位置和重复方式label->setStyleSheet(QString("QLabel{background-image:url(:/image/res/%1.png); \border:1px solid gray; \background-position:center; \background-repeat:no-repeat; \}").arg(QString::number(i + 1)));// 每次循环完成后,将创建的 QLabel 对象添加到 m_videoLabelList 列表中m_videoLabelList.append(label);}// 设置默认布局为一分屏switchLayout(VideoLayoutType::OneVideo);
}void Widget::initMenu() {m_switchMenu = new QMenu(this);m_switchMenu->addAction("1");m_switchMenu->addAction("4");m_switchMenu->addAction("5");m_switchMenu->addAction("6");m_switchMenu->addAction("9");// 创建 QMap 关联容器将字符串映射到视频布局类型QMap<QString, int> strTypeMap;strTypeMap["1"] = VideoLayoutType::OneVideo;strTypeMap["4"] = VideoLayoutType::FourVideo;strTypeMap["5"] = VideoLayoutType::FiveVideo;strTypeMap["6"] = VideoLayoutType::SixVideo;strTypeMap["9"] = VideoLayoutType::NineVideo;connect(m_switchMenu, &QMenu::triggered, this, [=](QAction *action) {// 首先,接受一个 QAction 对象作为参数,获取其文本内容保存到变量 strText// 然后,从映射中获取对应的视频布局类型,并将其保存到变量 type// 最后,根据获取到的视频布局类型,进行布局的切换操作QString strText = action->text();VideoLayoutType type = VideoLayoutType(strTypeMap[strText]);switchLayout(type);});
}// 右键打开一个菜单并将其显示在鼠标的当前位置
void Widget::contextMenuEvent(QContextMenuEvent *event) {m_switchMenu->exec(QCursor::pos()); // 获取鼠标的位置
}void Widget::switchLayout(VideoLayoutType type) {QLayout* layout = this->layout();// 清空并删除一个布局(layout)以及其包含的所有子项if (layout) {QLayoutItem* child;// 调用 layout 的 takeAt(0) 方法来获取并移除布局中的子项while ((child = layout->takeAt(0)) != 0) {// 检查 child 是否有关联的 widget(部件)if (child->widget()) {// 将其父对象设置为 NULL,即将其从布局中解除。这样做是为了确保删除子项时,其父对象不会也被删除child->widget()->setParent(NULL);}delete child;}delete layout;}switch (type) {case OneVideo: {QGridLayout* gLayout = new QGridLayout(this);gLayout->addWidget(m_videoLabelList[0]);gLayout->setMargin(0);}break;case FourVideo: {QGridLayout* gLayout = new QGridLayout(this);// 将布局的间距和边距设置为0gLayout->setSpacing(0);gLayout->setMargin(0);for (int i = 0; i < 4; i++) {// i / 2 用于计算行号,i % 2 用于计算列号gLayout->addWidget(m_videoLabelList[i], i / 2, i % 2);}}break;case FiveVideo: {// 总体竖直布局QVBoxLayout* pVLay = new QVBoxLayout(this);pVLay->setSpacing(0);// Top 水平布局三分屏QHBoxLayout* pHTopLay = new QHBoxLayout(this);pHTopLay->setSpacing(0);for (int i = 0; i < 3; i++) {pHTopLay->addWidget(m_videoLabelList[i]);}// Bottom 水平布局二分屏QHBoxLayout* pHBottomLay = new QHBoxLayout(this);pHBottomLay->setSpacing(0);for (int i = 3; i < 5; i++) {pHBottomLay->addWidget(m_videoLabelList[i]);}pVLay->addLayout(pHTopLay);pVLay->addLayout(pHBottomLay);}break;case SixVideo: {QGridLayout* gLayout = new QGridLayout(this);gLayout->addWidget(m_videoLabelList[0], 0, 0, 2, 2);gLayout->addWidget(m_videoLabelList[1], 0, 2);gLayout->addWidget(m_videoLabelList[2], 1, 2);gLayout->addWidget(m_videoLabelList[3], 2, 0);gLayout->addWidget(m_videoLabelList[4], 2, 1);gLayout->addWidget(m_videoLabelList[5], 2, 2);gLayout->setSpacing(0);gLayout->setMargin(0);}break;case NineVideo: {QGridLayout* gLayout = new QGridLayout(this);gLayout->setSpacing(0);gLayout->setMargin(0);for (int i = 0; i < 9; i++) {gLayout->addWidget(m_videoLabelList[i], i / 3, i % 3);}}break;default:break;}
}
4. 手写 VRoom 视频会议登录界面

- loginCode.cpp
#include "loginCode.h"
#include <QVBoxLayout>
#include <QHBoxLayout>
#include <QLabel>
#include <QToolButton>
#include <QPushButton>
#include <QCoreApplication>loginCode::loginCode(QWidget* parent) : QDialog(parent) {QVBoxLayout* mainVLayout;QHBoxLayout* titleBarHLayout;QPushButton* btnSet;QLabel* label;QPushButton* btnMin;QPushButton* btnClose;QHBoxLayout* logoHLayout;QLabel* label_logo;QVBoxLayout* verticalLayout;QPushButton* btnWeichatLogin;QPushButton* btnJoin;QHBoxLayout* horizontalLayout_2;QFrame* line;QLabel* label_3;QFrame* line_2;QHBoxLayout* horizontalLayout_3;QToolButton* toolBtnPhone;QToolButton* toolBtnEnpriseWeichat;QToolButton* toolBtnSSO;// mainVLayoutmainVLayout = new QVBoxLayout(this);mainVLayout->setSpacing(6);mainVLayout->setObjectName(QString::fromUtf8("mainVLayout"));mainVLayout->setContentsMargins(10, 10, 10, 10);// 1、titleBarHLayouttitleBarHLayout = new QHBoxLayout();titleBarHLayout->setSpacing(6);titleBarHLayout->setObjectName(QString::fromUtf8("titleBarHLayout"));btnSet = new QPushButton(this);btnSet->setObjectName(QString::fromUtf8("btnSet"));btnSet->setMinimumSize(QSize(32, 32));btnSet->setMaximumSize(QSize(32, 32));titleBarHLayout->addWidget(btnSet);label = new QLabel(this);label->setObjectName(QString::fromUtf8("label"));label->setAlignment(Qt::AlignCenter);titleBarHLayout->addWidget(label);// 最小化图标btnMin = new QPushButton(this);btnMin->setObjectName(QString::fromUtf8("btnMin"));btnMin->setMaximumSize(QSize(32, 32));titleBarHLayout->addWidget(btnMin);// 关闭图标btnClose = new QPushButton(this);btnClose->setObjectName(QString::fromUtf8("btnClose"));btnClose->setMaximumSize(QSize(32, 32));titleBarHLayout->addWidget(btnClose);mainVLayout->addLayout(titleBarHLayout);mainVLayout->setSpacing(40);// 2、logoHLayoutlogoHLayout = new QHBoxLayout();logoHLayout->setSpacing(6);logoHLayout->setObjectName(QString::fromUtf8("logoHLayout"));logoHLayout->setSpacing(40);label_logo = new QLabel(this);label_logo->setObjectName(QString::fromUtf8("label_logo"));label_logo->setMinimumSize(QSize(419/2, 468/2));label_logo->setMaximumSize(QSize(419/2, 468/2));logoHLayout->addWidget(label_logo);logoHLayout->setSpacing(40);mainVLayout->addLayout(logoHLayout);mainVLayout->setSpacing(35);// 3、verticalLayoutverticalLayout = new QVBoxLayout();verticalLayout->setSpacing(6);verticalLayout->setObjectName(QString::fromUtf8("verticalLayout"));btnWeichatLogin = new QPushButton(this);btnWeichatLogin->setObjectName(QString::fromUtf8("btnWeichatLogin"));btnWeichatLogin->setMinimumSize(QSize(400, 50));btnWeichatLogin->setMaximumSize(QSize(400, 50));verticalLayout->addWidget(btnWeichatLogin);verticalLayout->setSpacing(20);btnJoin = new QPushButton(this);btnJoin->setObjectName(QString::fromUtf8("btnJoin"));btnJoin->setMinimumSize(QSize(400, 50));btnJoin->setMaximumSize(QSize(400, 50));btnJoin->setStyleSheet(QString::fromUtf8("QPushButton\n""{  \n""    /* \345\211\215\346\231\257\350\211\262 */  \n""    color:#0054E6;  \n"" \n""    /* \350\203\214\346\231\257\350\211\262 */  \n""    background-color:rgb(255,255,255);  \n"" \n""    /* \350\276\271\346\241\206\351\243\216\346\240\274 */  \n""    border-style:outset;  \n"" \n""    /* \350\276\271\346\241\206\345\256\275\345\272\246 */  \n""    border-width:0.5px;  \n"" \n""    /* \350\276\271\346\241\206\351\242\234\350\211\262 */  \n""    border-color:gray;  \n"" \n""    /* \350\276\271\346\241\206\345\200\222\350\247\222 */  \n""    border-radius:2px;  \n""} \n"" \n""/*\351\274\240\346\240\207\346\202\254\346\265\256\346\227\266\347\232\204\346\225\210\346\236\234*/\n""QPushButton:hover\n""{\n""    /* \350\276\271\346\241\206\351\242\234\350\211\262 */  \n""    border-color:blue;  \n""}"));verticalLayout->addWidget(btnJoin);mainVLayout->addLayout(verticalLayout);horizontalLayout_2 = new QHBoxLayout();horizontalLayout_2->setSpacing(6);horizontalLayout_2->setObjectName(QString::fromUtf8("horizontalLayout_2"));line = new QFrame(this);line->setObjectName(QString::fromUtf8("line"));line->setFrameShape(QFrame::HLine);line->setFrameShadow(QFrame::Sunken);horizontalLayout_2->addWidget(line);label_3 = new QLabel(this);label_3->setObjectName(QString::fromUtf8("label_3"));label_3->setAlignment(Qt::AlignCenter);horizontalLayout_2->addWidget(label_3);line_2 = new QFrame(this);line_2->setObjectName(QString::fromUtf8("line_2"));line_2->setFrameShape(QFrame::HLine);line_2->setFrameShadow(QFrame::Sunken);horizontalLayout_2->addWidget(line_2);mainVLayout->addLayout(horizontalLayout_2);horizontalLayout_3 = new QHBoxLayout();horizontalLayout_3->setSpacing(6);horizontalLayout_3->setObjectName(QString::fromUtf8("horizontalLayout_3"));toolBtnPhone = new QToolButton(this);toolBtnPhone->setObjectName(QString::fromUtf8("toolBtnPhone"));toolBtnPhone->setMinimumSize(QSize(60, 80));toolBtnPhone->setMaximumSize(QSize(60, 80));horizontalLayout_3->addWidget(toolBtnPhone);toolBtnEnpriseWeichat = new QToolButton(this);toolBtnEnpriseWeichat->setObjectName(QString::fromUtf8("toolBtnEnpriseWeichat"));toolBtnEnpriseWeichat->setMinimumSize(QSize(60, 80));toolBtnEnpriseWeichat->setMaximumSize(QSize(60, 80));horizontalLayout_3->addWidget(toolBtnEnpriseWeichat);toolBtnSSO = new QToolButton(this);toolBtnSSO->setObjectName(QString::fromUtf8("toolBtnSSO"));toolBtnSSO->setMinimumSize(QSize(60, 80));toolBtnSSO->setMaximumSize(QSize(60, 80));horizontalLayout_3->addWidget(toolBtnSSO);mainVLayout->addLayout(horizontalLayout_3);this->setWindowTitle(QCoreApplication::translate("this", "ch21_TencentMeetingLogin", nullptr));btnSet->setText(QCoreApplication::translate("this", "PushButton", nullptr));label->setText(QCoreApplication::translate("this", "\350\247\206\351\242\221\344\274\232\350\256\256", nullptr));btnMin->setText(QCoreApplication::translate("this", "PushButton", nullptr));btnClose->setText(QCoreApplication::translate("this", "PushButton", nullptr));label_logo->setText(QCoreApplication::translate("this", "TextLabel", nullptr));btnWeichatLogin->setText(QCoreApplication::translate("this", "PushButton", nullptr));btnJoin->setText(QCoreApplication::translate("this", "\345\212\240\345\205\245\344\274\232\350\256\256", nullptr));label_3->setText(QCoreApplication::translate("this", "\345\205\266\345\256\203\347\231\273\345\275\225\346\226\271\345\274\217", nullptr));toolBtnPhone->setText(QCoreApplication::translate("this", "...", nullptr));toolBtnEnpriseWeichat->setText(QCoreApplication::translate("this", "...", nullptr));toolBtnSSO->setText(QCoreApplication::translate("this", "...", nullptr));this->setWindowFlags(Qt::FramelessWindowHint | Qt::WindowMinMaxButtonsHint);btnSet->setText("");btnSet->setStyleSheet("QPushButton{background-image:url(:/loginCode/resources/set.png);border:none}  \QPushButton::hover{background-color:rgb(99,99,99)}");btnMin->setText("");btnMin->setStyleSheet("QPushButton{background-image:url(:/loginCode/resources/min.png);border:none}  \QPushButton::hover{background-color:rgb(99,99,99)}");btnClose->setText("");btnClose->setStyleSheet("QPushButton{background-image:url(:/loginCode/resources/close.png);border:none}  \QPushButton::hover{background-color:rgb(99,99,99)}");label_logo->clear();QPixmap* pix = new QPixmap(":/loginCode/resources/vroom.jpg");pix->scaled(label_logo->size(), Qt::KeepAspectRatio);label_logo->setScaledContents(true);label_logo->setPixmap(*pix);btnWeichatLogin->setText("");btnWeichatLogin->setStyleSheet("QPushButton{background-image:url(:/loginCode/resources/weichatlogin.png);border:none}  \QPushButton::hover{background-color:rgb(99,99,99)}");toolBtnPhone->setIcon(QIcon(":/loginCode/resources/phonelogin.png"));toolBtnPhone->setIconSize(QSize(60, 60));toolBtnPhone->setText(u8"手机号");toolBtnPhone->setToolButtonStyle(Qt::ToolButtonTextUnderIcon);toolBtnPhone->setStyleSheet("background-color:white;border:none");toolBtnEnpriseWeichat->setIcon(QIcon(":/loginCode/resources/enpriseweichat.png"));toolBtnEnpriseWeichat->setIconSize(QSize(60, 60));toolBtnEnpriseWeichat->setText(u8"企业微信");toolBtnEnpriseWeichat->setToolButtonStyle(Qt::ToolButtonTextUnderIcon);toolBtnEnpriseWeichat->setStyleSheet("background-color:white;border:none");toolBtnSSO->setIcon(QIcon(":/loginCode/resources/sso.png"));toolBtnSSO->setIconSize(QSize(60, 60));toolBtnSSO->setText(u8"SSO");toolBtnSSO->setToolButtonStyle(Qt::ToolButtonTextUnderIcon);toolBtnSSO->setStyleSheet("background-color:white;border:none");connect(btnClose, &QPushButton::clicked, [=] {close();});
}
5. QTabWidget 用法详解

- widget.cpp
#include "widget.h"
#include "ui_widget.h"
#include "form.h"
#include <QHBoxLayout>
#include <QTabWidget>
#include <QDebug>
#include <QTabBar>Widget::Widget(QWidget *parent) : QWidget(parent), ui(new Ui::Widget) {ui->setupUi(this);QHBoxLayout* lay = new QHBoxLayout(this);// 选项卡控件提供一个选项卡栏和一个"页面区域",用于显示与每个选项卡相关的页面QTabWidget *pTabWidget = new QTabWidget(this);pTabWidget->setTabsClosable(true);              // 设置 tab 上的 × 是否显示pTabWidget->setMovable(true);                   // 设置 tab 是否可移动pTabWidget->setTabPosition(QTabWidget::North);  // 设置 tab 位置方位pTabWidget->setTabShape(QTabWidget::Rounded);   // 默认为方形 tab// 创建 3 个选项卡页面QWidget *w1 = new QWidget;w1->setStyleSheet("background-color:rgb(54,54,54)");QWidget *w2 = new QWidget;w2->setStyleSheet("background-color:rgb(54,154,54)");QWidget *w3 = new QWidget;w3->setStyleSheet("background-color:rgb(54,54,154)");// 将给定标签和页面的标签以指定的索引插入到标签控件中,并在标签栏中返回插入标签的索引pTabWidget->insertTab(0, w1, "tab1");pTabWidget->insertTab(1, w2, "tab2");pTabWidget->insertTab(2, w3, "tab3");// 插入一个自定义的 Form 类对象作为第三个选项卡到一个 TabWidget 控件中Form* f = new Form;pTabWidget->insertTab(3, f, "tab4");pTabWidget->setTabToolTip(2, "this is tab2");  // 鼠标悬浮在标签选项上时显示提示文字lay->addWidget(pTabWidget);// 监听标签选项卡当前状态改变事件connect(pTabWidget, &QTabWidget::currentChanged, [=](int index){qDebug() << "index = " << index;});// 监听鼠标双击事件connect(pTabWidget, &QTabWidget::tabBarDoubleClicked, [=](int index){qDebug() << "tabBarDoubleClicked index = " << index;});// 监听鼠标单击事件connect(pTabWidget, &QTabWidget::tabBarClicked, [=](int index){qDebug() << "tabBarClicked index = " << index;});// 关闭当前标签选项卡connect(pTabWidget, &QTabWidget::tabCloseRequested, [=](int index){qDebug() << "tabCloseRequested index = " << index;pTabWidget->removeTab(index);  // 点击 tab 上的 × 以关闭指定 tab});
}Widget::~Widget() {delete ui;
}
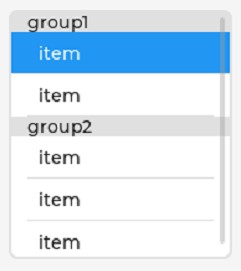
6. QListWidget 用法详解
- 两种显示模式
enum ViewMode {ListMode;  // 列表模式(默认)IconMode;  // 图标模式
};
6.1 列表模式添加 item

- widget.cpp
#include "widget.h" #include "ui_widget.h" #include "cuseritem.h"Widget::Widget(QWidget *parent) : QWidget(parent), ui(new Ui::Widget) {ui->setupUi(this);// 创建 itemQListWidgetItem* pItem1 = new QListWidgetItem(QIcon(":/resources/kits.png"), "Kits");QListWidgetItem* pItem2 = new QListWidgetItem(QIcon(":/resources/env.png"), u8"环境");QListWidgetItem* pItem3 = new QListWidgetItem(QIcon(":/resources/editor.png"), u8"编辑器");QListWidgetItem* pItem4 = new QListWidgetItem(QIcon(":/resources/vim.png"), "FakeVim");QListWidgetItem* pItem5 = new QListWidgetItem(QIcon(":/resources/help.png"), u8"帮助");QListWidgetItem* pItem6 = new QListWidgetItem;// 添加 itemui->listWidget->addItem(pItem1);ui->listWidget->addItem(pItem2);ui->listWidget->addItem(pItem3);ui->listWidget->addItem(pItem4);ui->listWidget->addItem(pItem5);ui->listWidget->addItem(pItem6);// 添加自定义 item 项CUserItem* pUserItem = new CUserItem(this);ui->listWidget->setItemWidget(pItem6, pUserItem); }Widget::~Widget() {delete ui; } - widget.ui

6.2 右键菜单、删除 item

-
widget.h
#ifndef WIDGET_H #define WIDGET_H#include <QWidget> #include <QMenu>QT_BEGIN_NAMESPACE namespace Ui { class Widget; } QT_END_NAMESPACEclass Widget : public QWidget {Q_OBJECTpublic:Widget(QWidget *parent = nullptr);~Widget();private:void initRightMenu();private slots:void on_PopupRightMenu(const QPoint &pos);private:Ui::Widget *ui;QMenu *m_pRightMenu = nullptr; }; #endif // WIDGET_H -
widget.cpp
#include "widget.h"
#include "ui_widget.h"
#include <QMessageBox>Widget::Widget(QWidget *parent) : QWidget(parent), ui(new Ui::Widget) {ui->setupUi(this);QListWidgetItem* pItem1 = new QListWidgetItem(QIcon(":/resources/kits.png"), "Kits");QListWidgetItem* pItem2 = new QListWidgetItem(QIcon(":/resources/env.png"), "env");QListWidgetItem* pItem3 = new QListWidgetItem(QIcon(":/resources/editor.png"), "editor");QListWidgetItem* pItem4 = new QListWidgetItem(QIcon(":/resources/vim.png"), "FakeVim");QListWidgetItem* pItem5 = new QListWidgetItem(QIcon(":/resources/help.png"), "help");ui->listWidget->addItem(pItem1);ui->listWidget->addItem(pItem2);ui->listWidget->addItem(pItem3);ui->listWidget->addItem(pItem4);ui->listWidget->addItem(pItem5);initRightMenu();// 设置菜单策略,必须设置,不然无法显示菜单ui->listWidget->setContextMenuPolicy(Qt::CustomContextMenu);// 连接信号与槽函数connect(ui->listWidget, &QListWidget::customContextMenuRequested, this, &Widget::on_PopupRightMenu);
}Widget::~Widget() {delete ui;
}// 槽函数实现
void Widget::on_PopupRightMenu(const QPoint &pos) {// 获取鼠标点击位置下的列表控件中的列表项指针QListWidgetItem *pItem = ui->listWidget->itemAt(pos);// 如果 pItem 为空,则说明没有找到列表项,直接返回if (!pItem) {return;}// 执行右键菜单对象 m_pRightMenu 的显示和事件处理// 使用全局鼠标位置作为弹出菜单的位置m_pRightMenu->exec(QCursor::pos());
}void Widget::initRightMenu() {m_pRightMenu = new QMenu(this);QAction* pAc1 = new QAction("action 1", this);QAction* pAc2 = new QAction("action 2", this);QAction* pAc3 = new QAction("action 3", this);QAction* pAc4 = new QAction("delete", this);m_pRightMenu->addAction(pAc1);m_pRightMenu->addAction(pAc2);m_pRightMenu->addAction(pAc3);m_pRightMenu->addAction(pAc4);connect(pAc1, &QAction::triggered, [=] {QMessageBox::information(this, "title", "ac1");});connect(pAc4, &QAction::triggered, [=] {// 动态删除/*QList<QListWidgetItem*> list;list = ui->listWidget->findItems("Kits", Qt::MatchCaseSensitive);QListWidgetItem* sel = list[0];int r = ui->listWidget->row(sel);QListWidgetItem* item = ui->listWidget->takeItem(r);ui->listWidget->removeItemWidget(item);delete item;*/// 删除当前 itemQListWidgetItem* item = ui->listWidget->currentItem();ui->listWidget->removeItemWidget(item);delete item;});
}
6.3 图标模式及右侧滑动条样式

- widget.cpp
#include "widget.h"
#include <QVBoxLayout>
#include <QListWidget>Widget::Widget(QWidget *parent) : QWidget(parent) {resize(600, 500);QVBoxLayout *pMainVLayout = new QVBoxLayout(this);QListWidget *pListWidget = new QListWidget(this);pListWidget->setViewMode(QListView::IconMode);  // 设置为图标模式// 设置水平和垂直滚动条属性pListWidget->setHorizontalScrollBarPolicy(Qt::ScrollBarAlwaysOff); // 屏蔽水平滑动条pListWidget->setVerticalScrollBarPolicy(Qt::ScrollBarAsNeeded);    // 垂直滑动条需要时才显示int vScrollBarWidth = 30; // 表示垂直滚动条的宽度// 定义一个样式表,用于设置一个列表控件(QListWidget)和垂直滚动条(QScrollBar)的外观// 使用.arg()函数将 vScrollBarWidth 的值作为参数,替换样式表字符串中的 %1 占位符,从而实现动态设置垂直滚动条宽度QString qssLW = QString("QScrollBar{width:%1px;background:rgba(255, 255, 255, 100%);margin:0px, 0px, 0px, 0px;}\QScrollBar::handle:vertical{width:8px;background:rgba(162, 163, 165, 100%);border-radius:4px;min-height:60;}\QScrollBar::handle:vertical:hover{width:8px;background:rgba(115,118,118, 100%);border-radius:4px;min-height:60;}\QScrollBar::add-page:vertical,QScrollBar::sub-page:vertical{background:rgba(255, 255, 255, 100%);border-radius:4px;}\QScrollBar::top-arrow:vertical,QScrollBar::bottom-arrow:vertical{border: none;background: none;color: none;}\QScrollBar::add-line:vertical{border:none;background:none;}\QScrollBar::sub-line:vertical{border:none;background:none;}\QListWidget{background-color:rgb(255,255,255);border:none;} \QListWidget::item{  \/*background:blue;*/  \margin-left:20px;  \margin-right:20px; \margin-top:10px; \} \").arg(QString::number(vScrollBarWidth));pListWidget->setStyleSheet(qssLW);// 180 包括 margin-left 的值// 如果 QListWidget::item 没有写 margin-right:20px,增加竖直滑动条和最后一列的间隙为 margin-left 的一半即可// 如果 QListWidget::item 写了 margin-right:20px, vScrollBarWidth + 1 即可pListWidget->setFixedWidth(180 * 3 + vScrollBarWidth + 1);// 使用一个循环来创建 15 个列表项,并将它们添加到一个列表控件中for (int i = 0 ; i < 15; i++) {QIcon icon(":/resources/env.png");// 使用格式化字符串函数 arg() 将当前迭代的整数 i 转换为字符串并替换 1%QString name = QString("user%1").arg(QString::number(i));QListWidgetItem* pItem = new QListWidgetItem(icon, name);pItem->setSizeHint(QSize(180, 180));  // 设置列表项的大小为 (180, 180) 像素pListWidget->addItem(pItem);}pMainVLayout->addWidget(pListWidget);
}Widget::~Widget() {}
7. QScrollArea 应用:模仿迅雷

- ScrollAreaDemo.h
#pragma once#include <QtWidgets/QWidget>
#include <QListWidget>
#include <QScrollArea>
#include <QStringList>
#include "CBaseSetWidget.h"
#include "GaojiSetWidget.h"
#include <vector>using namespace std;class ScrollAreaDemo : public QWidget {Q_OBJECTpublic:ScrollAreaDemo(QWidget *parent = Q_NULLPTR);private slots:void slotItemClicked(QListWidgetItem* item);void slotValueChanged(int value);private:QListWidget* m_pListWidget = nullptr;QScrollArea* m_pScrollArea = nullptr;QStringList m_textList;CBaseSetWidget* m_pBaseSetWidget;QWidget* m_pYunpanSetWidget;QWidget* m_pDownloadWidget;QWidget* m_pJieguanWidget;QWidget* m_pRenwuWidget;QWidget* m_pTixingWidget;QWidget* m_pXuanfuWidget;GaojiSetWidget* m_pGaojiWidget;// 将上述列表项存入 vector 容器vector<QWidget*> m_vecWidget;bool signFlag = false;
};
- ScrollAreaDemo.cpp
#include "ScrollAreaDemo.h"
#include <QHBoxLayout>
#include <string>  // c++ std::string
#include <QScrollBar>using namespace std;ScrollAreaDemo::ScrollAreaDemo(QWidget *parent) : QWidget(parent) {// 设置主窗口 this 的尺寸和背景色setFixedSize(150 + 1000 + 30 + 15, 900);this->setStyleSheet("background-color:rgb(26, 26, 26)");this->setWindowFlags(Qt::FramelessWindowHint | Qt::WindowMinMaxButtonsHint);// 1、创建左侧列表项m_pListWidget = new QListWidget(this);m_pListWidget->setFixedWidth(150);m_pListWidget->setFrameShape(QFrame::NoFrame);  // 设置 QListWidget 的边框形状为无边框// 设置 QListWidget 不接受焦点,无论用户如何点击该部件都不会成为当前活动窗口,从而避免干扰用户输入的问题m_pListWidget->setFocusPolicy(Qt::NoFocus);m_textList << "base setting" << "cloud setting" << "download setting" << "charge setting" << "mission setting" << "warn"<< "floating window" << "advance setting";m_pListWidget->addItems(m_textList);// 设置左侧列表项样式string lw_qss = R"(QListWidget {  background:rgb(26, 26, 26);color:rgb(200, 200, 200);font-size:15px;border-radius:1px;}QListWidget::item {height:40px;padding-left:10px;}QListWidget::item:!active {background:rgb(26, 26, 26);margin:5px 20px 1px 20px;}QListWidget::item:hover {background:rgb(56, 56, 56);padding-left:30px;}QListWidget::item:selected {border-radius:15px;background:lightblue;}QListWidget::item:selected:!active {background:rgb(51, 51, 51);color:#3F85FF;})";// 将 lw_qss 变量值转换为 QT 中的 QString 类型// 因为 QT 不支持 C++ 的 std::string 直接赋值给 QString 类型m_pListWidget->setStyleSheet(QString::fromStdString(lw_qss));// 2、创建右侧竖直滑动条m_pScrollArea = new QScrollArea(this);m_pScrollArea->setFixedWidth(1000 + 30);m_pScrollArea->setFrameShape(QFrame::NoFrame);m_pScrollArea->setHorizontalScrollBarPolicy(Qt::ScrollBarAlwaysOff); m_pScrollArea->setVerticalScrollBarPolicy(Qt::ScrollBarAsNeeded);// 设置右侧竖直滑动条样式string verticalbar_qss = R"(QScrollBar{width:16px;background:rgb(26, 26, 26);margin:0px, 0px, 0px, 0px;}QScrollBar::handle:vertical{width:8px;background:rgba(162, 163, 165, 100%);border-radius:4px;min-height:40;}QScrollBar::handle:vertical:hover{width:8px;background:rgba(115,118,118, 100%);border-radius:4px;min-height:40;}QScrollBar::add-page:vertical,QScrollBar::sub-page:vertical{background:rgb(26, 26, 26);border-radius:4px;}QScrollBar::top-arrow:vertical,QScrollBar::bottom-arrow:vertical{border: none;background: none;color: none;}QScrollBar::add-line:vertical{border:none;background:none;}QScrollBar::sub-line:vertical{border:none;background:none;})";m_pScrollArea->verticalScrollBar()->setStyleSheet(QString::fromStdString(verticalbar_qss));// base settingm_pBaseSetWidget = new CBaseSetWidget;m_vecWidget.push_back(m_pBaseSetWidget);// cloud settingm_pYunpanSetWidget = new QWidget;m_pYunpanSetWidget->setStyleSheet("background-image:url(:/ScrollAreaDemo/resources/YunPanSet.png);background-repeat: no-repeat;background-color:rgb(51, 51, 51)");m_pYunpanSetWidget->setFixedSize(1000, 478);m_vecWidget.push_back(m_pYunpanSetWidget);// download settingm_pDownloadWidget = new QWidget;m_pDownloadWidget->setStyleSheet("background-image:url(:/ScrollAreaDemo/resources/XiaZai.png);background-repeat: no-repeat;background-color:rgb(51, 51, 51)");m_pDownloadWidget->setFixedSize(1000, 337);m_vecWidget.push_back(m_pDownloadWidget);// charge settingm_pJieguanWidget = new QWidget;m_pJieguanWidget->setStyleSheet("background-image:url(:/ScrollAreaDemo/resources/JieGuanSet.png);background-repeat: no-repeat;background-color:rgb(51, 51, 51)");m_pJieguanWidget->setFixedSize(1000, 340);m_vecWidget.push_back(m_pJieguanWidget);// mission settingm_pRenwuWidget = new QWidget;m_pRenwuWidget->setStyleSheet("background-image:url(:/ScrollAreaDemo/resources/RenwuGuanli.png);background-repeat: no-repeat;background-color:rgb(51, 51, 51)");m_pRenwuWidget->setFixedSize(1000, 413);m_vecWidget.push_back(m_pRenwuWidget);// warnm_pTixingWidget = new QWidget;m_pTixingWidget->setStyleSheet("background-image:url(:/ScrollAreaDemo/resources/TiXing.png);background-repeat: no-repeat;background-color:rgb(51, 51, 51)");m_pTixingWidget->setFixedSize(1000, 728);m_vecWidget.push_back(m_pTixingWidget);// floating windowm_pXuanfuWidget = new QWidget;m_pXuanfuWidget->setStyleSheet("background-image:url(:/ScrollAreaDemo/resources/XuanFuChuang.png);background-repeat: no-repeat;background-color:rgb(51, 51, 51)");m_pXuanfuWidget->setFixedSize(1000, 206);m_vecWidget.push_back(m_pXuanfuWidget);// advance settingm_pGaojiWidget = new GaojiSetWidget;m_vecWidget.push_back(m_pGaojiWidget);// 3、创建一个 Widget 来整合 1 和 2QWidget* widget = new QWidget;QVBoxLayout* pVLay = new QVBoxLayout(widget);	// 将所有的 “设置 Widget” 添加进来for (auto w : m_vecWidget) {pVLay->addWidget(w);pVLay->addSpacing(15);}pVLay->setContentsMargins(0, 5, 0, 5);// 给 QScrollArea 设置 Widgetm_pScrollArea->setWidget(widget);QHBoxLayout* hlay = new QHBoxLayout(this);hlay->addWidget(m_pListWidget);hlay->setSpacing(0);hlay->addWidget(m_pScrollArea);// 点击 ListWidget 的 Item 切换显示区域connect(m_pListWidget, &QListWidget::itemClicked, this, &ScrollAreaDemo::slotItemClicked);// 滚动鼠标中键时 ScrollBar 值变化的信号槽connect(m_pScrollArea->verticalScrollBar(), &QScrollBar::valueChanged,this, &ScrollAreaDemo::slotValueChanged);
}// 在滚动区域中定位并滚动到与被点击列表项对应的窗口部件
void ScrollAreaDemo::slotItemClicked(QListWidgetItem* item) {signFlag = true; // 设置标志位为 trueQString itemText = item->text(); // 获取被点击列表项的文本内容QPoint widgetPos; // 用于保存窗口部件的位置信息int size = m_textList.size(); // 获取文本列表的大小for (int i = 0; i < size; i++) {// 如果点击的列表项的文本内容和文本列表中的某个文本内容相匹配if (itemText == m_textList[i]) { // 获取对应窗口部件的位置信息widgetPos = m_vecWidget[i]->pos();}}// 将滚动区域的垂直滚动条的值设置为窗口部件的位置信息中的y坐标值,实现滚动m_pScrollArea->verticalScrollBar()->setValue(widgetPos.y());
}// 在滚动区域的值变化时,根据窗口部件的可见性状态来更新对应的列表项的选中状态
// 目的是避免进入死循环,因为选中列表项会触发滚动区域的值变化事件
void ScrollAreaDemo::slotValueChanged(int value) {if (!signFlag) { // 如果标志位为falseint itemSize = m_vecWidget.size(); // 获取窗口部件列表的大小for (int i = 0; i < itemSize; i++) {// 如果窗口部件可见区域不为空if (!m_vecWidget[i]->visibleRegion().isEmpty()) { // 设置对应的列表项为选中状态m_pListWidget->item(i)->setSelected(true); return; // 结束函数} else {// 设置对应的列表项为非选中状态m_pListWidget->item(i)->setSelected(false); }}}signFlag = false; // 如果标志位为true,将其设为false
}

- CBaseSetWidget.cpp
#include "CBaseSetWidget.h"
#include <QHBoxLayout>
#include <QVBoxLayout>
#include <QCheckBox>
#include <QLabel>
#include <QLineEdit>
#include <QRadioButton>
#include <QPushButton>CBaseSetWidget::CBaseSetWidget(QWidget* parent) :QWidget(parent) {setWindowFlags(Qt::FramelessWindowHint);setAttribute(Qt::WA_StyledBackground);this->setStyleSheet("background-color:rgb(51, 51, 51);color:rgb(200,200,200);");QLabel* pBasesetLabel = new QLabel(this);pBasesetLabel->setText(u8"基本设置");QCheckBox* pCheckKaijiqidong = new QCheckBox(this);pCheckKaijiqidong->setText(u8"开机启动");QCheckBox* pCheckMiandarao = new QCheckBox(this);pCheckMiandarao->setFixedWidth(140);pCheckMiandarao->setText(u8"开启免打扰模式");QLabel* p1 = new QLabel(this);p1->setText("?");QCheckBox* pCheckBosskey = new QCheckBox(this);pCheckBosskey->setFixedWidth(105);pCheckBosskey->setText(u8"开启老板键");QLineEdit* pLineEdit = new QLineEdit(this);pLineEdit->setFixedWidth(100);pLineEdit->setStyleSheet("border-style:solid;border-width:1px;border-color:rgb(79,79,79);");QLabel* p2 = new QLabel(this);p2->setText("?");QCheckBox* pCheckNewShowMainUI = new QCheckBox(this);pCheckNewShowMainUI->setText(u8"新建时显示主界面");QLabel* pXiazaimoshi = new QLabel(this);pXiazaimoshi->setText(u8"下载模式");QRadioButton* pQuansuxiazai = new QRadioButton(this);pQuansuxiazai->setText(u8"全速下载");QRadioButton* pXiansuxiazai = new QRadioButton(this);pXiansuxiazai->setText(u8"限速下载");pXiansuxiazai->setFixedWidth(90);QPushButton* pBtnModify = new QPushButton(this);pBtnModify->setText(u8"修改设置");pBtnModify->setStyleSheet("background-color:#1A1A1A;color:#5F5F5F");QLabel* label_cfginfo = new QLabel(this);label_cfginfo->setText(u8"限制时间段: 00:00-23:59 最大下载速度:不限速");QVBoxLayout* pMainVlay = new QVBoxLayout(this);pMainVlay->addWidget(pBasesetLabel);pMainVlay->addSpacing(20);QHBoxLayout* pHlay1 = new QHBoxLayout(this);pHlay1->addSpacing(35);QVBoxLayout* pVlay1 = new QVBoxLayout(this);pVlay1->addWidget(pCheckKaijiqidong);pVlay1->addSpacing(20);QHBoxLayout* pHlay2 = new QHBoxLayout;pHlay2->addWidget(pCheckMiandarao);pHlay2->addWidget(p1);pVlay1->addLayout(pHlay2);  // 添加免打扰的水平布局pVlay1->addSpacing(20);QHBoxLayout* pHlay3 = new QHBoxLayout;pHlay3->addWidget(pCheckBosskey);pHlay3->addWidget(pLineEdit);pHlay3->addWidget(p2);pVlay1->addLayout(pHlay3);pVlay1->addSpacing(20);pVlay1->addWidget(pCheckNewShowMainUI);pVlay1->addSpacing(20);pVlay1->addWidget(pXiazaimoshi);  // 下载模式pVlay1->addSpacing(20);QHBoxLayout* pHlay4 = new QHBoxLayout;  //  下载模式下面的水平布局pHlay4->addSpacing(30);QVBoxLayout* pVlay2 = new QVBoxLayout(this);QHBoxLayout* pHlay5 = new QHBoxLayout;pHlay5->addWidget(pQuansuxiazai);pHlay5->addWidget(p2);pVlay2->addLayout(pHlay5);pVlay2->addSpacing(20);// 限速下载QHBoxLayout* pHlay6 = new QHBoxLayout;pHlay6->addWidget(pXiansuxiazai);pHlay6->addWidget(pBtnModify);pHlay6->addWidget(label_cfginfo);pHlay6->addStretch();pVlay2->addLayout(pHlay6);pHlay4->addLayout(pVlay2);pVlay1->addLayout(pHlay4);pHlay1->addLayout(pVlay1);pMainVlay->addLayout(pHlay1);pMainVlay->setContentsMargins(20, 20, 20, 20);
}CBaseSetWidget::~CBaseSetWidget() {}
- GaojiSetWidget.cpp
#include "GaojiSetWidget.h"
#include <QVBoxLayout>
#include <QLabel>GaojiSetWidget::GaojiSetWidget(QWidget *parent) : QWidget(parent) {QLabel* pLabel1 = new QLabel(this);pLabel1->setFixedSize(1000, 541);QPixmap* pixmap = new QPixmap(":/ScrollAreaDemo/resources/GaojiSet_1.png");pixmap->scaled(pLabel1->size(), Qt::KeepAspectRatio);pLabel1->setScaledContents(true);pLabel1->setPixmap(*pixmap);QLabel* pLabel2 = new QLabel(this);pLabel2->setFixedSize(1000, 685);pixmap = new QPixmap(":/ScrollAreaDemo/resources/GaojiSet_2.png");pixmap->scaled(pLabel2->size(), Qt::KeepAspectRatio);pLabel2->setScaledContents(true);pLabel2->setPixmap(*pixmap);QVBoxLayout* pVLay = new QVBoxLayout(this);pVLay->addWidget(pLabel1);pVLay->setSpacing(0);pVLay->addWidget(pLabel2);pVLay->setContentsMargins(0, 0, 0, 0);
}GaojiSetWidget::~GaojiSetWidget() {}