1. 前言
最近在使用OpenCV处理图片的时候,经常会遇到需要转换图像的情况,网上相关资料比较少,也不全,有时候得费劲老半天才能搞定。
自己踩了坑后,在这里记录下,都是我在项目中遇到的图像转化操作,是一些常用的图像格式转换操作。
具体包括:
nv21、rgba、rgb转换OpenCV的Mat转为BitmapBitmap转成RGB888NV21转成BitmapCamera2中的android.media.Image转为NV21Android传递Bitmap给JNI,并转为rgba的MatJPEG转NV21
本文的操作都是基于
Activity横屏的情况下进行的
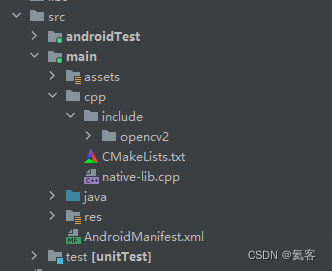
2. nv21、rgba、rgb转换
nv21是YUV420格式中的一种,在Android中,Camera1获取的摄像头数据,就是NV21格式的。
rgba、rgb格式,是不同于YUV的另一种色彩表示方式,通常我们需要转为RGB格式,再去做图像检测和处理。
所以在Android中,nv21和rgb的转换,是比较常用、比较普遍的。
2.1 nv21转为rgba格式的Mat
这里传入的jbyteArray data_是nv21格式,首先转成nv21的Mat,然后在通过cv::cvtColor方法,通过cv::COLOR_YUV2RGBA_NV21这个参数值,转为rgba格式的Mat。
extern "C"
JNIEXPORT jbyteArray JNICALL
Java_com_heiko_myncnnlib_NcnnNativeLib_nv21toARGB(JNIEnv *env, jobject thiz, jbyteArray data_,jint h, jint w) {jbyte *data = env->GetByteArrayElements(data_, NULL);cv::Mat nv21(h + h / 2, w, CV_8UC1, data);cv::Mat rgba(h, w, CV_8UC4);//nv21转为rgba格式cv::cvtColor(nv21, rgba, cv::COLOR_YUV2RGBA_NV21);//省略了后续无关代码....//释放资源env->ReleaseByteArrayElements(data_, data, 0);
}
2.2 nv21转为rgb的Mat
将nv21转成rgb格式的Mat,这里的COLOR_YUV420sp2RGB和COLOR_YUV2RGB_NV21是一样的。
cv::Mat rgba(h, w, CV_8UC3);
//将nv21的数据转为RGB
cv::cvtColor(nv21, rgb, cv::COLOR_YUV420sp2RGB); //也可以传COLOR_YUV2RGB_NV21
2.3 rgba转为rgb的Mat
cv::Mat rgb(rows, cols, CV_8UC3);
//将rgba转为rgb
cv::cvtColor(rgba, rgb, CV_RGBA2RGB);
3. OpenCV的Mat转为Bitmap
在JNI中,用OpenCV处理好图像后,得到的结果是Mat,那么需要将其转为byteArray,然后传递到Android层,再转为Bitmap,显示到ImageView上。
3.1 RGBA转成Bitmap
转成RGBA相对比较简单,只要将rgba的Mat,转为jbyteArray,传递到Android层就好。
extern "C"
JNIEXPORT jbyteArray JNICALL
Java_com_heiko_myncnnlib_NcnnNativeLib_nv21toARGB(JNIEnv *env, jobject thiz, jbyteArray data_,jint h, jint w) {jbyte *data = env->GetByteArrayElements(data_, NULL);cv::Mat nv21(h + h / 2, w, CV_8UC1, data);cv::Mat rgba(h, w, CV_8UC4);cv::cvtColor(nv21, rgba, cv::COLOR_YUV2RGBA_NV21);int rows = h;int cols = w;jbyteArray byteArray = env->NewByteArray(rows * cols * 4);env->SetByteArrayRegion(byteArray, 0, rows * cols * 4, reinterpret_cast<jbyte*>(rgba.data));env->ReleaseByteArrayElements(data_, data, 0);return byteArray;
}
Android层进行调用,这里创建Bitmap的时候,使用的是Bitmap.Config.ARGB_8888
//由于前摄像头放置位置是90度方向的,所以这里height和width对调 (实际上应该是在JNI里进行旋转操作,这里是怎么方便怎么来)var result = nativeLib.nv21toARGB(data,height,width)//var result = nativeLib.nv21toARGB(data,width,height)//byte数组转为ARGB8888的Bitmapval bitmap = Bitmap.createBitmap(width,height,Bitmap.Config.ARGB_8888)var buffer = ByteBuffer.wrap(result)bitmap.copyPixelsFromBuffer(buffer)
runOnUiThread {//显示到Bitmap上binding.img1.setImageBitmap(bitmap)
}
3.2 RGB888转RGB565后,再转成Bitmap
先来看一下RGB888转RGB565的方法
uint16_t *rgb888toRgb565(cv::Mat &rgb, int rows, int cols) {cv::Vec3b *data = rgb.ptr<cv::Vec3b>(0);uint16_t *rgb565 = new uint16_t[rows * cols];for (int i = 0; i < rows * cols; i++) {int r = data[i][0];int g = data[i][1];int b = data[i][2];rgb565[i] = ((r >> 3) << 11) | ((g >> 2) << 5) | (b >> 3);}return rgb565;
}
实现JNI方法,这里传入的data_是rgb888格式,然后转成Mat,再调用rgb888toRgb565转成rgb565,最后在转成jbyteArray返回给Android层。
extern "C"
JNIEXPORT jbyteArray JNICALL
Java_com_heiko_MyTest_rgb888ToRgb565(JNIEnv *env, jobject thiz, jbyteArray data_,jint w, jint h) {jbyte *data = env->GetByteArrayElements(data_, NULL);unsigned char *rgb_data = reinterpret_cast<unsigned char *>(data);cv::Mat rgb(h, w, CV_8UC3, rgb_data);int rows = h;int cols = w;jbyteArray byteArray = env->NewByteArray(rows * cols * 2);uint16_t *rgb565 = rgb888toRgb565(rgb, rows, cols);env->SetByteArrayRegion(byteArray, 0, rows * cols * 2, reinterpret_cast<jbyte *>(rgb565));env->ReleaseByteArrayElements(data_, data, 0);return byteArray;
}
Android层进行调用,这里创建Bitmap的时候,使用的是Bitmap.Config.RGB_565
//这里的data是RGB888格式,具体看4.x小节
val result : ByteArray = nativeLib.rgb888ToRgb565(data, imageWidth, imageHeight)
//byte数组转为Bitmap
val bitmap = Bitmap.createBitmap(imageWidth, imageHeight, Bitmap.Config.RGB_565)
var buffer = ByteBuffer.wrap(detectResult)
bitmap.copyPixelsFromBuffer(buffer)runOnUiThread { //显示到ImageView上binding.img1.setImageBitmap(bitmap)
}
3.3 RGBA转RGB565
rgba也可以先转成rgb565后,再传递给Android层,代码如下
uint16_t *rgbaToRgb565(cv::Mat &rgb, int rows, int cols) {cv::Vec4b *data = rgb.ptr<cv::Vec4b>(0);uint16_t *rgb565 = new uint16_t[rows * cols];for (int i = 0; i < rows * cols; i++) {int r = data[i][0];int g = data[i][1];int b = data[i][2];rgb565[i] = ((r >> 3) << 11) | ((g >> 2) << 5) | (b >> 3);}return rgb565;
}
4. Bitmap转RGB888
Android中的Bitmap是ARGB格式进行存储的,所以我们先取到Bitmap的像素数组,然后对其进行遍历,分别取到每个像素点的R、G、B数据,赋值到新的ByteArray里,就得到RGB888格式的图像数据了。
//解析bytes为bitmap,bytes是jpeg格式的图片流
val bitmap = BitmapFactory.decodeByteArray(bytes, 0, bytes.size)
val width: Int = bitmap.width
val height: Int = bitmap.height
val pixels = IntArray(width * height)
//获取像素赋值给 pixels
bitmap.getPixels(pixels, 0, width, 0, 0, width, height)val rgb888 = ByteArray(width * height * 3)
for (i in 0 until width * height) {// 注意:Android的Bitmap是ARGB格式,而不是RGBArgb888[i * 3] = Color.red(pixels[i]).toByte()rgb888[i * 3 + 1] = Color.green(pixels[i]).toByte()rgb888[i * 3 + 2] = Color.blue(pixels[i]).toByte()
}
5. YUV420转Bitmap
这里的yuv420的具体格式是NV21,也就是将NV21格式转为Bitamp。
具体操作为先将nv21的ByteArray转化为YuvImage对象,然后压缩为JPEG格式的ByteArray,最后通过BitmapFactory.decodeByteArray()来得到Bitmap。
fun convertYUV420ToBitmap(yuv420Data: ByteArray?,width: Int,height: Int): Bitmap {// 创建YuvImage对象val yuvImage = YuvImage(yuv420Data, ImageFormat.NV21, width, height, null)// 创建ByteArrayOutputStream对象val outputStream = ByteArrayOutputStream()// 将YuvImage对象压缩为JPEG格式的数据yuvImage.compressToJpeg(Rect(0, 0, width, height), 100, outputStream)// 将JPEG数据解码为Bitmap对象val jpegData = outputStream.toByteArray()return BitmapFactory.decodeByteArray(jpegData, 0, jpegData.size)
}
6. android.media.Image 转为 NV21
Android Camera2相机中取到的一帧数据是android.media.Image,我们设置android.graphics.ImageFormat为ImageFormat.YUV_420_888,这个格式是YCbCr的泛化格式,不会具体指明是YU12,YV12,NV12,或是是NV21。它能够表示任何4:2:0的平面和半平面格式,每个分量用8 bits表示。
这里,我们来将Image转为NV21格式。
fun imageToNV21(image: Image): ByteArray {val planes: Array<Image.Plane> = image.planesval yBuffer = planes[0].bufferval uBuffer = planes[1].bufferval vBuffer = planes[2].bufferval ySize = yBuffer.remaining()val uSize = uBuffer.remaining()val vSize = vBuffer.remaining()val yuvData = ByteArray(ySize + uSize + vSize)yBuffer[yuvData, 0, ySize]vBuffer[yuvData, ySize, vSize]uBuffer[yuvData, ySize + vSize, uSize]return yuvData
}
7. Android传递Bitmap给JNI,并转为rgba的Mat
Android中,也可以直接向JNI传递Bitmap对象,然后在JNI中,再去对Bitmap进行操作。
extern "C"
JNIEXPORT jbyteArray JNICALL
Java_com_zeekr_ncnnlib_NcnnNativeLib_humanDetectBitmap(JNIEnv *env, jobject thiz, jobject bitmap) {AndroidBitmapInfo bitmapInfo;//获取Bitmap的信息AndroidBitmap_getInfo(env, bitmap, &bitmapInfo);int rows = bitmapInfo.height;int cols = bitmapInfo.width;void *bitmapPixels;//获取Bitmap的像素AndroidBitmap_lockPixels(env, bitmap, &bitmapPixels);//转成rgba的Matcv::Mat rgba(rows, cols, CV_8UC4, bitmapPixels);AndroidBitmap_unlockPixels(env, bitmap);//省略了后续无关代码
}
关于在JNI中创建Bitmap,并传递到Android层,具体可以看我的这篇文章 : Android JNI/NDK 入门从一到二_氦客的博客-CSDN博客
8. JPEG转NV21
传入jpeg格式的ByteArray,返回NV21格式的ByteArray
fun jpegToNV21(jpegData: ByteArray, width: Int, height: Int): ByteArray {val bitmap = BitmapFactory.decodeByteArray(jpegData, 0, jpegData.size)val argb = IntArray(width * height)bitmap.getPixels(argb, 0, width, 0, 0, width, height)val yuv = ByteArray(width * height * 3 / 2)encodeYUV420SP(yuv, argb, width, height)bitmap.recycle()return yuv
}private fun encodeYUV420SP(yuv420sp: ByteArray, argb: IntArray, width: Int, height: Int) {val frameSize = width * heightvar yIndex = 0var uvIndex = frameSize//var a: Intvar R: Intvar G: Intvar B: Intvar Y: Intvar U: Intvar V: Intfor (j in 0 until height) {for (i in 0 until width) {//a = argb[j * width + i] and -0x1000000 shr 24R = argb[j * width + i] and 0xff0000 shr 16G = argb[j * width + i] and 0xff00 shr 8B = argb[j * width + i] and 0xff shr 0Y = (66 * R + 129 * G + 25 * B + 128 shr 8) + 16U = (-38 * R - 74 * G + 112 * B + 128 shr 8) + 128V = (112 * R - 94 * G - 18 * B + 128 shr 8) + 128yuv420sp[yIndex++] = (if (Y < 0) 0 else if (Y > 255) 255 else Y).toByte()if (j % 2 == 0 && i % 2 == 0) {yuv420sp[uvIndex++] = (if (V < 0) 0 else if (V > 255) 255 else V).toByte()yuv420sp[uvIndex++] = (if (U < 0) 0 else if (U > 255) 255 else U).toByte()}}}
}
本文为氦客在
CSDN上独家发布 : https://blog.csdn.net/EthanCo


