须知少日拏云志,曾许人间第一流
一,定义
Navigation 翻译成中文就是导航的意思。它是谷歌推出的Jetpack的一员,其目的主要就是来管理页面的切换和导航。
Activity 嵌套多个 Fragment 的 UI 架构模式已经非常普遍,但是对 Fragment 的管理,我们一般通过 FragmentManager 和 FragmentTransaction 来管理 Fragment 之间的切换。页面的切换通常还包括对应用程序 App bar 的管理、Fragment 间的切换动画,以及 Fragment 间的参数传递。纯代码的方式使用起来不是特别友好,并且 Fragment 和 App bar 在管理和使用的过程中显得混乱。
使用Navigation可以很方便的管理和切换Fragment。
二,角色介绍
Navigation组件由三部分构成:
1)导航图(xml文件):包含所有导航相关信息的 XML 资源,其中包含所有目的地和操作。该图表会显示应用的所有导航路径。
2)NavHostFragment:导航宿主是 Navigation 组件的核心部分之一。导航宿主是一个空容器,用户在应用中导航时,目的地会在该容器中交换进出。
3)NavController:导航到目的地是使用NavController 完成的,它是一个在NavHost中管理应用导航的对象。每个NavHost均有自己的相应NavController 。
三,Navigation的优点
1)可视化的页面导航图,类似于 Apple Xcode 中的 StoryBoard,便于我们理清页面关系。
2)通过 destination 和 action 完成页面间的导航。
3)方便添加页面切换动画。
4)页面间类型安全的参数传递。
5)通过 NavigationUI,对菜单、底部导航、抽屉菜单导航进行统一的管理。
四,基本使用
1,在app的build.gradle中添加引用:
implementation 'androidx.navigation:navigation-fragment:2.4.1'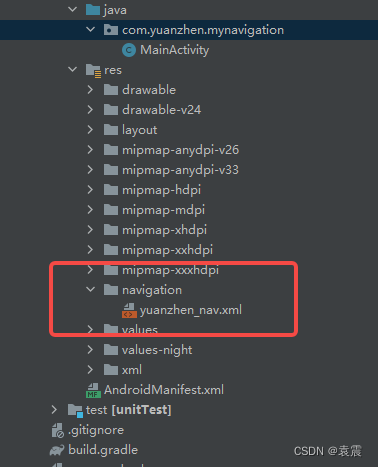
implementation 'androidx.navigation:navigation-ui:2.4.1'2,在res目录下创建导航图(xml文件):
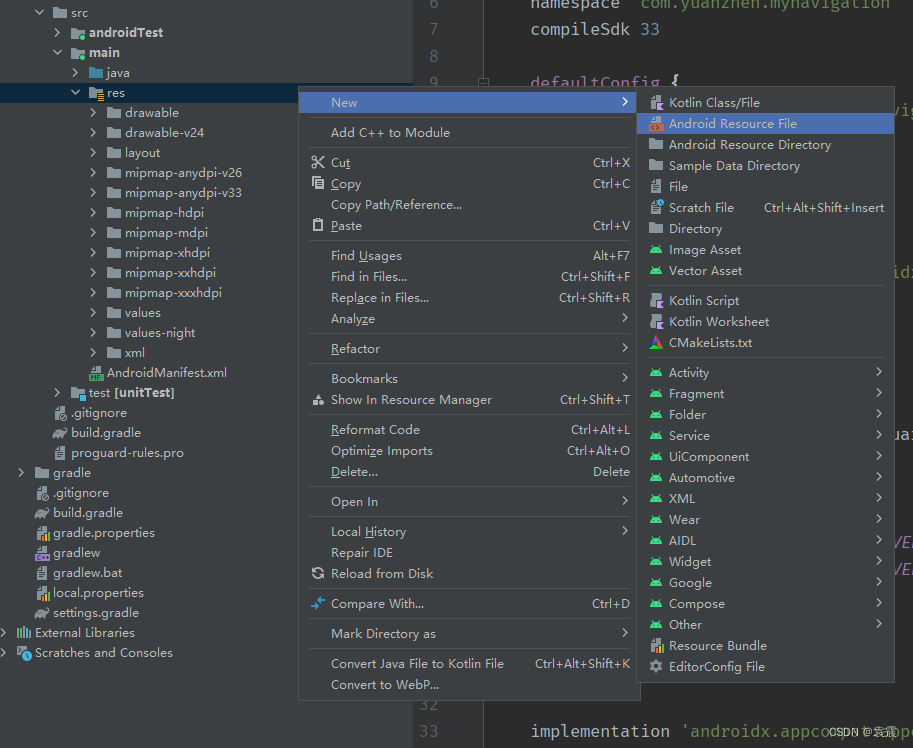
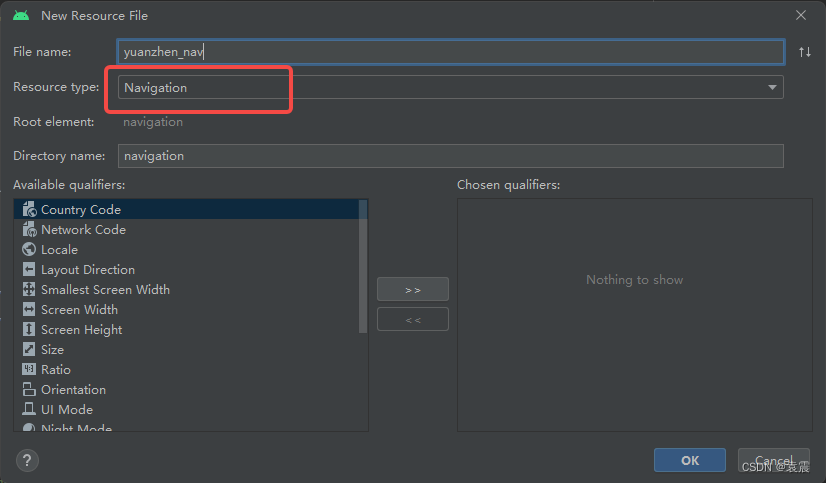
点击ok就会生成xml文件
3,创建fragment:
创建三个fragment,分别为YZ1Fragment,YZ2Fragment,YZ3Fragment
public class YZ1Fragment extends Fragment {@Nullable@Overridepublic View onCreateView(@NonNull LayoutInflater inflater, @Nullable ViewGroup container, @Nullable Bundle savedInstanceState) {return inflater.inflate(R.layout.fragment_yz1,container,false);}}fragment_yz1:
<?xml version="1.0" encoding="utf-8"?>
<androidx.constraintlayout.widget.ConstraintLayout xmlns:android="http://schemas.android.com/apk/res/android"android:layout_width="match_parent"android:layout_height="match_parent"xmlns:app="http://schemas.android.com/apk/res-auto"android:background="#223355"><TextViewandroid:id="@+id/message"android:layout_width="wrap_content"android:layout_height="wrap_content"android:text="我是第一页"android:textSize="20sp"android:textStyle="bold"app:layout_constraintBottom_toBottomOf="parent"app:layout_constraintEnd_toEndOf="parent"app:layout_constraintStart_toStartOf="parent"app:layout_constraintTop_toTopOf="parent" /><Buttonandroid:id="@+id/btn"android:layout_width="wrap_content"android:layout_height="wrap_content"android:text="跳转第二页"android:textAllCaps="false"app:layout_constraintLeft_toLeftOf="parent"app:layout_constraintRight_toRightOf="parent"app:layout_constraintTop_toBottomOf="@+id/message" /></androidx.constraintlayout.widget.ConstraintLayout>
public class YZ2Fragment extends Fragment {@Nullable@Overridepublic View onCreateView(@NonNull LayoutInflater inflater, @Nullable ViewGroup container, @Nullable Bundle savedInstanceState) {return inflater.inflate(R.layout.fragment_yz2,container,false);}
}fragment_yz2:
<?xml version="1.0" encoding="utf-8"?>
<androidx.constraintlayout.widget.ConstraintLayout xmlns:android="http://schemas.android.com/apk/res/android"android:layout_width="match_parent"android:layout_height="match_parent"xmlns:app="http://schemas.android.com/apk/res-auto"android:background="#dd2233"><TextViewandroid:id="@+id/textView"android:layout_width="wrap_content"android:layout_height="wrap_content"android:layout_marginLeft="8dp"android:layout_marginRight="8dp"android:layout_marginBottom="16dp"android:text="第二页"android:textSize="20sp"android:textStyle="bold"app:layout_constraintBottom_toBottomOf="parent"app:layout_constraintEnd_toEndOf="parent"app:layout_constraintStart_toStartOf="parent"app:layout_constraintTop_toTopOf="parent" /><Buttonandroid:id="@+id/btn"android:layout_width="wrap_content"android:layout_height="wrap_content"android:layout_marginStart="8dp"android:layout_marginLeft="8dp"android:layout_marginEnd="8dp"android:layout_marginRight="8dp"android:text="返回第一页"android:textAllCaps="false"app:layout_constraintEnd_toEndOf="parent"app:layout_constraintStart_toStartOf="parent"app:layout_constraintTop_toBottomOf="@+id/textView" /><Buttonandroid:id="@+id/btn2"android:layout_width="wrap_content"android:layout_height="wrap_content"android:layout_marginStart="8dp"android:layout_marginLeft="8dp"android:layout_marginEnd="8dp"android:layout_marginRight="8dp"android:text="前往第三页"android:textAllCaps="false"app:layout_constraintEnd_toEndOf="parent"app:layout_constraintStart_toStartOf="parent"app:layout_constraintTop_toBottomOf="@+id/btn" /></androidx.constraintlayout.widget.ConstraintLayout>
public class YZ3Fragment extends Fragment {@Nullable@Overridepublic View onCreateView(@NonNull LayoutInflater inflater, @Nullable ViewGroup container, @Nullable Bundle savedInstanceState) {return inflater.inflate(R.layout.fragment_yz3,container,false);}
}fragment_yz3:
<?xml version="1.0" encoding="utf-8"?>
<androidx.constraintlayout.widget.ConstraintLayout xmlns:android="http://schemas.android.com/apk/res/android"android:layout_width="match_parent"android:layout_height="match_parent"xmlns:app="http://schemas.android.com/apk/res-auto"android:background="#33ff22"><TextViewandroid:id="@+id/textView"android:layout_width="wrap_content"android:layout_height="wrap_content"android:layout_marginLeft="8dp"android:layout_marginRight="8dp"android:layout_marginBottom="16dp"android:text="第三页"android:textSize="20sp"android:textStyle="bold"app:layout_constraintBottom_toBottomOf="parent"app:layout_constraintEnd_toEndOf="parent"app:layout_constraintStart_toStartOf="parent"app:layout_constraintTop_toTopOf="parent" /><Buttonandroid:id="@+id/btn"android:layout_width="wrap_content"android:layout_height="wrap_content"android:layout_marginStart="8dp"android:layout_marginLeft="8dp"android:layout_marginEnd="8dp"android:layout_marginRight="8dp"android:text="跳到第二页"android:textAllCaps="false"app:layout_constraintEnd_toEndOf="parent"app:layout_constraintStart_toStartOf="parent"app:layout_constraintTop_toBottomOf="@+id/textView" /></androidx.constraintlayout.widget.ConstraintLayout>
4,回到yuanzhen_nav.xml中,点击添加:
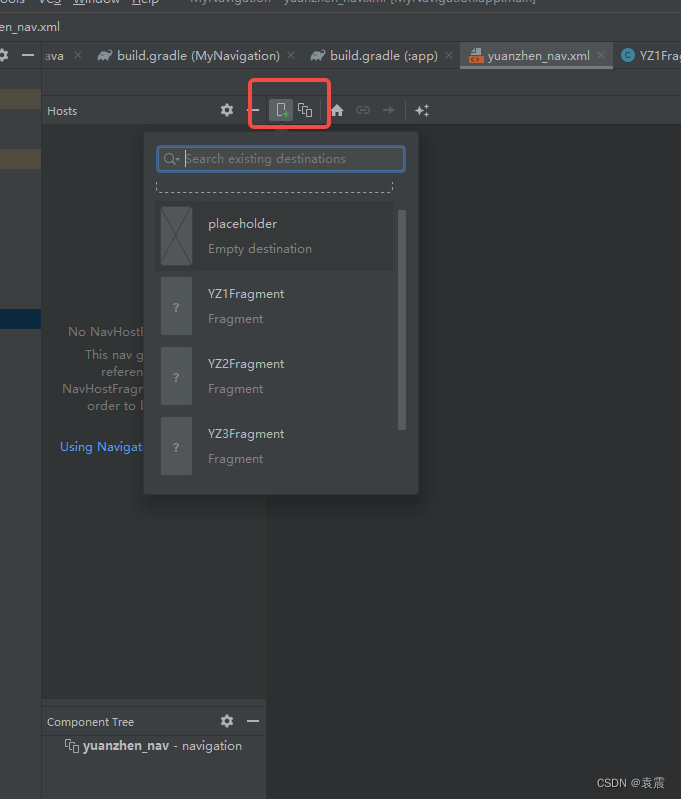
添加三个fragment :
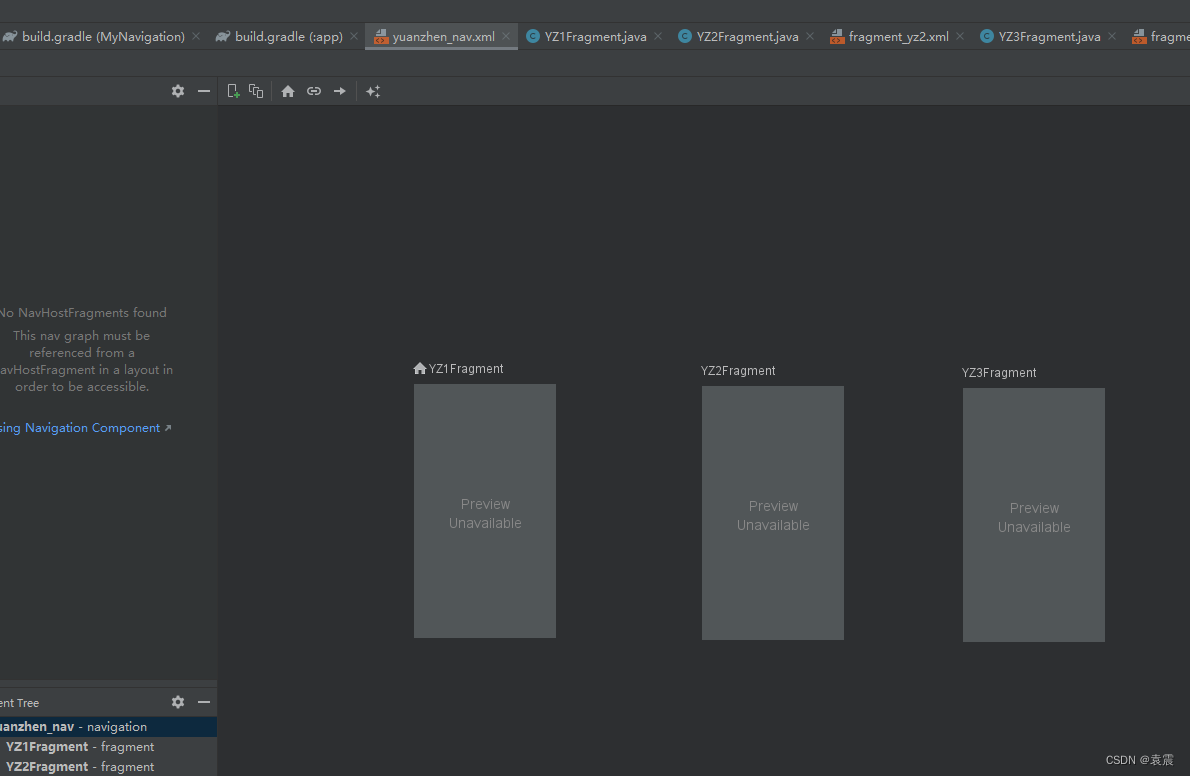
然后收到添加跳转方向:
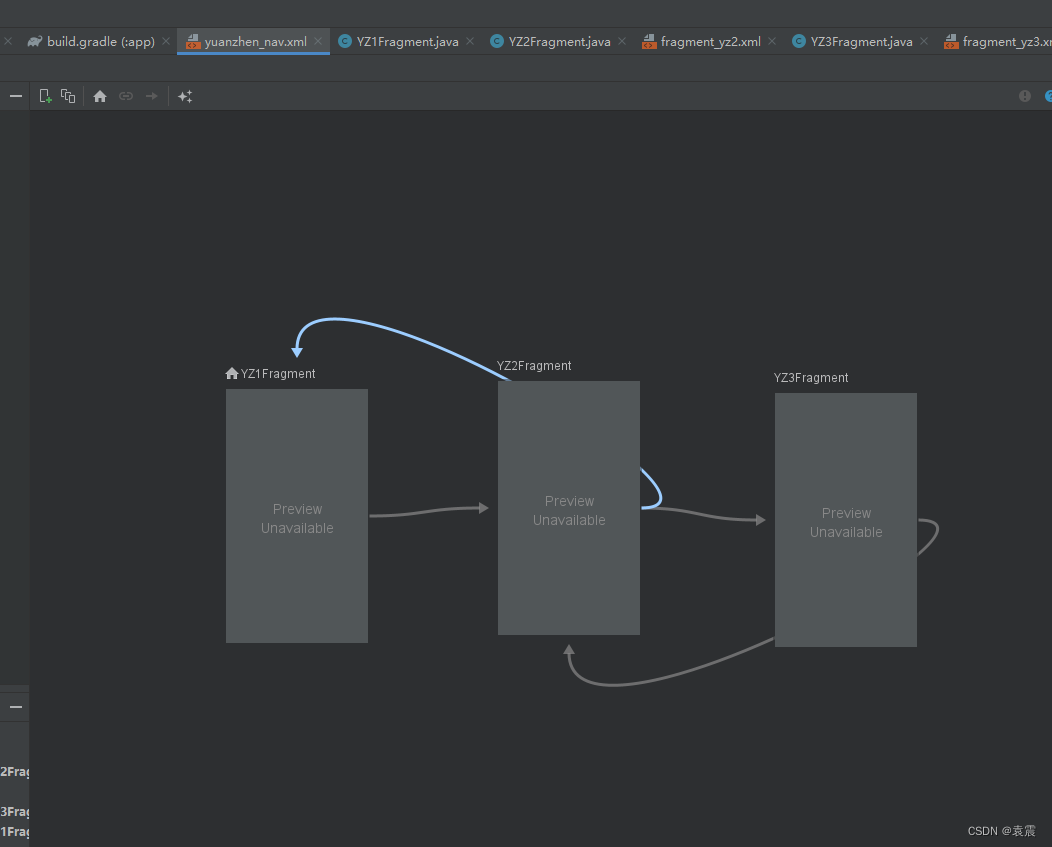
就会自动生成代码:
<?xml version="1.0" encoding="utf-8"?>
<navigation xmlns:android="http://schemas.android.com/apk/res/android"xmlns:app="http://schemas.android.com/apk/res-auto"android:id="@+id/yuanzhen_nav"app:startDestination="@id/YZ1Fragment"><fragmentandroid:id="@+id/YZ1Fragment"android:name="com.yuanzhen.mynavigation.YZ1Fragment"android:label="YZ1Fragment" ><actionandroid:id="@+id/action_YZ1Fragment_to_YZ2Fragment2"app:destination="@id/YZ2Fragment" /></fragment><fragmentandroid:id="@+id/YZ2Fragment"android:name="com.yuanzhen.mynavigation.YZ2Fragment"android:label="YZ2Fragment" ><actionandroid:id="@+id/action_YZ2Fragment_to_YZ3Fragment2"app:destination="@id/YZ3Fragment" /><actionandroid:id="@+id/action_YZ2Fragment_to_YZ1Fragment2"app:destination="@id/YZ1Fragment" /></fragment><fragmentandroid:id="@+id/YZ3Fragment"android:name="com.yuanzhen.mynavigation.YZ3Fragment"android:label="YZ3Fragment" ><actionandroid:id="@+id/action_YZ3Fragment_to_YZ2Fragment2"app:destination="@id/YZ2Fragment" /></fragment>
</navigation>
这里的action代表的就是跳转路径。
5,在fragment中实现跳转代码:
public class YZ1Fragment extends Fragment {@Nullable@Overridepublic View onCreateView(@NonNull LayoutInflater inflater, @Nullable ViewGroup container, @Nullable Bundle savedInstanceState) {return inflater.inflate(R.layout.fragment_yz1,container,false);}@Overridepublic void onViewCreated(@NonNull View view, @Nullable Bundle savedInstanceState) {super.onViewCreated(view, savedInstanceState);Button btn=view.findViewById(R.id.btn);btn.setOnClickListener(new View.OnClickListener() {@Overridepublic void onClick(View view) {Navigation.findNavController(view).navigate(R.id.action_YZ1Fragment_to_YZ2Fragment2);}});}}public class YZ2Fragment extends Fragment {@Nullable@Overridepublic View onCreateView(@NonNull LayoutInflater inflater, @Nullable ViewGroup container, @Nullable Bundle savedInstanceState) {return inflater.inflate(R.layout.fragment_yz2,container,false);}@Overridepublic void onViewCreated(@NonNull View view, @Nullable Bundle savedInstanceState) {super.onViewCreated(view, savedInstanceState);Button btn=view.findViewById(R.id.btn);btn.setOnClickListener(new View.OnClickListener() {@Overridepublic void onClick(View view) {Navigation.findNavController(view).navigate(R.id.action_YZ2Fragment_to_YZ1Fragment2);}});Button btn2=view.findViewById(R.id.btn2);btn2.setOnClickListener(new View.OnClickListener() {@Overridepublic void onClick(View view) {Navigation.findNavController(view).navigate(R.id.action_YZ2Fragment_to_YZ3Fragment2);}});}
}public class YZ3Fragment extends Fragment {@Nullable@Overridepublic View onCreateView(@NonNull LayoutInflater inflater, @Nullable ViewGroup container, @Nullable Bundle savedInstanceState) {return inflater.inflate(R.layout.fragment_yz3,container,false);}@Overridepublic void onViewCreated(@NonNull View view, @Nullable Bundle savedInstanceState) {super.onViewCreated(view, savedInstanceState);Button btn=view.findViewById(R.id.btn);btn.setOnClickListener(new View.OnClickListener() {@Overridepublic void onClick(View view) {Navigation.findNavController(view).navigate(R.id.action_YZ3Fragment_to_YZ2Fragment2);}});}}6,在Activity添加fragment:
public class MainActivity extends AppCompatActivity {private NavController navController;@Overrideprotected void onCreate(Bundle savedInstanceState) {super.onCreate(savedInstanceState);setContentView(R.layout.activity_main);navController = Navigation.findNavController(this, R.id.frag);NavigationUI.setupActionBarWithNavController(this, navController);}}activity_main:
<?xml version="1.0" encoding="utf-8"?>
<androidx.constraintlayout.widget.ConstraintLayout xmlns:android="http://schemas.android.com/apk/res/android"xmlns:app="http://schemas.android.com/apk/res-auto"xmlns:tools="http://schemas.android.com/tools"android:layout_width="match_parent"android:layout_height="match_parent"tools:context=".MainActivity"><fragmentandroid:id="@+id/frag"android:layout_width="match_parent"android:layout_height="match_parent"app:defaultNavHost="true"android:name="androidx.navigation.fragment.NavHostFragment"app:layout_constraintBottom_toBottomOf="parent"app:layout_constraintEnd_toEndOf="parent"app:layout_constraintStart_toStartOf="parent"app:layout_constraintTop_toTopOf="parent"app:navGraph="@navigation/yuanzhen_nav"/></androidx.constraintlayout.widget.ConstraintLayout>
运行效果:

五,添加导航栏
1,在res目录下添加menu:
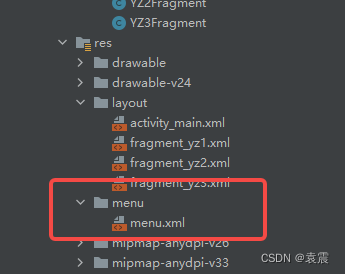
2,menu.xml:
<?xml version="1.0" encoding="utf-8"?>
<menu xmlns:android="http://schemas.android.com/apk/res/android"><itemandroid:id="@+id/YZ1Fragment"android:icon="@mipmap/pic_article_default"android:title="首页"/><itemandroid:id="@+id/YZ2Fragment"android:icon="@mipmap/tell_normal"android:title="第二页"/><itemandroid:id="@+id/YZ3Fragment"android:icon="@mipmap/video_call_default"android:title="第三页"/>
</menu>
注意,这里的id就是你要跳转的fragment名称
3,在activity_main添加新的布局:
<?xml version="1.0" encoding="utf-8"?>
<LinearLayout xmlns:android="http://schemas.android.com/apk/res/android"xmlns:app="http://schemas.android.com/apk/res-auto"xmlns:tools="http://schemas.android.com/tools"android:layout_width="match_parent"android:layout_height="match_parent"tools:context=".MainActivity"android:orientation="vertical"><fragmentandroid:id="@+id/frag"android:layout_width="match_parent"android:layout_height="wrap_content"android:layout_weight="9"app:defaultNavHost="true"android:name="androidx.navigation.fragment.NavHostFragment"app:layout_constraintBottom_toBottomOf="parent"app:layout_constraintEnd_toEndOf="parent"app:layout_constraintStart_toStartOf="parent"app:layout_constraintTop_toTopOf="parent"app:navGraph="@navigation/yuanzhen_nav"/><com.google.android.material.bottomnavigation.BottomNavigationViewandroid:id="@+id/btm"android:layout_width="match_parent"android:layout_height="wrap_content"android:layout_weight="1"app:menu="@menu/menu"/></LinearLayout>
4,在MainActivity添加代码:
public class MainActivity extends AppCompatActivity {private NavController navController;BottomNavigationView bottomNavigationView;@Overrideprotected void onCreate(Bundle savedInstanceState) {super.onCreate(savedInstanceState);setContentView(R.layout.activity_main);bottomNavigationView=findViewById(R.id.btm);navController = Navigation.findNavController(this, R.id.frag);NavigationUI.setupWithNavController(bottomNavigationView,navController);}
}
实现效果:

六,添加动画效果
添加动画效果非常简单:
1,打开yuanzhen_nav.xml文件
2,点击试图的跳转线:

3, 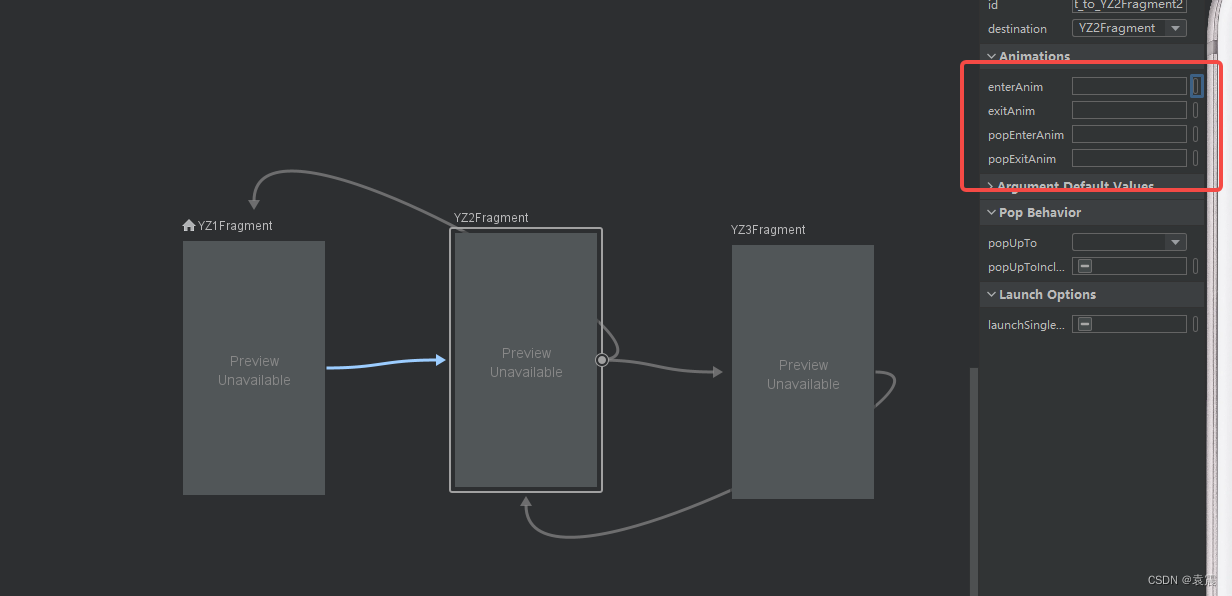
有四个动画可以选择
选择之后yaunzhen_nav文件如下:
<?xml version="1.0" encoding="utf-8"?>
<navigation xmlns:android="http://schemas.android.com/apk/res/android"xmlns:app="http://schemas.android.com/apk/res-auto"android:id="@+id/yuanzhen_nav"app:startDestination="@id/YZ1Fragment"><fragmentandroid:id="@+id/YZ1Fragment"android:name="com.yuanzhen.mynavigation.YZ1Fragment"android:label="YZ1Fragment" ><actionandroid:id="@+id/action_YZ1Fragment_to_YZ2Fragment2"app:destination="@id/YZ2Fragment"app:enterAnim="@anim/nav_default_pop_enter_anim"app:exitAnim="@anim/nav_default_pop_enter_anim"app:popEnterAnim="@anim/nav_default_pop_exit_anim"app:popExitAnim="@anim/nav_default_pop_exit_anim" /></fragment><fragmentandroid:id="@+id/YZ2Fragment"android:name="com.yuanzhen.mynavigation.YZ2Fragment"android:label="YZ2Fragment" ><actionandroid:id="@+id/action_YZ2Fragment_to_YZ3Fragment2"app:destination="@id/YZ3Fragment"app:enterAnim="@anim/nav_default_enter_anim"app:exitAnim="@anim/nav_default_exit_anim"app:popEnterAnim="@anim/nav_default_enter_anim"app:popExitAnim="@anim/nav_default_pop_exit_anim" /><actionandroid:id="@+id/action_YZ2Fragment_to_YZ1Fragment2"app:destination="@id/YZ1Fragment" /></fragment><fragmentandroid:id="@+id/YZ3Fragment"android:name="com.yuanzhen.mynavigation.YZ3Fragment"android:label="YZ3Fragment" ><actionandroid:id="@+id/action_YZ3Fragment_to_YZ2Fragment2"app:destination="@id/YZ2Fragment" /></fragment>
</navigation>
也可以自己去自定义动画