stable-diffusion-webui-wd14-tagger
前面几篇:
Stable-Diffusion|window10安装GPU版本的 Stable-Diffusion-WebUI遇到的一些问题(一)
【Stable-Diffusion|入门怎么下载与使用civitai网站的模型(二)】
Stable-Diffusion|文生图 拍立得纪实风格的Lora 图例(三)
Stable-Diffusion|文生图 完蛋我被美女包围了人物Lora(四)
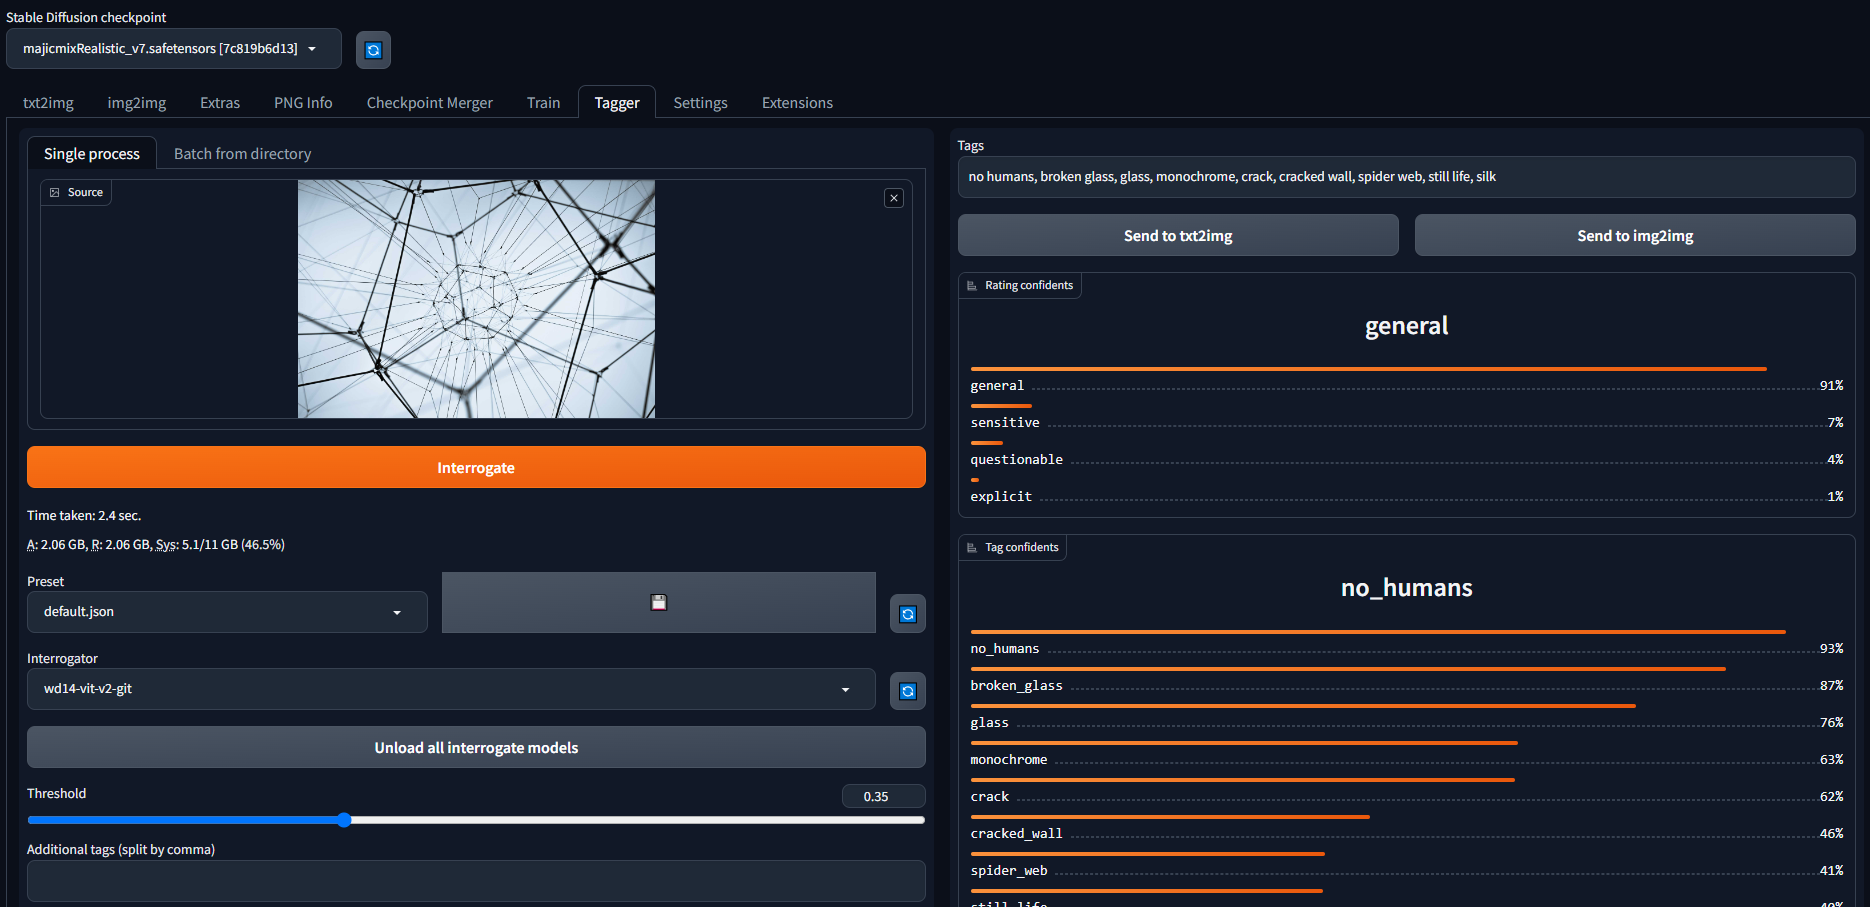
本篇介绍通过tagger反推,如果成功安装的话,会在TXT2IMG这一个栏目中多出tagger:
填入一张图片,就会自动生成prompt,同时可以通过send to,直接跳转到txt2img,img2img
安装的方式有多种:
- 直接从extensions中输入
https://github.com/toriato/stable-diffusion-webui-wd14-tagger.git进行安装:
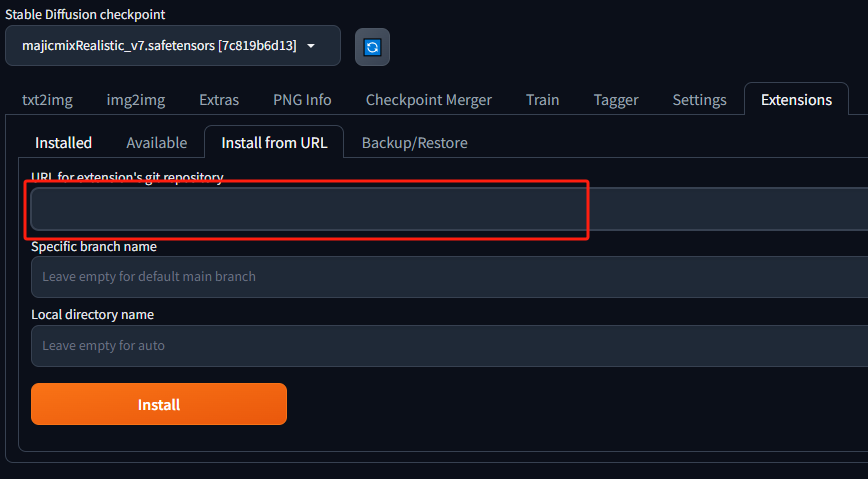
- 还有一种git clone到
extensions文件夹下面
此时,笔者遇到了版本问题,一直没有显示tagger这个栏目,参考了【解决stable diffusion webui1.6 wd1.4 tagger加载失败的问题】
需要修改:
tagger/ui.py
# 第十行
# from webui import wrap_gradio_gpu_call  # 原代码
from modules.call_queue import wrap_gradio_gpu_call
preload.py
# 第4行开始
# from modules.shared import models_path  # 原代码
from modules import paths# default_ddp_path = Path(models_path, 'deepdanbooru')  # 原代码
default_ddp_path = Path(paths.models_path, "deepdanbooru")
然后restart重启一下







![[C语言]大小端及整形输出问题](https://img-blog.csdnimg.cn/direct/b686faa76d764bc880fff886aa9748cc.png)

