Hibernate实战之操作MySQL数据库 2024.1.8
- 前提环境(Java+MySQL+Navicat+VS Code)
- 1、Hibernate简介
- 1.1 了解HQL
- 2、MySQL数据库建表
- 2.1 编写SQL脚本
- 2.2 MySQL执行脚本
- 3、Java操作MySQL实例(Hibernate)
- 3.1 准备依赖的第三方jar包
- 3.2 了解MySQL数据库连接配置信息并配置XML文件
- 3.2.1 新建 hibernate.cfg.xml 文件
- 3.2.2 新建 Row.hbm.xml 文件
- 3.3 编写Java类实现数据库操作(Row+App)
- 3.3.1 Row.java
- 3.3.2 App.java(含main函数)
- 3.4 测试执行并利用Navicat查看数据库结果
- 3.4.1 新增
- 3.4.2 修改
- 3.4.3 查询
- 3.4.4 删除
- 4、小结
前提环境(Java+MySQL+Navicat+VS Code)
 |  |
 |  |
1、Hibernate简介
Hibernate是一个以LGPL(Lesser GNU Public License)许可证形式发布的开源项目,它可以直接提供相关支持,底层驱动可以随意切换数据库,快速简洁。使业务层与具体数据库分开,只针对Hibernate 进行开发,完成数据和对象的持久化。如果大家感兴趣想要深入了解,建议参考其官方文档和引导示例学习,如QuickStart和中文文档。
 |  |
 |  |
1.1 了解HQL
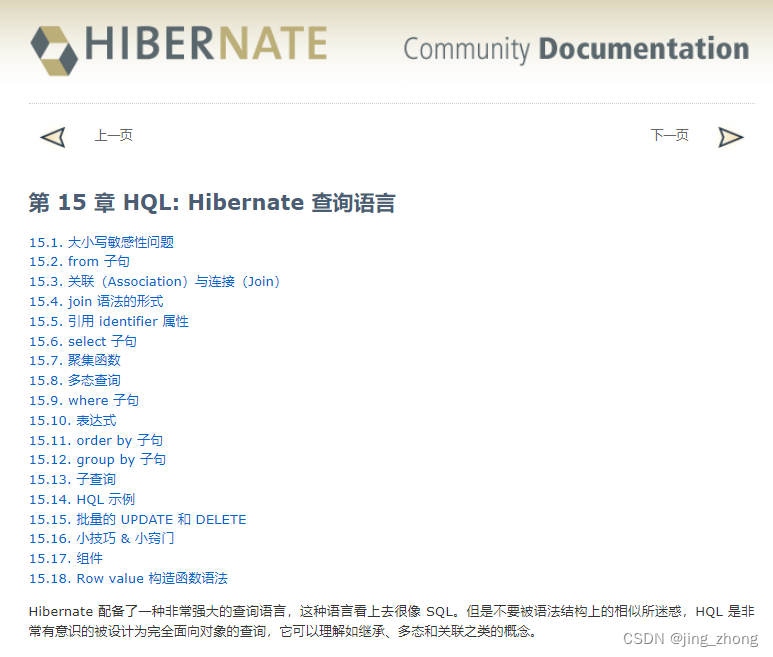
HQL是Hibernate Query Language的缩写,它可以提供更加丰富灵活、更为强大的查询能力,HQL更接近SQL语句查询语法,对动态查询参数绑定提供了丰富的支持,提供了类似标准SQL语句的查询方式,同时也提供了更加面向对象的封装。尤其在实体查询、更新、删除方面,一些常见的用法示例如下:
from User user where user age=20;from User user where user age between 20 and 30;from User user where user age in(20,30);from User user where user name is null;from User user where user name like '%zx%';from User user where (user age%2)=1;from User user where user age=20 and user name like '%zx%';
此外,具体的语法学习可参考社区文档。
2、MySQL数据库建表
为了便于后续使用Java代码操作MySQL数据库,首先需要设计数据表结构,对表中的字段数量、类型、长度、别名、英文名均进行设置,编写好SQL脚本并在数据库中执行,之后在Navicat或MySQL Workbench中进行查看。
2.1 编写SQL脚本
| 字段名 | 字段类型 | 字段别名 |
|---|---|---|
| id | 文本 | 唯一标识 |
| name | 文本 | 名称 |
| date | 日期 | 日期 |
| income | 小数 | 收入 |
针对上述表格中的create_Test.sql脚本文件内容如下:
CREATE database if NOT EXISTS `my_db` default character set utf8mb4 collate utf8mb4_unicode_ci;
use `my_db`;
SET NAMES utf8mb4;CREATE TABLE if NOT EXISTS `test` (`id` CHAR(50) NOT NULL,`name` VARCHAR(50),`date` timestamp(6),`income`  float4,PRIMARY KEY (id)
) ENGINE=InnoDB DEFAULT CHARSET=utf8mb4 COLLATE=utf8mb4_unicode_ci;
2.2 MySQL执行脚本
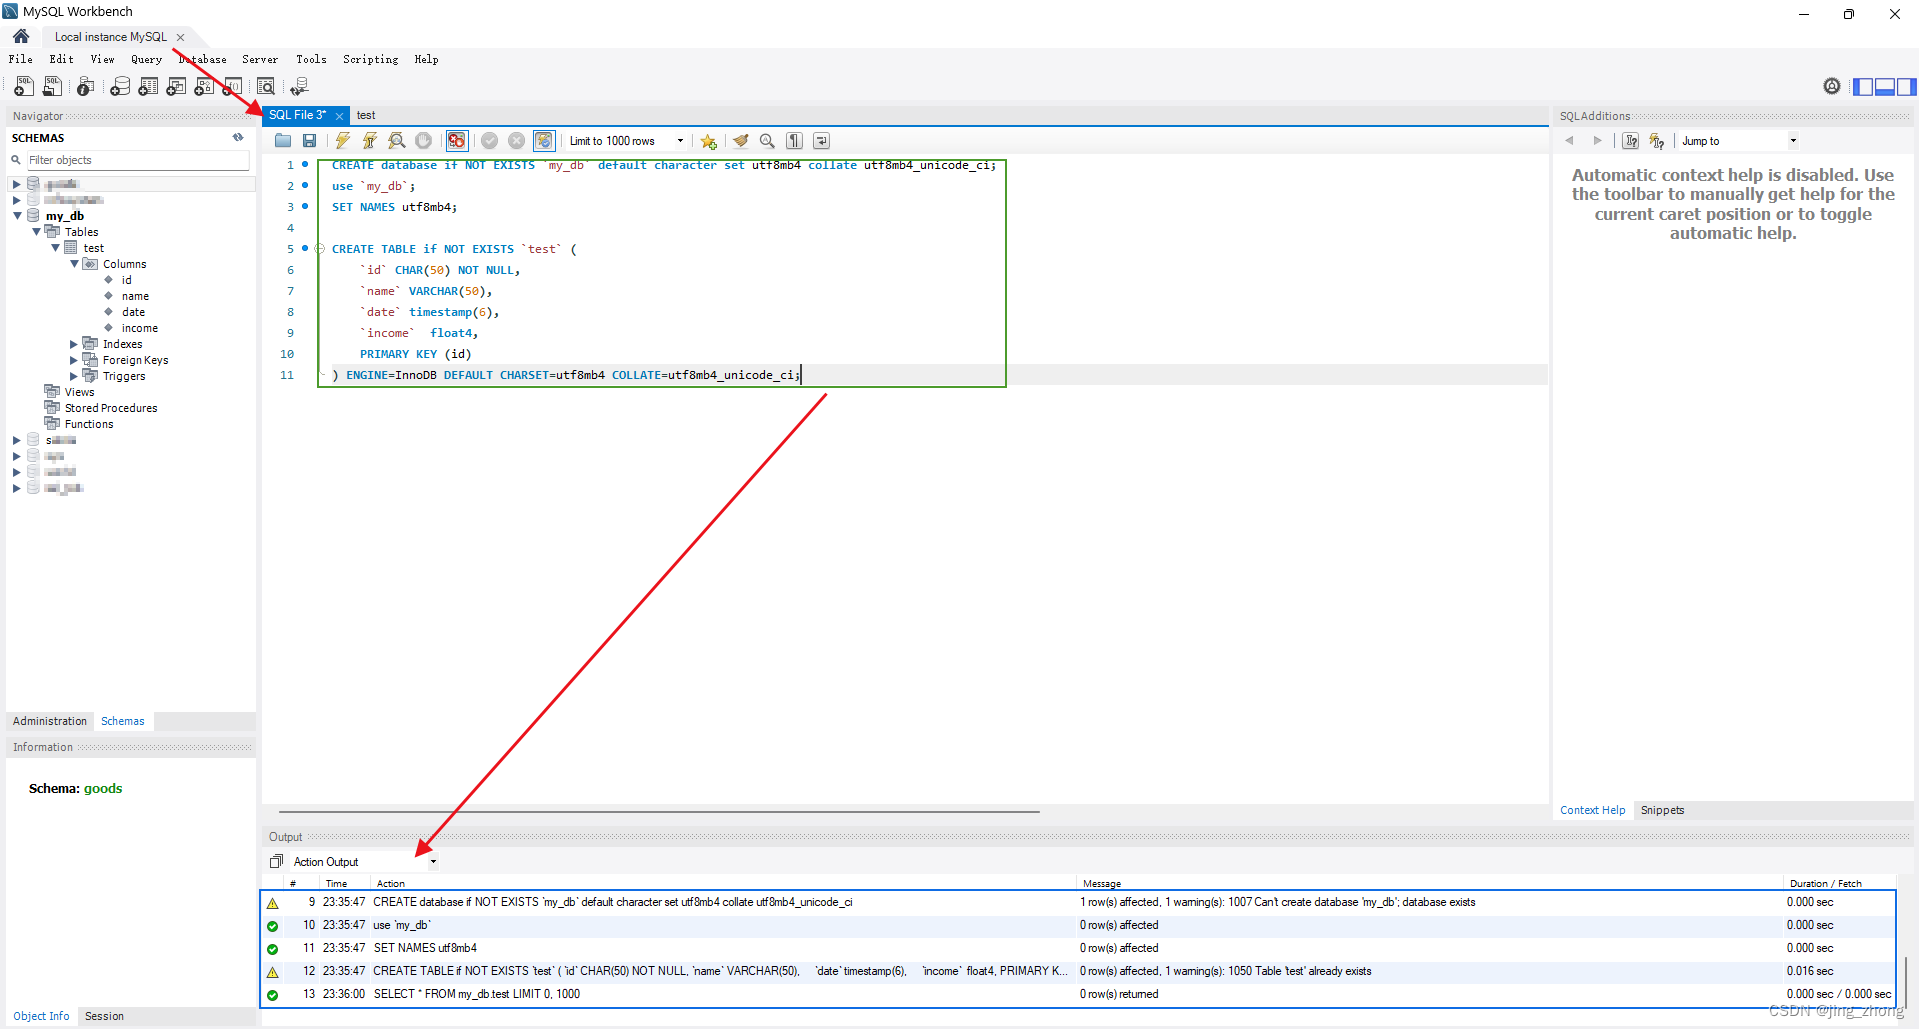
第一步,打开MySQL Workbench或Navicat,新建MySQL数据库连接,输入正确的用户名和密码后测试连接,连接成功后可以看到其中的数据库;
第二步,点击菜单中的新建查询,然后在编辑框中复制SQL语句,当然也可以打开现有的SQL文件,之后点击执行按钮即可查看到数据库和数据表已成功创建。
 |  |
3、Java操作MySQL实例(Hibernate)
下面具体以一个完整的Java项目为例,来介绍如何利用Hibernate对MySQL进行增删改查等操作。整个过程可能有些繁琐,但都较为基本,按部就班操作即可,具体分为:(1)准备三方依赖jar包;(2)了解MySQL数据库连接配置信息;(3)配置XML文件设置jdbc数据库连接MySQL;(4)编写Java类实现数据库操作;(5)测试执行查看效果。
3.1 准备依赖的第三方jar包
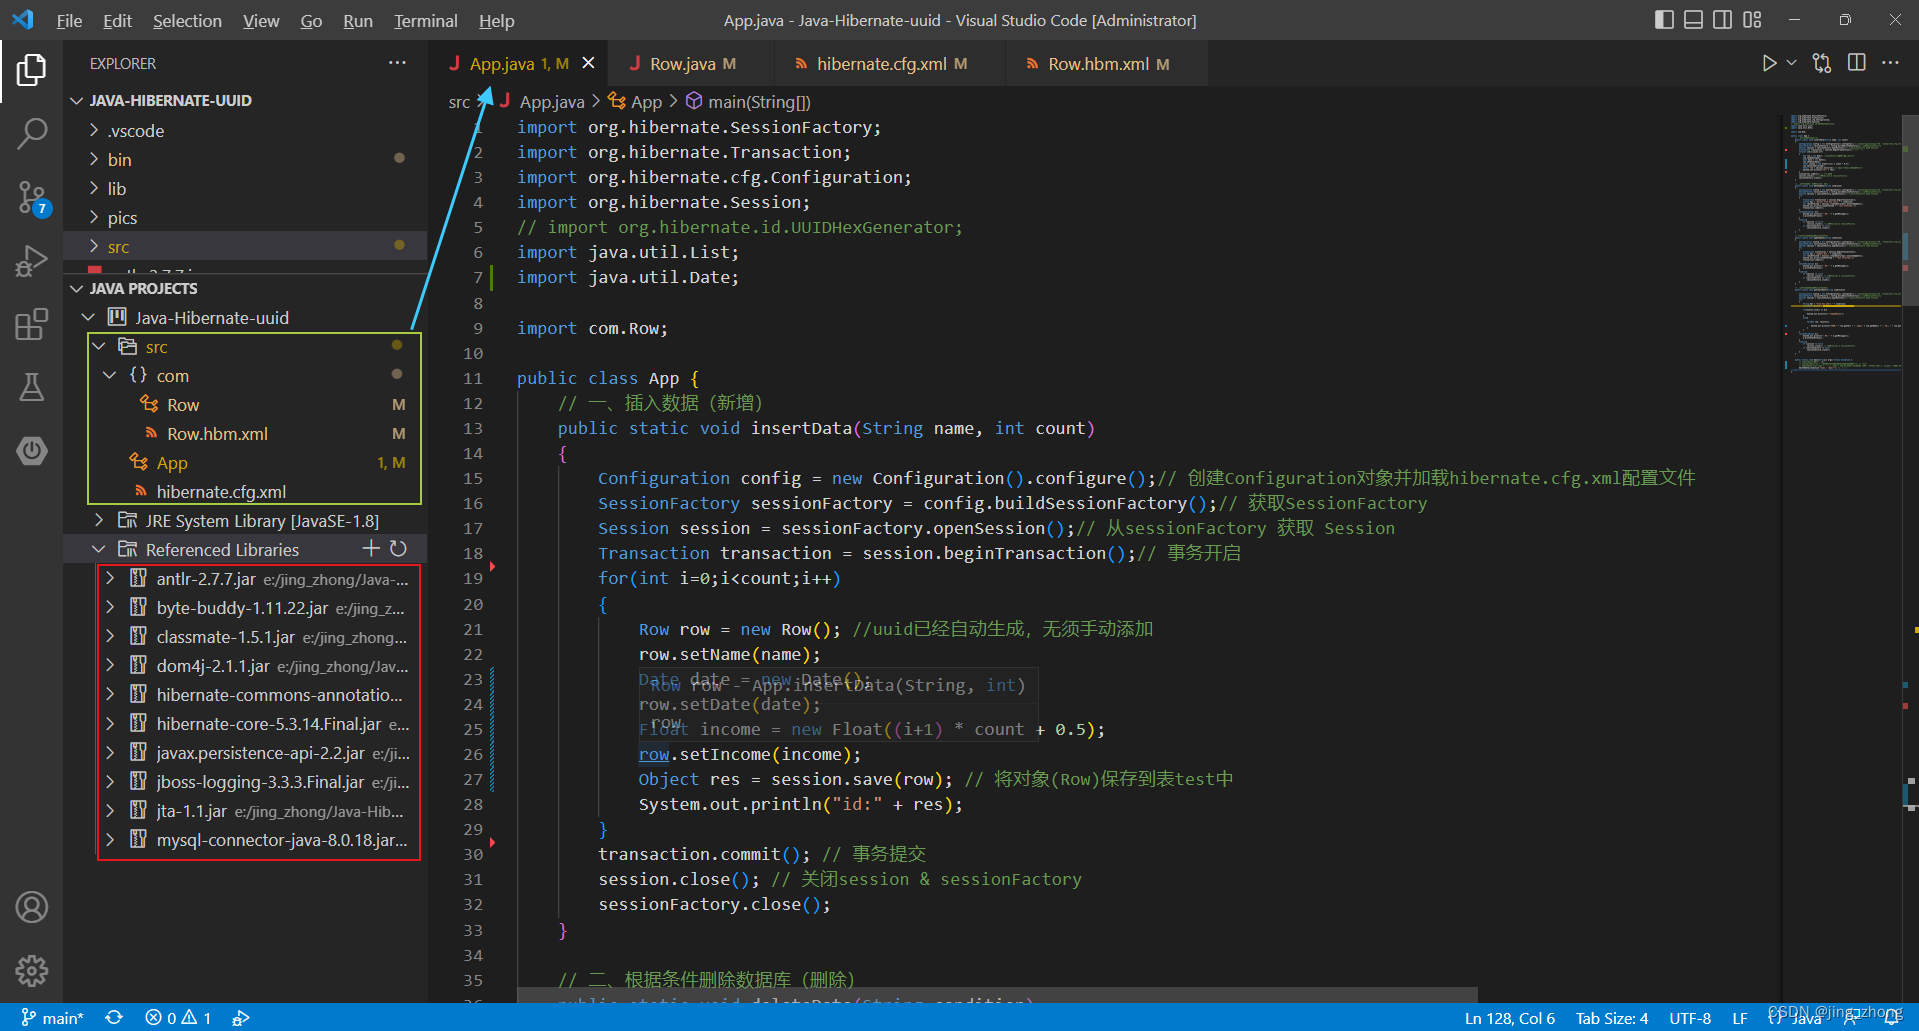
Java项目代码所依赖的三方jar包名称如下,具体可以从Maven官方仓库下载。(注:如果使用Maven,也可在pom文件中引入)
antlr-2.7.7.jar
byte-buddy-1.11.22.jar
classmate-1.5.1.jar
dom4j-2.1.1.jar
hibernate-commons-annotations-5.0.4.Final.jar
hibernate-core-5.3.14.Final.jar
javax.persistence-api-2.2.jar
jboss-logging-3.3.3.Final.jar
jta-1.1.jar
mysql-connector-java-8.0.18.jar
 |
 |
3.2 了解MySQL数据库连接配置信息并配置XML文件
| 数据库名称 | ip地址 | 端口 | 用户名 | 密码 |
|---|---|---|---|---|
| my_db | localhost | 3306 | root | 123456 |
3.2.1 新建 hibernate.cfg.xml 文件
<?xml version="1.0" encoding="UTF-8"?>
<!DOCTYPE hibernate-configuration PUBLIC"-//Hibernate/Hibernate Configuration DTD 3.0//EN""http://www.hibernate.org/dtd/hibernate-configuration-3.0.dtd">
<hibernate-configuration><session-factory><!-- 指定方言 --><property name="dialect">org.hibernate.dialect.MySQLDialect</property><!-- 链接数据库url --><property name="connection.url">jdbc:mysql://localhost:3306/my_db?useUnicode=true&characterEncoding=utf-8&serverTimezone=GMT%2B8</property><!-- 连接数据库的用户名 --><property name="connection.username">root</property><!-- 数据库的密码 --><property name="connection.password">123456</property><!-- 数据库驱动 --><property name="connection.driver_class">com.mysql.jdbc.Driver</property><!-- 显示sql语句 --><property name="show_sql">true</property><!-- 格式化sql语句 --><property name="format_sql">true</property><!-- 映射文件配置 --><mapping resource="com/Row.hbm.xml" /></session-factory>
</hibernate-configuration>
3.2.2 新建 Row.hbm.xml 文件
项目src下的Row.hbm.xml文件是对hibernate对数据库my_db中test表做的映射配置,同时应注意与对应的数据表类放在同一目录(package包)下,因此在编写HQL字符串语句时,需要从Row中查询而非test,实际执行时会从Row映射到test数据表哦!!!
<?xml version="1.0" encoding="UTF-8"?>
<!DOCTYPE hibernate-mapping PUBLIC "-//Hibernate/Hibernate Mapping DTD 3.0//EN" "http://www.hibernate.org/dtd/hibernate-mapping-3.0.dtd">
<hibernate-mapping><class name="com.Row" table="test"><id name="id" column="id"><!-- <generator class="org.hibernate.id.UUIDGenerator"/> --><generator class="uuid"/></id><property name="name" column="name"/><property name="date" column="date"/><property name="income" column="income"/></class>
</hibernate-mapping>
3.3 编写Java类实现数据库操作(Row+App)
编写Row.java类作为对test数据表中每行记录的抽象,编写App类调用main函数连接数据库执行相应的操作实例。
3.3.1 Row.java
package com;import java.util.Date;
import javax.persistence.*;
import org.hibernate.annotations.GenericGenerator;@Entity
@Table
public class Row {//设置主键@Id //配置uuid,原本jpa是不支持uuid的,但借用hibernate的方法能够实现。@GeneratedValue(generator = "idGenerator")@GenericGenerator(name = "idGenerator", strategy = "org.hibernate.id.UUIDGenerator") // uuid@Column(name = "id", unique = true, nullable = false, length = 32)private String id;public String getId() {return id;}public void setId(String id) {this.id = id;}private String name;public String getName() {return name;}public void setName(String name) {this.name = name;}private Date date;public Date getDate() {return date;}public void setDate(Date date) {this.date = date;}private Float income;public Float getIncome() {return income;}public void setIncome(Float income) {this.income = income;}}
3.3.2 App.java(含main函数)
import org.hibernate.SessionFactory;
import org.hibernate.Transaction;
import org.hibernate.cfg.Configuration;
import org.hibernate.Session;
// import org.hibernate.id.UUIDHexGenerator;
import java.util.List;
import java.util.Date;import com.Row;public class App {// 一、插入数据(新增)public static void insertData(String name, int count){Configuration config = new Configuration().configure();// 创建Configuration对象并加载hibernate.cfg.xml配置文件SessionFactory sessionFactory = config.buildSessionFactory();// 获取SessionFactorySession session = sessionFactory.openSession();// 从sessionFactory 获取 SessionTransaction transaction = session.beginTransaction();// 事务开启for(int i=0;i<count;i++){Row row = new Row(); //uuid已经自动生成,无须手动添加row.setName(name);Date date = new Date();row.setDate(date);Float income = new Float((i+1) * count + 0.5);row.setIncome(income);Object res = session.save(row); // 将对象(Row)保存到表test中System.out.println("id:" + res);}transaction.commit(); // 事务提交session.close(); // 关闭session & sessionFactorysessionFactory.close();}// 二、根据条件删除数据库(删除)public static void deleteData(String condition){Configuration config = new Configuration().configure();// 创建Configuration对象并加载hibernate.cfg.xml配置文件SessionFactory sessionFactory = config.buildSessionFactory();// 获取SessionFactorySession session = sessionFactory.openSession();// 从sessionFactory 获取 Sessiontry{Transaction transaction = session.beginTransaction();String hql = "delete from Row where " + condition;int rowsAffected = session.createQuery(hql).executeUpdate();			System.out.println(rowsAffected + " rows affected.");transaction.commit();}catch(Exception e){System.out.println("出错: " + e.getMessage());e.printStackTrace();}finally{if (session != null)session.close(); // 关闭session & sessionFactoryif (sessionFactory != null)sessionFactory.close(); }}// 三、根据条件更新数据库(修改)public static void updateData(String condition){Configuration config = new Configuration().configure();// 创建Configuration对象并加载hibernate.cfg.xml配置文件SessionFactory sessionFactory = config.buildSessionFactory();// 获取SessionFactorySession session = sessionFactory.openSession();// 从sessionFactory 获取 Sessiontry{Transaction transaction = session.beginTransaction();String hql = "update Row " + condition;int rowsAffected = session.createQuery(hql).executeUpdate();System.out.print(rowsAffected + " rows affected.");transaction.commit();}catch(Exception e){System.out.println("出错: " + e.getMessage());e.printStackTrace();}finally{if (session != null)session.close(); // 关闭session & sessionFactoryif (sessionFactory != null)sessionFactory.close(); }}// 四、根据条件查询数据库(查询)public static void queryAllData(String condition){Configuration config = new Configuration().configure();// 创建Configuration对象并加载hibernate.cfg.xml配置文件SessionFactory sessionFactory = config.buildSessionFactory();// 获取SessionFactorySession session = sessionFactory.openSession();// 从sessionFactory 获取 Sessiontry{String hql = "from Row where " + condition;List<Row> results = session.createQuery(hql).list();if(results.size() == 0){System.out.println("找不到记录!");}else{for(Row row: results){System.out.println("编号:" + row.getId() + ", 名称:" + row.getName() + ", 日期:" + row.getDate() + ", 收入:" + row.getIncome());}}}catch(Exception e){System.out.println("出错: " + e.getMessage());e.printStackTrace();}finally{if (session != null)session.close(); // 关闭session & sessionFactoryif (sessionFactory != null)sessionFactory.close(); }}public static void main(String[] args) throws Exception {insertData("张三", 10);// queryAllData("1=1"); // "1=1" "id = '4028896c8cdd6d55018cdd6d56420002'"// updateData("set name = '12233330000' WHERE 1=1");// deleteData("1=1"); //  name = 'jing_zhong'}
}
3.4 测试执行并利用Navicat查看数据库结果
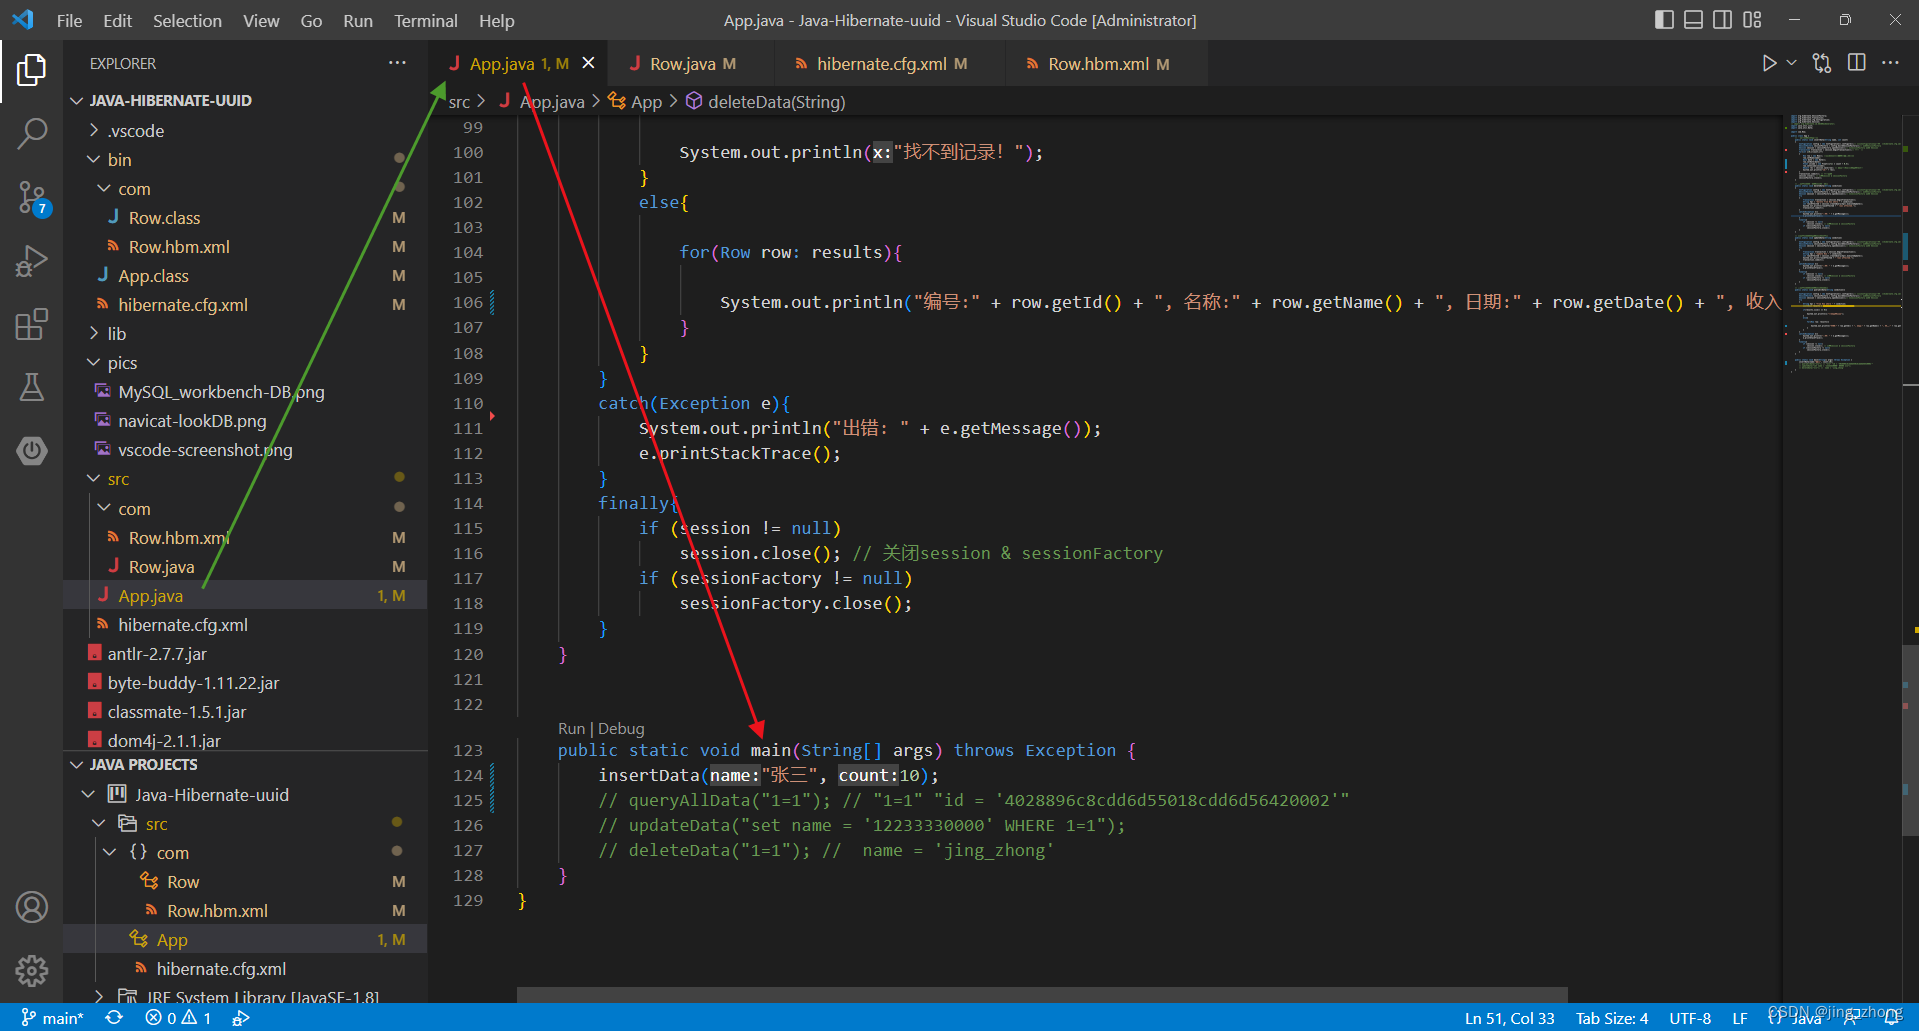
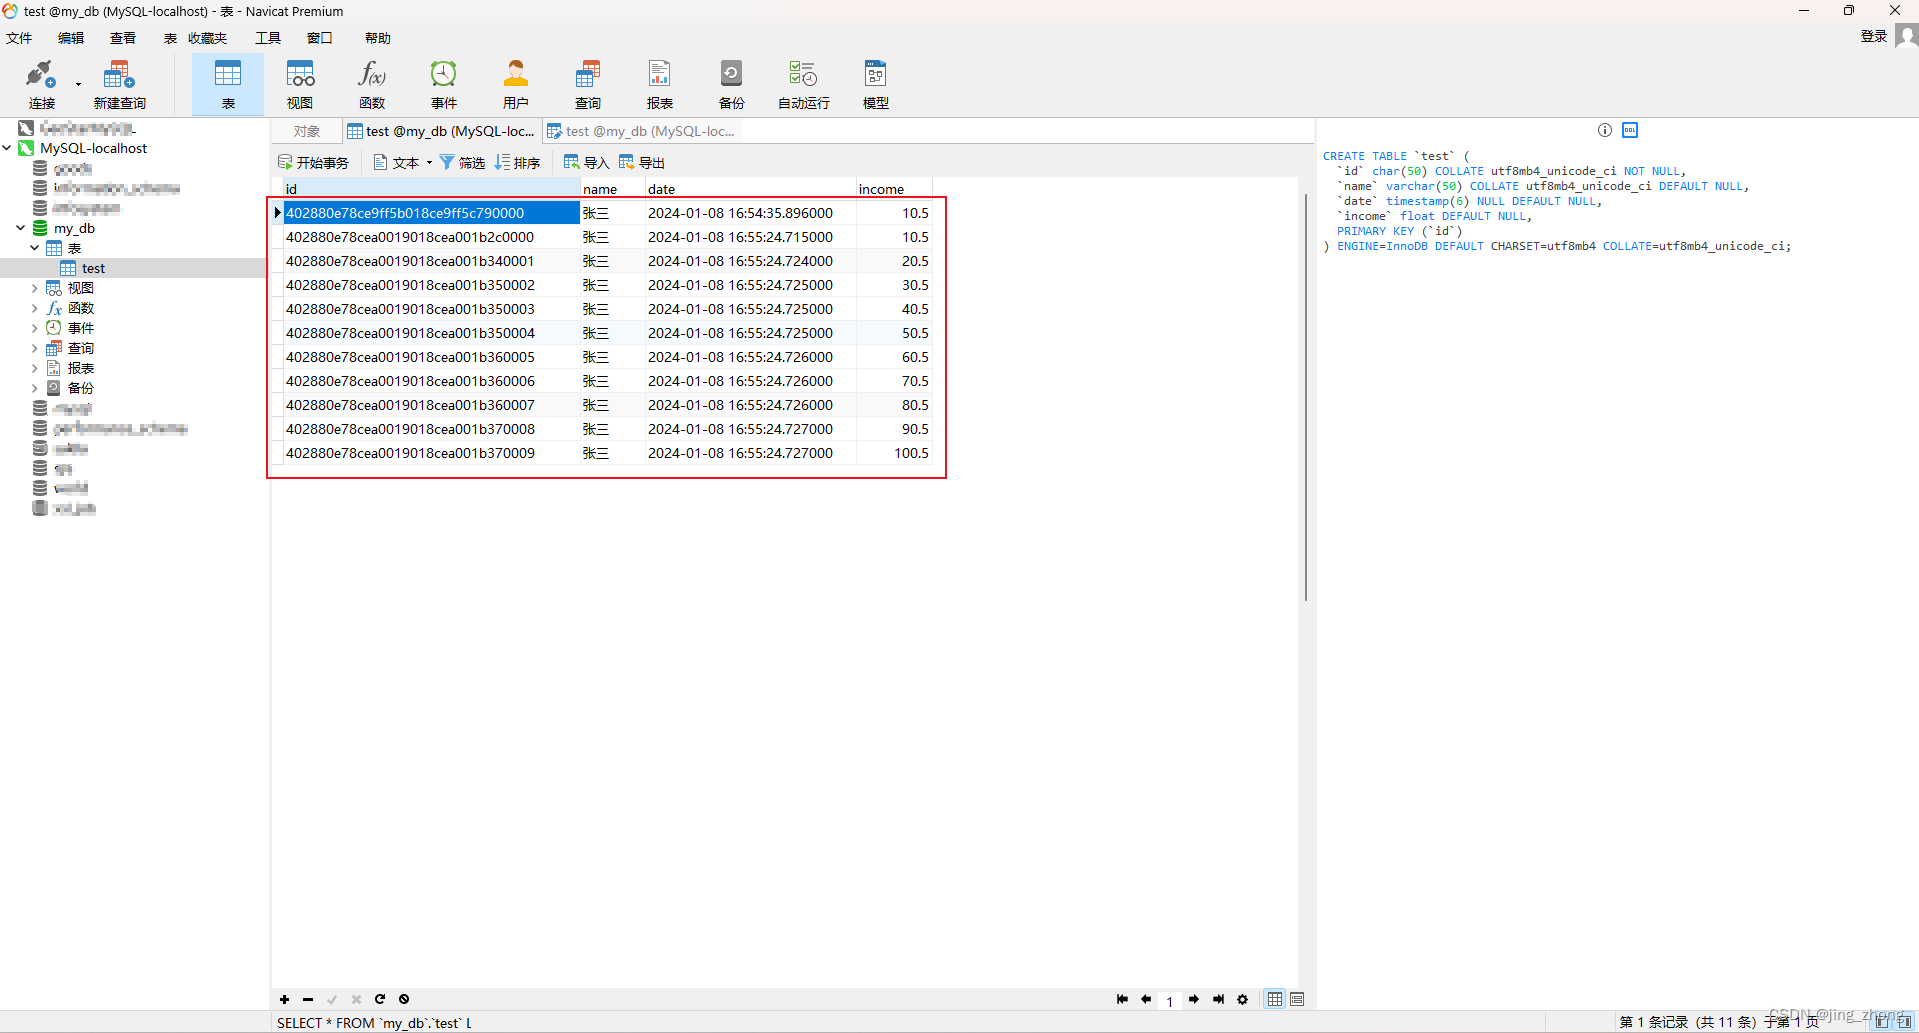
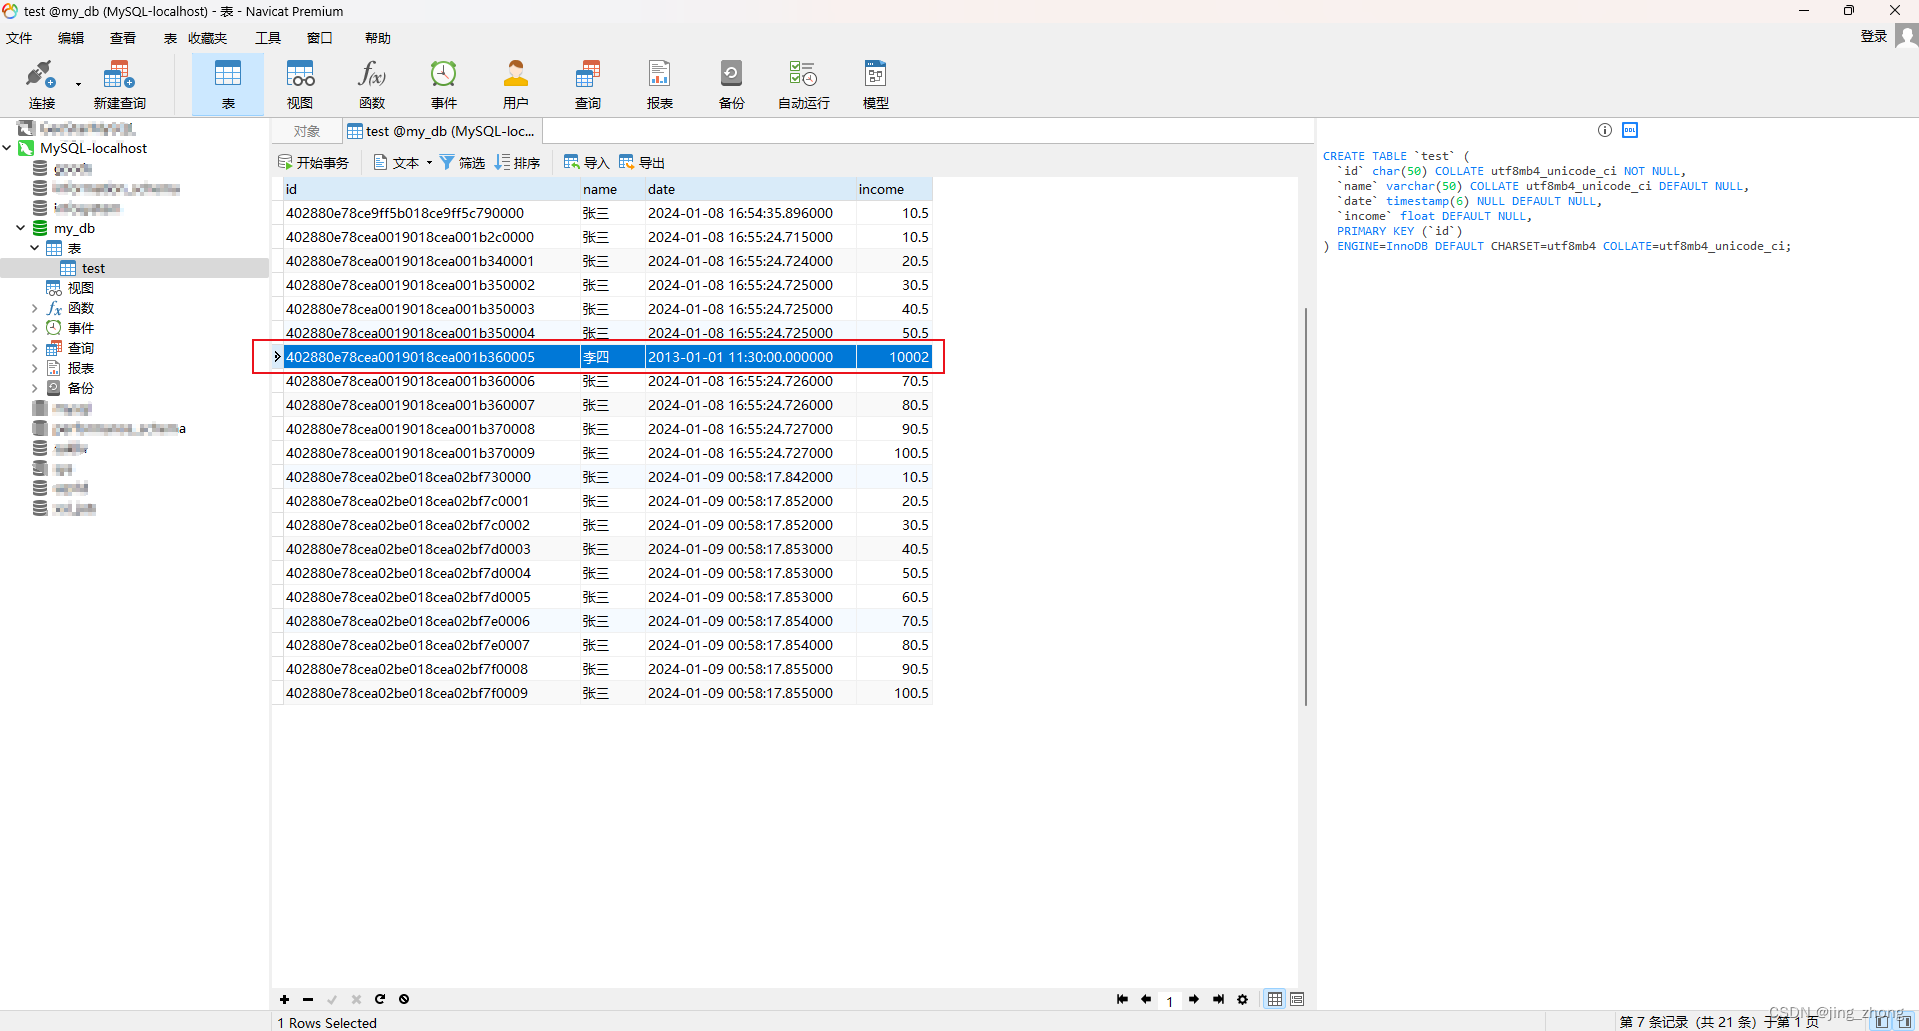
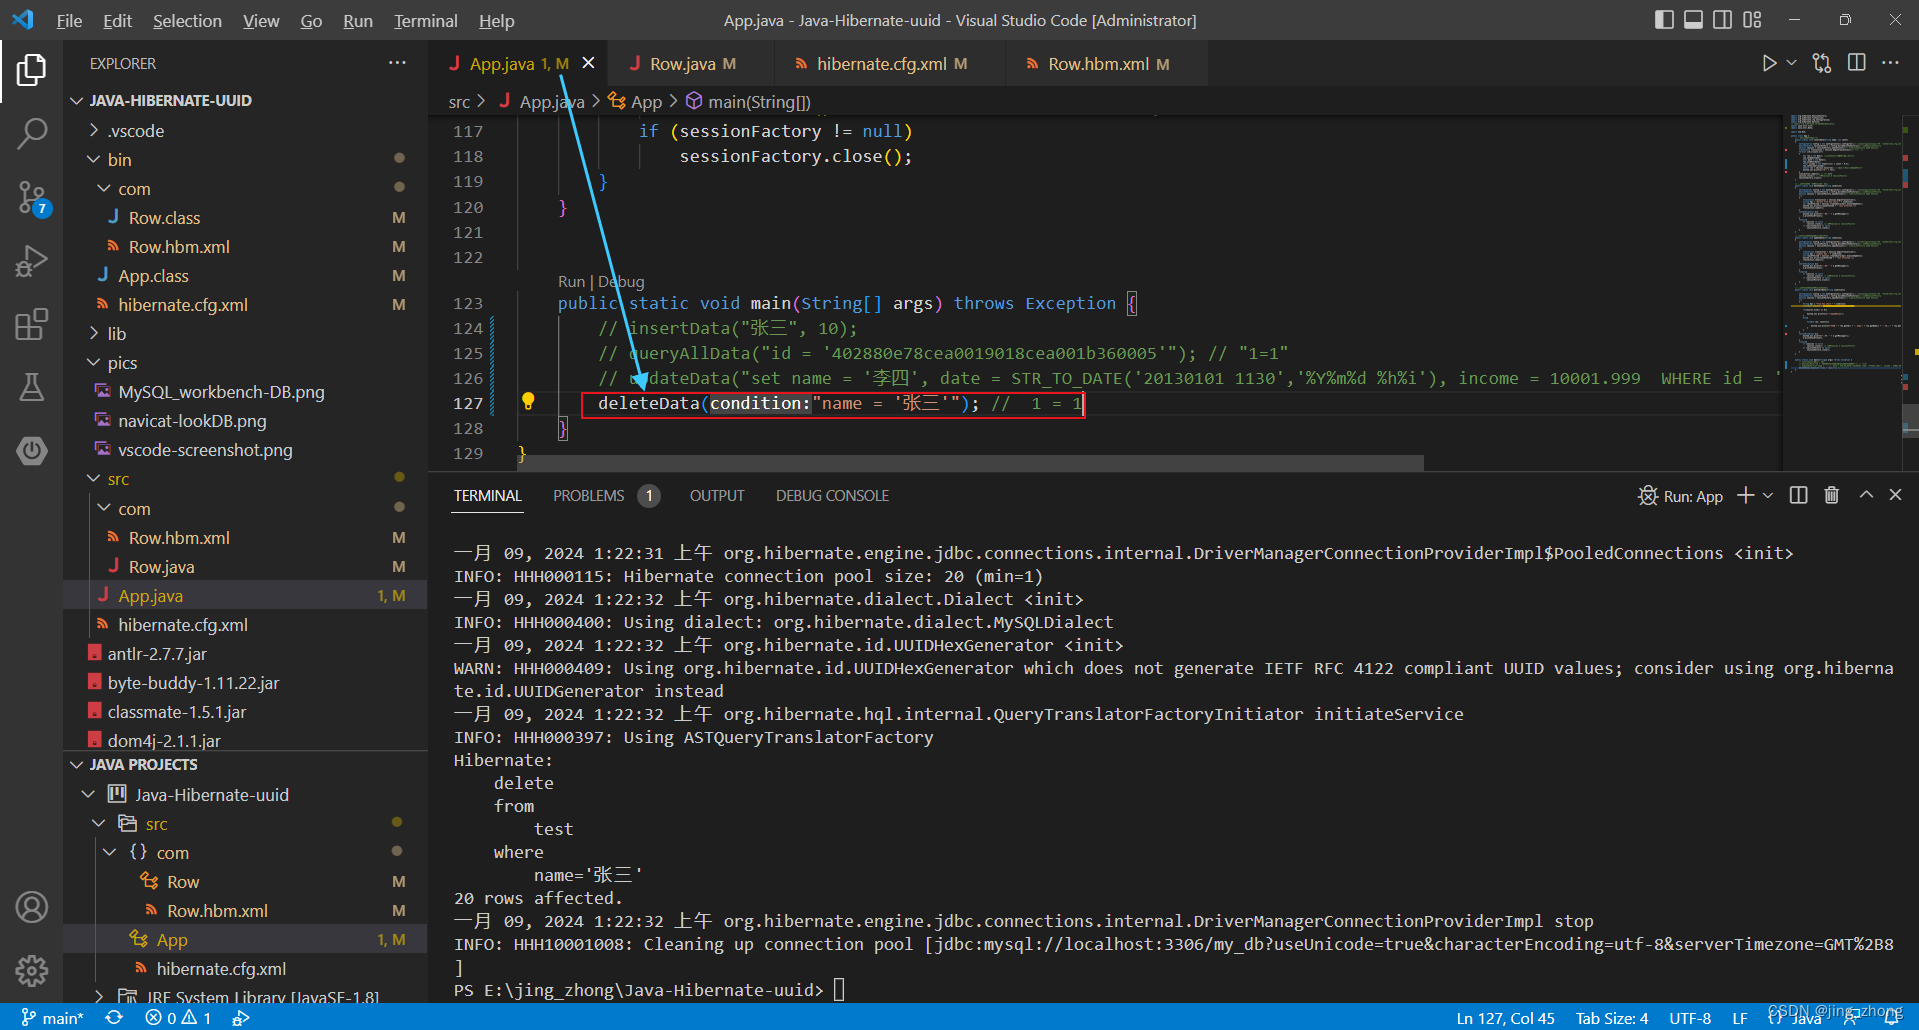
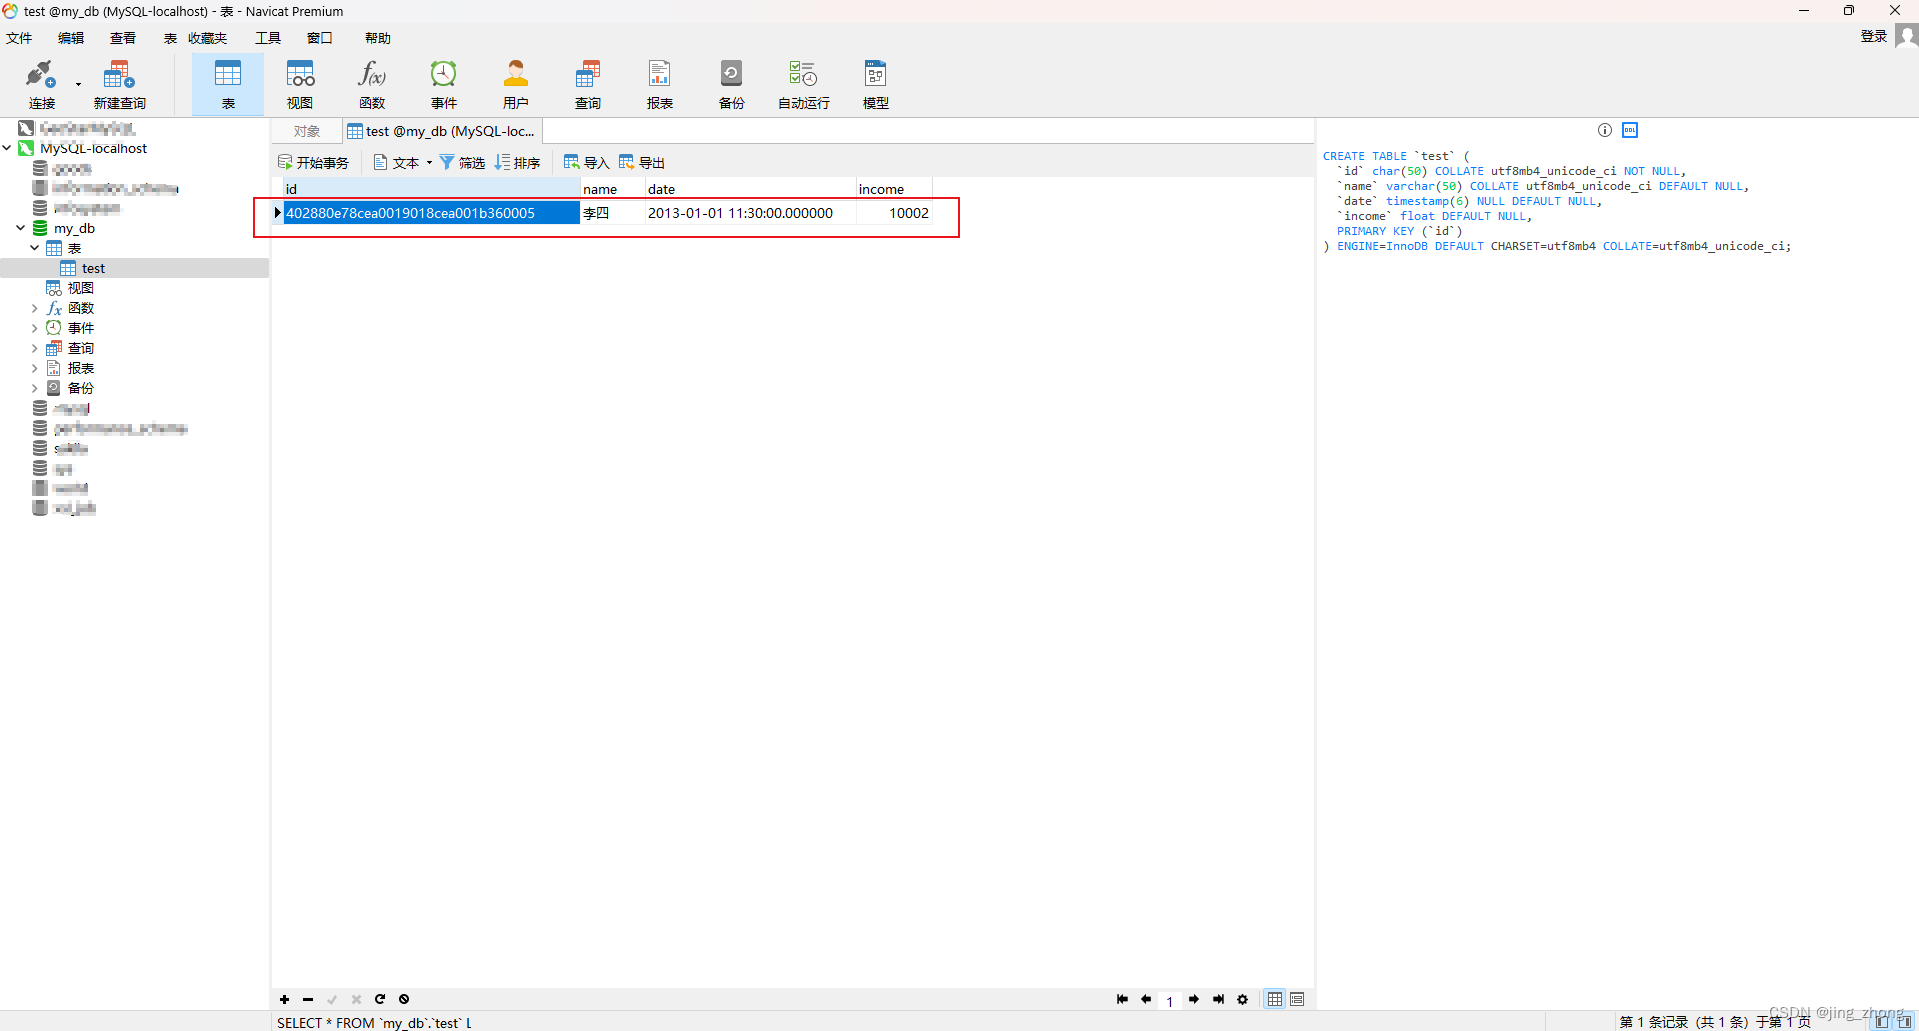
分别对常用的四种增删改查操作来进行测试执行,VSCode控制台和Navicat数据库结果分别如下图所示。
3.4.1 新增
3.4.2 修改
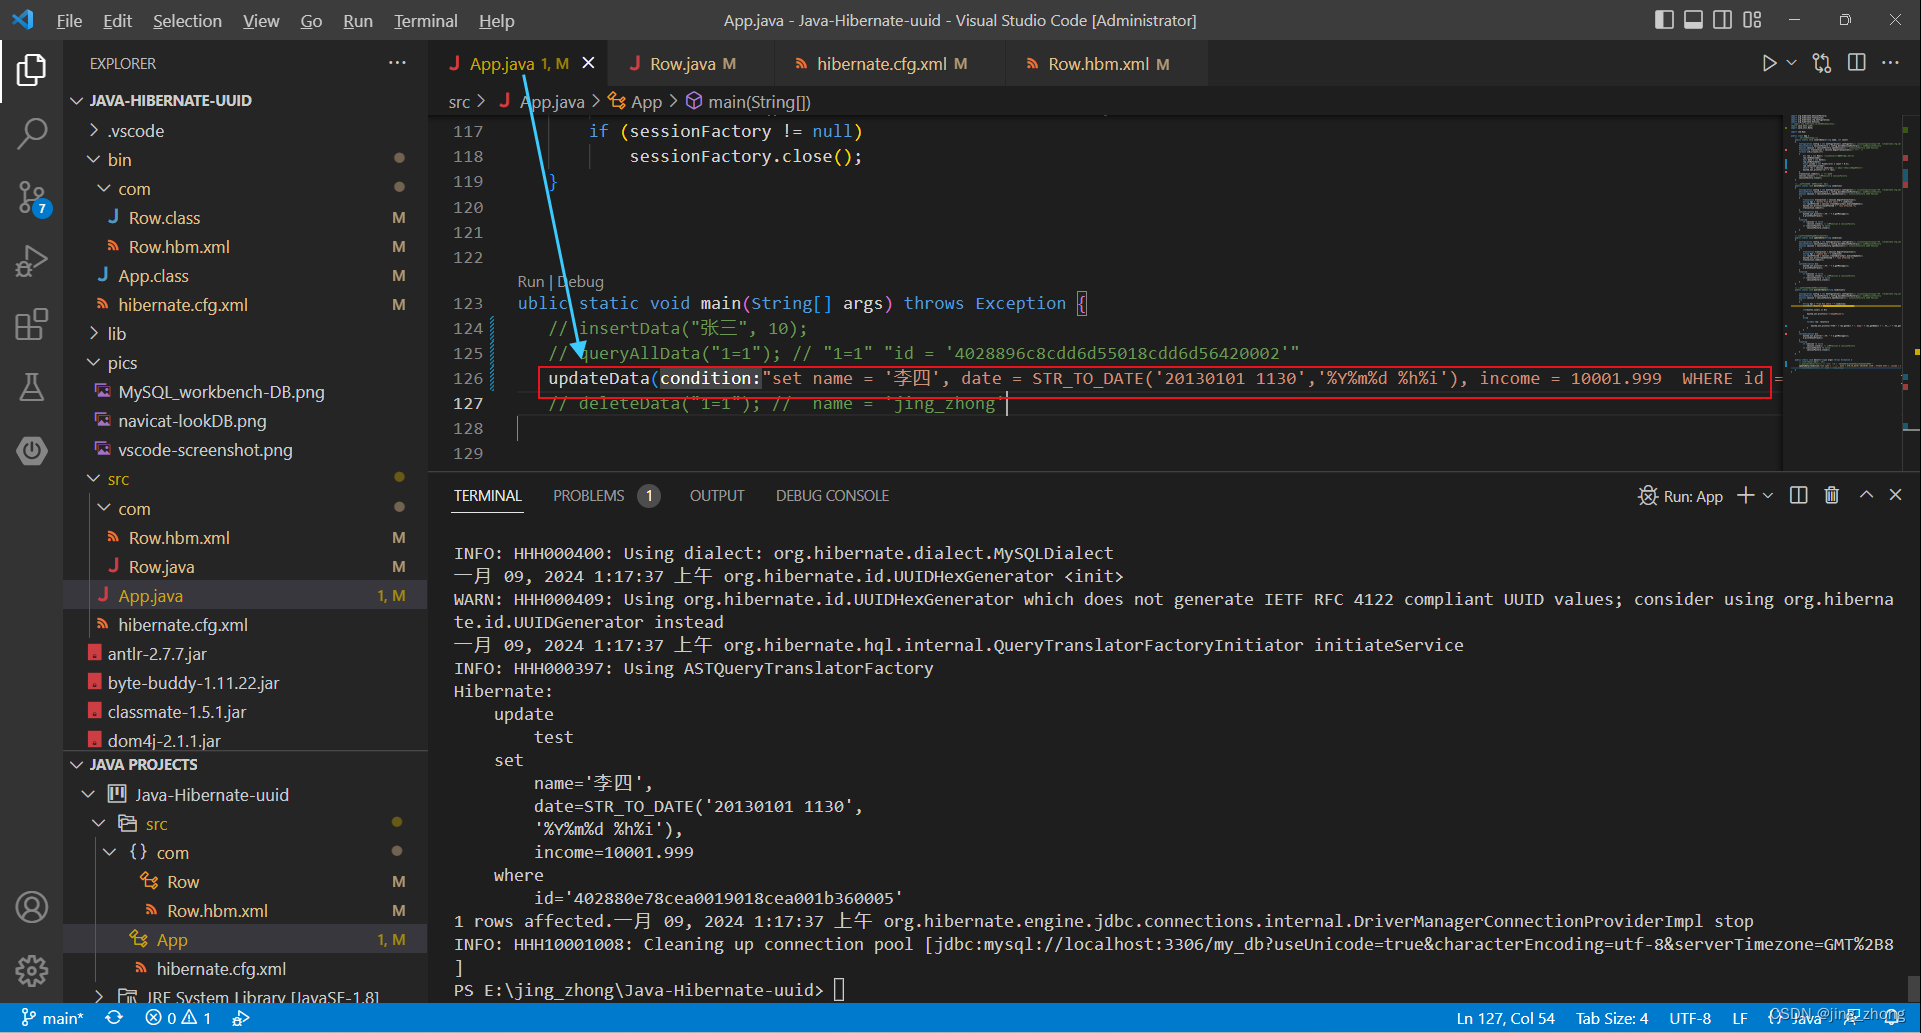
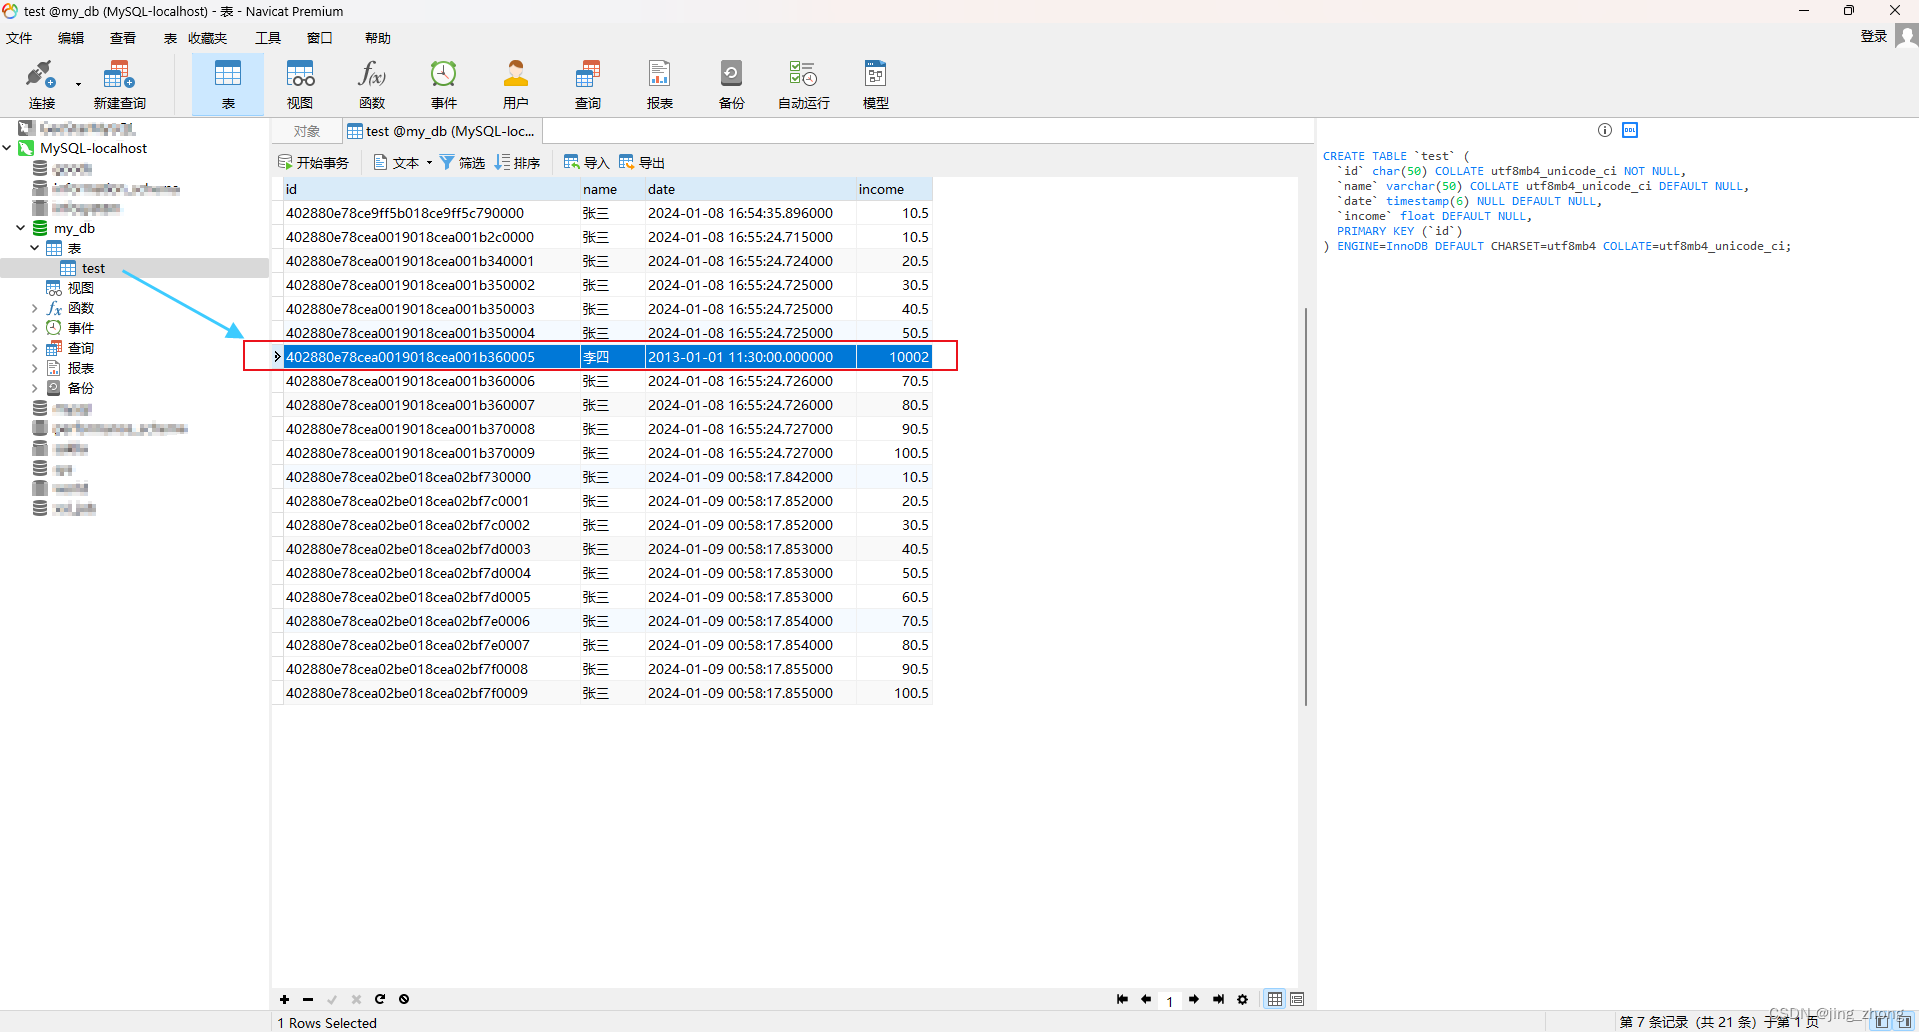
3.4.3 查询
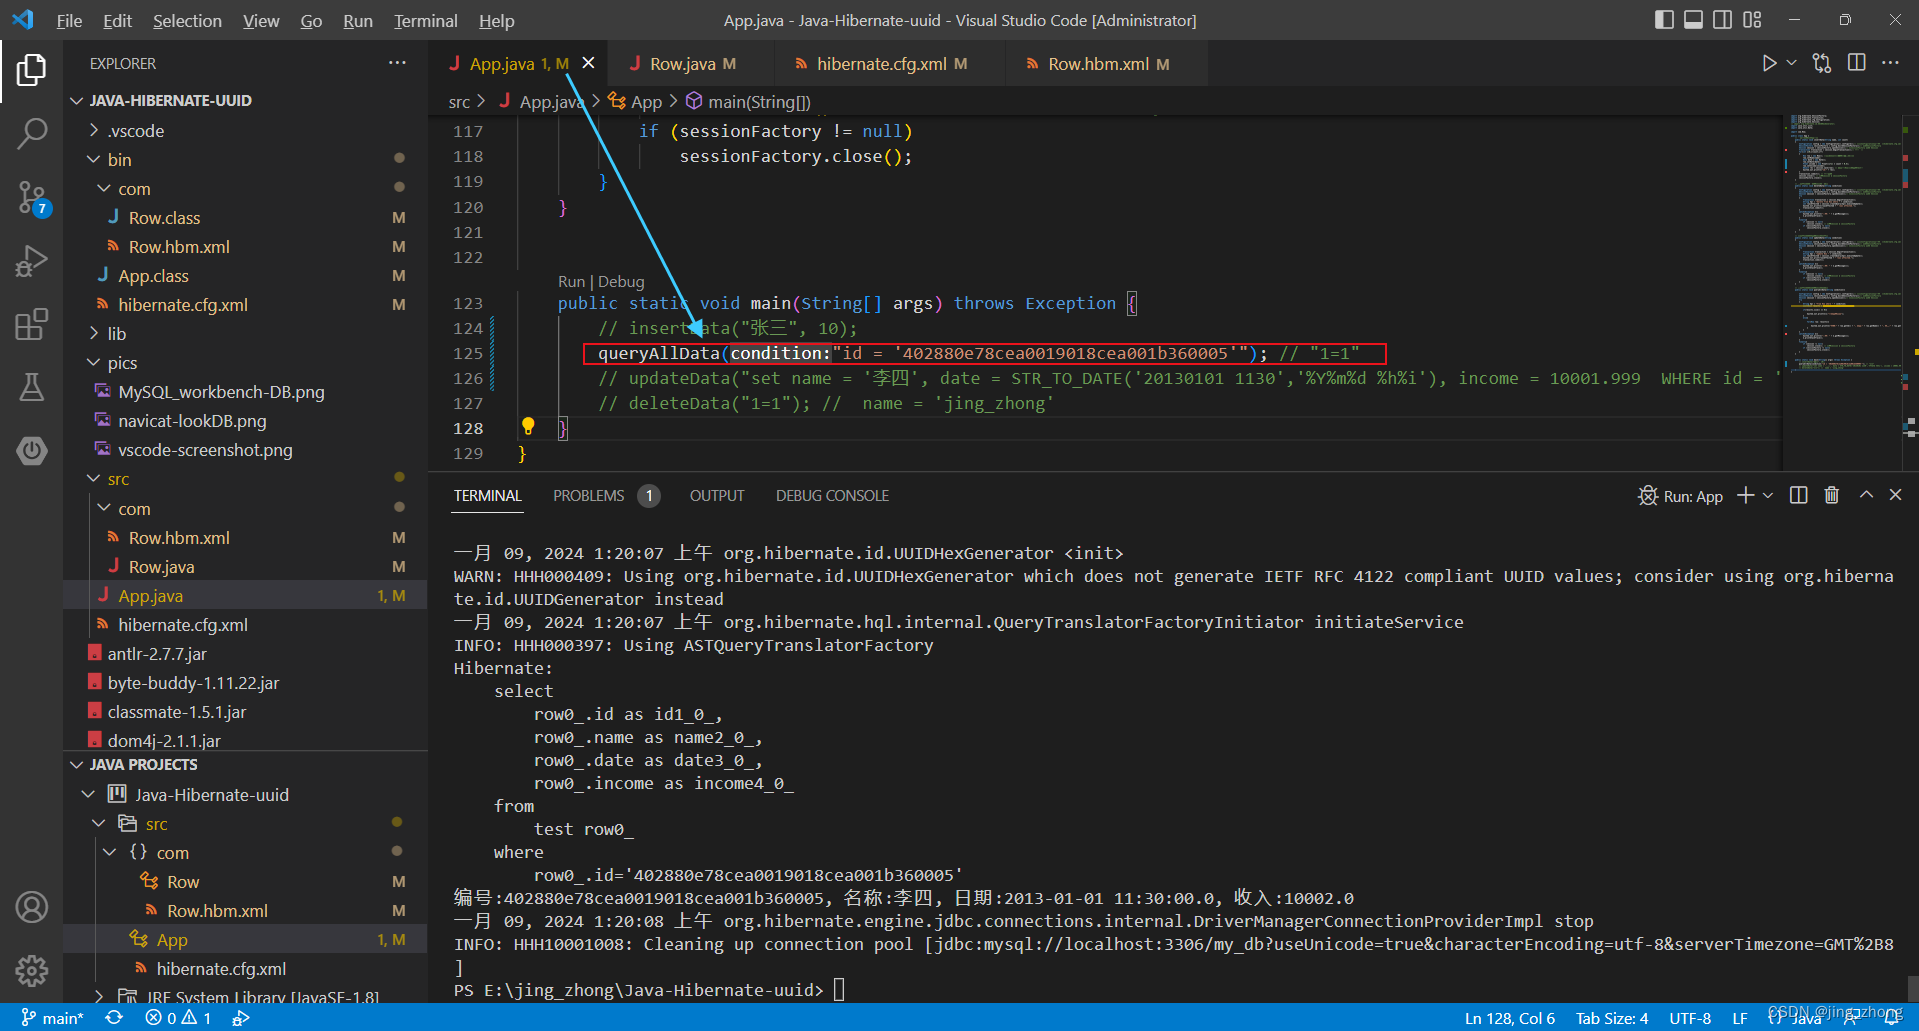
3.4.4 删除
4、小结
MySQL数据库作为极其受欢迎的一种关系型数据库,一直以来以其简单快速的优点受到广大开发者/工程师的一致好评,尽管市面上流行着各种各样的数据库,无论是开源或是商用型数据库,从设计理念和查询执行速度和效率上或多或少会有不同,当然软件、数据库、连接驱动版本也都在随之更新、迭代和升级 。
在平常的学习和工作中,熟练地运用数据库,学会利用SQL或HQL等脚本语言友好地与数据库交互,不仅是一种乐趣,而且也是除文件资源管理存储外的不二选择,对前端、后端工程师都会受益匪浅,提高效率,欢迎大家共同交流和探讨新技术或者遇到的问题,千千万万的开发者通力合作,一同解决技术问题,答疑解惑助力技术升级,共同营造良好生态,拥抱绿色未来最后希望小伙伴们都能够学有所成并学以致用哦!

