- 💂 个人网站:【 海拥】【神级代码资源网站】【办公神器】
- 🤟 基于Web端打造的:👉轻量化工具创作平台
- 💅 想寻找共同学习交流的小伙伴,请点击【全栈技术交流群】
在现代Web开发中,React和TypeScript已经成为了非常流行的技术组合。React是一个用于构建用户界面的JavaScript库,而TypeScript是JavaScript的超集,它添加了类型系统和其他功能。本文将介绍如何使用TypeScript和React进行Web应用开发实战。
1. 环境搭建
首先,我们需要搭建开发环境。确保已经安装了Node.js,然后使用以下命令安装Create React App脚手架工具:
npx create-react-app my-app --template typescript
这将创建一个名为my-app的React项目,并使用TypeScript模板。接下来,进入项目目录并启动开发服务器:
cd my-app
npm start
2. 组件开发
React的核心概念是组件。我们可以使用TypeScript来定义组件的类型,以便更好地管理和维护代码。以下是一个简单的组件示例:
import React, { useState } from 'react';interface Props {initialCount: number;
}const MyComponent: React.FC<Props> = ({ initialCount }) => {const [count, setCount] = useState(initialCount);const handleIncrement = () => {setCount(count + 1);};return (<div><p>Count: {count}</p><button onClick={handleIncrement}>Increment</button></div>);
};export default MyComponent;
在这个例子中,我们定义了一个名为MyComponent的函数式组件,它接受一个名为initialCount的属性。我们还使用了useState Hook来管理组件的状态。
3. 路由管理
在实际项目中,我们需要处理多个页面和路由。可以使用React Router库来实现路由管理。首先,安装React Router:
npm install react-router-dom
然后,创建一个路由配置文件,例如Routes.tsx:
import React from 'react';
import { BrowserRouter as Router, Switch, Route } from 'react-router-dom';
import HomePage from './pages/HomePage';
import AboutPage from './pages/AboutPage';const Routes: React.FC = () => {return (<Router><Switch><Route exact path="/" component={HomePage} /><Route path="/about" component={AboutPage} /></Switch></Router>);
};export default Routes;
在这个例子中,我们使用了BrowserRouter、Switch和Route组件来定义路由规则。我们还导入了两个页面组件:HomePage和AboutPage。
4. 状态管理
在复杂的应用中,我们需要管理全局状态。可以使用Redux或者Context API来实现状态管理。这里以Redux为例,首先安装Redux和相关库:
npm install redux react-redux @types/react-redux @types/redux
然后,创建一个简单的Redux store:
// store.tsx
import { createStore } from 'redux';
import { Provider } from 'react-redux';interface State {count: number;
}const initialState: State = {count: 0,
};function reducer(state = initialState, action: any) {switch (action.type) {case 'INCREMENT':return { ...state, count: state.count + 1 };default:return state;}
}const store = createStore(reducer);export { store, State };
接下来,修改index.tsx文件,引入Provider和store:
import React from 'react';
import ReactDOM from 'react-dom';
import { Provider } from 'react-redux';
import { store, State } from './store';
import Routes from './Routes';ReactDOM.render(<Provider store={store}><Routes /></Provider>,document.getElementById('root')
);
最后,修改MyComponent组件,使其能够读取和修改Redux store中的count值:
import React, { useState } from 'react';
import { useSelector, useDispatch } from 'react-redux';interface Props {initialCount?: number;
}const MyComponent: React.FC<Props> = ({ initialCount }) => {const count = useSelector((state: State) => state.count);const dispatch = useDispatch();const handleIncrement = () => {dispatch({ type: 'INCREMENT' });};return (<div><p>Count: {count}</p><button onClick={handleIncrement}>Increment</button></div>);
};export default MyComponent;
5. 样式和主题
为了提高项目的可维护性,我们可以使用CSS模块来编写样式。只需将CSS文件的扩展名更改为.module.css,然后在组件中导入即可。例如,创建一个名为MyComponent.module.css的文件:
/* MyComponent.module.css */
.container {background-color: lightblue;padding: 16px;
}
然后在MyComponent组件中导入和使用这个样式:
import React, { useState } from 'react';
import styles from './MyComponent.module.css';// ...省略其他代码...return (<div className={styles.container}><p>Count: {count}</p><button onClick={handleIncrement}>Increment</button></div>
);
此外,我们可以使用Styled-components库来实现主题切换。首先,安装Styled-components:
npm install styled-components
然后,创建一个主题配置文件,例如theme.ts:
// theme.ts
export const lightTheme = {backgroundColor: '#fff',textColor: '#000',
};export const darkTheme = {backgroundColor: '#000',textColor: '#fff',
};
接下来,使用Styled-components创建一个可切换主题的组件:
import React, { useState } from 'react';
import { ThemeProvider, createGlobalStyle } from 'styled-components';
import { lightTheme, darkTheme } from './theme';const GlobalStyle = createGlobalStyle`body {background-color: ${props => props.theme.backgroundColor};color: ${props => props.theme.textColor};}
`;const ThemedButton = styled.button`background-color: ${props => props.theme.backgroundColor};color: ${props => props.theme.textColor};
`;const ThemeSwitcher: React.FC = () => {const [theme, setTheme] = useState(lightTheme);const handleThemeSwitch = () => {setTheme(theme === lightTheme ? darkTheme : lightTheme);};return (<ThemeProvider theme={theme}><GlobalStyle /><ThemedButton onClick={handleThemeSwitch}>Switch Theme</ThemedButton></ThemeProvider>);
};export default ThemeSwitcher;
6. 性能优化
在开发过程中,我们需要关注应用的性能。可以使用React的shouldComponentUpdate方法或React.memo函数来避免不必要的渲染。此外,还可以使用Webpack等工具进行代码分割和懒加载。这里以React.memo为例:
import React, { useState, memo } from 'react';interface Props {initialCount: number;
}const MyComponent: React.FC<Props> = ({ initialCount }) => {// ...省略其他代码...
};export default memo(MyComponent);
通过使用React.memo,我们可以确保只有当props发生变化时,组件才会重新渲染。这有助于提高应用的性能。
⭐️ 好书推荐
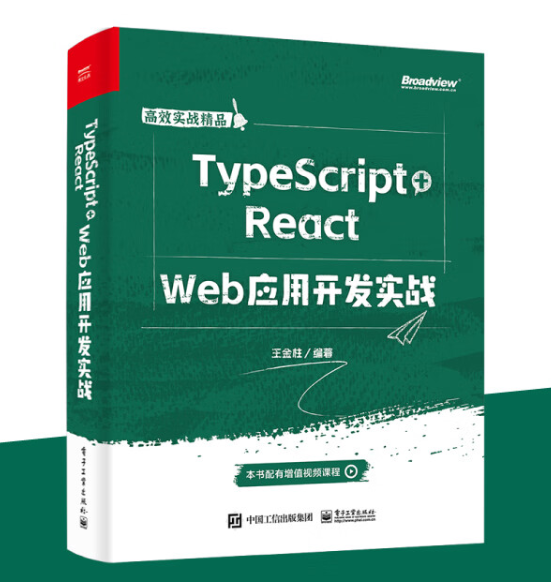
《TypeScript+React Web应用开发实战 》
【内容简介】
本书适应于当今前端开发的流行趋势,注重理论与实战相结合的思想,配合大量的、基础且实用的代码实例,帮助读者学习基于TypeScript语言规范的React框架开发的相关知识。全书内容通俗易懂、覆盖面广、充分翔实、重点突出,涵盖了TypeScript语言规范和React框架开发的方方面面。
全书内容共10章,TypeScript语言部分包括TypeScript语言基础与开发环境的搭建、TypeScript项目开发与配置、TypeScript语法规范和TypeScript语法高级特性等方面的内容;React框架部分包括React框架基础与开发环境的搭建,React语法、组件、状态与生命周期,React框架高级指引和React Hook新特性等方面的内容。同时,为了突出本书项目实战的特点,针对性地开发了两个Web项目应用,以帮助读者深入学习基于TypeScript + React技术的开发流程。
📚 京东购买链接:《TypeScript+React Web应用开发实战 》


![type may not be empty [type-empty]](https://img-blog.csdnimg.cn/direct/52a7ff7765574129847fdaea6bd1c611.png)

