目录
- 前言
- 客户端创建虚拟相机
- 示例代码
- 保存图片程序
- 运行结果
- 修改需求
- 二次开发
- 引入外部包
- 对SaveImage.java文件进行修改
- 保存图片saveDataToFile方法
- 选择相机chooseCamera方法
- 主方法
- FileUtil类处理过期照片
- 启动类与配置文件
- application.yml
- 通过实体类读取yml
- 启动类
- SaveImage.java类全部代码
- 运行结果
前言
有个项目需要使用java程序读取海康威视的相机图片。相机通过以太网连接服务器,部署在服务器上的java程序将相机拍摄的画面保存在指定路径下。
海康威视提供了sdk开发包,可以在官网中下载,windows和linux系统都有。但是开发包中给出的示例代码,无法满足实际需要,所以还需要对代码进行二次开发。
在进行二次开发时,官网并未提供java语言的开发手册,示例代码中也并未提供详细注释,所以我只能在阅读示例代码时,按照自己的理解添加一些注释。
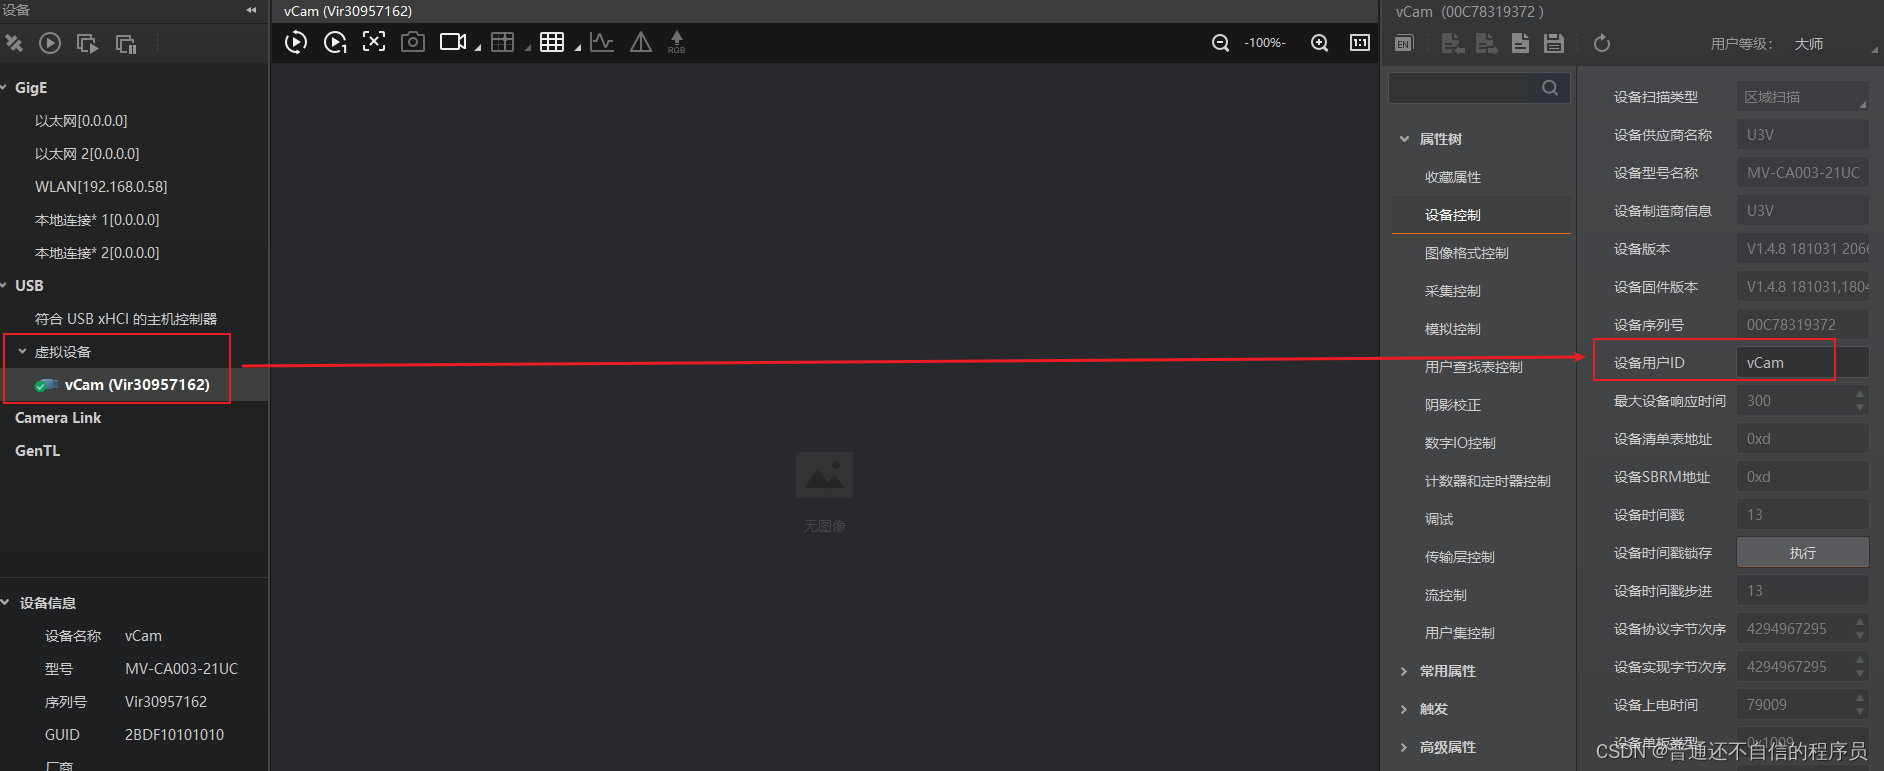
客户端创建虚拟相机
实体相机已经还回去了,所以这里用MVS客户端创建一个虚拟相机,测试代码。

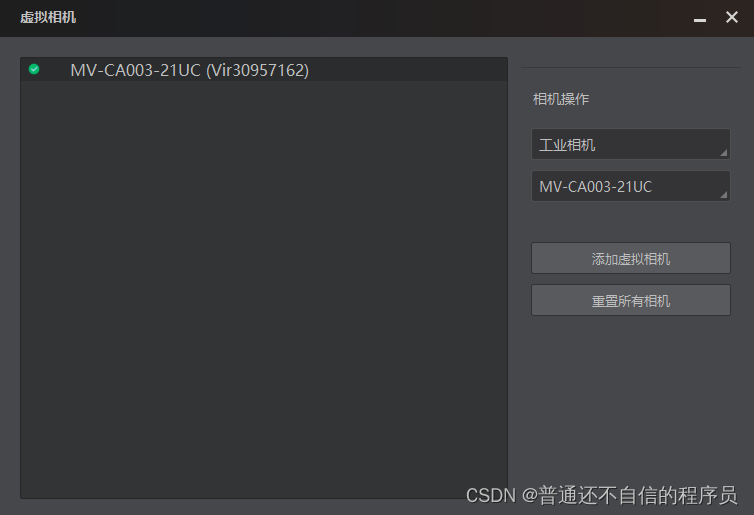
设置相机名字
示例代码
我这里只需要对保存照片的代码进行修改。
以下是官网提供的保存照片的代码
我在示例代码中对一些方法做了注释
保存图片程序
/**************************************************************************************************** @file SaveImage.java* @breif Use functions provided in MvCameraControlWrapper.jar to save image as JPEG。* @author zhanglei72* @date 2020/02/10** @warning * @version V1.0.0 2020/02/10 Create this file* @since 2020/02/10**************************************************************************************************/import java.io.*;
import java.util.ArrayList;
import java.util.Arrays;
import java.util.Scanner;import MvCameraControlWrapper.*;
import static MvCameraControlWrapper.MvCameraControl.*;
import static MvCameraControlWrapper.MvCameraControlDefines.*;public class SaveImage
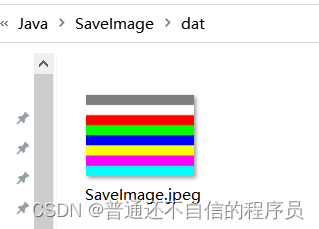
{/*** 打印连接的设备信息* 如果是通过以太网连接的相机,则会输出ip、名称等内容* 如果是通过usb连接的相机,则会输出相机名称*/private static void printDeviceInfo(MV_CC_DEVICE_INFO stDeviceInfo) {if (null == stDeviceInfo) {System.out.println("stDeviceInfo is null");return;}if (stDeviceInfo.transportLayerType == MV_GIGE_DEVICE) {System.out.println("\tCurrentIp: " + stDeviceInfo.gigEInfo.currentIp);System.out.println("\tModel: " + stDeviceInfo.gigEInfo.modelName);System.out.println("\tUserDefinedName: " + stDeviceInfo.gigEInfo.userDefinedName);} else if (stDeviceInfo.transportLayerType == MV_USB_DEVICE) {System.out.println("\tUserDefinedName: " + stDeviceInfo.usb3VInfo.userDefinedName);System.out.println("\tSerial Number: " + stDeviceInfo.usb3VInfo.serialNumber);System.out.println("\tDevice Number: " + stDeviceInfo.usb3VInfo.deviceNumber);} else {System.err.print("Device is not supported! \n");}System.out.println("\tAccessible: "+ MvCameraControl.MV_CC_IsDeviceAccessible(stDeviceInfo, MV_ACCESS_Exclusive));System.out.println("");}private static void printFrameInfo(MV_FRAME_OUT_INFO stFrameInfo){if (null == stFrameInfo){System.err.println("stFrameInfo is null");return;}StringBuilder frameInfo = new StringBuilder("");frameInfo.append(("\tFrameNum[" + stFrameInfo.frameNum + "]"));frameInfo.append("\tWidth[" + stFrameInfo.width + "]");frameInfo.append("\tHeight[" + stFrameInfo.height + "]");frameInfo.append(String.format("\tPixelType[%#x]", stFrameInfo.pixelType.getnValue()));System.out.println(frameInfo.toString());}/*** 保存图片到本地* 这个方法中主要是设置了文件保存的路径*/public static void saveDataToFile(byte[] dataToSave, int dataSize, String fileName){OutputStream os = null;try{// Create directoryFile tempFile = new File("dat");if (!tempFile.exists()) {tempFile.mkdirs();}os = new FileOutputStream(tempFile.getPath() + File.separator + fileName);os.write(dataToSave, 0, dataSize);System.out.println("SaveImage succeed.");}catch (IOException e){e.printStackTrace();}finally{// Close file streamtry {os.close();} catch (IOException e) {e.printStackTrace();}}}/*** 当有多个相机连接但程序只能保存一台相机拍摄的照片* 所以需要通过此方法输入相机索引号*/public static int chooseCamera(ArrayList<MV_CC_DEVICE_INFO> stDeviceList){if (null == stDeviceList){return -1;}// Choose a device to operateint camIndex = -1;Scanner scanner = new Scanner(System.in);while (true){try{/** 手动输入*/System.out.print("Please input camera index (-1 to quit):");camIndex = scanner.nextInt();if ((camIndex >= 0 && camIndex < stDeviceList.size()) || -1 == camIndex){break;}else{System.out.println("Input error: " + camIndex);}}catch (Exception e){e.printStackTrace();camIndex = -1;break;}}scanner.close();if (-1 == camIndex){System.out.println("Bye.");return camIndex;}if (0 <= camIndex && stDeviceList.size() > camIndex){if (MV_GIGE_DEVICE == stDeviceList.get(camIndex).transportLayerType){System.out.println("Connect to camera[" + camIndex + "]: " + stDeviceList.get(camIndex).gigEInfo.userDefinedName);}else if (MV_USB_DEVICE == stDeviceList.get(camIndex).transportLayerType){System.out.println("Connect to camera[" + camIndex + "]: " + stDeviceList.get(camIndex).usb3VInfo.userDefinedName);}else{System.out.println("Device is not supported.");}}else{System.out.println("Invalid index " + camIndex);camIndex = -1;}return camIndex;}/*** 主方法* 保存照片的代码在这里*/public static void main(String[] args){int nRet = MV_OK;int camIndex = -1;Handle hCamera = null;ArrayList<MV_CC_DEVICE_INFO> stDeviceList;do{System.out.println("SDK Version " + MvCameraControl.MV_CC_GetSDKVersion());// Enuerate GigE and USB devices try{stDeviceList = MV_CC_EnumDevices(MV_GIGE_DEVICE | MV_USB_DEVICE);if (0 >= stDeviceList.size()){System.out.println("No devices found!");break;}int i = 0;for (MV_CC_DEVICE_INFO stDeviceInfo : stDeviceList){System.out.println("[camera " + (i++) + "]");printDeviceInfo(stDeviceInfo);}}catch (CameraControlException e){System.err.println("Enumrate devices failed!" + e.toString());e.printStackTrace();break;}// choose cameracamIndex = chooseCamera(stDeviceList);if (camIndex == -1){break;}// Create handletry{hCamera = MvCameraControl.MV_CC_CreateHandle(stDeviceList.get(camIndex));}catch (CameraControlException e){System.err.println("Create handle failed!" + e.toString());e.printStackTrace();hCamera = null;break;}// Open devicenRet = MvCameraControl.MV_CC_OpenDevice(hCamera);if (MV_OK != nRet){System.err.printf("Connect to camera failed, errcode: [%#x]\n", nRet);break;}// Make sure that trigger mode is off/** 设置相机的触发器开关 Off On*/nRet = MvCameraControl.MV_CC_SetEnumValueByString(hCamera, "TriggerMode", "Off");if (MV_OK != nRet){System.err.printf("SetTriggerMode failed, errcode: [%#x]\n", nRet);break;}// Get payload sizeMVCC_INTVALUE stParam = new MVCC_INTVALUE();nRet = MvCameraControl.MV_CC_GetIntValue(hCamera, "PayloadSize", stParam);if (MV_OK != nRet){System.err.printf("Get PayloadSize fail, errcode: [%#x]\n", nRet);break;}// Start grabbingnRet = MvCameraControl.MV_CC_StartGrabbing(hCamera);if (MV_OK != nRet){System.err.printf("Start Grabbing fail, errcode: [%#x]\n", nRet);break;}// Get one frameMV_FRAME_OUT_INFO stImageInfo = new MV_FRAME_OUT_INFO();byte[] pData = new byte[(int)stParam.curValue];nRet = MvCameraControl.MV_CC_GetOneFrameTimeout(hCamera, pData, stImageInfo, 1000);if (MV_OK != nRet){System.err.printf("GetOneFrameTimeout fail, errcode:[%#x]\n", nRet);break;}System.out.println("GetOneFrame: ");printFrameInfo(stImageInfo);int imageLen = stImageInfo.width * stImageInfo.height * 3; // Every RGB pixel takes 3 bytesbyte[] imageBuffer = new byte[imageLen];// Call MV_CC_SaveImage to save image as JPEGMV_SAVE_IMAGE_PARAM stSaveParam = new MV_SAVE_IMAGE_PARAM();stSaveParam.width = stImageInfo.width; // image widthstSaveParam.height = stImageInfo.height; // image heightstSaveParam.data = pData; // image datastSaveParam.dataLen = stImageInfo.frameLen; // image data lengthstSaveParam.pixelType = stImageInfo.pixelType; // image pixel formatstSaveParam.imageBuffer = imageBuffer; // output image bufferstSaveParam.imageType = MV_SAVE_IAMGE_TYPE.MV_Image_Jpeg; // output image pixel formatstSaveParam.methodValue = 0; // Interpolation method that converts Bayer format to RGB24. 0-Neareast 1-double linear 2-HamiltonstSaveParam.jpgQuality = 60; // JPG endoding quality(50-99]nRet = MvCameraControl.MV_CC_SaveImage(hCamera, stSaveParam);if (MV_OK != nRet){System.err.printf("SaveImage fail, errcode: [%#x]\n", nRet);break;}// Save buffer content to file/** 将照片保存在本地,且在这里指定文件的名称*/saveDataToFile(imageBuffer, stSaveParam.imageLen, "SaveImage.jpeg");// Stop grabbingnRet = MvCameraControl.MV_CC_StopGrabbing(hCamera);if (MV_OK != nRet){System.err.printf("StopGrabbing fail, errcode: [%#x]\n", nRet);break;}} while (false);if (null != hCamera){// Destroy handlenRet = MvCameraControl.MV_CC_DestroyHandle(hCamera);if (MV_OK != nRet) {System.err.printf("DestroyHandle failed, errcode: [%#x]\n", nRet);}}}
}运行结果
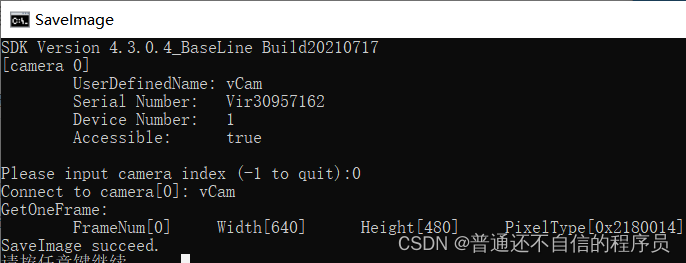
程序启动后,在控制台输出可连接的所有相机,用户输入相机索引号连接指定相机。[Camera 0]表示索引号为0。然后相机自动进行拍摄。
修改需求
通过运行程序,发现直接使用示例代码,无法满足实际使用需求。无法做到,图片保存名称不重复、图片保存路径无法自定义、需要用户手动输入相机索引号、对于指定日期以前的旧照片删除等等。
二次开发
首先记录对核心代码的修改内容,然后再将所有代码都列出来。
我这里使用了Springboot框架,为的是通过application.yml文件配置路径等数量,另外使用maven架构,方便打包。
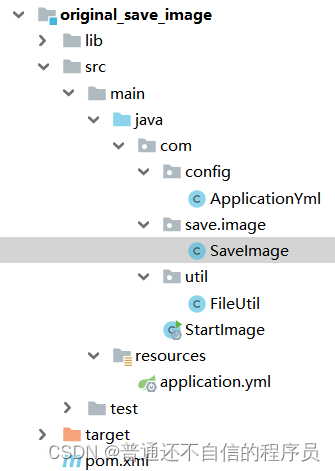
SaveImage为核心代码类
FileUtil用来删除过期照片
ApplicationYml用来读取yml文件中的配置
引入外部包
在进行二次开发前,还需要引入官网提供的下载包。
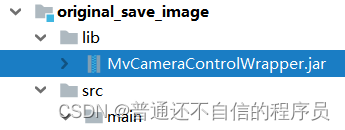
创建lib文件夹,将jar放入后,右击,Add as library。
在pom.xml文件中引入依赖
    <dependencies><dependency><groupId>com.hzx.testmaven34hikvision</groupId><artifactId>MvCameraControlWrapper</artifactId><version>1.0</version><scope>system</scope><systemPath>${project.basedir}/lib/MvCameraControlWrapper.jar</systemPath></dependency></dependencies>
<build><plugins><plugin><groupId>org.springframework.boot</groupId><artifactId>spring-boot-maven-plugin</artifactId><version>2.3.0.RELEASE</version><configuration><fork>true</fork><includeSystemScope>true</includeSystemScope></configuration></plugin><plugin><groupId>org.apache.maven.plugins</groupId><artifactId>maven-surefire-plugin</artifactId><configuration><skip>true</skip></configuration></plugin></plugins>
</build>
对SaveImage.java文件进行修改
这里先对照着示例代码,将修改的地方列举出来。全部代码后面给出。
示例代码中一些无关紧要的输出内容,在二次开发时注释掉了,这里就不再详细说明。
修改的地方,通过注释标出
保存图片saveDataToFile方法
public static void saveDataToFile(byte[] dataToSave, int dataSize, String fileName,String savePath) {OutputStream os = null;try {// Create directory/** savePath参数为图片保存路径,在调用方法时通过参数传入*/File tempFile = new File(savePath);if (!tempFile.exists()) {tempFile.mkdirs();}os = new FileOutputStream(tempFile.getPath() + File.separator + fileName);os.write(dataToSave, 0, dataSize);/** 图片保存成功后,输出当前时间*/System.out.println("--- " + sfTime.format(new Date()) + " Save Image succeed ---");} catch (IOException e) {e.printStackTrace();} finally {// Close file streamtry {os.close();} catch (IOException e) {e.printStackTrace();}}}
选择相机chooseCamera方法
public static int chooseCamera(ArrayList<MV_CC_DEVICE_INFO> stDeviceList,int camIndex) {if (null == stDeviceList) {return -1;}// Choose a device to operate//int camIndex = -1;Scanner scanner = new Scanner(System.in);while (true) {try {/** 原本需要用户输入的camIndex(相机索引),修改为调用方法时传参* 实际值从yml文件中获取*///System.out.print("Please input camera index (-1 to quit):");//camIndex = scanner.nextInt();//camIndex = 1;if ((camIndex >= 0 && camIndex < stDeviceList.size()) || -1 == camIndex) {// System.out.println("自动连接 [camera 0]");break;} else {System.out.println("Input error: " + camIndex);camIndex=-1;break;}} catch (Exception e) {e.printStackTrace();camIndex = -1;break;}}scanner.close();/*** 未修改代码省略*/}主方法
这里已经不是main方法了,因为使用springboot所以有了StartApplication类
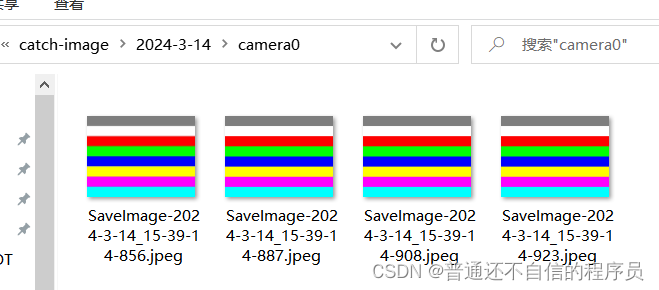
public static void mainImage(String savePath,Integer deleteDay,int camIndex) {int nRet = MV_OK;// int camIndex = -1;Handle hCamera = null;ArrayList<MV_CC_DEVICE_INFO> stDeviceList;boolean needConnectDevice = true;do {// Make sure that trigger mode is off/** 设置拍照触发器开关 出发模式需要到mvs客户端中为相机设置* 这里需要把MvCameraControl.MV_CC_SetEnumValueByString()方法第三个参数从Off改为On*/nRet = MvCameraControl.MV_CC_SetEnumValueByString(hCamera, "TriggerMode", "On");if (MV_OK != nRet) {System.err.printf("SetTriggerMode failed, errcode: [%#x]\n", nRet);break;}nRet = MvCameraControl.MV_CC_SaveImage(hCamera, stSaveParam);if (MV_OK != nRet) {//System.err.printf("SaveImage fail, errcode: [%#x]\n", nRet);// System.out.println(sfTime.format(new Date())+" "+ nRet + " No Image Need Save...");// break;//continue;} else {// 保存照片的方法 Save buffer content to file/*** 在这里设置照片的保存路径*/String savePathFull = savePath+ sfSave.format(new Date())+"/"+"camera"+camIndex+"/";saveDataToFile(imageBuffer, stSaveParam.imageLen, "SaveImage-" + sfSecond.format(new Date())+ ".jpeg",savePathFull);/* * 有新图片保存时,删除X天前保存图片的文件夹* X的实际值,通过参数传入*/Calendar calendar = Calendar.getInstance();calendar.setTime(new Date());// X天前的日期calendar.add(Calendar.DATE,(-deleteDay));String deleteFile = savePath+sfSave.format(calendar.getTime())+"/";FileUtil.deleteAllFile(deleteFile);}} while (true);}
FileUtil类处理过期照片
这里使用递归,删除保存的照片
public class FileUtil {public static void deleteAllFile(String dir){File dirFile = new File(dir);// 判断dir是否是目录且dir是否存在if (!dirFile.exists()||(!dirFile.isDirectory())) {// System.out.println("目录:"+dir+" 不存在");return;}// 删除文件夹中所有的文件,包括子文件夹File[] files = dirFile.listFiles();for (int i = 0; i < files.length; i++) {if (files[i].isFile()) {// 如果是文件直接删除files[i].delete();}else if(files[i].isDirectory()){// 如果是目录,则通过递归删除deleteAllFile(files[i].getAbsolutePath());}}// 最后删除当前文件夹dirFile.delete();}
}
启动类与配置文件
application.yml
config-info:image: D:/JavaCode/testmaven34hikvision/catch-image/ #图片保存路径deleteDay: 3 #删除X天前的图片connectCamera: 0 #连接相机编号
通过实体类读取yml
@ConfigurationProperties(prefix = "config-info")
@Component
public class ApplicationYml {private String image;private String deleteDay;private String connectCamera;public ApplicationYml() {}public String getImage() {return image;}public void setImage(String image) {this.image = image;}public String getDeleteDay() {return deleteDay;}public void setDeleteDay(String deleteDay) {this.deleteDay = deleteDay;}public String getConnectCamera() {return connectCamera;}public void setConnectCamera(String connectCamera) {this.connectCamera = connectCamera;}
}
启动类
@SpringBootApplication
@EnableConfigurationProperties
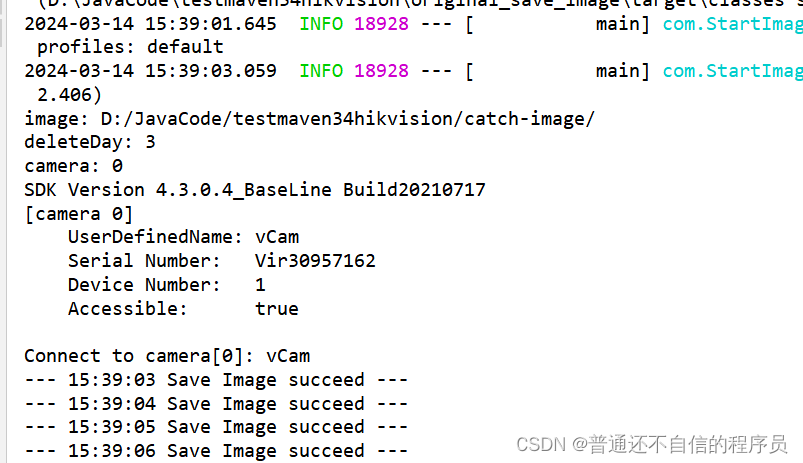
public class StartImage {private static ApplicationYml applicationYml;@Autowiredpublic void setApplicationYml(ApplicationYml applicationYml) {this.applicationYml = applicationYml;}public static void main(String[] args) throws Exception {SpringApplication.run(StartImage.class, args);System.out.println("image: "+applicationYml.getImage());System.out.println("deleteDay: "+applicationYml.getDeleteDay());System.out.println("camera: "+applicationYml.getConnectCamera());String image = applicationYml.getImage();SaveImage.mainImage(image,Integer.valueOf(applicationYml.getDeleteDay()),Integer.valueOf(applicationYml.getConnectCamera()));}
}
SaveImage.java类全部代码
public class SaveImage {private static SimpleDateFormat sfSecond = new SimpleDateFormat("yyyy-M-d_HH-mm-dd-SSS");private static SimpleDateFormat sfTime = new SimpleDateFormat("HH:mm:ss");private static SimpleDateFormat sfSave = new SimpleDateFormat("yyyy-M-d");private static void printDeviceInfo(MV_CC_DEVICE_INFO stDeviceInfo) {if (null == stDeviceInfo) {System.out.println("stDeviceInfo is null");return;}if (stDeviceInfo.transportLayerType == MV_GIGE_DEVICE) {System.out.println("\tCurrentIp:       " + stDeviceInfo.gigEInfo.currentIp);System.out.println("\tModel:           " + stDeviceInfo.gigEInfo.modelName);System.out.println("\tUserDefinedName: " + stDeviceInfo.gigEInfo.userDefinedName);} else if (stDeviceInfo.transportLayerType == MV_USB_DEVICE) {System.out.println("\tUserDefinedName: " + stDeviceInfo.usb3VInfo.userDefinedName);System.out.println("\tSerial Number:   " + stDeviceInfo.usb3VInfo.serialNumber);System.out.println("\tDevice Number:   " + stDeviceInfo.usb3VInfo.deviceNumber);} else {System.err.print("Device is not supported! \n");}System.out.println("\tAccessible:      " + MvCameraControl.MV_CC_IsDeviceAccessible(stDeviceInfo, MV_ACCESS_Exclusive));System.out.println("");}private static void printFrameInfo(MV_FRAME_OUT_INFO stFrameInfo) {if (null == stFrameInfo) {System.err.println("stFrameInfo is null");return;}StringBuilder frameInfo = new StringBuilder("");frameInfo.append(("\tFrameNum[" + stFrameInfo.frameNum + "]"));frameInfo.append("\tWidth[" + stFrameInfo.width + "]");frameInfo.append("\tHeight[" + stFrameInfo.height + "]");frameInfo.append(String.format("\tPixelType[%#x]", stFrameInfo.pixelType.getnValue()));// System.out.println(frameInfo.toString());}public static void saveDataToFile(byte[] dataToSave, int dataSize, String fileName,String savePath) {OutputStream os = null;try {// Create directory//File tempFile = new File(imagePathFun());File tempFile = new File(savePath);if (!tempFile.exists()) {tempFile.mkdirs();}os = new FileOutputStream(tempFile.getPath() + File.separator + fileName);os.write(dataToSave, 0, dataSize);System.out.println("--- " + sfTime.format(new Date()) + " Save Image succeed ---");} catch (IOException e) {e.printStackTrace();} finally {// Close file streamtry {os.close();} catch (IOException e) {e.printStackTrace();}}}public static int chooseCamera(ArrayList<MV_CC_DEVICE_INFO> stDeviceList,int camIndex) {if (null == stDeviceList) {return -1;}// Choose a device to operate//int camIndex = -1;Scanner scanner = new Scanner(System.in);while (true) {try {//System.out.print("Please input camera index (-1 to quit):");//camIndex = scanner.nextInt();//camIndex = 1;if ((camIndex >= 0 && camIndex < stDeviceList.size()) || -1 == camIndex) {// System.out.println("自动连接 [camera 0]");break;} else {System.out.println("Input error: " + camIndex);camIndex=-1;break;}} catch (Exception e) {e.printStackTrace();camIndex = -1;break;}}scanner.close();if (-1 == camIndex) {System.out.println("Bye.");return camIndex;}if (0 <= camIndex && stDeviceList.size() > camIndex) {if (MV_GIGE_DEVICE == stDeviceList.get(camIndex).transportLayerType) {System.out.println("Connect to camera[" + camIndex + "]: " + stDeviceList.get(camIndex).gigEInfo.userDefinedName);} else if (MV_USB_DEVICE == stDeviceList.get(camIndex).transportLayerType) {System.out.println("Connect to camera[" + camIndex + "]: " + stDeviceList.get(camIndex).usb3VInfo.userDefinedName);} else {System.out.println("Device is not supported.");}} else {System.out.println("Invalid index " + camIndex);camIndex = -1;}return camIndex;}public static void mainImage(String savePath,Integer deleteDay,int camIndex) {int nRet = MV_OK;// int camIndex = -1;Handle hCamera = null;ArrayList<MV_CC_DEVICE_INFO> stDeviceList;boolean needConnectDevice = true;do {if (needConnectDevice) {System.out.println("SDK Version " + MvCameraControl.MV_CC_GetSDKVersion());// Enuerate GigE and USB devicestry {stDeviceList = MV_CC_EnumDevices(MV_GIGE_DEVICE | MV_USB_DEVICE);if (0 >= stDeviceList.size()) {System.out.println("No devices found!");break;}int i = 0;for (MV_CC_DEVICE_INFO stDeviceInfo : stDeviceList) {System.out.println("[camera " + (i++) + "]");printDeviceInfo(stDeviceInfo);}} catch (CameraControlException e) {System.err.println("Enumrate devices failed!" + e.toString());e.printStackTrace();break;}// choose cameracamIndex = chooseCamera(stDeviceList,camIndex);if (camIndex == -1) {break;}// Create handletry {hCamera = MvCameraControl.MV_CC_CreateHandle(stDeviceList.get(camIndex));} catch (CameraControlException e) {System.err.println("Create handle failed!" + e.toString());e.printStackTrace();hCamera = null;break;}// Open devicenRet = MvCameraControl.MV_CC_OpenDevice(hCamera);if (MV_OK != nRet) {System.err.printf("Connect to camera failed, errcode: [%#x]\n", nRet);break;}needConnectDevice = false;}/*测试线路选择器*/// Make sure that trigger mode is offnRet = MvCameraControl.MV_CC_SetEnumValueByString(hCamera, "TriggerMode", "On");if (MV_OK != nRet) {System.err.printf("SetTriggerMode failed, errcode: [%#x]\n", nRet);break;}// Get payload sizeMVCC_INTVALUE stParam = new MVCC_INTVALUE();nRet = MvCameraControl.MV_CC_GetIntValue(hCamera, "PayloadSize", stParam);if (MV_OK != nRet) {System.err.printf("Get PayloadSize fail, errcode: [%#x]\n", nRet);break;}// Start grabbingnRet = MvCameraControl.MV_CC_StartGrabbing(hCamera);if (MV_OK != nRet) {System.err.printf("Start Grabbing fail, errcode: [%#x]\n", nRet);break;}// Get one frameMV_FRAME_OUT_INFO stImageInfo = new MV_FRAME_OUT_INFO();byte[] pData = new byte[(int) stParam.curValue];nRet = MvCameraControl.MV_CC_GetOneFrameTimeout(hCamera, pData, stImageInfo, 1000);if (MV_OK != nRet) {System.err.printf("GetOneFrameTimeout fail, errcode:[%#x]\n", nRet);break;}// System.out.println("GetOneFrame: ");printFrameInfo(stImageInfo);int imageLen = stImageInfo.width * stImageInfo.height * 3;    // Every RGB pixel takes 3 bytesbyte[] imageBuffer = new byte[imageLen];// Call MV_CC_SaveImage to save image as JPEGMV_SAVE_IMAGE_PARAM stSaveParam = new MV_SAVE_IMAGE_PARAM();stSaveParam.width = stImageInfo.width;                                  // image widthstSaveParam.height = stImageInfo.height;                                // image heightstSaveParam.data = pData;                                               // image datastSaveParam.dataLen = stImageInfo.frameLen;                             // image data lengthstSaveParam.pixelType = stImageInfo.pixelType;                          // image pixel formatstSaveParam.imageBuffer = imageBuffer;                                  // output image bufferstSaveParam.imageType = MV_SAVE_IAMGE_TYPE.MV_Image_Jpeg;               // output image pixel formatstSaveParam.methodValue = 0;                                            // Interpolation method that converts Bayer format to RGB24.  0-Neareast 1-double linear 2-HamiltonstSaveParam.jpgQuality = 60;                                            // JPG endoding quality(50-99]nRet = MvCameraControl.MV_CC_SaveImage(hCamera, stSaveParam);if (MV_OK != nRet) {//System.err.printf("SaveImage fail, errcode: [%#x]\n", nRet);// System.out.println(sfTime.format(new Date())+" "+ nRet + " No Image Need Save...");// break;//continue;} else {// 保存照片的方法 Save buffer content to fileString savePathFull = savePath+ sfSave.format(new Date())+"/"+"camera"+camIndex+"/";saveDataToFile(imageBuffer, stSaveParam.imageLen, "SaveImage-" + sfSecond.format(new Date())+ ".jpeg",savePathFull);// 有新图片保存时,删除X天前保存图片的文件夹Calendar calendar = Calendar.getInstance();calendar.setTime(new Date());// X天前的日期calendar.add(Calendar.DATE,(-deleteDay));String deleteFile = savePath+sfSave.format(calendar.getTime())+"/";FileUtil.deleteAllFile(deleteFile);}// Stop grabbingnRet = MvCameraControl.MV_CC_StopGrabbing(hCamera);if (MV_OK != nRet) {System.err.printf("StopGrabbing fail, errcode: [%#x]\n", nRet);break;}//            try {//                Thread.sleep(1000);//            } catch (InterruptedException e) {//                e.printStackTrace();//            }} while (true);if (null != hCamera) {// Destroy handlenRet = MvCameraControl.MV_CC_DestroyHandle(hCamera);if (MV_OK != nRet) {System.err.printf("DestroyHandle failed, errcode: [%#x]\n", nRet);}}}/*** 根据年月日计算图片的路径* @return*/private static String imagePathFun(){SimpleDateFormat sfDate = new SimpleDateFormat("yyyy-M-d");return "/home/hello/MVS/catch_image/"+sfDate.format(new Date())+"/";}
}
运行结果