环境介绍
开发板:Huawei Atals 200I DK A2
内存:4G
NPU:Ascend 310B4
准备环境
下载编译好的torch_npu
wget https://obs-9be7.obs.cn-east-2.myhuaweicloud.com/wanzutao/torch_npu-2.1.0rc1-cp39-cp39-linux_aarch64.whl
pip3 install torch_npu-2.1.0rc1-cp39-cp39-linux_aarch64.whl
安装PyTorch2.1.0、torchvision0.16.0
pip install torch==2.1.0 torchvision==1.16.0
安装ACLLite库
安装依赖
apt-get install ffmpeg libavcodec-dev libswscale-dev libavdevice-dev
克隆ACLLite代码仓
git clone https://gitee.com/ascend/ACLLite.git
cd ACLLite
设置环境变量
export DDK_PATH=/usr/local/Ascend/ascend-toolkit/latest
export NPU_HOST_LIB=$DDK_PATH/runtime/lib64/stub
安装
bash build_so.sh
安装依赖
克隆代码仓
git clone https://gitee.com/ascend/EdgeAndRobotics/
进入代码文件夹
cd EdgeAndRobotics/Samples/HandWritingTrainAndInfer
安装依赖
pip3 install -r requirements.txt
pip install pyyaml
配置离线推理所需的环境变量
# 配置程序编译依赖的头文件与库文件路径
export DDK_PATH=/usr/local/Ascend/ascend-toolkit/latest
export NPU_HOST_LIB=$DDK_PATH/runtime/lib64/stub
模型训练
设置环境变量减小算子编译内存占用
export TE_PARALLEL_COMPILER=1
export MAX_COMPILE_CORE_NUMBER=1
运行训练脚本
python main.py
开始运行
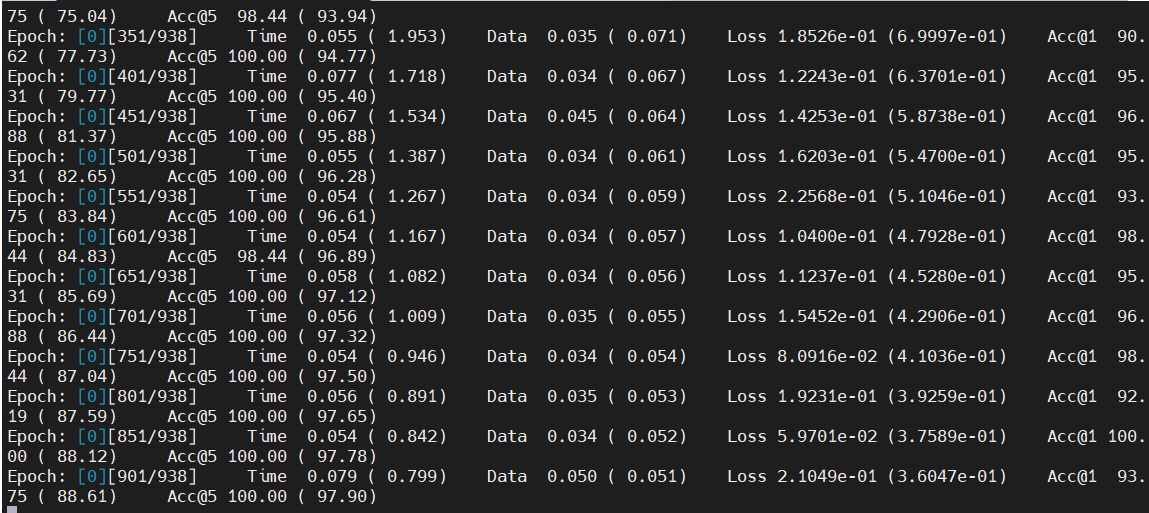
NPU使用情况

在线推理
训练生成的mnist.pt转换mnist.onnx模型
python3 export.py
获取测试图片
cd data
wget https://obs-9be7.obs.cn-east-2.myhuaweicloud.com/wanzutao/mnist/8.jpg
测试图片:

执行在线推理
cd ../onnxInfer/
python3 infer.py
推理结果
[image_path:data/8.jpg] [inferssession_time:1349 pictures/s] [output:8]
离线推理
获取测试图片
cd omInfer/data
wget https://obs-9be7.obs.cn-east-2.myhuaweicloud.com/wanzutao/mnist/8.jpg
获取PyTorch框架的ResNet50模型(.onnx),并转换为昇腾AI处理器能识别的模型(.om)
为了方便下载,在这里直接给出原始模型下载及模型转换命令,可以直接拷贝执行。
将在线推理时导出的mnist.onnx模型拷贝到model目录下
cd ../model
cp ../../mnist.onnx ./
获取AIPP配置文件
wget https://obs-9be7.obs.cn-east-2.myhuaweicloud.com/wanzutao/mnist/ecs/aipp.cfg
模型转换
atc --model=mnist.onnx --framework=5 --insert_op_conf=aipp.cfg --output=mnist --soc_version=Ascend310B4
编译样例源码
cd ../scripts
bash sample_build.sh
运行样例
bash sample_run.sh
运行结果
[INFO] value[0.999993] output[8]
