一、prisma起步
安装:
npm i prisma -g
查看初始化帮助信息:
prisma init -h
查看初始化帮助信息结果:
Set up a new Prisma projectUsage$ prisma init [options]
Options-h, --help   Display this help message
--datasource-provider   Define the datasource provider to use: postgresql, mysql, sqlite, sqlserver, mongodb or cockroachdb--generator-provider   Define the generator provider to use. Default: `prisma-client-js`--preview-feature   Define a preview feature to use.--output   Define Prisma Client generator output path to use.--url   Define a custom datasource urlExamplesSet up a new Prisma project with PostgreSQL (default)$ prisma initSet up a new Prisma project and specify MySQL as the datasource provider to use$ prisma init --datasource-provider mysqlSet up a new Prisma project and specify `prisma-client-go` as the generator provider to use$ prisma init --generator-provider prisma-client-goSet up a new Prisma project and specify `x` and `y` as the preview features to use$ prisma init --preview-feature x --preview-feature ySet up a new Prisma project and specify `./generated-client` as the output path to use$ prisma init --output ./generated-clientSet up a new Prisma project and specify the url that will be used$ prisma init --url mysql://user:password@localhost:3306/mydb
初始化:
#初始化项目,并指定采用的数据库类型为 xxxx 例子采用mysql
prisma init --datasource-provider mysql
初始化结果:
✔ Your Prisma schema was created at prisma/schema.prismaYou can now open it in your favorite editor.Next steps:
1. Set the DATABASE_URL in the .env file to point to your existing database. If your database has no tables yet, read https://pris.ly/d/getting-started
2. Run prisma db pull to turn your database schema into a Prisma schema.
3. Run prisma generate to generate the Prisma Client. You can then start querying your database.More information in our documentation:
https://pris.ly/d/getting-started┌────────────────────────────────────────────────────────────────┐
│  Developing real-time features?                                │
│  Prisma Pulse lets you respond instantly to database changes.  │
│  https://pris.ly/cli/pulse                                     │
└────────────────────────────────────────────────────────────────┘
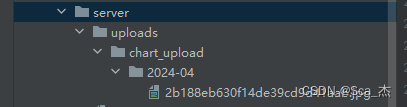
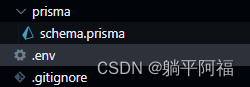
初始化生成目录:
二、配置数据库连接
.env文件中对数据库连接信息进行配置:
更多数据库连接方式查看文档
# MySql 数据库的连接方式
# DATABASE_URL="mysql://账号:密码@主机:端口/数据库名"
DATABASE_URL="mysql://root:1234aa@localhost:3306/mysqlorm"
三、编写表结构
表结构在/prisma/schema.prisma文件中编写
1. model 表 声明
1.1 简单声明一个表的例子:
model User{id        Int      @id @default(autoincrement()) // id int 类型 自增email     String   @unique // email  String 类型 唯一项name      StringcreatedAt DateTime @default(now())
}
1.2 声明一对多表关联的例子
model User{id        Int      @id @default(autoincrement()) // id int 类型 自增email     String   @unique // email  String 类型 唯一项name      Stringposts      Post[] // 一对多的关系
}
model Post{id        Int      @id @default(autoincrement())title String content Stringauthor     User #relation(fields:[authorId],references:[id]) // 关联User表中的id到authorId字段authorId Int
}
1.3 创建具体的表结构到数据库中
执行该语句如果数据库已经存在询问是否覆盖。
prisma migrate dev
可能得报错为mkdir 权限,找不到package.json文件
npm init 一下创建package.json文件再执行就好了
四、编写express
- 新建
src目录用来编写接口文件进行操作数据库 - 新建启动文件
main.js
const express = require('express') // 引入express
const { PrismaClient } =  require( '@prisma/client')// 引入prismaconst prisma = new PrismaClient() // new 新建类实例
const app = express()  // 初始化express
const port = 3000 // 端口号app.get('/test', async (req, res) => { // 启动测试服务try {// 类实例.表名.操作({ data:{filedName:filedValue})await prisma.user.create({ data: {name:'嘻嘻',email:'xxx@ww.com',posts:{ // 同步创建关联的post表信息。 这里的 posts 在 三、编写表结构中的1.2节定义create:[ // 操作 批量操作数组,单次操作数组内的单一对象即可 可继续嵌套{  title: 'My first post',content: 'This is my first post'},{title:'My 2nd post',content:'This is my 2nd post '}]}}})res.send('ok')} catch (error) {res.send(error)}
})app.listen(port, () => {console.log(`http://lcoalhost:${port}`)
})
插入数据
简单插入数据
await prisma.user.create({ data: {name:'嘻嘻',email:'xxx@ww.com'}})
复杂插入数据
// prisma 导入类new的实例
// user 表名
// create 创建的操作
await prisma.user.create({ data: {name:'嘻嘻',email:'xxx@ww.com',posts:{ // 同步创建关联的post表信息。 这里的 posts 在 三、编写表结构中的1.2节定义create:[ // 操作 批量操作数组,单次操作数组内的单一对象即可 可继续嵌套{  title: 'My first post',content: 'This is my first post'},{title:'My 2nd post',content:'This is my 2nd post '}]}}})
查询数据
单表查询
// prisma 实例对象
// user 表名
// findMany 查找apiconst data = await prisma.user.findMany()
表关联查询
// prisma 实例对象
// user 表名
// findMany 查找api
// posts 关联 post表的字段const data = await prisma.user.findMany({include:{      posts:true}})
返回数据格式为树状
"data": [{"id": 1,"email": "fujsbah@sqq.com","name": "xxxx","posts": [{"id": 1,"title": "My first post","content": "This is my first post","authorId": 1},{"id": 2,"title": "My 2nd post","content": "This is my 2nd post ","authorId": 1}]},{"id": 2,"email": "jsbah@sqq.com","name": "xxxx","posts": [{"id": 3,"title": "My first post","content": "This is my first post","authorId": 2},{"id": 4,"title": "My 2nd post","content": "This is my 2nd post ","authorId": 2}]}]
条件查询
app.get('/user/:id', async (req, res) => {try {const data = await prisma.user.findUnique({where:{id:Number(req.params.id) // 2},include:{posts:true}})res.send({code:'000000',msg:'success',data})} catch (error) {res.send({code:'000003',msg:'error',data:error})}
})
条件查询响应
{"code": "000000","msg": "success","data": {"id": 2,"email": "jsbah@sqq.com","name": "xxxx","posts": [{"id": 3,"title": "My first post","content": "This is my first post","authorId": 2},{"id": 4,"title": "My 2nd post","content": "This is my 2nd post ","authorId": 2}]}
}
编辑数据
app.post('/update', upload.array(), async (req, res) => {const { name, id, email } = req.bodytry {let data = await prisma.user.update({data: {name,email},where: {id: Number(id)}})res.send({code: '000000',msg: 'success',data})} catch (error) {res.send({code: '000004',msg: 'error',data: error})}
})
删除数据
简单删除
app.post('/delete', upload.array(), async (req, res) => {const { id } = req.bodytry {// 删除post文章表中作者id等于传入的id的数据let deletePostData = await prisma.post.delete({where: {authorId: Number(id)}})res.send({code: '000000',msg: 'success',data:{deletePostData}})} catch (error) {res.send({code: '000005',msg: 'error',data: error})}
})
复合删除
app.post('/delete', upload.array(), async (req, res) => {const { id } = req.body// 目标删除用户try {// 先删除外键关联到用户id的文章表,这要是这个id的文章都删除let deletePostData = await prisma.post.delete({where: {authorId: Number(id)}})// 没有外键依赖到之后 根据id删除用户let deleteUserData =  await prisma.user.delete({where: {id: Number(id)}})res.send({code: '000000',msg: 'success',data:{deleteUserData,deletePostData}})} catch (error) {res.send({code: '000005',msg: 'error',data: error})}
})