其实,yolov5模型可以分为深度网络、数据处理(图片处理)、损失函数、优化器选择、训练和预测及部分构成,相信大家对训练和预测的代码比较熟悉。前面两章我们根据代码和结构图了解了yolov5的深度网络,接下来看数据处理的部分。
1.voc_annotation.py文件
该文件处理的数据结构如下:
---VOCdevkit
---VOC2007
---Annotations(里面存放xml文件)
---JPEGImages(里面存放jpg文件)
---ImageSets(里面存放Main文件夹)
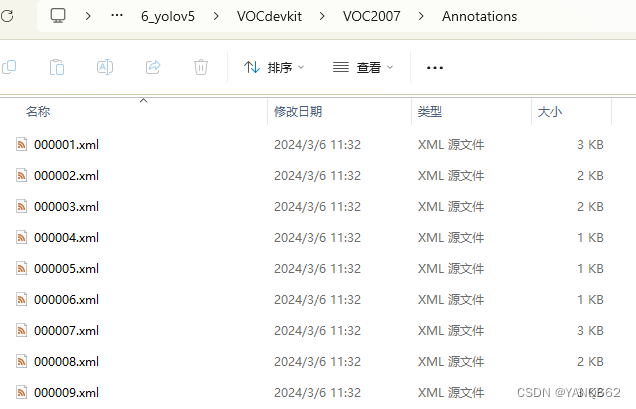
其中VOCdevkit是和voc_annotation.py同目录的文件夹,在这里截取xml文件如下,注意看截图上面的文件路径。
voc_annotation.py文件的代码如下:
import os
import random
import xml.etree.ElementTree as ETimport numpy as npfrom utils.utils import get_classes#该文件的本质是借用jpg图片和xml文件获得每个jpg图片内的目标的具体坐标及路径,该坐标和路径写在2007_train.txt文件里面,可以打开该文件#看格式,如D:\AI\yq\mubiao_detect\6_yolov5\VOCdevkit/VOC2007/JPEGImages/000002.jpg 17,56,42,69,0    表示:图片路径,目标的上下左右坐标,目标的具体类的index#--------------------------------------------------------------------------------------------------------------------------------#
#   annotation_mode用于指定该文件运行时计算的内容
#   annotation_mode为0代表整个标签处理过程,包括获得VOCdevkit/VOC2007/ImageSets里面的txt以及训练用的2007_train.txt、2007_val.txt
#   annotation_mode为1代表获得VOCdevkit/VOC2007/ImageSets里面的txt
#   annotation_mode为2代表获得训练用的2007_train.txt、2007_val.txt
#--------------------------------------------------------------------------------------------------------------------------------#
annotation_mode     = 0
#-------------------------------------------------------------------#
#   必须要修改,用于生成2007_train.txt、2007_val.txt的目标信息
#   与训练和预测所用的classes_path一致即可
#   如果生成的2007_train.txt里面没有目标信息
#   那么就是因为classes没有设定正确
#   仅在annotation_mode为0和2的时候有效
#-------------------------------------------------------------------#
classes_path        = 'model_data/voc_classes.txt'
#--------------------------------------------------------------------------------------------------------------------------------#
#   trainval_percent用于指定(训练集+验证集)与测试集的比例,默认情况下 (训练集+验证集):测试集 = 9:1
#   train_percent用于指定(训练集+验证集)中训练集与验证集的比例,默认情况下 训练集:验证集 = 9:1
#   仅在annotation_mode为0和1的时候有效
#--------------------------------------------------------------------------------------------------------------------------------#
trainval_percent    = 0.9
train_percent       = 0.9
#-------------------------------------------------------#
#   指向VOC数据集所在的文件夹
#   默认指向根目录下的VOC数据集
#-------------------------------------------------------#
VOCdevkit_path  = 'VOCdevkit'VOCdevkit_sets  = [('2007', 'train'), ('2007', 'val')]
classes, _      = get_classes(classes_path)#-------------------------------------------------------#
#   统计目标数量
#-------------------------------------------------------#
photo_nums  = np.zeros(len(VOCdevkit_sets))
nums        = np.zeros(len(classes))def convert_annotation(year, image_id, list_file):in_file = open(os.path.join(VOCdevkit_path, 'VOC%s/Annotations/%s.xml' % (year, image_id)), encoding='utf-8')tree = ET.parse(in_file)root = tree.getroot()for obj in root.iter('object'):difficult = 0if obj.find('difficult') != None:difficult = obj.find('difficult').textcls = obj.find('name').textif cls not in classes or int(difficult) == 1:continuecls_id = classes.index(cls)xmlbox = obj.find('bndbox')b = (int(float(xmlbox.find('xmin').text)), int(float(xmlbox.find('ymin').text)),int(float(xmlbox.find('xmax').text)), int(float(xmlbox.find('ymax').text)))list_file.write(" " + ",".join([str(a) for a in b]) + ',' + str(cls_id))nums[classes.index(cls)] = nums[classes.index(cls)] + 1if __name__ == "__main__":random.seed(0)if " " in os.path.abspath(VOCdevkit_path):raise ValueError("数据集存放的文件夹路径与图片名称中不可以存在空格,否则会影响正常的模型训练,请注意修改。")if annotation_mode == 0 or annotation_mode == 1:print("Generate txt in ImageSets.")xmlfilepath=os.path.join(VOCdevkit_path,"VOC2007/Annotations")saveBasePath = os.path.join(VOCdevkit_path, 'VOC2007/ImageSets/Main')temp_xml = os.listdir(xmlfilepath)#Annotations文件夹下所有文件的名称:['000001.xml', '000002.xml', '000003.xml', .......]total_xml = []#过滤掉temp_xml的非xml文件名称,提取temp_xml的所有xml文件for xml in temp_xml:if xml.endswith(".xml"):total_xml.append(xml)num = len(total_xml)list=range(num)tv = int(num * trainval_percent)tr = int(tv * train_percent)trainval=random.sample(list,tv)train = random.sample(trainval, tr)print("train and val size", tv)print("train size", tr)ftrainval = open(os.path.join(saveBasePath, 'trainval.txt'), 'w')ftest = open(os.path.join(saveBasePath, 'test.txt'), 'w')ftrain = open(os.path.join(saveBasePath, 'train.txt'), 'w')fval = open(os.path.join(saveBasePath, 'val.txt'), 'w')for i in list:name = total_xml[i][:-4] + '\n'if i in trainval:ftrainval.write(name)if i in train:ftrain.write(name)else:fval.write(name)else:ftest.write(name)ftrainval.close()ftrain.close()fval.close()ftest.close()print("Generate txt in ImageSets done.")if annotation_mode == 0 or annotation_mode == 2:print("Generate 2007_train.txt and 2007_val.txt for train.")type_index = 0for year, image_set in VOCdevkit_sets:image_ids = open(os.path.join(VOCdevkit_path, 'VOC%s/ImageSets/Main/%s.txt'%(year, image_set)), encoding='utf-8').read().strip().split()list_file = open('%s_%s.txt'%(year, image_set), 'w', encoding='utf-8')for image_id in image_ids:list_file.write('%s/VOC%s/JPEGImages/%s.jpg'%(os.path.abspath(VOCdevkit_path), year, image_id))convert_annotation(year, image_id, list_file)list_file.write('\n')photo_nums[type_index] = len(image_ids)type_index += 1list_file.close()print("Generate 2007_train.txt and 2007_val.txt for train done.")
运行完该代码后,在voc_annotation.py同目录下会生成2007_train.txt和2007_val.txt两个txt文件,这两个文件存放的是图片的路径和该图片的目标类型及目标在该图片中的坐标,具体内容如下图:

上图中,第一行的jpg所在的字符串是000002.jpg的路径,后面跟了4个数组,每个长为5,这5个数分别是目标的前后左右坐标和目标类型.4个数组表示该张图片标注了4个目标。
2.train.py文件
代码如下:
import osos.environ["KMP_DUPLICATE_LIB_OK"] = "TRUE"
# -------------------------------------#
#       对数据集进行训练
# -------------------------------------#
import datetime
import osimport numpy as np
import torch
import torch.backends.cudnn as cudnn
import torch.distributed as dist
import torch.nn as nn
import torch.optim as optim
from torch.utils.data import DataLoaderfrom nets.yolo import YoloBody
from nets.yolo_training import (ModelEMA, YOLOLoss, get_lr_scheduler,set_optimizer_lr, weights_init)
from utils.callbacks import LossHistory, EvalCallback
from utils.dataloader import YoloDataset, yolo_dataset_collate
from utils.utils import download_weights, get_anchors, get_classes, show_config
from utils.utils_fit import fit_one_epoch'''
训练自己的目标检测模型一定需要注意以下几点:
1、训练前仔细检查自己的格式是否满足要求,该库要求数据集格式为VOC格式,需要准备好的内容有输入图片和标签输入图片为.jpg图片,无需固定大小,传入训练前会自动进行resize。灰度图会自动转成RGB图片进行训练,无需自己修改。输入图片如果后缀非jpg,需要自己批量转成jpg后再开始训练。标签为.xml格式,文件中会有需要检测的目标信息,标签文件和输入图片文件相对应。2、损失值的大小用于判断是否收敛,比较重要的是有收敛的趋势,即验证集损失不断下降,如果验证集损失基本上不改变的话,模型基本上就收敛了。损失值的具体大小并没有什么意义,大和小只在于损失的计算方式,并不是接近于0才好。如果想要让损失好看点,可以直接到对应的损失函数里面除上10000。训练过程中的损失值会保存在logs文件夹下的loss_%Y_%m_%d_%H_%M_%S文件夹中3、训练好的权值文件保存在logs文件夹中,每个训练世代(Epoch)包含若干训练步长(Step),每个训练步长(Step)进行一次梯度下降。如果只是训练了几个Step是不会保存的,Epoch和Step的概念要捋清楚一下。
'''
if __name__ == "__main__":# ---------------------------------##   Cuda    是否使用Cuda#           没有GPU可以设置成False# ---------------------------------#Cuda = True# ---------------------------------------------------------------------##   distributed     用于指定是否使用单机多卡分布式运行#                   终端指令仅支持Ubuntu。CUDA_VISIBLE_DEVICES用于在Ubuntu下指定显卡。#                   Windows系统下默认使用DP模式调用所有显卡,不支持DDP。#   DP模式:#       设置            distributed = False#       在终端中输入    CUDA_VISIBLE_DEVICES=0,1 python train.py#   DDP模式:#       设置            distributed = True#       在终端中输入    CUDA_VISIBLE_DEVICES=0,1 python -m torch.distributed.launch --nproc_per_node=2 train.py# ---------------------------------------------------------------------#distributed = False# ---------------------------------------------------------------------##   sync_bn     是否使用sync_bn,DDP模式多卡可用# ---------------------------------------------------------------------#sync_bn = False# ---------------------------------------------------------------------##   fp16        是否使用混合精度训练#               可减少约一半的显存、需要pytorch1.7.1以上# ---------------------------------------------------------------------#fp16 = False# ---------------------------------------------------------------------##   classes_path    指向model_data下的txt,与自己训练的数据集相关#                   训练前一定要修改classes_path,使其对应自己的数据集# ---------------------------------------------------------------------#classes_path = 'model_data/voc_classes.txt'# ---------------------------------------------------------------------##   anchors_path    代表先验框对应的txt文件,一般不修改。#   anchors_mask    用于帮助代码找到对应的先验框,一般不修改。# ---------------------------------------------------------------------#anchors_path = 'model_data/yolo_anchors.txt'anchors_mask = [[6, 7, 8], [3, 4, 5], [0, 1, 2]]# ----------------------------------------------------------------------------------------------------------------------------##   权值文件的下载请看README,可以通过网盘下载。模型的 预训练权重 对不同数据集是通用的,因为特征是通用的。#   模型的 预训练权重 比较重要的部分是 主干特征提取网络的权值部分,用于进行特征提取。#   预训练权重对于99%的情况都必须要用,不用的话主干部分的权值太过随机,特征提取效果不明显,网络训练的结果也不会好##   如果训练过程中存在中断训练的操作,可以将model_path设置成logs文件夹下的权值文件,将已经训练了一部分的权值再次载入。#   同时修改下方的 冻结阶段 或者 解冻阶段 的参数,来保证模型epoch的连续性。##   当model_path = ''的时候不加载整个模型的权值。##   此处使用的是整个模型的权重,因此是在train.py进行加载的。#   如果想要让模型从0开始训练,则设置model_path = '',下面的Freeze_Train = Fasle,此时从0开始训练,且没有冻结主干的过程。##   一般来讲,网络从0开始的训练效果会很差,因为权值太过随机,特征提取效果不明显,因此非常、非常、非常不建议大家从0开始训练!#   从0开始训练有两个方案:#   1、得益于Mosaic数据增强方法强大的数据增强能力,将UnFreeze_Epoch设置的较大(300及以上)、batch较大(16及以上)、数据较多(万以上)的情况下,#      可以设置mosaic=True,直接随机初始化参数开始训练,但得到的效果仍然不如有预训练的情况。(像COCO这样的大数据集可以这样做)#   2、了解imagenet数据集,首先训练分类模型,获得网络的主干部分权值,分类模型的 主干部分 和该模型通用,基于此进行训练。# ----------------------------------------------------------------------------------------------------------------------------## model_path      = 'model_data/yolov5_s.pth'model_path = 'logs/last_epoch_weights.pth'# ------------------------------------------------------##   input_shape     输入的shape大小,一定要是32的倍数# ------------------------------------------------------#input_shape = [640, 640]# ------------------------------------------------------##   backbone        cspdarknet(默认)#                   convnext_tiny#                   convnext_small#                   swin_transfomer_tiny# ------------------------------------------------------#backbone = 'cspdarknet'# ----------------------------------------------------------------------------------------------------------------------------##   pretrained      是否使用主干网络的预训练权重,此处使用的是主干的权重,因此是在模型构建的时候进行加载的。#                   如果设置了model_path,则主干的权值无需加载,pretrained的值无意义。#                   如果不设置model_path,pretrained = True,此时仅加载主干开始训练。#                   如果不设置model_path,pretrained = False,Freeze_Train = Fasle,此时从0开始训练,且没有冻结主干的过程。# ----------------------------------------------------------------------------------------------------------------------------#pretrained = False# ------------------------------------------------------##   phi             所使用的YoloV5的版本。s、m、l、x#                   在除cspdarknet的其它主干中仅影响panet的大小# ------------------------------------------------------#phi = 's'# ------------------------------------------------------------------##   mosaic              马赛克数据增强。#   mosaic_prob         每个step有多少概率使用mosaic数据增强,默认50%。##   mixup               是否使用mixup数据增强,仅在mosaic=True时有效。#                       只会对mosaic增强后的图片进行mixup的处理。#   mixup_prob          有多少概率在mosaic后使用mixup数据增强,默认50%。#                       总的mixup概率为mosaic_prob * mixup_prob。##   special_aug_ratio   参考YoloX,由于Mosaic生成的训练图片,远远脱离自然图片的真实分布。#                       当mosaic=True时,本代码会在special_aug_ratio范围内开启mosaic。#                       默认为前70%个epoch,100个世代会开启70个世代。# ------------------------------------------------------------------#mosaic = Truemosaic_prob = 0.5mixup = Truemixup_prob = 0.5special_aug_ratio = 0.7# ------------------------------------------------------------------##   label_smoothing     标签平滑。一般0.01以下。如0.01、0.005。# ------------------------------------------------------------------#label_smoothing = 0# ----------------------------------------------------------------------------------------------------------------------------##   训练分为两个阶段,分别是冻结阶段和解冻阶段。设置冻结阶段是为了满足机器性能不足的同学的训练需求。#   冻结训练需要的显存较小,显卡非常差的情况下,可设置Freeze_Epoch等于UnFreeze_Epoch,Freeze_Train = True,此时仅仅进行冻结训练。##   在此提供若干参数设置建议,各位训练者根据自己的需求进行灵活调整:#   (一)从整个模型的预训练权重开始训练:#       Adam:#           Init_Epoch = 0,Freeze_Epoch = 50,UnFreeze_Epoch = 100,Freeze_Train = True,optimizer_type = 'adam',Init_lr = 1e-3,weight_decay = 0。(冻结)#           Init_Epoch = 0,UnFreeze_Epoch = 100,Freeze_Train = False,optimizer_type = 'adam',Init_lr = 1e-3,weight_decay = 0。(不冻结)#       SGD:#           Init_Epoch = 0,Freeze_Epoch = 50,UnFreeze_Epoch = 300,Freeze_Train = True,optimizer_type = 'sgd',Init_lr = 1e-2,weight_decay = 5e-4。(冻结)#           Init_Epoch = 0,UnFreeze_Epoch = 300,Freeze_Train = False,optimizer_type = 'sgd',Init_lr = 1e-2,weight_decay = 5e-4。(不冻结)#       其中:UnFreeze_Epoch可以在100-300之间调整。#   (二)从0开始训练:#       Init_Epoch = 0,UnFreeze_Epoch >= 300,Unfreeze_batch_size >= 16,Freeze_Train = False(不冻结训练)#       其中:UnFreeze_Epoch尽量不小于300。optimizer_type = 'sgd',Init_lr = 1e-2,mosaic = True。#   (三)batch_size的设置:#       在显卡能够接受的范围内,以大为好。显存不足与数据集大小无关,提示显存不足(OOM或者CUDA out of memory)请调小batch_size。#       受到BatchNorm层影响,batch_size最小为2,不能为1。#       正常情况下Freeze_batch_size建议为Unfreeze_batch_size的1-2倍。不建议设置的差距过大,因为关系到学习率的自动调整。# ----------------------------------------------------------------------------------------------------------------------------## ------------------------------------------------------------------##   冻结阶段训练参数#   此时模型的主干被冻结了,特征提取网络不发生改变#   占用的显存较小,仅对网络进行微调#   Init_Epoch          模型当前开始的训练世代,其值可以大于Freeze_Epoch,如设置:#                       Init_Epoch = 60、Freeze_Epoch = 50、UnFreeze_Epoch = 100#                       会跳过冻结阶段,直接从60代开始,并调整对应的学习率。#                       (断点续练时使用)#   Freeze_Epoch        模型冻结训练的Freeze_Epoch#                       (当Freeze_Train=False时失效)#   Freeze_batch_size   模型冻结训练的batch_size#                       (当Freeze_Train=False时失效)# ------------------------------------------------------------------#Init_Epoch = 92Freeze_Epoch = 50Freeze_batch_size = 4# ------------------------------------------------------------------##   解冻阶段训练参数#   此时模型的主干不被冻结了,特征提取网络会发生改变#   占用的显存较大,网络所有的参数都会发生改变#   UnFreeze_Epoch          模型总共训练的epoch#                           SGD需要更长的时间收敛,因此设置较大的UnFreeze_Epoch#                           Adam可以使用相对较小的UnFreeze_Epoch#   Unfreeze_batch_size     模型在解冻后的batch_size# ------------------------------------------------------------------#UnFreeze_Epoch = 300Unfreeze_batch_size = 2# ------------------------------------------------------------------##   Freeze_Train    是否进行冻结训练#                   默认先冻结主干训练后解冻训练。# ------------------------------------------------------------------#Freeze_Train = True# ------------------------------------------------------------------##   其它训练参数:学习率、优化器、学习率下降有关# ------------------------------------------------------------------## ------------------------------------------------------------------##   Init_lr         模型的最大学习率#   Min_lr          模型的最小学习率,默认为最大学习率的0.01# ------------------------------------------------------------------#Init_lr = 1e-2Min_lr = Init_lr * 0.01# ------------------------------------------------------------------##   optimizer_type  使用到的优化器种类,可选的有adam、sgd#                   当使用Adam优化器时建议设置  Init_lr=1e-3#                   当使用SGD优化器时建议设置   Init_lr=1e-2#   momentum        优化器内部使用到的momentum参数#   weight_decay    权值衰减,可防止过拟合#                   adam会导致weight_decay错误,使用adam时建议设置为0。# ------------------------------------------------------------------#optimizer_type = "sgd"momentum = 0.937weight_decay = 5e-4# ------------------------------------------------------------------##   lr_decay_type   使用到的学习率下降方式,可选的有step、cos# ------------------------------------------------------------------#lr_decay_type = "cos"# ------------------------------------------------------------------##   save_period     多少个epoch保存一次权值# ------------------------------------------------------------------#save_period = 10# ------------------------------------------------------------------##   save_dir        权值与日志文件保存的文件夹# ------------------------------------------------------------------#save_dir = 'logs'# ------------------------------------------------------------------##   eval_flag       是否在训练时进行评估,评估对象为验证集#                   安装pycocotools库后,评估体验更佳。#   eval_period     代表多少个epoch评估一次,不建议频繁的评估#                   评估需要消耗较多的时间,频繁评估会导致训练非常慢#   此处获得的mAP会与get_map.py获得的会有所不同,原因有二:#   (一)此处获得的mAP为验证集的mAP。#   (二)此处设置评估参数较为保守,目的是加快评估速度。# ------------------------------------------------------------------#eval_flag = Trueeval_period = 10# ------------------------------------------------------------------##   num_workers     用于设置是否使用多线程读取数据#                   开启后会加快数据读取速度,但是会占用更多内存#                   内存较小的电脑可以设置为2或者0# ------------------------------------------------------------------#num_workers = 2# ------------------------------------------------------##   train_annotation_path   训练图片路径和标签#   val_annotation_path     验证图片路径和标签# ------------------------------------------------------#train_annotation_path = '2007_train.txt'val_annotation_path = '2007_val.txt'# ------------------------------------------------------##   设置用到的显卡# ------------------------------------------------------#ngpus_per_node = torch.cuda.device_count()if distributed:dist.init_process_group(backend="nccl")local_rank = int(os.environ["LOCAL_RANK"])rank = int(os.environ["RANK"])device = torch.device("cuda", local_rank)if local_rank == 0:print(f"[{os.getpid()}] (rank = {rank}, local_rank = {local_rank}) training...")print("Gpu Device Count : ", ngpus_per_node)else:device = torch.device('cuda' if torch.cuda.is_available() else 'cpu')local_rank = 0rank = 0# ------------------------------------------------------##   获取classes和anchor# ------------------------------------------------------#class_names, num_classes = get_classes(classes_path)anchors, num_anchors = get_anchors(anchors_path)# ----------------------------------------------------##   下载预训练权重# ----------------------------------------------------#if pretrained:if distributed:if local_rank == 0:download_weights(backbone, phi)dist.barrier()else:download_weights(backbone, phi)# ------------------------------------------------------##   创建yolo模型# ------------------------------------------------------#model = YoloBody(anchors_mask, num_classes, phi, backbone, pretrained=pretrained, input_shape=input_shape)if not pretrained:weights_init(model)if model_path != '':# ------------------------------------------------------##   权值文件请看README,百度网盘下载# ------------------------------------------------------#if local_rank == 0:print('Load weights {}.'.format(model_path))# ------------------------------------------------------##   根据预训练权重的Key和模型的Key进行加载# ------------------------------------------------------#model_dict = model.state_dict()pretrained_dict = torch.load(model_path, map_location=device)# print("pretrained_dict>>>>>>>>>>>",pretrained_dict)load_key, no_load_key, temp_dict = [], [], {}for k, v in pretrained_dict.items():if k in model_dict.keys() and np.shape(model_dict[k]) == np.shape(v):temp_dict[k] = vload_key.append(k)else:no_load_key.append(k)model_dict.update(temp_dict)model.load_state_dict(model_dict)# ------------------------------------------------------##   显示没有匹配上的Key# ------------------------------------------------------#if local_rank == 0:print("\nSuccessful Load Key:", str(load_key)[:500], "……\nSuccessful Load Key Num:", len(load_key))print("\nFail To Load Key:", str(no_load_key)[:500], "……\nFail To Load Key num:", len(no_load_key))print("\n\033[1;33;44m温馨提示,head部分没有载入是正常现象,Backbone部分没有载入是错误的。\033[0m")# ----------------------##   获得损失函数# ----------------------#yolo_loss = YOLOLoss(anchors, num_classes, input_shape, Cuda, anchors_mask, label_smoothing)# ----------------------##   记录Loss# ----------------------#if local_rank == 0:time_str = datetime.datetime.strftime(datetime.datetime.now(), '%Y_%m_%d_%H_%M_%S')log_dir = os.path.join(save_dir, "loss_" + str(time_str))loss_history = LossHistory(log_dir, model, input_shape=input_shape)else:loss_history = None# ------------------------------------------------------------------##   torch 1.2不支持amp,建议使用torch 1.7.1及以上正确使用fp16#   因此torch1.2这里显示"could not be resolve"# ------------------------------------------------------------------#if fp16:from torch.cuda.amp import GradScaler as GradScalerscaler = GradScaler()else:scaler = Nonemodel_train = model.train() #训练模型用.train(),预测模型用.val()# ----------------------------##   多卡同步Bn# ----------------------------#if sync_bn and ngpus_per_node > 1 and distributed:model_train = torch.nn.SyncBatchNorm.convert_sync_batchnorm(model_train)elif sync_bn:print("Sync_bn is not support in one gpu or not distributed.")if Cuda:if distributed:# ----------------------------##   多卡平行运行# ----------------------------#model_train = model_train.cuda(local_rank)model_train = torch.nn.parallel.DistributedDataParallel(model_train, device_ids=[local_rank],find_unused_parameters=True)else:model_train = torch.nn.DataParallel(model)cudnn.benchmark = Truemodel_train = model_train.cuda()# ----------------------------##   权值平滑# ----------------------------#ema = ModelEMA(model_train)# ---------------------------##   读取数据集对应的txt# ---------------------------#with open(train_annotation_path, encoding='utf-8') as f:train_lines = f.readlines()with open(val_annotation_path, encoding='utf-8') as f:val_lines = f.readlines()num_train = len(train_lines)num_val = len(val_lines)if local_rank == 0:show_config(  # 输出训练开始的虚线框里的信息classes_path=classes_path, anchors_path=anchors_path, anchors_mask=anchors_mask, model_path=model_path,input_shape=input_shape, \Init_Epoch=Init_Epoch, Freeze_Epoch=Freeze_Epoch, UnFreeze_Epoch=UnFreeze_Epoch,Freeze_batch_size=Freeze_batch_size, Unfreeze_batch_size=Unfreeze_batch_size, Freeze_Train=Freeze_Train, \Init_lr=Init_lr, Min_lr=Min_lr, optimizer_type=optimizer_type, momentum=momentum,lr_decay_type=lr_decay_type, \save_period=save_period, save_dir=save_dir, num_workers=num_workers, num_train=num_train, num_val=num_val)# ---------------------------------------------------------##   总训练世代指的是遍历全部数据的总次数#   总训练步长指的是梯度下降的总次数#   每个训练世代包含若干训练步长,每个训练步长进行一次梯度下降。#   此处仅建议最低训练世代,上不封顶,计算时只考虑了解冻部分# ----------------------------------------------------------#wanted_step = 5e4 if optimizer_type == "sgd" else 1.5e4total_step = num_train // Unfreeze_batch_size * UnFreeze_Epochif total_step <= wanted_step:if num_train // Unfreeze_batch_size == 0:raise ValueError('数据集过小,无法进行训练,请扩充数据集。')wanted_epoch = wanted_step // (num_train // Unfreeze_batch_size) + 1print("\n\033[1;33;44m[Warning] 使用%s优化器时,建议将训练总步长设置到%d以上。\033[0m" % (optimizer_type, wanted_step))print("\033[1;33;44m[Warning] 本次运行的总训练数据量为%d,Unfreeze_batch_size为%d,共训练%d个Epoch,计算出总训练步长为%d。\033[0m" % (num_train, Unfreeze_batch_size, UnFreeze_Epoch, total_step))print("\033[1;33;44m[Warning] 由于总训练步长为%d,小于建议总步长%d,建议设置总世代为%d。\033[0m" % (total_step, wanted_step, wanted_epoch))# ------------------------------------------------------##   主干特征提取网络特征通用,冻结训练可以加快训练速度#   也可以在训练初期防止权值被破坏#   Init_Epoch为起始世代#   Freeze_Epoch为冻结训练的世代#   UnFreeze_Epoch总训练世代#   提示OOM或者显存不足请调小Batch_size# ------------------------------------------------------#if True:UnFreeze_flag = False# ------------------------------------##   冻结一定部分训练# ------------------------------------#if Freeze_Train:for param in model.backbone.parameters():param.requires_grad = False#冻结主干网络的训练# -------------------------------------------------------------------##   如果不冻结训练的话,直接设置batch_size为Unfreeze_batch_size# -------------------------------------------------------------------#batch_size = Freeze_batch_size if Freeze_Train else Unfreeze_batch_size# -------------------------------------------------------------------##   判断当前batch_size,自适应调整学习率# -------------------------------------------------------------------#nbs = 64lr_limit_max = 1e-3 if optimizer_type == 'adam' else 5e-2lr_limit_min = 3e-4 if optimizer_type == 'adam' else 5e-4Init_lr_fit = min(max(batch_size / nbs * Init_lr, lr_limit_min), lr_limit_max)Min_lr_fit = min(max(batch_size / nbs * Min_lr, lr_limit_min * 1e-2), lr_limit_max * 1e-2)# ---------------------------------------##   根据optimizer_type选择优化器# ---------------------------------------#pg0, pg1, pg2 = [], [], []for k, v in model.named_modules():if hasattr(v, "bias") and isinstance(v.bias, nn.Parameter):pg2.append(v.bias)if isinstance(v, nn.BatchNorm2d) or "bn" in k:pg0.append(v.weight)elif hasattr(v, "weight") and isinstance(v.weight, nn.Parameter):pg1.append(v.weight)optimizer = {'adam': optim.Adam(pg0, Init_lr_fit, betas=(momentum, 0.999)),'sgd': optim.SGD(pg0, Init_lr_fit, momentum=momentum, nesterov=True)}[optimizer_type]optimizer.add_param_group({"params": pg1, "weight_decay": weight_decay})optimizer.add_param_group({"params": pg2})# ---------------------------------------##   获得学习率下降的公式# ---------------------------------------#lr_scheduler_func = get_lr_scheduler(lr_decay_type, Init_lr_fit, Min_lr_fit, UnFreeze_Epoch)# ---------------------------------------##   判断每一个世代的长度# ---------------------------------------#epoch_step = num_train // batch_sizeepoch_step_val = num_val // batch_sizeif epoch_step == 0 or epoch_step_val == 0:raise ValueError("数据集过小,无法继续进行训练,请扩充数据集。")if ema:ema.updates = epoch_step * Init_Epoch# ---------------------------------------##   构建数据集加载器。# ---------------------------------------#print(train_lines[0])train_dataset = YoloDataset(train_lines, input_shape, num_classes, anchors, anchors_mask,epoch_length=UnFreeze_Epoch, \mosaic=mosaic, mixup=mixup, mosaic_prob=mosaic_prob, mixup_prob=mixup_prob,train=True, special_aug_ratio=special_aug_ratio)val_dataset = YoloDataset(val_lines, input_shape, num_classes, anchors, anchors_mask,epoch_length=UnFreeze_Epoch, \mosaic=False, mixup=False, mosaic_prob=0, mixup_prob=0, train=False,special_aug_ratio=0)if distributed:#如果分布式训练train_sampler = torch.utils.data.distributed.DistributedSampler(train_dataset, shuffle=True, )val_sampler = torch.utils.data.distributed.DistributedSampler(val_dataset, shuffle=False, )batch_size = batch_size // ngpus_per_nodeshuffle = Falseelse:train_sampler = Noneval_sampler = Noneshuffle = Truegen = DataLoader(train_dataset, shuffle=shuffle, batch_size=batch_size, num_workers=num_workers,pin_memory=True,drop_last=True, collate_fn=yolo_dataset_collate, sampler=train_sampler)gen_val = DataLoader(val_dataset, shuffle=shuffle, batch_size=batch_size, num_workers=num_workers,pin_memory=True,drop_last=True, collate_fn=yolo_dataset_collate, sampler=val_sampler)# ----------------------##   记录eval的map曲线# ----------------------#if local_rank == 0:eval_callback = EvalCallback(model, input_shape, anchors, anchors_mask, class_names, num_classes, val_lines,log_dir, Cuda, \eval_flag=eval_flag, period=eval_period)else:eval_callback = None# ---------------------------------------##   开始模型训练# ---------------------------------------#for epoch in range(Init_Epoch, UnFreeze_Epoch):# ---------------------------------------##   如果模型有冻结学习部分#   则解冻,并设置参数# ---------------------------------------#if epoch >= Freeze_Epoch and not UnFreeze_flag and Freeze_Train:batch_size = Unfreeze_batch_size# -------------------------------------------------------------------##   判断当前batch_size,自适应调整学习率# -------------------------------------------------------------------#nbs = 64lr_limit_max = 1e-3 if optimizer_type == 'adam' else 5e-2lr_limit_min = 3e-4 if optimizer_type == 'adam' else 5e-4Init_lr_fit = min(max(batch_size / nbs * Init_lr, lr_limit_min), lr_limit_max)Min_lr_fit = min(max(batch_size / nbs * Min_lr, lr_limit_min * 1e-2), lr_limit_max * 1e-2)# ---------------------------------------##   获得学习率下降的公式# ---------------------------------------#lr_scheduler_func = get_lr_scheduler(lr_decay_type, Init_lr_fit, Min_lr_fit, UnFreeze_Epoch)for param in model.backbone.parameters():param.requires_grad = Trueepoch_step = num_train // batch_sizeepoch_step_val = num_val // batch_sizeif epoch_step == 0 or epoch_step_val == 0:raise ValueError("数据集过小,无法继续进行训练,请扩充数据集。")if ema:ema.updates = epoch_step * epochif distributed:batch_size = batch_size // ngpus_per_nodegen = DataLoader(train_dataset, shuffle=shuffle, batch_size=batch_size, num_workers=num_workers,pin_memory=True,drop_last=True, collate_fn=yolo_dataset_collate, sampler=train_sampler)gen_val = DataLoader(val_dataset, shuffle=shuffle, batch_size=batch_size, num_workers=num_workers,pin_memory=True,drop_last=True, collate_fn=yolo_dataset_collate, sampler=val_sampler)UnFreeze_flag = Truegen.dataset.epoch_now = epochgen_val.dataset.epoch_now = epochif distributed:train_sampler.set_epoch(epoch)set_optimizer_lr(optimizer, lr_scheduler_func, epoch)fit_one_epoch(model_train, model, ema, yolo_loss, loss_history, eval_callback, optimizer, epoch, epoch_step,epoch_step_val, gen, gen_val, UnFreeze_Epoch, Cuda, fp16, scaler, save_period, save_dir,local_rank)if distributed:dist.barrier()if local_rank == 0:loss_history.writer.close()
以上代码中如下图:
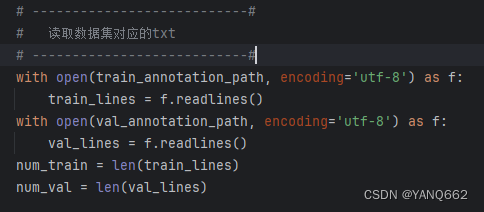
该段代码是读取第一步生成的2007_train.txt文件里的数据,打印train_lines是个列表,打印train_lines[0]如下:
![]()
然后放到下面代码处理数据,代码如下:
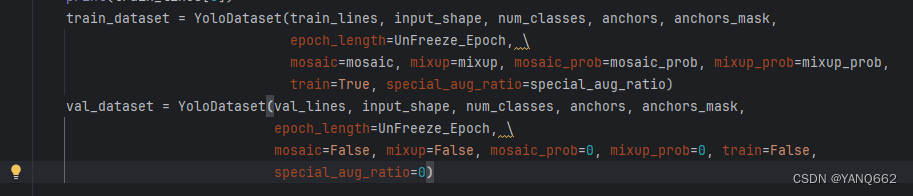
3.dataloader.py文件处理数据
该文件包含了yolov5处理数据的几个方法,(1)对数据进行随机的马赛克处理,并将4张图片贴在一张(640,640,3)大小的图片上;(2)对数据进行随机的缩放、翻转处理;(3)对数据进行随机两张图片各0.5的比例进行叠加处理。当然,在进行以上不同的图片处理时,我们的图片中的目标的位置坐标也会跟着发生变化,所以在处理图片的同时要同时处理目标的位置坐标。
该文件的代码及注释如下:
from random import sample, shuffleimport cv2
import numpy as np
import torch
from PIL import Image
from torch.utils.data.dataset import Datasetfrom utils.utils import cvtColor, preprocess_inputclass YoloDataset(Dataset):def __init__(self, annotation_lines, input_shape, num_classes, anchors, anchors_mask, epoch_length, \mosaic, mixup, mosaic_prob, mixup_prob, train, special_aug_ratio = 0.7):super(YoloDataset, self).__init__()self.annotation_lines   = annotation_linesself.input_shape        = input_shapeself.num_classes        = num_classesself.anchors            = anchorsself.anchors_mask       = anchors_maskself.epoch_length       = epoch_lengthself.mosaic             = mosaicself.mosaic_prob        = mosaic_probself.mixup              = mixupself.mixup_prob         = mixup_probself.train              = trainself.special_aug_ratio  = special_aug_ratioself.epoch_now          = -1self.length             = len(self.annotation_lines)self.bbox_attrs         = 5 + num_classesself.threshold          = 4def __len__(self):return self.lengthdef __getitem__(self, index):index       = index % self.length#---------------------------------------------------##   训练时进行数据的随机增强#   验证时不进行数据的随机增强#---------------------------------------------------#if self.mosaic and self.rand() < self.mosaic_prob and self.epoch_now < self.epoch_length * self.special_aug_ratio:lines = sample(self.annotation_lines, 3)lines.append(self.annotation_lines[index])#len(lines)=4shuffle(lines)# 1.马赛克,将4张图片贴在一张(640,640,3)的图片上image, box  = self.get_random_data_with_Mosaic(lines, self.input_shape)if self.mixup and self.rand() < self.mixup_prob:lines           = sample(self.annotation_lines, 1)# 2. 对图像进行缩放并且进行长和宽的扭曲,并进行图像的翻转及给图像加上灰条image_2, box_2  = self.get_random_data(lines[0], self.input_shape, random = self.train)# cv2.imshow("ss",image_2)# cv2.waitKey(0)# 3. 对两张图片进行各0.5的比例重叠(在image, box, image_2, box_2  马赛克和缩放图像中随机重叠)image, box      = self.get_random_data_with_MixUp(image, box, image_2, box_2)# iii=np.array(image,dtype=np.int8)# cv2.imshow("ss",iii)# cv2.waitKey(0)else:#如果不进行马赛克和图片之间的重叠,则只需要对图片进行缩放或者翻转image, box      = self.get_random_data(self.annotation_lines[index], self.input_shape, random = self.train)#(640,640,3)===>>>>(3,640,640)#将box转换为np类型的数据image       = np.transpose(preprocess_input(np.array(image, dtype=np.float32)), (2, 0, 1))box         = np.array(box, dtype=np.float32)if len(box) != 0:#---------------------------------------------------##   对真实框进行归一化,调整到0-1之间#---------------------------------------------------#box[:, [0, 2]] = box[:, [0, 2]] / self.input_shape[1]box[:, [1, 3]] = box[:, [1, 3]] / self.input_shape[0]#---------------------------------------------------##   序号为0、1的部分,为真实框的中心#   序号为2、3的部分,为真实框的宽高#   序号为4的部分,为真实框的种类#---------------------------------------------------#box[:, 2:4] = box[:, 2:4] - box[:, 0:2]box[:, 0:2] = box[:, 0:2] + box[:, 2:4] / 2y_true = self.get_target(box)#y_true[0].shape==>(3, 20, 20, 6)  y_true[1].shape==>(3, 40, 40, 6)   y_true[2].shape==>(3, 80, 80, 6)  类的个数1+5=6return image, box, y_truedef rand(self, a=0, b=1):return np.random.rand()*(b-a) + adef get_random_data(self, annotation_line, input_shape, jitter=.3, hue=.1, sat=0.7, val=0.4, random=True):line    = annotation_line.split()#['图片的绝对路径', '206,79,324,107,0', '140,108,278,184,0']===>图片路径,类的位置与类名称#------------------------------##   读取图像并转换成RGB图像#------------------------------#image   = Image.open(line[0])#line[0]==》图片的绝对路径image   = cvtColor(image)#------------------------------##   获得图像的高宽与目标高宽#------------------------------#iw, ih  = image.sizeh, w    = input_shape#------------------------------##   获得预测框#------------------------------#box     = np.array([np.array(list(map(int,box.split(',')))) for box in line[1:]])if not random:scale = min(w/iw, h/ih)nw = int(iw*scale)nh = int(ih*scale)dx = (w-nw)//2dy = (h-nh)//2#---------------------------------##   将图像多余的部分加上灰条#---------------------------------#image       = image.resize((nw,nh), Image.BICUBIC)new_image   = Image.new('RGB', (w,h), (128,128,128))new_image.paste(image, (dx, dy))image_data  = np.array(new_image, np.float32)#---------------------------------##   对真实框进行调整#---------------------------------#if len(box)>0:np.random.shuffle(box)box[:, [0,2]] = box[:, [0,2]]*nw/iw + dxbox[:, [1,3]] = box[:, [1,3]]*nh/ih + dybox[:, 0:2][box[:, 0:2]<0] = 0box[:, 2][box[:, 2]>w] = wbox[:, 3][box[:, 3]>h] = hbox_w = box[:, 2] - box[:, 0]box_h = box[:, 3] - box[:, 1]box = box[np.logical_and(box_w>1, box_h>1)] # discard invalid boxreturn image_data, box#------------------------------------------##   对图像进行缩放并且进行长和宽的扭曲#------------------------------------------#new_ar = iw/ih * self.rand(1-jitter,1+jitter) / self.rand(1-jitter,1+jitter)scale = self.rand(.25, 2)if new_ar < 1:nh = int(scale*h)nw = int(nh*new_ar)else:nw = int(scale*w)nh = int(nw/new_ar)image = image.resize((nw,nh), Image.BICUBIC)#------------------------------------------##   将图像多余的部分加上灰条#------------------------------------------#dx = int(self.rand(0, w-nw))dy = int(self.rand(0, h-nh))new_image = Image.new('RGB', (w,h), (128,128,128))new_image.paste(image, (dx, dy))image = new_image#------------------------------------------##   翻转图像#------------------------------------------#flip = self.rand()<.5if flip: image = image.transpose(Image.FLIP_LEFT_RIGHT)image_data      = np.array(image, np.uint8)#---------------------------------##   对图像进行色域变换#   计算色域变换的参数#---------------------------------#r               = np.random.uniform(-1, 1, 3) * [hue, sat, val] + 1#---------------------------------##   将图像转到HSV上#---------------------------------#hue, sat, val   = cv2.split(cv2.cvtColor(image_data, cv2.COLOR_RGB2HSV))dtype           = image_data.dtype#---------------------------------##   应用变换#---------------------------------#x       = np.arange(0, 256, dtype=r.dtype)lut_hue = ((x * r[0]) % 180).astype(dtype)lut_sat = np.clip(x * r[1], 0, 255).astype(dtype)lut_val = np.clip(x * r[2], 0, 255).astype(dtype)image_data = cv2.merge((cv2.LUT(hue, lut_hue), cv2.LUT(sat, lut_sat), cv2.LUT(val, lut_val)))image_data = cv2.cvtColor(image_data, cv2.COLOR_HSV2RGB)#---------------------------------##   对真实框进行调整#---------------------------------#if len(box)>0:np.random.shuffle(box)box[:, [0,2]] = box[:, [0,2]]*nw/iw + dxbox[:, [1,3]] = box[:, [1,3]]*nh/ih + dyif flip: box[:, [0,2]] = w - box[:, [2,0]]box[:, 0:2][box[:, 0:2]<0] = 0box[:, 2][box[:, 2]>w] = wbox[:, 3][box[:, 3]>h] = hbox_w = box[:, 2] - box[:, 0]box_h = box[:, 3] - box[:, 1]box = box[np.logical_and(box_w>1, box_h>1)] return image_data, boxdef merge_bboxes(self, bboxes, cutx, cuty):merge_bbox = []for i in range(len(bboxes)):for box in bboxes[i]:tmp_box = []x1, y1, x2, y2 = box[0], box[1], box[2], box[3]if i == 0:if y1 > cuty or x1 > cutx:continueif y2 >= cuty and y1 <= cuty:y2 = cutyif x2 >= cutx and x1 <= cutx:x2 = cutxif i == 1:if y2 < cuty or x1 > cutx:continueif y2 >= cuty and y1 <= cuty:y1 = cutyif x2 >= cutx and x1 <= cutx:x2 = cutxif i == 2:if y2 < cuty or x2 < cutx:continueif y2 >= cuty and y1 <= cuty:y1 = cutyif x2 >= cutx and x1 <= cutx:x1 = cutxif i == 3:if y1 > cuty or x2 < cutx:continueif y2 >= cuty and y1 <= cuty:y2 = cutyif x2 >= cutx and x1 <= cutx:x1 = cutxtmp_box.append(x1)tmp_box.append(y1)tmp_box.append(x2)tmp_box.append(y2)tmp_box.append(box[-1])merge_bbox.append(tmp_box)return merge_bboxdef get_random_data_with_Mosaic(self, annotation_line, input_shape, jitter=0.3, hue=.1, sat=0.7, val=0.4):h, w = input_shapemin_offset_x = self.rand(0.3, 0.7)min_offset_y = self.rand(0.3, 0.7)image_datas = [] box_datas   = []index       = 0for line in annotation_line:#---------------------------------##   每一行进行分割#---------------------------------#line_content = line.split()#---------------------------------##   打开图片#---------------------------------#image = Image.open(line_content[0])image = cvtColor(image)#---------------------------------##   图片的大小#---------------------------------#iw, ih = image.size#---------------------------------##   保存框的位置#---------------------------------#box = np.array([np.array(list(map(int,box.split(',')))) for box in line_content[1:]])# box: ['130,101,213,139,0', '215,88,257,107,0']#---------------------------------##   1.是否翻转图片#---------------------------------#flip = self.rand()<.5if flip and len(box)>0:image = image.transpose(Image.FLIP_LEFT_RIGHT)#图片左右翻转box[:, [0,2]] = iw - box[:, [2,0]]#目标的横坐标也跟着变换#------------------------------------------##   2.对图像进行缩放并且进行长和宽的扭曲#------------------------------------------#new_ar = iw/ih * self.rand(1-jitter,1+jitter) / self.rand(1-jitter,1+jitter)scale = self.rand(.4, 1)if new_ar < 1:nh = int(scale*h)nw = int(nh*new_ar)else:nw = int(scale*w)nh = int(nw/new_ar)image = image.resize((nw, nh), Image.BICUBIC)#-----------------------------------------------##   将图片进行放置,分别对应四张分割图片的位置#-----------------------------------------------#if index == 0:dx = int(w*min_offset_x) - nwdy = int(h*min_offset_y) - nhelif index == 1:dx = int(w*min_offset_x) - nwdy = int(h*min_offset_y)elif index == 2:dx = int(w*min_offset_x)dy = int(h*min_offset_y)elif index == 3:dx = int(w*min_offset_x)dy = int(h*min_offset_y) - nhnew_image = Image.new('RGB', (w,h), (128,128,128))new_image.paste(image, (dx, dy))image_data = np.array(new_image)#(640, 640, 3)# cv2.imshow("ss",image_data)# cv2.waitKey(0)index = index + 1box_data = []#---------------------------------##   对box进行重新处理#---------------------------------#if len(box)>0:np.random.shuffle(box)box[:, [0,2]] = box[:, [0,2]]*nw/iw + dxbox[:, [1,3]] = box[:, [1,3]]*nh/ih + dybox[:, 0:2][box[:, 0:2]<0] = 0box[:, 2][box[:, 2]>w] = wbox[:, 3][box[:, 3]>h] = hbox_w = box[:, 2] - box[:, 0]box_h = box[:, 3] - box[:, 1]box = box[np.logical_and(box_w>1, box_h>1)]box_data = np.zeros((len(box),5))box_data[:len(box)] = boximage_datas.append(image_data)#保存的是每张缩放后贴在(640,640,3)上的图片box_datas.append(box_data)#保存缩放后图片的目标所对应的位置#---------------------------------##   将图片分割,放在一起#---------------------------------#cutx = int(w * min_offset_x)cuty = int(h * min_offset_y)new_image = np.zeros([h, w, 3])new_image[:cuty, :cutx, :] = image_datas[0][:cuty, :cutx, :]new_image[cuty:, :cutx, :] = image_datas[1][cuty:, :cutx, :]new_image[cuty:, cutx:, :] = image_datas[2][cuty:, cutx:, :]new_image[:cuty, cutx:, :] = image_datas[3][:cuty, cutx:, :]new_image       = np.array(new_image, np.uint8)#将4张图片贴在一张(640,640,3)的图片上# cv2.imshow("ss",new_image)# cv2.waitKey(0)#---------------------------------##   对图像进行色域变换#   计算色域变换的参数#---------------------------------#r               = np.random.uniform(-1, 1, 3) * [hue, sat, val] + 1#---------------------------------##   将图像转到HSV上#---------------------------------#hue, sat, val   = cv2.split(cv2.cvtColor(new_image, cv2.COLOR_RGB2HSV))dtype           = new_image.dtype#---------------------------------##   应用变换#---------------------------------#x       = np.arange(0, 256, dtype=r.dtype)lut_hue = ((x * r[0]) % 180).astype(dtype)lut_sat = np.clip(x * r[1], 0, 255).astype(dtype)lut_val = np.clip(x * r[2], 0, 255).astype(dtype)new_image = cv2.merge((cv2.LUT(hue, lut_hue), cv2.LUT(sat, lut_sat), cv2.LUT(val, lut_val)))new_image = cv2.cvtColor(new_image, cv2.COLOR_HSV2RGB)#---------------------------------##   对框进行进一步的处理#---------------------------------#new_boxes = self.merge_bboxes(box_datas, cutx, cuty)# print(new_boxes)# cv2.imshow("ss",new_image)# cv2.waitKey(0)return new_image, new_boxesdef get_random_data_with_MixUp(self, image_1, box_1, image_2, box_2):new_image = np.array(image_1, np.float32) * 0.5 + np.array(image_2, np.float32) * 0.5if len(box_1) == 0:new_boxes = box_2elif len(box_2) == 0:new_boxes = box_1else:new_boxes = np.concatenate([box_1, box_2], axis=0)return new_image, new_boxesdef get_near_points(self, x, y, i, j):sub_x = x - isub_y = y - jif sub_x > 0.5 and sub_y > 0.5:return [[0, 0], [1, 0], [0, 1]]elif sub_x < 0.5 and sub_y > 0.5:return [[0, 0], [-1, 0], [0, 1]]elif sub_x < 0.5 and sub_y < 0.5:return [[0, 0], [-1, 0], [0, -1]]else:return [[0, 0], [1, 0], [0, -1]]def get_target(self, targets):#-----------------------------------------------------------##   一共有三个特征层数#-----------------------------------------------------------#num_layers  = len(self.anchors_mask)input_shape = np.array(self.input_shape, dtype='int32')grid_shapes = [input_shape // {0:32, 1:16, 2:8, 3:4}[l] for l in range(num_layers)]y_true      = [np.zeros((len(self.anchors_mask[l]), grid_shapes[l][0], grid_shapes[l][1], self.bbox_attrs), dtype='float32') for l in range(num_layers)]box_best_ratio = [np.zeros((len(self.anchors_mask[l]), grid_shapes[l][0], grid_shapes[l][1]), dtype='float32') for l in range(num_layers)]if len(targets) == 0:return y_truefor l in range(num_layers):in_h, in_w      = grid_shapes[l]anchors         = np.array(self.anchors) / {0:32, 1:16, 2:8, 3:4}[l]batch_target = np.zeros_like(targets)#-------------------------------------------------------##   计算出正样本在特征层上的中心点#-------------------------------------------------------#batch_target[:, [0,2]]  = targets[:, [0,2]] * in_wbatch_target[:, [1,3]]  = targets[:, [1,3]] * in_hbatch_target[:, 4]      = targets[:, 4]#-------------------------------------------------------##   wh                          : num_true_box, 2#   np.expand_dims(wh, 1)       : num_true_box, 1, 2#   anchors                     : 9, 2#   np.expand_dims(anchors, 0)  : 1, 9, 2#   #   ratios_of_gt_anchors代表每一个真实框和每一个先验框的宽高的比值#   ratios_of_gt_anchors    : num_true_box, 9, 2#   ratios_of_anchors_gt代表每一个先验框和每一个真实框的宽高的比值#   ratios_of_anchors_gt    : num_true_box, 9, 2##   ratios                  : num_true_box, 9, 4#   max_ratios代表每一个真实框和每一个先验框的宽高的比值的最大值#   max_ratios              : num_true_box, 9#-------------------------------------------------------#ratios_of_gt_anchors = np.expand_dims(batch_target[:, 2:4], 1) / np.expand_dims(anchors, 0)ratios_of_anchors_gt = np.expand_dims(anchors, 0) / np.expand_dims(batch_target[:, 2:4], 1)ratios               = np.concatenate([ratios_of_gt_anchors, ratios_of_anchors_gt], axis = -1)max_ratios           = np.max(ratios, axis = -1)for t, ratio in enumerate(max_ratios):#-------------------------------------------------------##   ratio : 9#-------------------------------------------------------#over_threshold = ratio < self.thresholdover_threshold[np.argmin(ratio)] = Truefor k, mask in enumerate(self.anchors_mask[l]):if not over_threshold[mask]:continue#----------------------------------------##   获得真实框属于哪个网格点#   x  1.25     => 1#   y  3.75     => 3#----------------------------------------#i = int(np.floor(batch_target[t, 0]))j = int(np.floor(batch_target[t, 1]))offsets = self.get_near_points(batch_target[t, 0], batch_target[t, 1], i, j)for offset in offsets:local_i = i + offset[0]local_j = j + offset[1]if local_i >= in_w or local_i < 0 or local_j >= in_h or local_j < 0:continueif box_best_ratio[l][k, local_j, local_i] != 0:if box_best_ratio[l][k, local_j, local_i] > ratio[mask]:y_true[l][k, local_j, local_i, :] = 0else:continue#----------------------------------------##   取出真实框的种类#----------------------------------------#c = int(batch_target[t, 4])#----------------------------------------##   tx、ty代表中心调整参数的真实值#----------------------------------------#y_true[l][k, local_j, local_i, 0] = batch_target[t, 0]y_true[l][k, local_j, local_i, 1] = batch_target[t, 1]y_true[l][k, local_j, local_i, 2] = batch_target[t, 2]y_true[l][k, local_j, local_i, 3] = batch_target[t, 3]y_true[l][k, local_j, local_i, 4] = 1y_true[l][k, local_j, local_i, c + 5] = 1#----------------------------------------##   获得当前先验框最好的比例#----------------------------------------#box_best_ratio[l][k, local_j, local_i] = ratio[mask]return y_true# DataLoader中collate_fn使用
def yolo_dataset_collate(batch):images  = []bboxes  = []y_trues = [[] for _ in batch[0][2]]for img, box, y_true in batch:images.append(img)bboxes.append(box)for i, sub_y_true in enumerate(y_true):y_trues[i].append(sub_y_true)images  = torch.from_numpy(np.array(images)).type(torch.FloatTensor)bboxes  = [torch.from_numpy(ann).type(torch.FloatTensor) for ann in bboxes]y_trues = [torch.from_numpy(np.array(ann, np.float32)).type(torch.FloatTensor) for ann in y_trues]return images, bboxes,y_trues
该文件最终返回变换后的images, bboxes加一个y_trues,其中y_true是(3, 80, 80, 6),(3, 40, 40, 6),(3, 20, 20, 6),这里三个大小的数组分别对应主干网络的是80X80,40X40,20X20的三个输出特征层,3表示每个特征层的每个点有3个大小和形状不同的候选框anchor,6表示5+1,其中1表示总共训练1个类,5=4+1,其中1表示有没有目标(有目标或者只有背景),4表示如果有目标,那么需要获得该目标的中心坐标(x,y)及目标的长和宽(w,h)。