1、准备
ESP32 单片机开发板
ST7789 LCD 模块(240 * 320 像素)
杜邦线
2、接线
| LCD | 功能 | ESP32 |
|---|---|---|
| VCC | 供电电压正极 | 3.3V 、 5V |
| GND | 供电电压负极 | GND |
| IDN / MOSI | SPI 接口数据 引脚 | 23 |
| CLK | 串行接口时钟信号 | 18 |
| CS | 芯片选择引脚;低电平有效 | 5 |
| DC | 显示数据 / 命令选择引脚 | 27 |
| RST | 复位引脚,低电平有效 | 26 |
| BL | 背光阴极 | 4 |
3、安装库
| TFT_eSPI | 通过SPI方式驱动LCD,支持多种LCD常用驱动IC |
| AnimatedGIF | GIF的解码库,用来显示GIF动图 |
( 添加 TFT_eSPI 库提示找不到 SPI.h,在 platformio.ini 文件中添加 lib_ldf_mode = deep+)
TFT_eSPI 库修改配置文件
该库有 User_Setup.h 和 User_Setup_Select.h 两个配置文件,支持 ① 自定义参数或 ② 使用已有配置驱动TFT屏幕。
选择 LCD 型号
// Only define one driver, the other ones must be commented out
//#define ILI9341_DRIVER       // Generic driver for common displays
//#define ILI9341_2_DRIVER     // Alternative ILI9341 driver, see https://github.com/Bodmer/TFT_eSPI/issues/1172
//#define ST7735_DRIVER      // Define additional parameters below for this display
//#define ILI9163_DRIVER     // Define additional parameters below for this display
//#define S6D02A1_DRIVER
//#define RPI_ILI9486_DRIVER // 20MHz maximum SPI
//#define HX8357D_DRIVER
//#define ILI9481_DRIVER
//#define ILI9486_DRIVER
//#define ILI9488_DRIVER     // WARNING: Do not connect ILI9488 display SDO to MISO if other devices share the SPI bus (TFT SDO does NOT tristate when CS is high)
#define ST7789_DRIVER      // Full configuration option, define additional parameters below for this display
//#define ST7789_2_DRIVER    // Minimal configuration option, define additional parameters below for this display
//#define R61581_DRIVER
//#define RM68140_DRIVER
//#define ST7796_DRIVER
//#define SSD1351_DRIVER
//#define SSD1963_480_DRIVER
//#define SSD1963_800_DRIVER
//#define SSD1963_800ALT_DRIVER
//#define ILI9225_DRIVER
//#define GC9A01_DRIVER
选择显示颜色
// #define TFT_RGB_ORDER TFT_RGB  // Colour order Red-Green-Blue
#define TFT_RGB_ORDER TFT_BGR  // Colour order Blue-Green-Red
选择 LCD 屏幕尺寸
// For ST7789, ST7735, ILI9163 and GC9A01 ONLY, define the pixel width and height in portrait orientation
// #define TFT_WIDTH  80
// #define TFT_WIDTH  128
// #define TFT_WIDTH  172 // ST7789 172 x 320
// #define TFT_WIDTH  170 // ST7789 170 x 320
#define TFT_WIDTH  240 // ST7789 240 x 240 and 240 x 320
// #define TFT_HEIGHT 160
// #define TFT_HEIGHT 128
//#define TFT_HEIGHT 240 // ST7789 240 x 240
#define TFT_HEIGHT 320 // ST7789 240 x 320
// #define TFT_HEIGHT 240 // GC9A01 240 x 240
选择 LCD 屏幕连接单片机引脚
// For ESP32 Dev board (only tested with ILI9341 display)
// The hardware SPI can be mapped to any pins#define TFT_MISO 19
#define TFT_MOSI 23
#define TFT_SCLK 18
#define TFT_CS   5  // Chip select control pin
#define TFT_DC   27  // Data Command control pin
#define TFT_RST  26  // Reset pin (could connect to RST pin)
//#define TFT_RST  -1  // Set TFT_RST to -1 if display RESET is connected to ESP32 board RST
TFT_eSPI 库一些 API
初始化
tft.init();  // 初始化
tft.fillScreen(uint32_t color); // 填充全屏幕
tft.invertDisplay(bool i);  // 屏幕旋转,反转显示颜色i = 1反转,i = 0正常显示设置
设置起始坐标位置和字号
void setCursor(int16_t x, int16_t y);   // 设置文本显示坐标,默认以文本左上角为参考点,可以改变参考点
void setCursor(int16_t x, int16_t y, uint8_t font); // 设置文本显示坐标,和文本的字体
设置字体颜色
void setTextColor(uint16_t color);  // 设置文本颜色
void setTextColor(uint16_t fgcolor, uint16_t bgcolor);  // 设置文本颜色与背景色
设置字体大小
void setTextSize(uint8_t size); // 设置文本大小,文本大小范围为 1~7 的整数显示字体
tft.print("Hello World!");
tft.println("Hello World!");
显示字符串(居左)
int16_t drawString(const String &string, int32_t x, int32_t y)
int16_t drawString(const char *string, int32_t x, int32_t y)
int16_t drawString(const String &string, int32_t x, int32_t y, uint8_t font)
int16_t drawString(const char *string, int32_t x, int32_t y, uint8_t font)
显示字符串(居中)
int16_t drawCentreString(const char *string, int32_t x, int32_t y, uint8_t font)
int16_t drawCentreString(const String &string, int32_t x, int32_t y, uint8_t font)
显示字符串(居右)
int16_t drawRightString(const char *string, int32_t x, int32_t y, uint8_t font)
int16_t drawRightString(const String &string, int32_t x, int32_t y, uint8_t font)
显示字符
int16_t drawChar(uint16_t uniCode, int32_t x, int32_t y)
int16_t drawChar(uint16_t uniCode, int32_t x, int32_t y, uint8_t font)
void drawChar(int32_t x, int32_t y, uint16_t c, uint32_t color, uint32_t bg, uint8_t size)
显示浮点数
int16_t TFT_eSPI::drawFloat(float floatNumber, uint8_t decimal, int32_t x, int32_t y)
int16_t TFT_eSPI::drawFloat(float floatNumber, uint8_t decimal, int32_t x, int32_t y, uint8_t font)
显示数字
int16_t drawNumber(long intNumber, int32_t x, int32_t y)
int16_t drawNumber(long intNumber, int32_t x, int32_t y, uint8_t font)绘制
画点
void drawPixel(int32_t x, int32_t y, uint32_t color)
画线
void drawLine(int32_t xs, int32_t ys, int32_t xe, int32_t ye, uint32_t color)
画横线(快速)
void drawFastHLine(int32_t x, int32_t y, int32_t w, uint32_t color)
画竖线(快速)
void drawFastVLine(int32_t x, int32_t y, int32_t h, uint32_t color)
画空心圆
tft.drawCircle(100,100,50,TFT_RED);
画实心圆
void fillCircle(int32_t x, int32_t y, int32_t r, uint32_t color)
void fillRect(int32_t x,int32_t y,int32_t w,int32_t h,uint32_t color)
画空心椭圆
tft.drawEllipse(100,100,100,60,TFT_GREENYELLOW);
画实心椭圆
void drawRect(int32_t x, int32_t y, int32_t w, int32_t h, uint32_t color)
画空心矩形
void drawRect(int32_t x, int32_t y, int32_t w, int32_t h, uint32_t color)
画实心矩形
void fillRect(int32_t x, int32_t y, int32_t w, int32_t h, uint32_t color)
画空心圆角矩形
void drawRoundRect(int32_t x, int32_t y, int32_t w, int32_t h, int32_t radius, uint32_t color)
画实心圆角矩形
void fillRoundRect(int32_t x, int32_t y, int32_t w, int32_t h, int32_t radius, uint32_t color)
画空心三角形
void drawTriangle(int32_t x1, int32_t y1, int32_t x2, int32_t y2, int32_t x3, int32_t y3, uint32_t color)
画实心三角形
void fillTriangle(int32_t x1, int32_t y1, int32_t x2, int32_t y2, int32_t x3, int32_t y3, uint32_t color)图片
显示BMP图片
void drawBitmap(int16_t x, int16_t y, const uint8_t *bitmap, int16_t w, int16_t h, uint16_t fgcolor)
void drawBitmap(int16_t x, int16_t y, const uint8_t *bitmap, int16_t w, int16_t h, uint16_t fgcolor, uint16_t bgcolor)
XBM
void drawXBitmap(int16_t x, int16_t y, const uint8_t *bitmap, int16_t w, int16_t h, uint16_t fgcolor)
void drawXBitmap(int16_t x, int16_t y, const uint8_t *bitmap, int16_t w, int16_t h, uint16_t fgcolor, uint16_t bgcolor)
显示图片
void pushImage(int32_t x, int32_t y, int32_t w, int32_t h, const uint16_t *data)
void pushImage(int32_t x, int32_t y, int32_t w, int32_t h, uint16_t *data)
void pushImage(int32_t x, int32_t y, int32_t w, int32_t h, const uint16_t *data, uint16_t transparent)
void pushImage(int32_t x, int32_t y, int32_t w, int32_t h, uint16_t *data, uint16_t transparent)
void pushImage(int32_t x, int32_t y, int32_t w, int32_t h, uint8_t *data, bool bpp8 = true, uint16_t *cmap = (uint16_t *)nullptr)
void pushImage(int32_t x, int32_t y, int32_t w, int32_t h, uint8_t *data, uint8_t transparent, bool bpp8 = true, uint16_t *cmap = (uint16_t *)nullptr)
TFT_eSPI 库画一个带动画的矩形进度条
#include <Arduino.h>
#include <TFT_eSPI.h>
#include <SPI.h>TFT_eSPI tft = TFT_eSPI(); // Invoke custom libraryvoid fillSegment(int x,int y,unsigned int colour)
{int y2 = 10;for (int i = 0; i <  +100; i++){tft.fillRect(x, y,  i,  y2, colour);//如果在这里加个delay会出现扇形动画delay(20);}
}void setup(void)
{tft.init();tft.setRotation(0);tft.fillScreen(TFT_BLACK);
}void loop()
{fillSegment(65, 120, TFT_RED);tft.fillScreen(TFT_BLACK);
}
4、GIF 动图转成数据
方法一
工具是下面参考链接里别的文章里面找到的

工具链接:https://pan.baidu.com/s/1f2rgD1a9PY-_hboPdbfaow
提取码:4h6h
(1)把要转换的图片放到这个工具的目录下(目录不要太深)
(2)打开电脑的运行窗口(win+R),输入“cmd”打开命令窗口
(3)在命令窗口中输入跳转命令,跳转到转换工具所在的目录下
cd C:\Users\NING MEI\Desktop\Windows

(4)运行应用程序,运行成功的话就会生成相应的头文件
格式:应用程序名+空格+图片名+空格+>+空格+转换后的文件名
image_to_c64.exe 1.jpg > image1.h

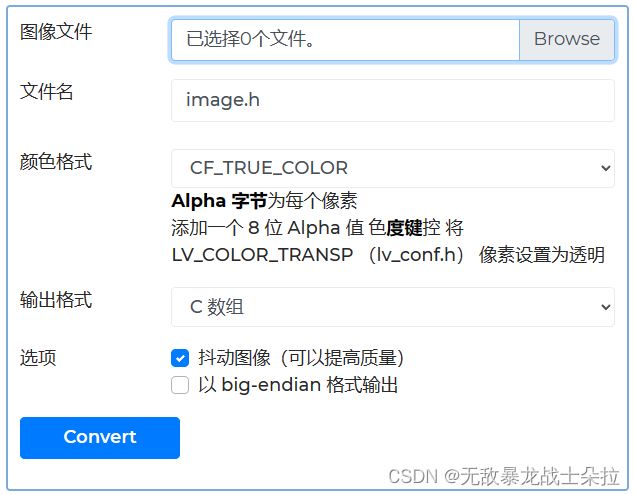
方法二
这个网址直接生成:在线图像转换器 - BMP、JPG 或 PNG 到 C 数组或二进制 |LVGL公司
5、示例代码
代码实现串口接收消息显示对应的图片
#include <SPI.h>
#include <TFT_eSPI.h>
#include <AnimatedGIF.h>#include "1.h"
#include "gif_demo1.h"
#include "gif_demo2.h"
#include "gif_demo3.h"
#include "gif_demo4.h"
#include "gif_demo5.h"#include <pgmspace.h>#define GIF_DEMO0 gif_1
#define GIF_DEMO1 gif_demo1
#define GIF_DEMO2 gif_demo2
#define GIF_DEMO3 gif_demo3
#define GIF_DEMO4 gif_demo4
#define GIF_DEMO5 gif_demo5TFT_eSPI tft = TFT_eSPI();
AnimatedGIF gif;#define NORMAL_SPEED
#define GIF_ENABLE#ifdef GIF_ENABLE
#define DISPLAY_WIDTH tft.width()
#define DISPLAY_HEIGHT tft.height()
#define BUFFER_SIZE 256 // 最优是 >= GIF宽度或宽度的整除#ifdef USE_DMA
uint16_t usTemp[2][BUFFER_SIZE]; // 全局支持DMA使用
#else
uint16_t usTemp[1][BUFFER_SIZE];
#endifbool dmaBuf = 0;// 划线
void GIFDraw(GIFDRAW *pDraw)
{uint8_t *s;uint16_t *d;uint16_t *usPalette;int x, y, iWidth, iCount;// 显示边界检查和裁剪iWidth = pDraw->iWidth;if (iWidth + pDraw->iX > DISPLAY_WIDTH)iWidth = DISPLAY_WIDTH - pDraw->iX;usPalette = pDraw->pPalette;y = pDraw->iY + pDraw->y; // 当前行if (y >= DISPLAY_HEIGHT || pDraw->iX >= DISPLAY_WIDTH || iWidth < 1)return;// Old image disposals = pDraw->pPixels;if (pDraw->ucDisposalMethod == 2) // restore to background color{for (x = 0; x < iWidth; x++){if (s[x] == pDraw->ucTransparent)s[x] = pDraw->ucBackground;}pDraw->ucHasTransparency = 0;}// 将新的像素应用到主图像上if (pDraw->ucHasTransparency) // 如果使用透明度{uint8_t *pEnd, c, ucTransparent = pDraw->ucTransparent;pEnd = s + iWidth;x = 0;iCount = 0; // 计数非透明像素while (x < iWidth){c = ucTransparent - 1;d = &usTemp[0][0];while (c != ucTransparent && s < pEnd && iCount < BUFFER_SIZE) // 在寻找不透明像素时{c = *s++;if (c == ucTransparent) // done, stop{s--; // 看作透明像素}else // 不透明{*d++ = usPalette[c];iCount++;}}if (iCount) // 不透明像素{// 由于线段短,DMA会降低性能tft.setAddrWindow(pDraw->iX + x, y, iCount, 1);tft.pushPixels(usTemp, iCount);x += iCount;iCount = 0;}// 寻找透明像素c = ucTransparent;while (c == ucTransparent && s < pEnd){c = *s++;if (c == ucTransparent)x++;elses--;}}}else{s = pDraw->pPixels;// 展开第一个通道以提高DMA性能// 通过RGB565调色板转换8位像素(已经字节反转)if (iWidth <= BUFFER_SIZE)for (iCount = 0; iCount < iWidth; iCount++)usTemp[dmaBuf][iCount] = usPalette[*s++];elsefor (iCount = 0; iCount < BUFFER_SIZE; iCount++)usTemp[dmaBuf][iCount] = usPalette[*s++];#ifdef USE_DMA // 71.6 fps (ST7796 84.5 fps)tft.dmaWait();tft.setAddrWindow(pDraw->iX, y, iWidth, 1);tft.pushPixelsDMA(&usTemp[dmaBuf][0], iCount);dmaBuf = !dmaBuf;
#else // 57.0 fpstft.setAddrWindow(pDraw->iX, y, iWidth, 1);tft.pushPixels(&usTemp[0][0], iCount);
#endifiWidth -= iCount;while (iWidth > 0) // 如果像素缓冲区小于宽度,则循环{// 通过RGB565调色板转换8位像素(已经字节反转)if (iWidth <= BUFFER_SIZE)for (iCount = 0; iCount < iWidth; iCount++)usTemp[dmaBuf][iCount] = usPalette[*s++];elsefor (iCount = 0; iCount < BUFFER_SIZE; iCount++)usTemp[dmaBuf][iCount] = usPalette[*s++];#ifdef USE_DMAtft.dmaWait();tft.pushPixelsDMA(&usTemp[dmaBuf][0], iCount);dmaBuf = !dmaBuf;
#elsetft.pushPixels(&usTemp[0][0], iCount);
#endifiWidth -= iCount;}}
}
#endifstruct struct_FIG
{String name;int value;
};struct_FIG FIG[] ={{"FIG1", 1},{"FIG2", 2},{"FIG3", 3},{"FIG4", 4}};String read_fig;
uint8_t read_value = 1;
bool flag;void Task1code(void *pvParameters)
{for (;;){while (Serial.available() > 0){char C = Serial.read();read_fig += C;flag = 1;}if (flag){for (struct_FIG &single : FIG){if (read_fig.equals(single.name + "\r\n")){read_value = single.value;read_fig = "";}}read_fig = "";flag = 0;}vTaskDelay(20 / portTICK_PERIOD_MS);}
}void setup()
{Serial.begin(115200);tft.begin();tft.setRotation(0);tft.fillScreen(TFT_BLACK);gif.begin(BIG_ENDIAN_PIXELS);analogWrite(16, 100); // 背景光xTaskCreatePinnedToCore(Task1code, "Task1", 10000, NULL, 1, NULL, 0);
}// 渲染速率由GIF控制
#ifdef NORMAL_SPEED
void loop()
{if (read_value == 1){
#ifdef GIF_DEMO0if (gif.open((uint8_t *)GIF_DEMO0, sizeof(GIF_DEMO0), GIFDraw)){Serial.printf("Successfully opened GIF; Canvas size = %d x %d", gif.getCanvasWidth(), gif.getCanvasHeight());tft.startWrite(); // TFT芯片选择锁低while (gif.playFrame(true, NULL)){yield();}gif.close();tft.endWrite(); // 释放TFT芯片选择其他SPI设备}
#endif}else if (read_value == 2){
#ifdef GIF_DEMO4if (gif.open((uint8_t *)GIF_DEMO4, sizeof(GIF_DEMO4), GIFDraw)){Serial.printf("Successfully opened GIF; Canvas size = %d x %d\n", gif.getCanvasWidth(), gif.getCanvasHeight());tft.startWrite();while (gif.playFrame(true, NULL)){yield();}gif.close();tft.endWrite();}
#endif}elseread_value = 1;
}// 测试最大渲染速度
#else
void loop()
{long lTime = micros();int iFrames = 0;if (gif.open((uint8_t *)GIF_DEMO4, sizeof(GIF_DEMO4), GIFDraw)){tft.startWrite(); // TFT芯片选择锁低while (gif.playFrame(false, NULL)){// 每个循环渲染一帧iFrames++;yield();}gif.close();tft.endWrite(); // 释放TFT芯片选择其他SPI设备lTime = micros() - lTime;Serial.print(iFrames / (lTime / 1000000.0));Serial.println(" fps");}
}#endif
下面链接有别的大佬的源码。
6、参考链接
ESP32 Arduino 学习篇(五)TFT_eSPI库_arduino tft库-CSDN博客
Arduino应用开发——LCD显示GIF动图_lcd显示动画效果-CSDN博客