C# OpenCvSharp Demo - Mat格式化输出、Mat序列化和反序列化

目录
效果
项目
代码
下载
效果
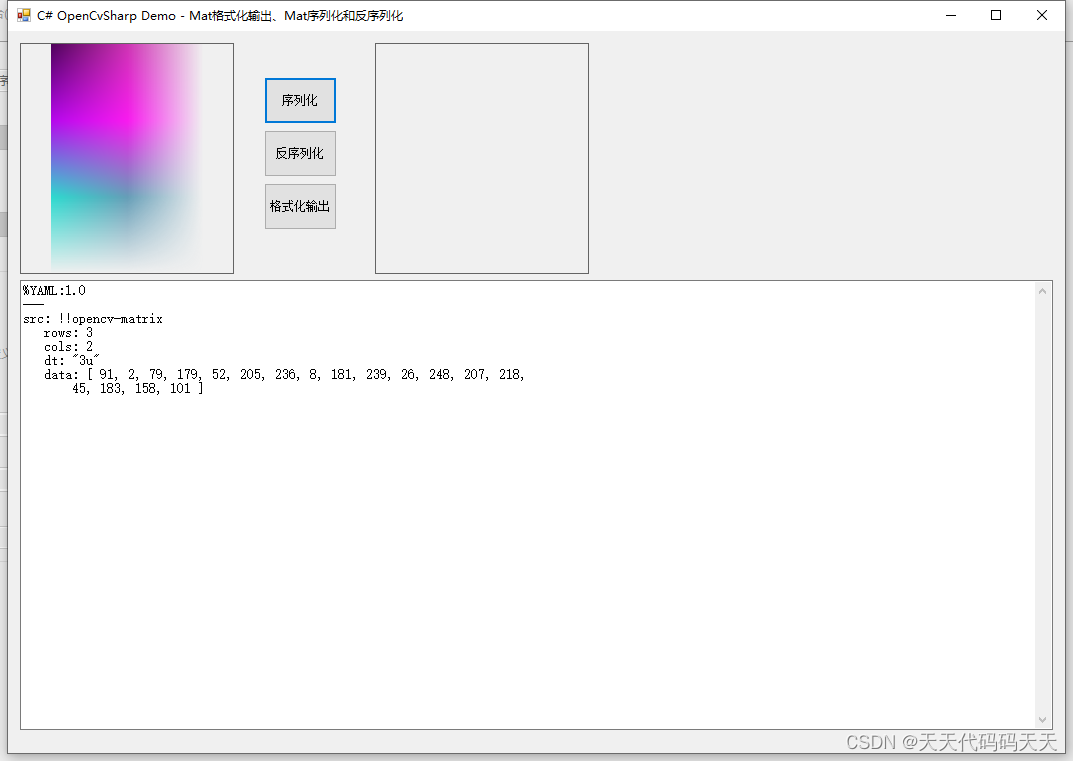
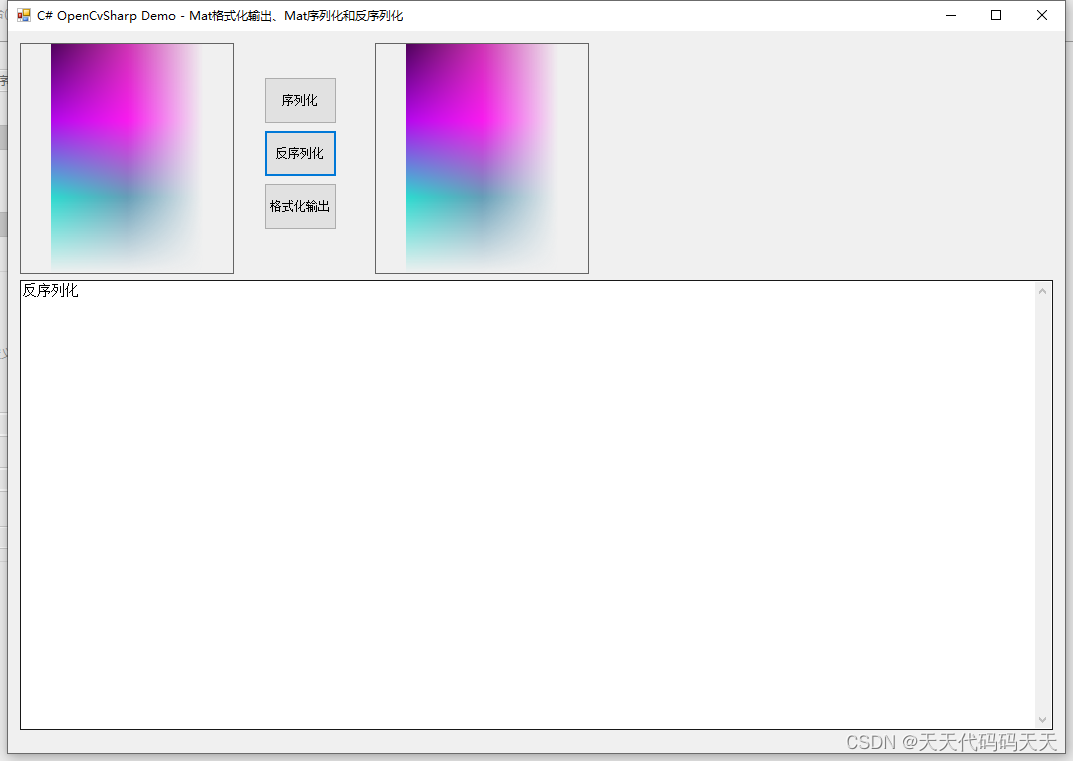
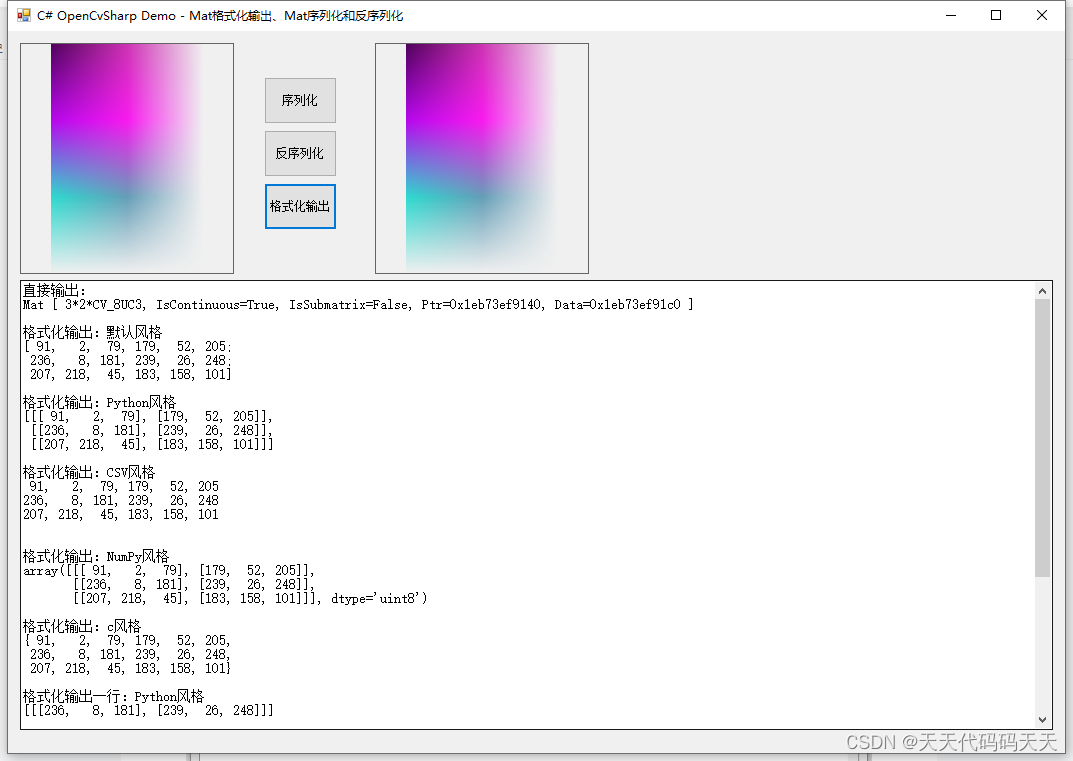
直接输出:Mat [ 3*2*CV_8UC3, IsContinuous=True, IsSubmatrix=False, Ptr=0x1eb73ef9140, Data=0x1eb73ef91c0 ]格式化输出:默认风格[ 91,   2,  79, 179,  52, 205;236,   8, 181, 239,  26, 248;207, 218,  45, 183, 158, 101]格式化输出:Python风格[[[ 91,   2,  79], [179,  52, 205]],[[236,   8, 181], [239,  26, 248]],[[207, 218,  45], [183, 158, 101]]]格式化输出:CSV风格91,   2,  79, 179,  52, 205
236,   8, 181, 239,  26, 248
207, 218,  45, 183, 158, 101格式化输出:NumPy风格array([[[ 91,   2,  79], [179,  52, 205]],[[236,   8, 181], [239,  26, 248]],[[207, 218,  45], [183, 158, 101]]], dtype='uint8')格式化输出:c风格{ 91,   2,  79, 179,  52, 205,236,   8, 181, 239,  26, 248,207, 218,  45, 183, 158, 101}格式化输出一行:Python风格[[[236,   8, 181], [239,  26, 248]]]格式化输出一列:Python风格[[179,  52, 205],[239,  26, 248],[183, 158, 101]]格式化输出ROI 矩形:Python风格[[[ 91,   2,  79], [179,  52, 205]],[[236,   8, 181], [239,  26, 248]]]格式化输出ROI Range:Python风格[[[ 91,   2,  79], [179,  52, 205]],[[236,   8, 181], [239,  26, 248]]]
项目
代码
using OpenCvSharp;
using System;
using System.Drawing;
using System.IO;
using System.Text;
using System.Windows.Forms;
namespace OpenCvSharp_Demo
{
public partial class Form1 : Form
{
public Form1()
{
InitializeComponent();
}
Mat image;
StringBuilder sb = new StringBuilder();
private void Form1_Load(object sender, EventArgs e)
{
image = new Mat(3, 2, MatType.CV_8UC3);
Cv2.Randu(image, Scalar.All(0d), Scalar.All(255d));
pictureBox1.Image = new Bitmap(image.ToMemoryStream());
}
//序列化
private void button2_Click(object sender, EventArgs e)
{
textBox1.Text = "序列化";
FileStorage fileStorage = new FileStorage("file.txt", FileStorage.Modes.Write);
fileStorage.Write("src", image);
fileStorage.Release();
//读取显示
textBox1.Text = File.ReadAllText("file.txt");
}
//反序列化
private void button4_Click(object sender, EventArgs e)
{
textBox1.Text = "反序列化";
FileStorage fileStorage = new FileStorage("file.txt", FileStorage.Modes.Read);
Mat loadImage = fileStorage["src"].ToMat();
pictureBox2.Image = new Bitmap(loadImage.ToMemoryStream());
fileStorage.Release();
}
//格式化输出
private void button5_Click(object sender, EventArgs e)
{
sb.Clear();
sb.AppendLine("直接输出:");
sb.AppendLine(image.ToString());
sb.AppendLine("");
sb.AppendLine("格式化输出:默认风格");
sb.AppendLine(Cv2.Format(image));
sb.AppendLine("");
sb.AppendLine("格式化输出:Python风格");
sb.AppendLine(Cv2.Format(image, FormatType.Python));
sb.AppendLine("");
sb.AppendLine("格式化输出:CSV风格");
sb.AppendLine(Cv2.Format(image, FormatType.CSV));
sb.AppendLine("");
sb.AppendLine("格式化输出:NumPy风格");
sb.AppendLine(Cv2.Format(image, FormatType.NumPy));
sb.AppendLine("");
sb.AppendLine("格式化输出:c风格");
sb.AppendLine(Cv2.Format(image, FormatType.C));
sb.AppendLine("");
sb.AppendLine("格式化输出一行:Python风格");
sb.AppendLine(Cv2.Format(image.Row(1), FormatType.Python));
sb.AppendLine("");
sb.AppendLine("格式化输出一列:Python风格");
sb.AppendLine(Cv2.Format(image.Col(1), FormatType.Python));
sb.AppendLine("");
sb.AppendLine("格式化输出ROI 矩形:Python风格");
sb.AppendLine(Cv2.Format(new Mat(image, new Rect(0, 0, 2, 2)), FormatType.Python));
sb.AppendLine("");
sb.AppendLine("格式化输出ROI Range:Python风格");
sb.AppendLine(Cv2.Format(new Mat(image, new OpenCvSharp.Range(0, 2), new OpenCvSharp.Range(0, 2)), FormatType.Python));
sb.AppendLine("");
sb.Replace("\n", "\r\n");
textBox1.Text = sb.ToString();
}
}
}
using OpenCvSharp;
using System;
using System.Drawing;
using System.IO;
using System.Text;
using System.Windows.Forms;namespace OpenCvSharp_Demo
{public partial class Form1 : Form{public Form1(){InitializeComponent();}Mat image;StringBuilder sb = new StringBuilder();private void Form1_Load(object sender, EventArgs e){image = new Mat(3, 2, MatType.CV_8UC3);Cv2.Randu(image, Scalar.All(0d), Scalar.All(255d));pictureBox1.Image = new Bitmap(image.ToMemoryStream());}//序列化private void button2_Click(object sender, EventArgs e){textBox1.Text = "序列化";FileStorage fileStorage = new FileStorage("file.txt", FileStorage.Modes.Write);fileStorage.Write("src", image);fileStorage.Release();//读取显示textBox1.Text = File.ReadAllText("file.txt");}//反序列化private void button4_Click(object sender, EventArgs e){textBox1.Text = "反序列化";FileStorage fileStorage = new FileStorage("file.txt", FileStorage.Modes.Read);Mat loadImage = fileStorage["src"].ToMat();pictureBox2.Image = new Bitmap(loadImage.ToMemoryStream());fileStorage.Release();}//格式化输出private void button5_Click(object sender, EventArgs e){sb.Clear();sb.AppendLine("直接输出:");sb.AppendLine(image.ToString());sb.AppendLine("");sb.AppendLine("格式化输出:默认风格");sb.AppendLine(Cv2.Format(image));sb.AppendLine("");sb.AppendLine("格式化输出:Python风格");sb.AppendLine(Cv2.Format(image, FormatType.Python));sb.AppendLine("");sb.AppendLine("格式化输出:CSV风格");sb.AppendLine(Cv2.Format(image, FormatType.CSV));sb.AppendLine("");sb.AppendLine("格式化输出:NumPy风格");sb.AppendLine(Cv2.Format(image, FormatType.NumPy));sb.AppendLine("");sb.AppendLine("格式化输出:c风格");sb.AppendLine(Cv2.Format(image, FormatType.C));sb.AppendLine("");sb.AppendLine("格式化输出一行:Python风格");sb.AppendLine(Cv2.Format(image.Row(1), FormatType.Python));sb.AppendLine("");sb.AppendLine("格式化输出一列:Python风格");sb.AppendLine(Cv2.Format(image.Col(1), FormatType.Python));sb.AppendLine("");sb.AppendLine("格式化输出ROI 矩形:Python风格");sb.AppendLine(Cv2.Format(new Mat(image, new Rect(0, 0, 2, 2)), FormatType.Python));sb.AppendLine("");sb.AppendLine("格式化输出ROI Range:Python风格");sb.AppendLine(Cv2.Format(new Mat(image, new OpenCvSharp.Range(0, 2), new OpenCvSharp.Range(0, 2)), FormatType.Python));sb.AppendLine("");sb.Replace("\n", "\r\n");textBox1.Text = sb.ToString();}}
}
下载
源码下载

