uniapp + vue2 设置代理如下:
已生成的项目架构里面找到manifest.json文件,通过源码视图的方式打开文件,在文件中添加一下代码即可完成代理:
"h5": {"devServer": {"disableHostCheck": true, //禁止访问本地host文件"port": 8000, //修改项目端口"proxy": {/**配置服务器路径**/"/api": {"target": "https://api.xxx.com",// 目标服务器"changeOrigin": true,/**重写路径**/"pathRewrite": {"^/api": ""}}}}
}
但是注意,这仅限于使用的是vue2,现在新项目都是vue3,因此这个写法作废了,
看下官方怎么说,事情的本质官方说的比较明白了:
uni-app 中 manifest.json->h5->devServer,vue2 实际上对应 webpack 的 devServer,vue3 实际上对应 vite 的 server,鉴于 manifest 为 json 文件,故 webpack.config.js->devServer 及 vite.config.js->server 配置项下的简单类型属性均可在manifest.json->h5->devServer节点下配置,funciton 等复杂类型暂不支持。
官方链接:https://uniapp.dcloud.net.cn/collocation/manifest.html#devserver

也就是说vue2用的是webpack,vue3用的是vite,因此要用vue3 + vite的方式来配置这个proxy,
但是在vite中,重写路径是通过函数来做的,上面uniapp说了不支持函数写法,所以只能换另一种方式,不在uniapp的文件中配。
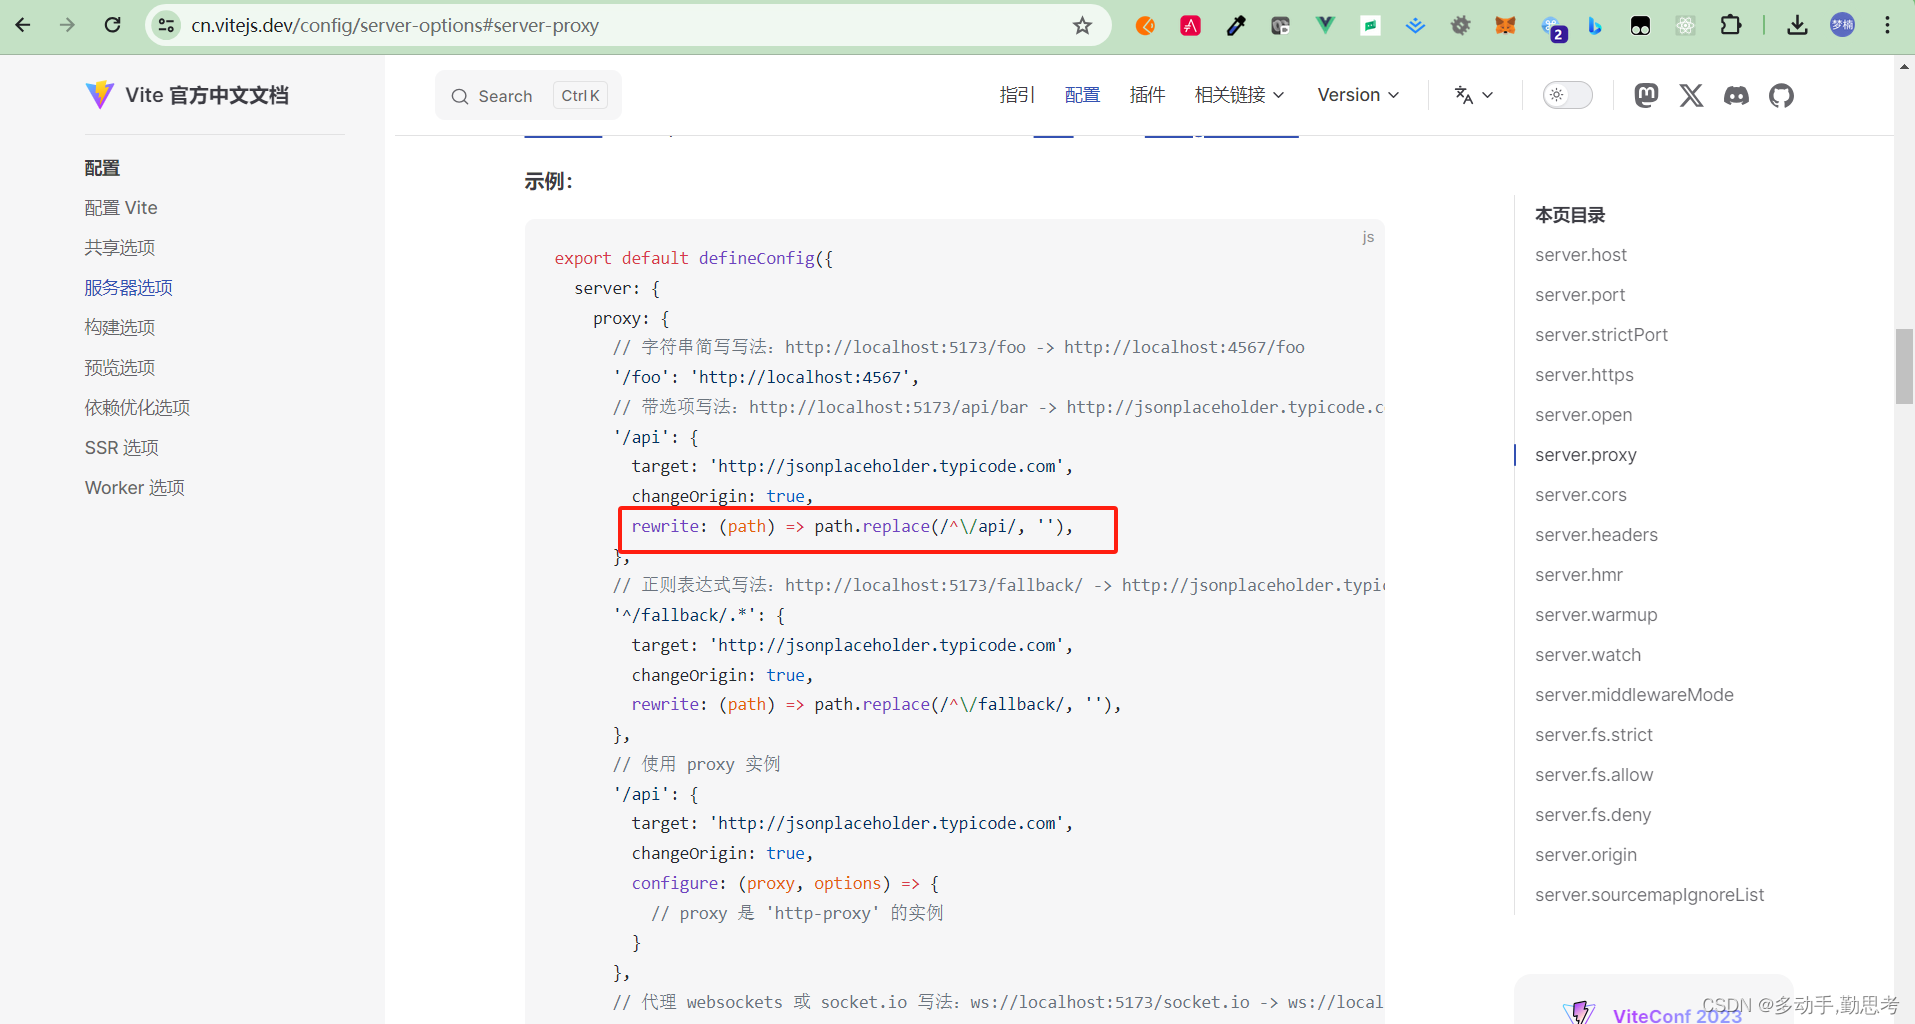
Vue3的方式
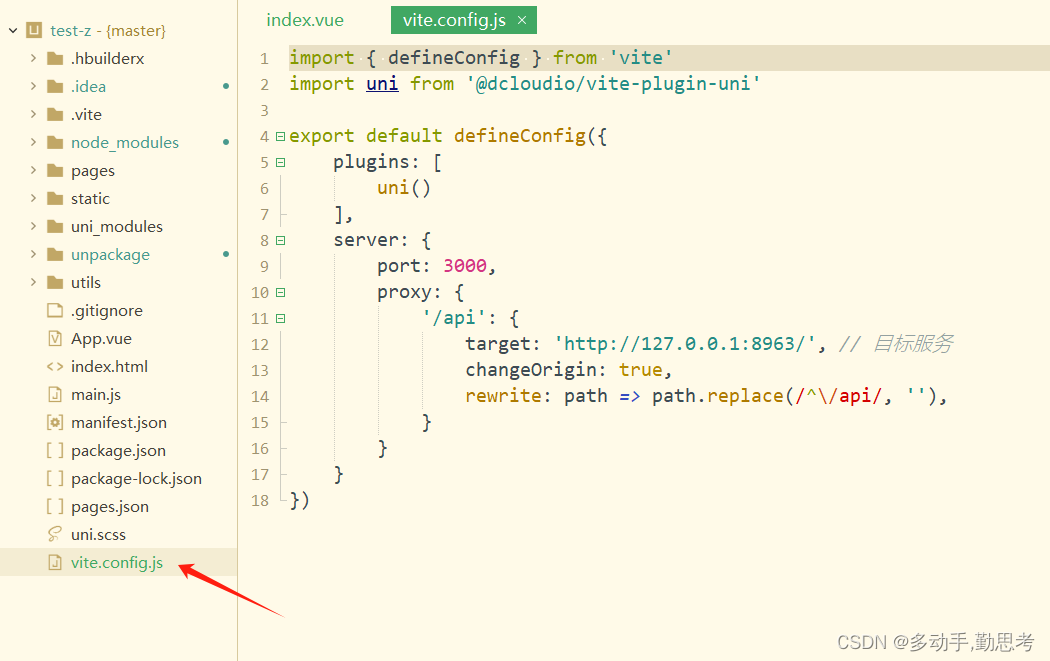
在项目根目录下面创建一个名为vite.config.js的文件(如果不存在),在文件中编辑一下内容即可:
这里就是直接新建vite文件来操作使用即可啦。
import { defineConfig } from 'vite'
import uni from '@dcloudio/vite-plugin-uni'export default defineConfig({plugins: [uni()],server: {port: 3000,proxy: {'/api': {target: 'https://api.xxx.com', // 目标服务  changeOrigin: true,rewrite: path => path.replace(/^\/api/, ''),}}}
})
参考了:https://blog.csdn.net/m0_53536475/article/details/130144830
