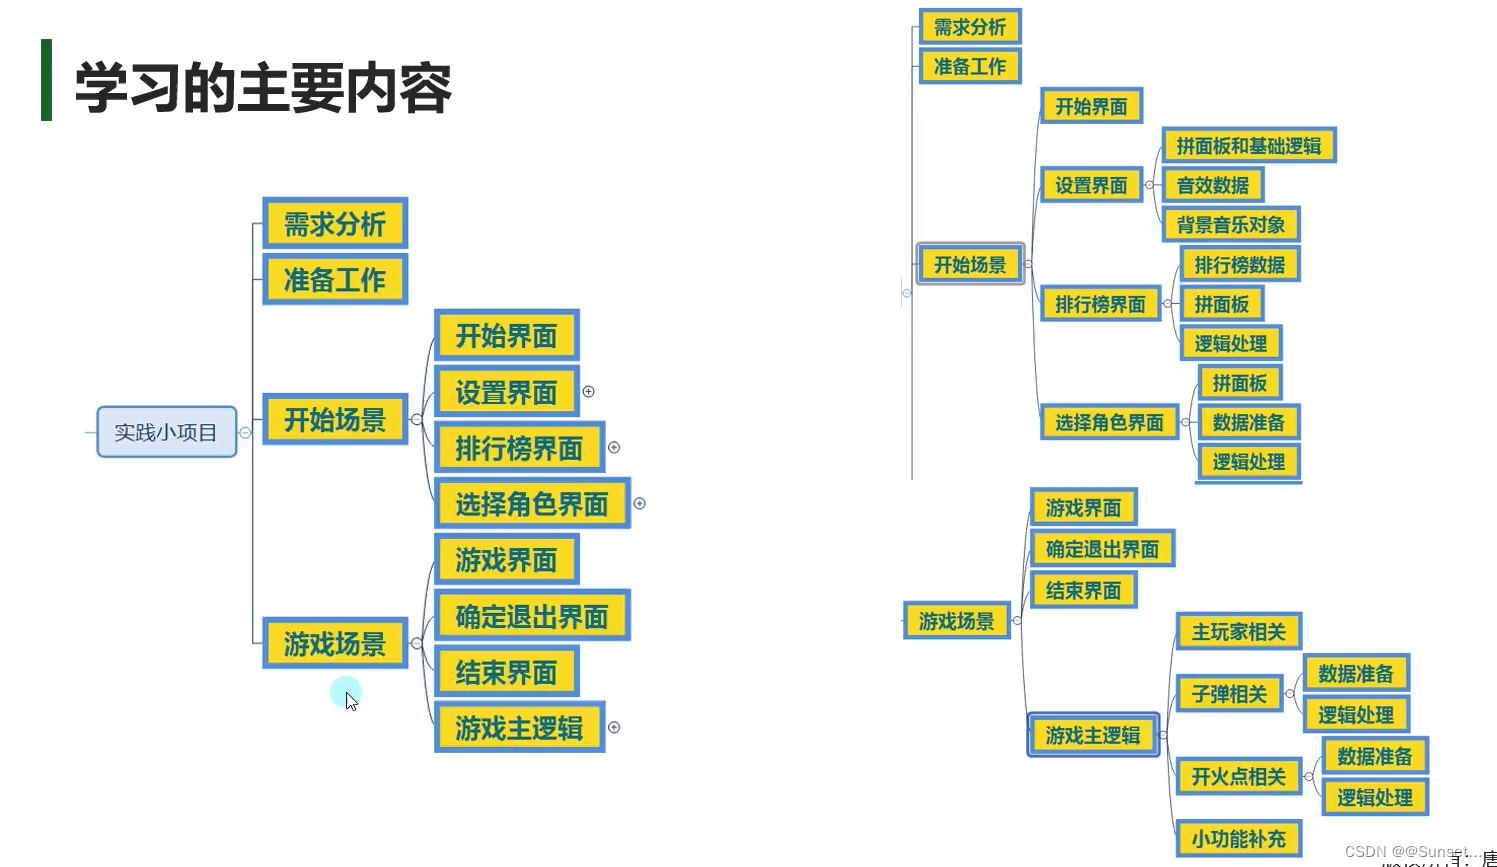
项目流程:
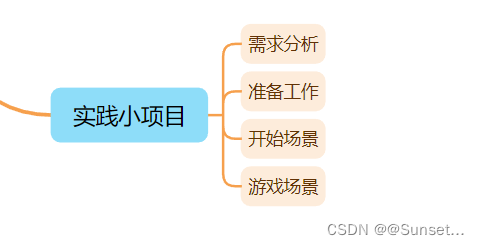
需求分析
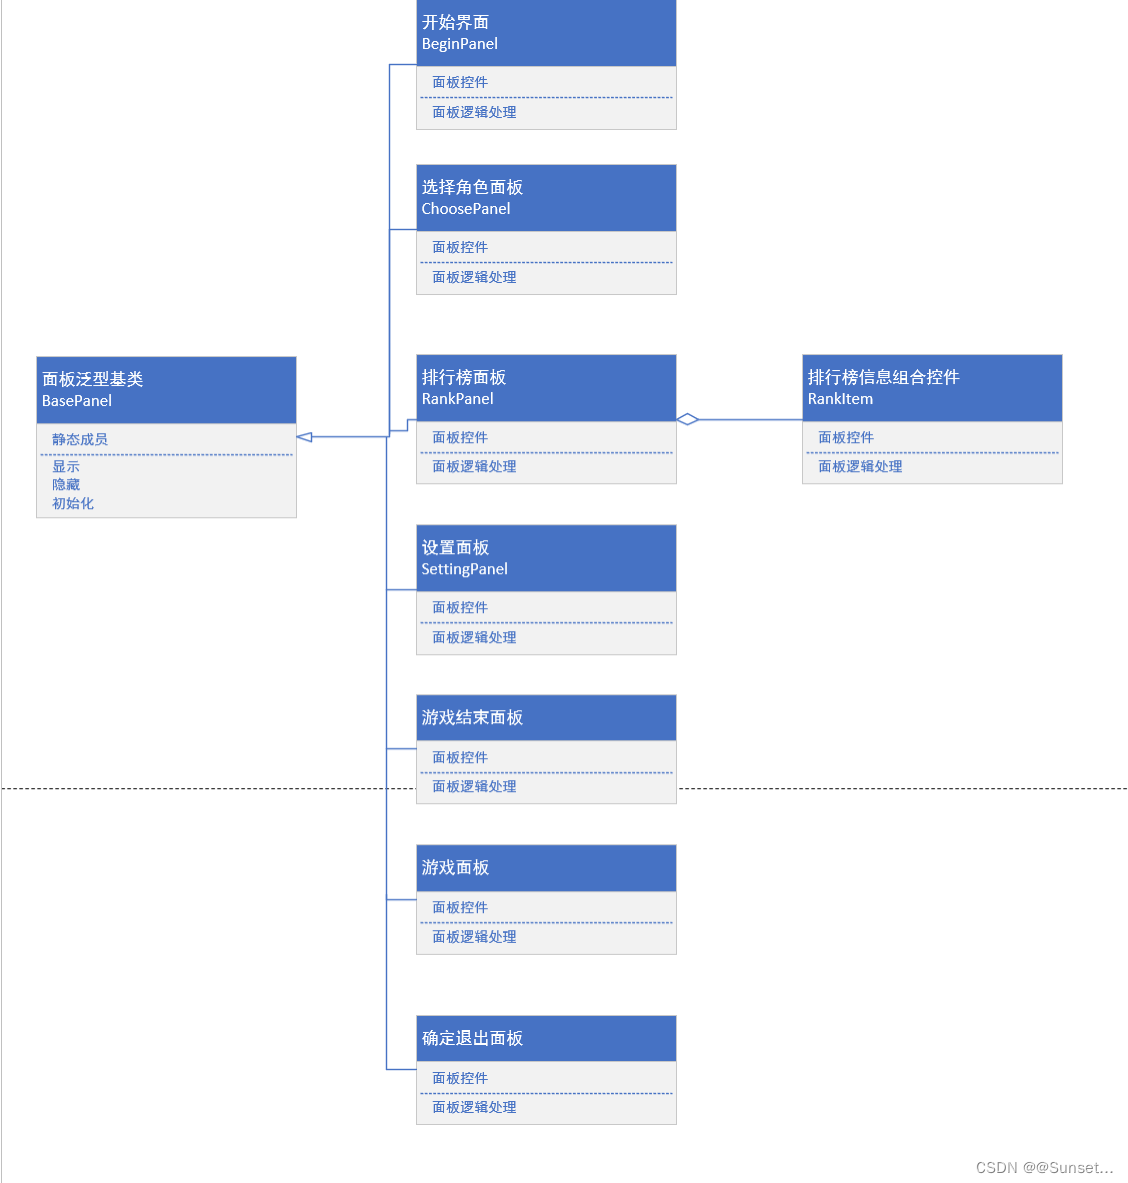
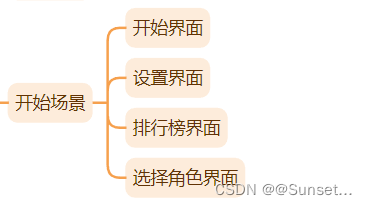
开始界面

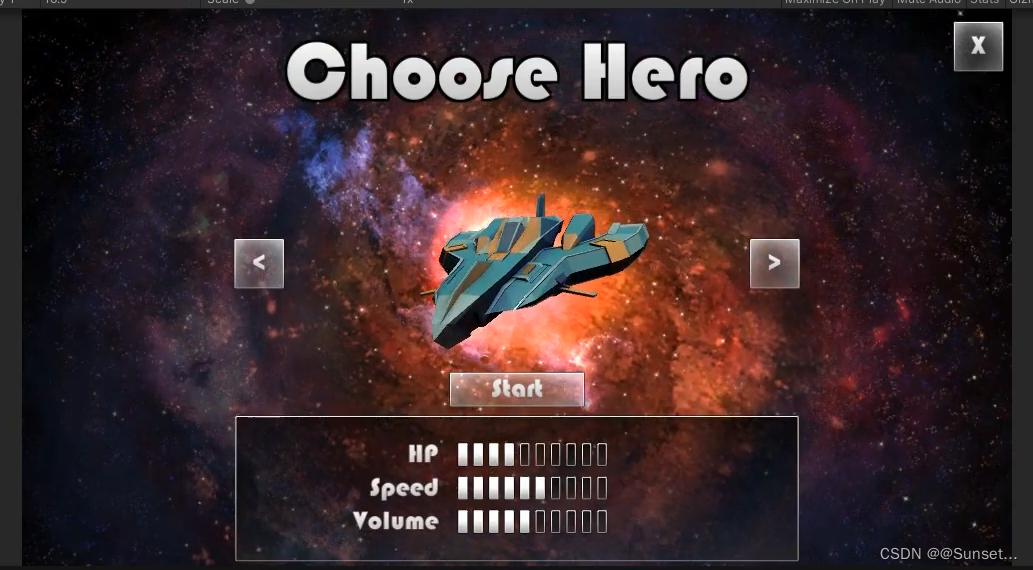
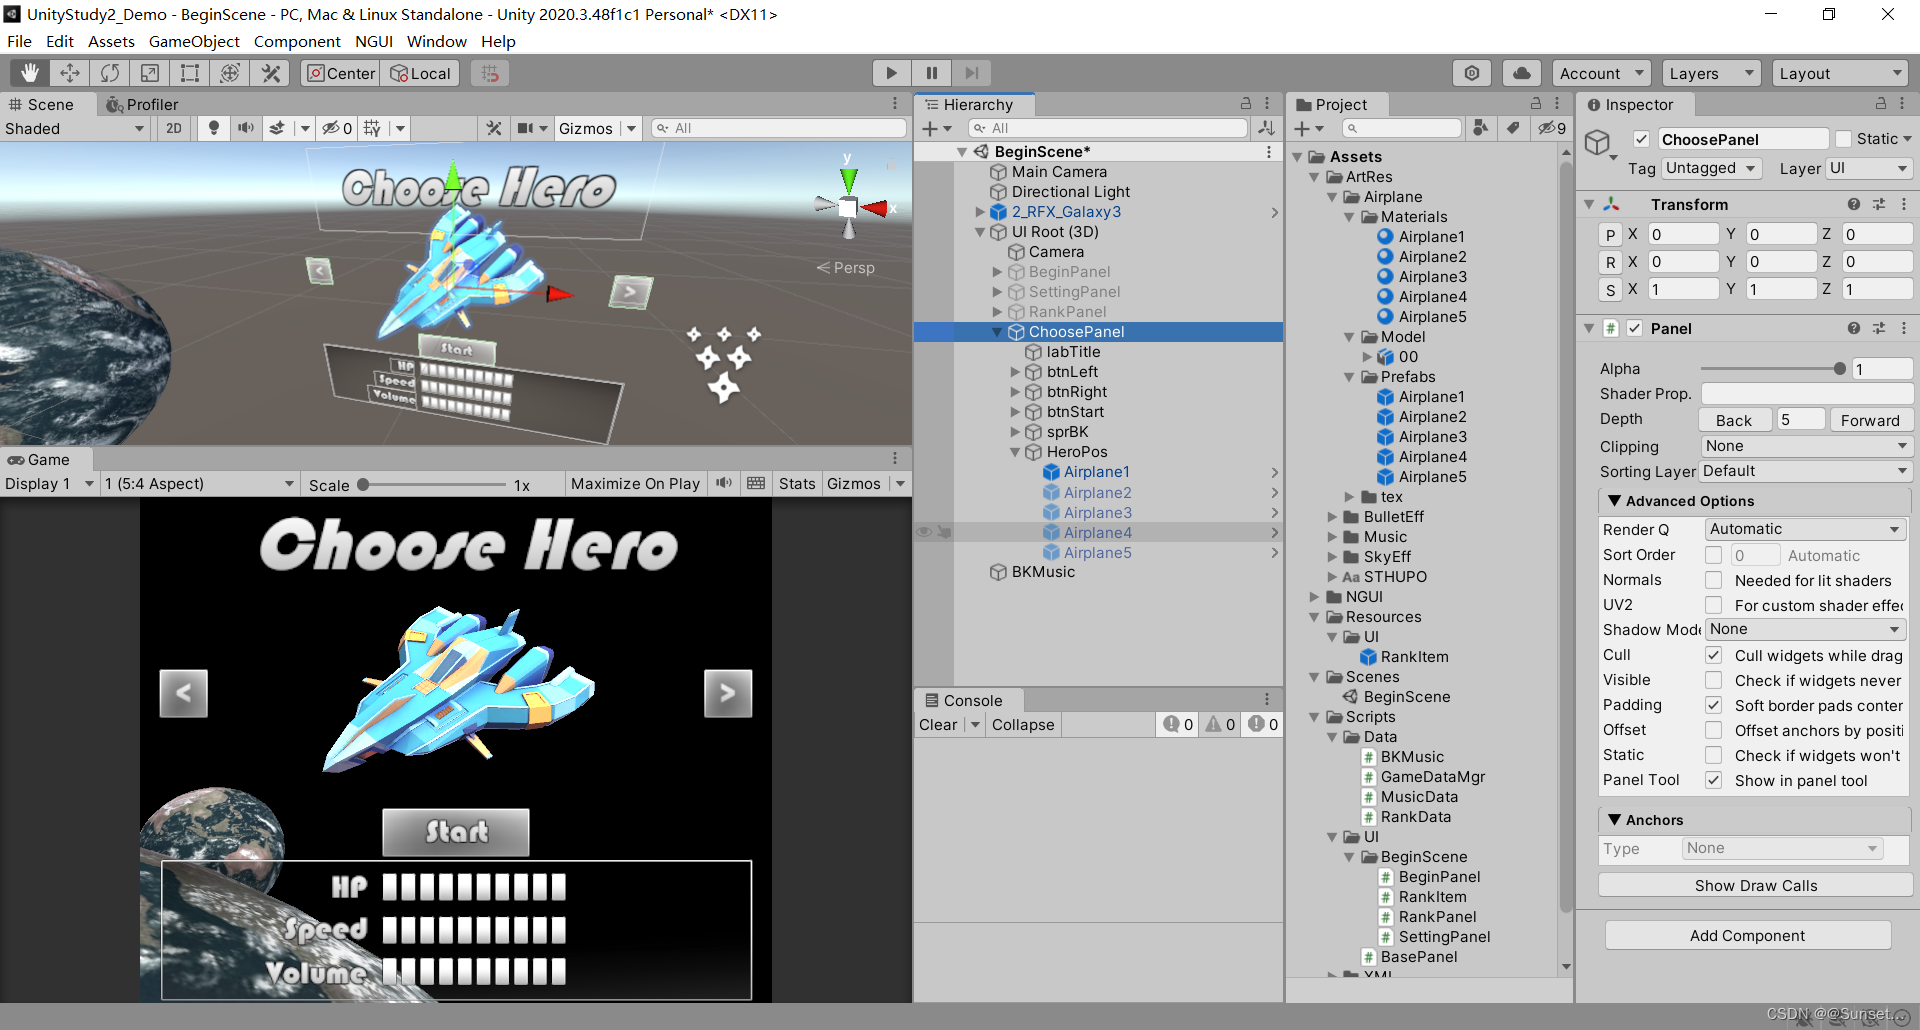
选择角色面板
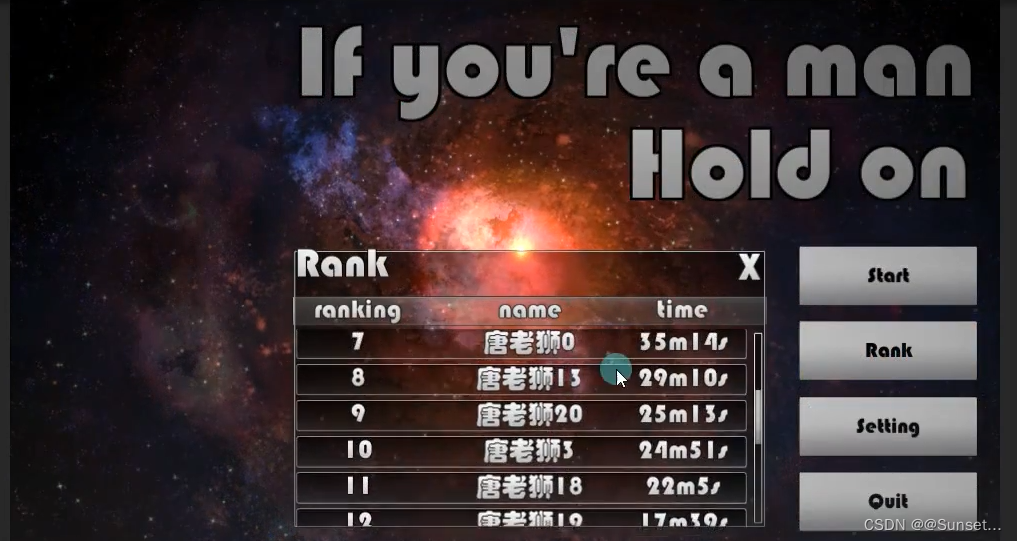
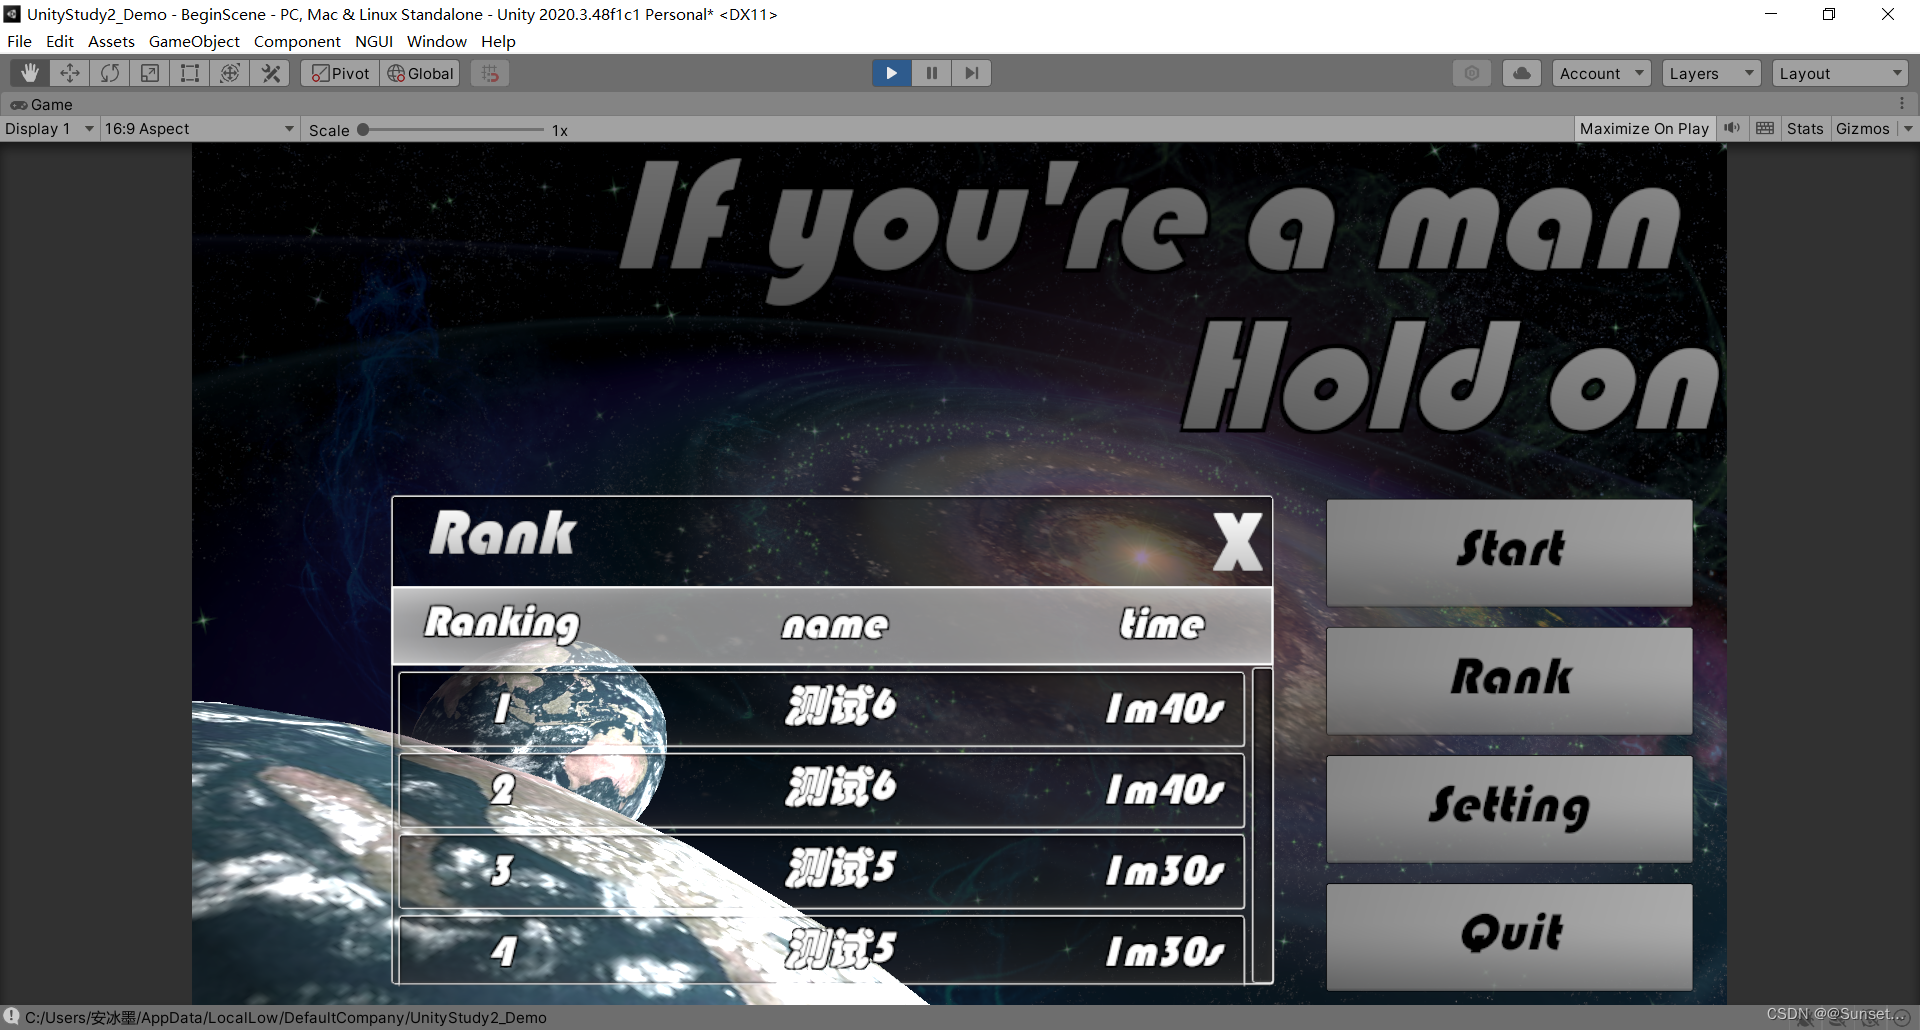
排行榜面板
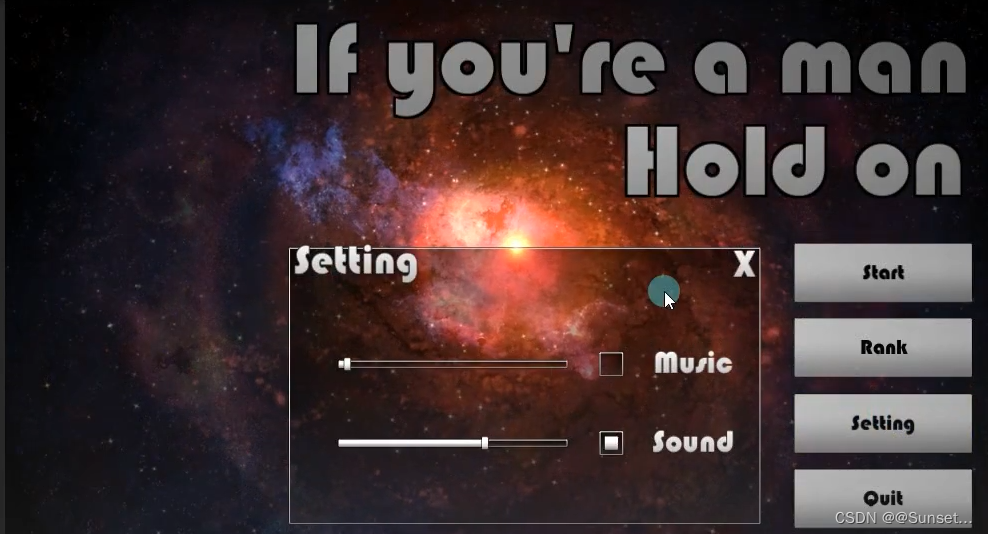
设置面板
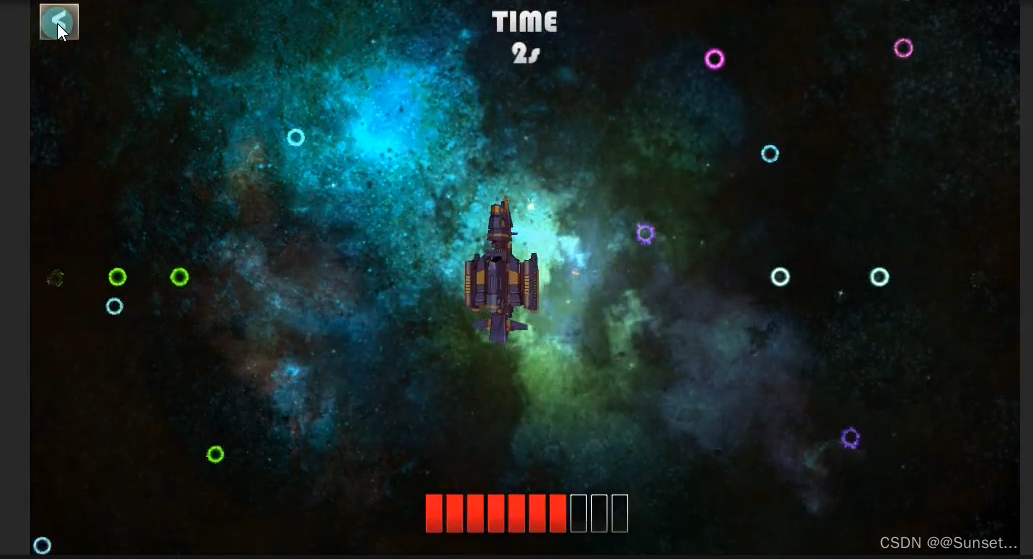
游戏面板
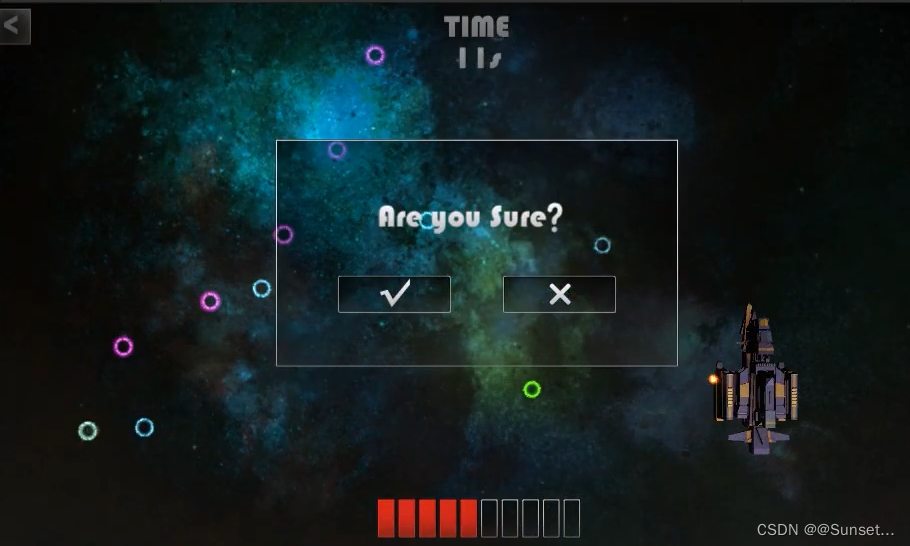
确定退出面板
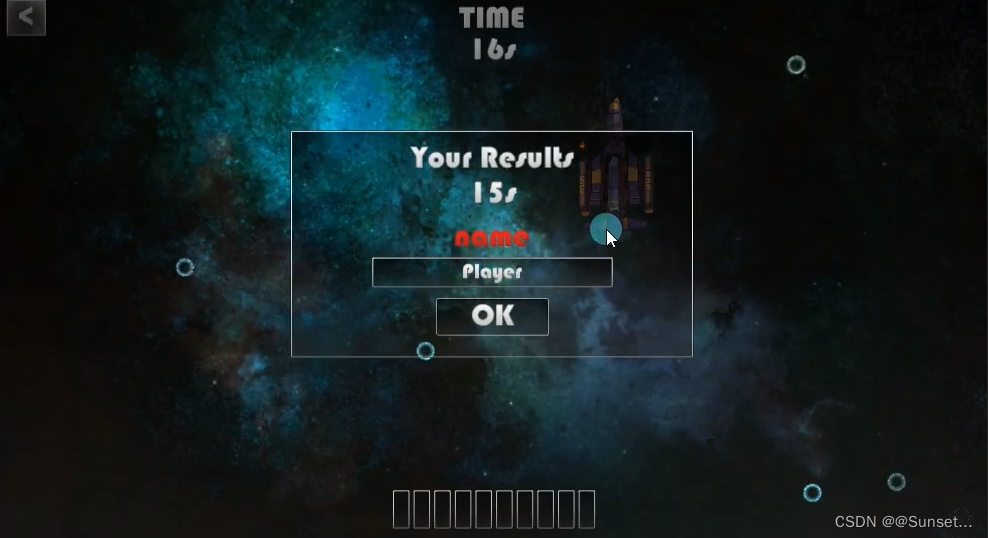
死亡面板
UML类图
准备工作
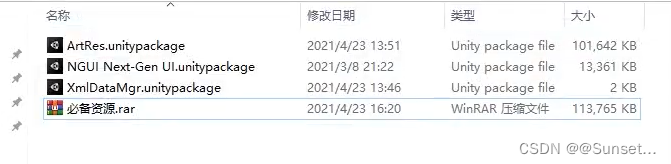
1.导入资源
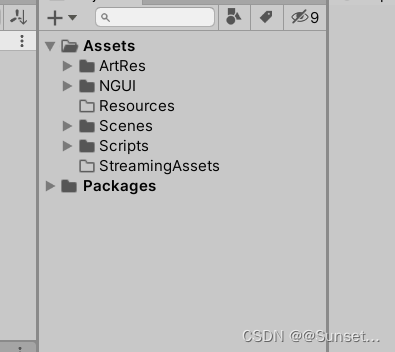
2.创建需要的文件夹
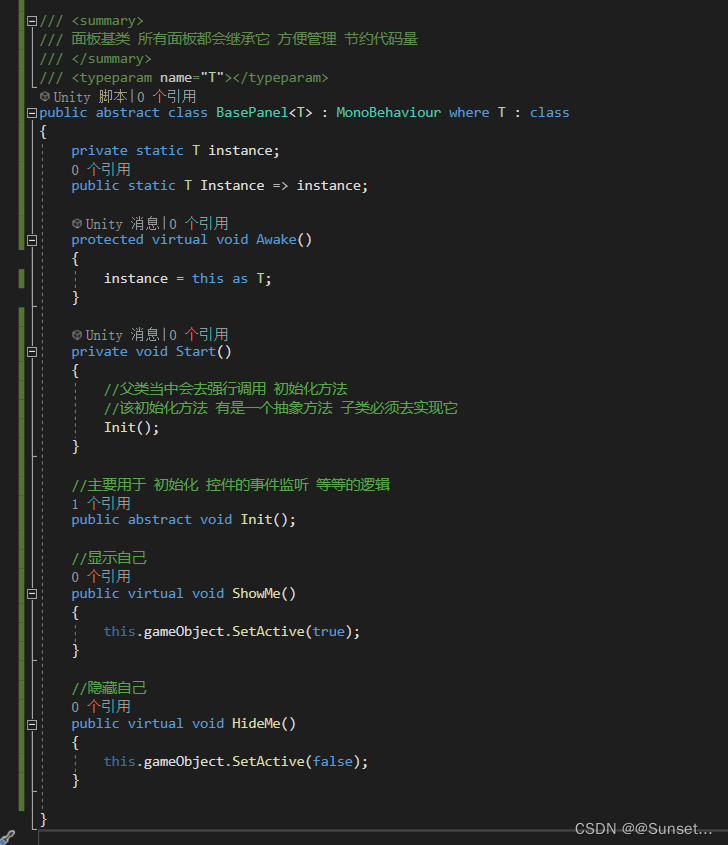
3.创建好面板基类
开始场景
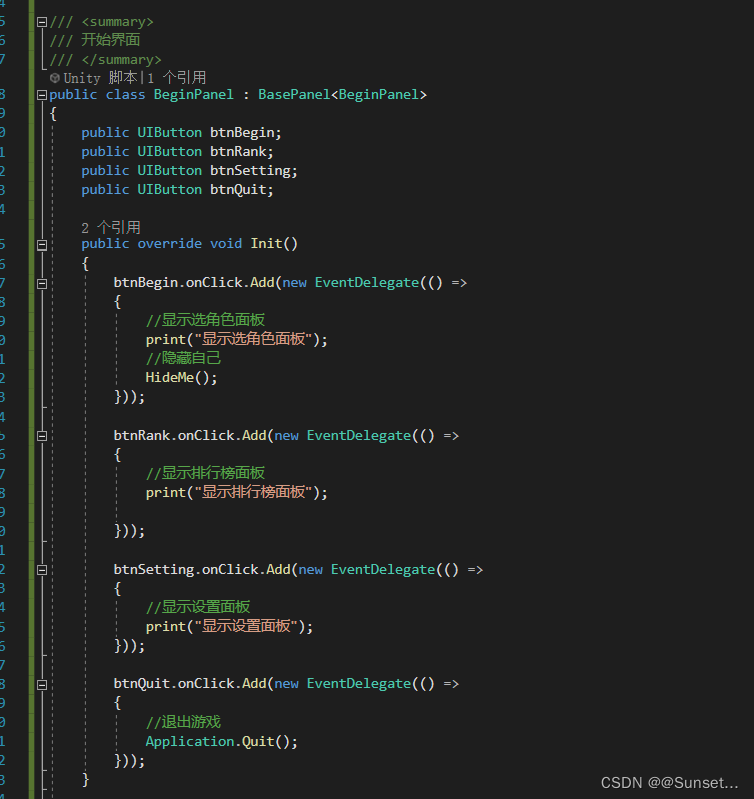
开始界面
1.拼面板
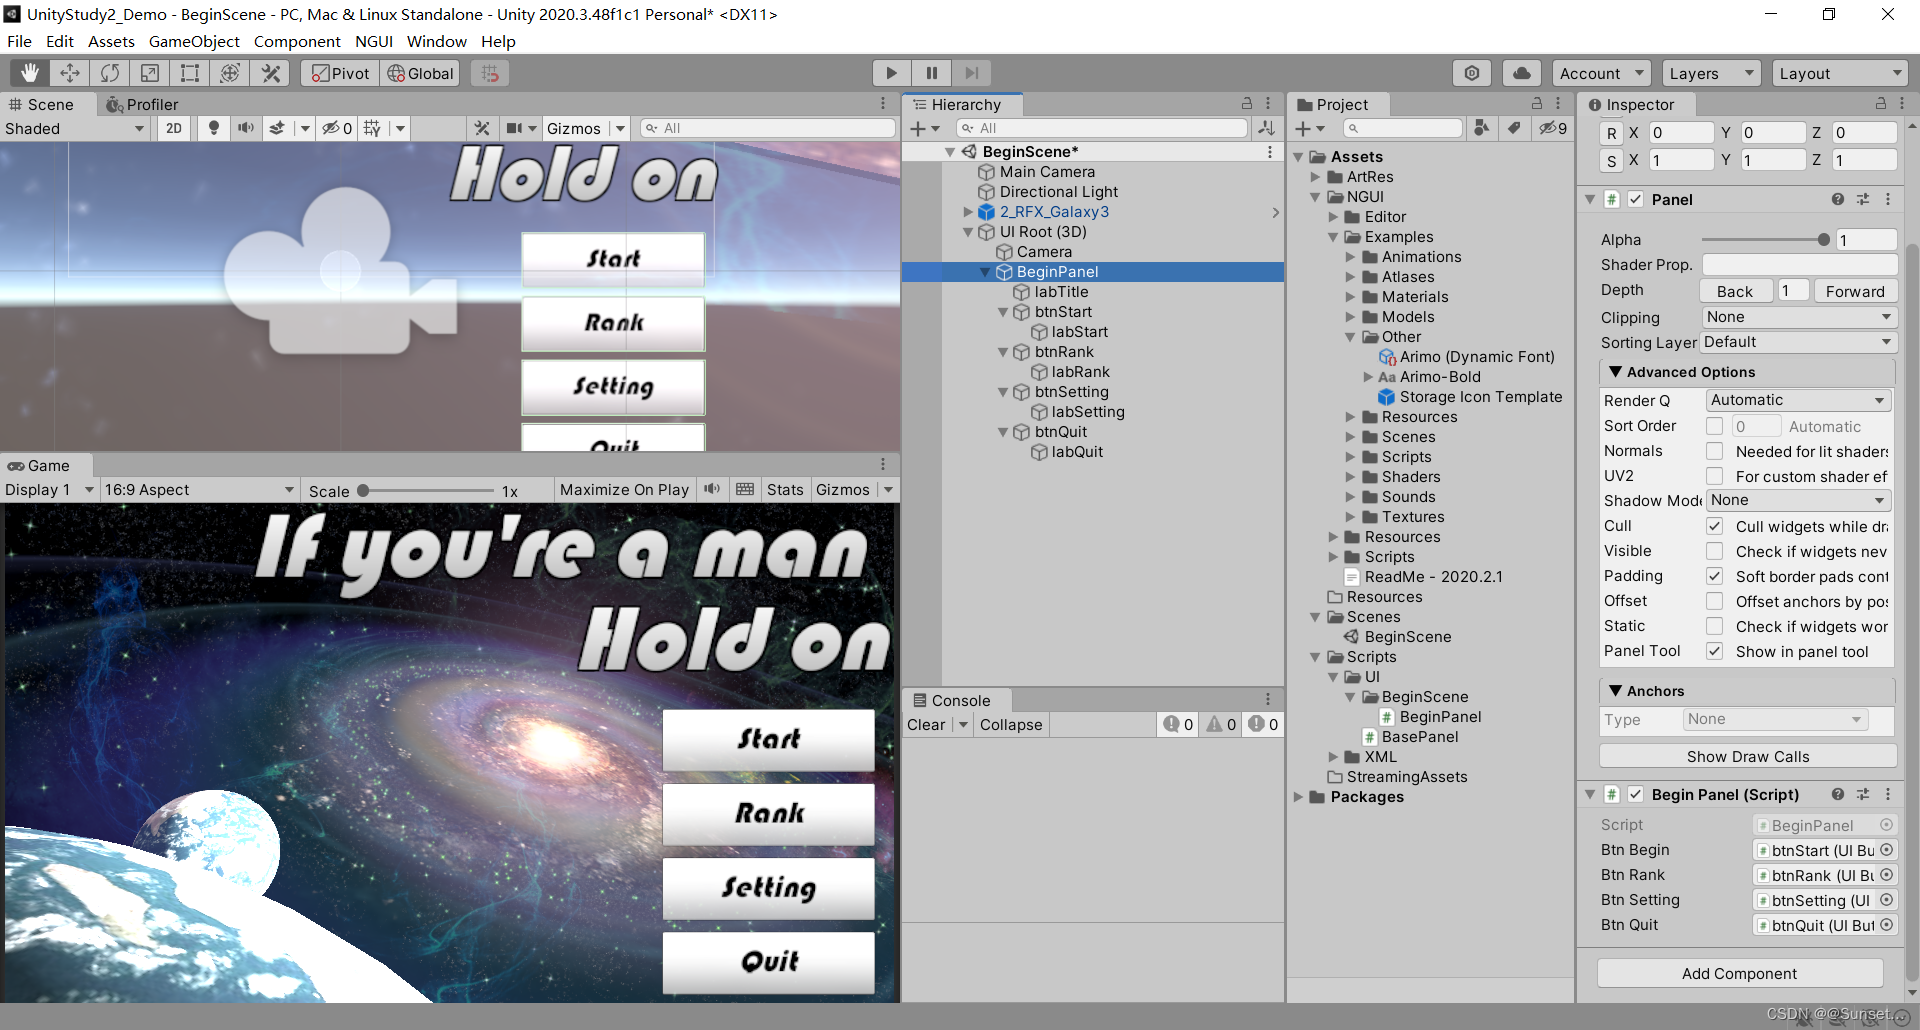
2.写脚本
注意事项:注意先设置NGUI的分辨率大小,注意控件的分辨率自适应,注意 Draw Calls!
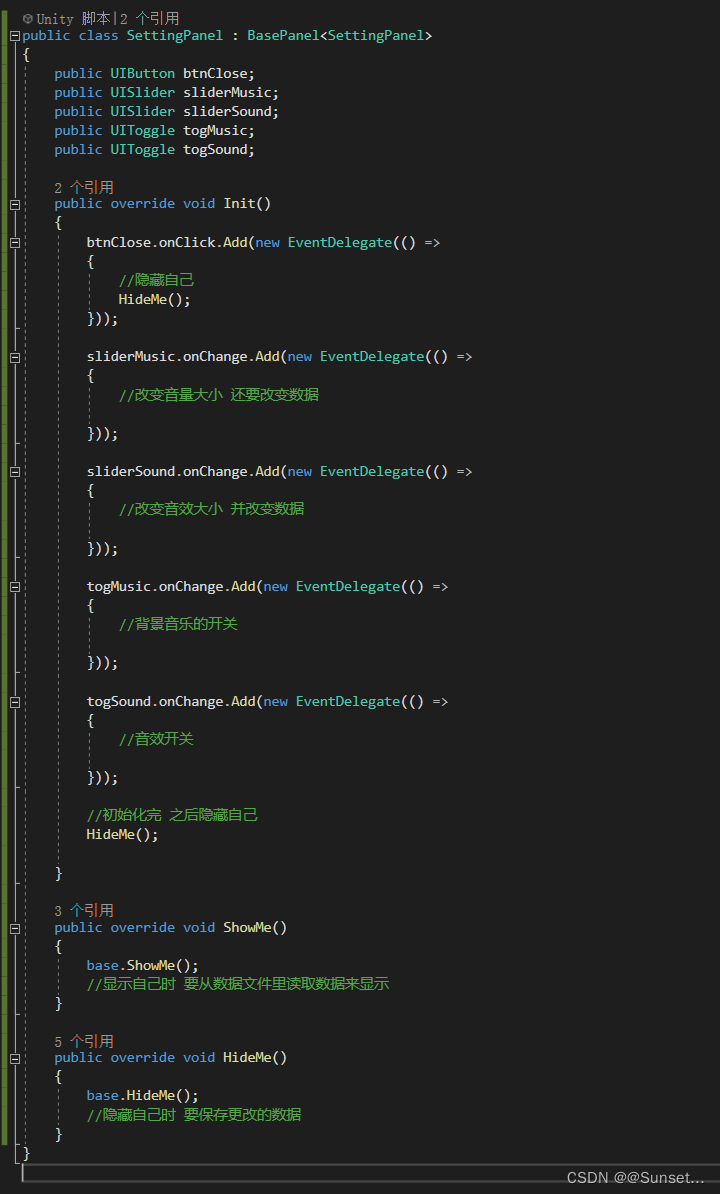
设置界面 —— 拼面板和基础逻辑
1.拼面板
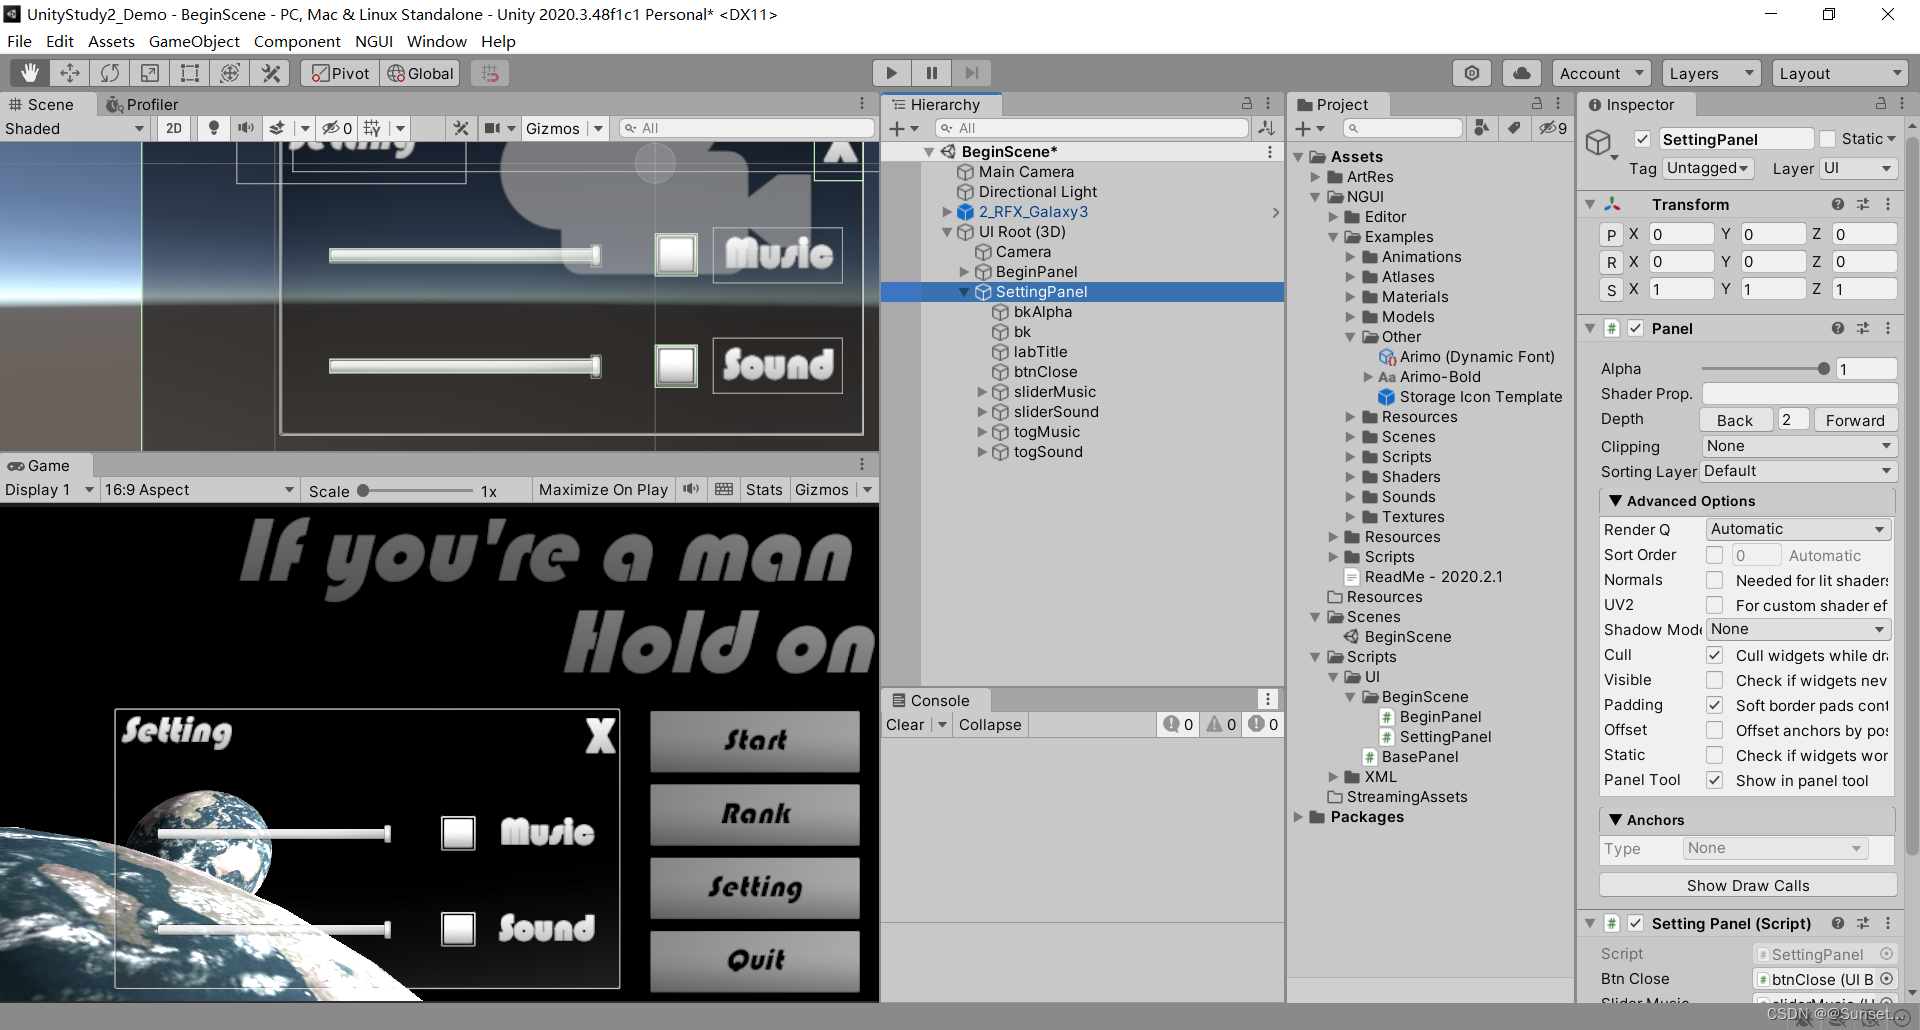
2.逻辑
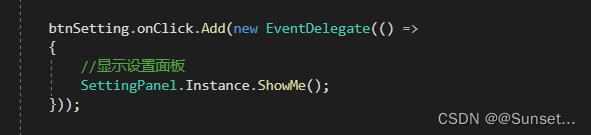
BegingPael 里打开设置面板
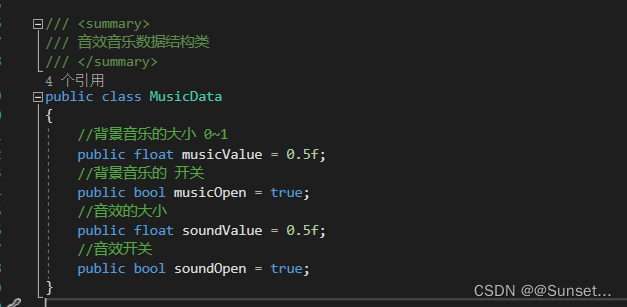
设置界面——音效数据
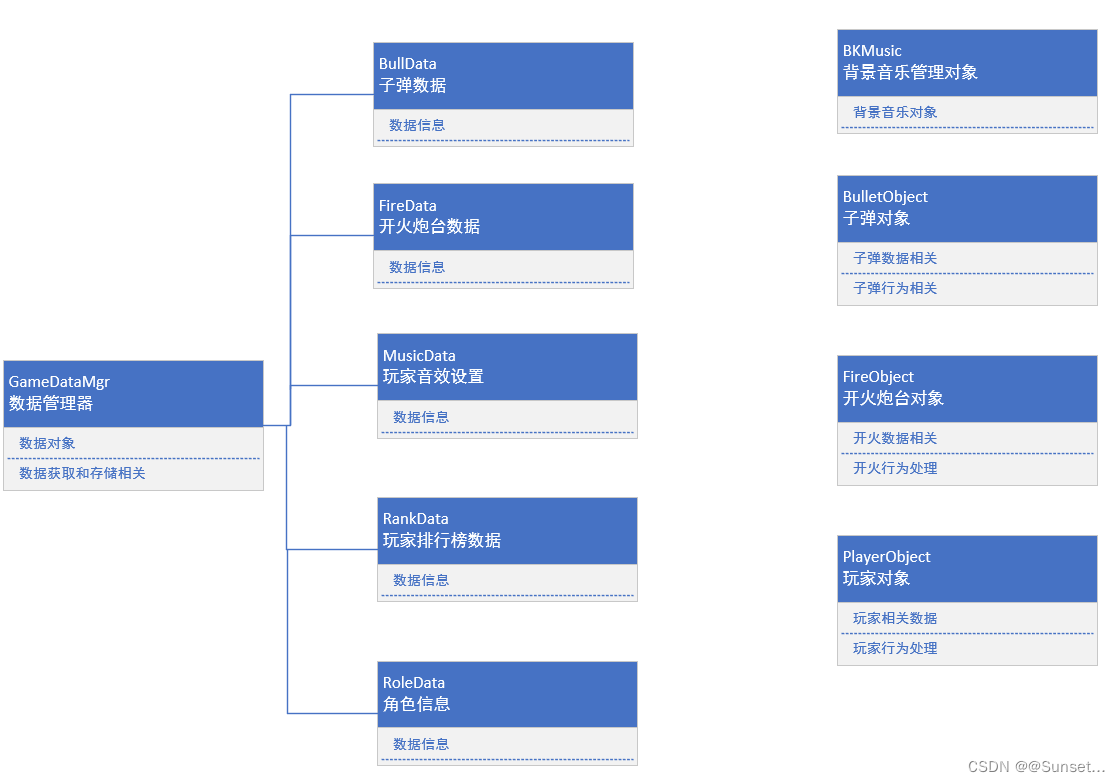
1.创建音效数据类
2.创建游戏数据管理类
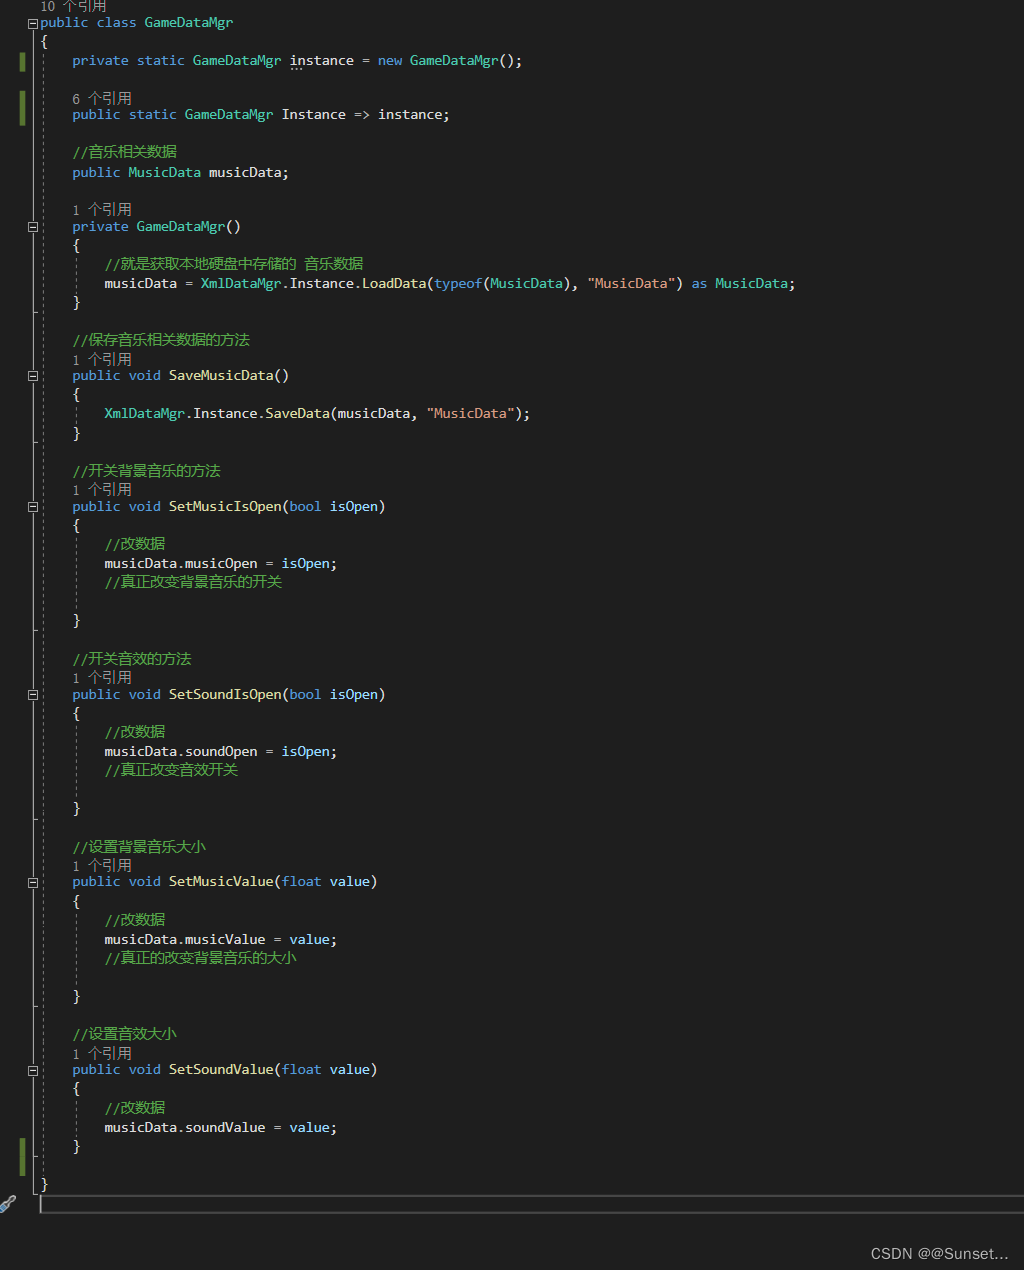
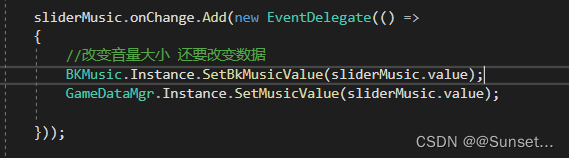
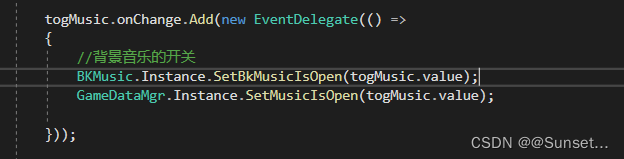
3.SettingPanel 关联逻辑

实现了音效数据的在设置面板中的获取和修改
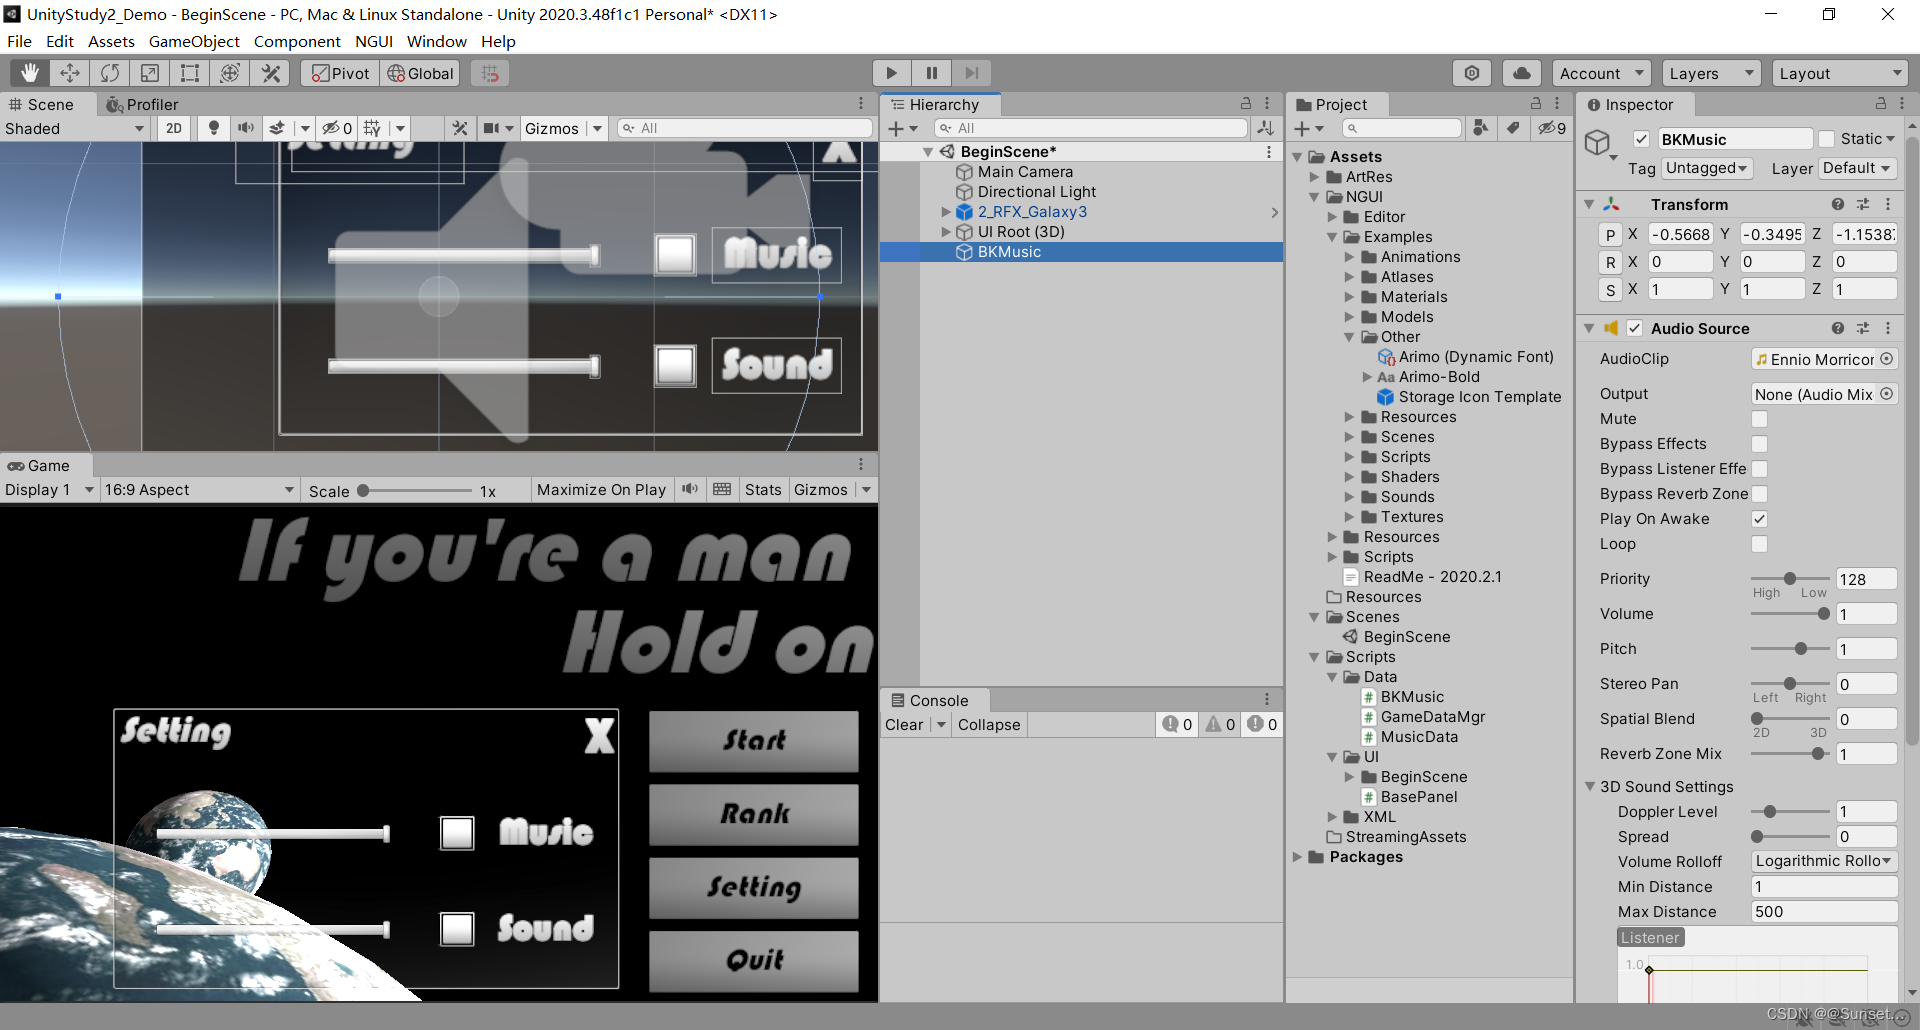
设置界面——背景音乐对象
1.创建音乐对象和音乐控制脚本
音乐对象
音乐控制脚本
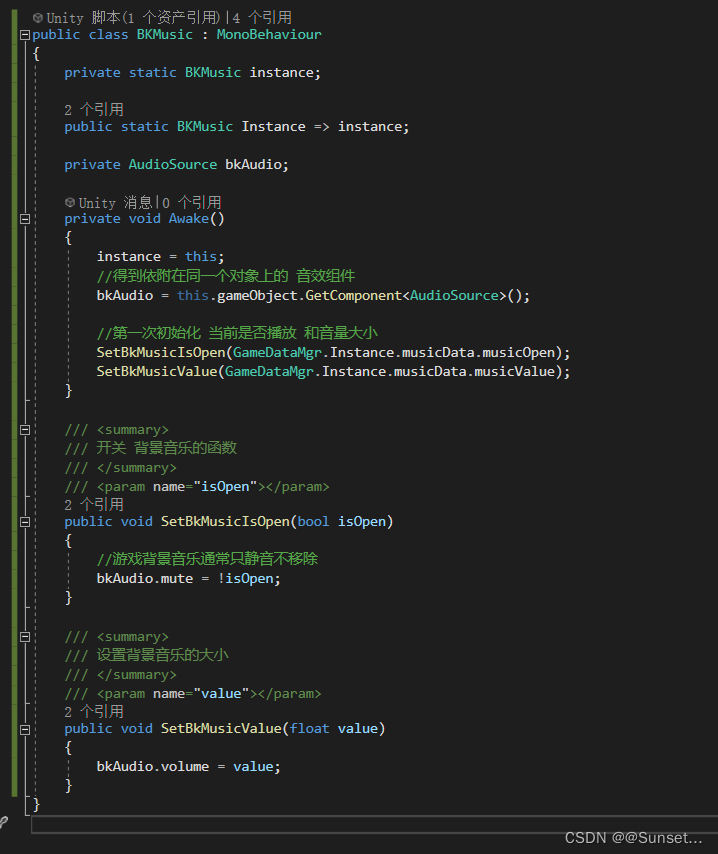
2.设置面板 调用
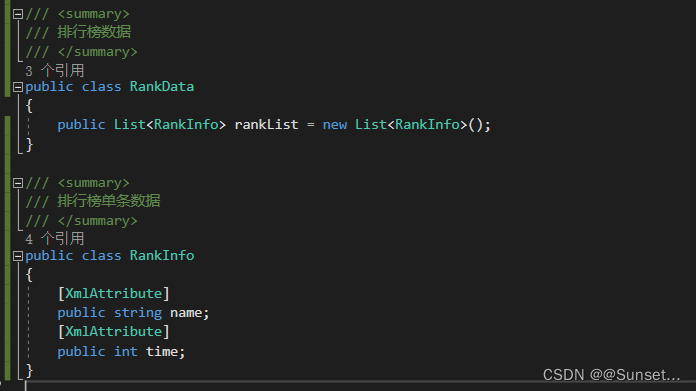
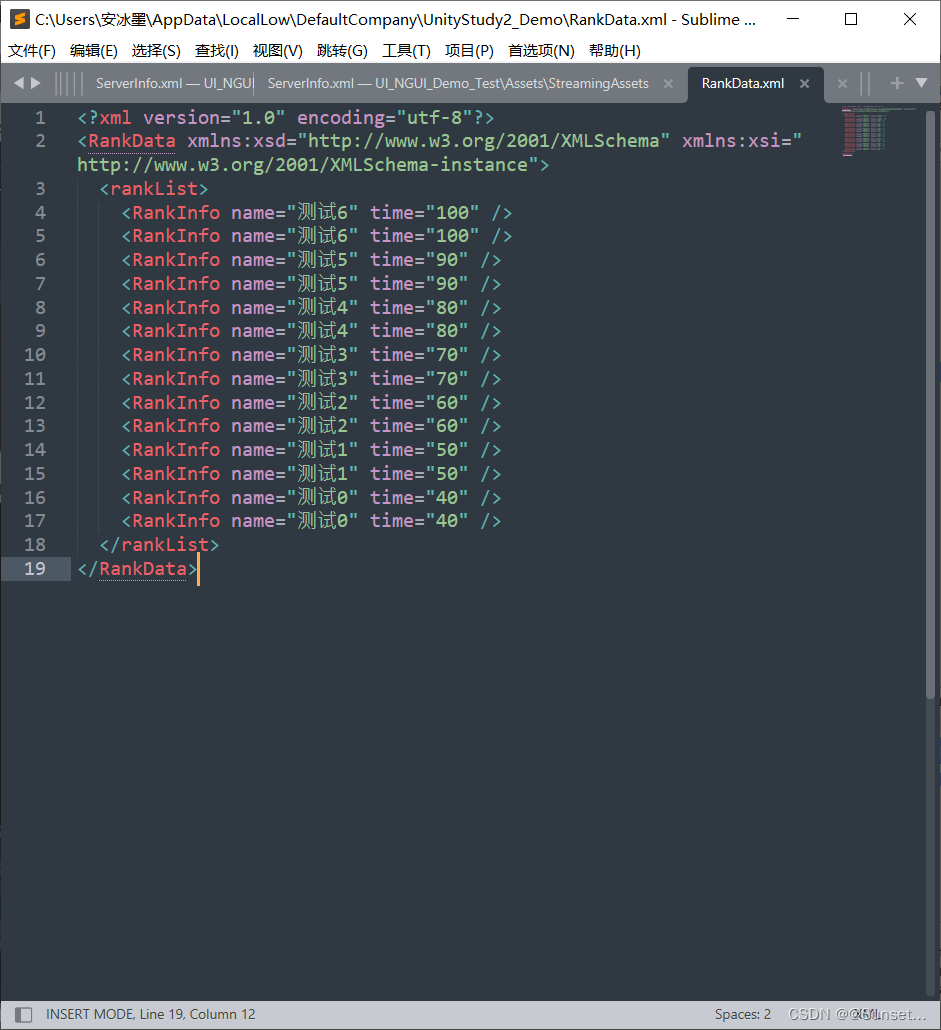
排行榜界面——排行榜数据
1.排行榜数据类
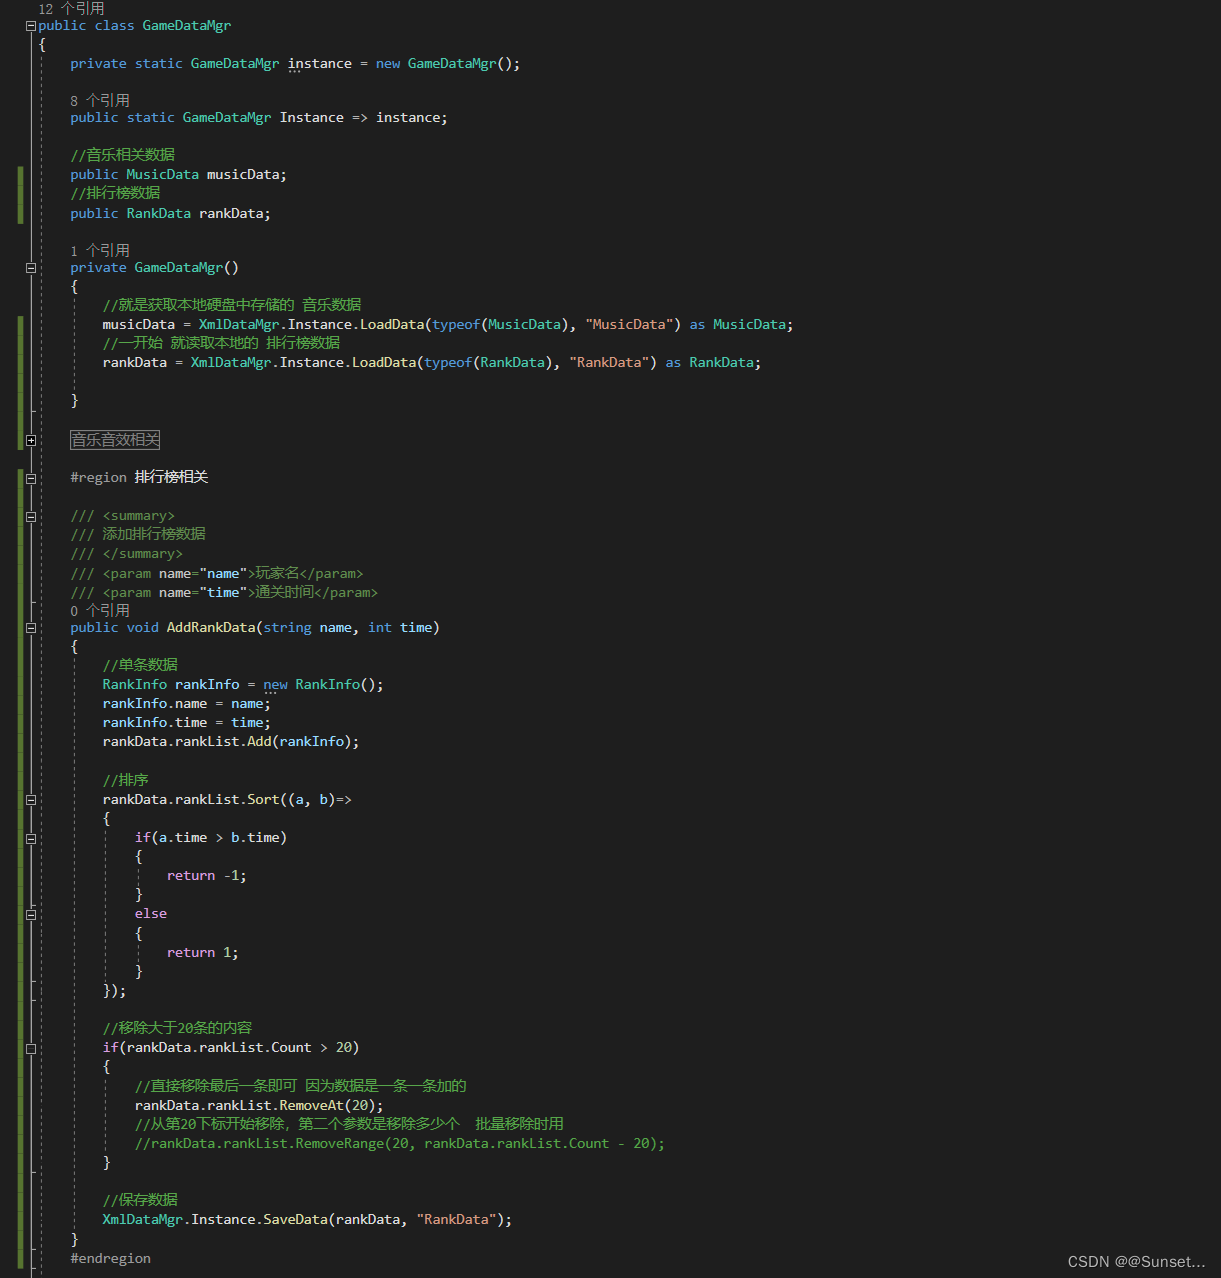
2.GameDataMgr 中调用
排行榜界面——拼面板
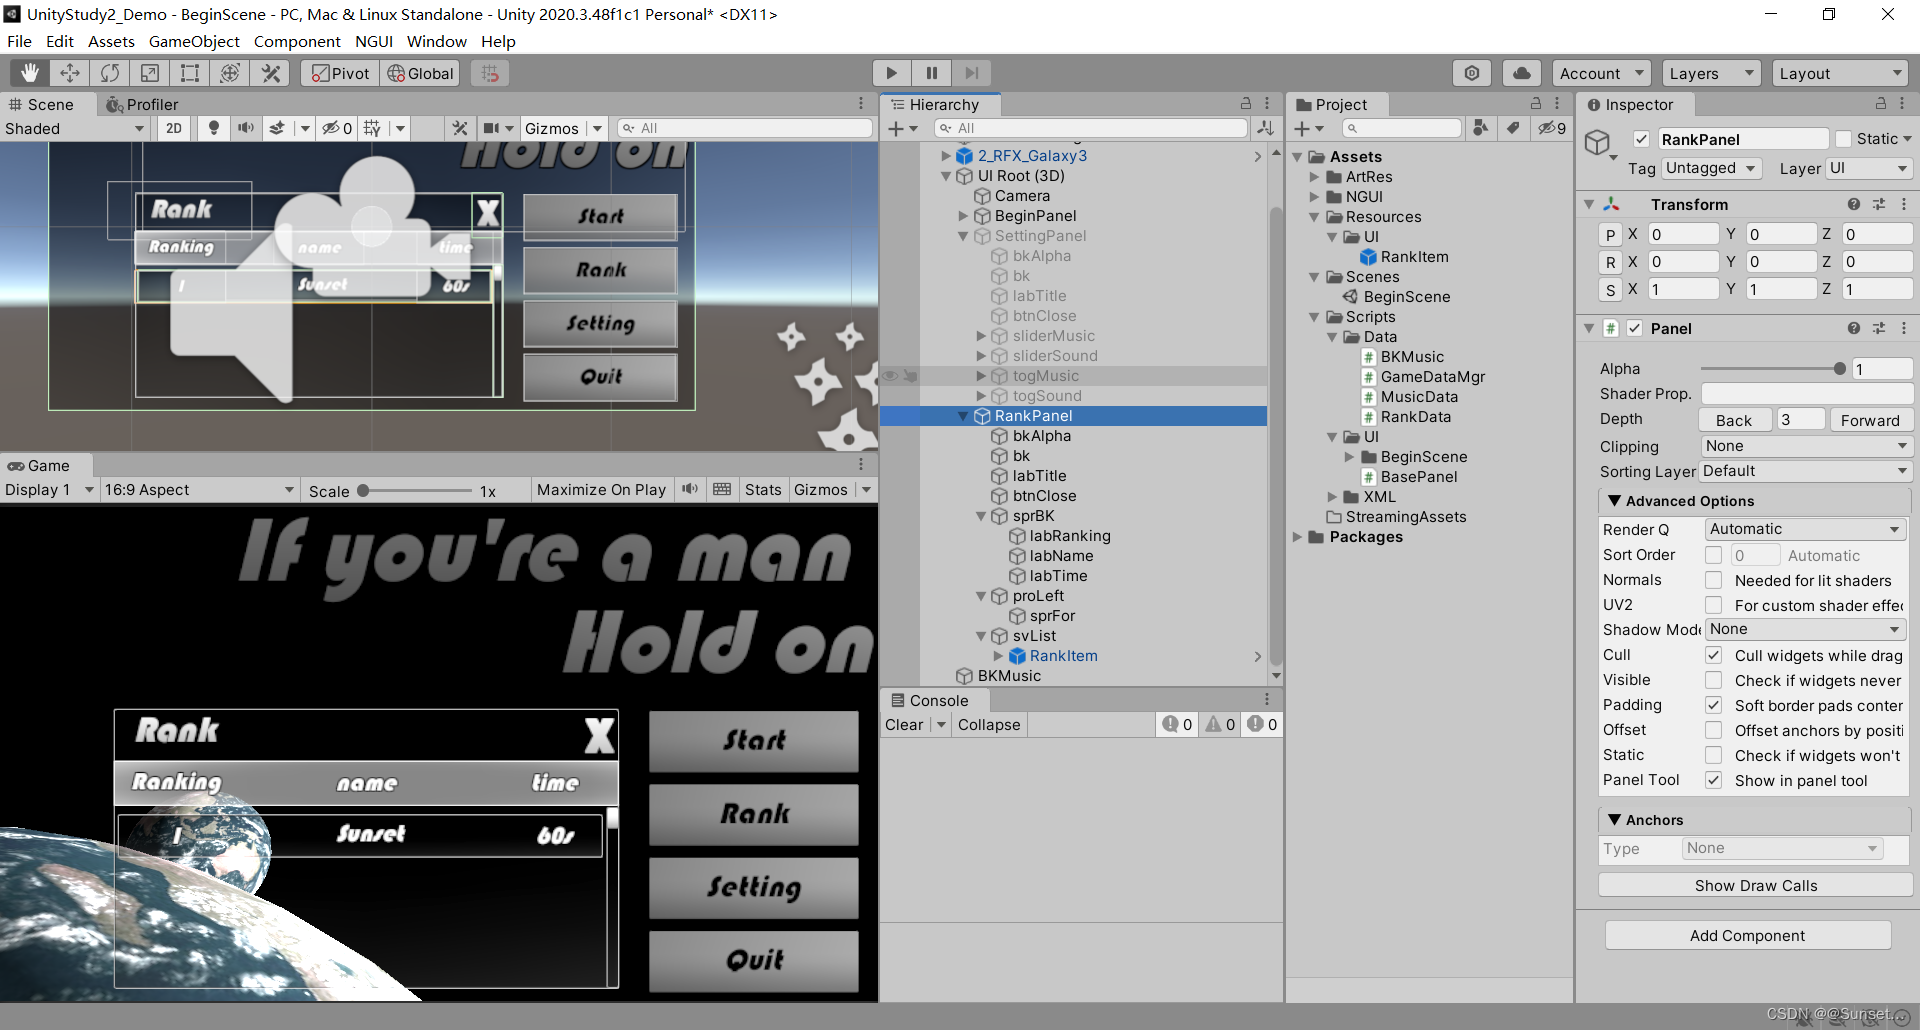
排行榜界面——逻辑处理
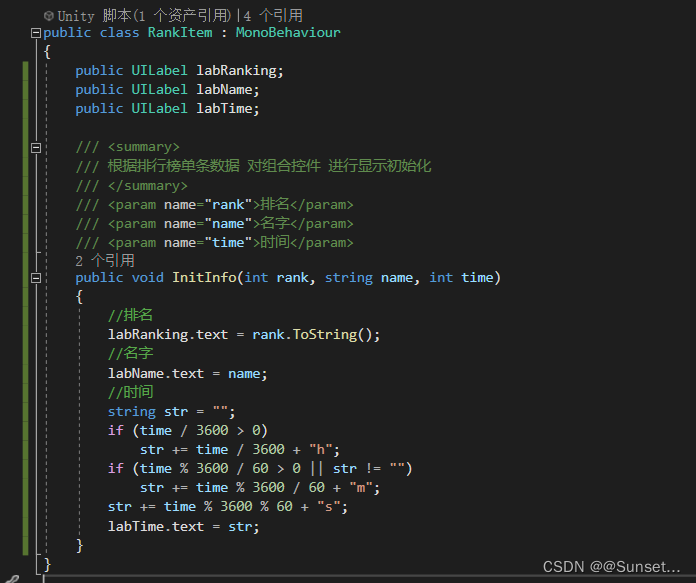
1.单个排行榜控件类——RankItem
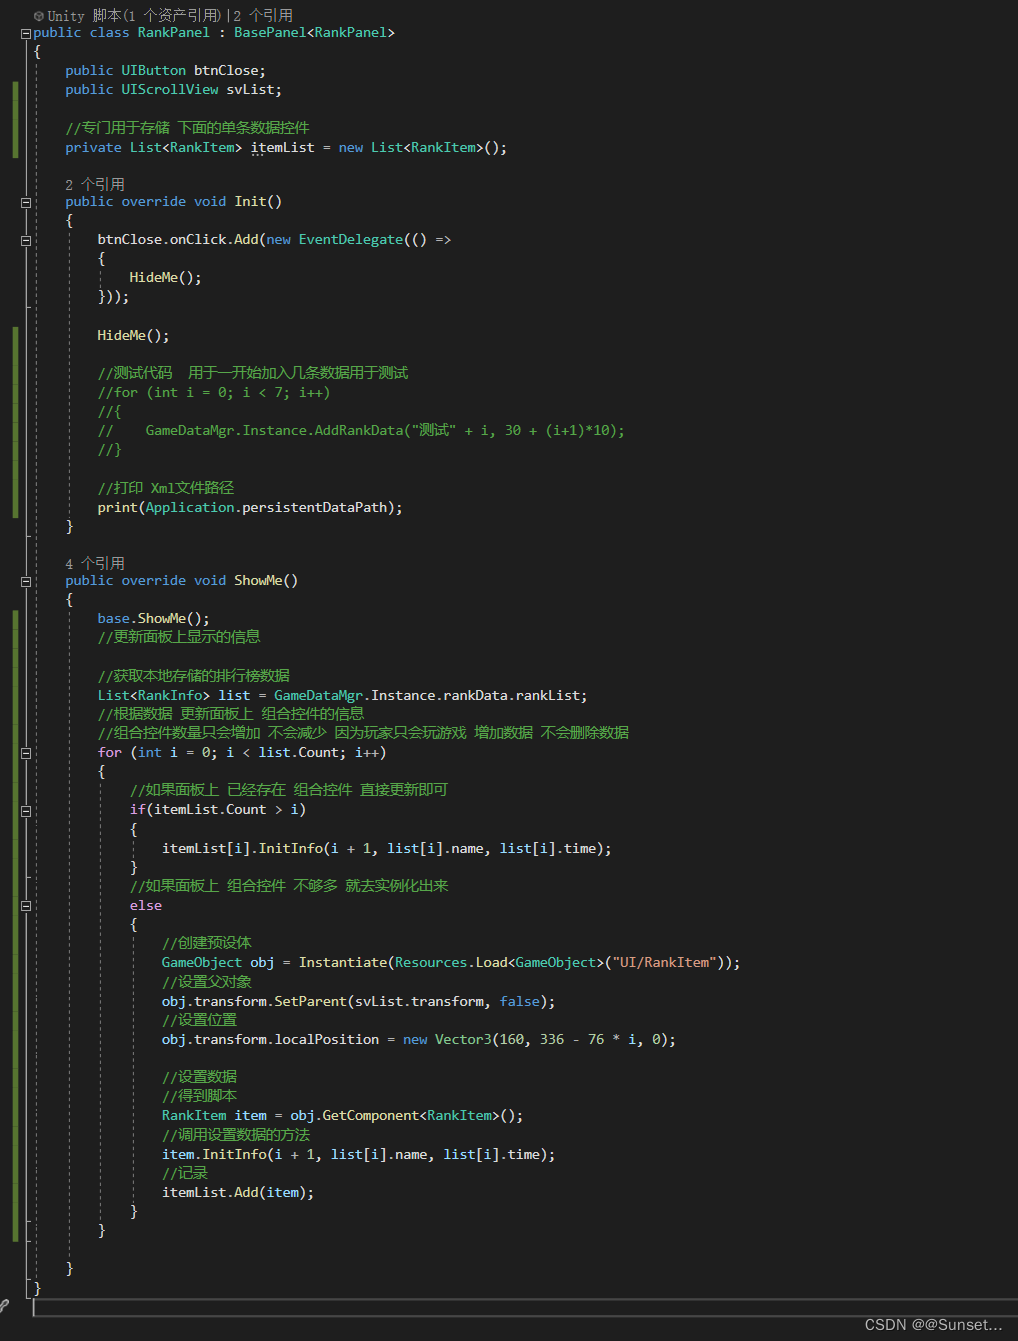
2.创建排行榜面板类
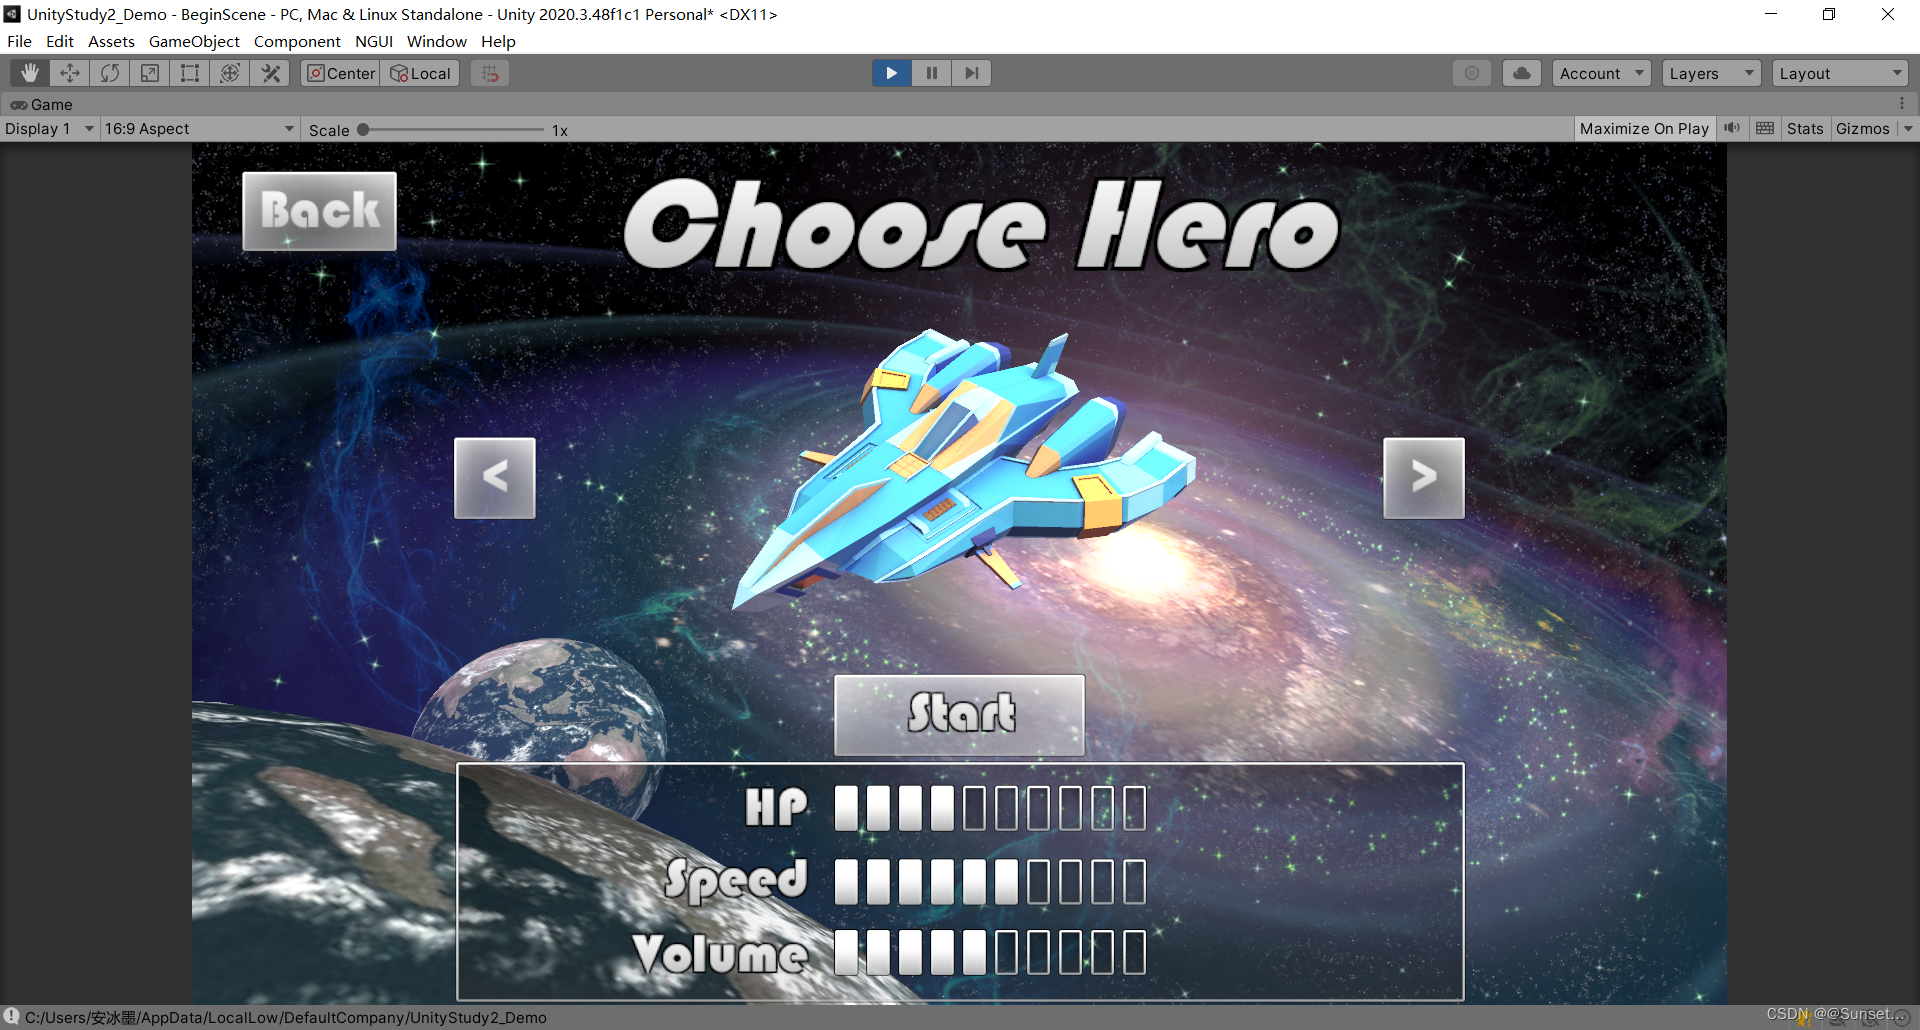
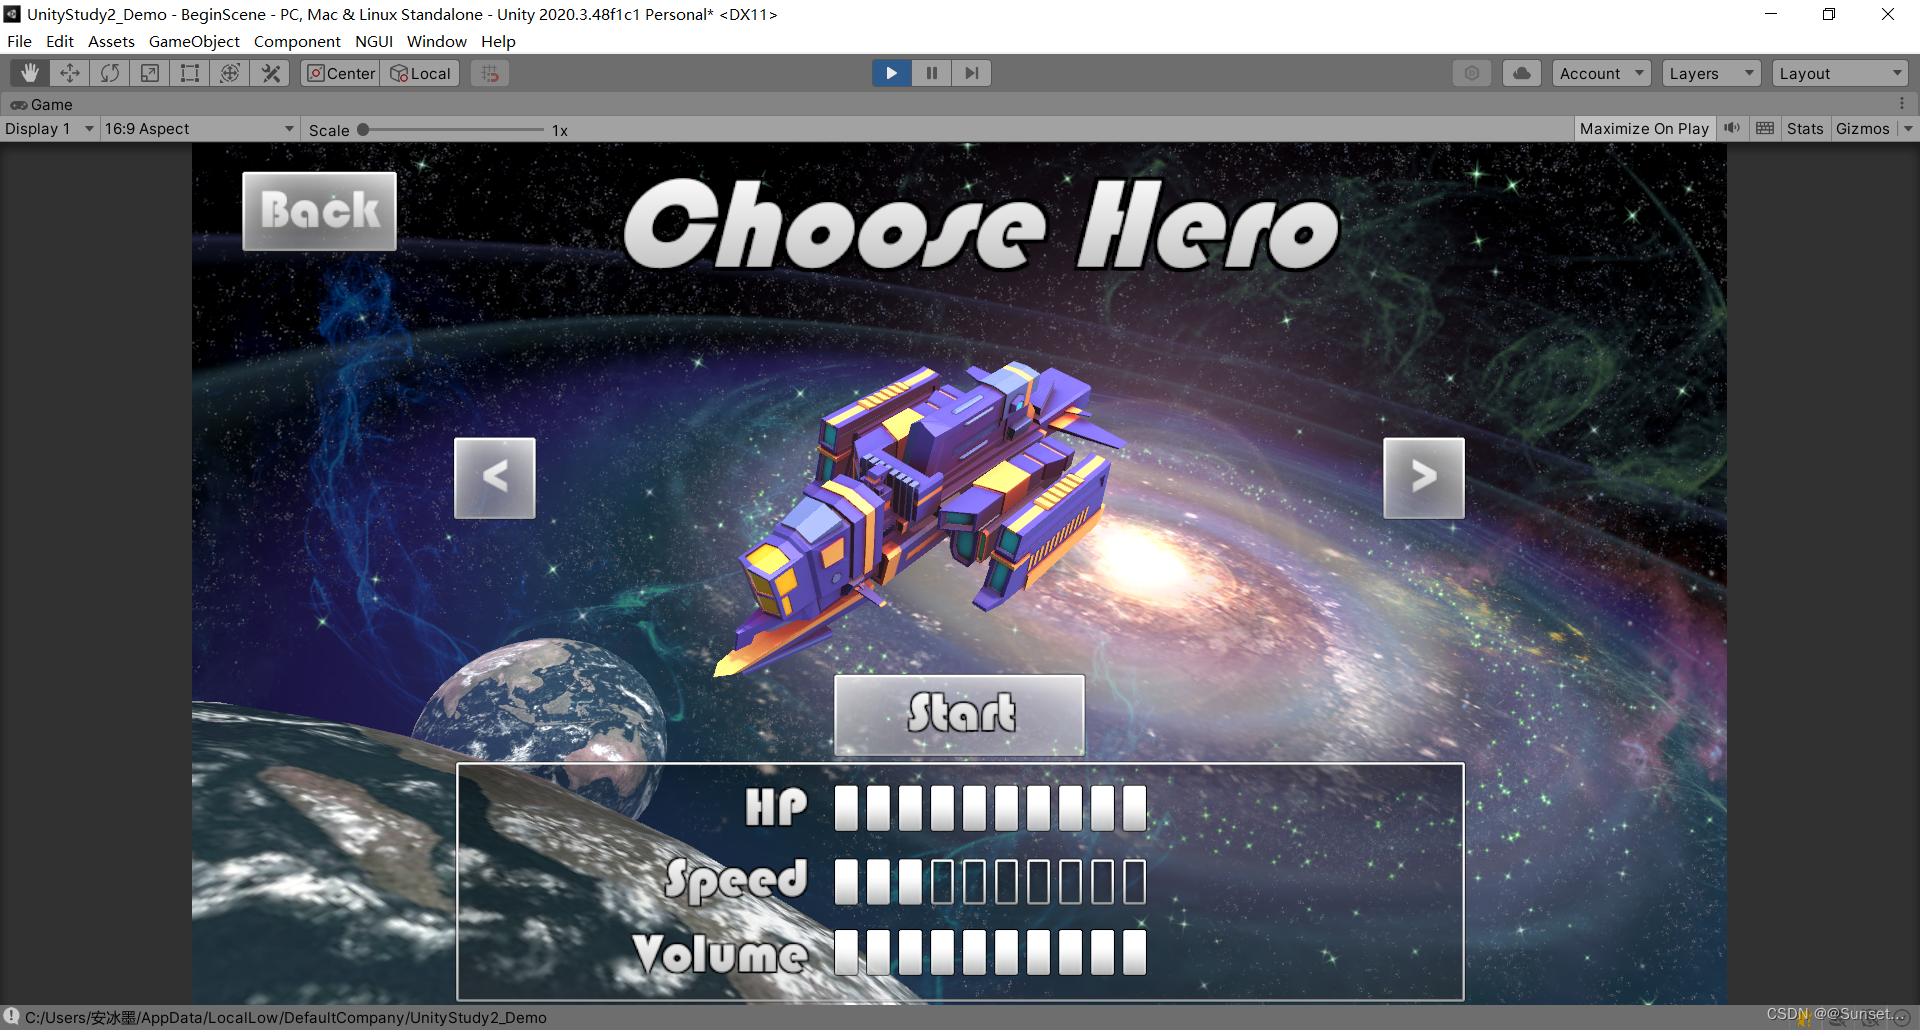
选择角色界面 —— 拼面板
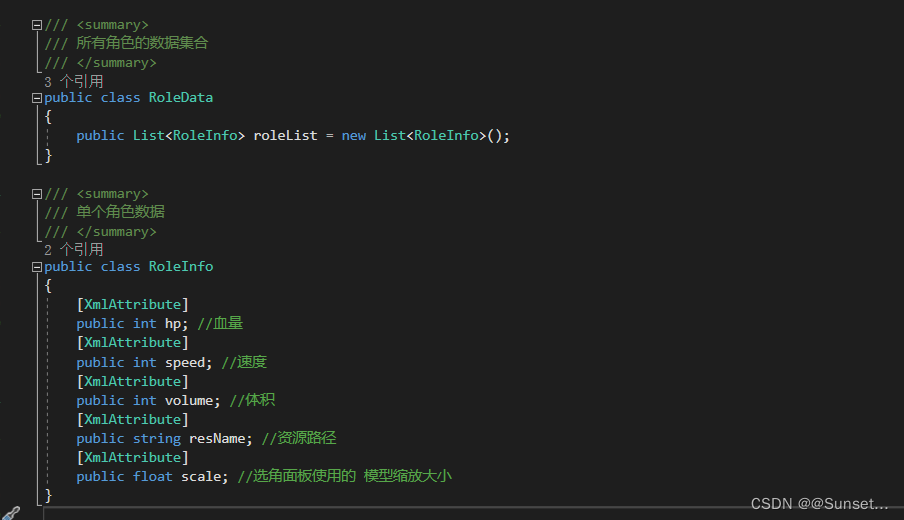
选择角色界面——数据准备
1.创建数据集合
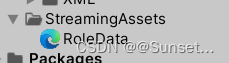
2.创建Xml配置文件
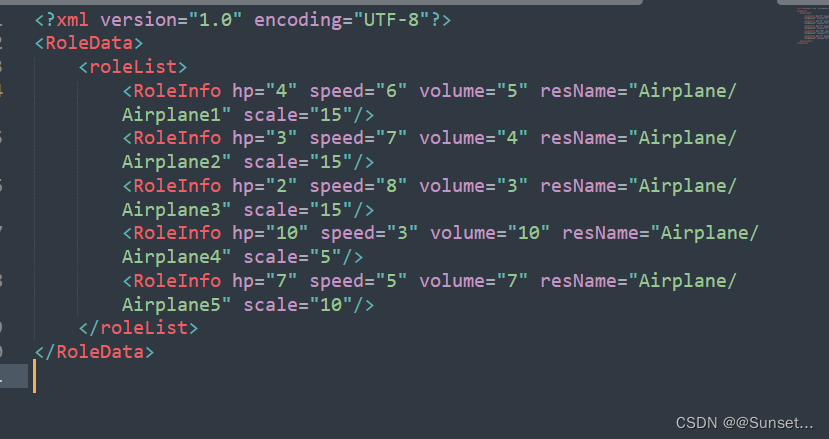
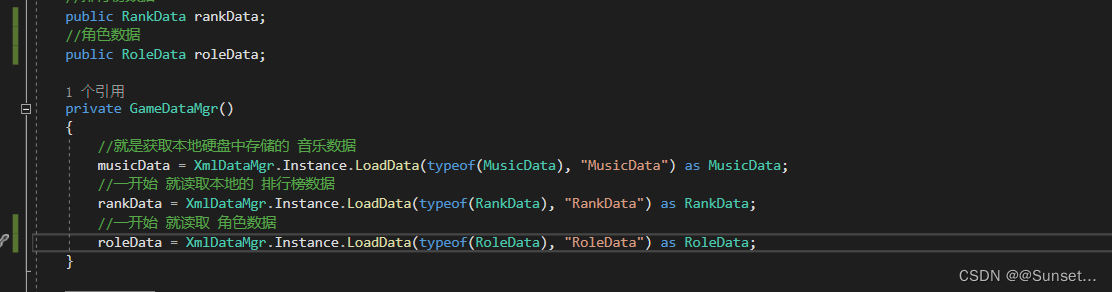
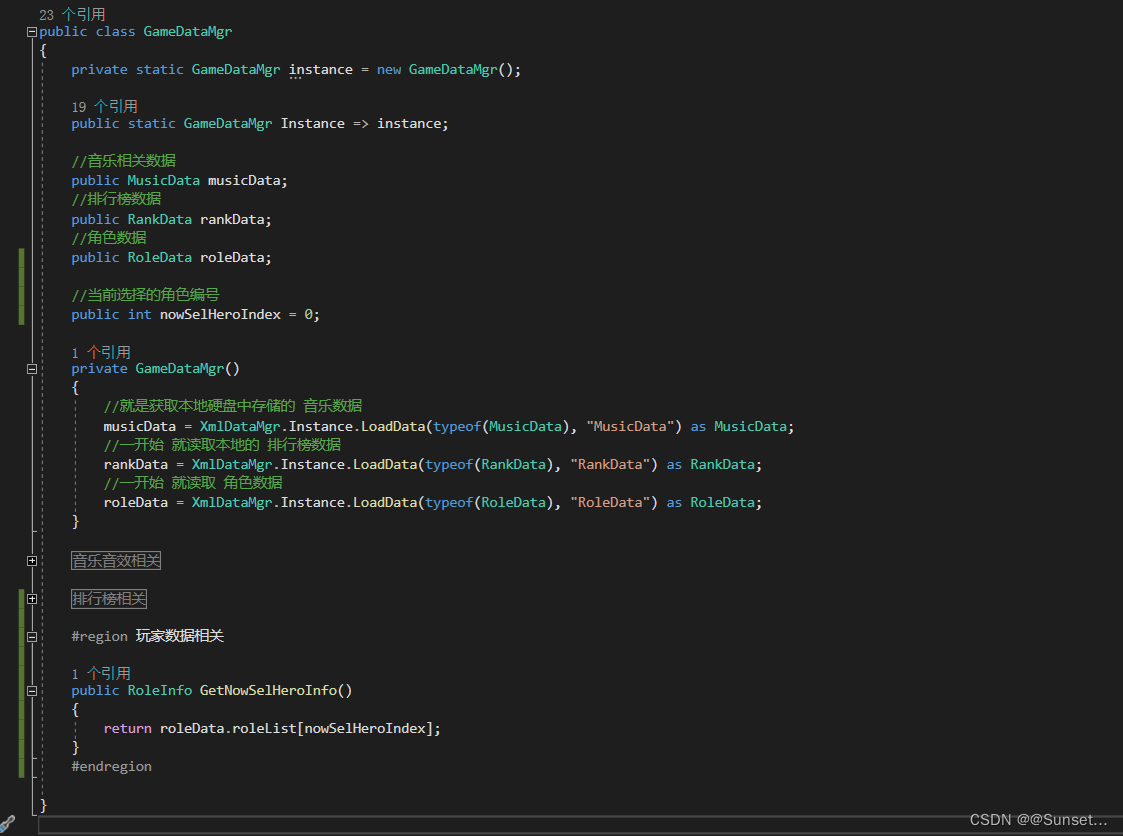
3.GameDataMgr 中调用初始化
选择角色界面——逻辑处理
1.创建 ChoosePanel 类
using System.Collections;
using System.Collections.Generic;
using UnityEngine;
using UnityEngine.SceneManagement;public class ChoosePanel : BasePanel<ChoosePanel>
{//各按钮public UIButton btnClose;public UIButton btnLeft;public UIButton btnRight;public UIButton btnStart;//模型父对象public Transform heroPos;//下方属性相关对象public List<GameObject> hpObjs;public List<GameObject> speedObjs;public List<GameObject> volumeObjs;//当前显示的飞机模型对象private GameObject airPlaneObj;public override void Init(){//选择角色后 点击开始 切换场景btnStart.onClick.Add(new EventDelegate(() =>{SceneManager.LoadScene("GameScene");}));btnLeft.onClick.Add(new EventDelegate(() =>{//左按钮 减我们设定的索引--GameDataMgr.Instance.nowSelHeroIndex;//如果 小于最小的索引 直接让其等于 最后一个索引if (GameDataMgr.Instance.nowSelHeroIndex < 0)GameDataMgr.Instance.nowSelHeroIndex = GameDataMgr.Instance.roleData.roleList.Count - 1;ChangeNowHero();}));btnRight.onClick.Add(new EventDelegate(() =>{//右按钮 加我们设定的索引++GameDataMgr.Instance.nowSelHeroIndex;//如果大于了最大索引 就置0if (GameDataMgr.Instance.nowSelHeroIndex > GameDataMgr.Instance.roleData.roleList.Count - 1)GameDataMgr.Instance.nowSelHeroIndex = 0;ChangeNowHero();}));btnClose.onClick.Add(new EventDelegate(() =>{//关闭自己HideMe();//显示开始面板BeginPanel.Instance.ShowMe();}));HideMe();}public override void ShowMe(){base.ShowMe();//每次显示的时候都从第一个开始GameDataMgr.Instance.nowSelHeroIndex = 0;ChangeNowHero();}public override void HideMe(){base.HideMe();//删除当前模型DestroyObj();}//切换当前的选择private void ChangeNowHero(){//得到当前选择的 玩家游戏数据RoleInfo info = GameDataMgr.Instance.GetNowSelHeroInfo();//更新模型//先删除上一次的飞机模型DestroyObj();//再创建当前的飞机模型airPlaneObj = Instantiate(Resources.Load<GameObject>(info.resName));//设置父对象airPlaneObj.transform.SetParent(heroPos);//设置角度和位置 缩放airPlaneObj.transform.localPosition = Vector3.zero;airPlaneObj.transform.localRotation = Quaternion.identity;airPlaneObj.transform.localScale = Vector3.one * info.scale;//修改层级airPlaneObj.layer = LayerMask.NameToLayer("UI");//更新属性for (int i = 0; i < 10; i++){hpObjs[i].SetActive(i < info.hp);speedObjs[i].SetActive(i < info.speed);volumeObjs[i].SetActive(i < info.volume);}}/// <summary>/// 用于删除上一次显示的模型对象/// </summary>private void DestroyObj(){if(airPlaneObj != null){//移除场景的模型Destroy(airPlaneObj);//置空airPlaneObj = null;}}private float time;//是否鼠标选中 模型private bool isSel;// Update is called once per framevoid Update(){//让飞机 上下浮动time += Time.deltaTime;heroPos.Translate(Vector3.up * Mathf.Sin(time) * 0.0001f, Space.World);//射线检测 让飞机 可以左右转动if (Input.GetMouseButtonDown(0)){//如果点击了 UI层碰撞器 认为需要开始 拖动 飞机了if (Physics.Raycast(Camera.main.ScreenPointToRay(Input.mousePosition),1000,1 << LayerMask.NameToLayer("UI"))){isSel = true;}}//抬起 取消选中if (Input.GetMouseButtonUp(0))isSel = false;//旋转对象if (Input.GetMouseButton(0) && isSel){heroPos.rotation *= Quaternion.AngleAxis(Input.GetAxis("Mouse X") * 20, Vector3.up);}}
}
2.GameDataMgr 中逻辑关联
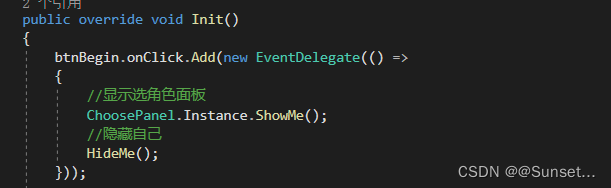
3.BeginPanel 中显隐设置
注意:模型旋转时,发射射线检测的摄像机要是主摄像机,或者就自己指定摄像机发射。
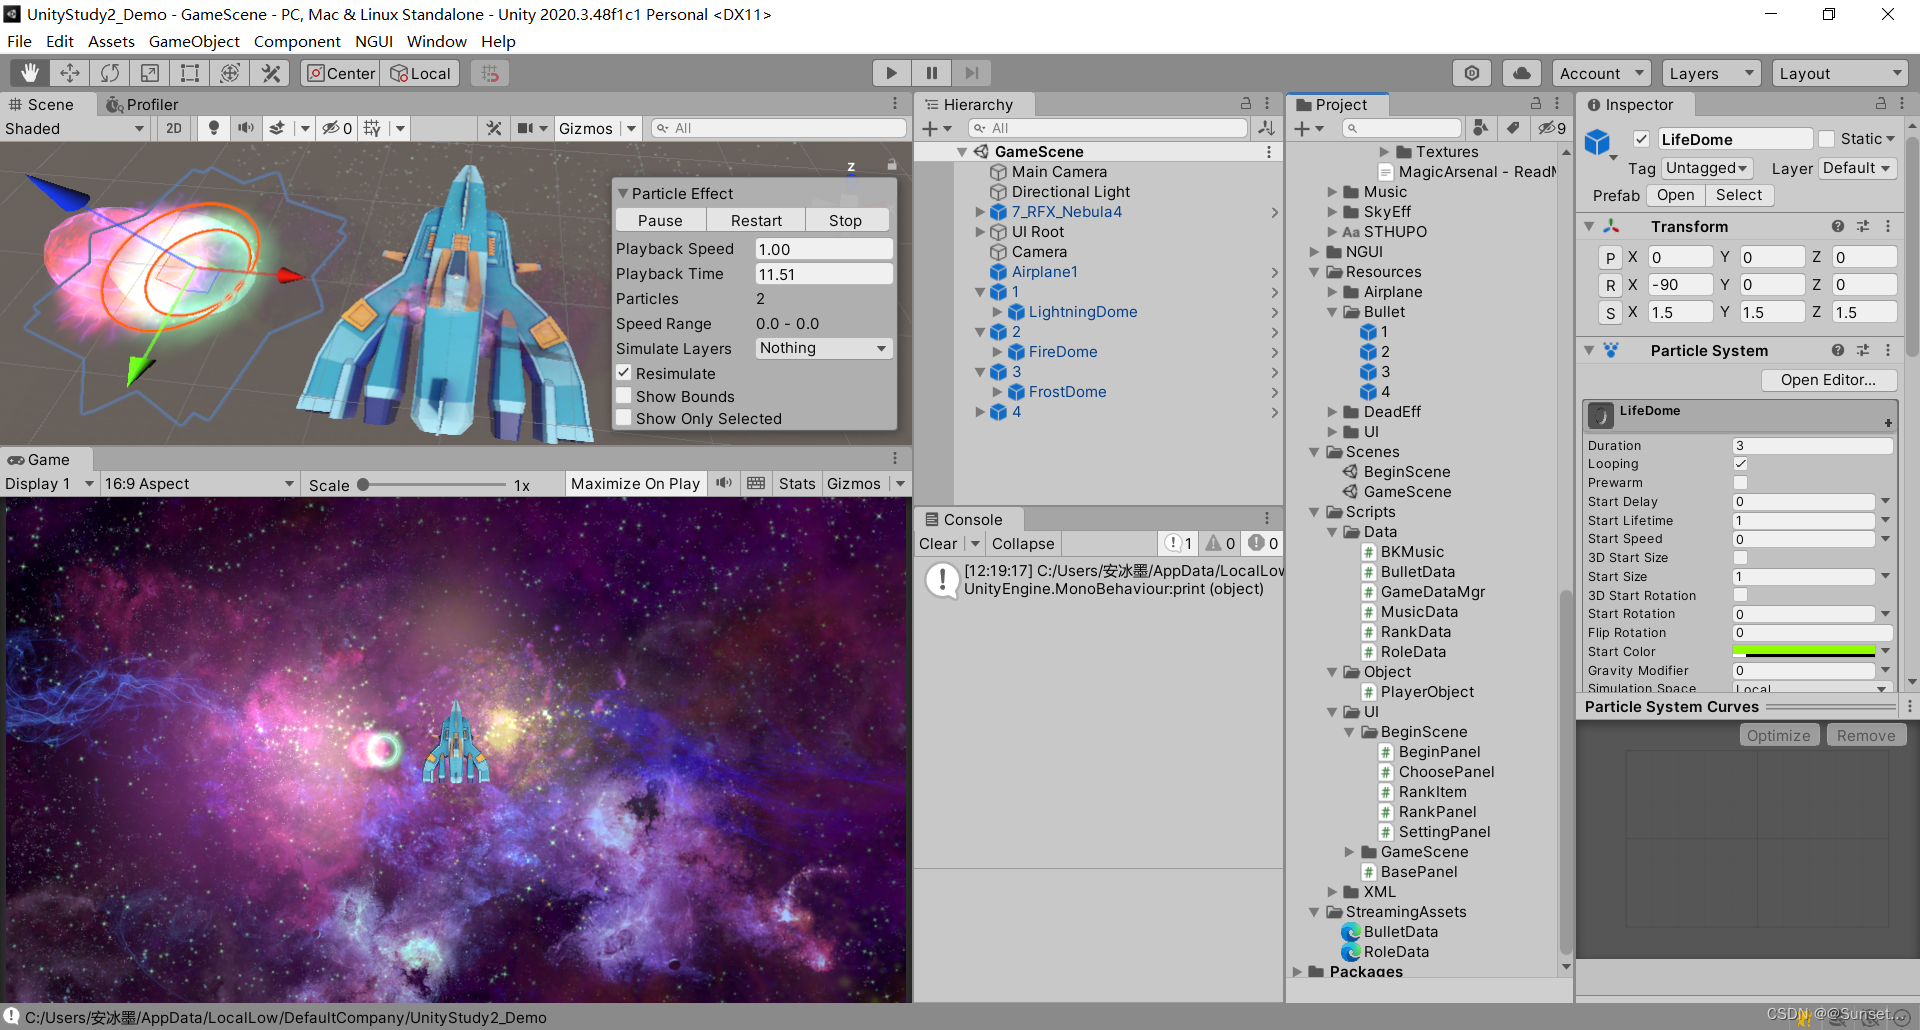
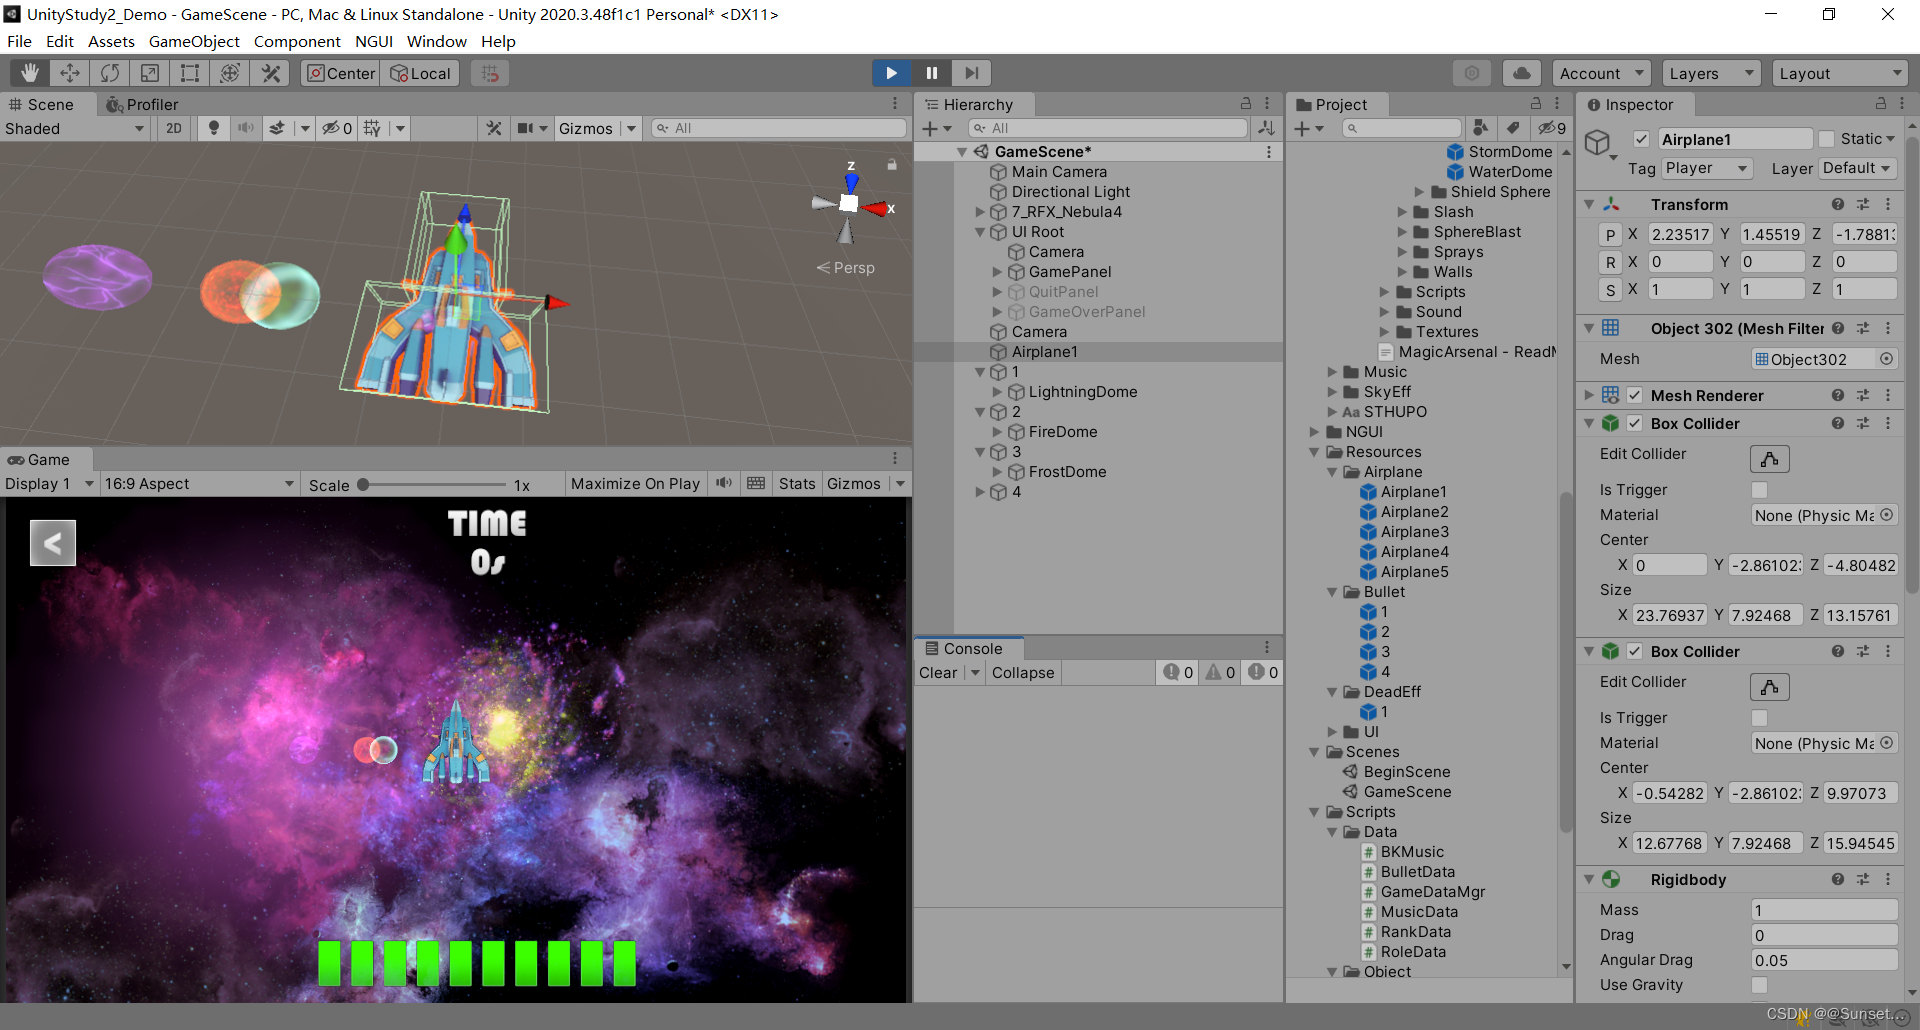
游戏场景
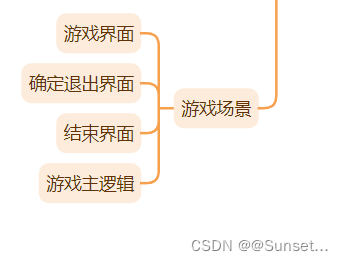
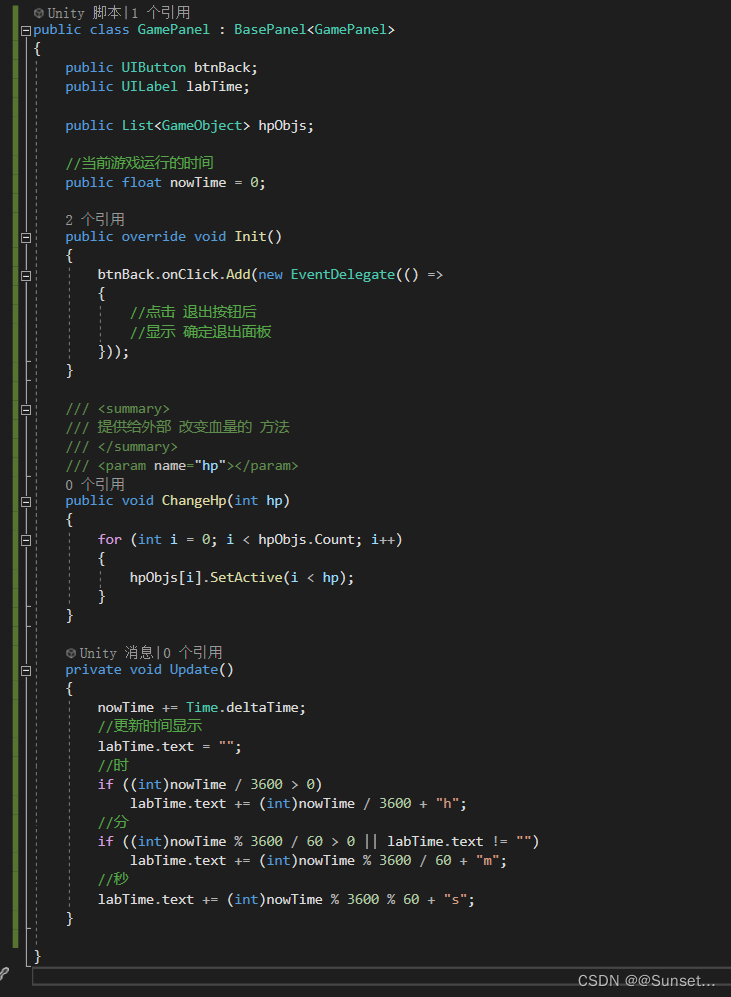
游戏界面
1.拼面板
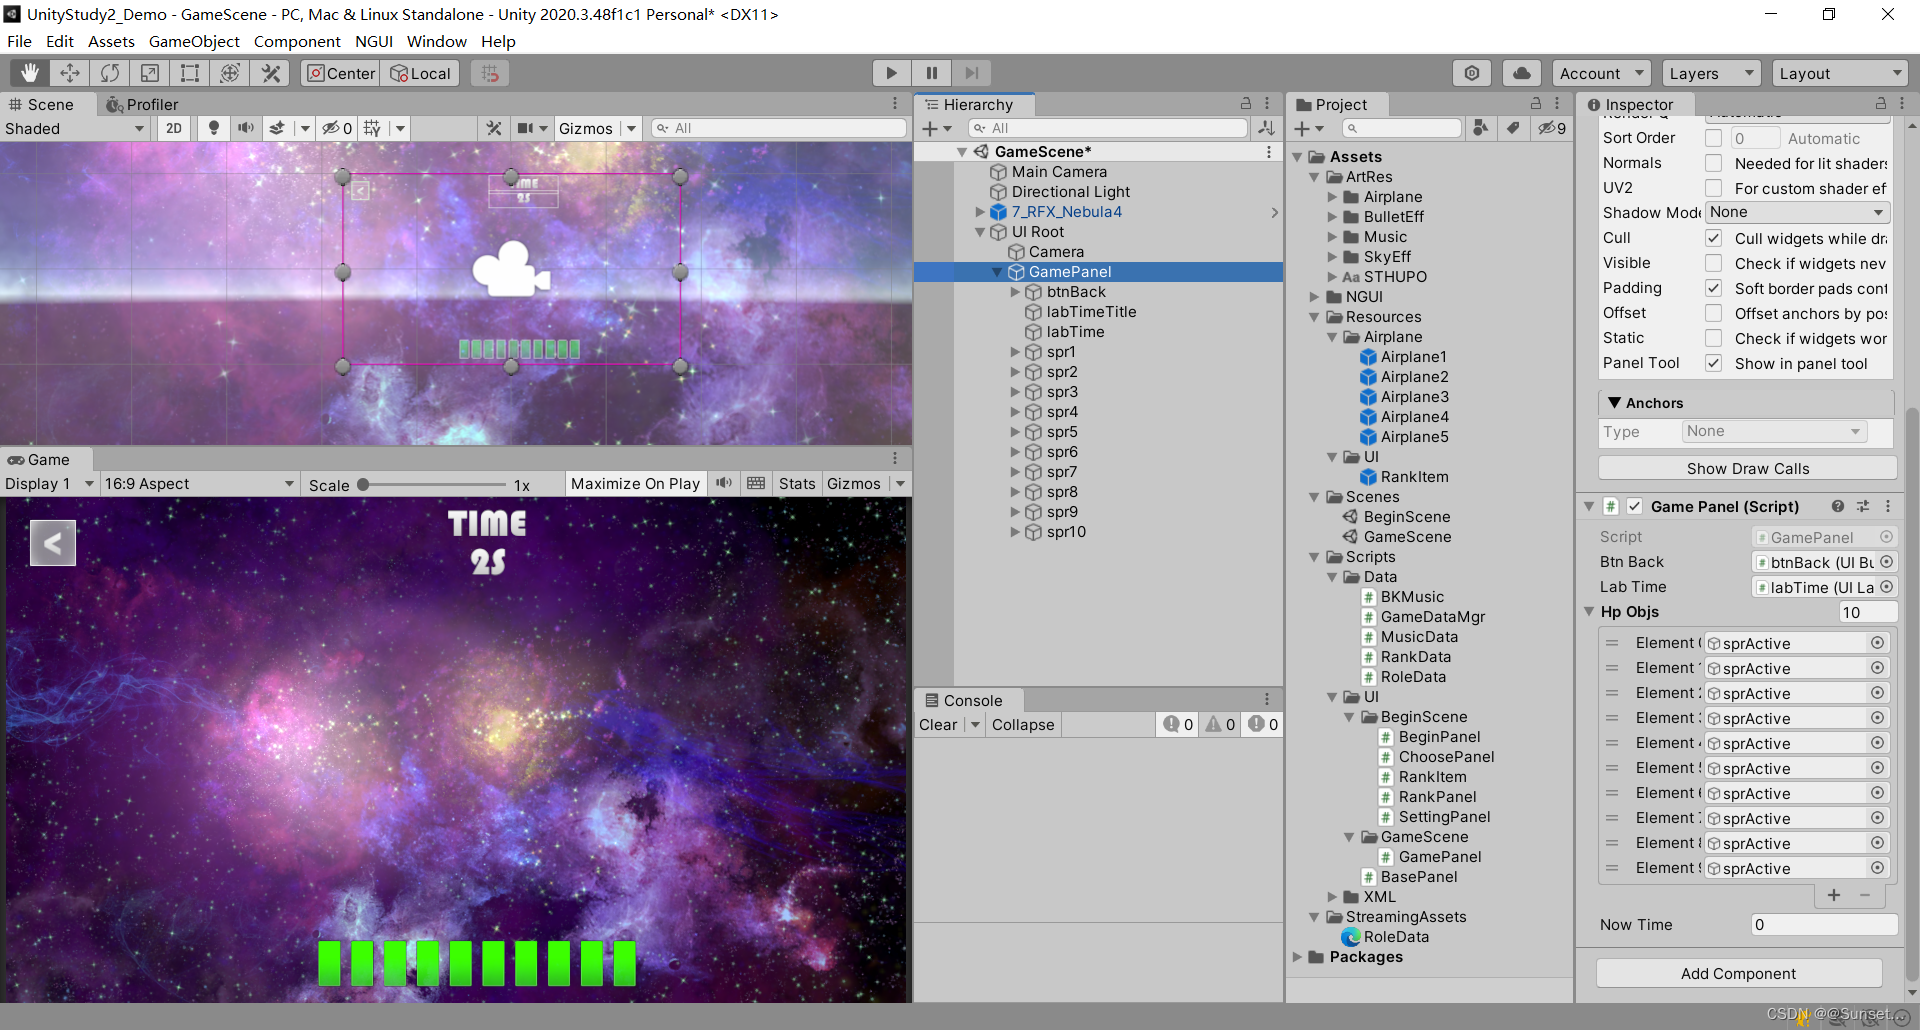
2.逻辑面板
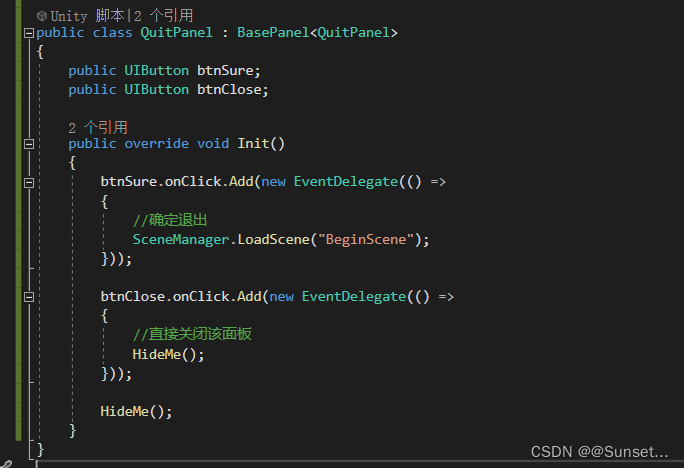
确定退出界面
1.拼面板
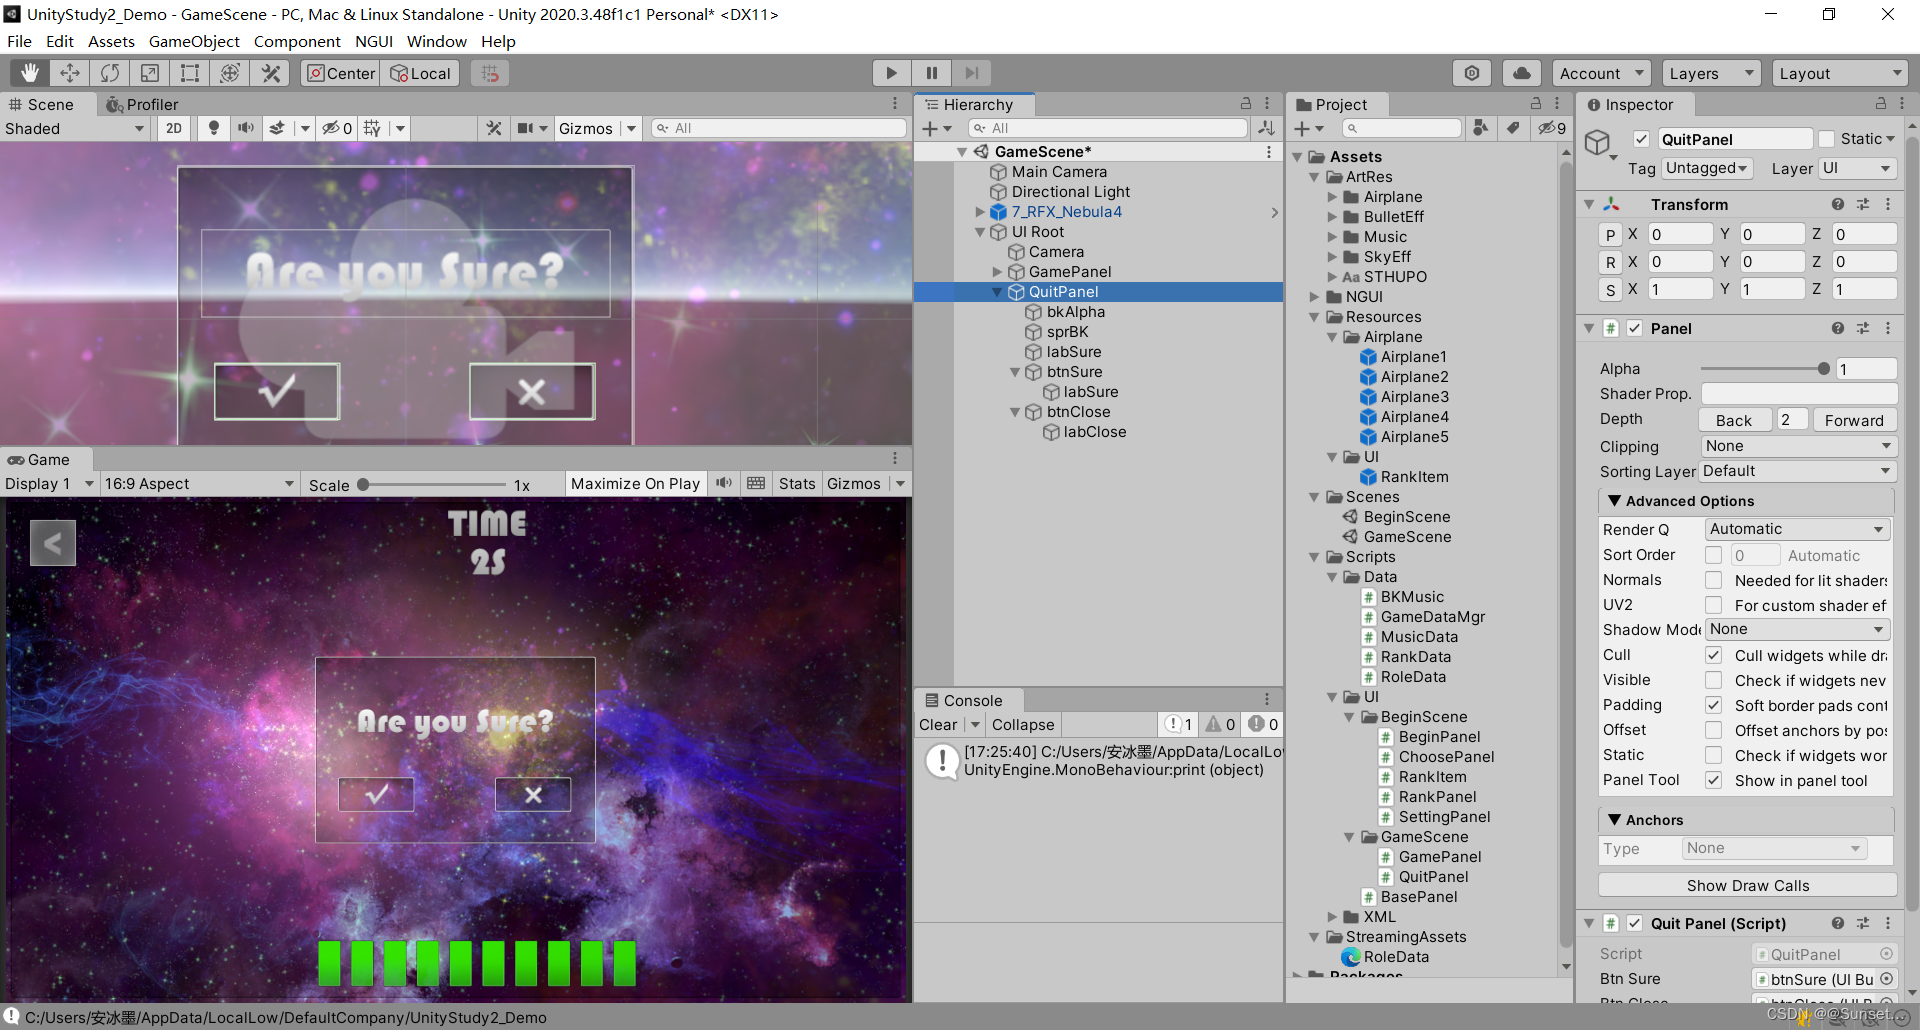
2.写逻辑
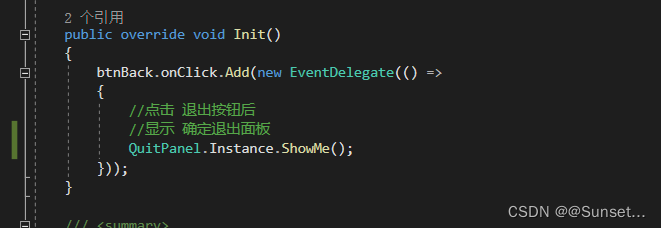
3.调用
GamePanel 中调用
结束界面
1.拼面板
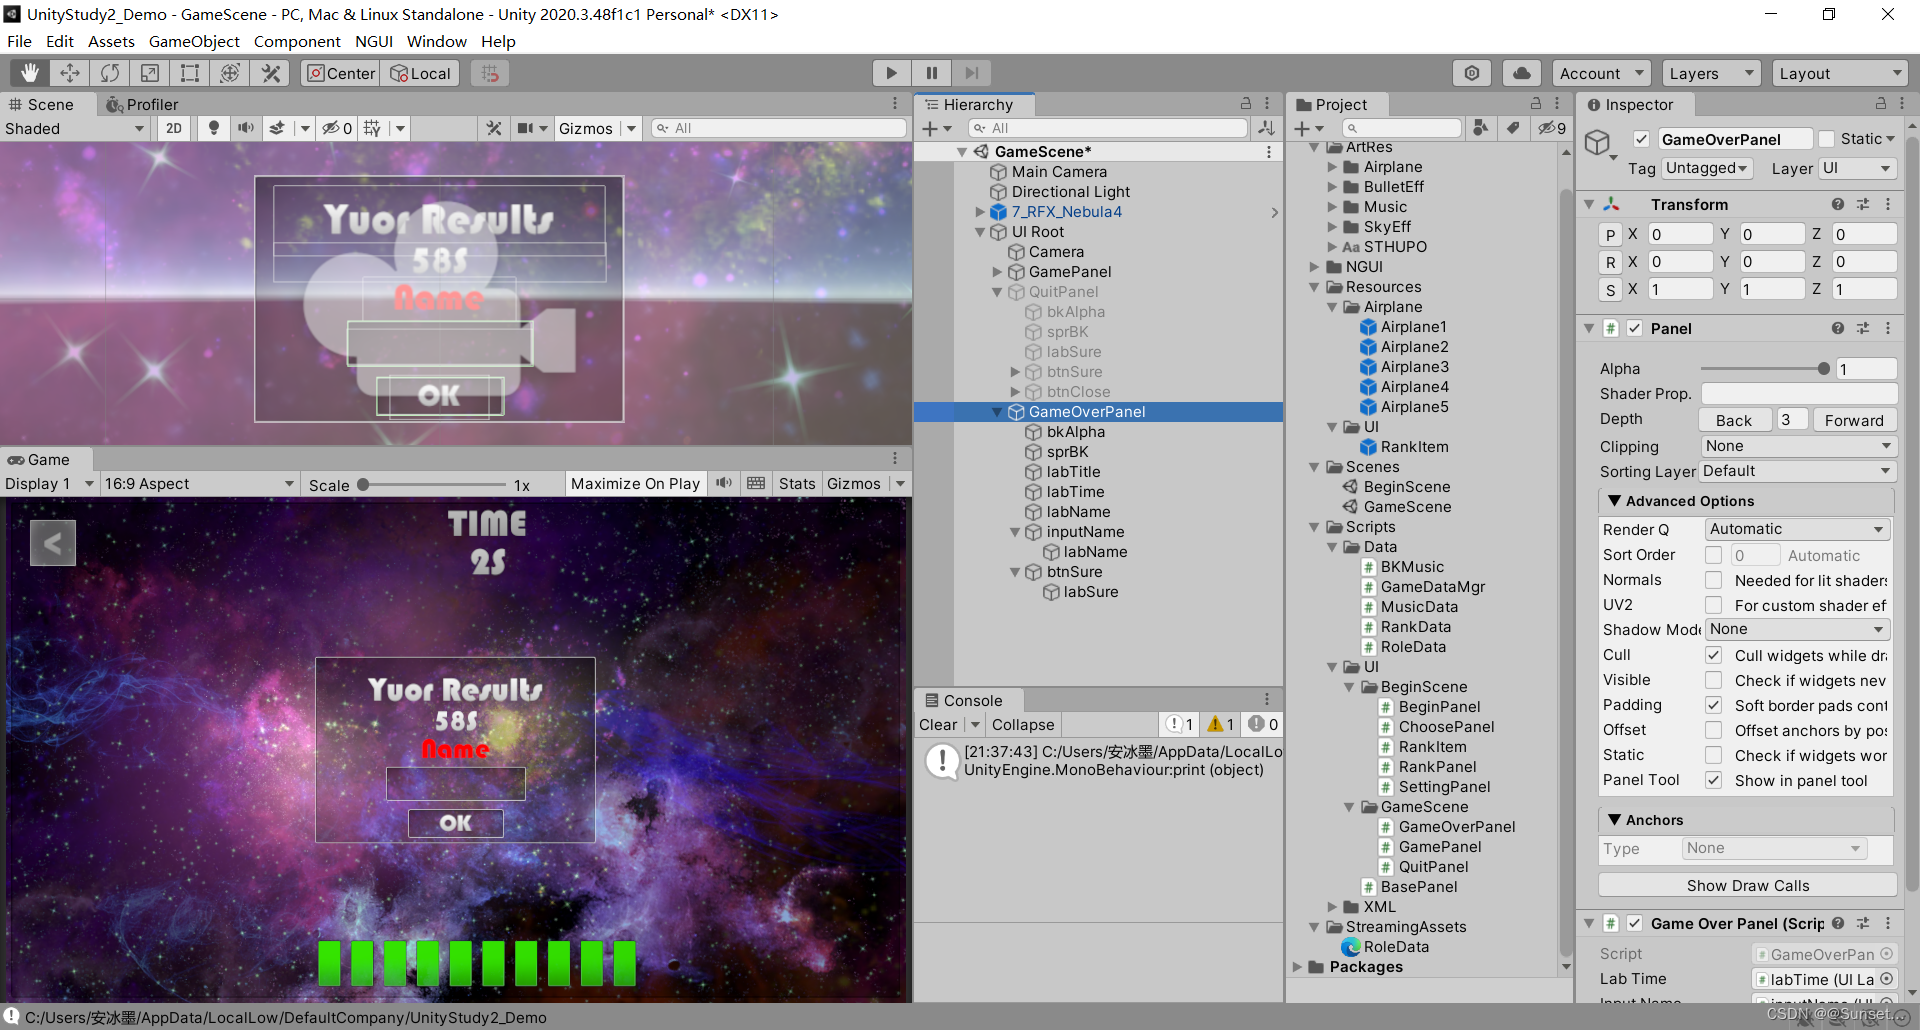
2.写逻辑

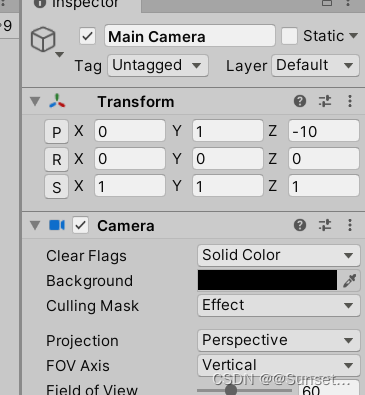
游戏主逻辑——主玩家相关
1.加一个相加来渲染
一个专门渲染特效
一个专门渲染UI
一个专门渲染其他

2.玩家逻辑
using System.Collections;
using System.Collections.Generic;
using UnityEngine;public class PlayerObject : MonoBehaviour
{//血量public int nowHp;public int maxHp;//速度public int speed;//旋转速度public int roundSpeed;//目标四元数角度private Quaternion targetQ;//是否死亡public bool isDead;//当前世界坐标系转屏幕上的点private Vector3 nowPos;//上一次玩家的位置 就是在位移前 玩家的位置private Vector3 frontPos;public void Dead(){isDead = true;//显示游戏结束面板GameOverPanel.Instance.ShowMe();}public void Wound(){if (isDead)return;//减血this.nowHp -= 1;//更新游戏面板上的血量显示GamePanel.Instance.ChangeHp(this.nowHp);//是否死亡了if (this.nowHp <= 0)this.Dead();}private float hValue;private float vValue;// Update is called once per framevoid Update(){//如果死亡了 就没有必要移动了if (isDead)return;//移动 旋转逻辑//旋转hValue = Input.GetAxisRaw("Horizontal");vValue = Input.GetAxisRaw("Vertical");//如果没有按我们的AD键 那么目标角度 就是(0,0,0)度if (hValue == 0)targetQ = Quaternion.identity;//如果按AD键 就是(0,0,20)或者 (0,0,-20) 根据按的左右决定elsetargetQ = hValue < 0 ? Quaternion.AngleAxis(20, Vector3.forward) : Quaternion.AngleAxis(-20, Vector3.forward);//让飞机朝着 这个目标四元数 去旋转this.transform.rotation = Quaternion.Slerp(this.transform.rotation, targetQ, roundSpeed * Time.deltaTime);//在位移之前 记录 之前的位置frontPos = this.transform.position;//移动this.transform.Translate(Vector3.forward * vValue * speed * Time.deltaTime);this.transform.Translate(Vector3.right * hValue * speed * Time.deltaTime, Space.World);//进行极限判断nowPos = Camera.main.WorldToScreenPoint(this.transform.position);//左右 溢出判断if(nowPos.x < 0 || nowPos.x >= Screen.width){this.transform.position = new Vector3(frontPos.x, this.transform.position.y, this.transform.position.z);}//上下 溢出判断if(nowPos.y < 0 || nowPos.y >= Screen.height){this.transform.position = new Vector3(this.transform.position.x, this.transform.position.y, frontPos.z);}}
}
游戏主逻辑——子弹相关
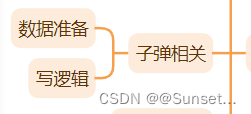
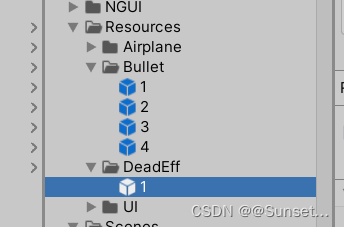
数据准备
1.制作子弹 和 子弹爆炸特效
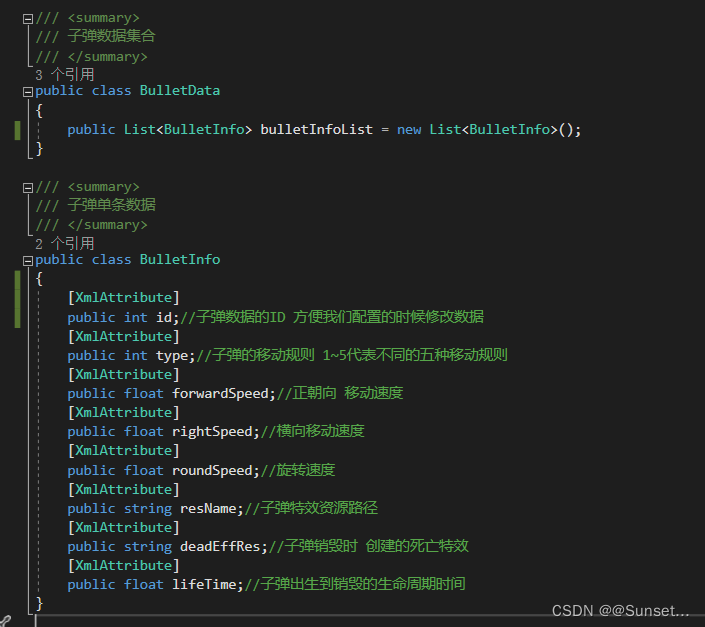
2.子弹数据类
3.Xml文件配置

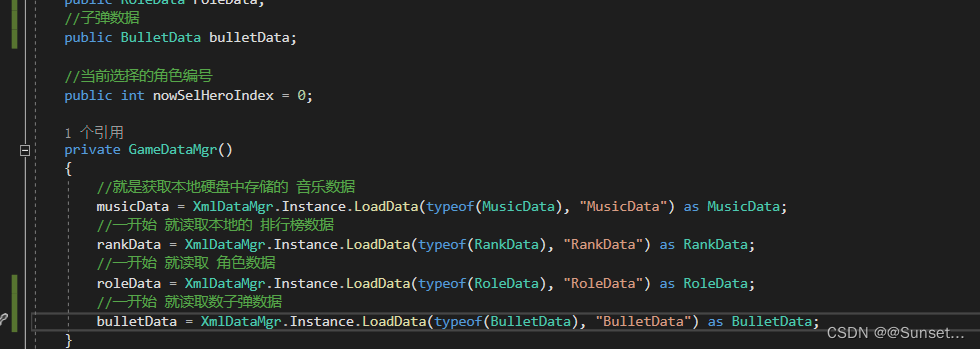
4. GameDataMgr 管理初始化
写逻辑
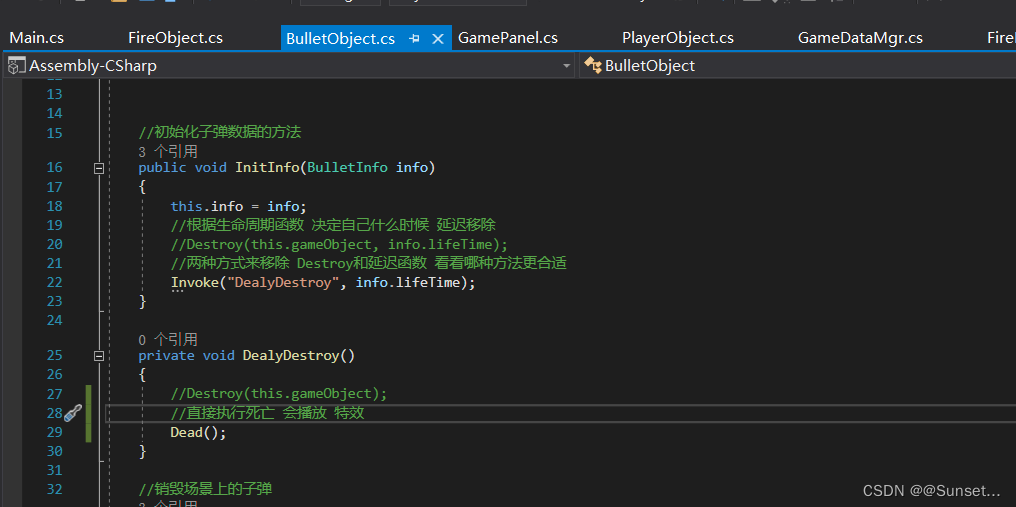
1.创建 BullteObject 脚本
using System.Collections;
using System.Collections.Generic;
using UnityEngine;public class BulletObject : MonoBehaviour
{//子弹使用的数据private BulletInfo info;//用于曲线移动的 计时变量private float time;//初始化子弹数据的方法public void InitInfo(BulletInfo info){this.info = info;//根据生命周期函数 决定自己什么时候 延迟移除//Destroy(this.gameObject, info.lifeTime);//两种方式来移除 Destroy和延迟函数 看看哪种方法更合适Invoke("DealyDestroy", info.lifeTime);}private void DealyDestroy(){Destroy(this.gameObject);}//销毁场景上的子弹public void Dead(){//创建死亡特效GameObject eff = Instantiate(Resources.Load<GameObject>(this.info.deadEffRes));//设置特效的位置 创建在当前子弹的位置eff.transform.position = this.transform.position;//1秒后延迟移除特效Destroy(eff, 1f);//销毁子弹对象Destroy(this.gameObject);}//和对象碰撞时 (触发)private void OnTriggerEnter(Collider other){if (other.gameObject.CompareTag("Player")){//得到玩家脚本PlayerObject obj = other.GetComponent<PlayerObject>();//玩家受伤减血obj.Wound();//销毁自己 就是直接调用 Dead方法Dead();}}// Update is called once per framevoid Update(){//所有移动的共同特点 都是朝自己的面朝向动this.transform.Translate(Vector3.forward * info.forwardSpeed * Time.deltaTime);//接着再来处理 其他的移动逻辑//1 代表 只朝自己面朝向移动 直线移动//2 代表 曲线运动//3 代表 右抛物线//4 代表 左抛物线//5 代表 跟踪移动switch (info.type){case 2:time += Time.deltaTime;//sin里面值变化的快慢 决定了 左右变化的频率//乘以的速度 变化的大小 决定了 左右位移的多少this.transform.Translate(Vector3.right * info.rightSpeed * Time.deltaTime * Mathf.Sin(time * info.roundSpeed));break;case 3://右抛物线 无非 就是 去改变 旋转角度this.transform.rotation *= Quaternion.AngleAxis(info.roundSpeed * Time.deltaTime, Vector3.up);break;case 4://左抛物线 无非 就是 去改变 旋转角度this.transform.rotation *= Quaternion.AngleAxis(-info.roundSpeed * Time.deltaTime, Vector3.up);break;case 5://跟踪移动 不停的计算 玩家和我之间的方向向量 得到四元数 然后自己的角度 不停的 变化为这个目标四元数this.transform.rotation = Quaternion.Slerp(this.transform.rotation,Quaternion.LookRotation(PlayerObject.Instance.transform.position - this.transform.position), info.roundSpeed * Time.deltaTime);break;}}
}
2.测试

游戏主逻辑——开火点相关
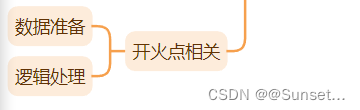
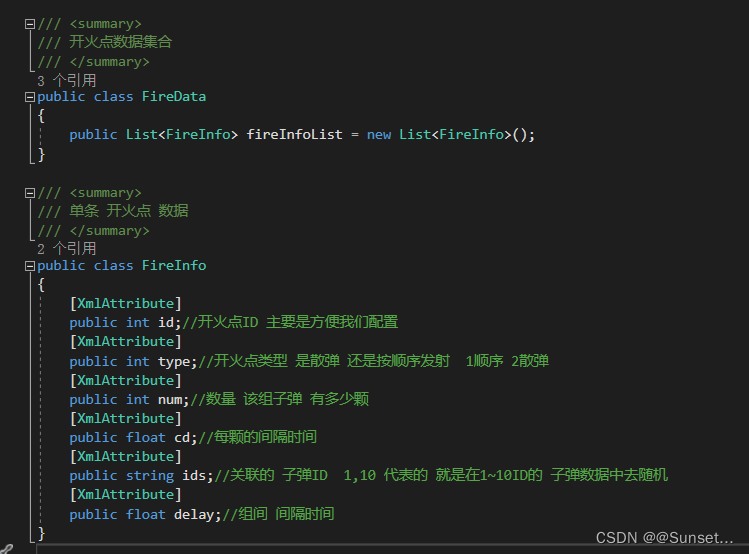
数据准备
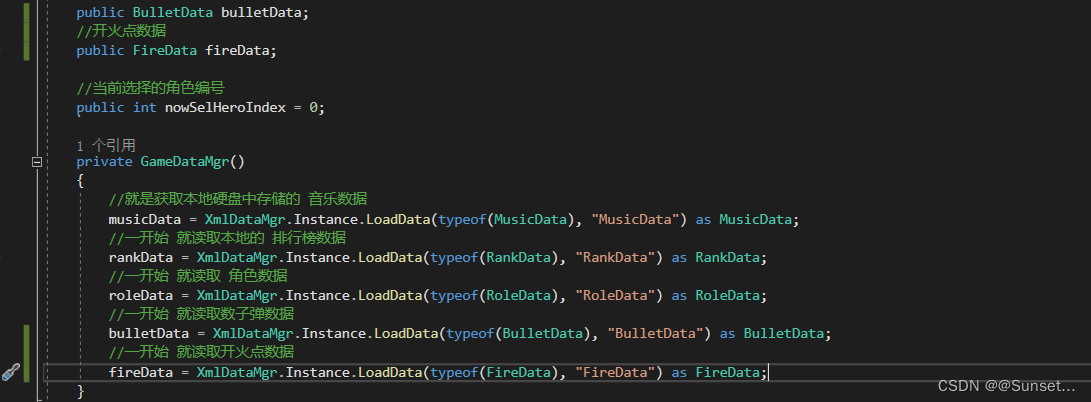
1.创建开火点数据 —— FireData
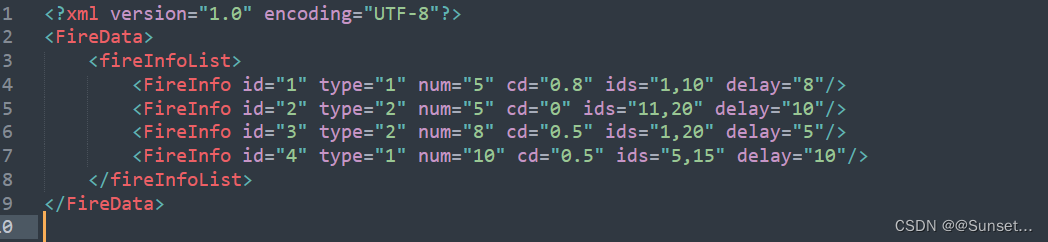
2.配置Xml文件
3. GameDataMgr 中初始化
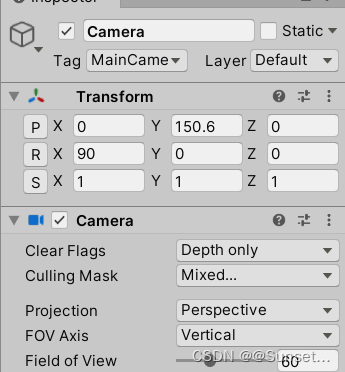
逻辑处理一
主要实现了绘制开火点位置
using System.Collections;
using System.Collections.Generic;
using UnityEngine;/// <summary>
/// 表示 开火点位置的 类型
/// </summary>
public enum E_Pos_Type
{TopLeft,Top,TopRight,Left,Right,BottonLeft,Botton,BottonRight,
}public class FireObject : MonoBehaviour
{public E_Pos_Type type;//表示屏幕上的点private Vector3 screenPos;//初始发射子弹的方向 主要用于作为散弹的初始方向 用于计算private Vector3 initDir;// Update is called once per framevoid Update(){//用于测试玩家转屏幕坐标后 横截面的 z轴值//print(Camera.main.WorldToScreenPoint(PlayerObject.Instance.transform.position));//更新 开火点位置 达到分辨率自适应UpdatePos();}//根据点的类型 来更新它的位置private void UpdatePos(){//这里设置z轴 是为了和主玩家位置转屏幕坐标后的 z位置一样 目的是 让点和玩家 所在的 横截面是一致的screenPos.z = 150.6f;switch (type){case E_Pos_Type.TopLeft:screenPos.x = 0;screenPos.y = Screen.height;initDir = Vector3.right;break;case E_Pos_Type.Top:screenPos.x = Screen.width / 2;screenPos.y = Screen.height;initDir = Vector3.right;break;case E_Pos_Type.TopRight:screenPos.x = Screen.width;screenPos.y = Screen.height;initDir = Vector3.left;break;case E_Pos_Type.Left:screenPos.x = 0;screenPos.y = Screen.height / 2;initDir = Vector3.up;break;case E_Pos_Type.Right:screenPos.x = Screen.width;screenPos.y = Screen.height / 2;initDir = Vector3.up;break;case E_Pos_Type.BottonLeft:screenPos.x = 0;screenPos.y = 0;initDir = Vector3.right;break;case E_Pos_Type.Botton:screenPos.x = Screen.width / 2;screenPos.y = 0;initDir = Vector3.right;break;case E_Pos_Type.BottonRight:screenPos.x = Screen.width;screenPos.y = 0;initDir = Vector3.left;break;}//再把屏幕点 转换为 世界坐标点 那得到的 就是我们想要的坐标点this.transform.position = Camera.main.ScreenToWorldPoint(screenPos);}
}
逻辑处理二
1.实现了重置开火点数据 和 检测开火逻辑 (代码量较多 要好好了解)
using System.Collections;
using System.Collections.Generic;
using UnityEngine;/// <summary>
/// 表示 开火点位置的 类型
/// </summary>
public enum E_Pos_Type
{TopLeft,Top,TopRight,Left,Right,BottonLeft,Botton,BottonRight,
}public class FireObject : MonoBehaviour
{public E_Pos_Type type;//表示屏幕上的点private Vector3 screenPos;//初始发射子弹的方向 主要用于作为散弹的初始方向 用于计算private Vector3 initDir;//当前开火点的数据信息private FireInfo fireInfo;private int nowNum;private float nowCD;private float nowDelay;//当前组开火点 使用的子弹信息private BulletInfo nowBulletInfo;//散弹时 每颗子弹的间隔角度private float changeAngle;//用于发射散弹时 记录上一次的方向private Vector3 nowDir;// Update is called once per framevoid Update(){//用于测试玩家转屏幕坐标后 横截面的 z轴值//print(Camera.main.WorldToScreenPoint(PlayerObject.Instance.transform.position));//更新 开火点位置 达到分辨率自适应UpdatePos();//每次 都检测 是否需要 重置 开火点数据ResetFireInfo();//发射子弹UpdateFire();}//根据点的类型 来更新它的位置private void UpdatePos(){//这里设置z轴 是为了和主玩家位置转屏幕坐标后的 z位置一样 目的是 让点和玩家 所在的 横截面是一致的screenPos.z = 150.6f;switch (type){case E_Pos_Type.TopLeft:screenPos.x = 0;screenPos.y = Screen.height;initDir = Vector3.right;break;case E_Pos_Type.Top:screenPos.x = Screen.width / 2;screenPos.y = Screen.height;initDir = Vector3.right;break;case E_Pos_Type.TopRight:screenPos.x = Screen.width;screenPos.y = Screen.height;initDir = Vector3.left;break;case E_Pos_Type.Left:screenPos.x = 0;screenPos.y = Screen.height / 2;initDir = Vector3.up;break;case E_Pos_Type.Right:screenPos.x = Screen.width;screenPos.y = Screen.height / 2;initDir = Vector3.up;break;case E_Pos_Type.BottonLeft:screenPos.x = 0;screenPos.y = 0;initDir = Vector3.right;break;case E_Pos_Type.Botton:screenPos.x = Screen.width / 2;screenPos.y = 0;initDir = Vector3.right;break;case E_Pos_Type.BottonRight:screenPos.x = Screen.width;screenPos.y = 0;initDir = Vector3.left;break;}//再把屏幕点 转换为 世界坐标点 那得到的 就是我们想要的坐标点this.transform.position = Camera.main.ScreenToWorldPoint(screenPos);}//重置当前要发射的炮台数据private void ResetFireInfo(){//自己定一个规则 只有当cd和数量都为0时 才认为需要重新获取 发射点数据if (nowCD != 0 && nowNum != 0)return;//组间休息时间判断if (fireInfo != null){nowDelay -= Time.deltaTime;//还在组间休息if (nowDelay > 0)return;}//从数据中随机取出一条 来按照规则 发射子弹List<FireInfo> list = GameDataMgr.Instance.fireData.fireInfoList;fireInfo = list[Random.Range(0, list.Count)];//我们不能直接改变数据当中的内容 我们应该拿变量 临时存储下来 这样就不会影响我们数据本身nowNum = fireInfo.num;nowCD = fireInfo.cd;nowDelay = fireInfo.delay;//通过 开火点数据 取出 当前要使用的子弹数据信息//得到开始id 和 结束id 用于随机取子弹信息string[] strs = fireInfo.ids.Split(',');int beginID = int.Parse(strs[0]);int endID = int.Parse(strs[1]);int randomBulletID = Random.Range(beginID, endID + 1);nowBulletInfo = GameDataMgr.Instance.bulletData.bulletInfoList[randomBulletID - 1];//如果是散弹 就需要计算 间隔角度if (fireInfo.type == 2){switch (type){case E_Pos_Type.TopLeft:case E_Pos_Type.TopRight:case E_Pos_Type.BottonLeft:case E_Pos_Type.BottonRight:changeAngle = 90f / (nowNum + 1);break;case E_Pos_Type.Top:case E_Pos_Type.Left:case E_Pos_Type.Right:case E_Pos_Type.Botton:changeAngle = 180f / (nowNum + 1);break;}}}//检测开火private void UpdateFire(){//当前状态 是不需要发射子弹的if (nowCD == 0 && nowNum == 0)return;//cd更新nowCD -= Time.deltaTime;if (nowCD > 0)return;GameObject bullet;BulletObject bulletObj;switch (fireInfo.type){//一颗一颗的发射子弹 朝向玩家case 1://动态创建 子弹对象bullet = Instantiate(Resources.Load<GameObject>(nowBulletInfo.resName));//动态添加 子弹脚本bulletObj = bullet.AddComponent<BulletObject>();//把当前的子弹数据传入子弹脚本 进行初始化bulletObj.InitInfo(nowBulletInfo);//设置子弹的位置 和朝向bullet.transform.position = this.transform.position;bullet.transform.rotation = Quaternion.LookRotation(PlayerObject.Instance.transform.position - bullet.transform.position);//表示已经发射一颗子弹--nowNum;//重置cdnowCD = nowNum == 0 ? 0 : fireInfo.cd;break;//发射散弹case 2://无CD 一瞬间 发射所有的散弹if(nowCD == 0){for (int i = 0; i < nowNum; i++){//动态创建 子弹对象bullet = Instantiate(Resources.Load<GameObject>(nowBulletInfo.resName));//动态添加 子弹脚本bulletObj = bullet.AddComponent<BulletObject>();//把当前的子弹数据传入子弹脚本 进行初始化bulletObj.InitInfo(nowBulletInfo);//设置子弹的位置 和朝向bullet.transform.position = this.transform.position;//每次都会旋转一个角度 得到一个新的方向nowDir = Quaternion.AngleAxis(changeAngle * i, Vector3.up) * initDir;bullet.transform.rotation = Quaternion.LookRotation(nowDir);}//因为是瞬间创建完所有子弹 所以 重置数据nowCD = nowNum = 0;}else{//动态创建 子弹对象bullet = Instantiate(Resources.Load<GameObject>(nowBulletInfo.resName));//动态添加 子弹脚本bulletObj = bullet.AddComponent<BulletObject>();//把当前的子弹数据传入子弹脚本 进行初始化bulletObj.InitInfo(nowBulletInfo);//设置子弹的位置 和朝向bullet.transform.position = this.transform.position;//每次都会旋转一个角度 得到一个新的方向nowDir = Quaternion.AngleAxis(changeAngle * (fireInfo.num - nowNum), Vector3.up) * initDir;bullet.transform.rotation = Quaternion.LookRotation(nowDir);//表示已经发射一颗子弹--nowNum;//重置cdnowCD = nowNum == 0 ? 0 : fireInfo.cd;}break;}}}
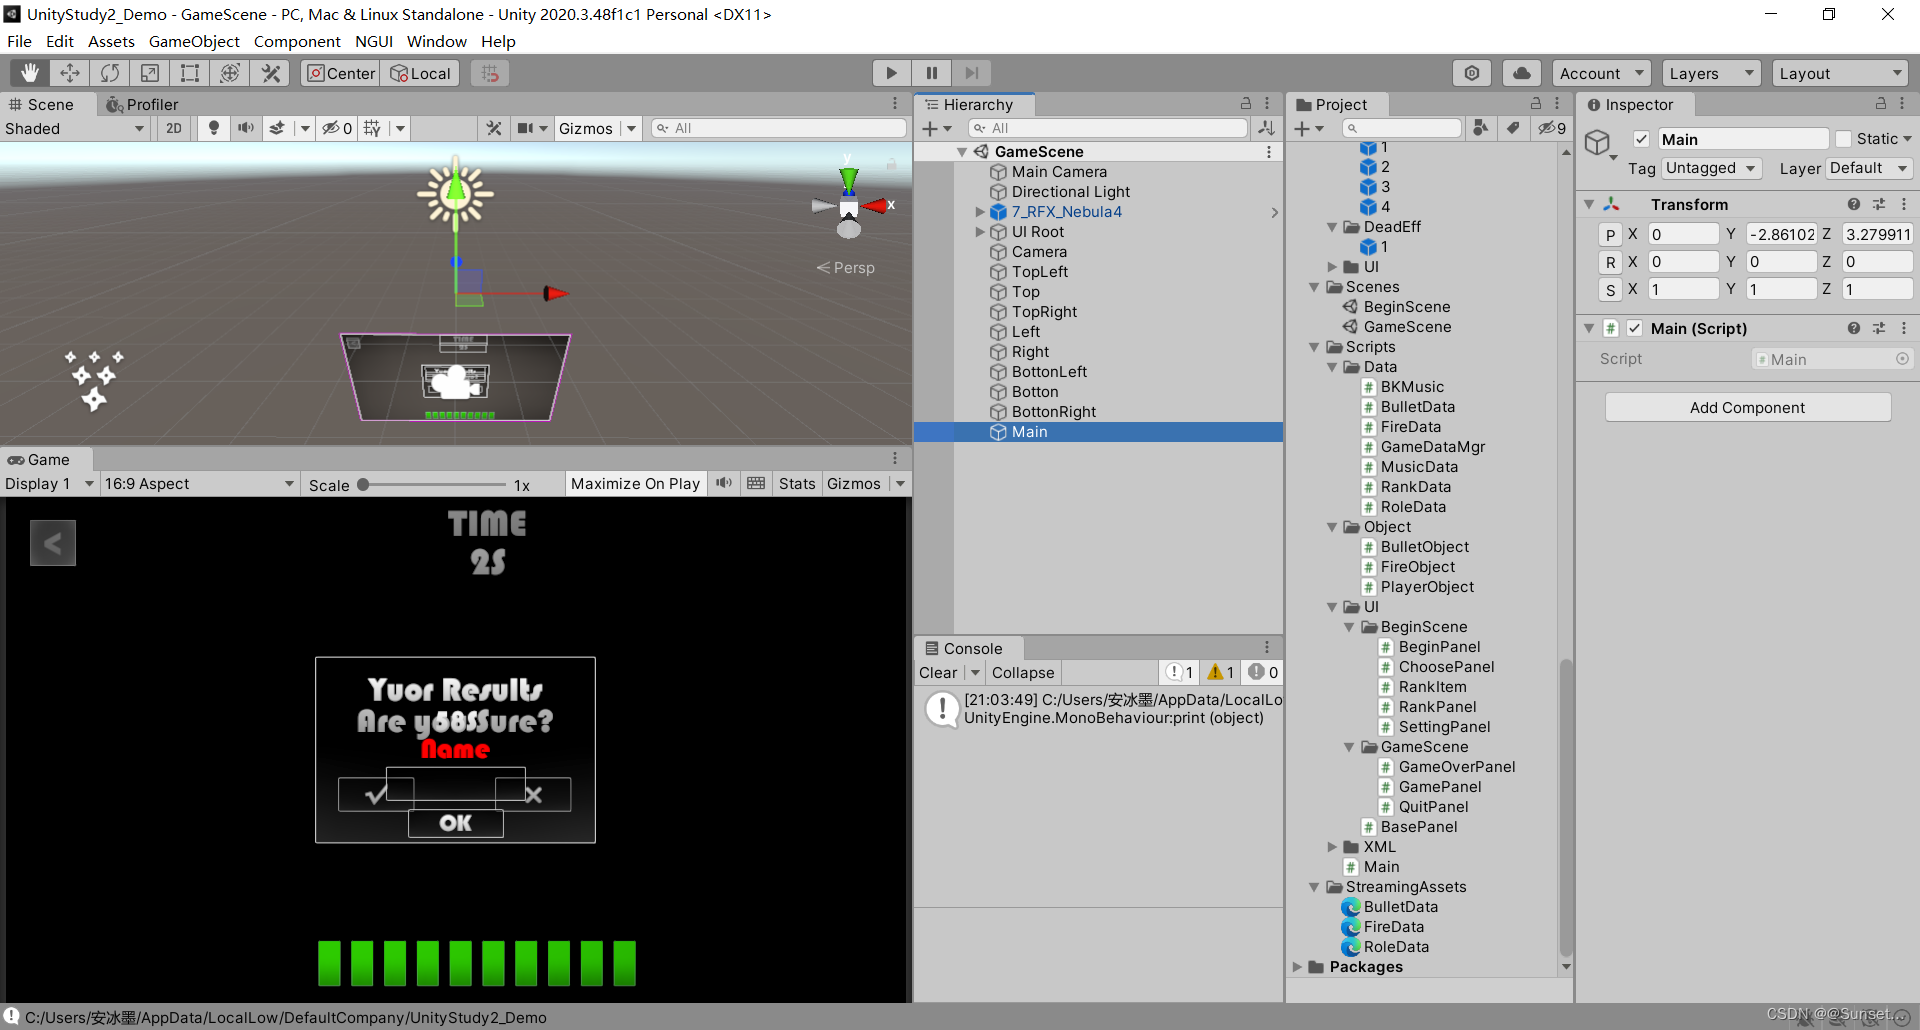
2.串联 开始面板和游戏面板
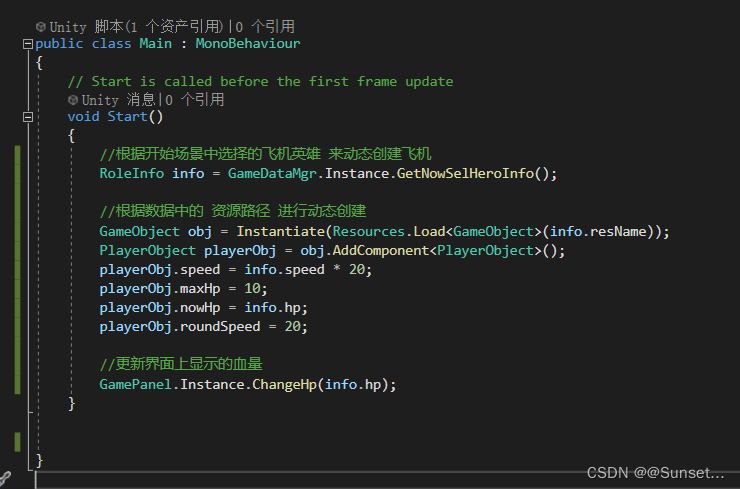
创建 Main 类 用于创建玩家飞机
逻辑功能完善
1.子弹自动销毁
2.不隐藏光标
3.射线检测销毁子弹

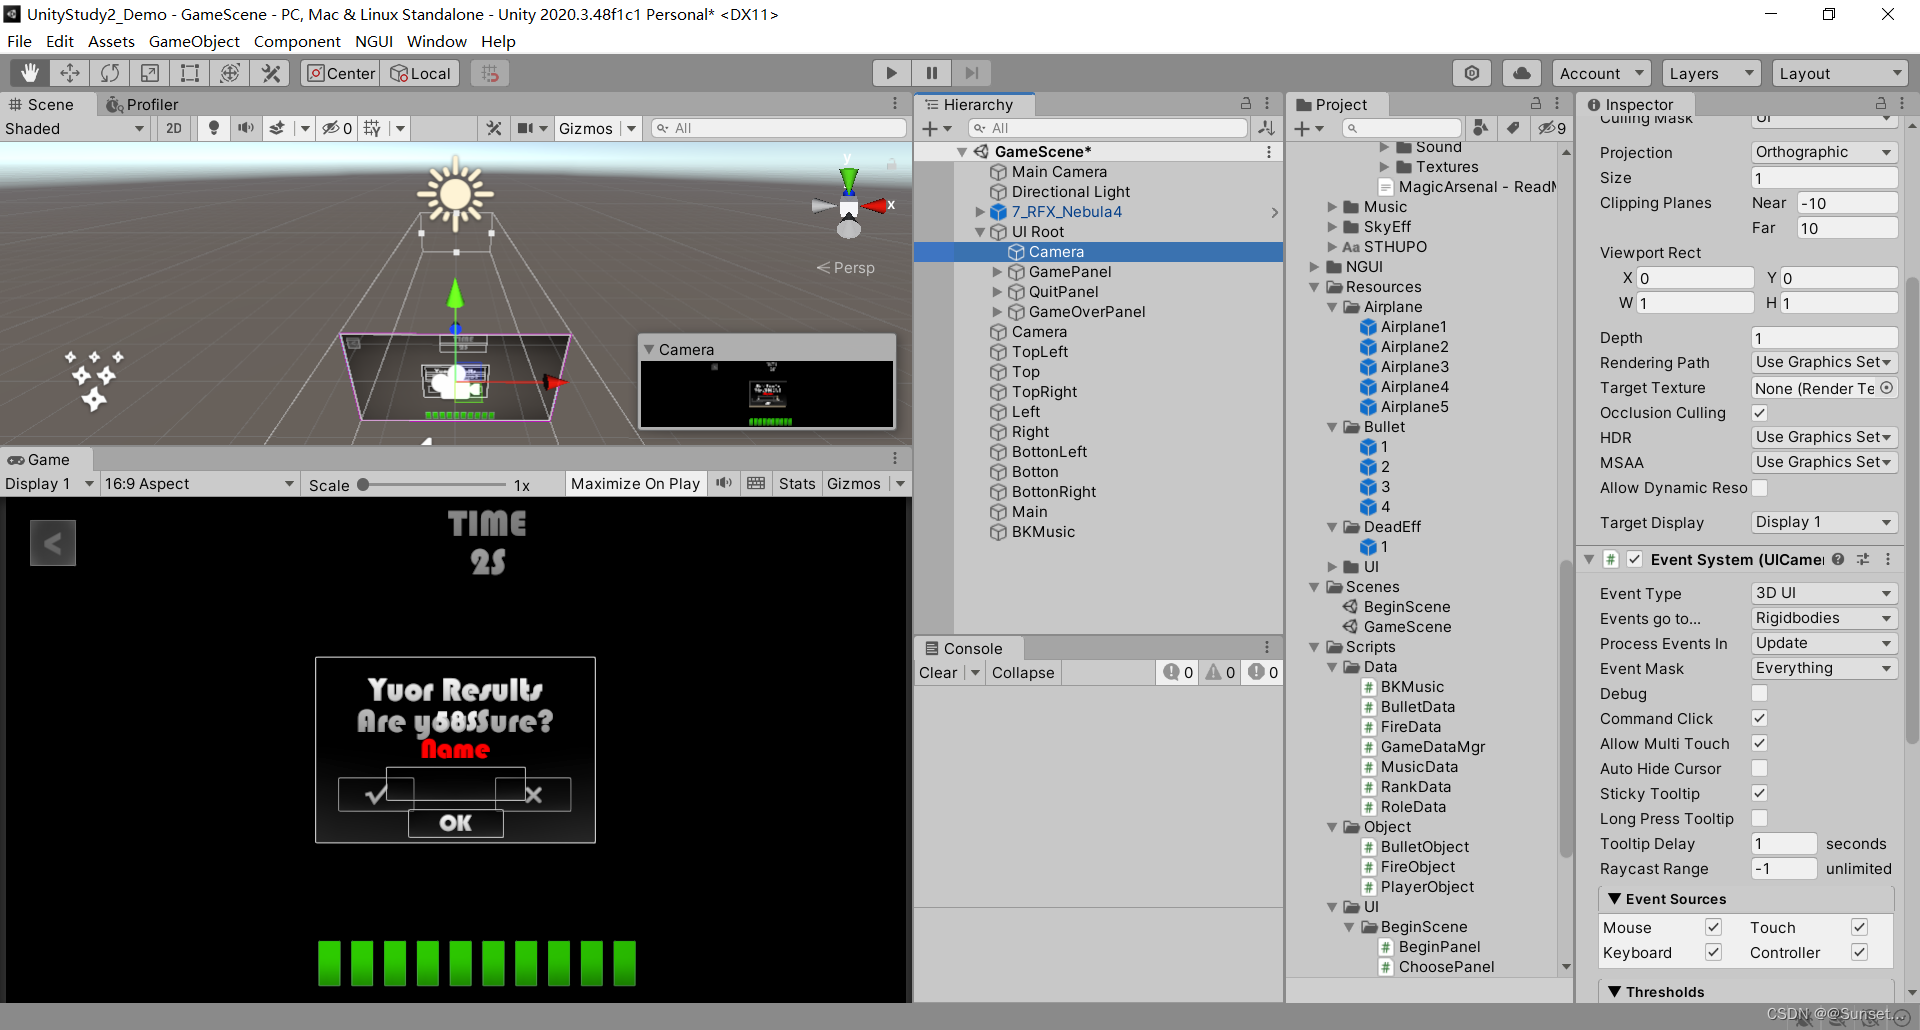
游戏展示:
暂时无法上传!
总结


](https://img-blog.csdnimg.cn/direct/64f3f6aa429e49b39466a38e94377f43.png)