Are you looking to expand GPT's capabilities? Check out this tutorial for a complete example of an AI Assistant that can send emails whenever we ask it to.
您是否希望扩展GPT的功能?查看这个教程,它提供了一个完整的示例,展示了一个AI助手如何在我们要求时发送电子邮件。
New updates on 17th of April 2024 from OpenAI
2024年4月17日来自OpenAI的最新更新
OpenAI announced significant updates to the Assistants API. The update includes enhancements aimed at improving the capabilities and performance of the assistants.
OpenAI宣布对Assistants API进行了重大更新。此次更新包括旨在提高助手功能和性能的增强措施。
- Knowledge retrieval now supports up to 10,000 files.知识检索现在支持多达10,000个文件。
- More control over token and model configuration. 对令牌和模型配置拥有更多的控制权
- Streaming support. 流支持
Introduction 引言
If you've been playing around or building something using the OpenAI API you've probably run into the Function Calling feature. We're going to build an example app that implements the Assistants API and makes use of the Function Calling tool to send an email.
如果你一直在使用OpenAI API进行开发或构建一些东西,你可能已经遇到了函数调用功能。我们将构建一个示例应用程序,它实现Assistants API并使用函数调用工具来发送电子邮件。
The Function Calling functionality in AI Assistants is usually referred to only as Functions.
AI助手中的函数调用功能通常仅称为函数(Functions)。
OpenAI AI Assistants Tools OpenAI AI助手工具
The Assistants API uses tools to perform actions. The following OpenAI built-in tools are currently available:
Assistants API使用工具来执行操作。目前可用的OpenAI内置工具有:
- Function Calling (aka
Functions) 函数调用(也被称为函数) - Code Interpreter 代码解释器
- Knowledge Retrieval (Retrieval) 知识检索(检索)
Assistants API is still in beta. The OpenAI team mentioned that there will be new tools coming soon.
Assistants API 目前仍处于测试阶段(beta)。OpenAI 团队提到很快会有新的工具推出。
We'll look at the Code Interpreter and Knowledge Retrieval tools in a future post. For this one, we'll build an AI Assistant that uses the Functions tool to call a custom function in our code.
我们将在未来的文章中探讨代码解释器和知识检索工具。对于这篇文章,我们将构建一个 AI 助手,该助手使用 Functions 工具来调用我们代码中的自定义函数。
What is Function Calling? 什么是函数调用
New OpenAI models gpt-3.5-turbo-1106 and gpt-4-1106-preview can detect when a function should be called. This means that the models will invoke a function that you specify and will pass the necessary parameters in JSON format which match the function's signature.
新的 OpenAI 模型 gpt-3.5-turbo-1106 和 gpt-4-1106-preview 能够检测何时应该调用一个函数。这意味着这些模型将调用您指定的函数,并以与函数签名匹配的 JSON 格式传递必要的参数。
This means that you could extend the model's capabilities such as calling a send_email function.
这意味着您可以扩展模型的能力,比如调用一个 send_email 函数。
Why use Functions? 为什么要使用函数(Functions)?
Suppose you're having a conversation with the chatbot and you ask it to do something beyond its native capabilities such as sending an email or querying your SQL database.
假设你正在与聊天机器人进行对话,并请求它执行一些超出其原生功能的事情,比如发送电子邮件或查询你的SQL数据库。
How would you do this? Well, within your application code, you will let your model know that for specific user requests it could request the calling of a function to perform a custom action.
你该如何实现这一点呢?在你的应用程序代码中,你会让你的模型知道,对于特定的用户请求,它可以请求调用一个函数来执行自定义操作。
How to use Function Calling 如何使用函数调用
Let's assume that we're creating an AI assistant that generates random funny quotes. Occasionally, the user may ask the assistant to send the quote by email.
假设我们正在创建一个AI助手,该助手可以生成随机的有趣引语。偶尔,用户可能会要求助手通过电子邮件发送这些引语。
Generating funny quotes is already within GPT's native capabilities but sending emails is not. Let's see how we can make the model call a function that sends an email to our user.
生成有趣的引语已经是GPT的原生能力之一,但发送电子邮件则不是。让我们看看如何使模型调用一个函数,以便向我们的用户发送电子邮件。
Creating the AI Assistant using the API 使用API创建AI助手
The Assistants API is a new feature that was introduced by Sam Altman during the DevDay keynote on Nov. 6, 2023. It allows us to create AI Assistants for our applications.
Assistants API 是一项新功能,由 Sam Altman 在 2023 年 11 月 6 日的 DevDay 主题演讲中介绍。它允许我们为我们的应用程序创建 AI 助手。
To add this function, we'll need to go through the steps below:
要添加这个功能,我们需要按照以下步骤操作:
- Prepare environment 准备环境
- Create our AI Assistant using the Assistants API 使用 Assistants API 创建我们的 AI 助手
- Include the custom
Functionas one of theTools将自定义函数作为工具之一包含在内 - Prompt the model by asking it to send the quote in an email 通过请求模型将引语通过电子邮件发送来提示模型
- Check whether the model wants to use the custom
Functionfrom its toolset 检查模型是否想从其工具集中使用自定义函数 - Call the
Functionwithin our code 在我们的代码中调用该函数 - Let the model know that we executed the custom
Function让模型知道我们已经执行了自定义函数 - Get the final response back from the model 从模型中获取最终响应
Step 1: Prepare environment 第一步 准备环境
First things first, we'll need to create our new directory, a virtual environment, and install the OpenAI Python SDK.
首先,我们需要创建新的目录,虚拟环境,并安装 OpenAI Python SDK。
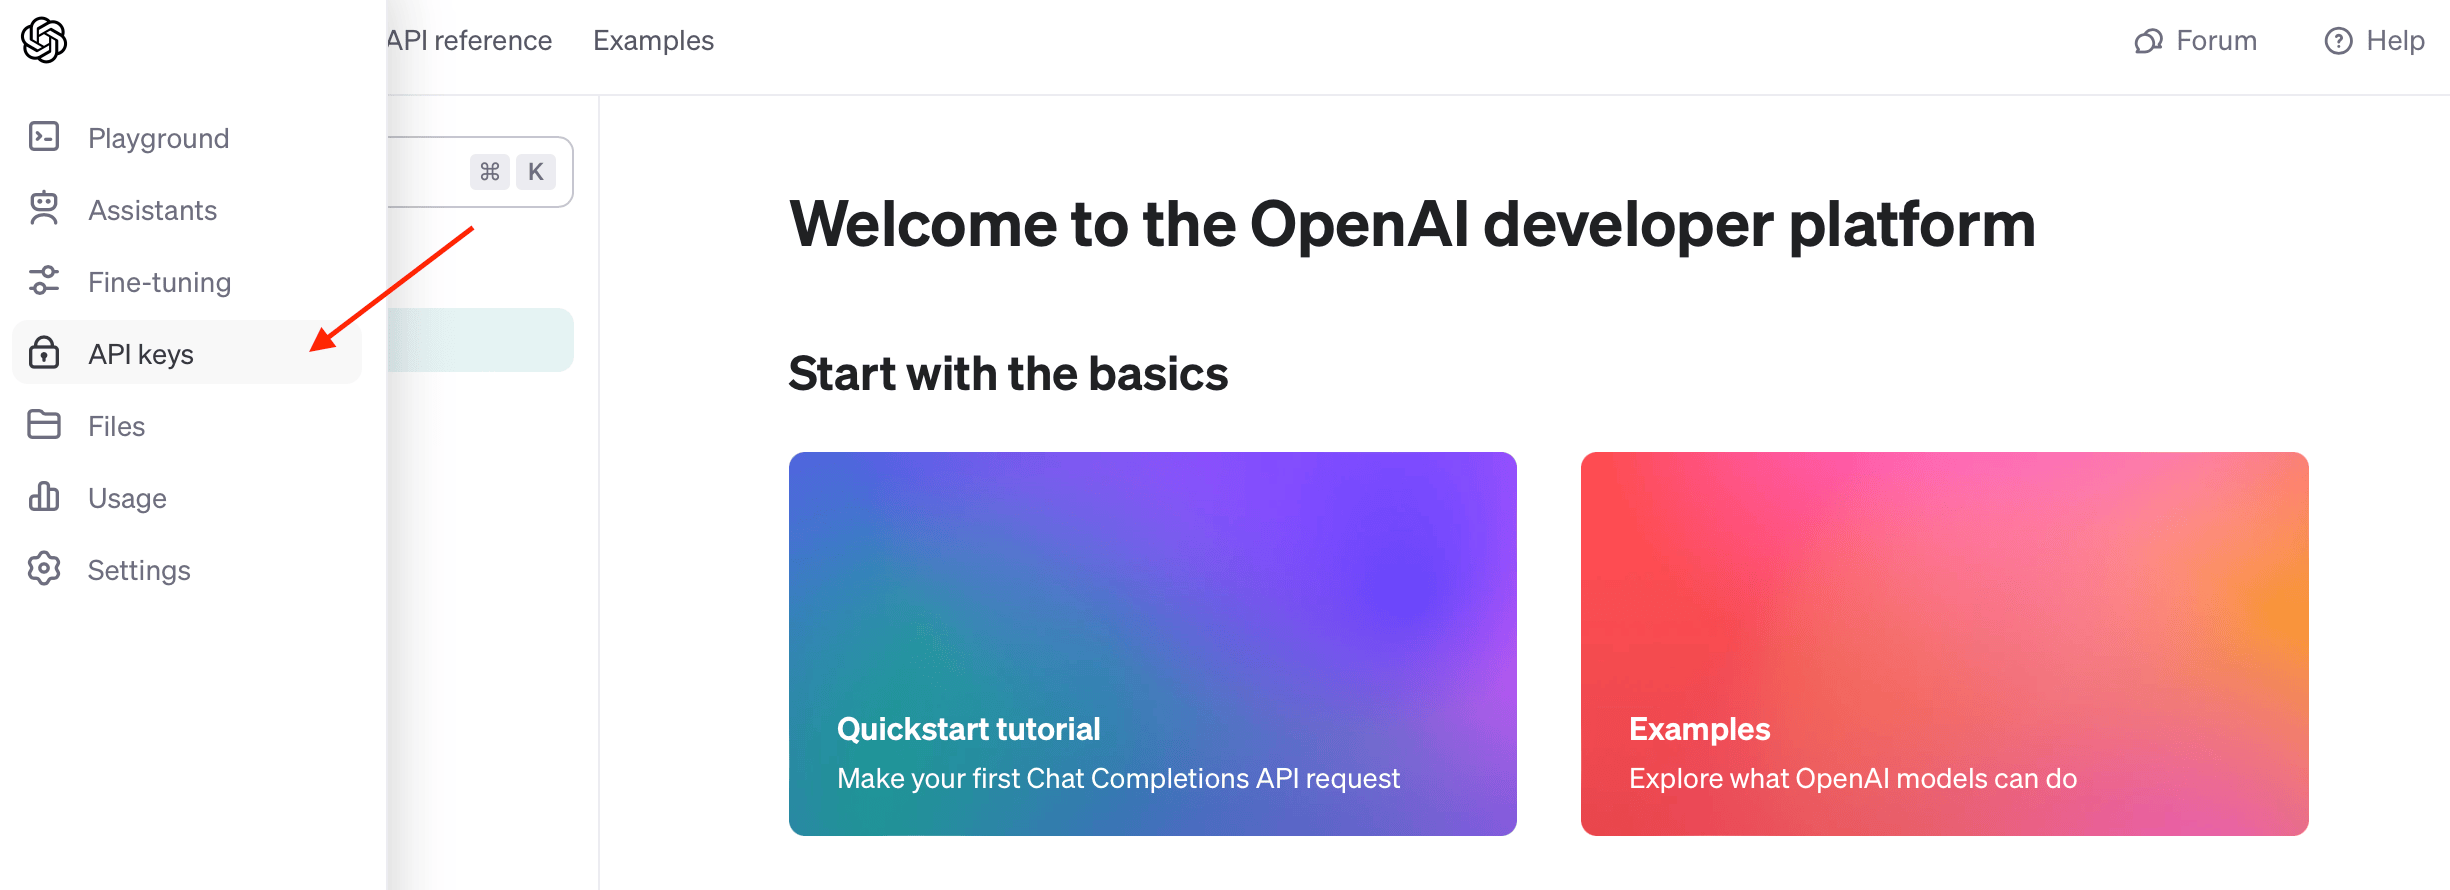
Grab your OpenAI API Key 获取你的 OpenAI API 密钥
Head over to your OpenAI account and create a new API key that you'll be using for this application.
前往你的 OpenAI 账户并创建一个新的 API 密钥,这个密钥将用于这个应用程序。
It's generally good practice to create a new API key for each application that you use.
通常,为每个你使用的应用程序创建一个新的 API 密钥是一个好习惯。
Set up Python application 设置 Python 应用程序
Let's create our new directory. I am going to call it openai-function-calling:
让我们创建新的目录。我将它命名为 openai-function-calling:
mkdir openai-function-callingLet's cd into the new directory and create our main.py file:
让我们进入新目录并创建我们的 main.py 文件:
cd openai-function-calling
touch main.py
Now, we'll create and activate our virtual environment:
现在,我们将创建并激活我们的虚拟环境:
python -m venv venv
source venv/bin/activate
Install OpenAI Python SDK 安装 OpenAI Python SDK
Great, with the above set up, let's install the OpenAI SDK using pip:
太好了,有了上述设置,我们现在使用 pip 来安装 OpenAI SDK:
pip install openaiStep 2: Create the assistant 步骤 2: 创建助手
To create our shiny new AI Assistant, we'll use the following function client.beta.assistants.create, in your main.py file add the following:
为了创建我们闪亮的新 AI 助手,我们将使用 client.beta.assistants.create 这个函数。在你的 main.py 文件中添加以下内容:
from openai import OpenAIclient = OpenAI(api_key="YOUR_API_KEY",
)def create_assistant():assistant = client.beta.assistants.create(name="Wise Guy",instructions="You are a wise philosopher that generates funny quotes.",model="gpt-3.5-turbo-1106",tools=tools)return assistant
The create_assistant() will create a new assistant called Wise Guy with the given parameters. We also passed in the tools parameter which tells the Assistant that it has tools at its disposal in case it needs to use them.
create_assistant() 函数将使用给定的参数创建一个名为 Wise Guy 的新助手。我们还传递了 tools 参数,它告诉助手在需要时可以使用哪些工具。
That's where we tell the Assistant that it has a custom function it can use. Okay, let's do that and define our custom Function and add it to the tools variable.
这就是我们告诉助手它有一个可以使用的自定义函数的地方。好的,让我们来定义我们的自定义函数,并将其添加到 tools 变量中。
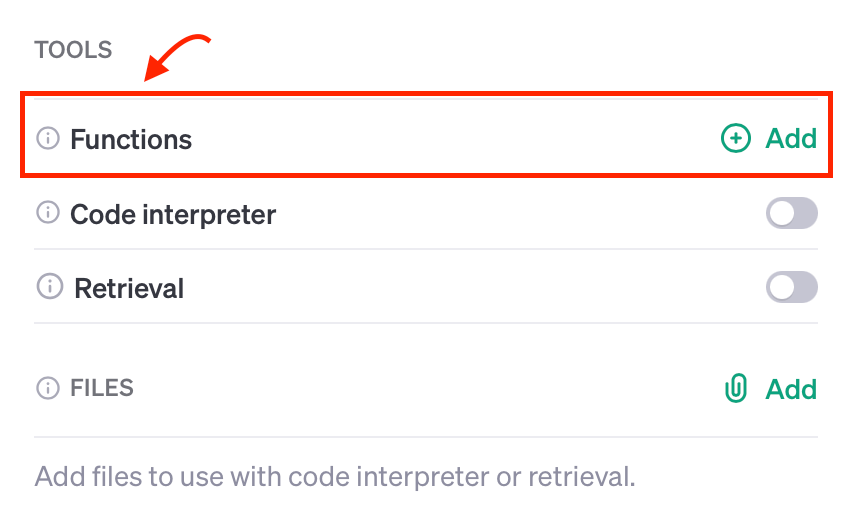
Currently, the supported tools are function, retrieval, and code_interpreter. However, the OpenAI team announced that other tools will be added in the future as well as custom tools.
目前,支持的工具包括 function、retrieval 和 code_interpreter。然而,OpenAI 团队宣布未来将添加其他工具以及自定义工具。
Step 3: Define the custom Function as a tool 步骤 3: 定义自定义函数作为工具
Just to recap, our Function takes in a quote and then sends it via email. First, let's define the function in Python:
简单回顾一下,我们的函数接收一个引语,然后通过电子邮件发送它。首先,让我们在 Python 中定义这个函数:
Defining send_email in Python 在 Python 中定义 send_email 函数
def send_email(quote, recipient = "your@email.com"):# # ...print(f"Quote: {quote}\nSending to: {recipient}")return "Message sent to " + recipientNext, let's inform the AI Assistant about our Function and its parameters.
接下来,让我们告诉 AI 助手有关我们的函数及其参数的信息。
JSON Function send_email definition JSON 中 send_email 函数的定义
tools = [{"type": "function","function": {"name": "send_email","description": "Sends a quote via email","parameters": {"type": "object","properties": {"quote": {"type": "string","description": "A generated funny quote"}},"required": ["quote"]}}
}]
Let's break it down: 让我们来详细解释一下:
"type": "function": This lets the Assistant know that this tool is of typeFunction.
"type": "function":这告诉助手这个工具的类型是 Function。
"parameters": Here, we let the Assistant know about the function parameters. In our case, we just have one property calledquoteand it isrequired.
"parameters":在这里,我们让助手了解函数的参数。在我们的例子中,我们只有一个名为 quote 的属性,并且它是必需的。
Great! Remember in Step 2 we passed in the tools parameter? This is what we just defined and we'll pass it to our client.beta.assistants.create() method.
太好了!记得在步骤 2 中我们传递了 tools 参数吗?这就是我们刚才定义的,我们将它传递给 client.beta.assistants.create() 方法。
Step 4: Prompting the AI assistant 步骤 4: 提示 AI 助手
Prompting the AI Assistant requires that we execute a Run given a thread and an assistant and then wait for the response.
提示 AI 助手需要我们给定一个线程和一个助手来执行一个运行(Run),然后等待响应。
Creating our assistant 创建我们的助手
assistant = create_assistant()Creating a thread
thread = client.beta.threads.create()Prompting the assistant and waiting for a response 提示助手并等待响应
To prompt the model, we need to create a message within a thread using the client.beta.threads.messages.create method and then create a run using the client.beta.threads.runs.create method.
要提示模型,我们需要使用 client.beta.threads.messages.create 方法在线程中创建一条消息,然后使用 client.beta.threads.runs.create 方法创建一个运行(Run)。
Here's what our send_and_run function: 这是我们的 send_and_run 函数:
def send_and_run(content):message = client.beta.threads.messages.create(thread_id=thread.id,role="user",content=content,)return client.beta.threads.runs.create(thread_id=thread.id,assistant_id=assistant.id,)Since a run runs asynchronously, we'll need to wait until it finishes. OpenAI says streaming support is coming soon, in the meantime, we can poll the run's status property by using the client.beta.threads.runs.retrieve method, like so:
由于一个运行(Run)是异步进行的,我们需要等待它完成。OpenAI 表示即将支持流式处理,在此期间,我们可以通过使用 client.beta.threads.runs.retrieve 方法轮询运行的 status 属性来检查其状态,如下所示:
def wait_on_run(run):while run.status == "queued" or run.status == "in_progress":run = client.beta.threads.runs.retrieve(thread_id=thread.id,run_id=run.id,)time.sleep(0.5)return runFinally, we can simply call our send_and_run function and wait for the response:
最后,我们可以简单地调用我们的 send_and_run 函数并等待响应:
run = wait_on_run(send_and_run("Create a funny quote and email it"))Behind the scenes, a Thread was created with the following message: "Create a funny quote and email it" and then sent to our AI Assistant as we executed the Run.
在幕后,当我们执行运行(Run)时,创建了一个带有以下消息的线程:“Create a funny quote and email it”(创建一个有趣的引语并通过电子邮件发送),然后将该消息发送给我们的 AI 助手。
After the run completes, we can inspect its contents to see whether the AI Assistant wants to use our custom send_email Function. Let's see how below.
运行完成后,我们可以检查其内容以查看 AI 助手是否想使用我们自定义的 send_email 函数。让我们看看下面如何操作。
Step 5: Check if the assistant needs to use our Function
步骤 5:检查助手是否需要使用我们的函数
Since the prompt contains "and email it", our AI Assistant will most likely decide to call our custom Function to execute this task.
由于提示中包含“and email it”,我们的 AI 助手很可能会决定调用我们的自定义函数来执行这个任务。
We're looking for the requires_action status of the run which means that the model determined that a function should be called. The model also determined the names and arguments needed to call the function.
我们正在寻找运行的 requires_action 状态,这意味着模型已经确定应该调用一个函数。模型还确定了调用函数所需的函数名和参数。
Let's check the run status and try to see if the assistant picked up the Function name and its associated arguments:
让我们检查运行的状态,并尝试看看助手是否选择了函数名及其相关参数:
if run.status == "requires_action":tool_call = run.required_action.submit_tool_outputs.tool_calls[0]name = tool_call.function.namearguments = json.loads(tool_call.function.arguments)print("Waiting for custom Function:", name)print("Function arguments:")print(arguments)Here's the response: 响应如下:
Waiting for custom Function: send_email
Function arguments:
{'quote': 'I told my wife she should embrace her mistakes. She gave me a hug. Then filed for divorce.'}
Not very funny, but it works! 起作用了
Step 6: Call the Function from our Python code
步骤 6:从我们的 Python 代码中调用函数
Now the AI Assistant is waiting for us to execute the function and inform it that it's done.
现在,AI 助手正在等待我们执行函数并通知它已完成。
Let's do it:
task = send_email(**arguments)Step 7: Inform the model that the Function was called
步骤 7:通知模型已调用函数
We'll now let the Assistant know that the function was executed, by using the client.beta.threads.runs.submit_tool_outputs method as shown below:
现在,我们将使用 client.beta.threads.runs.submit_tool_outputs 方法通知助手函数已执行,如下所示:
run = client.beta.threads.runs.submit_tool_outputs(thread_id=thread.id,run_id=run.id,tool_outputs=[{"tool_call_id": tool_call.id,"output": "done",}],
)
This executes a run with the tool_outputs parameters which lets the model formulate a proper response based on the Function's output.
这执行了一个带有 tool_outputs 参数的运行,使模型能够根据函数的输出来制定适当的响应。
I hard-coded the output to "done" since we're just sending an email. In a real-world application, you may want to pass whatever your custom function returns.
由于我们只是发送一封电子邮件,因此我将输出硬编码为“done”。在真实应用中,您可能希望传递自定义函数返回的任何内容。
Step 8: Getting the final response from the model
步骤 8:从模型中获取最终响应
In the previous step, we executed a run and provided the Assistant with the Function's response.
在之前的步骤中,我们执行了一个运行,并向助手提供了函数的响应。
Now we're just going to wait until the run completes and print out the response by calling the client.beta.threads.messages.list method as shown here:
现在,我们将等待运行完成,并通过调用 client.beta.threads.messages.list 方法来打印出响应,如下所示:
run = wait_on_run(run)print(client.beta.threads.messages.list(thread_id=thread.id, order="asc"))SyncCursorPage[ThreadMessage](data=[ThreadMessage(id='msg_GxTLNJDPYe0dDDUnedDQLRHS', assistant_id=None, content=[MessageContentText(text=Text(annotations=[], value='Create a funny quote and email it'), type='text')], created_at=1701803371, file_ids=[], metadata={}, object='thread.message', role='user', run_id=None, thread_id='thread_g2PvjM4UdWNOAY1YlQ4dT6hu'), ThreadMessage(id='msg_tzzNFJodk7ksqVA1xu6tnlSA', assistant_id='asst_TsDAtpgi7EKAzWrV9lLKFgUT', content=[MessageContentText(text=Text(annotations=[], value='The funny quote has been sent via email!'), type='text')], created_at=1701803375, file_ids=[], metadata={}, object='thread.message', role='assistant', run_id='run_aib9MQMWgHnjp2ylGrbw4NJR', thread_id='thread_g2PvjM4UdWNOAY1YlQ4dT6hu')], object='list', first_id='msg_GxTLNJDPYe0dDDUnedDQLRHS', last_id='msg_tzzNFJodk7ksqVA1xu6tnlSA', has_more=False)
As you can see in the MessageContentText object the model responded with "The funny quote has been sent via email!". Beautiful, exactly what we need.
如您在 MessageContentText 对象中所见,模型以“The funny quote has been sent via email!”(有趣的引语已通过电子邮件发送!)进行了响应。太棒了,这正是我们所需要的。
And that's a wrap! 结束了
Wrapping up 总结
After you execute your code by running the python main.py command in your terminal, you can go to your OpenAI assistants page, where you should be able to see something similar to the below:
在您的终端中运行 python main.py 命令来执行您的代码后,您可以前往您的 OpenAI 助手页面,在那里您应该能看到类似于以下内容的输出:
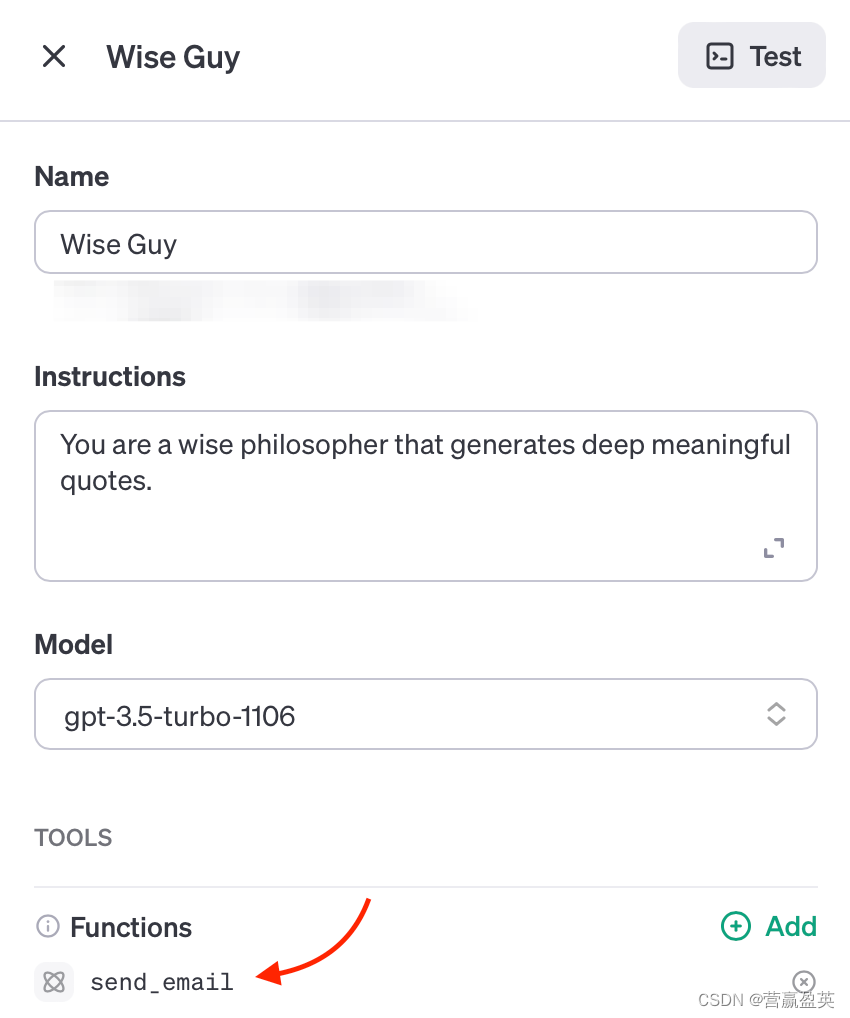
You could click on the Test button found at the top right of the screen to test your assistant in the Playground.
您可以点击屏幕右上角的“Test”按钮,在 Playground 中测试您的助手。
In this post, we've seen how we can use the OpenAI Assistants API to create an AI assistant that uses the Function Calling (or Functions) tool to perform a specific action beyond its native capabilities.
在本文中,我们了解了如何使用 OpenAI Assistants API 创建一个 AI 助手,该助手使用函数调用(或函数)工具来执行超出其原生能力的特定操作。
I'd love to know if you found this post helpful or if you have any questions or comments.
我想知道这篇文章是否对您有帮助,或者您是否有任何问题或评论。
Thanks for reading!