在这篇博客中,我们将讨论如何使用简单的 HTML 和 CSS 构建一个登录与注册页面。这个页面包含两个主要部分:登录界面和注册界面。我们还会展示如何通过 JavaScript 切换这两个部分的显示状态。
页面结构
我们将创建一个页面,其中包含两个主要的 div 元素:一个用于登录,另一个用于注册。默认情况下,登录部分会显示,注册部分会隐藏。用户可以通过点击按钮在这两个部分之间切换。
HTML 代码
以下是页面的 HTML 结构:
<div class="box"><div style=" width: 100%;height: 100%;"><div style="display: block;" id="myLogin" style="width: 100%;height: 100%;"><div class="left"><button class="register" type="submit" onclick="toggleDivRegister()">去注册</button></div><div class="right" style="margin-left: 300px;"><h2>登 录</h2><form action=""><div style="width: 400px;"><div><div style="display: flex;"><i class="iconPhone distant1"></i><input class="content" type="phone" placeholder="手机号" required></div><div style="display: flex;"><i class="iconPassword distant1"></i><input class="content" type="password" placeholder="密码" required></div></div><div style="padding: 10px;"><span style="float: left;display: flex;justify-content: center;align-content: center;"><input type="checkbox" style="vertical-align:top;" /><spanstyle="font-size: 14px;vertical-align:top;padding-left: 5px;">记住密码</span></span><span style="float: right;font-size: 15px;color: rgb(74, 159, 244);">忘记密码?</span></div></div><button class="submit" type="submit">登录</button></form></div></div><div style="display: none;" id="myRegister" style="width: 100%;height: 100%;"><div class="left"><button class="register" type="submit" onclick="toggleDivLogin()">去登录</button></div><div class="right" style="margin-left: 300px;"><h2 style="color: #74b9ff;font-size: 50px;margin-top: 40px;">注 册</h2><form action=""><div style="width: 400px;"><div><div style="display: flex;"><i class="iconPhone distant2"></i><input class="content" type="phone" placeholder="请输入手机号"style="height: 30px; padding-bottom: 10px;" required></div><div style="display: flex;"><i class="iconUser distant2"></i><input class="content" type="username" placeholder="请输入用户名"style="height: 30px; padding-bottom: 10px;" required></div><div style="display: flex;"><i class="iconPassword distant2"></i><input class="content" type="password" placeholder="请输入密码"style="height: 30px; padding-bottom: 10px;" required></div><div style="display: flex;"><i class="iconPassword distant2"></i><input class="content" type="password_reset" placeholder="请再次输入密码"style="height: 30px; padding-bottom: 10px;" required></div></div></div><button class="submit" type="submit" onclick="submitRegister()">立即注册</button></form></div></div></div></div>JavaScript 代码
为了实现登录和注册界面的切换,我们需要一些 JavaScript 代码。以下是实现这些功能的 JavaScript 函数:
function toggleDivRegister() {var x = document.getElementById("myRegister");var y = document.getElementById("myLogin");x.style.display = "block";y.style.display = "none";}function toggleDivLogin() {var x = document.getElementById("myRegister");var y = document.getElementById("myLogin");x.style.display = "none";y.style.display = "block";}function submitRegister() {// alert("注册成功!")}CSS 样式
接下来,我们需要为页面添加样式,以确保它在视觉上是吸引人的。将以下 CSS 代码保存在 styles.css 文件中:
* {margin: 0;padding: 0;box-sizing: border-box;}.box {width: 900px;height: 500px;background-color: rgba(255, 255, 255, 0.7);border-radius: 10px;margin: 10% auto;box-shadow: 0 0 10px 6px rgba(0, 0, 0, 0.1);position: relative;z-index: 1;}.box .left {width: 35%;height: 100%;position: absolute;z-index: 2;background-image: url(1.jpg);background-size: cover;}.register {position: absolute;width: 60%;height: 60px;color: #080808;background-color: transparent;font-size: 20px;border-radius: 5ch;border: 2px dotted #0984e3;margin: 70% 0 0 50%;transform: translateX(-50%);}.register:hover {color: #0984e3;}.box .right {display: flex;width: 65%;flex-direction: column;align-items: center;}.box .right h2 {color: #74b9ff;font-size: 50px;margin-top: 70px;}.box .right form {display: flex;flex-wrap: wrap;justify-content: center;}.box .right form .content {width: 100%;height: 50px;font-size: 20px;margin-top: 30px;padding: 10px 0 0 10px;border: none;border-bottom: 1px dotted #74b9ff;color: #74b9ff;}.right form .content:focus {outline: none;color: #74b9ff;padding: 10px 0 0 20px;}.right .submit {width: 60%;height: 60px;color: #f6f6f6;background-image: linear-gradient(120deg, #0984e3, #b1d2f6 100%);font-size: 20px;border-radius: 5ch;border: none;margin: 30px 0 0 50%;transform: translateX(-50%);}.right .submit:hover {box-shadow: 0 0 5px 5px rgba(20, 20, 20, 0.15);}.iconPhone {display: inline-block;height: 20px;width: 20px;background-image: url(img/phone.svg);background-size: cover;/*这里放置图标的绝对路径*/background-repeat: no-repeat;}.iconPassword {display: inline-block;height: 20px;width: 20px;background-image: url(img/password.svg);background-size: cover;/*这里放置图标的绝对路径*/background-repeat: no-repeat;}.iconUser {display: inline-block;height: 20px;width: 20px;background-image: url(img/user.svg);background-size: cover;/*这里放置图标的绝对路径*/background-repeat: no-repeat;}.distant2 {margin-top: 35px;}.distant1 {margin-top: 50px;}完整代码
<!DOCTYPE html>
<html lang="zh-CN"><head><meta charset="UTF-8"><meta http-equiv="X-UA-Compatible" content="IE=edge"><meta name="viewport" content="width=device-width, initial-scale=1.0"><title>登录页面</title><style>* {margin: 0;padding: 0;box-sizing: border-box;}.box {width: 900px;height: 500px;background-color: rgba(255, 255, 255, 0.7);border-radius: 10px;margin: 10% auto;box-shadow: 0 0 10px 6px rgba(0, 0, 0, 0.1);position: relative;z-index: 1;}.box .left {width: 35%;height: 100%;position: absolute;z-index: 2;background-image: url(1.jpg);background-size: cover;}.register {position: absolute;width: 60%;height: 60px;color: #080808;background-color: transparent;font-size: 20px;border-radius: 5ch;border: 2px dotted #0984e3;margin: 70% 0 0 50%;transform: translateX(-50%);}.register:hover {color: #0984e3;}.box .right {display: flex;width: 65%;flex-direction: column;align-items: center;}.box .right h2 {color: #74b9ff;font-size: 50px;margin-top: 70px;}.box .right form {display: flex;flex-wrap: wrap;justify-content: center;}.box .right form .content {width: 100%;height: 50px;font-size: 20px;margin-top: 30px;padding: 10px 0 0 10px;border: none;border-bottom: 1px dotted #74b9ff;color: #74b9ff;}.right form .content:focus {outline: none;color: #74b9ff;padding: 10px 0 0 20px;}.right .submit {width: 60%;height: 60px;color: #f6f6f6;background-image: linear-gradient(120deg, #0984e3, #b1d2f6 100%);font-size: 20px;border-radius: 5ch;border: none;margin: 30px 0 0 50%;transform: translateX(-50%);}.right .submit:hover {box-shadow: 0 0 5px 5px rgba(20, 20, 20, 0.15);}.iconPhone {display: inline-block;height: 20px;width: 20px;background-image: url(img/phone.svg);background-size: cover;/*这里放置图标的绝对路径*/background-repeat: no-repeat;}.iconPassword {display: inline-block;height: 20px;width: 20px;background-image: url(img/password.svg);background-size: cover;/*这里放置图标的绝对路径*/background-repeat: no-repeat;}.iconUser {display: inline-block;height: 20px;width: 20px;background-image: url(img/user.svg);background-size: cover;/*这里放置图标的绝对路径*/background-repeat: no-repeat;}.distant2 {margin-top: 35px;}.distant1 {margin-top: 50px;}</style><script>function toggleDivRegister() {var x = document.getElementById("myRegister");var y = document.getElementById("myLogin");x.style.display = "block";y.style.display = "none";}function toggleDivLogin() {var x = document.getElementById("myRegister");var y = document.getElementById("myLogin");x.style.display = "none";y.style.display = "block";}function submitRegister() {// alert("注册成功!")}</script><link rel="icon" href="man.png">
</head><body><div class="box"><div style=" width: 100%;height: 100%;"><div style="display: block;" id="myLogin" style="width: 100%;height: 100%;"><div class="left"><button class="register" type="submit" onclick="toggleDivRegister()">去注册</button></div><div class="right" style="margin-left: 300px;"><h2>登 录</h2><form action=""><div style="width: 400px;"><div><div style="display: flex;"><i class="iconPhone distant1"></i><input class="content" type="phone" placeholder="手机号" required></div><div style="display: flex;"><i class="iconPassword distant1"></i><input class="content" type="password" placeholder="密码" required></div></div><div style="padding: 10px;"><span style="float: left;display: flex;justify-content: center;align-content: center;"><input type="checkbox" style="vertical-align:top;" /><spanstyle="font-size: 14px;vertical-align:top;padding-left: 5px;">记住密码</span></span><span style="float: right;font-size: 15px;color: rgb(74, 159, 244);">忘记密码?</span></div></div><button class="submit" type="submit">登录</button></form></div></div><div style="display: none;" id="myRegister" style="width: 100%;height: 100%;"><div class="left"><button class="register" type="submit" onclick="toggleDivLogin()">去登录</button></div><div class="right" style="margin-left: 300px;"><h2 style="color: #74b9ff;font-size: 50px;margin-top: 40px;">注 册</h2><form action=""><div style="width: 400px;"><div><div style="display: flex;"><i class="iconPhone distant2"></i><input class="content" type="phone" placeholder="请输入手机号"style="height: 30px; padding-bottom: 10px;" required></div><div style="display: flex;"><i class="iconUser distant2"></i><input class="content" type="username" placeholder="请输入用户名"style="height: 30px; padding-bottom: 10px;" required></div><div style="display: flex;"><i class="iconPassword distant2"></i><input class="content" type="password" placeholder="请输入密码"style="height: 30px; padding-bottom: 10px;" required></div><div style="display: flex;"><i class="iconPassword distant2"></i><input class="content" type="password_reset" placeholder="请再次输入密码"style="height: 30px; padding-bottom: 10px;" required></div></div></div><button class="submit" type="submit" onclick="submitRegister()">立即注册</button></form></div></div></div></div>
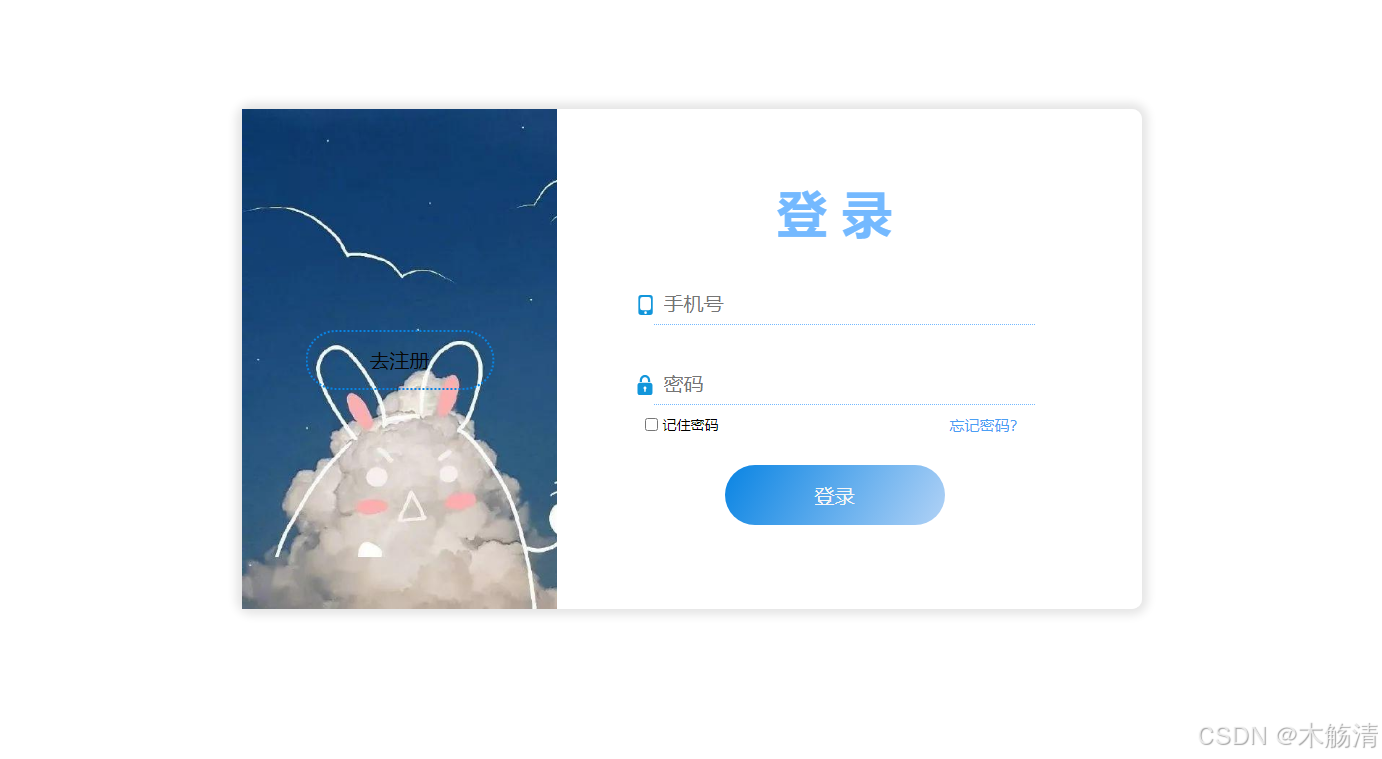
</body></html>实现效果
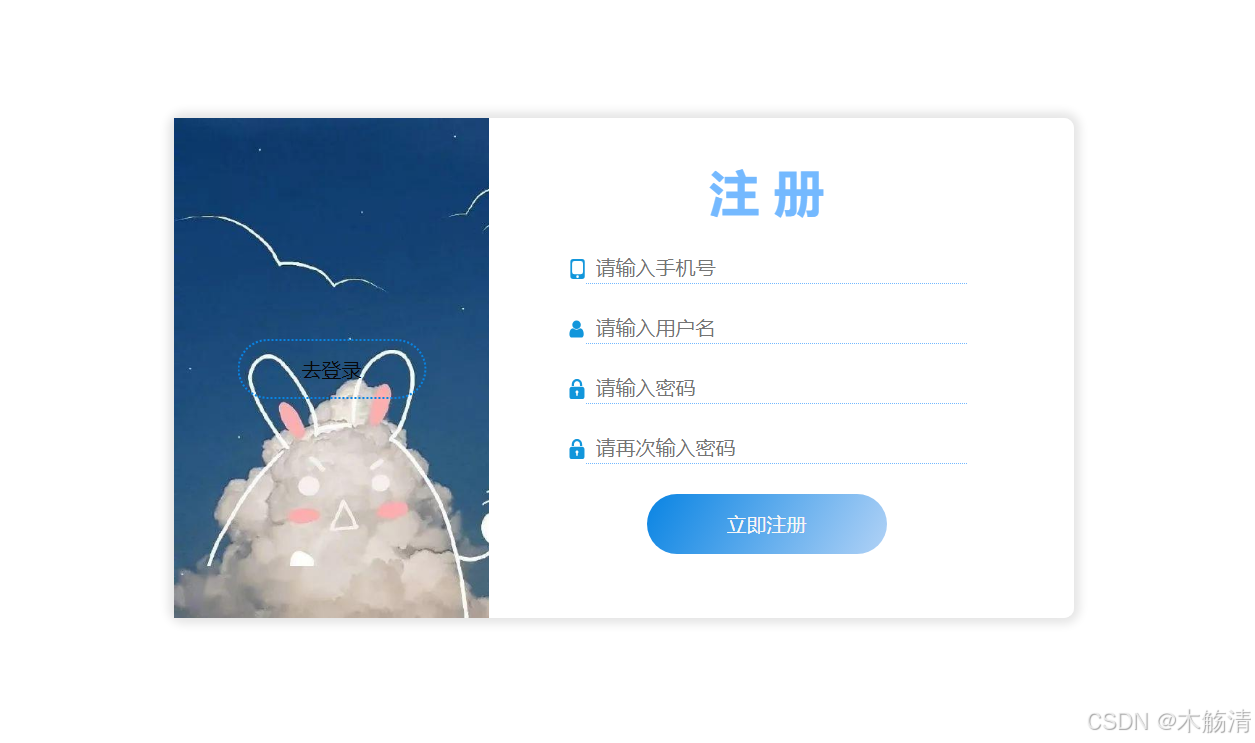
总结
在本教程中,我们创建了一个包含登录和注册功能的基本页面。通过 HTML 定义页面结构,使用 CSS 进行样式设计,并通过 JavaScript 实现页面功能,我们构建了一个功能完备的用户界面。这种基础的设计可以根据需要进一步扩展,例如添加表单验证、与后端 API 集成等。
希望这个详细的教程对您有所帮助!如果您有任何问题或建议,请在评论区留言,我们将尽快回复。