目录
一、整体结构
1、设置一个div盒子
2、设置图片展示
3、页码按钮
4、翻页按钮
二、CSS样式
1、 .clear_ele::after
2、设置图片、按钮等属性的样式
三、JavaScript部分(Vue)
1、导入模块
2、创建Vue应用
①定义响应式数据
②定义事件处理函数
I、上一张照片切换
II、下一张照片切换
III、跳转指定照片
方法一
方法二
③最后将其暴露出来
四、总结
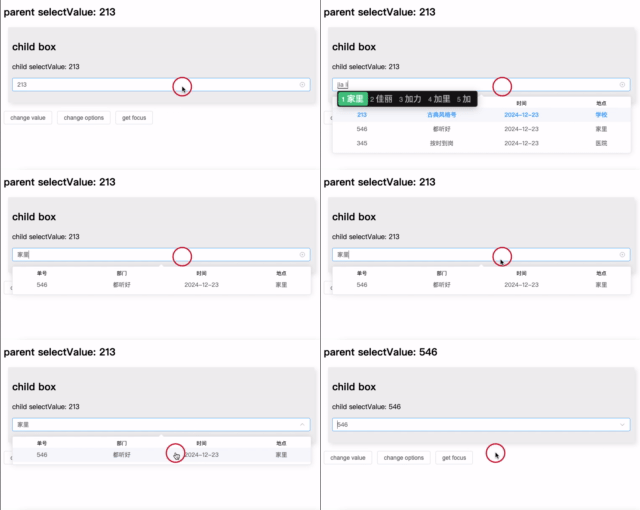
在上一篇博客中,我们了解到了Vue的响应式数据、v-on,v-bind,v-if,v-for等相关知识点,我们可以通过这些知识点制作如下视频内的效果
一、整体结构
1、设置一个div盒子
<div id="app"> 是一个 id 为 app 的 div 元素,它是Vue应用程序挂载的目标元素,在这个元素内部的内容将由Vue实例来控制和渲染。
2、设置图片展示
<img>标签通过v-bind:src="img.url"将图片的src属性与img.url数据进行绑定,使其能根据数据的变化动态加载不同的图片,并且设置了class="img"应用之前定义的图片样式。
3、页码按钮
通过v-for="(val, idx) in 4"指令在<ul>标签内循环生成了4个<li>标签作为页码按钮,每个按钮显示的值为循环变量val,并且绑定了@click="jump(val)"事件(不过jump函数未在提供的代码中完整定义,推测是用于跳转到指定页码的功能),同时应用了class="button"样式。
4、翻页按钮
有两个按钮,分别绑定了@click事件,@click="prev"用于点击时调用prev函数实现上一张图片的切换,@click="next"用于调用next函数实现下一张图片的切换。
<div id="app"><h2>基于Vue3实现的相册:展示第{{ img.number }}张相片</h2><img v-bind:src="img.url" class="img"> <ul type="none" class="clear_ele box"><li v-for="(val, idx) in 4" @click="jump(val)" class="button"> {{val}} </li></ul><button @click="prev">上一张</button> <button @click="next">下一张</button></div>运行结果如下:

二、CSS样式
1、 .clear_ele::after
这是一个伪元素选择器,用于在具有clear_ele类的元素后面添加一个空的块级元素,并清除左右浮动,以确保布局的正常显示。
2、设置图片、按钮等属性的样式
代码如下:
<style>.clear_ele::after{content: ""; /* 这个伪元素的内容属性必须有 */display: block;clear: both;}.box{margin-bottom: 20px;padding: 0;}.button{background-color: bisque;width: 20px;float: left; text-align: center;margin-right: 10px;border-radius: 8px;cursor: pointer; }.img{width: 480px; height: 240px;border: 1px bisque solid;}</style>大家可以根据实际需要调整相应的样式。

这样一个雏形就出来了
三、JavaScript部分(Vue)
1、导入模块
从js文件中导入createApp、ref和reactive等Vue相关的重要函数和对象,createApp用于创建Vue应用实例,ref和reactive用于创建不同类型的响应式数据。
import { createApp, ref, reactive } from './vue.esm-browser.js'2、创建Vue应用
①定义响应式数据
createApp({setup() {// 【定义数据】const img = reactive({number: 1,url: "./img_src/logo1.png"})
)}.mount("#app")在createApp的setup函数内,首先使用reactive函数定义一个img的响应式对象,包含number(初始值为1)用于显示当前照片的序号和url用于显示当前照片的路径。
②定义事件处理函数
I、上一张照片切换
const prev = () => {img.number--if (img.number == 0) {img.number = 4}img.url = `./img_src/logo${img.number}.png` } 使用prev函数,用于实现上一张图片的切换功能。当点击“上一张”按钮时,函数先将照片序号减1,之后判断序号是否为0,如果为0则重置为4,最后更新图片路径,使其指向对应图片。
II、下一张照片切换
同理,使用next函数实现下一张照片切换的功能,当点击“下一张”按钮时,函数先将照片序号加1,之后判断序号是否为5,如果为5则重置为1,最后更新图片路径,使其指向对应图片。代码如下:
const next = () => {img.number++if (img.number == 5) {img.number = 1}img.url = `./img_src/logo${img.number}.png`III、跳转指定照片
方法一
使用reactive函数创建一个响应式对象,其中包含两属性:index(记录图片序号)和url(显示图片路径)
const img = reactive({index: 1,url: "./img_src/logo1.png", //图片路径} )显示指定照片的函数,四张照片便编写四个函数,那其中一个举例:
const show_1_img = () => {img.index = 1img.url = `./img_src/logo${img.index}.png` }将img.index设置为对应的序号(第一张照片为1,第二张为2以此类推),使其指向对应图片路径。
const show_1_img = () => {img.index = 1img.url = `./img_src/logo${img.index}.png` }const show_2_img = () => {img.index = 2img.url = `./img_src/logo${img.index}.png` }const show_3_img = () => {img.index = 3img.url = `./img_src/logo${img.index}.png` }const show_4_img = () => {img.index = 4img.url = `./img_src/logo${img.index}.png`}最后将其暴露出来
return { img, show_1_img,show_2_img,show_3_img,show_4_img,pre, next }方法二
这种方法比较简易,而还有一种方法更加简洁、方便
const jump = (val) => {img.number = valimg.url = `./img_src/logo${img.number}.png`}函数接受一个val参数,这个参数表示要跳转的图片序号,在函数内部将img.number的值设为val,根据新的值更新图片的路径,使其指向对应的图片路径。
③最后将其暴露出来
return {img, prev,next,jump}}四、总结
这样就实现了一个基于Vue的相册功能,通过Vue的响应式数据和各种指令,实现了图片动态展示和通过按钮点击切换图片(上一张或下一张)。
完整代码如下:
<!DOCTYPE html>
<html lang="en"><head><meta charset="UTF-8"><title>相册</title><style>.clear_ele::after{content: "";  /* 这个伪元素的内容属性必须有 */display: block;clear: both;}.box{margin-bottom: 20px;padding: 0;}.button{background-color: bisque;width: 20px;float: left;  text-align: center;margin-right: 10px;border-radius: 8px;cursor: pointer;  }.img{width: 480px;  height: 240px;border: 1px bisque solid;}</style>
</head><body><div id="app"><h2>基于Vue3实现的相册:展示第{{ img.number }}张相片</h2><img v-bind:src="img.url"   class="img"> <ul type="none" class="clear_ele box"><li v-for="(val, idx) in 4"  @click="jump(val)" class="button"> {{val}} </li></ul><button @click="prev">上一张</button>     <button @click="next">下一张</button></div><script type="module">import { createApp,  ref,  reactive } from './vue.esm-browser.js'createApp({setup() {// 【定义数据】const img = reactive({number: 1,url: "./img_src/logo1.png"})// 【定义函数】//上一张const prev = () => {img.number--if (img.number == 0) {img.number = 4}img.url = `./img_src/logo${img.number}.png`                 }                //下一张const next = () => {img.number++if (img.number == 5) {img.number = 1}img.url = `./img_src/logo${img.number}.png`}//跳转const jump = (val) => {img.number = valimg.url = `./img_src/logo${img.number}.png`}return {img, prev,next,jump}}}).mount("#app")</script>
</body></html>
运行结果如下(详细效果请观看博客开头的视频):

大家可以根据前面所学内容或复制上面的代码制作这个属于自己的相册。


