1.什么是ansible
1.1.基本介绍
1.2.基本架构
1.3.基本特征
1.4.优点
1.5.ansible工作机制
2.Ansible安装
2.1.机器准备
2.2.安装ansible
2.2.1.安装epel源
2.2.2.安装ansible
2.2.3.查看ansible版本
2.2.4.树状结构展示文件夹
2.2.4.1.其中ansible.cfg的内容如下
2.2.4.2.host的默认内容是
2.3.配置主机清单
2.4.设置SSH无密码登录
2.5.参考文章
1.什么是ansible
转自:https://blog.51cto.com/liqingbiao/1875921
1.1.基本介绍
ansible是新出现的自动化运维工具,基于Python开发,集合了众多运维工具(puppet、cfengine、chef、func、fabric)的优点,实现了批量系统配置、批量程序部署、批量运行命令等功能。
ansible是基于 paramiko 开发的,并且基于模块化工作,本身没有批量部署的能力。真正具有批量部署的是ansible所运行的模块,ansible只是提供一种框架。ansible不需要在远程主机上安装client/agents,因为它们是基于ssh来和远程主机通讯的。ansible目前已经已经被红帽官方收购,是自动化运维工具中大家认可度最高的,并且上手容易,学习简单。是每位运维工程师必须掌握的技能之一。主要包括:
- (1)、连接插件connection plugins:负责和被监控端实现通信;
- (2)、host inventory:指定操作的主机,是一个配置文件里面定义监控的主机;
- (3)、各种模块核心模块、command模块、自定义模块;
- (4)、借助于插件完成记录日志邮件等功能;
- (5)、playbook:剧本执行多个任务时,非必需可以让节点一次性运行多个任务。
1.2.基本架构

1.3.基本特征
(1)、no agents:不需要在被管控主机上安装任何客户端;
(2)、no server:无服务器端,使用时直接运行命令即可;
(3)、modules in any languages:基于模块工作,可使用任意语言开发模块;
(4)、yaml,not code:使用yaml语言定制剧本playbook;
(5)、ssh by default:基于SSH工作;
(6)、strong multi-tier solution:可实现多级指挥。
1、部署简单,只需在主控端部署Ansible环境,被控端无需做任何操作;
2、默认使用SSH协议对设备进行管理;
3、有大量常规运维操作模块,可实现日常绝大部分操作。
4、配置简单、功能强大、扩展性强;
5、支持API及自定义模块,可通过Python轻松扩展;
6、通过Playbooks来定制强大的配置、状态管理;
7、轻量级,无需在客户端安装agent,更新时,只需在操作机上进行一次更新即可;
8、提供一个功能强大、操作性强的Web管理界面和REST API接口——AWX平台。
1.4.优点
(1)、轻量级,无需在客户端安装agent,更新时,只需在操作机上运行一次更新即可;
(2)、批量任务执行可以写成脚本,而且不用分发到远程就可以执行。
(3)、使用python编写,维护更简单,ruby语法过于复杂
(4)、支持sudo
1.5.ansible工作机制

2.Ansible安装
2.1.机器准备
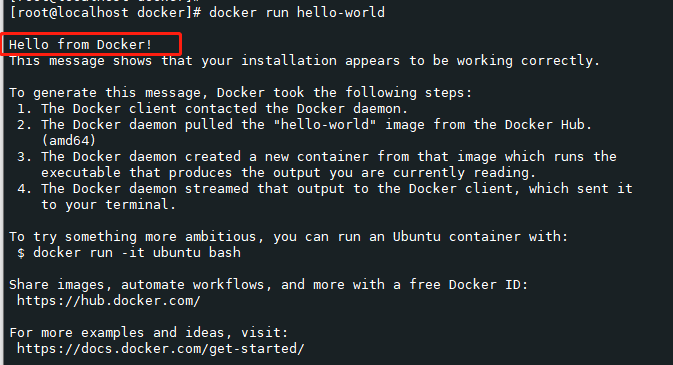
本次使用docker进行虚拟化:
docker相关的命令是:
docker commit d74af80aa35a centos7.5.1804.v0.2将镜像保存
docker save -o xxx.tar containerId将镜像导入
docker load < xxx.tar
============================================================docker run -itd --restart=always --name node2 --hostname node2 -v D:/dockerworkspace/node2/hosts:/etc/hosts -v D:/dockerworkspace/node2/hostname:/etc/hostname -v D:/dockerworkspace/node2/data:/data -v D:/dockerworkspace/node2/profile:/etc/profile -v D:/dockerworkspace/node2/software:/root/software -v D:/dockerworkspace/node2/installed:/root/installed -v D:/dockerworkspace/node2/workspace:/root/workspace -p 20022:22 --ip 172.17.0.2 1694ea743590 /usr/sbin/sshd -Ddocker run -itd --restart=always --name node3 --hostname node3 -v D:/dockerworkspace/node3/hosts:/etc/hosts -v D:/dockerworkspace/node3/hostname:/etc/hostname -v D:/dockerworkspace/node3/data:/data -v D:/dockerworkspace/node3/profile:/etc/profile -v D:/dockerworkspace/node3/software:/root/software -v D:/dockerworkspace/node3/installed:/root/installed -v D:/dockerworkspace/node3/workspace:/root/workspace -p 30022:22 --ip 172.17.0.3  1694ea743590 /usr/sbin/sshd -Ddocker run -itd --restart=always --name node4 --hostname node4 -v D:/dockerworkspace/node4/hosts:/etc/hosts -v D:/dockerworkspace/node4/hostname:/etc/hostname -v D:/dockerworkspace/node4/data:/data -v D:/dockerworkspace/node4/profile:/etc/profile -v D:/dockerworkspace/node4/software:/root/software -v D:/dockerworkspace/node4/installed:/root/installed -v D:/dockerworkspace/node4/workspace:/root/workspace -p 40022:22 --ip 172.17.0.4 1694ea743590 /usr/sbin/sshd -Ddocker run -itd --restart=always --name node5 --hostname node5 -v D:/dockerworkspace/node5/hosts:/etc/hosts -v D:/dockerworkspace/node5/hostname:/etc/hostname -v D:/dockerworkspace/node5/data:/data -v D:/dockerworkspace/node5/profile:/etc/profile -v D:/dockerworkspace/node5/software:/root/software -v D:/dockerworkspace/node5/installed:/root/installed -v D:/dockerworkspace/node5/workspace:/root/workspace -p 50022:22 --ip 172.17.0.5 1694ea743590 /usr/sbin/sshd -Ddocker run -itd --restart=always --name node6 --hostname node6 -v D:/dockerworkspace/node6/hosts:/etc/hosts -v D:/dockerworkspace/node6/hostname:/etc/hostname -v D:/dockerworkspace/node6/data:/data -v D:/dockerworkspace/node6/profile:/etc/profile -v D:/dockerworkspace/node6/software:/root/software -v D:/dockerworkspace/node6/installed:/root/installed -v D:/dockerworkspace/node6/workspace:/root/workspace -p 60022:22 --ip 172.17.0.6 1694ea743590 /usr/sbin/sshd -D
| 主机名 | IP | 安装软件 | 组名 |
|---|---|---|---|
| node2(管理机器) | 172.17.0.2 | Ansible | |
| node3(被管理机器) | 172.17.0.3 | abc | |
| node4(被管理机器) | 172.17.0.4 | abc | |
| node5(备用) | 172.17.0.5 | ||
| node6(备用) | 172.17.0.6 |
2.2.安装ansible
在管理机器上安装ansible
2.2.1.安装epel源
[root@node2 ~]# yum install -y epel-release
Loaded plugins: fastestmirror, ovl
Determining fastest mirrors* base: mirrors.163.com* extras: mirrors.163.com* updates: mirrors.163.com
base                                                                                                                     | 3.6 kB  00:00:00
extras                                                                                                                   | 2.9 kB  00:00:00
updates                                                                                                                  | 2.9 kB  00:00:00
(1/2): extras/7/x86_64/primary_db                                                                                        | 243 kB  00:00:00
(2/2): updates/7/x86_64/primary_db                                                                                       |  11 MB  00:00:01
Resolving Dependencies
--> Running transaction check
---> Package epel-release.noarch 0:7-11 will be installed
--> Finished Dependency ResolutionDependencies Resolved================================================================================================================================================Package                                Arch                             Version                         Repository                        Size
================================================================================================================================================
Installing:epel-release                           noarch                           7-11                            extras                            15 kTransaction Summary
================================================================================================================================================
Install  1 PackageTotal download size: 15 k
Installed size: 24 k
Downloading packages:
epel-release-7-11.noarch.rpm                                                                                             |  15 kB  00:00:00
Running transaction check
Running transaction test
Transaction test succeeded
Running transactionInstalling : epel-release-7-11.noarch                                                                                                     1/1Verifying  : epel-release-7-11.noarch                                                                                                     1/1Installed:epel-release.noarch 0:7-11Complete!
[root@node2 ~]#
2.2.2.安装ansible
[root@node2 ~]# yum install ansible -y
Loaded plugins: fastestmirror, ovl
Loading mirror speeds from cached hostfile
epel/x86_64/metalink                                                                                                     | 3.9 kB  00:00:00* base: mirrors.163.com* epel: ftp.jaist.ac.jp* extras: mirrors.163.com* updates: mirrors.163.com
epel                                                                                                                     | 4.7 kB  00:00:00
(1/3): epel/x86_64/group_gz                                                                                              |  96 kB  00:00:00
(2/3): epel/x86_64/updateinfo                                                                                            | 1.0 MB  00:00:01
xxxxxxxxxxxxxxxxxxxxxxxxx
--> Running transaction check
---> Package python-backports.x86_64 0:1.0-8.el7 will be installed
---> Package python-pycparser.noarch 0:2.14-1.el7 will be installed
--> Processing Dependency: python-ply for package: python-pycparser-2.14-1.el7.noarch
--> Running transaction check
Complete!
[root@node2 ~]#
2.2.3.查看ansible版本
[root@node2 ~]# ansible --version
ansible 2.9.25config file = /etc/ansible/ansible.cfgconfigured module search path = [u'/root/.ansible/plugins/modules', u'/usr/share/ansible/plugins/modules']ansible python module location = /usr/lib/python2.7/site-packages/ansibleexecutable location = /usr/bin/ansiblepython version = 2.7.5 (default, Apr 11 2018, 07:36:10) [GCC 4.8.5 20150623 (Red Hat 4.8.5-28)]
[root@node2 ~]#
2.2.4.树状结构展示文件夹
# ansible --version          //查看ansible版本
# yum install tree -y
# tree /etc/ansible/         //树状结构展示文件夹/etc/ansible/├── ansible.cfg        #ansible的配置文件├── hosts            #ansible的主仓库,用于存储需要管理的远程主机的相关信息└── roles             #角色(这是一个目录)
2.2.4.1.其中ansible.cfg的内容如下

2.2.4.2.host的默认内容是
[root@node2 ansible]# cat hosts
# This is the default ansible 'hosts' file.
#
# It should live in /etc/ansible/hosts
#
#   - Comments begin with the '#' character
#   - Blank lines are ignored
#   - Groups of hosts are delimited by [header] elements
#   - You can enter hostnames or ip addresses
#   - A hostname/ip can be a member of multiple groups# Ex 1: Ungrouped hosts, specify before any group headers.## green.example.com
## blue.example.com
## 192.168.100.1
## 192.168.100.10# Ex 2: A collection of hosts belonging to the 'webservers' group## [webservers]
## alpha.example.org
## beta.example.org
## 192.168.1.100
## 192.168.1.110# If you have multiple hosts following a pattern you can specify
# them like this:## www[001:006].example.com# Ex 3: A collection of database servers in the 'dbservers' group## [dbservers]
##
## db01.intranet.mydomain.net
## db02.intranet.mydomain.net
## 10.25.1.56
## 10.25.1.57# Here's another example of host ranges, this time there are no
# leading 0s:## db-[99:101]-node.example.com[root@node2 ansible]#
2.3.配置主机清单
[root@node2 ansible]# cd /etc/ansible
[root@node2 ansible]# vim hosts
[abc]              # 自定义一个组名
172.17.0.3         # 添加被管理主机的IP[aaa]
172.17.0.4[bbb]
172.17.0.5
172.17.0.6
2.4.设置SSH无密码登录
[root@node2 ansible]# ssh-keygen -t rsa
Generating public/private rsa key pair.
Enter file in which to save the key (/root/.ssh/id_rsa):
Created directory '/root/.ssh'.
Enter passphrase (empty for no passphrase):
Enter same passphrase again:
Your identification has been saved in /root/.ssh/id_rsa.
Your public key has been saved in /root/.ssh/id_rsa.pub.
The key fingerprint is:
SHA256:sZtXen524PUZoQP5C76faiL/Rpx9IOUIFpVB7SIjymM root@node2
The key's randomart image is:
+---[RSA 2048]----+
|         .+++    |
|         o . o   |
|        o . *    |
|       . = * + . |
|    . . S + O o .|
|     E   o B =.o.|
|    . . o = o.+o+|
|       . o * .=.o|
|        o.=+== . |
+----[SHA256]-----+
[root@node2 ansible]#
yum -y install openssh-clients (此命令是在出现了-bash: ssh-copy-id: command not found之后执行)
ssh-copy-id root@172.17.0.3
ssh-copy-id root@172.17.0.4
ssh-copy-id root@172.17.0.5
ssh-copy-id root@172.17.0.6免交互代理:
[root@node2 ansible]# ssh-agent bash
[root@node2 ansible]# ssh-add[root@node2 ansible]# ssh-copy-id -i /root/.ssh/id_rsa.pub root@172.17.0.3
/usr/bin/ssh-copy-id: INFO: Source of key(s) to be installed: "/root/.ssh/id_rsa.pub"
/usr/bin/ssh-copy-id: INFO: attempting to log in with the new key(s), to filter out any that are already installed
/usr/bin/ssh-copy-id: INFO: 1 key(s) remain to be installed -- if you are prompted now it is to install the new keys
root@172.17.0.3's password:Number of key(s) added: 1Now try logging into the machine, with:   "ssh 'root@172.17.0.3'"
and check to make sure that only the key(s) you wanted were added.[root@node2 ansible]# ssh-copy-id -i /root/.ssh/id_rsa.pub root@172.17.0.4
/usr/bin/ssh-copy-id: INFO: Source of key(s) to be installed: "/root/.ssh/id_rsa.pub"
/usr/bin/ssh-copy-id: INFO: attempting to log in with the new key(s), to filter out any that are already installed
/usr/bin/ssh-copy-id: INFO: 1 key(s) remain to be installed -- if you are prompted now it is to install the new keys
root@172.17.0.4's password:Number of key(s) added: 1Now try logging into the machine, with:   "ssh 'root@172.17.0.4'"
and check to make sure that only the key(s) you wanted were added.[root@node2 ansible]# ssh-copy-id -i /root/.ssh/id_rsa.pub root@172.17.0.5
/usr/bin/ssh-copy-id: INFO: Source of key(s) to be installed: "/root/.ssh/id_rsa.pub"
/usr/bin/ssh-copy-id: INFO: attempting to log in with the new key(s), to filter out any that are already installed
/usr/bin/ssh-copy-id: INFO: 1 key(s) remain to be installed -- if you are prompted now it is to install the new keys
root@172.17.0.5's password:Number of key(s) added: 1Now try logging into the machine, with:   "ssh 'root@172.17.0.5'"
and check to make sure that only the key(s) you wanted were added.[root@node2 ansible]# ssh-copy-id -i /root/.ssh/id_rsa.pub root@172.17.0.6
/usr/bin/ssh-copy-id: INFO: Source of key(s) to be installed: "/root/.ssh/id_rsa.pub"
/usr/bin/ssh-copy-id: INFO: attempting to log in with the new key(s), to filter out any that are already installed
/usr/bin/ssh-copy-id: INFO: 1 key(s) remain to be installed -- if you are prompted now it is to install the new keys
root@172.17.0.6's password:Number of key(s) added: 1Now try logging into the machine, with:   "ssh 'root@172.17.0.6'"
and check to make sure that only the key(s) you wanted were added.[root@node2 ansible]#
2.5.参考文章
https://blog.51cto.com/u_13630803/2153392
https://www.cnblogs.com/cyleon/p/11164344.html
https://blog.51cto.com/u_13630803/2153820