文章目录
- 前言
- 一、点聚合是什么?
- 二、开发前准备
- 三、API示例
- 1.引入高德地图
- 2.创建地图实例
- 3.添加标点
- 4.删除标点
- 5.删除所有标点(覆盖物)
- 6.聚合点
- 7.自定义聚合点样式
- 8.清除聚合
- 9.打开窗体信息
- 四、实战开发
- 需求要求
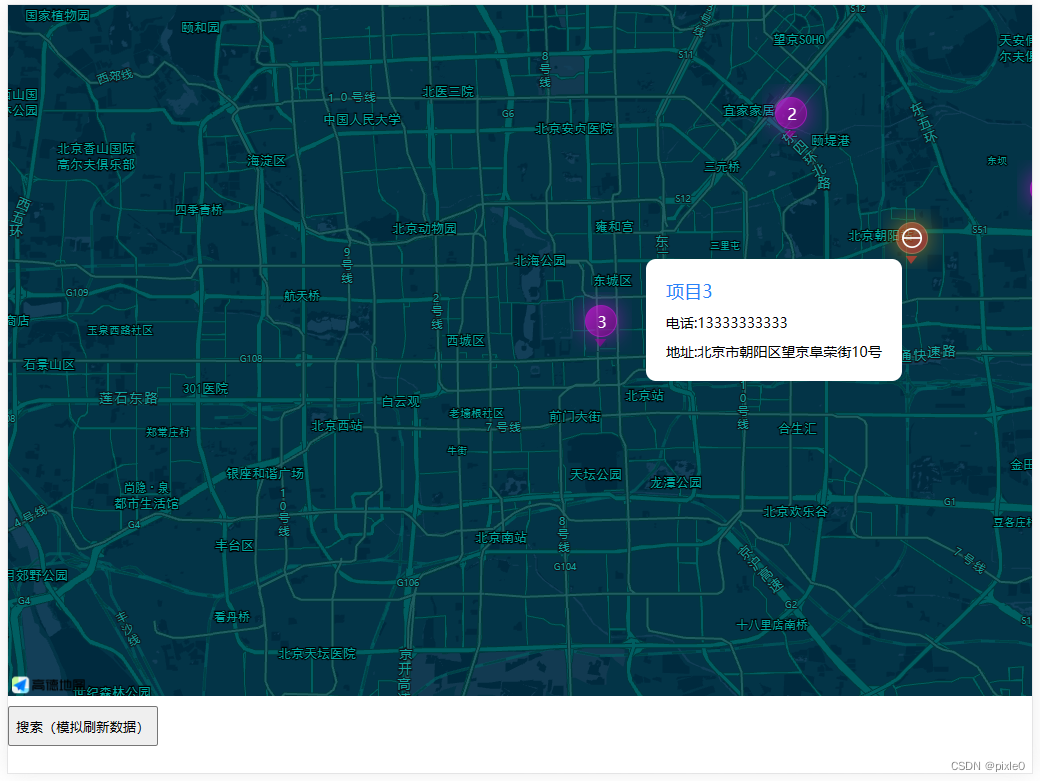
- 效果图如下:
- 封装思路分析
- 完整代码
- 效果
前言
本文将讲述如何利用高德地图JS API实现地图标点、聚合点、自定义图标、点击窗体信息展示等基本功能实现,结合实际项目中遇到场景需求进行演示和封装高复用性组件
一、点聚合是什么?
当地图中的标点很多的时候,缩小地图层级时候会重叠在一起,这时候可以把局部区域重叠的点聚合成一个点并标注当前区域重合点个数来展示,随着地图缩放层级动态响应式渲染。

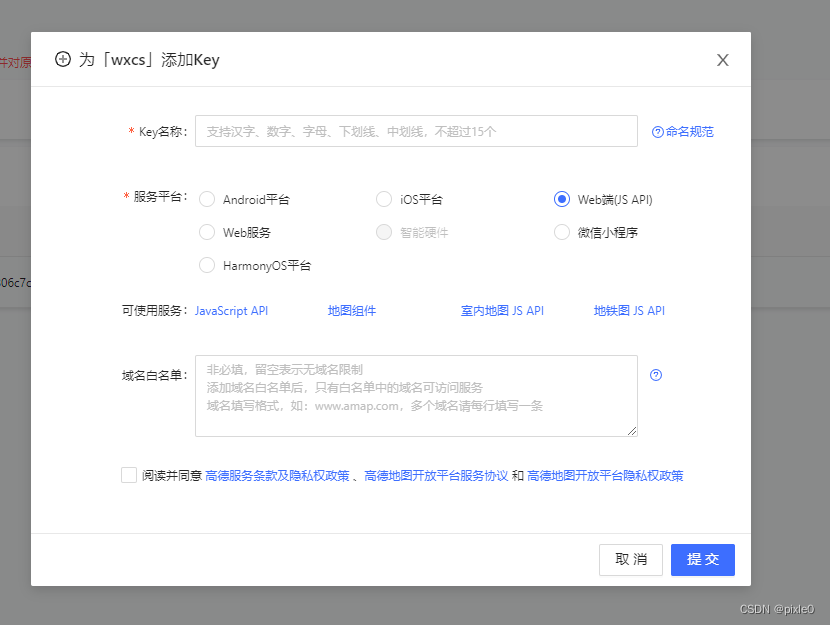
二、开发前准备
需要到高德开放平台-控制台申请key,我的应用——添加key——服务平台选择Web端(JS API)
三、API示例
接下来将以Vue项目演示API功能
1.引入高德地图
入口文件index.html引入高德sdk,key填写申请的key
<script src="https://webapi.amap.com/maps?v=1.4.15&key=您申请的key值"></script>
2.创建地图实例
创建一个地图容器
<div id="map"></div>
`创建一个地图实例,之后功能将依赖该实例,vue要在mounted周期函数内执行
 mounted() {
//地图实例let map = new AMap.Map('map',//地图容器id{resizeEnable: true, //是否监控地图容器尺寸变化zoom:11, //初始化地图层级center: [116.397428, 39.90923], //初始化地图中心点//  mapStyle:'amap://styles/blue',//地图样式(背景)可选,可以在后台新建自定义样式});}
3.添加标点
//新建一个标点let marker = new AMap.Marker({position:[116.397428, 39.90923], //位置offset: new AMap.Pixel(-13, -30),//偏移//icon:'', //图标可选,可以使用本地或者在线图标});//监听标点点击事件marker.on('click',e=>{console.log(e,'click')})//标点添加到地图上map.add(marker)
4.删除标点
删除一个或者多个标点,入参markers数组表示标点对象集合
let marker = new AMap.Marker({position:[116.39, 39.90], //位置});let marker2 = new AMap.Marker({position:[117.39, 40.90], //位置});map.add(marker)map.add(marker2)//删除第一个标点map.remove([marker]);
5.删除所有标点(覆盖物)
map.clearMap()
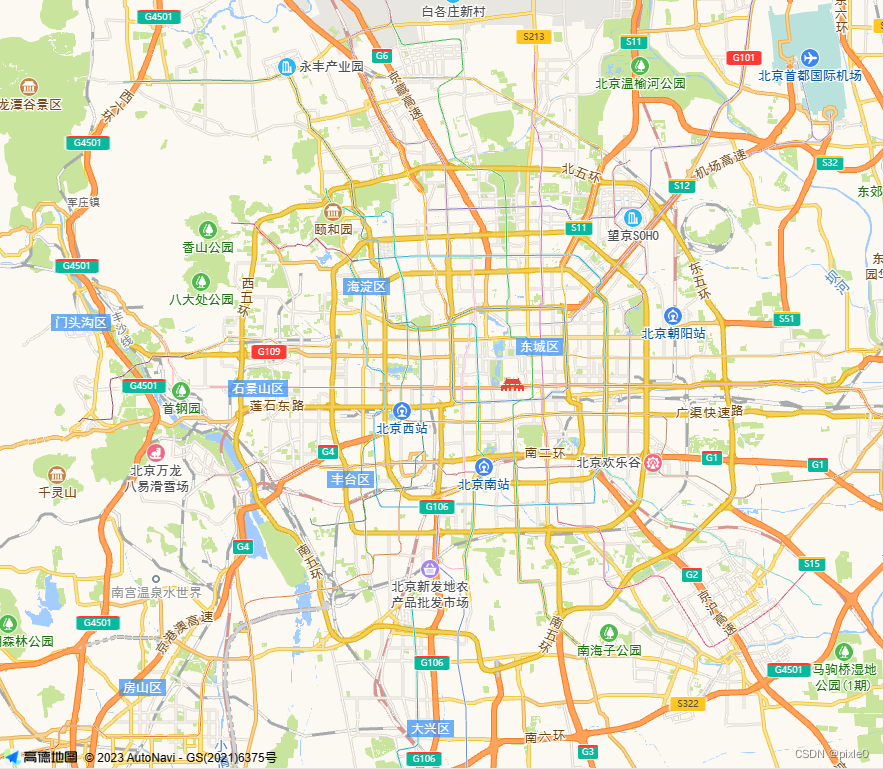
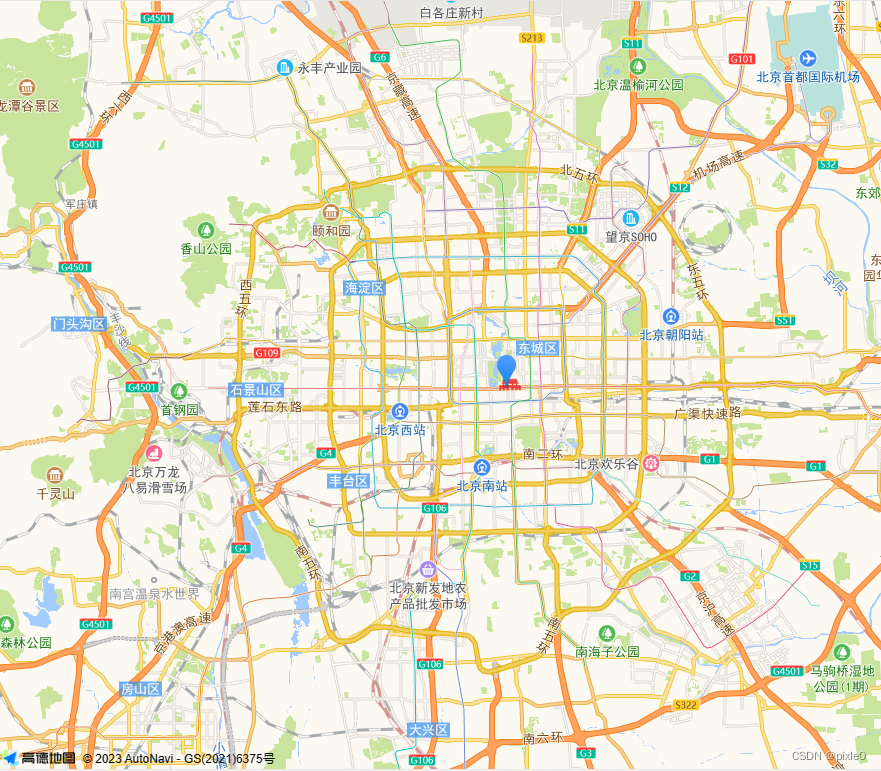
6.聚合点
//添加2个标点let marker = new AMap.Marker({position:[116.397428, 39.90923], //位置});let marker2 = new AMap.Marker({p position:[116.3680, 39.9200], //位置});map.add(marker)map.add(marker2)/*设置聚合*@param map:地图实例*@param markers:标点对象数组*/let cluster = new AMap.MarkerClusterer(map, markers, {gridSize:80});
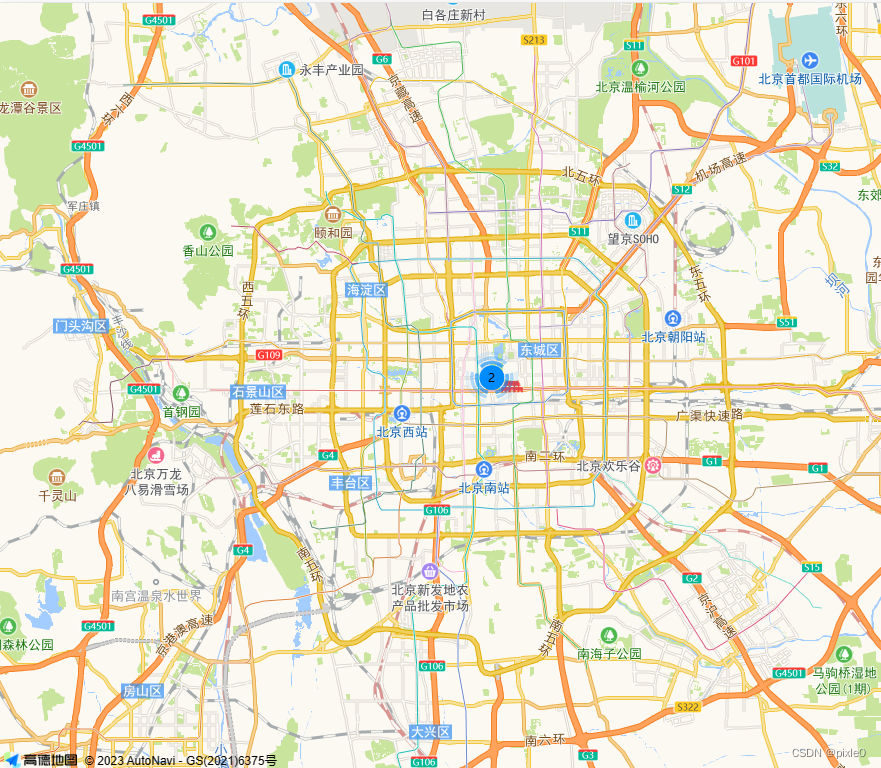
未聚合
聚合效果:
7.自定义聚合点样式
聚合点自定义样式通过设置renderClusterMarker字段配置渲染函数,并在渲染函数中通过dom操作生成样式节点插入聚合点父节点上
//聚合点实例let cluster = new AMap.MarkerClusterer(map, markers, {gridSize: 80,renderClusterMarker:renderClusterMarker,//自定义样式渲染});//渲染函数function renderClusterMarker(context) {var div = document.createElement("div");div.style.width = "50px";div.style.height = "50px";div.style.lineHeight = "50px";div.style.backgroundImage = `url(/static/images/icon.png)`;//自定义图标背景div.style.backgroundSize = "100%";div.style.backgroundRepeat = "no-repeat";div.innerHTML = context.count;//聚合个数div.style.color = "#fff";div.style.fontSize = "16px";div.style.paddingBottom = "10px";div.style.boxSizing = "border-box";div.style.textAlign = "center";var size = Math.round(30 + Math.pow(context.count / markers.length, 1 / 5) * 20//markers所有标点对象集合);context.marker.setOffset(new AMap.Pixel(-size / 2, -size / 2));context.marker.setContent(div);}

8.清除聚合
每次重新渲染设置聚合需要清除之前,不然数量会叠加
//cluster:聚合点实例cluster&&cluster.setMap(null);
9.打开窗体信息
//新建一个标点let marker = new AMap.Marker({position:[116.397428, 39.90923], //位置offset: new AMap.Pixel(-13, -30),//偏移//icon:'', //图标可选,可以使用本地或者在线图标});//监听标点点击事件(显示窗体信息)marker.on('click',e=>{//创建窗体实例let infoWindow =new AMap.InfoWindow({content:'test',//窗体内容,支持插入dom.innerHTML anchor:'top-right'//锚点,窗体相对鼠标点击位置});//显示窗体//map:地图实例,[lng,lat]:窗体在地图中位置infoWindow.open(map,[e.lnglat.lng,e.lnglat.lat])})//标点添加到地图上map.add(marker)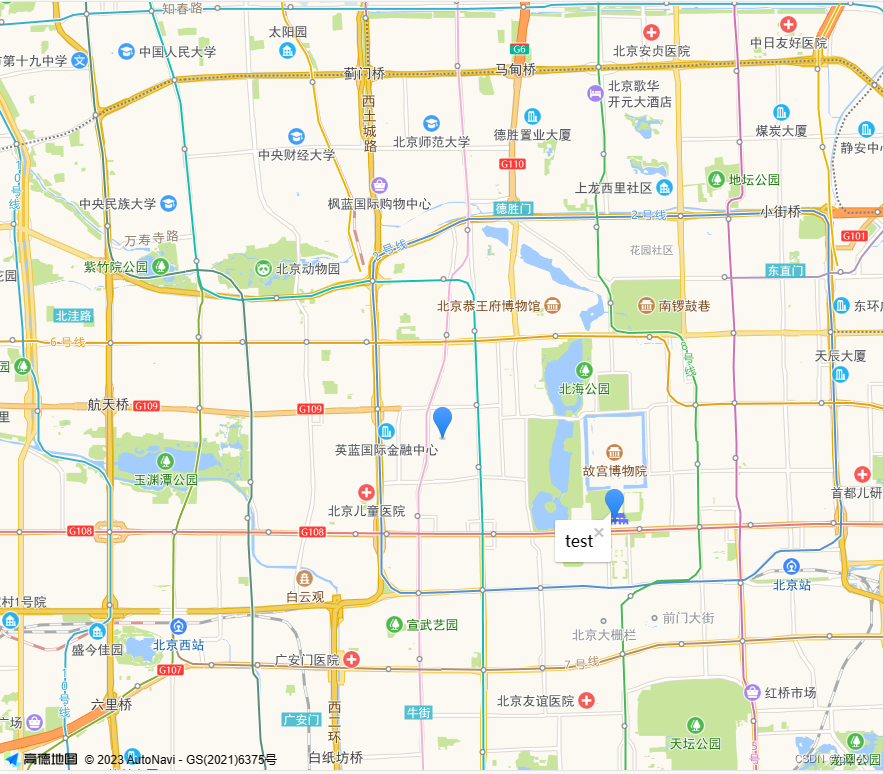
四、实战开发
需求要求
1.假设需要在地图上标注各种工程项目位置,工程项目分为3中类型,在建工程,已完成工程,延期工程不同类型分别对应不同图标
2.实现聚合功能,聚合图标自定义
3.点击对应工程项目弹窗显示项目信息
4.外部有搜索条件可以进行数据搜索,搜索完重新渲染地图,比如搜索xxxx至xxxx时间内在建工程,或者根据类型搜索等
5.大屏功能进行地图样式换肤
6.封装成通用组件方便下次开发使用
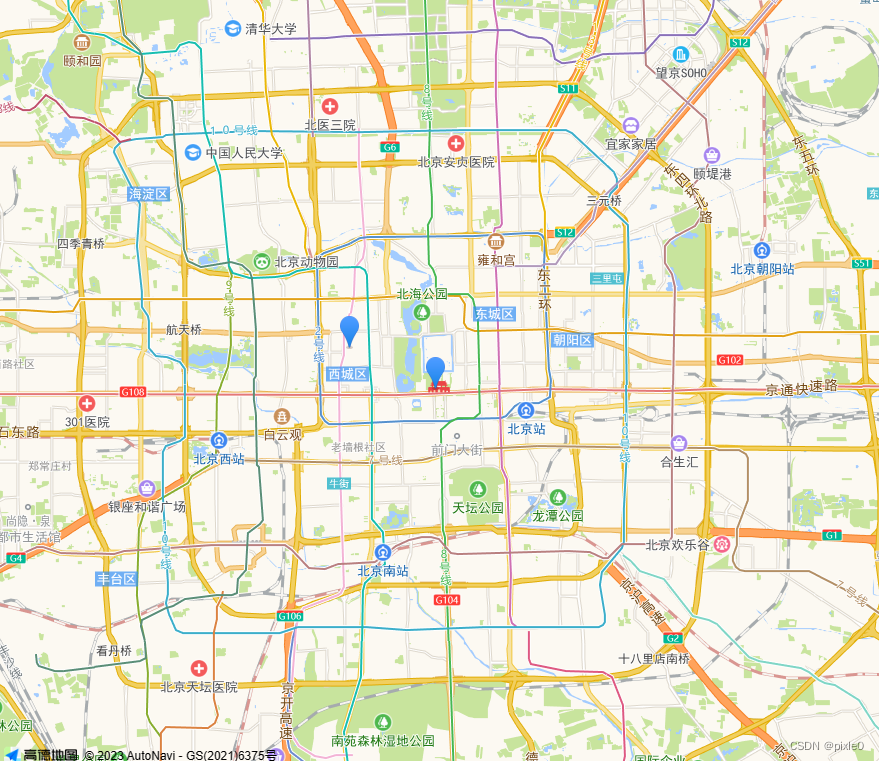
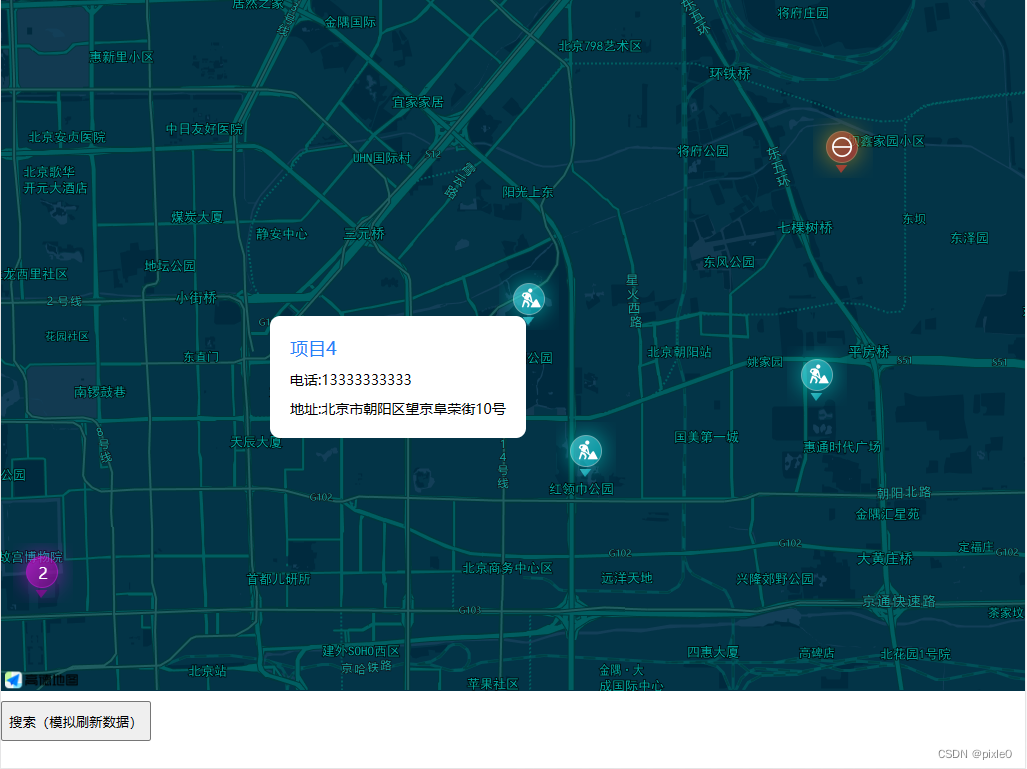
效果图如下:
封装思路分析
怎样封装才能方便使用呢?
对于组件封装我们可以采用倒推法,先写父组件里面的引用然后倒推实现子组件逻辑。
我们很容易想到在父组件内这样引用地图组件
<amap :center="mapCenter" :zoom="zoom" :markers="markers"></amap>
传入地图中心点(center)、层级(zoom)以及标点经纬度数组(markers)就能自动渲染,有了这个锥形后我们在继续扩展。
聚合样式和信息窗体要如何设计才能适应不同场景的自定义呢?
对于vue自定义内容首当其冲能想到的当然是slot,用插槽形式暴露给调用方就能自由diy
<amap :center="mapCenter" :zoom="zoom" :markers="markers"><!-- 聚合样式 --><template v-slot:cluster></template><!-- 窗体样式 --><template v-slot:infoWindow></template>
</amap>
整个调用我们已经推导出来了,但还有一个问题,窗体或者聚合插槽中渲染数据要怎么样拿到?这个数据是和每个标点一一对应。我们可以通过标点参数(markers)传入数据在通过作用域插槽传出,最终成型为:
<amap :center="mapCenter" :zoom="zoom" :markers="markers"><!-- 聚合样式 --><template v-slot:cluster></template><!-- 窗体样式 --><template v-slot:infoWindow="{ data }"></template></amap>
很可惜经过研究聚合点个数数据无法通过作用域插槽传出,我们可以在封装的组件中通过dom操作直接在插槽节点内添加一个span节点写入个数居中显示,写死这个渲染节点,这样除了这个数字剩下图标样式都可以通过插槽自定义。
完整代码
先封装高德地图工具类
amap.js
/*** 高德地图工具类*/
class amap {/*** 构造函数* @param  id :地图容器id* @param  params 地图配置参数*/constructor(id, params) {this.markers = [];//所有标点数组集合this.cluster=null;//聚合点实例this.map = new AMap.Map(id, {...params});}/*** 添加标点* @param markers:标点数组,item支持经纬度或者对象* @param clickEvent:标点点击事件回调*/addMarkers(markers = [], clickEvent = () => { }) {for (let item of markers) {let params = {offset: new AMap.Pixel(-13, -30)};if (Array.isArray(item)) {params.position = item;} else if (typeof item === "object") {params = { ...item,...params };}//新建一个标点let marker = new AMap.Marker(params);//标点点击事件marker.on("click", (e) => {typeof clickEvent === 'function' && clickEvent({ ...params, lnglat: e.lnglat })});//标点添加到地图上this.map.add(marker);//保存到实例this.markers.push(marker)}}//清空地图覆盖物clearMap() {this.markers=[]this.map.clearMap();}/*** 聚合点* @param renderClusterMarker:聚合点自定义渲染函数*/clusterMarker(renderClusterMarker) {//清除之前的聚合this.cluster&&this.cluster.setMap(null);  //设置聚合this.cluster= new AMap.MarkerClusterer(this.map, this.markers, {gridSize: 80,renderClusterMarker: renderClusterMarker});}//打开信息窗口showInfoWindow({ lng, lat, ...params }) {//创建窗体实例let infoWindow = new AMap.InfoWindow(params);//显示窗体//map:地图实例,[lng,lat]:窗体在地图中位置infoWindow.open(this.map, [lng, lat])}//关闭信息窗口closeInfoWindow() {this.map.clearInfoWindow();}}export default amap
高德地图组件
amap.vue
<template><div id="amap-container" class="amap-container" :style="layoutStyle"><!-- 自定义渲染样式 --><div class="cust-cluster-wrap"><slot name="cluster"></slot></div><div class="cust-infoWindow-wrap"><slot name="infoWindow" :data="currentMarkerData"></slot></div></div>
</template><script>
import amap from "./amap";
export default {name: "Amap",props: {//地图宽单位pxwidth: {type: [Number, String],default: "100%",},//地图高单位pxheight: {type: [Number, String],default: "100%",},//地图实例化参数mapParams: {type: Object,default: () => {},},//地图中心点center: {type: Array,default: () => [116.397428, 39.90923],},//地图层级zoom: {type: Number,default: 11,},//标点markers: {type: Array,default: () => [],},//是否聚合点isCluster: {type: Boolean,default: true,},//点击标点是否显示信息窗口isShowInfoWindow: {type: Boolean,default: true,},//信息窗口配置参数infoWindowParams: {type: Object,default: () => {},},//是否点击地图关闭信息窗口closeIwOnClickMap: {type: Boolean,default: true,},},data() {return {map: null, //地图实例cluster: null, //聚合点实例currentMarkerData: {},};},computed: {//设置地图容器宽高layoutStyle() {//%或者px兼容处理const getAttrVal = (val) =>val.toString().includes("%") ? val : `${val}px`;return {width: getAttrVal(this.width),height: getAttrVal(this.height),};},//是否自定义聚合点样式isCustcluster() {return this.$scopedSlots.cluster;},//是否自定义信息窗口isCustInfoWindow() {return this.$scopedSlots.infoWindow;},},watch: {//监听标点数据重新渲染markers: {handler(val) {if (this.map) {//清空地图标点this.map.clearMap();//重新渲染this.addMarkers(val);this.isCluster && this.clusterMarker(); //设置聚合点}},immediate: false,deep: true,},},mounted() {this.createMap(); //创建地图this.addMarkers(this.markers); //添加标点this.isCluster && this.clusterMarker(); //设置聚合点},beforeDestroy() {//销毁地图this.map && this.map.map.destroy();},methods: {//创建地图实例createMap() {this.map = new amap("amap-container", {...this.mapParams,zoom: this.zoom,center: this.center,});//地图加载完成this.map.map.on("complete", () => {this.$emit("initComplete");});//地图点击事件this.map.map.on("click", (e) => {this.closeIwOnClickMap&&this.closeInfoWindow()this.$emit("mapClick", e);});},//标点addMarkers(markers = []) {this.map.addMarkers(markers, (e) => {this.currentMarkerData = e;//点击标点显示信息窗口if (this.isShowInfoWindow) {//等待currentMarkerData数据渲染更新完成在打开信息窗口this.$nextTick(() => {this.map.showInfoWindow({lat: e.lnglat.lat,lng: e.lnglat.lng,...this.infoWindowParams,isCustom: this.isCustInfoWindow,content: this.getCustInfoWindowDom() || e.infoWindowContent || "",});});}//派发标点点击事件this.$emit("markerClick", e);});},//聚合标点clusterMarker() {//自定义渲染函数function renderClusterMarker(context) {//获取自定义聚合点DOMlet custClusterDom =document.getElementsByClassName("cust-cluster-wrap")[0];let div = document.createElement("div");div.innerHTML = custClusterDom.innerHTML;let span = document.createElement("span");span.style.position = "absolute";span.style.top = "50%";span.style.left = "50%";span.style.transform = "translate(-50%,-50%)";span.style.zIndex = "99";//设置聚合数span.innerHTML = context.count;//插入聚合数量span节点div.children[0].appendChild(span);let size = Math.round(30 + Math.pow(context.count / this.map.markers.length, 1 / 5) * 20);context.marker.setOffset(new AMap.Pixel(-size / 2, -size / 2));context.marker.setContent(div);}//聚合this.map &&this.map.clusterMarker(this.isCustcluster ? renderClusterMarker.bind(this) : undefined);},//获取自定义窗口DomgetCustInfoWindowDom() {if (!this.isCustInfoWindow) return;return document.getElementsByClassName("cust-infoWindow-wrap")[0].innerHTML;},//关闭信息窗口closeInfoWindow() {this.map.closeInfoWindow();},},
};
</script><style lang="scss" scoped>
.amap-container {width: 100%;height: 100%;
}
.cust-cluster-wrap {position: fixed;top: 0;left: 0;transform: translate(-100%, -100%);
}
.cust-infoWindow-wrap {position: fixed;top: 0;left: 0;transform: translate(-100%, -100%);
}
</style>
页面调用:
inde.vue
<template><div class="container"><!-- 地图区域 --><div class="map-wrap"><amap:center="mapCenter":zoom="zoom":mapParams="mapParams":markers="markers":infoWindowParams="infoWindowParams"isCluster@initComplete="onInitComplete"@mapClick="onMapClick"><!-- 聚合样式 --><template v-slot:cluster><div class="cluster"><img class="icon" src="/static/images/icon.png" /></div></template><!-- 窗体样式 --><template v-slot:infoWindow="{ data }"><div class="infoWindow"><div class="name">{{ data.projectName }}</div><div class="row">电话:{{ data.phone }}</div><div class="row">地址:{{ data.address }}</div></div></template></amap></div><!-- 搜索按钮 --><button class="search" @click="onSearch">搜索(模拟刷新数据)</button></div>
</template><script>
import amap from "./component/amap/amap.vue";
export default {components: {amap,},data() {return {markers: [], //标点集合mapCenter: [116.397428, 39.90923],zoom: 13,mapParams: {mapStyle: "amap://styles/blue", //地图样式},infoWindowParams: {anchor: "top-right",offset: new AMap.Pixel(0, 15), //偏移},};},created() {this.onSearch();},mounted() {},methods: {//加载完成onInitComplete() {console.log("加载完成");},//点击地图onMapClick(e) {console.log(e, "点击地图");},//搜索onSearch() {this.markers = [];this.$nextTick(() => {//模拟接口生成数据for (let i = 0; i < parseInt(Math.random() * 20); i++) {let [lng, lat] = this.mapCenter;let position = [lng + i * Math.random() * 0.05, lat + i * 0.01];this.markers.push({position,//经纬度icon: `/static/images/map_icon${parseInt(Math.random() * 3) + 1}.png`,//标点图标projectName: `项目${i}`,//项目名称phone: "13333333333",//电话address: "北京市朝阳区望京阜荣街10号",//地址});}});},},
};
</script><style lang="scss" scoped>
.container {width: 100%;height: 100%;
}
.map-wrap {height: 90%;width: 100%;.cluster {height: 60px;width: 60px;border-radius: 50%;color: #fff;font-size: 16px;line-height: 50px;.icon {width: 100%;position: absolute;top: 0;left: 0;height: 100%;}}.infoWindow {padding: 20px;box-sizing: border-box;border-radius: 10px;background: #fff;.name {font-size: 18px;color: rgb(39, 130, 248);}.row {margin-top: 10px;font-size: 14px;}}
}
.search {margin-top: 10px;width: 150px;height: 40px;
}
</style>
效果
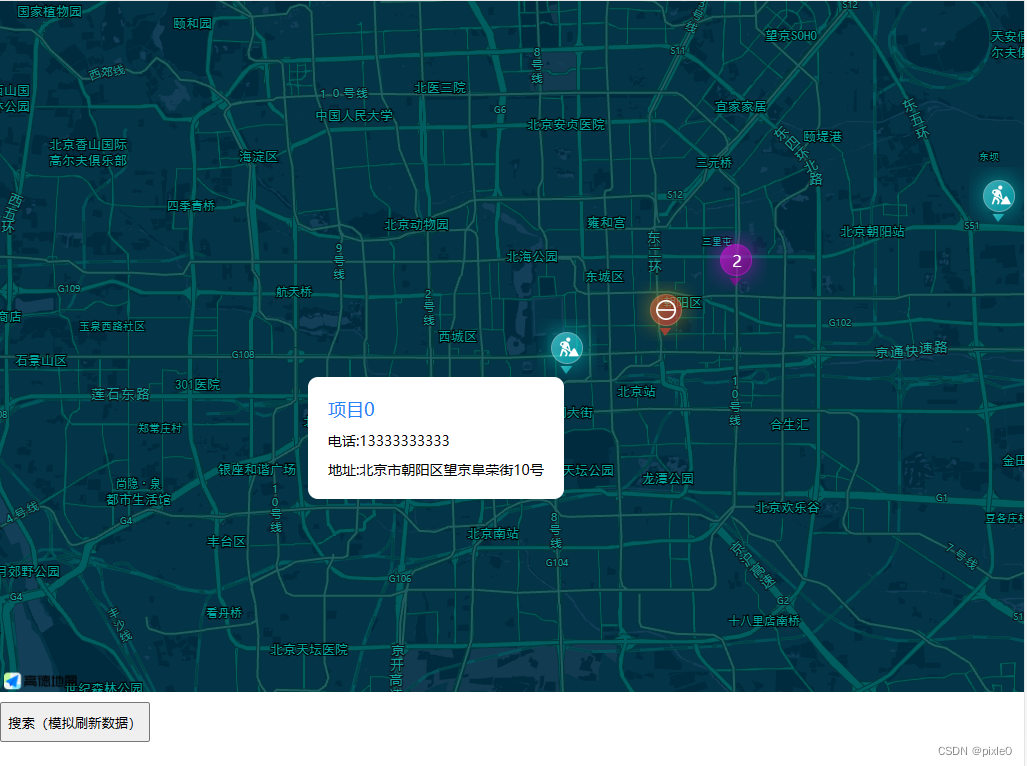
搜索刷新后


![[python] Kmeans文本聚类算法+PAC降维+Matplotlib显示聚类图像](https://img-blog.csdnimg.cn/e5e5c5f840db459e81ea55e66bc89fd7.png)