目录
1 Springboot的创建
步骤
2 项目的书写和运行
创建service包并在其下写一个service文件
项目的运行
pom文件的一些配置
parent
web
test
打包
打包过程
1 Springboot的创建
步骤
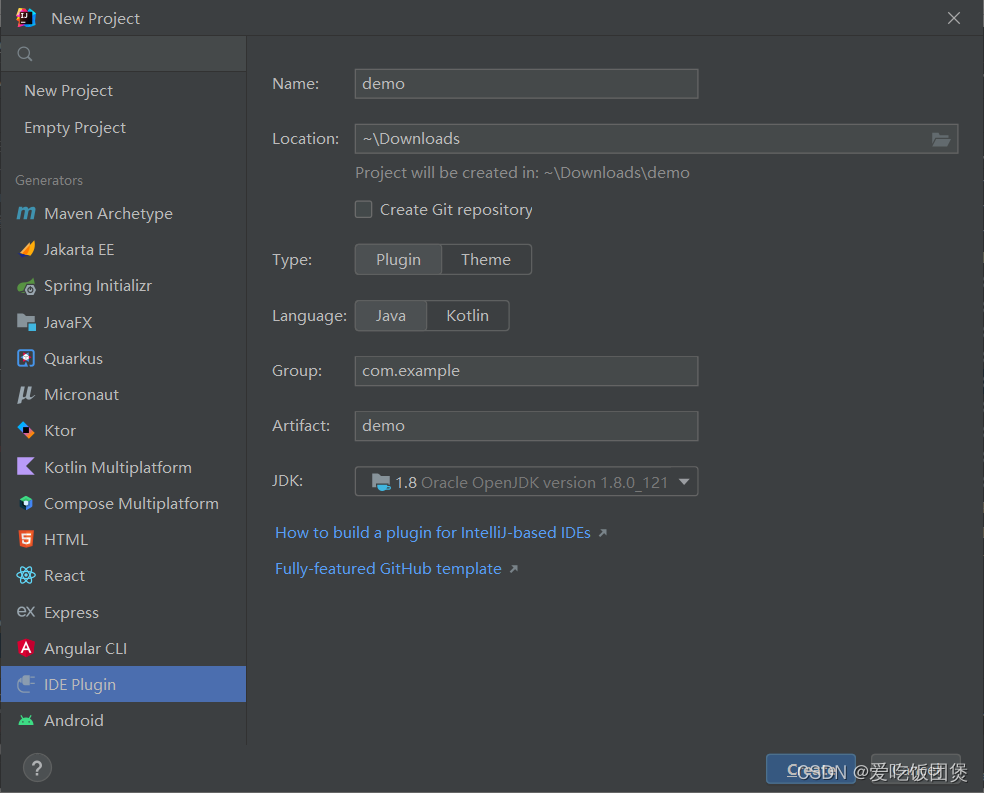
- 首先new一个新项目

- 然后依照如下创建
2 项目的书写和运行
创建service包并在其下写一个service文件
注意:service一定要放在项目名的包下 这里还有一些注解的解释请仔细观看
import org.springframework.web.bind.annotation.RequestMapping;
import org.springframework.web.bind.annotation.RestController;
//返回字符串类型
@RestController
public class HelloController {//接口 http://localhost:8080/hello@RequestMapping("/hello")public String hello(){return "hello world";}
}
项目的运行
运行项目名包下的Appliaction文件即可
//本身就是spring的一个组件
@SpringBootApplication
public class DemoSpringBootApplication {public static void main(String[] args) {SpringApplication.run(DemoSpringBootApplication.class, args);}}
pom文件的一些配置
parent
<!--有一个父项目-->
<parent><groupId>org.springframework.boot</groupId><artifactId>spring-boot-starter-parent</artifactId><version>2.7.14</version><relativePath/> <!-- lookup parent from repository -->
</parent>
web
<!--web 依赖 配好了 Tomact servlet .xml-->
<dependency><groupId>org.springframework.boot</groupId><artifactId>spring-boot-starter-web</artifactId>
</dependency>
test
<!--单元测试-->
<dependency><groupId>org.springframework.boot</groupId><artifactId>spring-boot-starter-test</artifactId><scope>test</scope>
</dependency
打包
    <!--打jar包程序--><plugins><plugin><groupId>org.springframework.boot</groupId><artifactId>spring-boot-maven-plugin</artifactId></plugin></plugins>
</build>
打包后会形成一个jar文件,这个jar文件也相当于一个接口。通过在命令窗口执行这个文件也可以达到效果。
打包过程
1
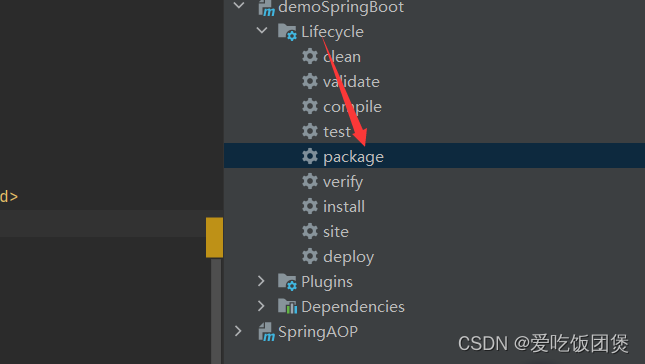
2 3在cmd窗口执行文件




![[JavaWeb]【八】web后端开发-Mybatis](https://img-blog.csdnimg.cn/7fd0499f84594fa4b9682a5e31397490.png)



![[Go版]算法通关村第十三关黄金——数字数学问题之数论问题(最大公约数、素数、埃氏筛、丑数)](https://img-blog.csdnimg.cn/428862e6c0034036979c3c7ccf93f534.png)
