目录
C++线程同步
引入
互斥锁
std::mutex
std::lock_guard类模板
unique_lock
成员方法
应用举例
std::lock()函数模板
std::call_once(flag、function)
懒汉式单例模式实例
unique_lock互斥锁方式
编辑
call_once方式
条件变量
std::condition
条件变量使用实例
原子操作
读写atomic对象的值
原子操作使用实例
内存模型:强顺序与弱顺序
C++线程同步
引入
线程同步是一种编程技术,它用于在多线程环境中确保多个线程能够正确、安全地共享和访问共享资源。线程同步的主要目的是防止数据竞争和不一致性,以及避免多个线程同时对同一数据进行修改或访问导致的问题。
以下是一些需要实现线程同步的情况:
- 数据竞争:当多个线程同时访问和修改共享资源时,可能导致数据不一致或不可预测的结果。例如,如果两个线程都尝试修改同一个变量的值,其中一个线程的修改可能会被另一个线程覆盖,导致数据错误。
- 死锁:当多个线程相互等待对方释放资源时,会导致程序陷入死锁状态,无法继续执行。例如,线程A等待线程B释放资源,而线程B正在等待线程A释放资源,导致两个线程都无法继续执行。
- 资源竞争:当多个线程同时访问共享资源时,可能会导致资源争用,影响程序的性能和响应时间。例如,多个线程同时访问同一个文件或数据库连接,可能会导致读写冲突和性能下降。
因此,实现线程同步的目的是确保多个线程能够正确地访问和修改共享资源,避免数据竞争、死锁和资源竞争等问题。常用的线程同步技术包括互斥锁、信号量、条件变量、读写锁等。
C++11对于线程同步提供了四种机制,分别是
- 互斥锁
- std::call_once(flag、function)
- 条件变量
- 原子操作
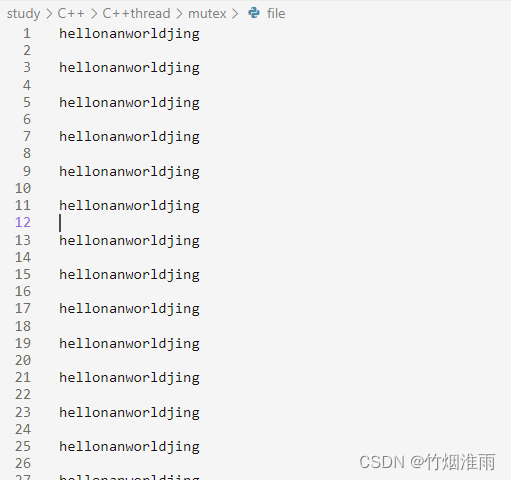
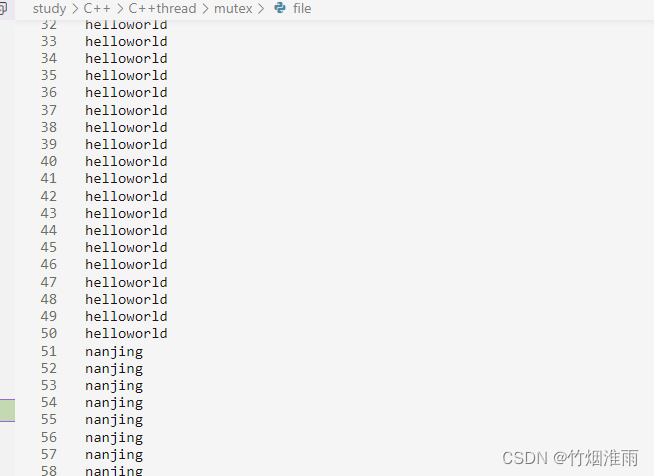
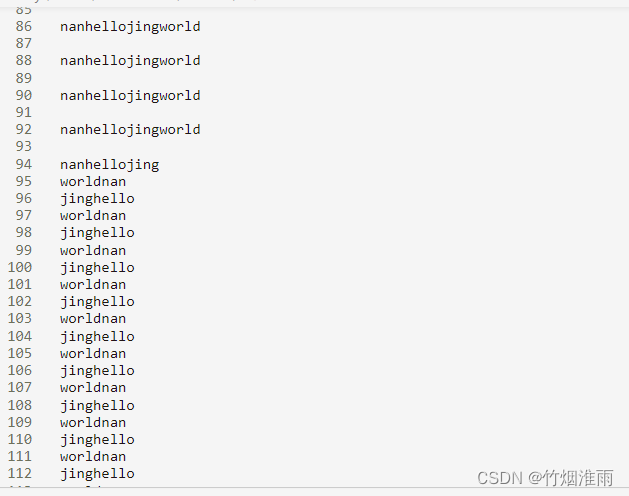
以两个线程对文件进行写入操作为例,如果不加以同步操作,由于线程时间片调度机制,会产生线程竞态,从而会导致写入的数据顺序发生混乱
#include <iostream>
#include <thread>
#include <sys/types.h>
#include <sys/stat.h>
#include <fcntl.h>
#include <unistd.h>
using namespace std;class FileWriter
{
public:void myWriter1(int fd){int num=50;while(num--){write(fd,"hello",5);write(fd,"world",5);write(fd,"\n",1);}}void myWriter2(int fd){int num=50;while(num--){write(fd,"nan",3);write(fd,"jing",4);write(fd,"\n",1);}}
};int main(int argc, char const *argv[])
{int fd = open("file",O_CREAT | O_WRONLY,0655);if(fd == -1){perror("open file error!");exit(-1);}FileWriter f;thread t1(&FileWriter::myWriter1,&f,fd);thread t2(&FileWriter::myWriter2,&f,fd);t1.join();t2.join();return 0;
}
互斥锁
std::mutex
不同于C语言的互斥锁,C++的互斥锁定义完不需要初始化和销毁,直接使用即可
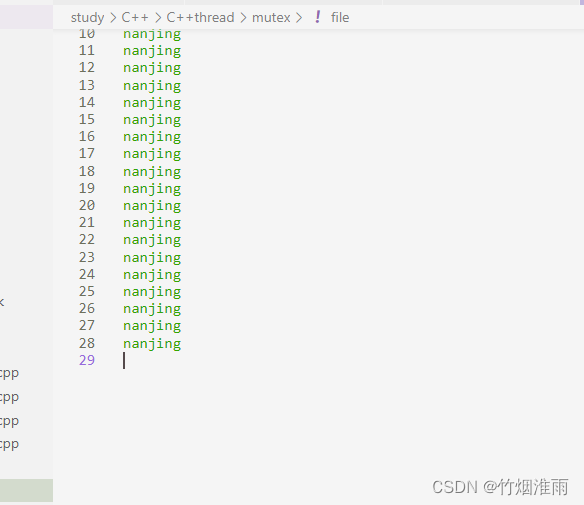
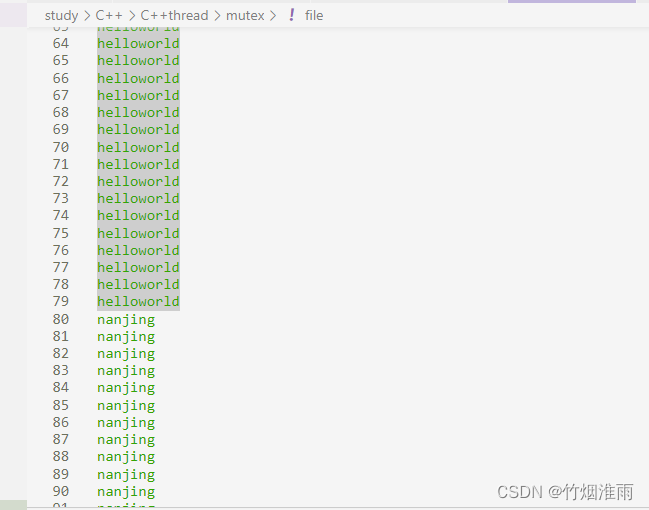
如下:对之前的多线程文件写入程序进行上锁,解决资源竞态的问题
#include <iostream>
#include <thread>
#include <sys/types.h>
#include <sys/stat.h>
#include <fcntl.h>
#include <unistd.h>
#include <mutex>
using namespace std;class FileWriter
{
public:void myWriter1(int fd){int num=50;while(num--){my_mutex.lock();write(fd,"hello",5);write(fd,"world",5);write(fd,"\n",1);my_mutex.unlock();}}void myWriter2(int fd){int num=50;while(num--){my_mutex.lock();write(fd,"nan",3);write(fd,"jing",4);write(fd,"\n",1);my_mutex.unlock();}}std::mutex my_mutex;
};int main(int argc, char const *argv[])
{int fd = open("file",O_CREAT | O_WRONLY,0655);if(fd == -1){perror("open file error!");exit(-1);}FileWriter f;thread t1(&FileWriter::myWriter1,&f,fd);thread t2(&FileWriter::myWriter2,&f,fd);t1.join();t2.join();return 0;
}
std::lock_guard类模板
- std::mutex有时候lock()完,忘记unlock()会导致死锁的问题
如下图中,使用break跳出循环会跳过解锁,从而导致死锁问题

- std::lock_guard不再使用lock、unlock,可以用于解决死锁问题
即使用lock_guard创建一个类模板对象,它会通过构造和析构的方式帮我们自动进行上锁解锁
lock_guard会在定义的时候上锁,出了它的当前作用域就会自动解锁(析构)
#include <iostream>
#include <thread>
#include <sys/types.h>
#include <sys/stat.h>
#include <fcntl.h>
#include <unistd.h>
#include <mutex>
using namespace std;class FileWriter
{
public:void myWriter1(int fd){int num=50;while(num--){lock_guard<mutex>my_lock(my_mutex);write(fd,"hello",5);write(fd,"world",5);write(fd,"\n",1);}}void myWriter2(int fd){int num=50;while(num--){lock_guard<mutex>my_lock(my_mutex);write(fd,"nan",3);write(fd,"jing",4);write(fd,"\n",1);}}std::mutex my_mutex;
};int main(int argc, char const *argv[])
{int fd = open("file",O_CREAT | O_WRONLY,0655);if(fd == -1){perror("open file error!");exit(-1);}FileWriter f;thread t1(&FileWriter::myWriter1,&f,fd);thread t2(&FileWriter::myWriter2,&f,fd);t1.join();t2.join();return 0;
}
unique_lock
unique_lock是一个类模板,使用等同于std::lock_guard
成员方法
构造函数unique_lock的第二个参数
- std::adopt_lock表示这个互斥量已经被lock了(你必须要把互斥量提前lock了,否则会报异常)
- std::try_to_lock:尝试用mutex的lock()方法去锁定这个mutex,但如果没有锁定成功,也会立即返回
lock(),加锁:unique_lock创建的对象锁,可以在作用域内任意地方上锁,一般用于unlock()解锁后,再次上锁
unlock(),解锁:unique_lock创建的对象锁,可以在作用域内任意地方解锁,而不通过离开作用域析构解锁
try_lock(),尝试给互斥量加锁,如果拿不到锁,返回false,如果拿到了锁,返回true,这个函数是不阻塞的
总结:lock_guard不够灵活,它只能保证在析构的时候执行解锁操作;而unique_lock内部需要维护锁的状态,所以效率要比lock_guard低一点,在lock_guard能解决问题的时候,就用lock_guard
应用举例
实例1:多线程文件写入
#include <iostream>
#include <thread>
#include <sys/types.h>
#include <sys/stat.h>
#include <fcntl.h>
#include <unistd.h>
#include <mutex>
using namespace std;class FileWriter
{
public:void myWriter1(int fd){int num=50;while(num--){unique_lock<mutex>my_lock(my_mutex);write(fd,"hello",5);write(fd,"world",5);write(fd,"\n",1);my_mutex.unlock();}}void myWriter2(int fd){int num=50;while(num--){unique_lock<mutex>my_lock(my_mutex);write(fd,"nan",3);write(fd,"jing",4);write(fd,"\n",1);}}std::mutex my_mutex;
};int main(int argc, char const *argv[])
{int fd = open("file",O_CREAT | O_WRONLY,0655);if(fd == -1){perror("open file error!");exit(-1);}FileWriter f;thread t1(&FileWriter::myWriter1,&f,fd);thread t2(&FileWriter::myWriter2,&f,fd);t1.join();t2.join();return 0;
}
实例2:使用adopt_lock时,unique_lock定义时将不会自动上锁,需要我们用lock()方法指定地方进行上锁,否则无法上锁导致数据混乱
#include <iostream>
#include <thread>
#include <sys/types.h>
#include <sys/stat.h>
#include <fcntl.h>
#include <unistd.h>
#include <mutex>
using namespace std;class FileWriter
{
public:void myWriter1(int fd){int num=100;while(num--){//my_mutex.lock();unique_lock<mutex>my_lock(my_mutex,std::adopt_lock);write(fd,"hello",5);write(fd,"world",5);write(fd,"\n",1);my_mutex.unlock();}}void myWriter2(int fd){int num=100;while(num--){unique_lock<mutex>my_lock(my_mutex);write(fd,"nan",3);write(fd,"jing",4);write(fd,"\n",1);}}std::mutex my_mutex;
};int main(int argc, char const *argv[])
{int fd = open("file",O_CREAT | O_WRONLY,0655);if(fd == -1){perror("open file error!");exit(-1);}FileWriter f;thread t1(&FileWriter::myWriter1,&f,fd);thread t2(&FileWriter::myWriter2,&f,fd);t1.join();t2.join();return 0;
}
std::lock()函数模板
功能:一次锁住两个或者两个以上的互斥量(至少两个,多了不限),解决锁的顺序问题导致死锁的风险
解锁
- 方法1:unlock
- 方法2:std::lock_guard()的std::adopt_lock参数
举例:我们在创建多个锁的时候,上锁和解锁的顺序一定要相同,否则会导致死锁的问题
比如在下面程序中,线程1在解锁完锁2的时候,线程2会上锁2,这样就会导致线程1中无法对锁1解锁,从而在线程2中对锁1也无法上锁,这样就导致死锁,两个线程同时发生阻塞
#include <iostream>
#include <thread>
#include <sys/types.h>
#include <sys/stat.h>
#include <fcntl.h>
#include <unistd.h>
#include <mutex>
using namespace std;class FileWriter
{
public:void myWriter1(int fd){int num=100;while(num--){   my_mutex1.lock();my_mutex2.lock();write(fd,"hello",5);write(fd,"world",5);write(fd,"\n",1);my_mutex2.unlock();my_mutex1.unlock();}}void myWriter2(int fd){int num=100;while(num--){my_mutex2.lock();my_mutex1.lock();write(fd,"nan",3);write(fd,"jing",4);write(fd,"\n",1);my_mutex1.unlock();my_mutex2.unlock();}}std::mutex my_mutex1,my_mutex2;
};int main(int argc, char const *argv[])
{int fd = open("file",O_CREAT | O_WRONLY,0655);if(fd == -1){perror("open file error!");exit(-1);}FileWriter f;thread t1(&FileWriter::myWriter1,&f,fd);thread t2(&FileWriter::myWriter2,&f,fd);t1.join();t2.join();return 0;
}

但我们使用类模板提供的lock()方法,就不用关心上锁和解锁顺序问题,解锁先后与上锁无关
#include <iostream>
#include <thread>
#include <sys/types.h>
#include <sys/stat.h>
#include <fcntl.h>
#include <unistd.h>
#include <mutex>
using namespace std;class FileWriter
{
public:void myWriter1(int fd){int num=100;while(num--){   lock(my_mutex1,my_mutex2);write(fd,"hello",5);write(fd,"world",5);write(fd,"\n",1);my_mutex2.unlock();my_mutex1.unlock();}}void myWriter2(int fd){int num=100;while(num--){lock(my_mutex1,my_mutex2);write(fd,"nan",3);write(fd,"jing",4);write(fd,"\n",1);my_mutex1.unlock();my_mutex2.unlock();}}std::mutex my_mutex1,my_mutex2;
};int main(int argc, char const *argv[])
{int fd = open("file",O_CREAT | O_WRONLY,0655);if(fd == -1){perror("open file error!");exit(-1);}FileWriter f;thread t1(&FileWriter::myWriter1,&f,fd);thread t2(&FileWriter::myWriter2,&f,fd);t1.join();t2.join();return 0;
}
std::lock_guard的std::adopt_lock参数确保在构造时不会再次锁定互斥锁,而是假设这些互斥锁已经被锁定,并在析构时自动解锁
#include <iostream>
#include <thread>
#include <sys/types.h>
#include <sys/stat.h>
#include <fcntl.h>
#include <unistd.h>
#include <mutex>
using namespace std;class FileWriter
{
public:void myWriter1(int fd){int num = 100;while (num--){std::lock(my_mutex1, my_mutex2);std::lock_guard<std::mutex> lock1(my_mutex1, std::adopt_lock);std::lock_guard<std::mutex> lock2(my_mutex2, std::adopt_lock);write(fd, "hello", 5);write(fd, "world", 5);write(fd, "\n", 1);}}void myWriter2(int fd){int num = 100;while (num--){std::lock(my_mutex1, my_mutex2);std::lock_guard<std::mutex> lock1(my_mutex1, std::adopt_lock);std::lock_guard<std::mutex> lock2(my_mutex2, std::adopt_lock);write(fd, "nan", 3);write(fd, "jing", 4);write(fd, "\n", 1);}}std::mutex my_mutex1, my_mutex2;
};int main(int argc, char const *argv[])
{int fd = open("file", O_CREAT | O_WRONLY, 0655);if (fd == -1){perror("open file error!");exit(-1);}FileWriter f;thread t1(&FileWriter::myWriter1, &f, fd);thread t2(&FileWriter::myWriter2, &f, fd);t1.join();t2.join();return 0;
}
std::call_once(flag、function)
互斥锁的最大问题是频繁的上锁解锁造成的开销比较大
std::call_once()功能是能够保证函数function只被调用一次,具备互斥量这种能力,而且效率上比互斥量消耗的资源更小
懒汉式单例模式实例
unique_lock互斥锁方式
#include <iostream>
#include <thread>
#include <string>
#include <vector>
#include <list>
#include <mutex>using namespace std;std::mutex resource_mutex;class MyCAS
{
private:MyCAS(){}//私有化了的构造函数
private:static MyCAS *m_instance;//静态成员变量
public:static MyCAS *GetInstance(){//提高效率//a)如果if(m_instance != NULL)条件成立,则表示肯定m_instance已经被new过了//b)如果if(m_instance == NULL),不代表m_instance一定没被new过if(m_instance == NULL)//双重锁定(双重检查){std::unique_lock<std::mutex>mymutex(resource_mutex);if(m_instance == NULL){m_instance == new MyCAS();static CGarhuishou cl;}}return m_instance;}class CGarhuishou//类中套类,用来释放对象{public:~CGarhuishou()//类的析构函数中{if(MyCAS::m_instance){delete MyCAS::m_instance;MyCAS::m_instance = NULL;}}};void func(){cout << "测试"<<endl;}
};//类静态变量初始化
MyCAS *MyCAS::m_instance = NULL;//线程入口函数
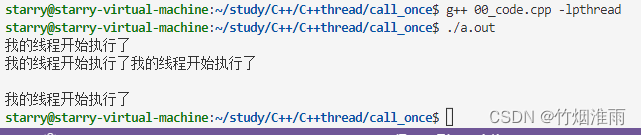
void mythread()
{cout << "我的线程开始执行了" <<endl;MyCAS *p_a = MyCAS::GetInstance(); //这里可能就有问题了cout << "我的线程开始执行了" <<endl;
}int main()
{std::thread myobj1(mythread);std::thread myobj2(mythread);myobj1.join();myobj2.join();return 0;
}
call_once方式
#include <iostream>
#include <thread>
#include <string>
#include <vector>
#include <list>
#include <mutex>using namespace std;std::mutex resource_mutex;
std::once_flag g_flag; //这是一个系统定义的标记class MyCAS
{static void CreateInstance()//只被调用一次{std::chrono::microseconds dura(20000);std::this_thread::sleep_for(dura);m_instance == new MyCAS();static CGarhuishou cl;}private:MyCAS(){}//私有化了的构造函数
private:static MyCAS *m_instance;//静态成员变量
public:static MyCAS *GetInstance(){//两个线程同时执行到这里,其中一个线程要等另外一个线程执行完毕CrateInstance(),这里可以把g_flag看做一把锁std::call_once(g_flag,CreateInstance);cout << "call_once()执行完毕"<<endl;return m_instance;}class CGarhuishou//类中套类,用来释放对象{public:~CGarhuishou()//类的析构函数中{if(MyCAS::m_instance){delete MyCAS::m_instance;MyCAS::m_instance = NULL;}}};void func(){cout << "测试"<<endl;}
};//类静态变量初始化
MyCAS *MyCAS::m_instance = NULL;//线程入口函数
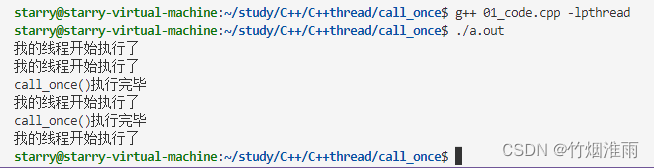
void mythread()
{cout << "我的线程开始执行了" <<endl;MyCAS *p_a = MyCAS::GetInstance();cout << "我的线程开始执行了" <<endl;
}int main()
{std::thread myobj1(mythread);std::thread myobj2(mythread);myobj1.join();myobj2.join();return 0;
}
条件变量
std::condition
前提:需要有互斥锁的支持
等待条件:wait(mutex,lambda)
- 如果第二个参数lambda表达式返回值是true,那么wait()直接返回;
- 如果第二个参数lambda表达式返回值是false,那么wait()将解锁互斥量,并且阻塞到本条件变量成立
唤醒:notify_once()只能通知一个线程
唤醒:notify_all()通知所有线程
条件变量使用实例
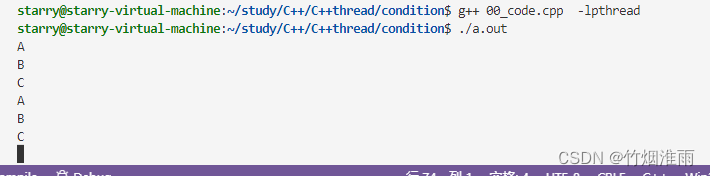
打印ABC
#include <iostream>
#include <thread>
#include <mutex>
#include <condition_variable>
#include <unistd.h>using namespace std;class Print
{
public:void printA(){while(1){//lock_guard<mutex>my_lock(my_mutex);unique_lock<mutex>my_lock(my_mutex);my_cond.wait(my_lock,[this](){if(count==0){  return true;}return false;});cout << "A" <<endl;count =1 ;my_cond.notify_all();sleep(1);}}void printB(){while(1){//lock_guard<mutex>my_lock(my_mutex);unique_lock<mutex>my_lock(my_mutex);my_cond.wait(my_lock,[this](){if(count==1){  return true;}return false;});cout << "B" <<endl;count =2 ;my_cond.notify_all();sleep(1);}}void printC(){while(1){//lock_guard<mutex>my_lock(my_mutex);unique_lock<mutex>my_lock(my_mutex);my_cond.wait(my_lock,[this](){if(count==2){  return true;}return false;});cout << "C" <<endl;count =0 ;my_cond.notify_all();sleep(1);}}int count;mutex my_mutex;condition_variable my_cond;
};int main()
{Print p;p.count =0;thread t1(&Print::printA,&p);thread t2(&Print::printB,&p);thread t3(&Print::printC,&p);t1.join();t2.join();t3.join();return 0;
}
原子操作
原子操作:是在多线程中不会被打断的程序片段(汇编指令);原子操作比互斥量更胜一筹;
作用:原子操作一般用来保护单一变量,不保护代码段
std::atomic
读写atomic对象的值
- load():以原子方式读atomic对象的值
- store():以原子方式写入内容
我们也可以直接读写原子变量的值,但是使用提供的成员方法更安全
atomic<int>atm;
atm=0;
cout<<atm<<endl;//读取atm是原子操作,但是整个这一行代码不是原子操作auto atm2(atm.load());//以原子方式读取atomic对象的值
atm.store(12);//以原子方式写入内容
原子操作使用实例
按理说两个线程都加一百万次,结果应该是二百万,但实际的结果却不是。因为++实际上是两个操作,先加1,然后给变量赋值,因此并不是原子操作,所以会导致两个线程竞态,导致结果变小。
#include <iostream>
#include <thread>
#include <mutex>
#include <vector>
#include <future>
#include <atomic>
#include <list>
#include <string>using namespace std;//我们封装了一个类型为int的对象,像操作一个int类型变量一样来操作这个g_mycont
//std::atomic<int>g_mycont(0);int g_mycont = 0;void mythread()
{for(int i =0 ;i<1000000;i++){g_mycont++;//对应的操作是个原子操作(不会被打断)//g_mycont += 1;//g_mycont = g_mycont + 1; //结果不对,不是原子操作}
}int main()
{thread myobj1(mythread);thread myobj2(mythread);myobj1.join();myobj2.join();cout << "两个线程执行完毕,最终的g_mycont的结果是:"<<g_mycont<<endl;return 0;
}
通过加锁可以解决问题
#include <iostream>
#include <thread>
#include <mutex>
#include <vector>
#include <future>
#include <atomic>
#include <list>
#include <string>using namespace std;//我们封装了一个类型为int的对象,像操作一个int类型变量一样来操作这个g_mycont
//std::atomic<int>g_mycont(0);int g_mycont = 0;
mutex my_mutex;
void mythread()
{for(int i =0 ;i<1000000;i++){my_mutex.lock();g_mycont++;//对应的操作是个原子操作(不会被打断)//g_mycont += 1;//g_mycont = g_mycont + 1; //结果不对,不是原子操作my_mutex.unlock();}
}int main()
{thread myobj1(mythread);thread myobj2(mythread);myobj1.join();myobj2.join();cout << "两个线程执行完毕,最终的g_mycont的结果是:"<<g_mycont<<endl;return 0;
}
C++11支持将变量申明为原子值
#include <iostream>
#include <thread>
#include <mutex>
#include <vector>
#include <future>
#include <atomic>
#include <list>
#include <string>using namespace std;//我们封装了一个类型为int的对象,像操作一个int类型变量一样来操作这个g_mycont
std::atomic<int>g_mycont(0);void mythread()
{for(int i =0 ;i<1000000;i++){g_mycont++;//对应的操作是个原子操作(不会被打断)//g_mycont += 1;//g_mycont = g_mycont + 1; //结果不对,不是原子操作}
}int main()
{thread myobj1(mythread);thread myobj2(mythread);myobj1.join();myobj2.join();cout << "两个线程执行完毕,最终的g_mycont的结果是:"<<g_mycont<<endl;return 0;
}
注:atomic原子操作仅对于++、--、&=、|=是支持的
内存模型:强顺序与弱顺序
强顺序保证了程序的正确性,但效率会很低,一般编译器优化的时候都是按照弱顺序来执行
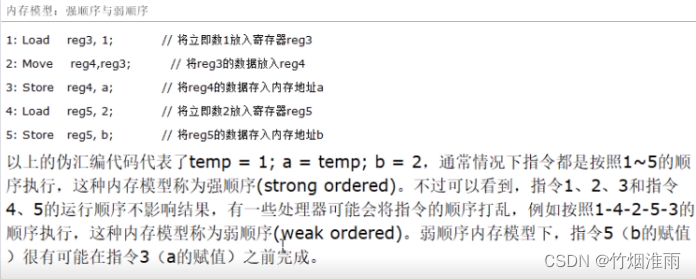
- 强顺序模型(又叫TSO,Total Strong Order),是一种靠向程序顺序的顺序模型
- 弱内存模型(简称WMO,Weak Memory Ordering),是把是否要求强制顺序这个要求直接交给程序员的方法
- C++11的std::memory_order有6个枚举值,其中有四个常用
- 顺序一致性顺序std::memory_order_seq_cst
- 松散顺序std::memory_order_relaxed
- 释放顺序std:memory_order_acquire&std::memory_order_release
- std::memory_order_consume本线程所有后续有关本操作的必须在本操作完成后执行