目录
前言
需求
实现
前言
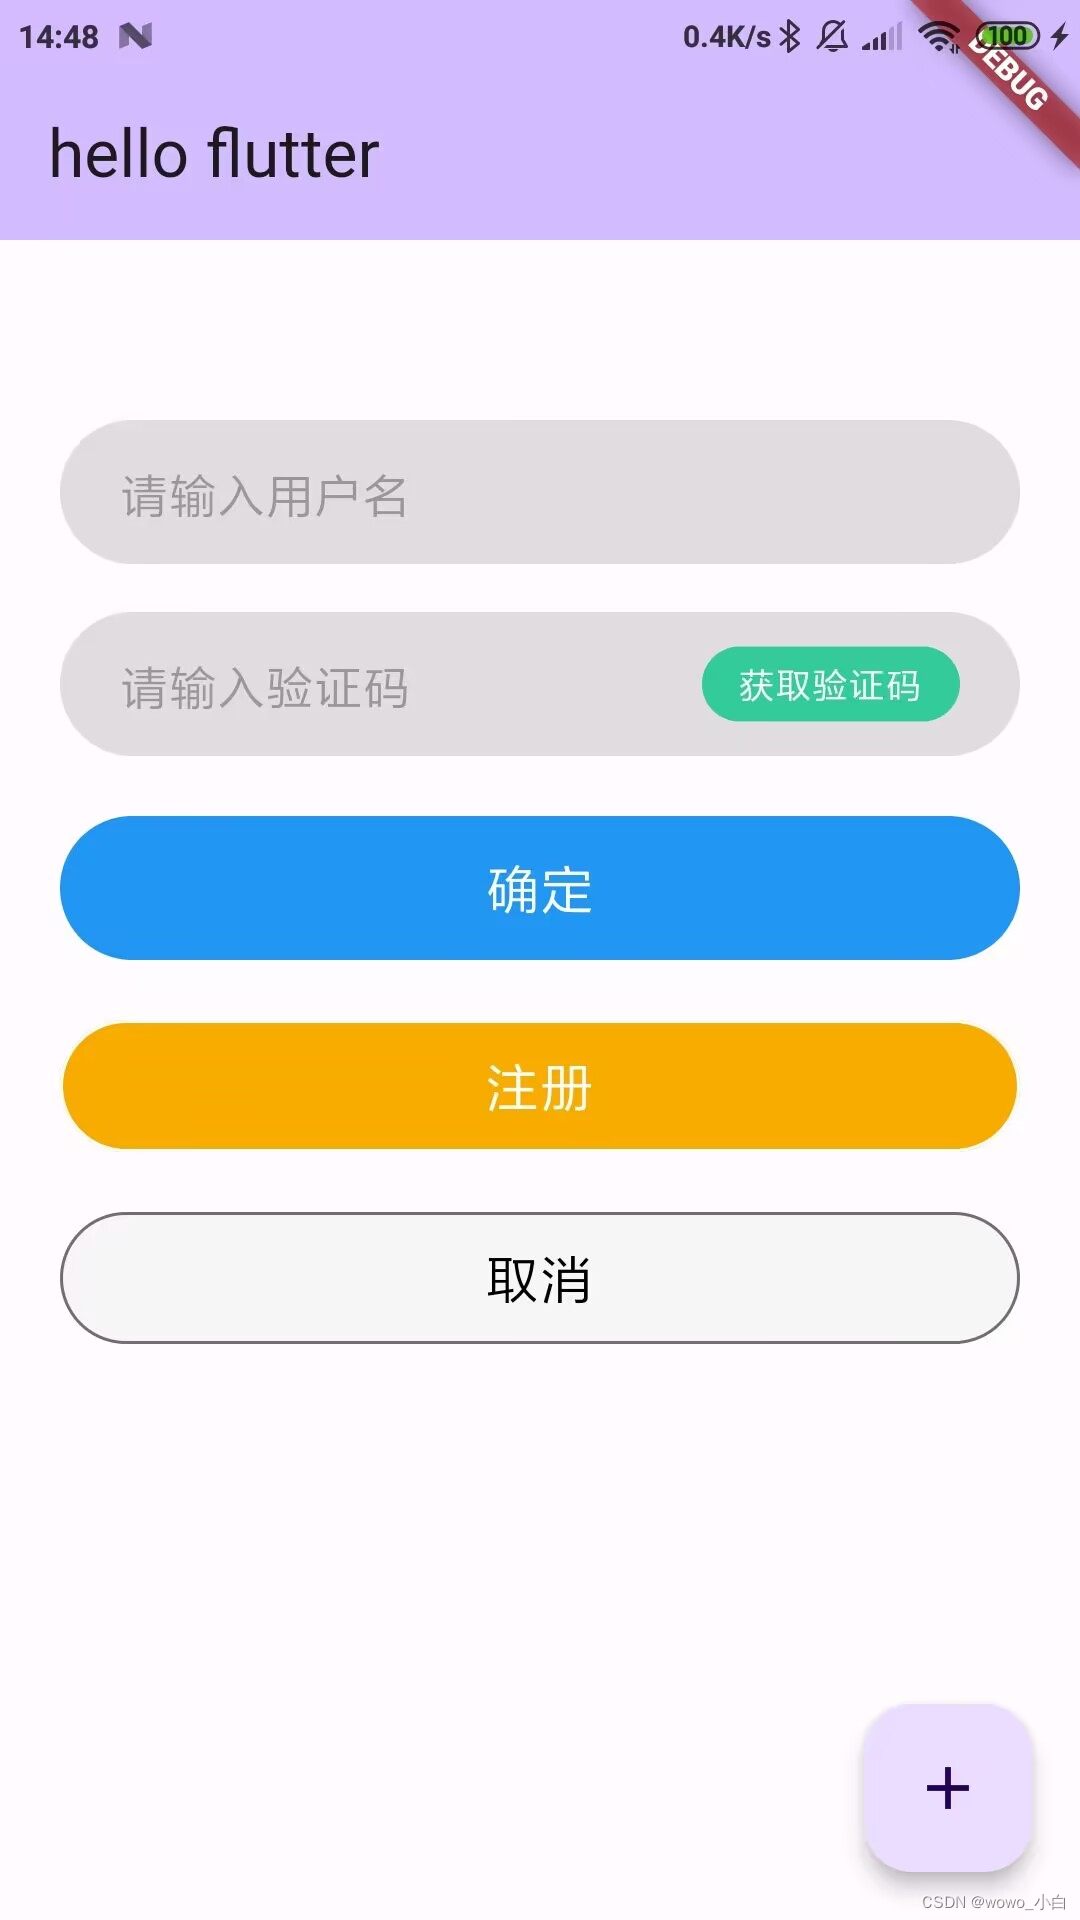
最近闲着无聊学习了flutter的一下知识,发现flutter和安卓之间,页面开发的方式还是有较大的差异的,众所周知,android的页面开发都是写在xml文件中的,而flutter直接写在代码里(dart文件中),从目前我的认识来看,两者在UI上的“套娃”方式,flutter更能套,简直就是“套中套”啊哈哈。比如今天的手写一个最简单的自定义按钮吧,效果如下图所示
需求
- 带文本的普通按钮,可修改字体大小和字体颜色
- 提供修改背景色,按下后的背景色支持
- 支持圆角和边框
- 提供点击事件的回调
这几个需求还是毕竟常用的,目前没考虑渐变色和图标,具体需求具体改吧
实现
本次demo的代码本身属于练手,相当于flutter的"hello world"(毕竟我才刚了解flutter没几天)。
以下是具体的代码实现:
import 'package:flutter/material.dart';class CustomTextButton extends StatefulWidget {//按钮的宽度final double? width;//按钮的长度final double? height;final String text;final double? textSize;final Color textColor;final Color backgroundColor;final Color pressedBackgroundColor;final VoidCallback onClick;final double borderRadius;final Color borderColor;const CustomTextButton({super.key,required this.onClick,required this.text,this.textSize = 16,this.width = double.infinity,required this.height,this.backgroundColor = Colors.white,this.pressedBackgroundColor = Colors.white,this.borderRadius = 0.0,this.borderColor = Colors.white,this.textColor = Colors.black});@overrideState<CustomTextButton> createState() => _CustomTextButtonState();
}class _CustomTextButtonState extends State<CustomTextButton> {bool _isPressed = false;@overrideWidget build(BuildContext context) {return ConstrainedBox(constraints:BoxConstraints.expand(width: widget.width, height: widget.height),child: GestureDetector(onTap: () {widget.onClick();},onTapDown: (details) {setState(() {_isPressed = true;});},onTapUp: (details) {setState(() {_isPressed = false;});},child: Container(alignment: Alignment.center,decoration: BoxDecoration(color: _isPressed? widget.pressedBackgroundColor: widget.backgroundColor,borderRadius: BorderRadius.circular(widget.borderRadius),border: Border.fromBorderSide(BorderSide(width: 1, color: widget.borderColor))),child: Text(widget.text,maxLines: 1,overflow: TextOverflow.ellipsis,style: TextStyle(color: widget.textColor,fontSize: widget.textSize,fontStyle: FontStyle.normal,),),),),);}
}extension HexColor on Color {/// String is in the format "aabbcc" or "ffaabbcc" with an optional leading "#".static Color fromHex(String hexString) {final buffer = StringBuffer();if (hexString.length == 6 || hexString.length == 7) buffer.write('ff');buffer.write(hexString.replaceFirst('#', ''));return Color(int.parse(buffer.toString(), radix: 16));}}
代码演示,如何使用,这个还是非常简单易懂的,有什么需要改进的地方,也请大佬指示改进。
Container(margin: const EdgeInsets.only(left: 20, right: 20),child: CustomTextButton(text: '注册',textSize: 18,textColor: Colors.white,backgroundColor: HexColor.fromHex("F9AC00"),pressedBackgroundColor: HexColor.fromHex("E0CE32"),height: 44,borderRadius: 30,onClick: () {Fluttertoast.showToast(msg: "您按了注册",toastLength: Toast.LENGTH_SHORT,gravity: ToastGravity.BOTTOM,timeInSecForIosWeb: 1,backgroundColor: Colors.black12,textColor: Colors.black,fontSize: 14.0);},),),