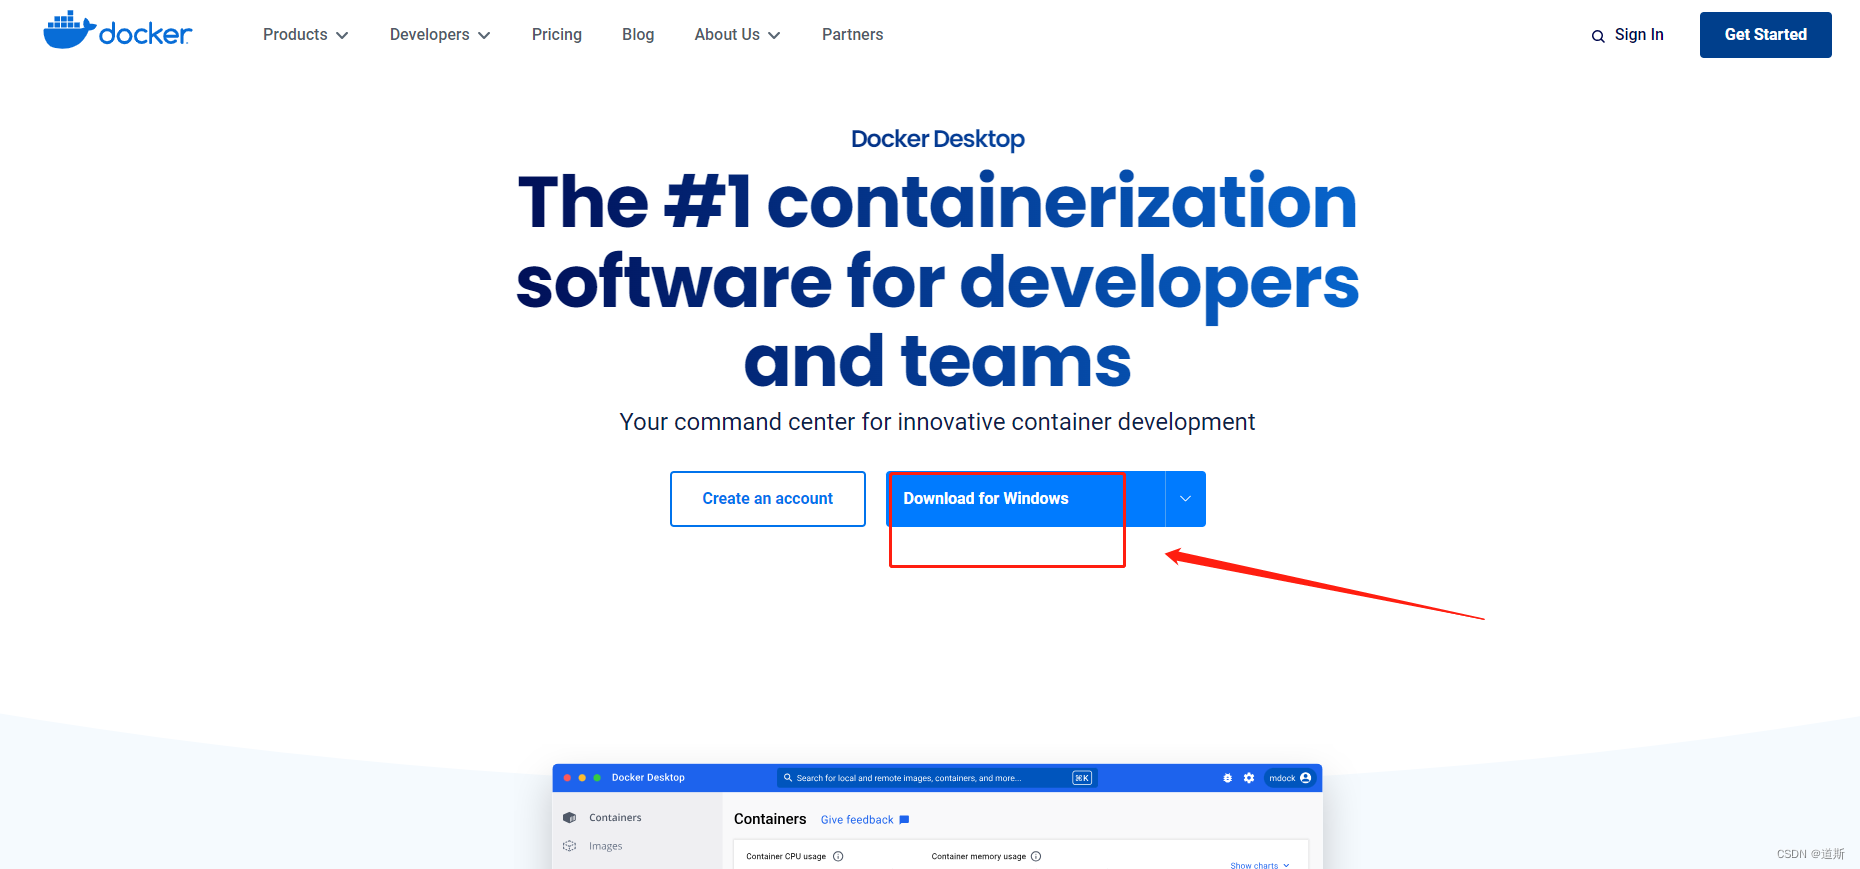
一、首先在windows系统上下载并安装docker,要下载windows版本
https://www.docker.com/products/docker-desktop/
PS:安装过程中需要WSL,我的是win11系统,直接提示了我安装就可以下一步了。其他windows系统版本我不知道是否需要单独安装。
安装完成docker后运行效果如下(可以在官网注册账号):
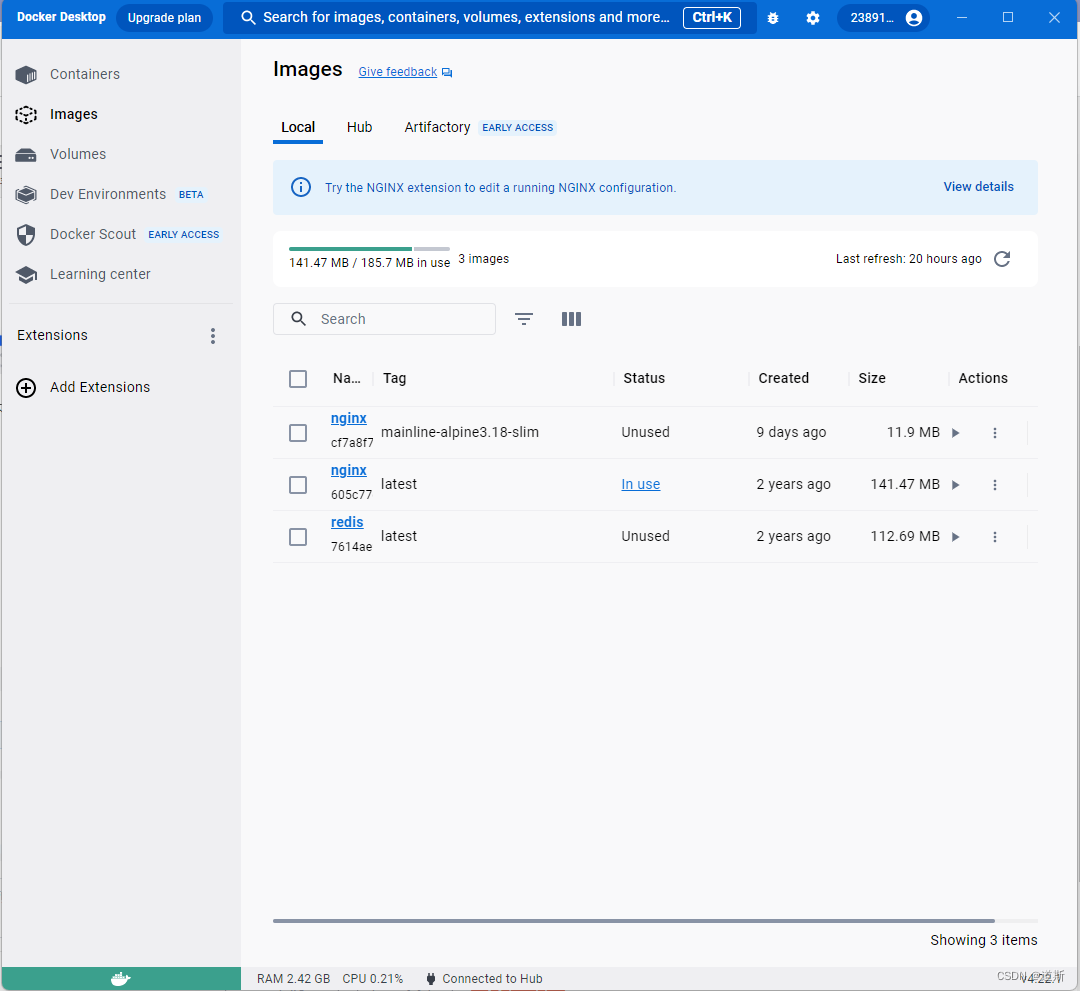
二、接下来的步骤咱们尽量不用命令(因为是windows嘛,全部图形化操作),在docker这个应用程序中安装nginx
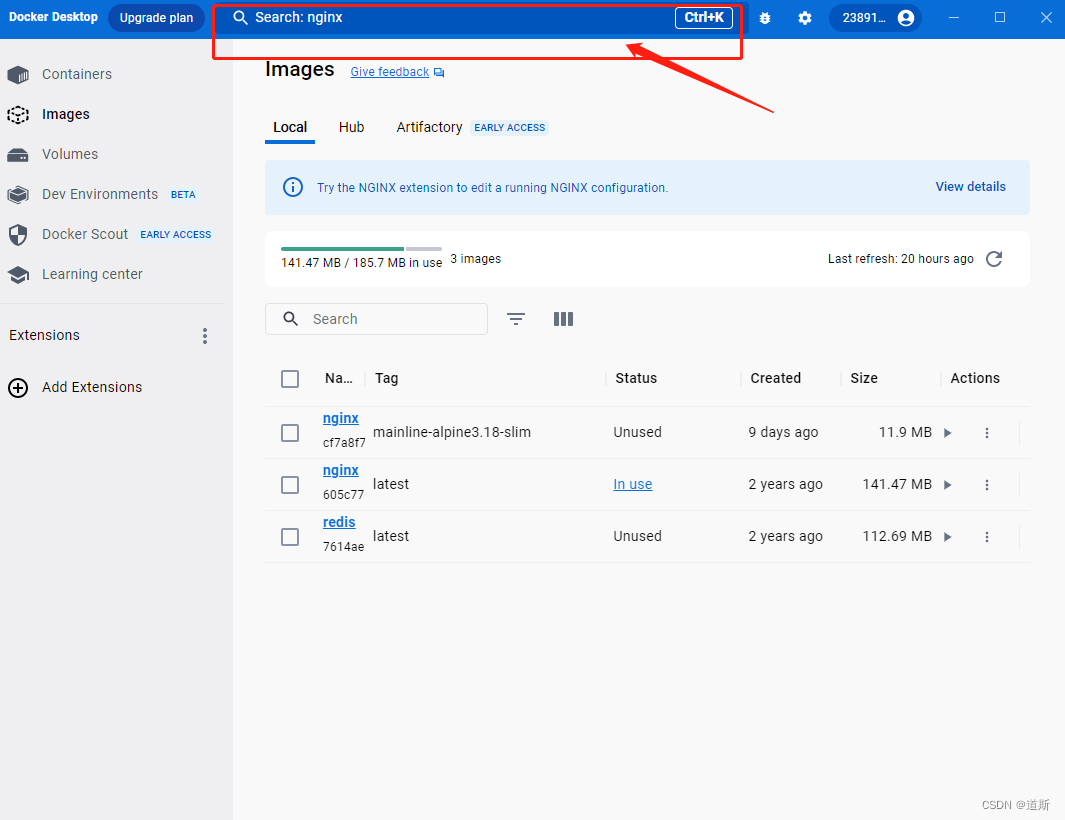
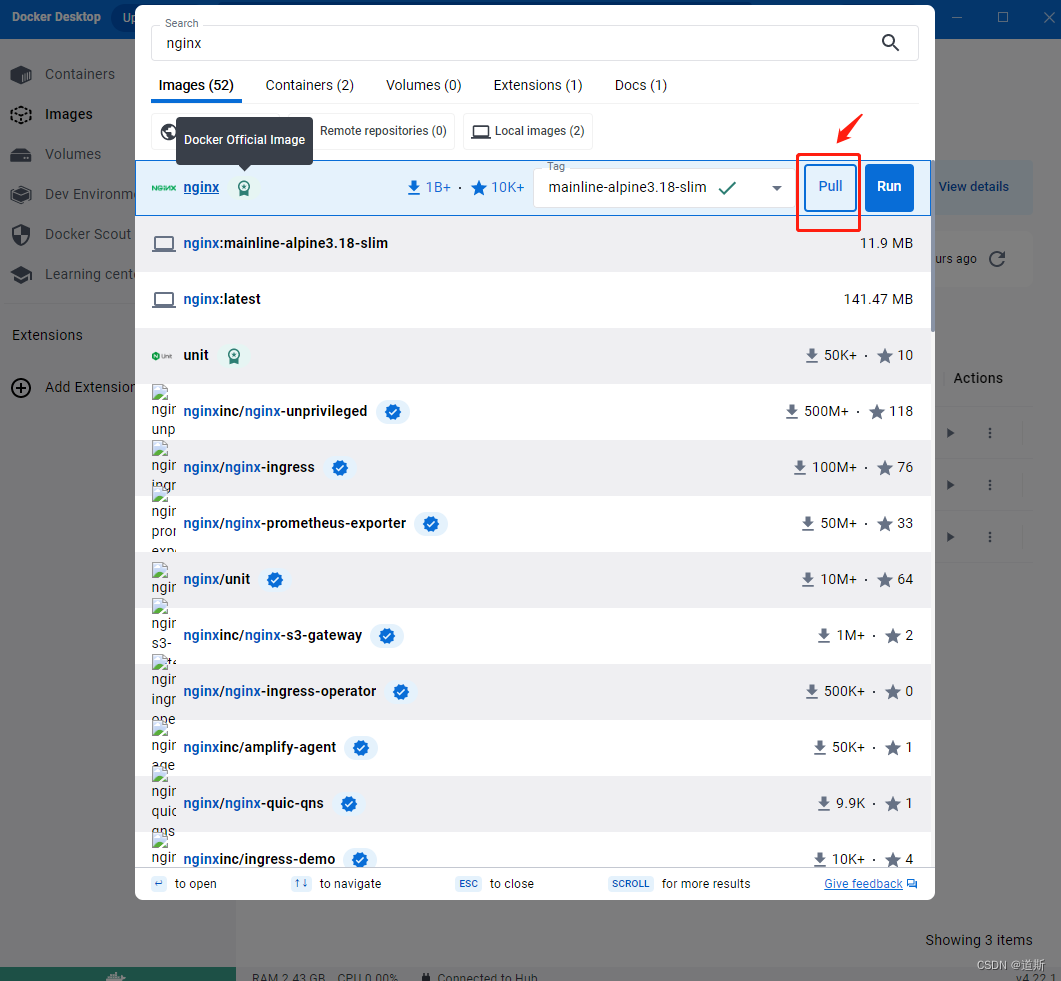
搜索nginx关键字,然后最好选择刀客团队发布的,最新版,更安全和稳定。如果没有可以选第三方发布的,用量比较大的。点击后面那个Pull,等待获取完成就算安装完了。
三、此时可以运行nginx镜像,生成一个应用容器了。
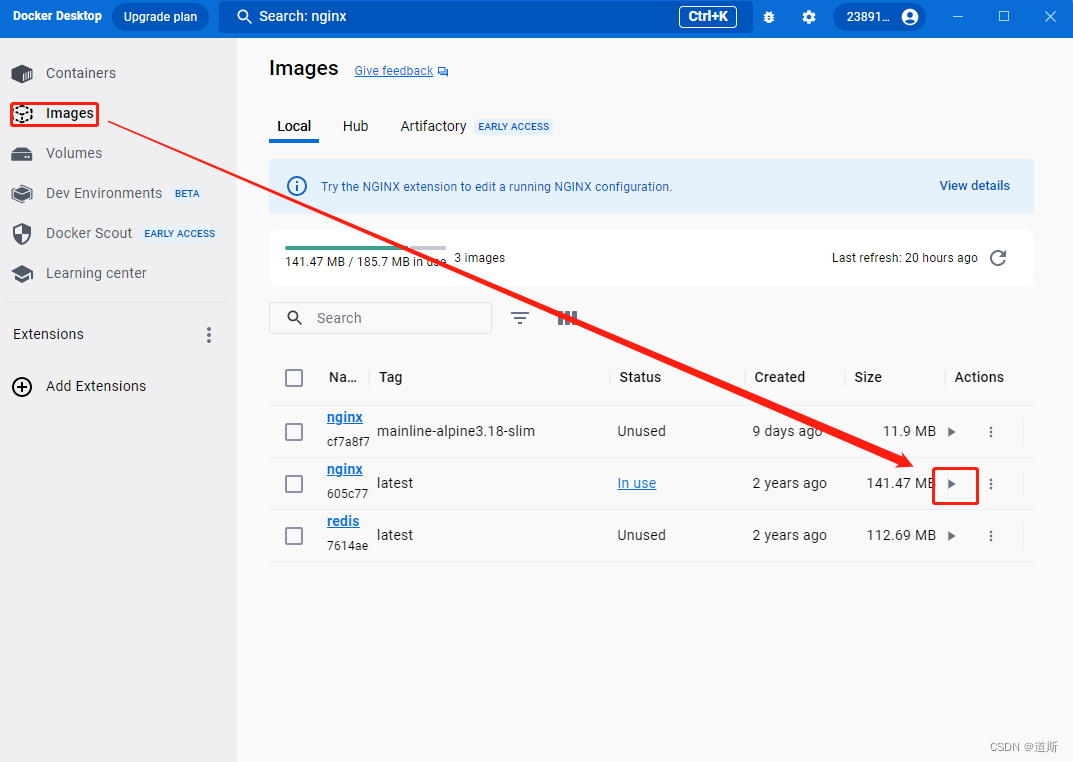
填写相关信息这里是个坑,如果你点击docker程序提供的选择路径按钮,将来运行会出错,提示找不到路径,所以得按如下的双斜杠形式填写:
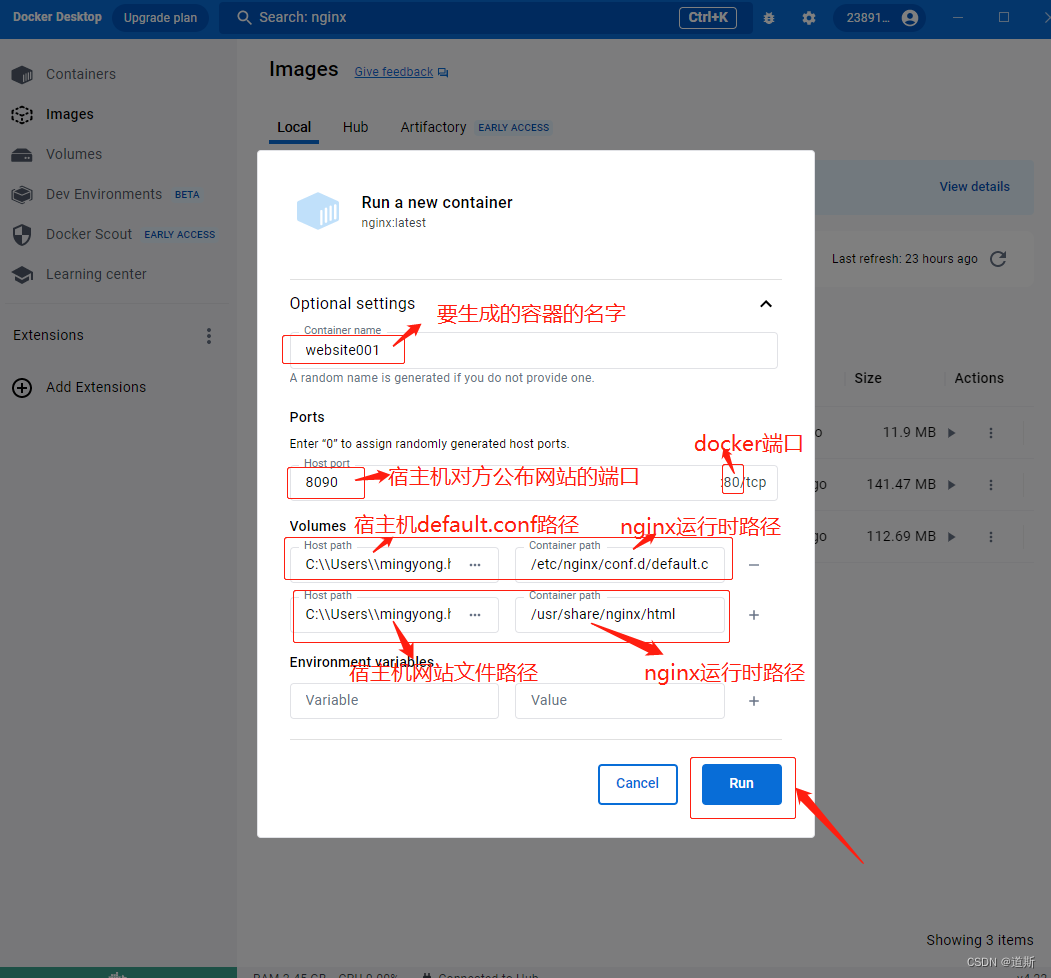
1.宿主机default.conf路径 :
C:\\Users\\mingyong.huang\\Desktop\\local\\default.conf
2.nginx运行时路径(即 default.conf),这里不明白是什么意思,去查一下nginx使用方法,这个路径基本都是固定的:
/etc/nginx/conf.d/default.conf
3.宿主机网站文件路径(即:是你的vue项目被编译后的网站静态文件存放路径):
C:\\Users\\mingyong.huang\\Desktop\\www\\site1\\dist
4.nginx运行时路径(即 nginx运行网站的静态文件路径),也是固定的,同理,不懂去查一下nginx使用方法:
/usr/share/nginx/html
PS:至于网上有说什么nginx运行时还有个 /etc/nginx.conf需要配置,这次我没有用到也可以正常运行!此处咱们先不管它,等后期用到再说。
最后点击run按钮,大功告成!看下成果吧!
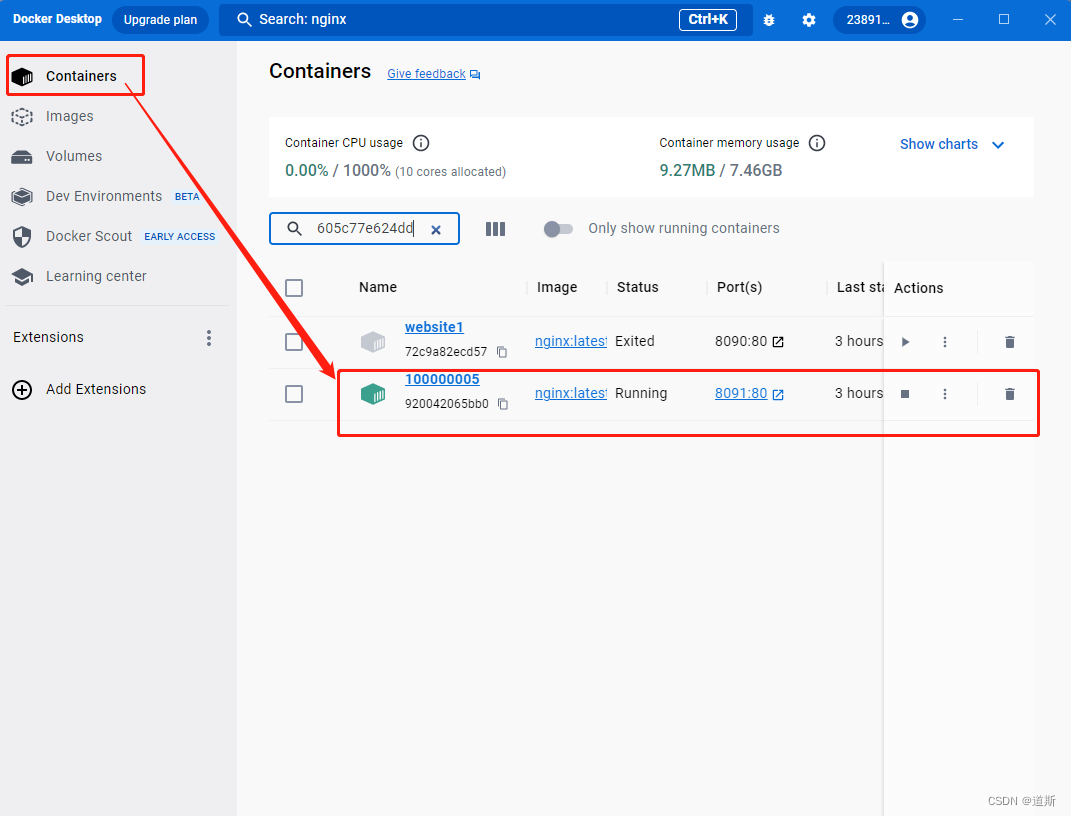
此时你就能看到生成的容器了,按照此方法,你想生成多少个容器都可以。是不是比虚拟机更轻量级,你还可以pull更多的应用,比如redis、mysql等等。
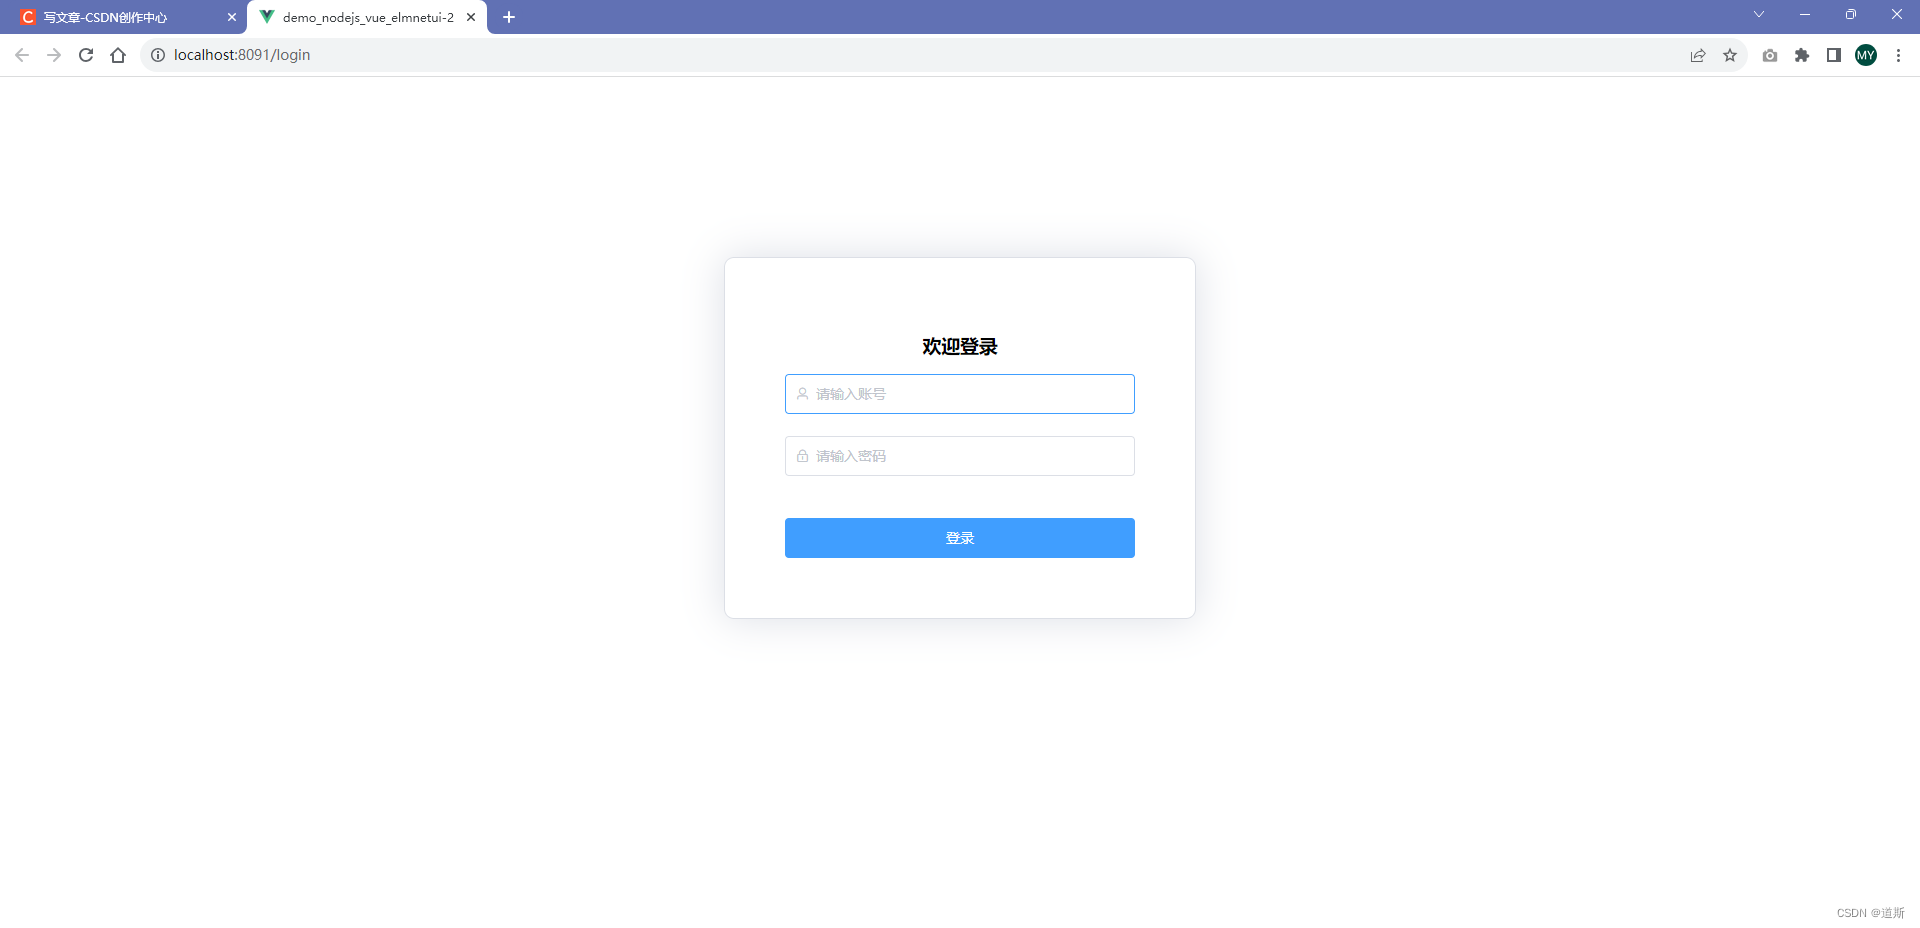
完美运行网站!
PS:vue项目如果用的history模式(而不是hash模式),直接F5刷新页面会报错404,解决办法就是在default.conf文件加一句话即可,try_files $uri $uri/ /index.html;
这个文件我是放在C:\\Users\\mingyong.huang\\Desktop\\local\\default.conf的嘛,所以打开后编辑保存,重启此容器即可。
server {listen       80;listen  [::]:80;server_name  localhost;#access_log  /var/log/nginx/host.access.log  main;location / {root   /usr/share/nginx/html;index  index.html index.htm;# 避免f5刷新后404..try_files  $uri  $uri/  /index.html;}#error_page  404              /404.html;# redirect server error pages to the static page /50x.html#error_page   500 502 503 504  /50x.html;location = /50x.html {root   /usr/share/nginx/html;}# proxy the PHP scripts to Apache listening on 127.0.0.1:80##location ~ \.php$ {#    proxy_pass   http://127.0.0.1;#}# pass the PHP scripts to FastCGI server listening on 127.0.0.1:9000##location ~ \.php$ {#    root           html;#    fastcgi_pass   127.0.0.1:9000;#    fastcgi_index  index.php;#    fastcgi_param  SCRIPT_FILENAME  /scripts$fastcgi_script_name;#    include        fastcgi_params;#}# deny access to .htaccess files, if Apache's document root# concurs with nginx's one##location ~ /\.ht {#    deny  all;#}
}
全部完毕!
