Android 12 源码分析 —— 应用层 五(SystemUI的StatusBar类的启动过程和三个窗口的创建)
| 更新历史 | 日期 | 内容 |
|---|---|---|
| 1 | 2023-9-18 | 修改关于mLightsOutNotifController的错误注释 |
在前面的文章中,我们介绍了SystemUI App的基本布局和基本概念。接下来,我们进入SystemUI应用的各个UI是如何被加入屏幕的。那么我们就先从三个窗口的创建开始
注意:三个窗口,即StatusBar窗口,NavigationBar窗口,NotificationShade窗口
而这三个窗口都是从StatusBar.java中创建的,因此从这个类开始介绍。
本篇文章需要结合上一篇博文一起查看,上一篇博文是整个Layout的整体概览。本篇文章可以认为是整个关键类的概览。
上一篇博文的地址:“Android 12 源码分析 —— 应用层 四(SystemUI的基本布局设计及其基本概念)http://t.csdn.cn/Q1XSM”
太长不想看版:
1. StatusBar的Dagger2配置
2. StatusBar的start()函数开始初始化
3. StatusBar的start()函数调用createAndAddWindow()函数创建三大窗口
4. createAndAddWindow()函数调用makeStatusBarView()创立各个Window和View,并将其添加到屏幕上
5. makeStatusBarView()函数调用inflateStatusBarWindow()创建StatusBar和NotificationShade两个窗口
6. makeStatusBarView()函数调用createNavigationBar()创建NavigationBar窗口
7. makeStatusBarView()函数创建用在StatusBar窗口中的CollapsedStatusBarFragment它代表了StatusBar中的具体内容
8. makeStatusBarView()函数创建用在NotificationShade窗口中的QSFragment它代表了整个下拉状态栏中QS的内容
1.StatusBar的Dagger2配置
仔细阅读StatusBar源码,会发现,StatusBar的构造函数,并没有被@Inject注解标记。那么StatusBar就不会被自动的创建。但是为了能够更好的加入Dagger2图中,我们通过@Provides来提供StatusBar对象。如下:
@Module(includes = {StatusBarPhoneDependenciesModule.class})
public interface StatusBarPhoneModule {//提供StatusBard对象实例@Provides@SysUISingletonstatic StatusBar provideStatusBar(Context context,/*省略超级长的参数定义*/) {return new StatusBar(context,/*省略超级长的参数传入*/);}
}
由上面的代码可得:StatusBarPhoneModule模块提供了,创建StatusBar的方法。也即,当SystemUI需要StatusBar时,将会由provideStatusBar方法来提供
而在StatusBar的构造函数中,只是简单的对象赋值,无需赘述。至于这些对象对应的逻辑抽象是什么,在使用他们的时候,会进一步提及。
注意:关于@Provides的解释,以及Dagger2如何实现provideStatusBar,和StatusBarPhoneModule,见“Android 12 源码分析 —— 应用层 三(SystemUIFactory及其Dependency解析)http://t.csdn.cn/1o4P3”
那么StatusBarPhoneModule肯定会被包含在SysUIComponent中,我们来理一下他们之间的关系。
查找SystemUI整个源码,可以看到如下的代码:
//可见StatusBarModule模块包含了 StatusBarPhoneModule模块
@Module(includes = {StatusBarPhoneModule.class, StatusBarDependenciesModule.class,NotificationsModule.class, NotificationRowModule.class})
public interface StatusBarModule {
}
而StatusBarModule模块,被SystemUIBinder模块所包含,如下:
//包含StatusBarModule模块
@Module(includes = {RecentsModule.class, StatusBarModule.class, KeyguardModule.class})
public abstract class SystemUIBinder {}
而SystemUIBinder模块则被SystemUIComponent包含如下:
//包含SystemUIBinder模块
@SysUISingleton
@Subcomponent(modules = {DefaultComponentBinder.class,DependencyProvider.class,SystemUIBinder.class,SystemUIModule.class,SystemUIDefaultModule.class})
public interface SysUIComponent {}
我们总结一下,其包含关系:
SysUIComponent > SystemUIBinder > StatusBarModule > StatusBarPhoneModule:提供创建StatusBar实例的方法
2.StatusBar的第一次创立时机
当system_server启动SystemUIService时,会去启用SystemUIApplication的startServicesIfNeeded()函数。
而在这个函数中,会根据配置参数,启动对应的服务。其中StatusBar就在配置之中。一旦读取到配置,则调用ContextComponentHelper的resolveSystemUI来查询,是否Dagger2中可以提供对应的对象。此处正是StatusBar的第一次创立时间。
这部分的具体流程,见:“Android 12 源码分析 —— 应用层 二(SystemUI大体组织和启动过程)http://t.csdn.cn/Gk418” 的startServicesIfNeeded()函数
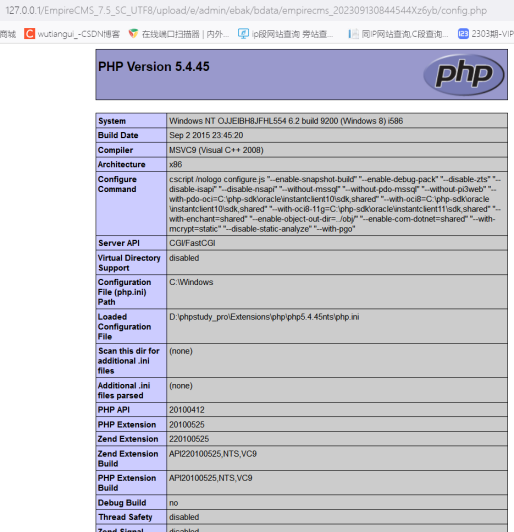
为了能够有直观的感受,此处提供其第一次创建的调用栈图片。如下

注意:关于调用栈的获取,详见:“Android 12 源码分析 —— 应用层 一(SystemUI准备篇) http://t.csdn.cn/FrjAh” (这是一篇必读文章,请务必掌握其中的技巧和方法)
3. StatusBar的初始化
在SystemUIApplication的startServicesIfNeeded()函数中被创建之后,会马上调用SystemUI的两个方法,而StatusBar继承了SystemUI,因此也会调用这两个方法:
- 先调用start()方法
- 再调用onBootCompleted()方法
查看StatusBar,将会发现其没有覆写onBootCompleted()方法。那么StatusBar的初始化,将只会有start()方法
4. StatusBar.start()函数
StatusBar.start()函数特别长,源码如下:
注意:本文关注其启动过程,而不会过多的介绍各个类的具体细节,如,不会介绍关于ScreenLifeCycle的详细设计逻辑。这些详细设计逻辑将会在整个启动过程介绍完成之后,分篇进行介绍
@Overridepublic void start() {//监听屏幕的生命周期,屏幕的生命周期有:正在打开,打开完成,正在关闭,关闭完成mScreenLifecycle.addObserver(mScreenObserver);//监听设备的唤醒和睡眠,注意它和Doze模式的区别mWakefulnessLifecycle.addObserver(mWakefulnessObserver);//赋值UIModeManager,它提供,disable car mode等功能mUiModeManager = mContext.getSystemService(UiModeManager.class);//对BypassHeadsUpNotifier进行初始化,它可以绕过heads up。//heads up的解释见后文补充内容mBypassHeadsUpNotifier.setUp();//如果当前存在气泡通知,则监听taskbar的改变//气泡通知。见后文补充内容if (mBubblesOptional.isPresent()) {mBubblesOptional.get().setExpandListener(mBubbleExpandListener);IntentFilter filter = new IntentFilter(TASKBAR_CHANGED_BROADCAST);mBroadcastDispatcher.registerReceiver(mTaskbarChangeReceiver, filter);}//初始化KeyguardIndicationController,它控制锁屏底部消息的提示,如对充电的提示mKeyguardIndicationController.init();//颜色提取器,增加监听,一旦颜色改变SystemUI会进行相应的主题切换mColorExtractor.addOnColorsChangedListener(this);//监听StatusBarState的改变,当StatusBarSate改变时,将会收到通知。//注意监听器,有优先级//StatusBarState在当前版本有4中状态:1. SHADE(也就是正常状态,卷帘(也即下拉状态栏)被收起的状态)//2. KEYGUARD(StatusBar当前处在锁屏状态)//3. SHADE_LOCKED(StatusBar当前在锁屏装来下,被下拉出来了)//4. FULLSCREEN_USER_SWITCHER(statusbar被锁住,同时展示一个全屏的多用户切换)mStatusBarStateController.addCallback(this,SysuiStatusBarStateController.RANK_STATUS_BAR);//赋值WindwManagermWindowManager = (WindowManager) mContext.getSystemService(Context.WINDOW_SERVICE);//赋值DreamManager,它和屏保有关,注意它和后面Ambient mode的区别mDreamManager = IDreamManager.Stub.asInterface(ServiceManager.checkService(DreamService.DREAM_SERVICE));//赋值,mDisplay对象,Display对象代表了一种逻辑屏幕,而非实体屏幕mDisplay = mWindowManager.getDefaultDisplay();mDisplayId = mDisplay.getDisplayId();//更新需要的DisplaySize相关信息updateDisplaySize();//读取配置,查看是否打开震动mVibrateOnOpening = mContext.getResources().getBoolean(R.bool.config_vibrateOnIconAnimation);//赋值WindowManagerService,注意前面已经获取到了WindowManager。//事实上,这个根本没有在本类中使用,它只是以前老旧代码的遗产mWindowManagerService = WindowManagerGlobal.getWindowManagerService();//获取DevicePolicyManager,它是设备所有者规定的一些策略,比如是否允许当前用户使用相机等等mDevicePolicyManager = (DevicePolicyManager) mContext.getSystemService(Context.DEVICE_POLICY_SERVICE);//赋值,辅助功能,本类中也未使用该变量,它是以前代码的遗产mAccessibilityManager = (AccessibilityManager)mContext.getSystemService(Context.ACCESSIBILITY_SERVICE);//为KeyguardUpdateMonitor设置一个KeyguardBypassController//其中KeyguradUpdateMonitor负责监听Keyguard感兴趣的事情,比如SIM卡的变化等//KeyguardBypassController负责绕过锁屏的控制,比如人脸识别,识别正确,则直接打开锁屏(注意,此类我不是很确定)mKeyguardUpdateMonitor.setKeyguardBypassController(mKeyguardBypassController);//获取StatusBarManagerService。注意StatusBarManagerService和StatusBar之间的关系,见后文补充内容mBarService = IStatusBarService.Stub.asInterface(ServiceManager.getService(Context.STATUS_BAR_SERVICE));//获取KeyguardManager,该类用于解锁和加锁keyguardmKeyguardManager = (KeyguardManager) mContext.getSystemService(Context.KEYGUARD_SERVICE);//检查当前用户是否支持设置和查询Wallpaper(壁纸)mWallpaperSupported =mContext.getSystemService(WallpaperManager.class).isWallpaperSupported();//CommandQueue增加一个回调,关于CommandQueue的说明,见补充知识点mCommandQueue.addCallback(this);//监听DemoMode。DemoMode的知识点,见补充内容mDemoModeController.addCallback(this);//根据补充内容第三点和第四点,需要建立和sytem_server进程中的StatusBarManagerService之间的联系//返回结果包括系统要求的一些东西,如显示哪些图标,禁用哪些功能等RegisterStatusBarResult result = null;try {result = mBarService.registerStatusBar(mCommandQueue);} catch (RemoteException ex) {ex.rethrowFromSystemServer();}//现在开始创建UI,这个就是在上一篇博文中,提及的UI布局和创建的入口//下文详解createAndAddWindows(result);//如果mWallpaperSupported为true,也即当前用户支持访问和修改壁纸if (mWallpaperSupported) {//那么监听壁纸的改变IntentFilter wallpaperChangedFilter = new IntentFilter(Intent.ACTION_WALLPAPER_CHANGED);mBroadcastDispatcher.registerReceiver(mWallpaperChangedReceiver, wallpaperChangedFilter,null /* handler */, UserHandle.ALL);//注意,此处主动调用了onRecive()函数,它是为了初始化其他Controller中关于//壁纸的一些信息,如,设置NotificationShadeWindowController是否支持Ambient模式,Ambient mode见后文mWallpaperChangedReceiver.onReceive(mContext, null);} else if (DEBUG) {//or,we log the messageLog.v(TAG, "start(): no wallpaper service ");}//初始化各个presenter后文详细介绍setUpPresenter();//检查Result对象是否要求显示一个临时的StatusBar,这往往是来自于system_server的请求//临时的StatusBar对于用户来讲是临时可见的if (containsType(result.mTransientBarTypes, ITYPE_STATUS_BAR)) {//显示一个临时的StatusBar,它通过显示一个StatusBar的过渡动画来显示showTransientUnchecked();}//一旦获取到RegisterStatusBarResult对象(后文称:Result对象),我们就要根据其//内容进行相应的设置。//用于通知SystemBar的一些属性已经改变。因为这些属性以前没有被设置过onSystemBarAttributesChanged(mDisplayId, result.mAppearance, result.mAppearanceRegions,result.mNavbarColorManagedByIme, result.mBehavior, result.mAppFullscreen);//通知输入法的状态改变,但是此处内容为空。setImeWindowStatus(mDisplayId, result.mImeToken, result.mImeWindowVis,result.mImeBackDisposition, result.mShowImeSwitcher);//将图标信息,通过CommandQueue通知给感兴趣的对象int numIcons = result.mIcons.size();for (int i = 0; i < numIcons; i++) {//在该队列中,会调用callback通知其他需要处理图标的对象mCommandQueue.setIcon(result.mIcons.keyAt(i), result.mIcons.valueAt(i));}//省略调试代码//如果当前用户支持设置壁纸if (mWallpaperSupported) {//那么就设置壁纸不要处于Ambient模式,ambient mode是关屏之后,屏幕显示一些//画面和周围的环境融为一体,如,在电视上显示一副梵高的星空,当做整面墙的装饰//被称为:环境融合模式IWallpaperManager wallpaperManager = IWallpaperManager.Stub.asInterface(ServiceManager.getService(Context.WALLPAPER_SERVICE));try {//set in ambient modewallpaperManager.setInAmbientMode(false /* ambientMode */, 0L /* duration */);} catch (RemoteException e) {// Just pass, nothing critical.}}//图标显示的策略,哪些该显示,哪些不该显示mIconPolicy.init();//监听锁屏状态mKeyguardStateController.addCallback(this);//初始化锁屏相关对象startKeyguard();//StatusBar也需要监听一些外部消息,这些外部消息也是Keyguard感兴趣的消息,如SIM卡的状态改变mKeyguardUpdateMonitor.registerCallback(mUpdateCallback);//初始化DozeServiceHost,它和Doze 模式相关,是DozeService和SystemUI其他部分交互的接口。后面文章详细讲解mDozeServiceHost.initialize(this,mStatusBarKeyguardViewManager,mNotificationShadeWindowViewController,mNotificationPanelViewController,mAmbientIndicationContainer);//在Doze模式下,还有很多配置参数,DozeParameters就是配置参数的逻辑抽象,此处给他增加一个监听mDozeParameters.addCallback(this::updateLightRevealScrimVisibility);//监听配置的改变,如语言改变,时区改变等mConfigurationController.addCallback(this);//监听电池相关的信息mBatteryController.observe(mLifecycle, this);mLifecycle.setCurrentState(RESUMED);//初始化disableFlag相关的内容//disableFlag相关的内容见后文的补充内容int disabledFlags1 = result.mDisabledFlags1;int disabledFlags2 = result.mDisabledFlags2;//调用InitController,初始化disablFlag相关的内容//InitController收集,所有在SystemUI实现类启动完成之后,的任务//然后在SystemUIApplication的startServicesIfNeeded()函数中被调用//此处通过调用setUpDisableFlags()函数,来处理disableFlags//而setUpDisableFlags()函数,通过CommandQueue将需要处理的disableFlags通知给其他需要的对象。比如告诉NavigationBar不要显示recent mInitController.addPostInitTask(() -> setUpDisableFlags(disabledFlags1, disabledFlags2));//增加误触的监听,当发生误触时,需要复位一些UI,防止一些动画停止在半途//Falsingmanager负责管理,一些误触的操作mFalsingManager.addFalsingBeliefListener(mFalsingBeliefListener);//给PluginManager,增加一个插件监听器。插件相关内容不做介绍,后面详细介绍mPluginManager.addPluginListener(/*省略代码*/)}
start()函数主要完成如下的功能:
- 初始化各个于SystemUI整个App相关的业务类
- 建立这些之间的引用关系
- 初始化StatusBarManagerService中的配置,如disablFlag,icon,transient bar等
- 调用createAndAddWindow()创建需要的UI
接下来,我们从createAndAddWindow()函数开始,看看其创建UI的过程。
基本概念补充
- heads up:SystemUI的一种通知显示方式,它允许重要通知以卡片的形式,出现在屏幕的顶部。
- Bubble notification:气泡通知,它是一种通知显示方式,它悬浮在屏幕上,如Messages by google 接收到的短信内容
- StatusBar和StatusBarManagerService的关系:SystemUI作为一个应用,它并不能被其他的用户所使用,为了保证其他用户的使用,系统内部有一个StatusBarService服务,它位于system_server进程中,它负责和其他用户进行交互。同时当SystemUI启动完成之后,会将自己注册到StatusBarSerivce服务中。这样StatusBarService服务就能够调用SystemUI中的StatusBar功能了。简单的结构如下:SystemUI<---->StatusBarManagerService<----->other app. 为了他们之间能够畅快的沟通,使用binder通信。
- CommandQueue:在第三点中,我们提到StatusBarManagerService和SystemUI是通过Binder通信,当SystemUI要调用StatusBarManagerService时,使用的是IStatusBarService接口。而当StatusBarManagerService要调用SystemUI时使用的是IStatusBar接口。这个接口在SystemUI侧的实现即为CommandQueue.可以将ComandQueue理解为:来自于外部(相对于SystemUI的外部)的命令队列。
- DemoMode:演示模式,演示模式将固定一个假的statusbar,可以用来调试各个图标的UI。关于DemoMode的进一步打开和关闭指令,在后面细讲时会提及
- disableFlags:它表示的是SystemUI中应该被禁止的功能,它被分成两种类型分别为,disable1,disable2.如果其他进程需要修改这两个的值,可以用IStatusBarService的disablexxx()函数进行修改
- disable1 的值有:
- DISABLE_NONE:什么也不禁止
- DISABLE_EXPAND:禁止下拉展开
- DISABLE_NOTIFICATION_ICONS:禁止通知图标
- DISABLE_NOTIFICATION_ALERTS:禁止通知声音,震动,弹出警报等功能
- DISABLE_NOTIFICATION_TICKER:禁止通知滚动条
- DISABLE_SYSTEM_INFO:禁止状态栏的中间区域的信息显示
- DISABLE_HOME/RECENT/BACK:分别禁止导航栏中的home,recent,BACK按钮
- DISABLE_CLOCK:禁止状态栏中的时钟显示
- DISABLE_SEARCH:禁用搜索
- DISABLE_ONGOING_CALL_CHIP:禁用状态栏中,正在通话图标
- disable2 的值有:
- DISABLE_NONE:什么也不禁止
- DISABLE_QUICK_SETTINGS:禁用QS
- DISABLE_SYSTEM_ICON:禁用系统图标
- DISABLE_NOTIFICATION_SHADE:禁用NotificationShade窗口
- DISABLE_GLOBAL_ACTION:禁用GlobalActionDialog即,开关机弹框
- DISABLE_ROTATE_SUGGESTIONS:禁用导航栏中的旋转建议图标
- ambient mode:ambient mode是关屏之后,屏幕显示一些画面和周围的环境融为一体,如,在电视上显示一副梵高的星空,当做整面墙的装饰.被称为:环境融合模式
4.1 createAndAddWindwo()函数
createAndAddWindow()函数原文如下:
public void createAndAddWindows(@Nullable RegisterStatusBarResult result) {//创建对应的UImakeStatusBarView(result);//将NotificationShadeWindow加入屏幕mNotificationShadeWindowController.attach();//将StatusBarWinidow加入屏幕mStatusBarWindowController.attach();
}
注意:关于NotificationShadeWindow和StatusBarWindow的说明见“Android 12 源码分析 —— 应用层 四(SystemUI的基本布局设计及其基本概念)http://t.csdn.cn/ioWFS”
接下来看看makeStatusBarView()函数
4.1.1 makeStatusBarView()函数
makeStatusBarView()函数负责创建三大窗口的View。源码如下:
protected void makeStatusBarView(@Nullable RegisterStatusBarResult result) {//更新需要用到的资源,如逻辑屏幕的大小final Context context = mContext;updateDisplaySize(); // populates mDisplayMetrics//更新资源,在还没有创建各种View之前,该函数实际调用为空updateResources();//更新主题updateTheme();//构造真正的View视图,见后文详解inflateStatusBarWindow();//NotificationShadeWindowViewController是NotificationShadeWindowView的控制器//而这个View是NotificationShade窗口的顶层窗口mNotificationShadeWindowViewController.setService(this, mNotificationShadeWindowController);//为其设置一个触摸监听mNotificationShadeWindowView.setOnTouchListener(getStatusBarWindowTouchListener());//分别找到View层级中的各个view的ControllermStackScrollerController =mNotificationPanelViewController.getNotificationStackScrollLayoutController();mStackScroller = mStackScrollerController.getView();NotificationListContainer notifListContainer =mStackScrollerController.getNotificationListContainer();//并将NotificationListContainer设置到NotificationLogger中mNotificationLogger.setUpWithContainer(notifListContainer);//构造NotificationShelf视图inflateShelf();//将Shelf中的icon和状态栏中的icon同步一一下mNotificationIconAreaController.setupShelf(mNotificationShelfController);//为NotificationPanelView设置监听器,监听展开的过程mNotificationPanelViewController.addExpansionListener(mWakeUpCoordinator);mNotificationPanelViewController.addExpansionListener(this::dispatchPanelExpansionForKeyguardDismiss);// 允许Plugin引用DarkDispatcher和StatusBarStateControllermPluginDependencyProvider.allowPluginDependency(DarkIconDispatcher.class);mPluginDependencyProvider.allowPluginDependency(StatusBarStateController.class);//使用Fragment管理StatusBar的View,达到可重用的目的//注意:对于这里提及的各个View,可以查看上一篇关于Layout基本布局的博文FragmentHostManager.get(mPhoneStatusBarWindow).addTagListener(CollapsedStatusBarFragment.TAG, (tag, fragment) -> {//将Fragment转换成CollapsedStatusBarFragmentCollapsedStatusBarFragment statusBarFragment =(CollapsedStatusBarFragment) fragment;//先保存以前的PhoneStatusBarViewPhoneStatusBarView oldStatusBarView = mStatusBarView;//再获取新的PhoneStatusBarViewmStatusBarView = (PhoneStatusBarView) statusBarFragment.getView();//对PhoneStatusBarView进行设置,包括注册监听,传递需要的对象等mStatusBarView.setBar(this);mStatusBarView.setPanel(mNotificationPanelViewController);mStatusBarView.setScrimController(mScrimController);mStatusBarView.setExpansionChangedListeners(mExpansionChangedListeners);//如果有一个heads up在顶部,则需要调整为正确的状态if (mHeadsUpManager.hasPinnedHeadsUp()) {//主要是通知各个监听器,更新各自的状态mNotificationPanelViewController.notifyBarPanelExpansionChanged();}//初始化PhoneStatusBarView中的Bouncer//Bouncer界面就是,解锁时要求输入pin,密码等的界面//新创建的PhoneStatusBarView中的Bouncer默认是没有打开的。因此要根据//当前实际进行更新mStatusBarView.setBouncerShowing(mBouncerShowing);//如果以前的StatusBar已经展开了一部分,则要求新的StatusBar也展开同样的大小//因为新创建的PhoneStatusBar,默认展开是0if (oldStatusBarView != null) {float fraction = oldStatusBarView.getExpansionFraction();boolean expanded = oldStatusBarView.isExpanded();mStatusBarView.panelExpansionChanged(fraction, expanded);}//重新创建HeadsUpAppearanceControllerHeadsUpAppearanceController oldController = mHeadsUpAppearanceController;if (mHeadsUpAppearanceController != null) {mHeadsUpAppearanceController.destroy();}//重新创建一个新的HeadsUpAppearanceController对象//这个对象负责控制heads up的外观mHeadsUpAppearanceController = new HeadsUpAppearanceController(mNotificationIconAreaController, mHeadsUpManager,mStackScroller.getController(),mStatusBarStateController, mKeyguardBypassController,mKeyguardStateController, mWakeUpCoordinator, mCommandQueue,mNotificationPanelViewController, mStatusBarView);//从旧对象中读取值赋值给新对象mHeadsUpAppearanceController.readFrom(oldController);/建立LightsOutNotificationController和对应View的关系//LightsOutNotificationController负责处理SYSTEM_UI_FLAG_LOW_PROFILE中的//图标的消失和隐藏,负责显示小圆点//SYSTEM_UI_FLAG_LOW_PROFILE:这个属性的能力是让SystemBar在视觉上变得模糊,//具体表现是状态栏图标仅保留电量时间关键图标,并且变暗。导航栏图标变成三个点或者变暗mLightsOutNotifController.setLightsOutNotifView(mStatusBarView.findViewById(R.id.notification_lights_out));//将StatusBar窗口的view,放入NotificationShade窗口的控制器中mNotificationShadeWindowViewController.setStatusBarView(mStatusBarView);//检查是否要进行StatusBar的模式切换,如果要切换则会形成一个过渡动画//关于StatusBar模式切换的细节,我们在介绍完StatusBarWindow的整个初始化过程之后,//另外的文章进一步介绍.此处我们关注整个启动过程checkBarModes();}).getFragmentManager().beginTransaction().replace(R.id.status_bar_container,new CollapsedStatusBarFragment(mOngoingCallController,mAnimationScheduler,mStatusBarLocationPublisher,mNotificationIconAreaController,mFeatureFlags,mStatusBarIconController,mKeyguardStateController,mNetworkController,mStatusBarStateController,this,mCommandQueue),CollapsedStatusBarFragment.TAG).commit();//设置必要的对象,这些对象的功能和逻辑抽象,在必要的时候介绍.//现在,大体可按照如下的方式进行理解//HeadsUpManager:负责管理heads up,如管理Heads up通知的更新//VisualStabilityManager:保证一种固定的通知显示,当通知超出显示范围的时候,就抑制其重排//StatusBarTouchableRegionManager:管理StatusBar的哪一部分可以触摸mHeadsUpManager.setup(mVisualStabilityManager);mStatusBarTouchableRegionManager.setup(this, mNotificationShadeWindowView);mHeadsUpManager.addListener(this);mHeadsUpManager.addListener(mNotificationPanelViewController.getOnHeadsUpChangedListener());mHeadsUpManager.addListener(mVisualStabilityManager);mNotificationPanelViewController.setHeadsUpManager(mHeadsUpManager);//构建NavigationBarcreateNavigationBar(result);//ENABLE_LOCKSCREEN_WALLPAPER 是否打开锁屏下显示壁纸,默认打开//mWallpaperSupported表示当前用户是否支持设置和访问壁纸,默认支持if (ENABLE_LOCKSCREEN_WALLPAPER && mWallpaperSupported) {//得到LockScreenWallpaper对象mLockscreenWallpaper = mLockscreenWallpaperLazy.get();}//传递必要的对象mNotificationPanelViewController.setKeyguardIndicationController(mKeyguardIndicationController);//这是负责显示Ambient模式的视图,但是在当前版本中是没有实现的//目前可以在三星的电视机上有这部分的实现代码//本系列文章将不会介绍mAmbientIndicationContainer = mNotificationShadeWindowView.findViewById(R.id.ambient_indication_container);//控制自动隐藏的UI元素,当需要判断是否要自动隐藏式,需要查询当前的StatusBar的一些状态//故要调用setStatusBar传递过去,此处对StatusBar的函数封装成了AutoHideUiElement对象mAutoHideController.setStatusBar(new AutoHideUiElement() {@Overridepublic void synchronizeState() {checkBarModes();}@Overridepublic boolean shouldHideOnTouch() {return !mRemoteInputManager.getController().isRemoteInputActive();}@Overridepublic boolean isVisible() {return isTransientShown();}@Overridepublic void hide() {clearTransient();}});//查找遮罩//关于遮罩的说明,见上一篇Layout基本布局的博文ScrimView scrimBehind = mNotificationShadeWindowView.findViewById(R.id.scrim_behind);ScrimView notificationsScrim = mNotificationShadeWindowView.findViewById(R.id.scrim_notifications);ScrimView scrimInFront = mNotificationShadeWindowView.findViewById(R.id.scrim_in_front);ScrimView scrimForBubble = mBubblesManagerOptional.isPresent()? mBubblesManagerOptional.get().getScrimForBubble() : null;//设置遮罩的监听mScrimController.setScrimVisibleListener(scrimsVisible -> {mNotificationShadeWindowController.setScrimsVisibility(scrimsVisible);});//将遮罩的controller和view进行连接mScrimController.attachViews(scrimBehind, notificationsScrim, scrimInFront, scrimForBubble);//找到LightRevealScrim,关于LightRevealScrim见上一篇关于Layout基本布局的博文mLightRevealScrim = mNotificationShadeWindowView.findViewById(R.id.light_reveal_scrim);//设置透明度改变的监听mLightRevealScrim.setScrimOpaqueChangedListener((opaque) -> {Runnable updateOpaqueness = () -> {mNotificationShadeWindowController.setLightRevealScrimOpaque(mLightRevealScrim.isScrimOpaque());};if (opaque) {// Delay making the view opaque for a frame, because it needs some time to render// otherwise this can lead to a flicker where the scrim doesn't cover the screenmLightRevealScrim.post(updateOpaqueness);} else {updateOpaqueness.run();}});//初始化用于AOD动画的controller,AOD概念见补充知识mUnlockedScreenOffAnimationController.initialize(this, mLightRevealScrim);//根据配置,进行LightRevealScrim的可见性的设置updateLightRevealScrimVisibility();//为NotificationPanelViewController设置必要的对象mNotificationPanelViewController.initDependencies(this,mNotificationShelfController);//找到BackDropView,BackDropView的说明见上一篇关于Layout布局的博文BackDropView backdrop = mNotificationShadeWindowView.findViewById(R.id.backdrop);//因为多媒体播放时,可能会使用BackDropView,因此将BackDropView传递给NotificationMediaManagermMediaManager.setup(backdrop, backdrop.findViewById(R.id.backdrop_front),backdrop.findViewById(R.id.backdrop_back), mScrimController, mLockscreenWallpaper);//读取配置,获取最大的壁纸放大系数,默认值为1.10float maxWallpaperZoom = mContext.getResources().getFloat(com.android.internal.R.dimen.config_wallpaperMaxScale);//NotificationShadeDepthController负责statusbar 窗口的模糊//此处增加一个监听器,监听模糊的程度,越模糊则depth越大mNotificationShadeDepthControllerLazy.get().addListener(depth -> {float scale = MathUtils.lerp(maxWallpaperZoom, 1f, depth);backdrop.setPivotX(backdrop.getWidth() / 2f);backdrop.setPivotY(backdrop.getHeight() / 2f);backdrop.setScaleX(scale);backdrop.setScaleY(scale);});//通知NotificationPanelViewController此时此刻,还未走完开机向导mNotificationPanelViewController.setUserSetupComplete(mUserSetup);//获取qs_frame,该view用于放置QS,关于QS,见补充内容final View container = mNotificationShadeWindowView.findViewById(R.id.qs_frame);if (container != null) {//使用Fragment创建一个可以被复用的View,该Fragment用于放置QSFragmentHostManager fragmentHostManager = FragmentHostManager.get(container);//辅助类,创建QSFragment对象,然后提交到FragmentManager中ExtensionFragmentListener.attachExtensonToFragment(container, QS.TAG, R.id.qs_frame,mExtensionController.newExtension(QS.class).withPlugin(QS.class).withDefault(this::createDefaultQSFragment).build());//创建BrightnessMirrorControllermBrightnessMirrorController = new BrightnessMirrorController(mNotificationShadeWindowView,mNotificationPanelViewController,mNotificationShadeDepthControllerLazy.get(),mBrightnessSliderFactory,(visible) -> {mBrightnessMirrorVisible = visible;updateScrimController();});//触发FragmentManager中的onFragmentViewCreated方法,并在触发之后,//传递需要的对象fragmentHostManager.addTagListener(QS.TAG, (tag, f) -> {QS qs = (QS) f;if (qs instanceof QSFragment) {mQSPanelController = ((QSFragment) qs).getQSPanelController();mQSPanelController.setBrightnessMirror(mBrightnessMirrorController);}});}//省略调试功能代码//如果未亮屏幕//那么主动触发一个ACTION_SCREEN_OFF的操作,后文详解这个操作if (!mPowerManager.isScreenOn()) {mBroadcastReceiver.onReceive(mContext, new Intent(Intent.ACTION_SCREEN_OFF));}//创建一个唤醒锁。mGestureWakeLock = mPowerManager.newWakeLock(PowerManager.SCREEN_BRIGHT_WAKE_LOCK,"GestureWakeLock");//获取震动服务mVibrator = mContext.getSystemService(Vibrator.class);//VibrationEffect用于表示触摸震动的视觉效果mCameraLaunchGestureVibrationEffect = getCameraGestureVibrationEffect(mVibrator, context.getResources());//注册广播接收器//监听,请求NotificationShadeWindow消失的Intent//监听,请求Recent消失的Intent//监听,屏幕关闭//监听,请求StatusBar 打开设备monitoring dialogregisterBroadcastReceiver();//去掉用于调试的代码//监听用户是否已经设置完,开机向导mDeviceProvisionedController.addCallback(mUserSetupObserver);//主动调用,用于调用setUserSetupComplete为正确的值mUserSetupObserver.onUserSetupChanged();//下面两句代码,用于hwui库,暂时不用管// disable profiling bars, since they overlap and clutter the output on app windowsThreadedRenderer.overrideProperty("disableProfileBars", "true");// Private API call to make the shadows look better for RecentsThreadedRenderer.overrideProperty("ambientRatio", String.valueOf(1.5f));
}
本方法完成如下功能:
- 初始化各种资源
- 调用inflateStatusBarWindow()构造NotificationShade窗口和StaturBar窗口的顶层View容器
- 调用inflateShelf()构造NotificationShelf
- 调用createNavigationBar()构造NavigationBar窗口的顶层View容器
- 再通过Fragment创建可重用的View,加入这些顶层容器View中,如QSFragment,CollapsedStatusBarFragment
- 再创建Controller和View之间的联系
- 注册感兴趣的广播
基本概念补充
- AOD:always on display,SystemUI提供一种在息屏状态下会显示的UI
- QS:Quick Settings,也就是下拉状态栏之后,可以快速开关的一排排图标
- 唤醒锁:通过调用PowerManager的newWakeLock()获取一个WakeLock对象。加锁则调用WakeLock.acquire(),释放则调用WakeLock.release(). WakeLock可以配置不同的持有锁级别,主要有:
- PARTIAL_WAKE_LOCK:部分唤醒锁,屏幕和键盘背光可以关闭,但是cpu会一直运行,直到调用了release
- FULL_WAKE_LOCK:完全唤醒锁,cpu一直运行,屏幕,键盘背光都不会关闭
- SCREEN_DIM_WAKE_LOCK:屏幕变暗唤醒锁,屏幕常亮,但是会变暗,键盘背光允许关闭。按电源键则会释放锁
- SCREEN_BRIGHT_WAKE_LOCK:屏幕不会变暗,键盘背光允许关闭。如果按电源,则会释放锁
接下来我们介绍,两个用来创建顶层View的函数,inflateStatusBarWindow()和createNavigationBar()
4.1.1.1 inflateStatusBarWindow()函数
函数源码如下:
private void inflateStatusBarWindow() {//通过工厂类,得到NotificationShade窗口的顶层View,细节见后文补充mNotificationShadeWindowView = mSuperStatusBarViewFactory.getNotificationShadeWindowView();//根据Dagger2中画的图,获取各个需要的对象,Dagger2的细节见“Android 12 源码分析 —— 应用层 三”StatusBarComponent statusBarComponent = mStatusBarComponentBuilder.get().statusBarWindowView(mNotificationShadeWindowView).build();//获取需要的依赖mNotificationShadeWindowViewController = statusBarComponent.getNotificationShadeWindowViewController();//建立view和controller之间的联系mNotificationShadeWindowController.setNotificationShadeView(mNotificationShadeWindowView);//创建完顶层View之后,需要创建子View,本方法用于创建子View。这个过程将会在后续文章“NotificationShade窗口”中介绍mNotificationShadeWindowViewController.setupExpandedStatusBar();//获取依赖并初始化mStatusBarWindowController = statusBarComponent.getStatusBarWindowController();//根据工厂类,获取StatusBar窗口的顶层View,细节见后文补充mPhoneStatusBarWindow = mSuperStatusBarViewFactory.getStatusBarWindowView();//获取依赖,并初始化mNotificationPanelViewController = statusBarComponent.getNotificationPanelViewController();statusBarComponent.getLockIconViewController().init();//依然是获取依赖并初始化mAuthRippleController = statusBarComponent.getAuthRippleController();mAuthRippleController.init();
}
在本函数inflateStatusBarWindow(),主要完成的工作就是:
- 创建顶层View,并初始化
- 建立Controller和View之间的联系
在这里先看看上面函数是如何创建NotificationShadeWindow的顶层View的。
SuperStatusBarViewFactory的getNotificationShadeWindow()如下
public NotificationShadeWindowView getNotificationShadeWindowView() {if (mNotificationShadeWindowView != null) {return mNotificationShadeWindowView;}//解析,super_notification_shade.xml文件。 super_notification_shade.xml文件见“Android 12 源码分析 —— 应用层 四”mNotificationShadeWindowView = (NotificationShadeWindowView)mInjectionInflationController.injectable(LayoutInflater.from(mContext)).inflate(R.layout.super_notification_shade,/* root= */ null);if (mNotificationShadeWindowView == null) {throw new IllegalStateException("R.layout.super_notification_shade could not be properly inflated");}return mNotificationShadeWindowView;
}
注意:super_notification_shade.xml文件的详细说明,见“Android 12 源码分析 —— 应用层 四(SystemUI的基本布局设计及其基本概念)http://t.csdn.cn/Jmtwu”
接下来还需要看看,StatusBar窗口的顶层View是如何创建的,源码如下:
public StatusBarWindowView getStatusBarWindowView() {if (mStatusBarWindowView != null) {return mStatusBarWindowView;}//解析super_status_bar.xml文件,并返回。//super_status_bar.xml文件的详细说明,见上一篇博文“Android 12 源码分析 —— 应用层 四”mStatusBarWindowView =(StatusBarWindowView) mInjectionInflationController.injectable(LayoutInflater.from(mContext)).inflate(R.layout.super_status_bar,/* root= */ null);if (mStatusBarWindowView == null) {throw new IllegalStateException("R.layout.super_status_bar could not be properly inflated");}return mStatusBarWindowView;
}
总结:inflateStatusBarWindow()方法,用于创建两个窗口(StatusBar和NotificationShade)的顶层View
注意:本文主要关注StatusBar类的初始化过程,对于各个顶层View之后的细节,以及对应的子View的细节,将会在对应的篇章中进行详细的介绍
4.1.1.2 createNavigationBar()函数
createNavigationBar()源码如下:
protected void createNavigationBar(@Nullable RegisterStatusBarResult result) {//调用控制器方法,创建相应的View和Window//在此处我们只需要知道是干什么的就行,在后面的文章中会详细介绍NavigationBar的创建mNavigationBarController.createNavigationBars(true /* includeDefaultDisplay */, result);
}
注意:本文主题为StatusBar启动过程以及3个窗口的初始化创建,在后面的文章中,我们会详细讨论每个窗口的创建过程
4.1.1.3 第一次主动触发ACTION_SCREEN_OFF
在makeStatusBarView()函数中,会主动调用广播接收器的onReceive方法,并传递一个ACTION_SCREEN_OFF的Intent。
接下来我们看看这个动作所对应的操作。
private final BroadcastReceiver mBroadcastReceiver = new BroadcastReceiver() {@Overridepublic void onReceive(Context context, Intent intent) {Trace.beginSection("StatusBar#onReceive");if (DEBUG) Log.v(TAG, "onReceive: " + intent);String action = intent.getAction();//省略跟SCREEN_OFF无关的代码if (Intent.ACTION_SCREEN_OFF.equals(action)) {//设置其可触摸if (mNotificationShadeWindowController != null) {mNotificationShadeWindowController.setNotTouchable(false);}//如果有气泡通知,则隐藏if (mBubblesOptional.isPresent() && mBubblesOptional.get().isStackExpanded()) {// Post to main thread handler, since updating the UI.mMainThreadHandler.post(() -> mBubblesOptional.get().collapseStack());}//结束StatusBar和NavigationBar的过渡动画finishBarAnimations();//通知变成折叠状态resetUserExpandedStates();}//省略根SCREEN_OFF无关的代码Trace.endSection();}
};
总结:
- 在初始化的时候,主动触发SCREEN_OFF,并复位一些UI显示
4.2 setupPresenter()函数
在start()函数中,还会调用一个重要的初始化presenter的函数,即setupPresenter(),源码如下:
private void setUpPresenter() {//ActivityLaunchAnimator用于打开Activity时触发动画mActivityLaunchAnimator = new ActivityLaunchAnimator(this, mContext);//NotificationAnimationProvider用于提供从通知中打开Activity时的动画mNotificationAnimationProvider = new NotificationLaunchAnimatorControllerProvider(mNotificationShadeWindowViewController,mStackScrollerController.getNotificationListContainer(),mHeadsUpManager);//创建一个StatusBarNotificationPresenter,它表示的是一种用于呈现(presenter)Notifications的抽象,可以通过它查询Notification的状态mPresenter = new StatusBarNotificationPresenter(mContext, mNotificationPanelViewController,mHeadsUpManager, mNotificationShadeWindowView, mStackScrollerController,mDozeScrimController, mScrimController, mNotificationShadeWindowController,mDynamicPrivacyController, mKeyguardStateController,mKeyguardIndicationController,this /* statusBar */, mShadeController,mLockscreenShadeTransitionController, mCommandQueue, mInitController,mNotificationInterruptStateProvider);//传递必要的对象给NotificationShelf对象mNotificationShelfController.setOnActivatedListener(mPresenter);//传递必要对象mRemoteInputManager.getController().addCallback(mNotificationShadeWindowController);//NotificationActivityStarter用于处理从Notification中启动ActivitymNotificationActivityStarter =mStatusBarNotificationActivityStarterBuilder.setStatusBar(this).setActivityLaunchAnimator(mActivityLaunchAnimator).setNotificationAnimatorControllerProvider(mNotificationAnimationProvider).setNotificationPresenter(mPresenter).setNotificationPanelViewController(mNotificationPanelViewController).build();//为mStackScroller设置必要对象,mStackScroller对象即为Notification的父容器NotificationStackScrollLayoutmStackScroller.setNotificationActivityStarter(mNotificationActivityStarter);//为NotificationGutsManager设置NotificationActivityStarter对象,NotificationGutsManager//是长按notification之后,出现的图标mGutsManager.setNotificationActivityStarter(mNotificationActivityStarter);//初始化NotificationControllermNotificationsController.initialize(this,mBubblesOptional,mPresenter,mStackScrollerController.getNotificationListContainer(),mNotificationActivityStarter,mPresenter);
}
从这个函数看,它主要负责处理如下内容:
- 初始化从StatusBar打开Activity的对象
- 初始化从Notification打开Activity的对象
- 初始化从NotificationGuts打开Activity的对象
前面我们已经处理好了Notification相关的初始化,接下来初始化跟keyguard相关的初始化,它从startKeyguard()函数开始
4.3 startKeyguard()函数
startKeygurad()函数源码如下:
protected void startKeyguard() {Trace.beginSection("StatusBar#startKeyguard");//获取生物解锁控制器,它负责人脸,指纹解锁,虹膜等的解锁mBiometricUnlockController = mBiometricUnlockControllerLazy.get();//监听生物解锁的各个模式事件,具体细节见后续文章的指纹解锁mBiometricUnlockController.setBiometricModeListener(new BiometricUnlockController.BiometricModeListener() {@Overridepublic void onResetMode() {setWakeAndUnlocking(false);}@Overridepublic void onModeChanged(int mode) {switch (mode) {case BiometricUnlockController.MODE_WAKE_AND_UNLOCK_FROM_DREAM:case BiometricUnlockController.MODE_WAKE_AND_UNLOCK_PULSING:case BiometricUnlockController.MODE_WAKE_AND_UNLOCK:setWakeAndUnlocking(true);}}@Overridepublic void notifyBiometricAuthModeChanged() {StatusBar.this.notifyBiometricAuthModeChanged();}private void setWakeAndUnlocking(boolean wakeAndUnlocking) {if (getNavigationBarView() != null) {getNavigationBarView().setWakeAndUnlocking(wakeAndUnlocking);}}});//将必要对象注册给StatusBarKeyguardViewManager对象mStatusBarKeyguardViewManager.registerStatusBar(/* statusBar= */ this, getBouncerContainer(),mNotificationPanelViewController, mBiometricUnlockController,mStackScroller, mKeyguardBypassController);//KeyguardIndicationControllermKeyguardIndicationController.setStatusBarKeyguardViewManager(mStatusBarKeyguardViewManager);mBiometricUnlockController.setKeyguardViewController(mStatusBarKeyguardViewManager);mRemoteInputManager.getController().addCallback(mStatusBarKeyguardViewManager);//DynamicPrivacyController负责动态控制Notification内容的可见性mDynamicPrivacyController.setStatusBarKeyguardViewManager(mStatusBarKeyguardViewManager);//LightBarController负责浅色模式如何应用到icon上 mLightBarController.setBiometricUnlockController(mBiometricUnlockController);mMediaManager.setBiometricUnlockController(mBiometricUnlockController);mKeyguardDismissUtil.setDismissHandler(this::executeWhenUnlocked);Trace.endSection();//注意如果上面没有注释的,可以直接搜索对象名,在前文中有相应注释
}
该函数也非常的简单,构建各个对象,然后将各个对象传递给需要的对象。
至此整个StatusBar的初始化过程完成,接下来我们对其关键部分做一个总结,以掌握其主体脉络
- 系统启动完成,启动system_server
- system_server启动SystemUIService
- SystemUIService启动SystemUIApplication的startServicesIfNeeded()
- startServicesIfNeeded()启动StatusBar
(前面四个就是“Android 12 源码分析 —— 应用层 二”和“Android 12 源码分析 —— 应用层 三”的主体内容) - start()函数中,建立与system_server中的联系
- start()函数中,调用createAndAddWindow()创建需要的窗口
- start()函数中,初始化各个需要的必要对象
- createAndAddWindow()函数中,调用makeStatusBarView()创立各个Window和View,并将其添加到屏幕上
- makeStatusBarView()函数中,调用inflateStatusBarWindow()创建StatusBar和NotificationShade两个窗口
- makeStatusBarView()函数中,调用createNavigationBar()创建NavigationBar窗口
- makeStatusBarView()函数中,创建用在StatusBar窗口中的CollapsedStatusBarFragment它代表了StatusBar中的具体内容
- makeStatusBarView()函数中,创建用在NotificationShade窗口中的QSFragment它代表了整个下拉状态栏中QS的内容
- 并在初始化的过程中,协调各个对象之间的关系
- 并在初始化过程中,关闭屏幕,恢复UI到一个初始状态
在本篇文章中,我们并没有过多深入去讨论CollapsedStatusBarFragment的创建,而是停留在了其顶层View上,因此,接下来几篇文章,将分别介绍CollapsedStatusBarFragment,QSFragment以及StackScroll的创建过程,最后再介绍NavigationBar的创建过程。
下一篇文章,StatusBar窗口的UI创建和初始化
ps1:行文过程中,常常发现,中英文交杂,尤其是名字,其实有时候让人挺费解的,若读者有疑问,可在留言,知无不言,言无不尽。
ps2:当然文中难免有错误,望不吝赐教


