目录
一.前言
二.链表表示和实现(单链表)
1.1 顺序表的优缺点
1.2 链表的概念及结构
1.3 打印函数
1.4 空间函数
1.5 尾插函数(最最最麻烦的)
1.5.1 尾插最关键部分!
1.6 头插函数
1.7 尾删函数
1.8 头删函数
1.9 查找函数
1.10 在pos之前插入x函数
1.12 在pos之后插入x函数
1.13 删除pos位置函数
1.14 删除pos的后一个位置函数
1.15 小测试
三.全部代码
四.结语
 一.前言
一.前言
超级详细的单链表分析,把这一口吃下去妈妈再也不担心孩子因为知识匮乏饿肚子了~ 码字不易,希望大家多多支持我呀!(三连+关注,你是我滴神!)
二.链表表示和实现(单链表)
1.1 顺序表的优缺点
回顾前文所说的顺序表:
缺点:
- 头部和中部插入删除效率都不行 O(N)
- 空间不够了,扩容有一定的消耗(尤其是异地扩容)
- 扩容逻辑,可能还存在空间 (比如100满了,你要插入110个数据,扩容到200就会浪费90个空间)
优点:
- 尾插尾删足够快
- 下标的随机访问和修改
1.2 链表的概念及结构
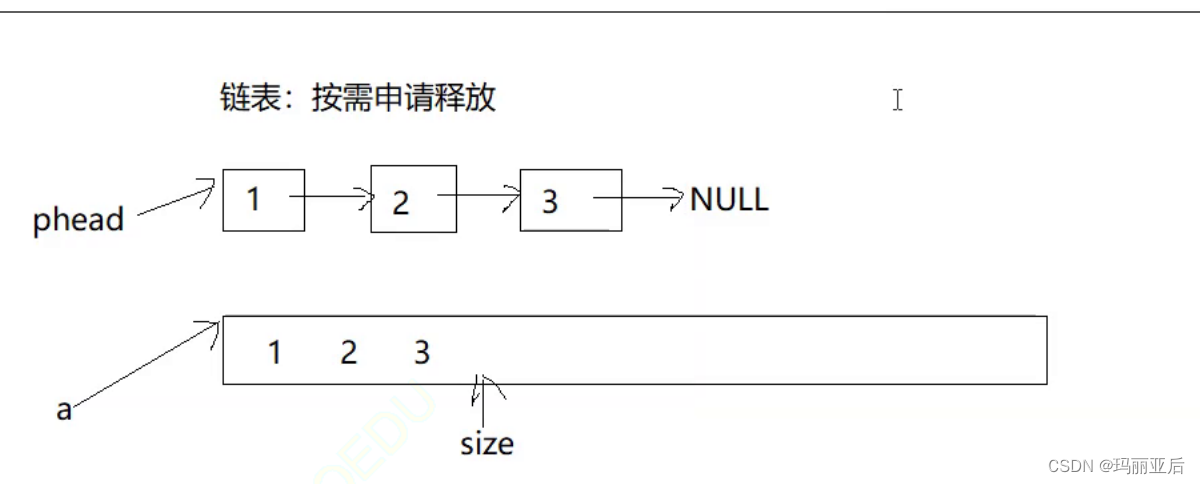
顺序表只需要知道首元素地址即可有一块连续的物理空间,并且尾部用size定义,而链表在物理空间并非连续,而是按需申请释放单个空间,空间之间用指针来相互联系。链表空间尾部是用NULL定义。
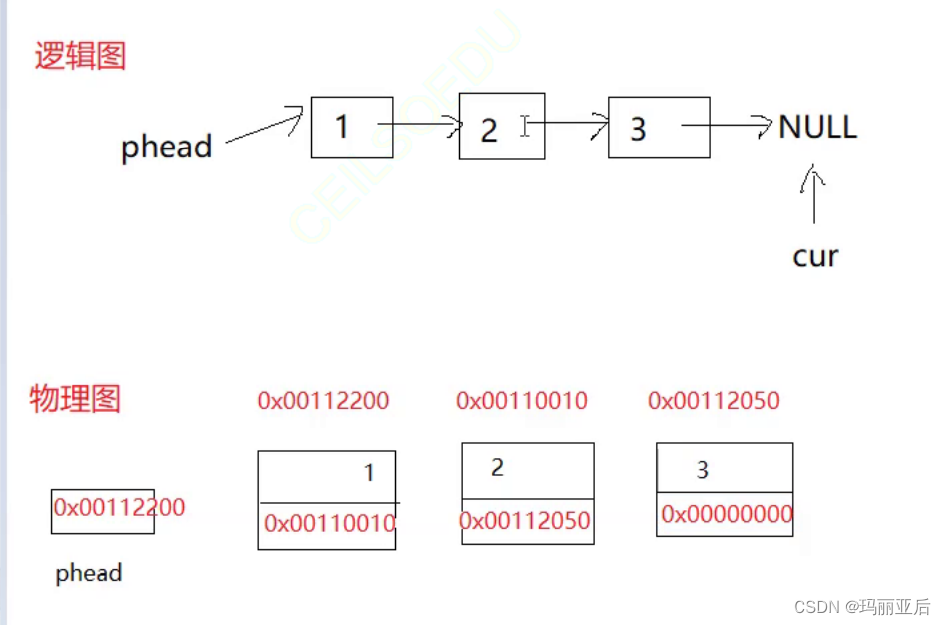
备注:由malloc出来的节点地址是随机的。
#define _CRT_SECURE_NO_WARNINGS 1
//Test.c
#include <stdio.h>typedef int SLTDataType;
typedef struct SListNode
{SLTDataType data;struct SListNode* next;
}SLTNode;int main()
{return 0;
}从单链表的图示我们可以知道它是有多个节点链接而成的,一个节点里意味着有一个结构体,那么我们所指向节点的指针就应该是结构体指针变量。(struct SListNode* next)
1.3 打印函数

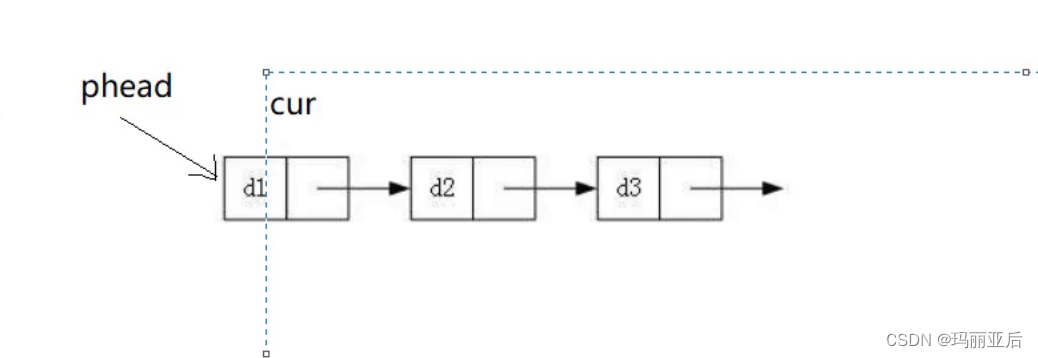
因为phead是指向第一个节点的,所以不要轻易去改变,我们可以再创造一个指针来遍历链表。
void PrintSList(SLTNode* phead)
{SLTNode* cur = phead;while (cur != NULL){printf("%d->", cur->data);cur = cur->next;}printf("NULL\n");
}
肯定许多友友无法理解为什么 cur = cur->next;这个next明明在代码中没有明确的指向,为什么还可以去使用呢?其实在cur指向第一个节点时cur->next是去取该结构体里面next的值,而next所存储的则是下一个结构体的地址。这样使得cur去指向第二个节点。至于为什么next能够存储下一个节点的地址就是关于编译器里的汇编该做(计算机会自动识别该指令)的事情了,我们就不做过多介绍了。
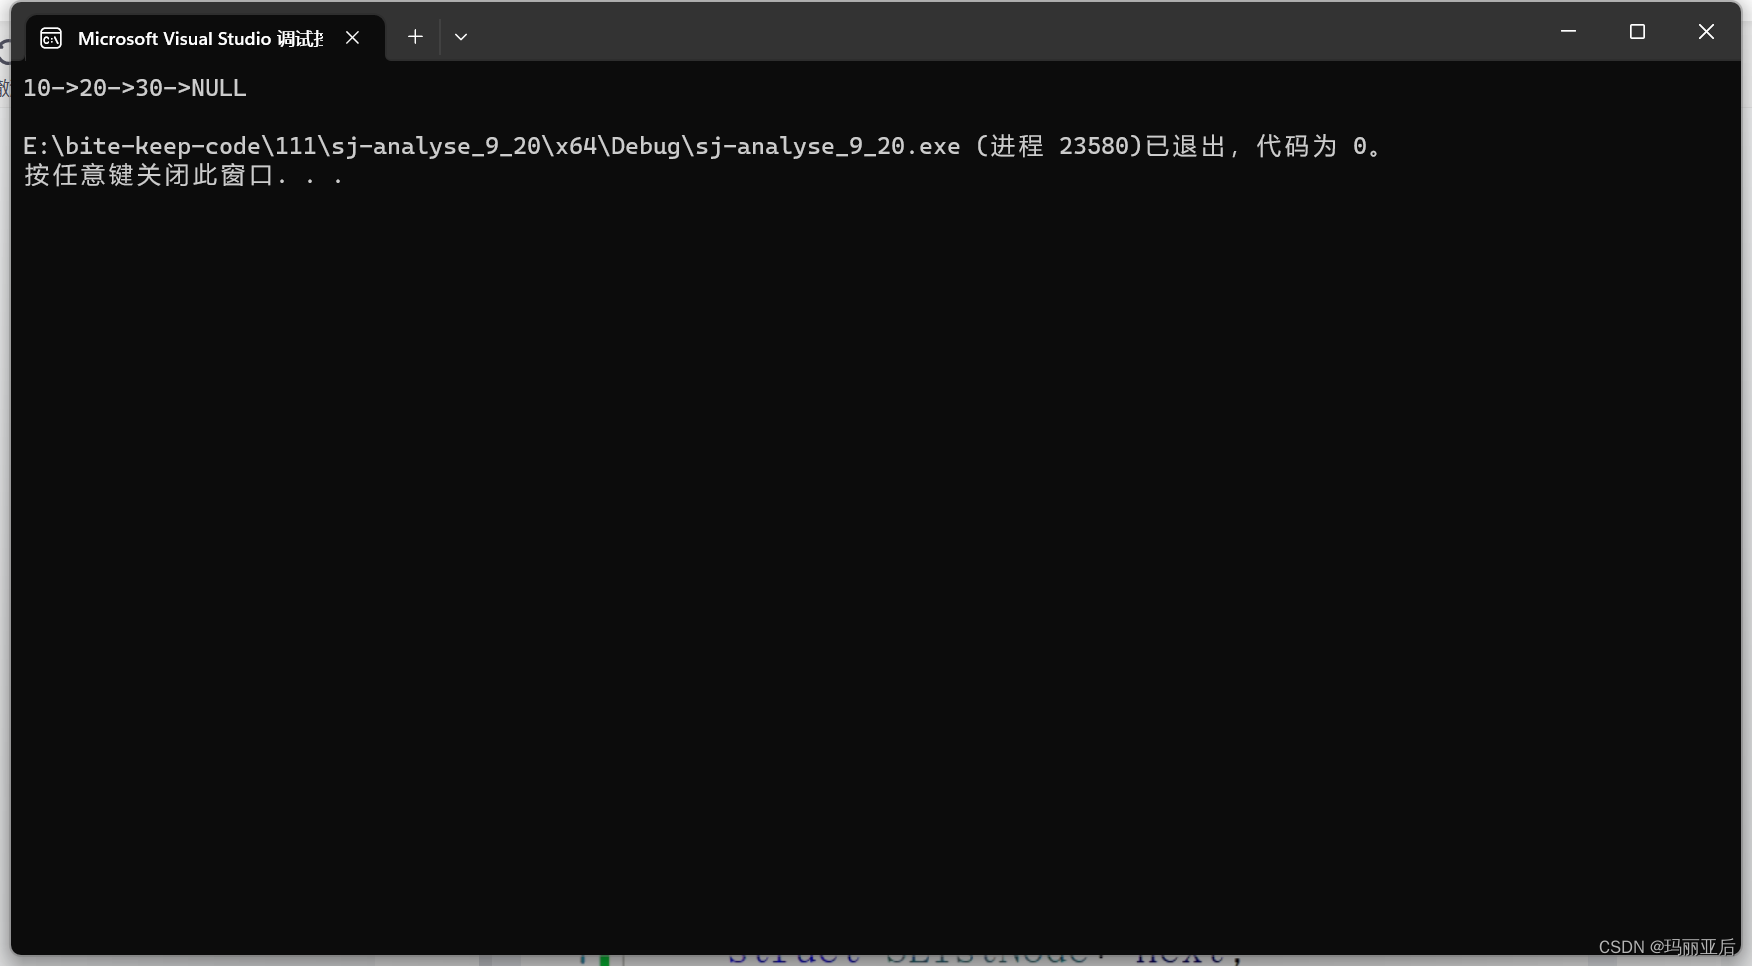
接下来带大家感受一下简易链表的跑动情况;
#define _CRT_SECURE_NO_WARNINGS 1
//Test.c
#include <stdio.h>
#include <stdlib.h>typedef int SLTDataType;
typedef struct SListNode
{SLTDataType data;struct SListNode* next;
}SLTNode;void PrintSList(SLTNode* phead)
{SLTNode* cur = phead;while (cur != NULL){printf("%d->", cur->data);cur = cur->next;}printf("NULL\n");
}int main()
{SLTNode* n1 = (SLTNode*)malloc(sizeof(SLTNode));//注意!这里malloc出来的节点是结构体,那么sizeof也得代入结构体的大小,//又因为是用结构体指针接收,所以强制类型转换也要使用(SLTNode*)。n1->data = 10;SLTNode* n2 = (SLTNode*)malloc(sizeof(SLTNode));n2->data = 20;SLTNode* n3 = (SLTNode*)malloc(sizeof(SLTNode));n3->data = 30;n1->next = n2;n2->next = n3;n3->next = NULL;PrintSList(n1);return 0;
} 
在见识到简易链表后那接下来我们就要进入真正完整结构的链表了,老规矩,先创造3个文件。
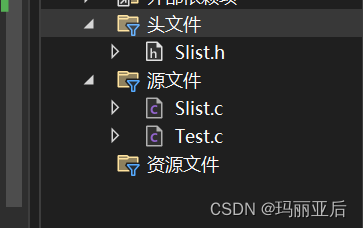
1.4 空间函数
SLTNode* BuySlistNode(SLTDataType x)
{SLTNode* newnode = (SLTNode*)malloc(sizeof(SLTNode));if (newnode == NULL){perror("malloc fail");exit(-1);}newnode->data = x;newnode->next = NULL;return newnode;}当我们创造空间函数后来进行测试:(不过会遇到一个难点,我们该如何把这些节点联系在一起呢?)
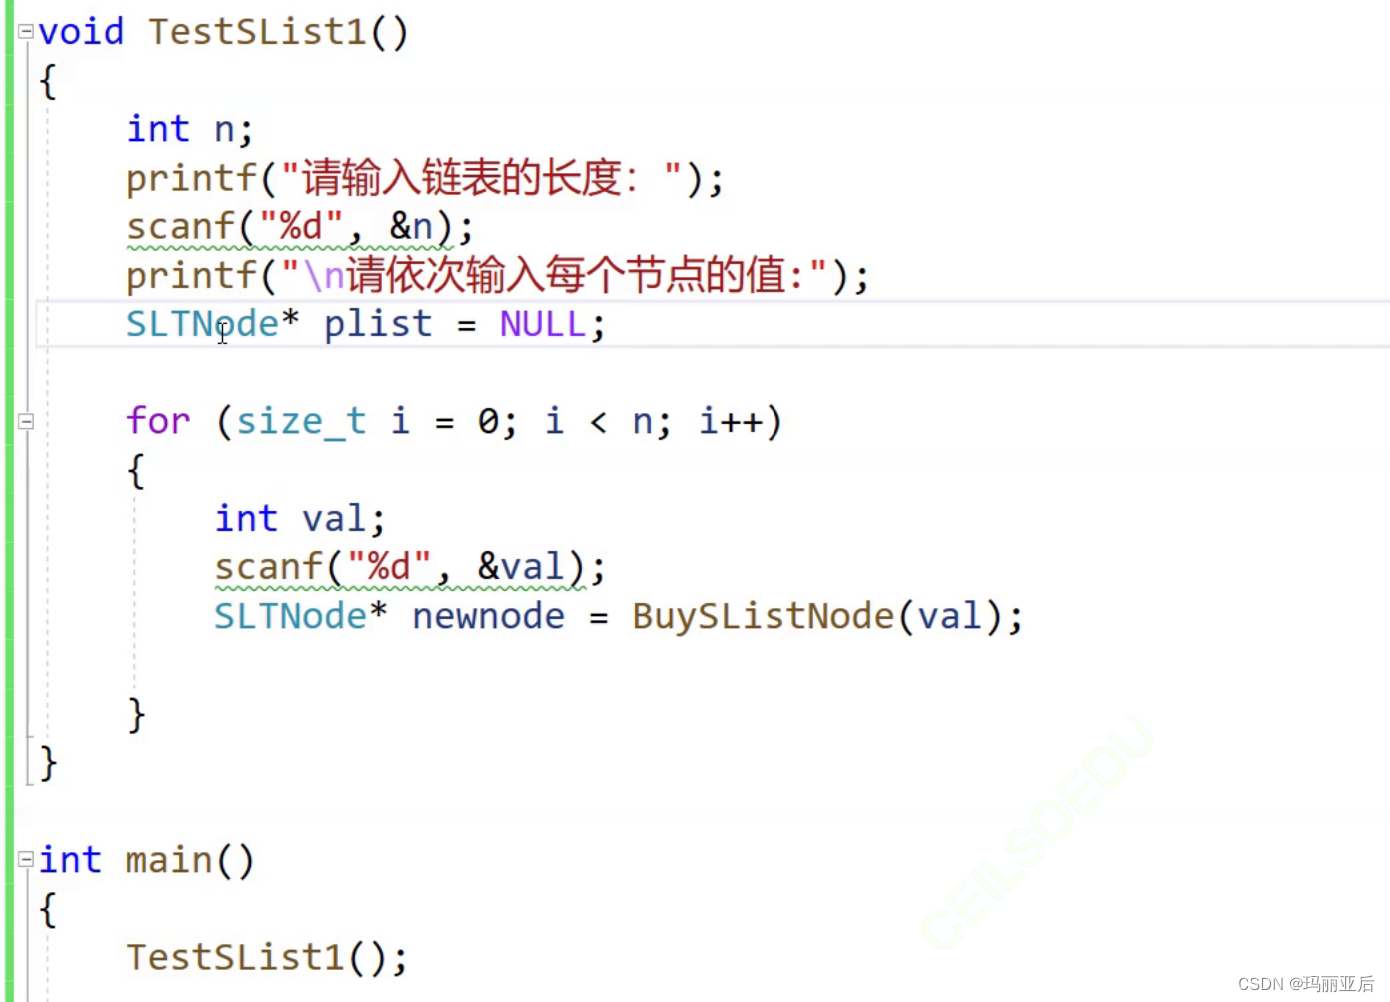 这里我们提前先用头插来进行链接并且分析:
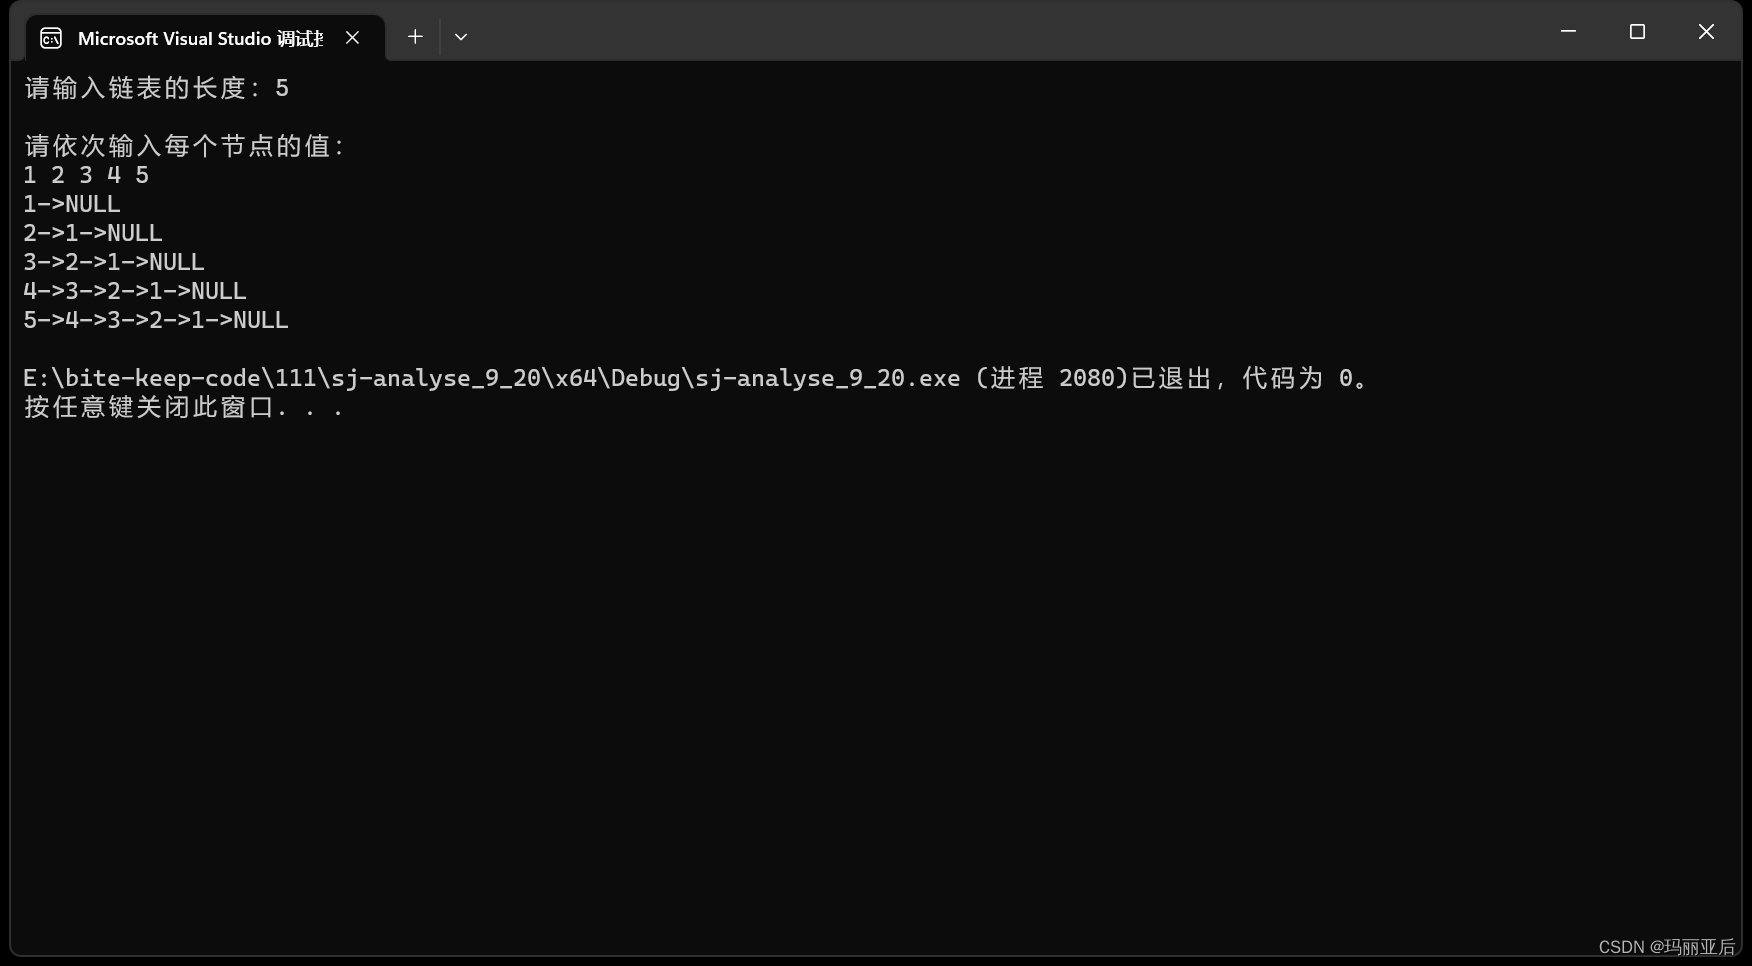
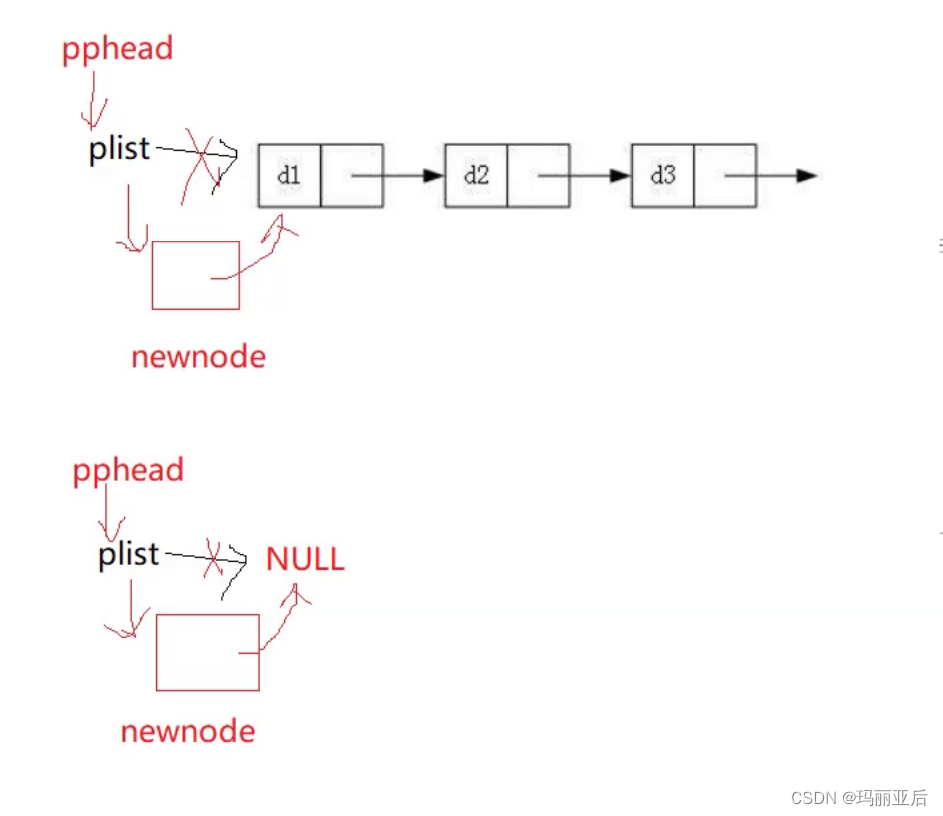
当我们的链表不为空时,要想头插需要用newnode这个新节点将plist与plist指向的第一个节点链接起来。先将第一个节点的地址(plist所指向)交给newnode这个新节点的next处,使新节点后面链接的是第一个节点,再把新节点的地址交给plist,使plist所指向的永远都是新的第一节点。
注意!切不可交换顺序,如果先把新节点newnode的地址交给plist,那原先第一个节点就不能通过plist找到了,成为了野指针。
当链表为空时,由于plist指向的是空指针,那么当插入新节点时,plist指向就变成了新节点(第一节点),而新节点所指向的就是空指针(newnode->next=NULL)。
最后得出结论:关于头插的两句代码newnode->next = plist与plist = newnode完美契合两种情况,不需要用条件来区分开来。
最终测试:
#define _CRT_SECURE_NO_WARNINGS 1
//Test.c
#include "Slist.h"
#include <stdio.h>
#include <stdlib.h>void TestSList1()
{int n = 0;printf("请输入链表的长度:");scanf("%d", &n);printf("\n请依次输入每个节点的值:\n");SLTNode* plist = NULL;for (int i = 0; i < n; i++){int val = 0;scanf("%d", &val);SLTNode* newnode = BuySlistNode(val);newnode->next = plist;plist = newnode;PrintSList(plist);}}int main()
{TestSList1();return 0;
}
1.5 尾插函数(最最最麻烦的)
尾插:肯定是从最后开始插入,malloc一个新空间,那么它所在节点先存储所插入的数,再然后就是空指针的地址。
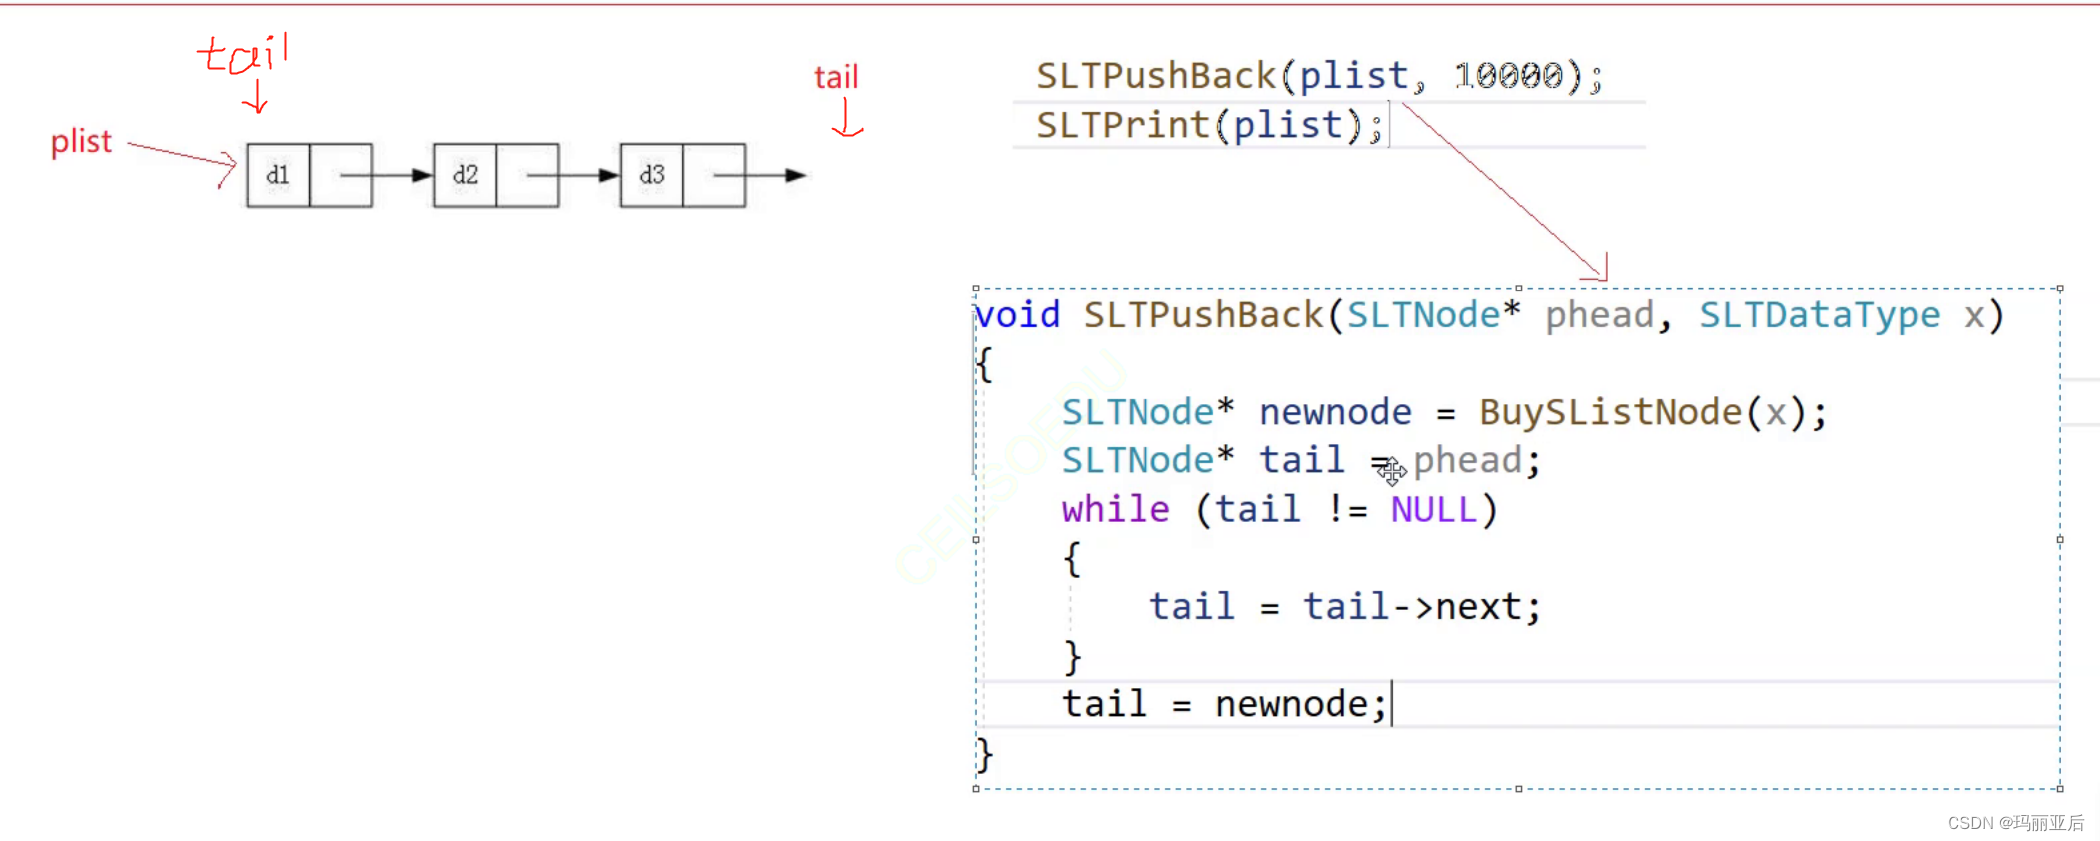
不过既然从最后插入,那得在原有数据上找到尾巴,从尾巴后面开始插入成为末尾。
很多友友都会将代码误写成下面这样:(其实这样是大错特错的)
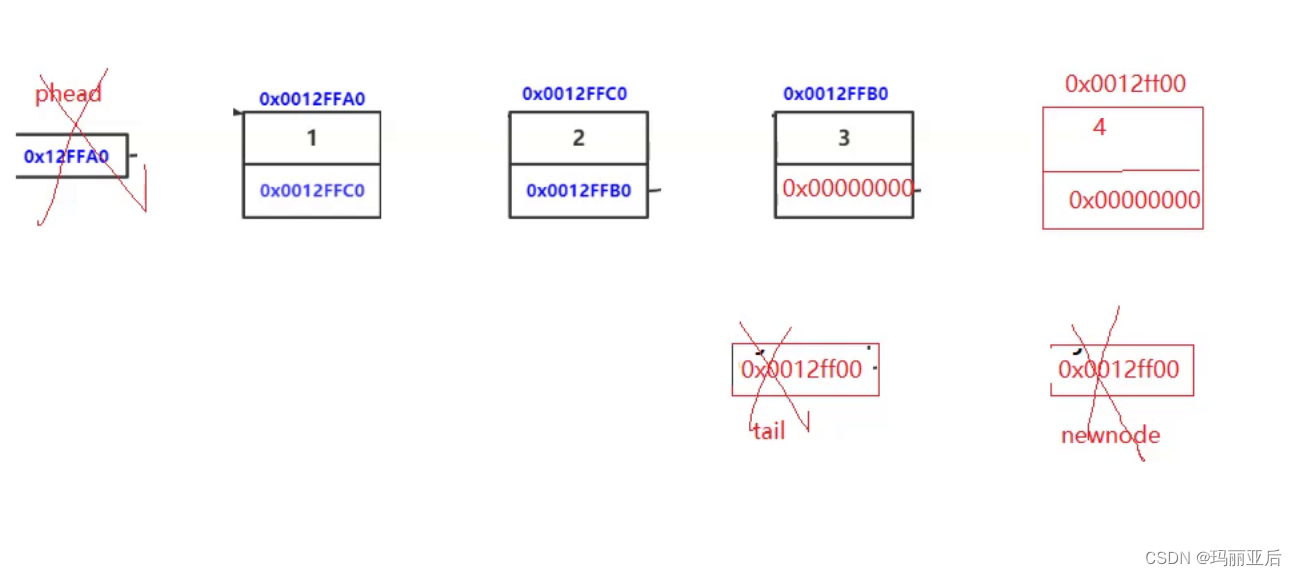
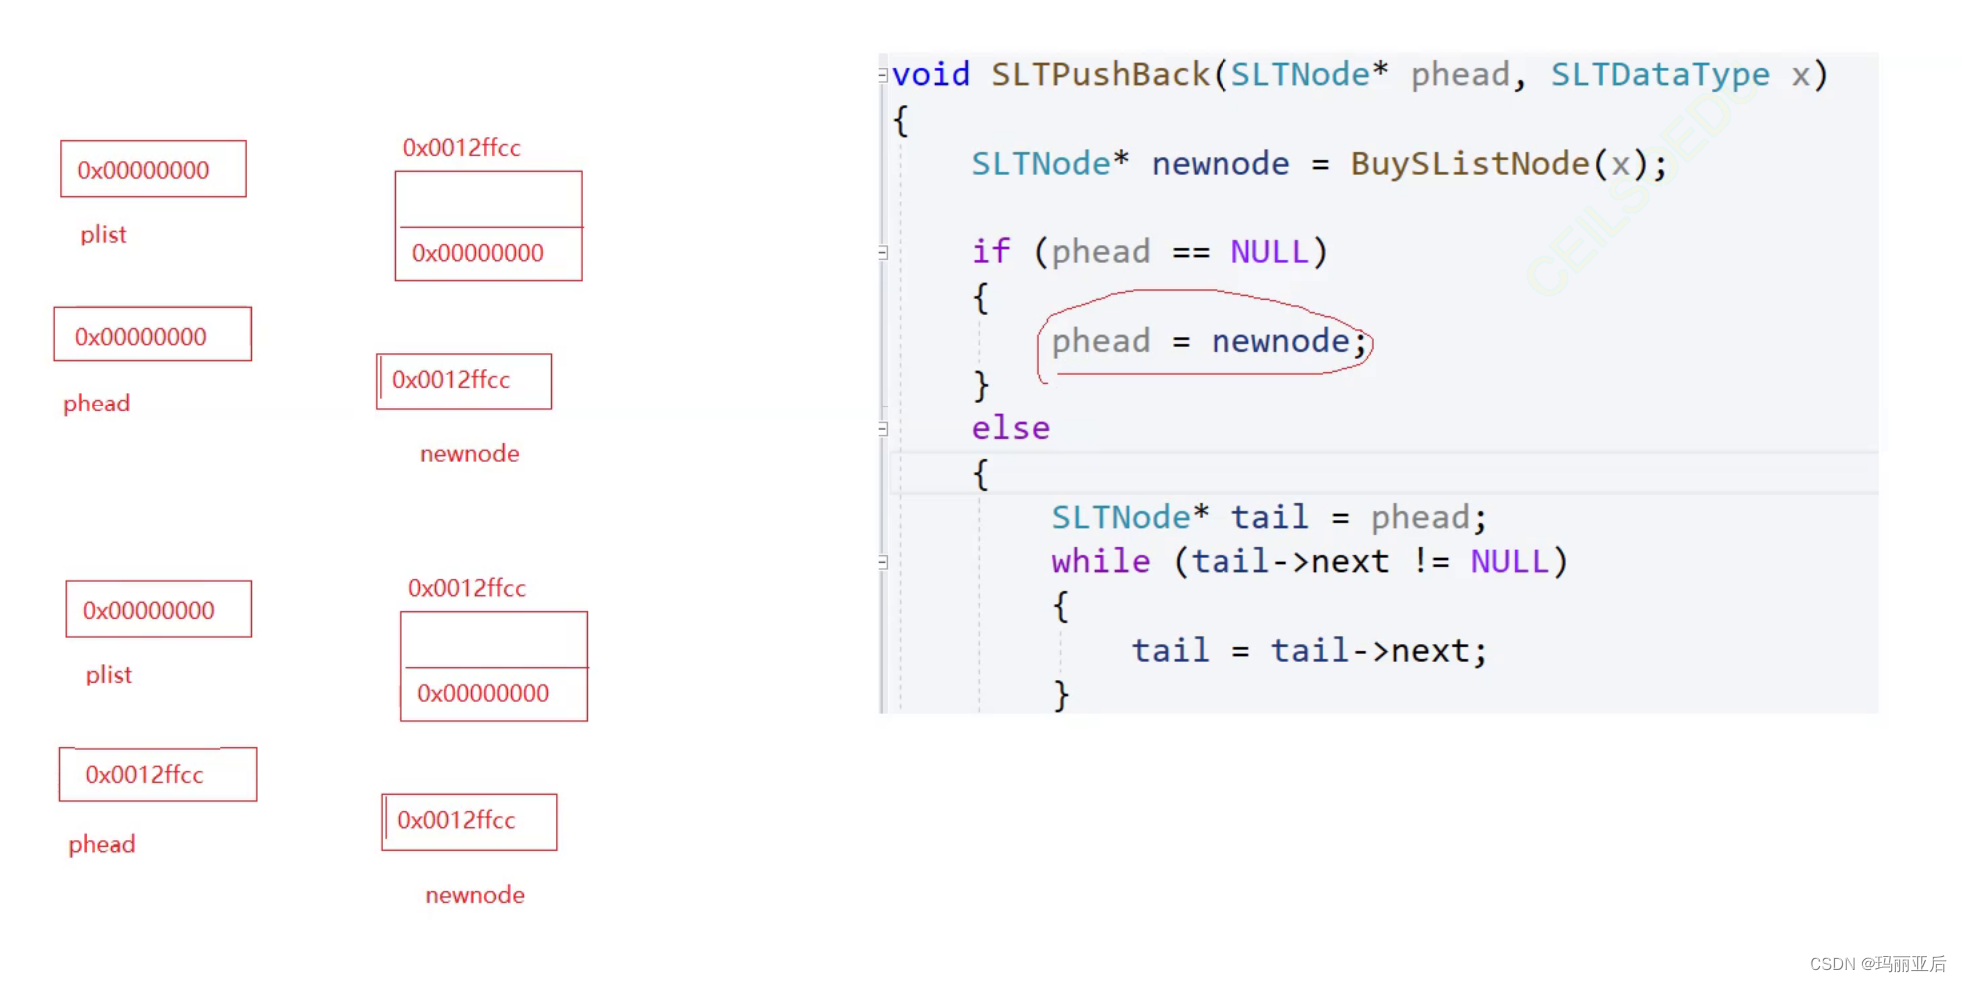
当我们画好物理图来分析就知道了,假如我们创造了新节点,而tail因为指向空指针而停止循环,但在我们执行最后一句代码后:tail = newnode,tail确实指向了新的节点,但是我们可以从图中看到新节点并没有和上一个节点链接起来!上一个节点所指向的仍然是空指针。
该函数里有三个局部变量:phead, newnode, tail.出了作用域全部销毁。数据4并没有尾插进去,新开的这个节点反而丢失了。之所以4所在节点不会被销毁是因为该节点是malloc在堆上开辟的,除非你去free掉,否则是不会销毁的。这就是我们为什么费劲去malloc一个节点,如果单单在函数内部搞节点出了作用域就会被销毁。
另外不用担心phead的销毁而找不到链表,phead是形参,我们外面还有pilst(实参)也有指向。
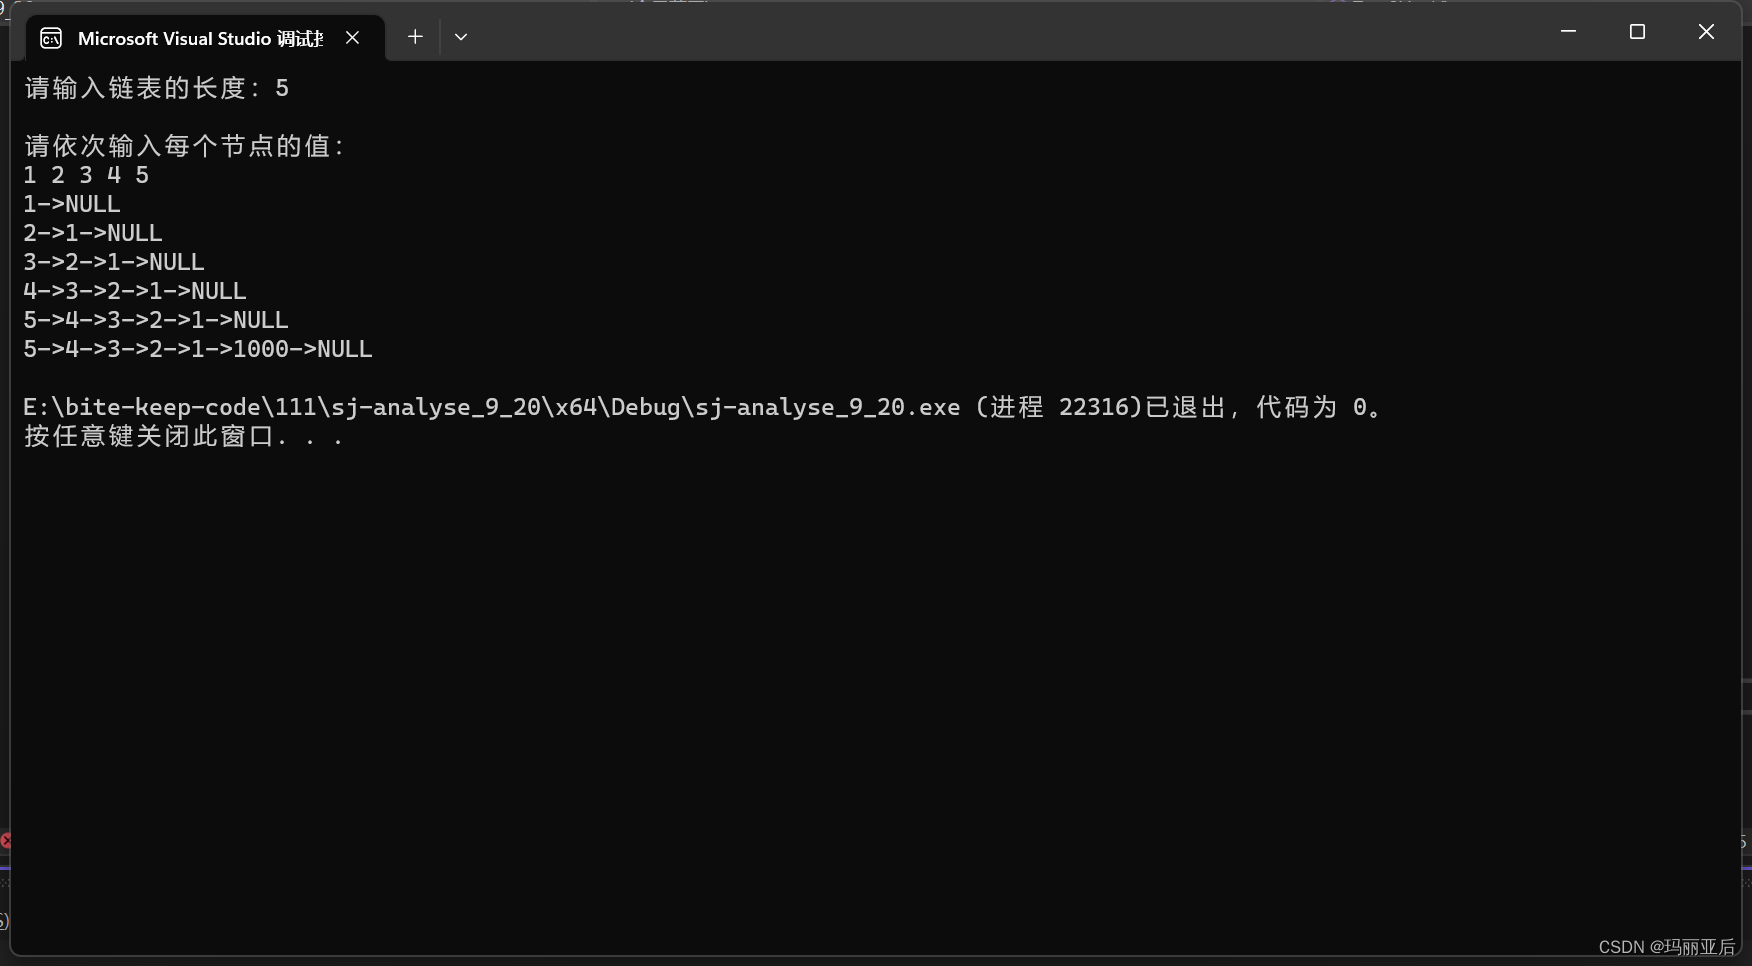
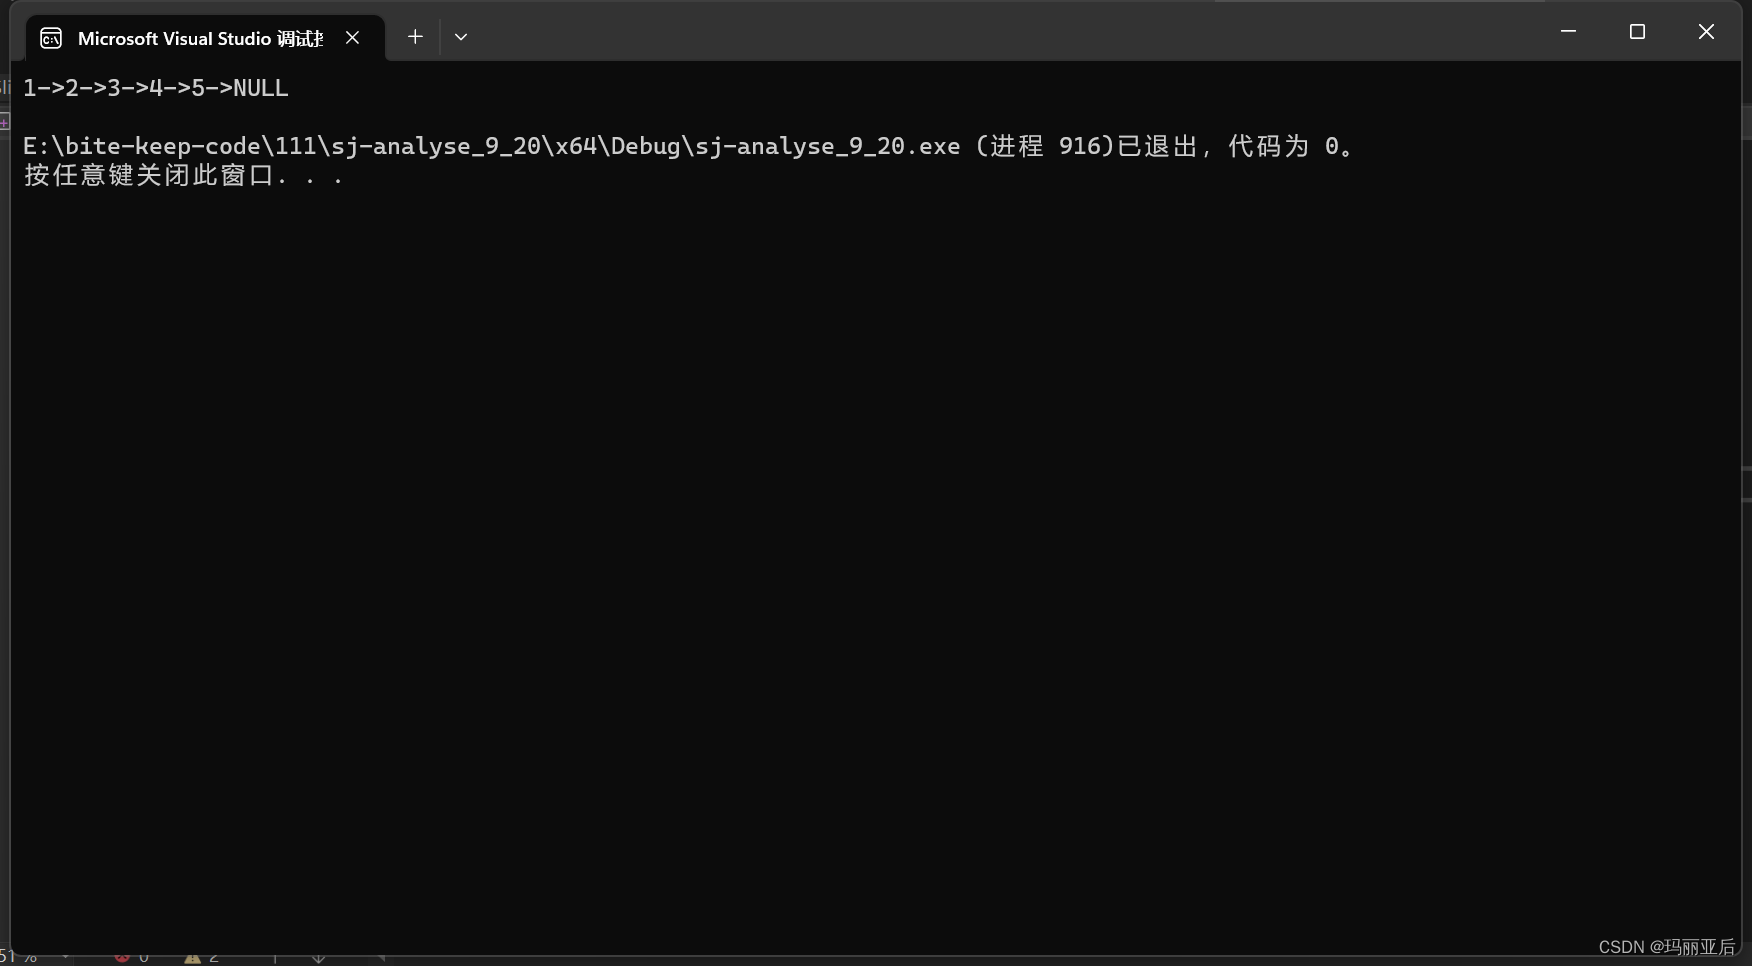
最后我们再来测试是否插入:(尾插1000)
//尾插函数
void SLTPushBack(SLTNode* phead, SLTDataType x)
{SLTNode* newnode = BuySlistNode(x);SLTNode* tail = phead;while (tail->next != NULL){tail = tail->next;}tail->next = newnode;
}
void TestSList1() {int n = 0;printf("请输入链表的长度:");scanf("%d", &n);printf("\n请依次输入每个节点的值:\n");SLTNode* plist = NULL;for (int i = 0; i < n; i++){int val = 0;scanf("%d", &val);SLTNode* newnode = BuySlistNode(val);newnode->next = plist;plist = newnode;PrintSList(plist);}SLTPushBack(plist, 1000);PrintSList(plist);}
1.5.1 尾插最关键部分!
前面是通过各种方式先折腾出一个链表,然后再进行尾插。
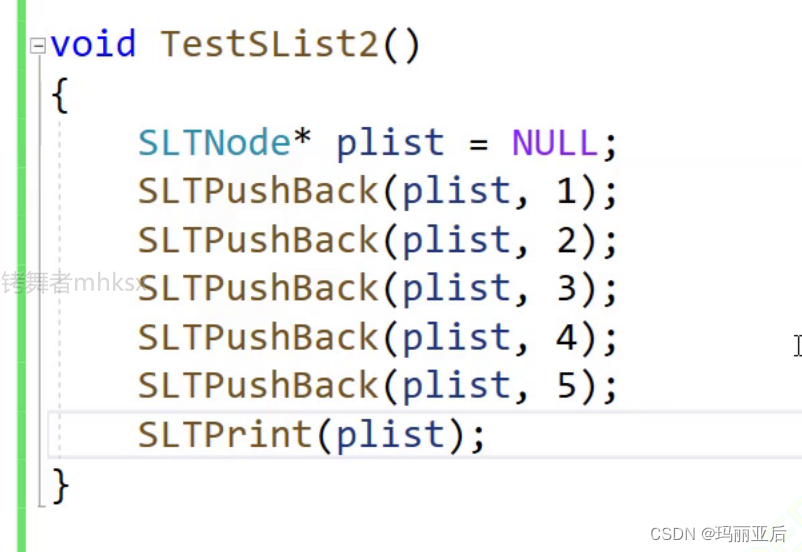
现在我们来测试一下没有链表(空链表),没有节点的时候尾插会发生什么。
//修改后的尾插函数
void SLTPushBack(SLTNode* phead, SLTDataType x)
{SLTNode* newnode = BuySlistNode(x);if (phead == NULL){phead = newnode;}else{SLTNode* tail = phead;while (tail->next != NULL){tail = tail->next;}tail->next = newnode;}
}
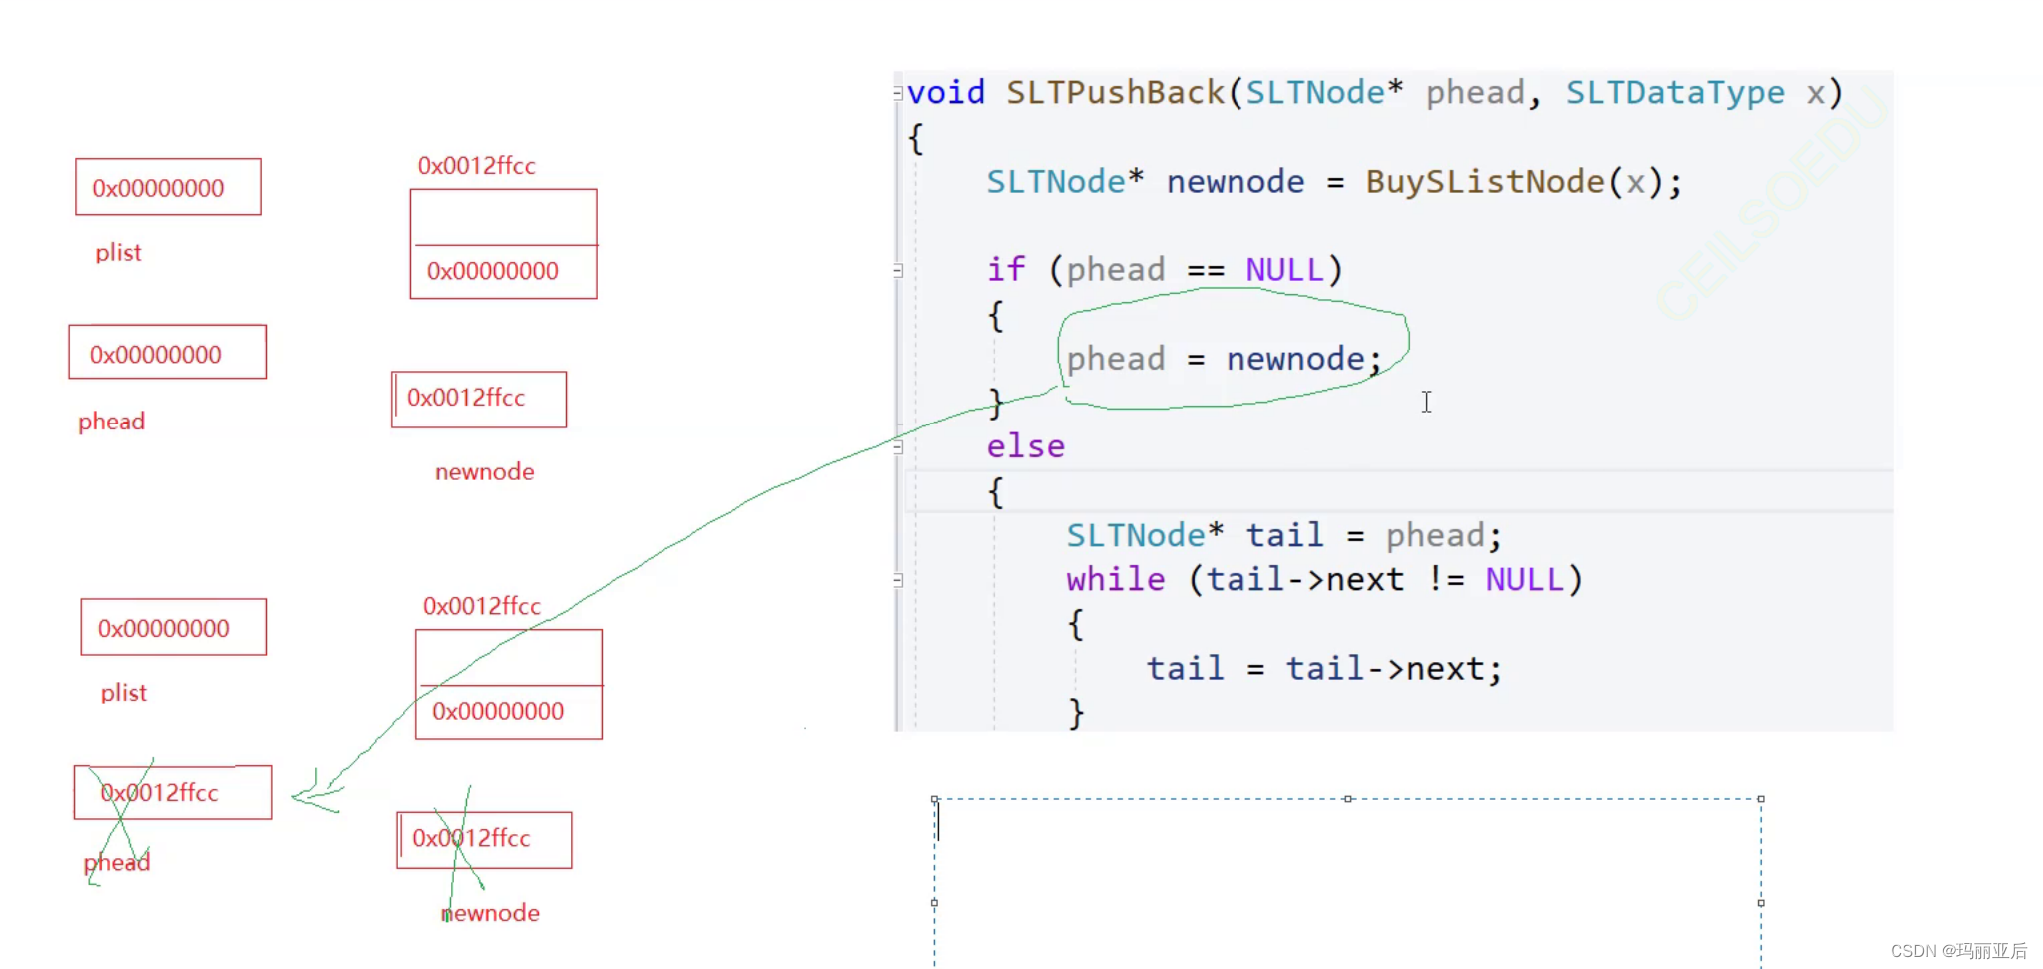
结果插入失败,这又是为什么呢?
我们来一起分析一波:
当if条件执行完后离开作用域phead和newnode变量跟之前一样销毁。
这时候跟前面测试已经不同!测试1中是已经有了链表,在外面作为实参的plist已经是指向了第一个节点,在只进行尾插的情况下plist会一直指向第一节点,所以反而不用在意出了局部作用域就销毁的phead。在测试1中phead的作用更多是让tail能顺利指向首节点,而不是去尝试改变plist的值。
而现在的测试2中链表是空的,这意味着外面的plist的指向一直是空指针,需要phead来传递新节点的地址让外面的plist能够顺利指向它。可是phead只要离开作用域就会被销毁,无法起到传递地址的作用,这该怎么办呢?
其实,这里的形参phead和实参plist本质上还是传值调用,phead只是plist的一份临时拷贝,改变phead的值是起不到改变plist的目的的,可它们不都是指针吗?怎么会改变不了呢?接下来,我为大家来演示一个小案例就明白了~
小案例:
void Swap1(int* p1, int* p2) {int tmp = *p1;*p1 = *p2;*p2 = tmp; }void Swap2(int** pp1, int** pp2) {int* tmp = **pp1;**pp1 = **pp2;**pp2 = tmp; }int main() {TestSList1();int a = 0;int b = 1;Swap1(&a, &b);int* x1 = &a;int* x2 = &b;Swap1(x1, x2);return 0; }在上述代码中,如果需要改变int的值,那就得传int*去接收。万一要改变的值是int*呢?那就得用int**去接收。我们在空链表的时候就相当于是传递x1,x2两个int*类型的值,但却用int*去接收,那x1,x2怎么可能会改变呢~
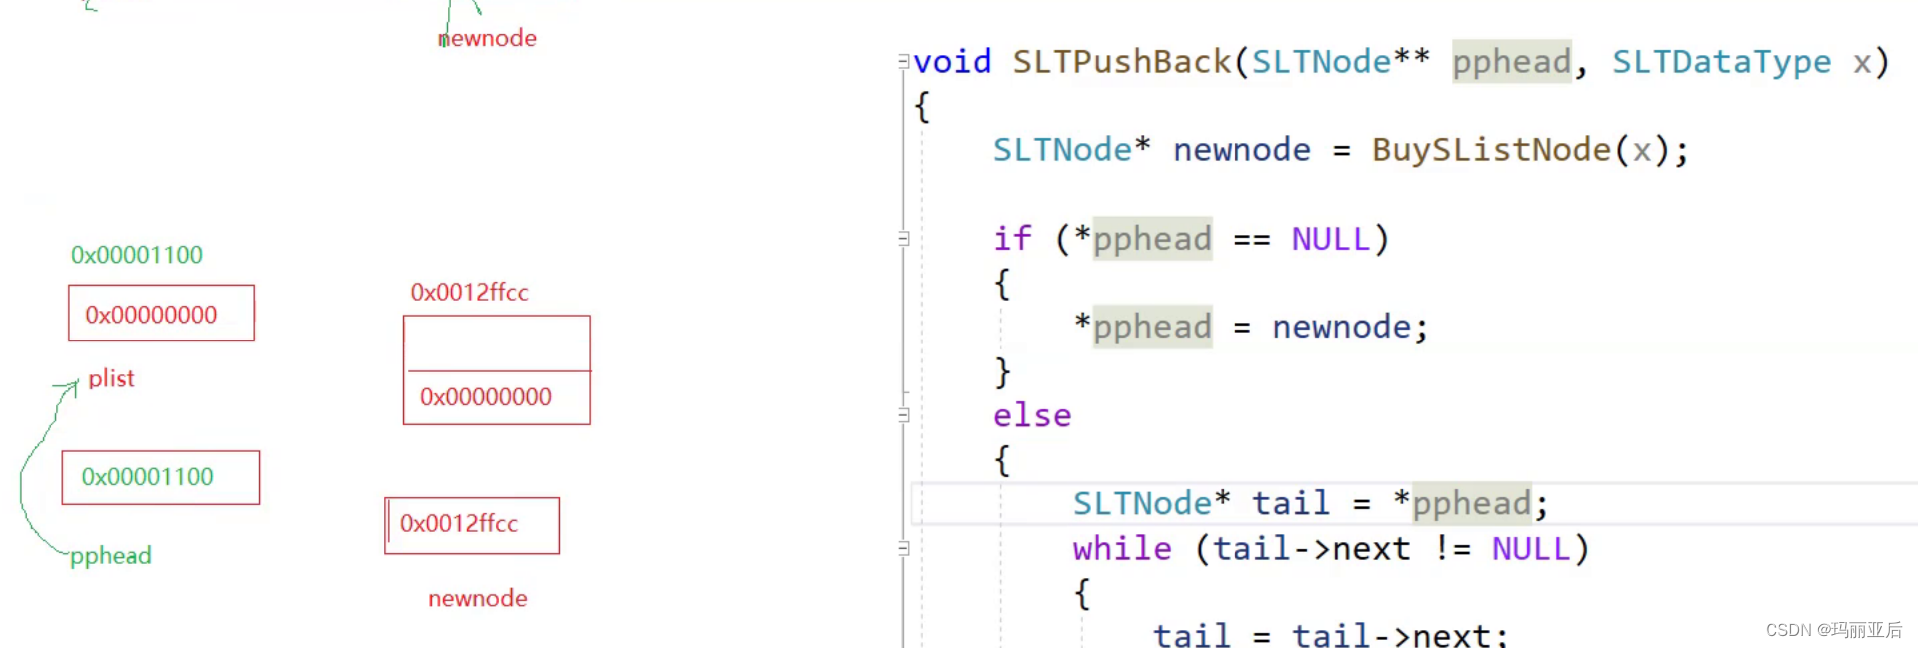
所以要想让外面的plist能够改变,首先先传递plist的地址,再用二级指针去接收~
void TestSList2()
{SLTNode* plist = NULL;SLTPushBack(&plist, 1);SLTPushBack(&plist, 2);SLTPushBack(&plist, 3);SLTPushBack(&plist, 4);SLTPushBack(&plist, 5);PrintSList(plist);
}int main()
{//TestSList1();TestSList2();//int a = 0;//int b = 1;//Swap1(&a, &b);//int* x1 = &a;//int* x2 = &b;//Swap1(x1, x2);return 0;
}
//修改后的尾插函数 void SLTPushBack(SLTNode** pphead, SLTDataType x) {SLTNode* newnode = BuySlistNode(x);if (*pphead == NULL){//改变结构体的指针,用二级指针改变*pphead = newnode;}else{SLTNode* tail = *pphead;while (tail->next != NULL){tail = tail->next;}//改变结构体(next),用结构体指针(tail)tail->next = newnode;} }
现在情况发生改变,我们的pphead是指向plist,而*pphead变成了去解引用地址,就是去看plist里面的所存储的地址,解引用发现plist里面存储的地址为空,那就把newnode的地址传递进去,达到传址调用的目的。
那为什么tail不用二级指针呢?,首先tail(结构体指针)指向的是一个结构体,tail->next是结构体里面的成员,而我们要想对结构体进行改变,用结构体指针就可以了。
最费劲的地方结束啦,相信后面的内容大家肯定可以轻松掌握~
1.6 头插函数
在经历复杂的尾插函数洗礼后,那头插函数还需要二级指针吗?
肯定需要啊,尾插只是在空链表时有必要用二级指针,那头插可就次次都需要二级指针了。
尾插需要判断链表是否为空,因为一方是改变结构体,另一方是改变结构体指针。而头插就不用去判断链表是否为空了,反正都是去改变结构体指针。
//头插函数
void SLTPushFront(SLTNode** pphead, SLTDataType x)
{assert(pphead);SLTNode* newnode = BuySlistNode(x);newnode->next = *pphead;*pphead = newnode;
}
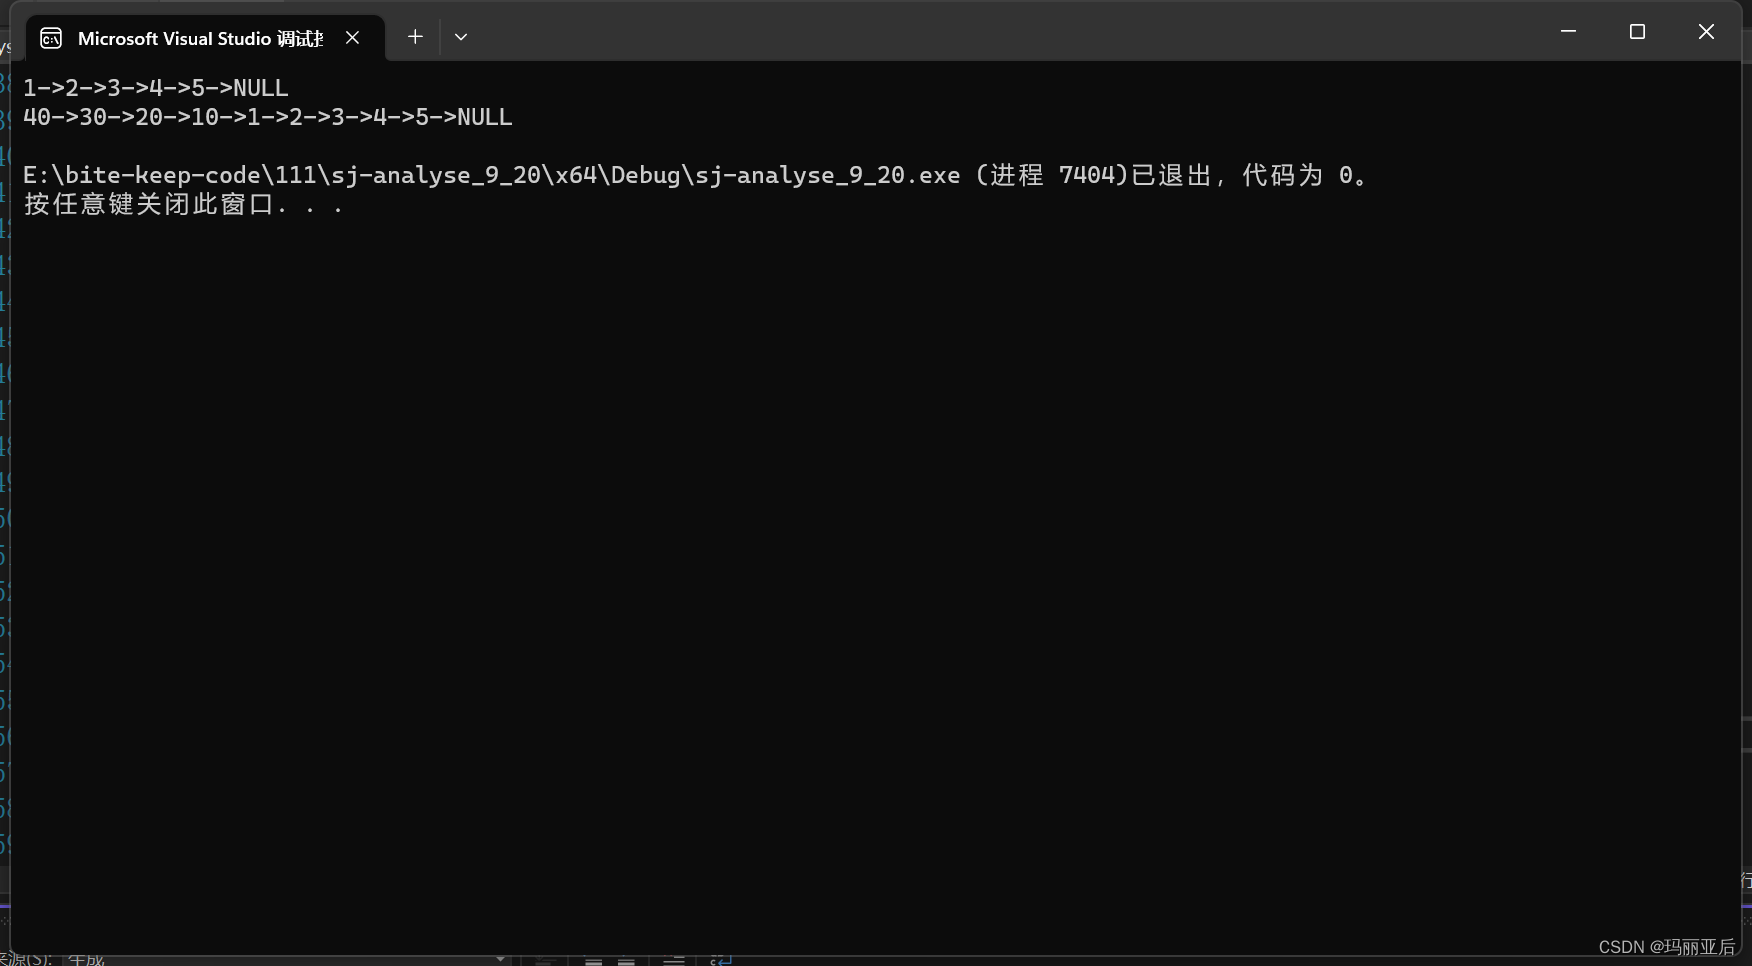
测试一下:
void TestSList2()
{SLTNode* plist = NULL;SLTPushBack(&plist, 1);SLTPushBack(&plist, 2);SLTPushBack(&plist, 3);SLTPushBack(&plist, 4);SLTPushBack(&plist, 5);PrintSList(plist);SLTPushFront(&plist, 10);SLTPushFront(&plist, 20);SLTPushFront(&plist, 30);SLTPushFront(&plist, 40);PrintSList(plist);
}
1.7 尾删函数
如题:尾删需要二级指针吗?
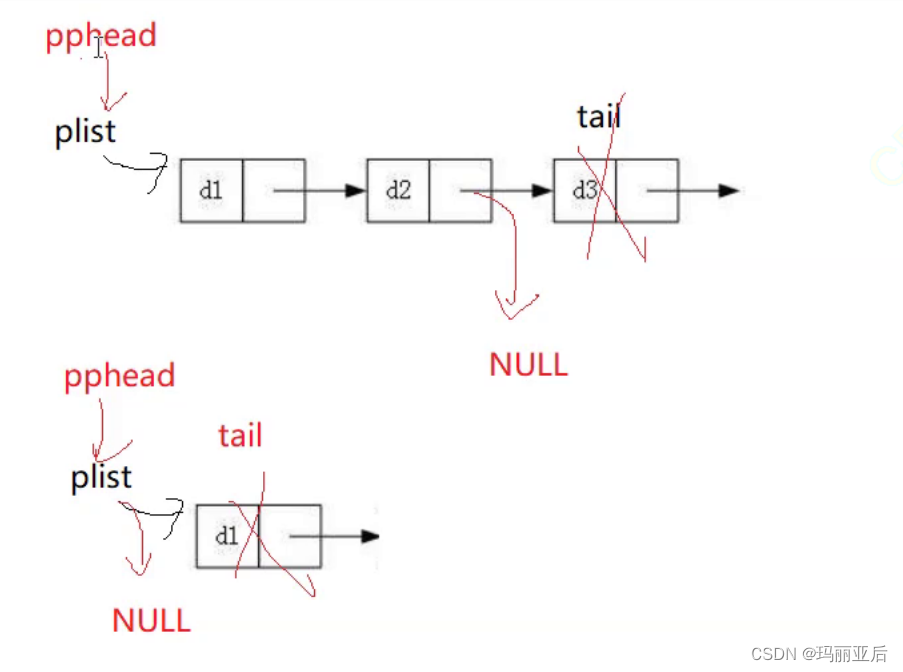
前面确实只需要注意改结构体就行了,不需要用到二级指针~,但单我们删到只剩下最后一个节点时,没有前一个节点置空,所以是需要改变plist让它指向NULL滴~所以还是需要用到二级指针哦。
哈哈有没有发现只要把二级指针这一口吃下去了,后面都好说了~神挡杀神,佛挡杀佛~
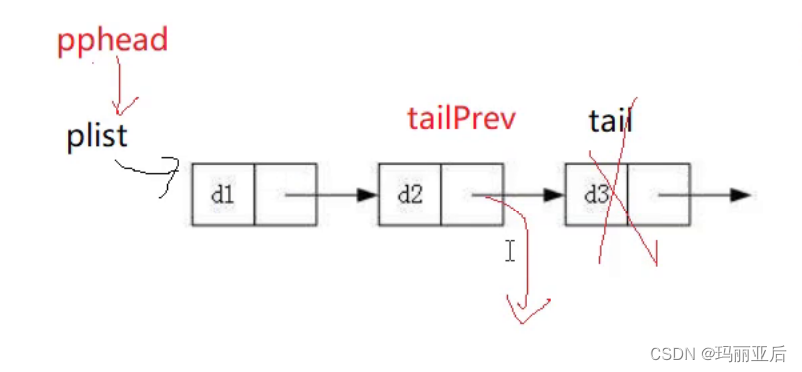
如果free掉最后的空间节点,那么它的前一个节点由于所存地址的空间已经丢失,那么所存储该地址的指针就会变成野指针。所以我们需要把在尾部前面的节点所存储的地址变成空指针,确保它是尾部删除后成为新的尾部。
//尾删函数
void SLTPopBack(SLTNode** pphead)
{assert(pphead);//这里断言的目的是因为pphead指向的是plist的地址,而plist永远有所指向//要么指向NULL,要么指向链表,所以pphead是不能为空的。//空assert(*pphead);//一个节点if ((*pphead)->next == NULL){free(*pphead);*pphead = NULL;}//一个节点以上else{SLTNode* tailpre = NULL;SLTNode* tail = *pphead;while (tail->next != NULL){tailpre = tail;tail = tail->next;}free(tail);tailpre->next = NULL;}
}
也有一种难看懂的写法:自行选择~
//尾删函数
void SLTPopBack(SLTNode** pphead)
{//空assert(*pphead);//一个节点if ((*pphead)->next == NULL){free(*pphead);*pphead = NULL;}//一个节点以上else{SLTNode* tail = *pphead;while (tail->next->next){tail = tail->next;}free(tail->next);tail->next = NULL;}}
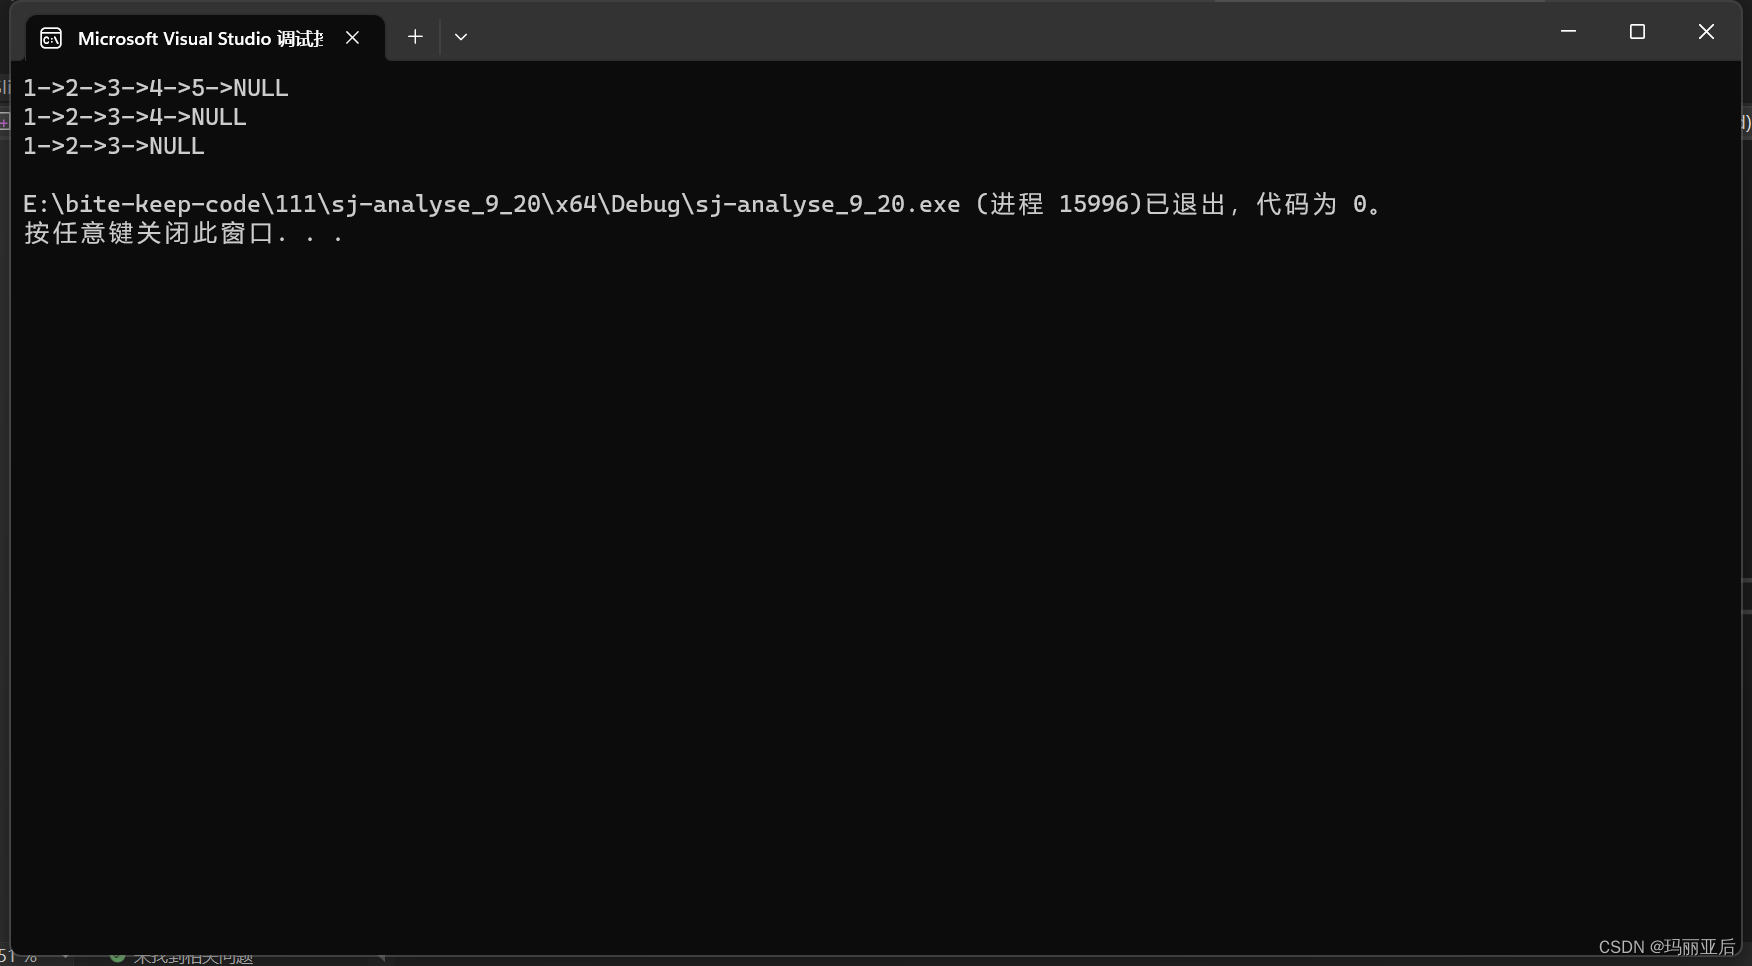
老规矩测试一下:
void TestSList3()
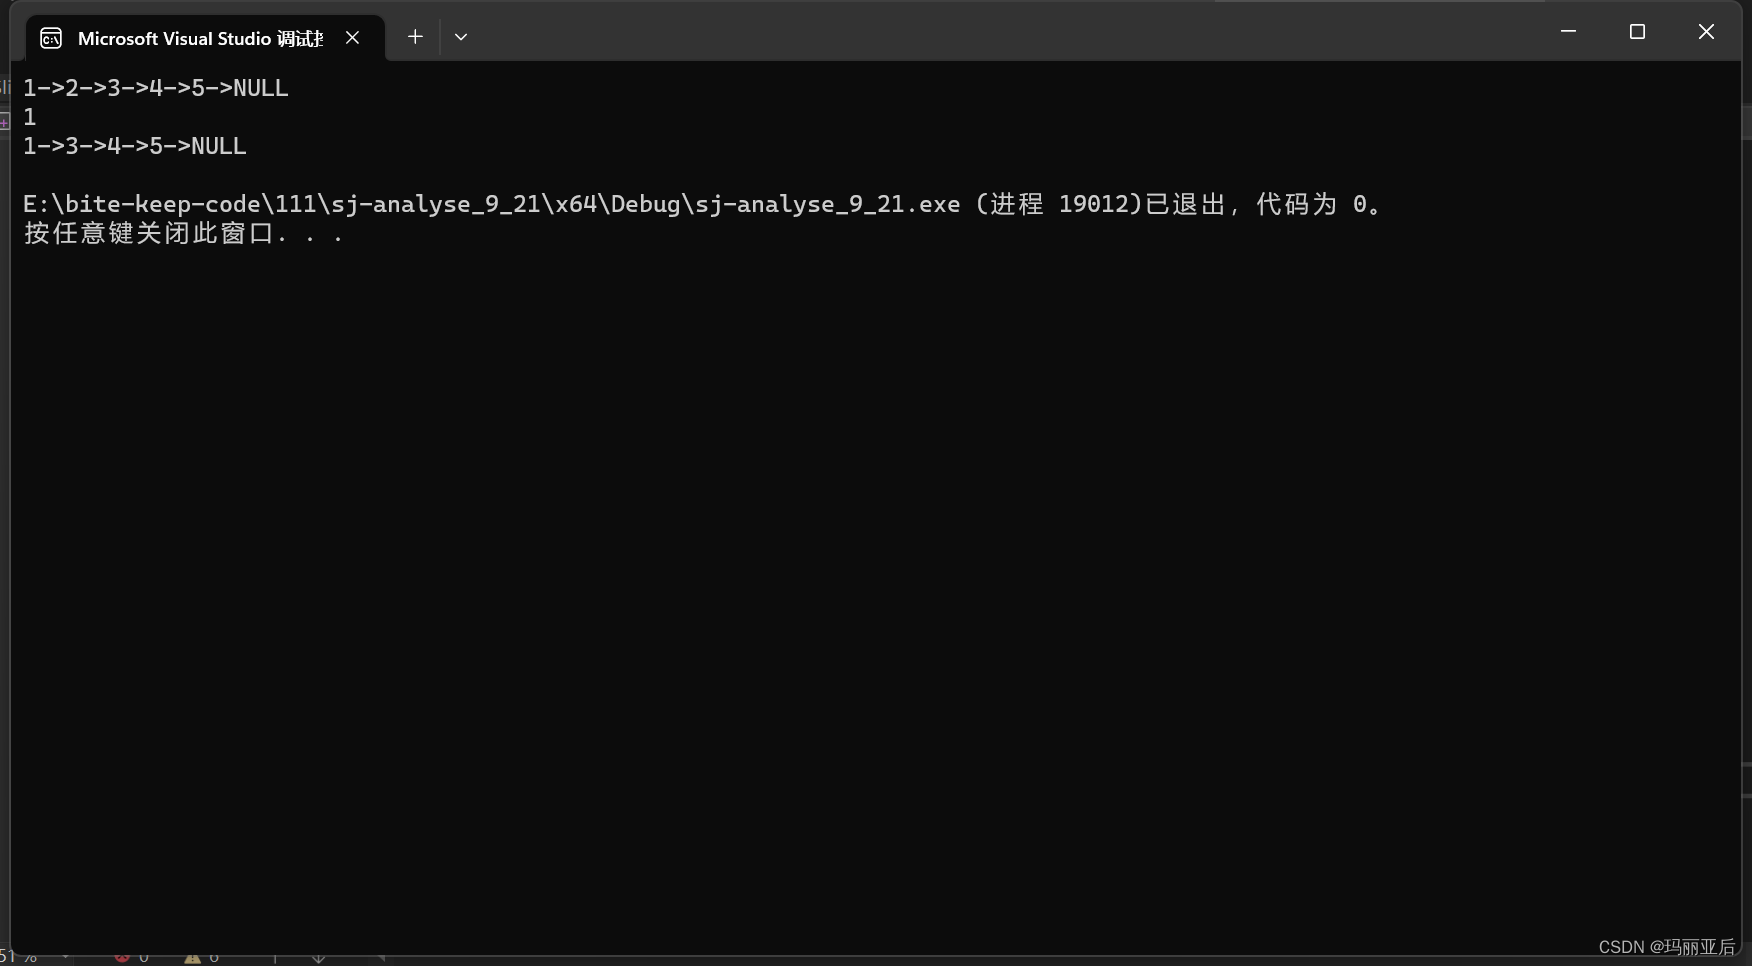
{SLTNode* plist = NULL;SLTPushBack(&plist, 1);SLTPushBack(&plist, 2);SLTPushBack(&plist, 3);SLTPushBack(&plist, 4);SLTPushBack(&plist, 5);PrintSList(plist);SLTPopBack(&plist);PrintSList(plist);SLTPopBack(&plist);PrintSList(plist);}
1.8 头删函数
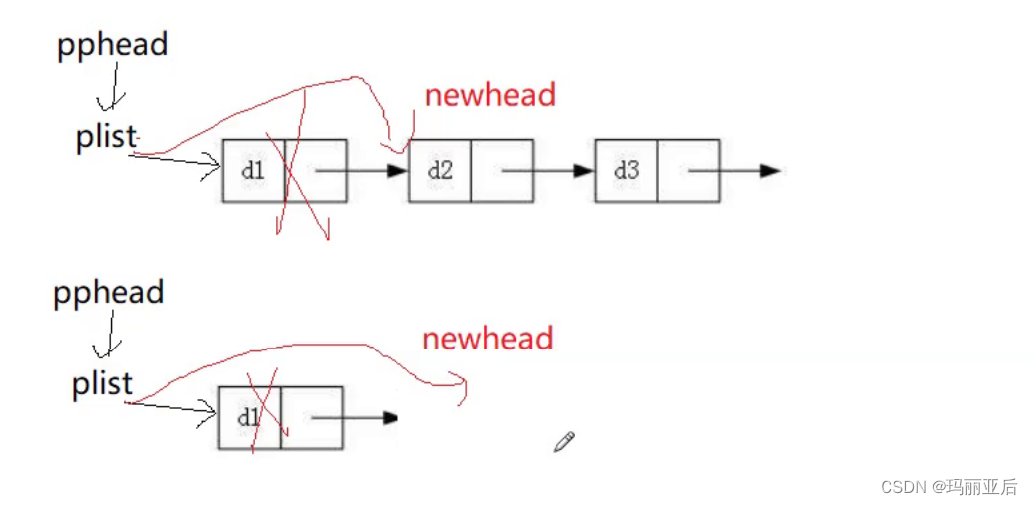
基本逻辑就是保存好下一节点newhead,然后再free掉首个节点,最后让plist指向newhead.
//头删函数
void SLTPopFront(SLTNode** pphead)
{assert(pphead);//空assert(*pphead);//非空SLTNode* newhead = (*pphead)->next;free(*pphead);*pphead = newhead;}
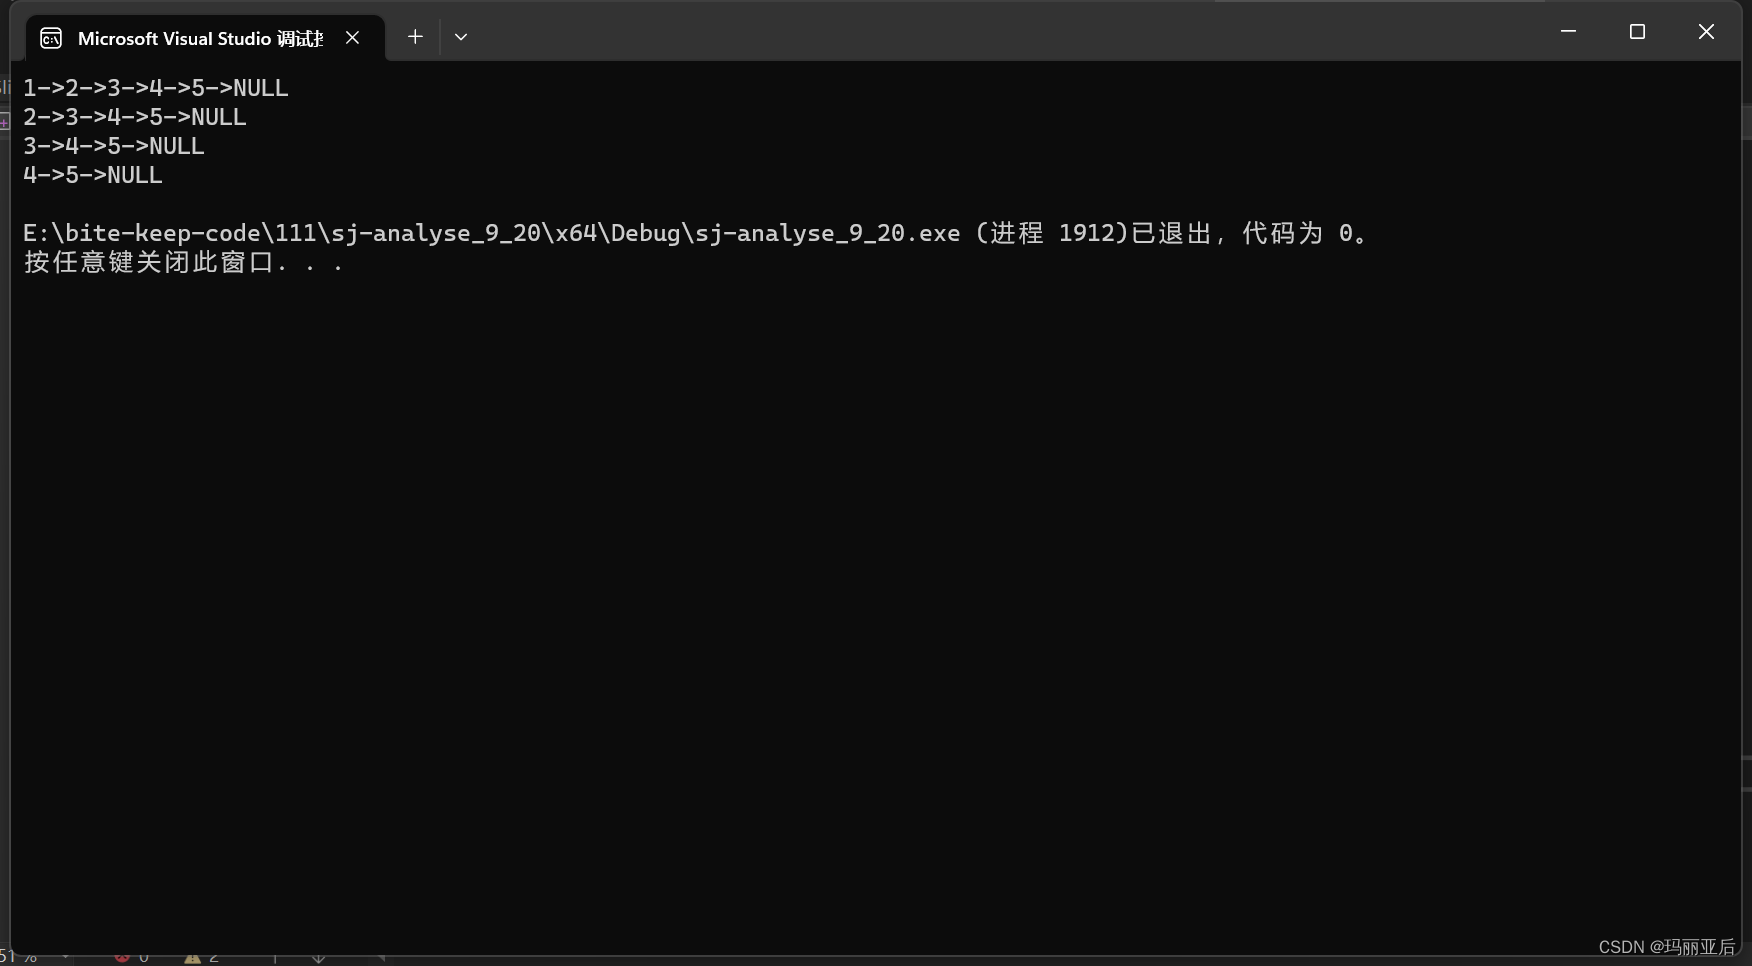
测试一下:
void TestSList4()
{SLTNode* plist = NULL;SLTPushBack(&plist, 1);SLTPushBack(&plist, 2);SLTPushBack(&plist, 3);SLTPushBack(&plist, 4);SLTPushBack(&plist, 5);PrintSList(plist);SLTPopFront(&plist);PrintSList(plist);SLTPopFront(&plist);PrintSList(plist);SLTPopFront(&plist);PrintSList(plist);}
1.9 查找函数
//查找函数
SLTNode* SLTFind(SLTNode* phead, SLTDataType x)
{SLTNode* cur = phead;while (cur){if (cur->data == x){return cur;}cur = cur->next;}return NULL;
}
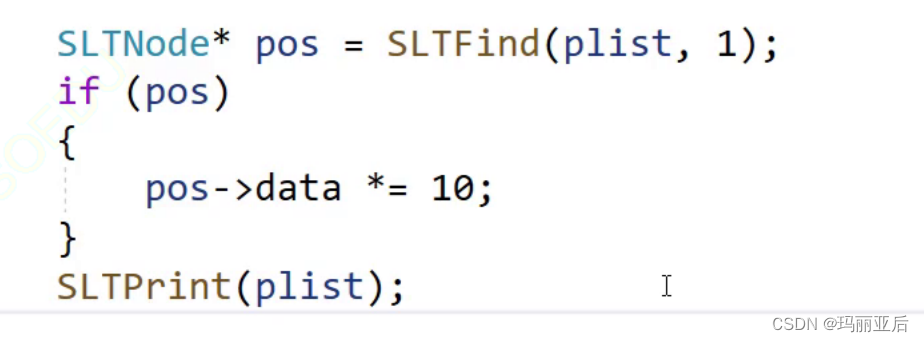
查找函数也可以起到修改数值的作用
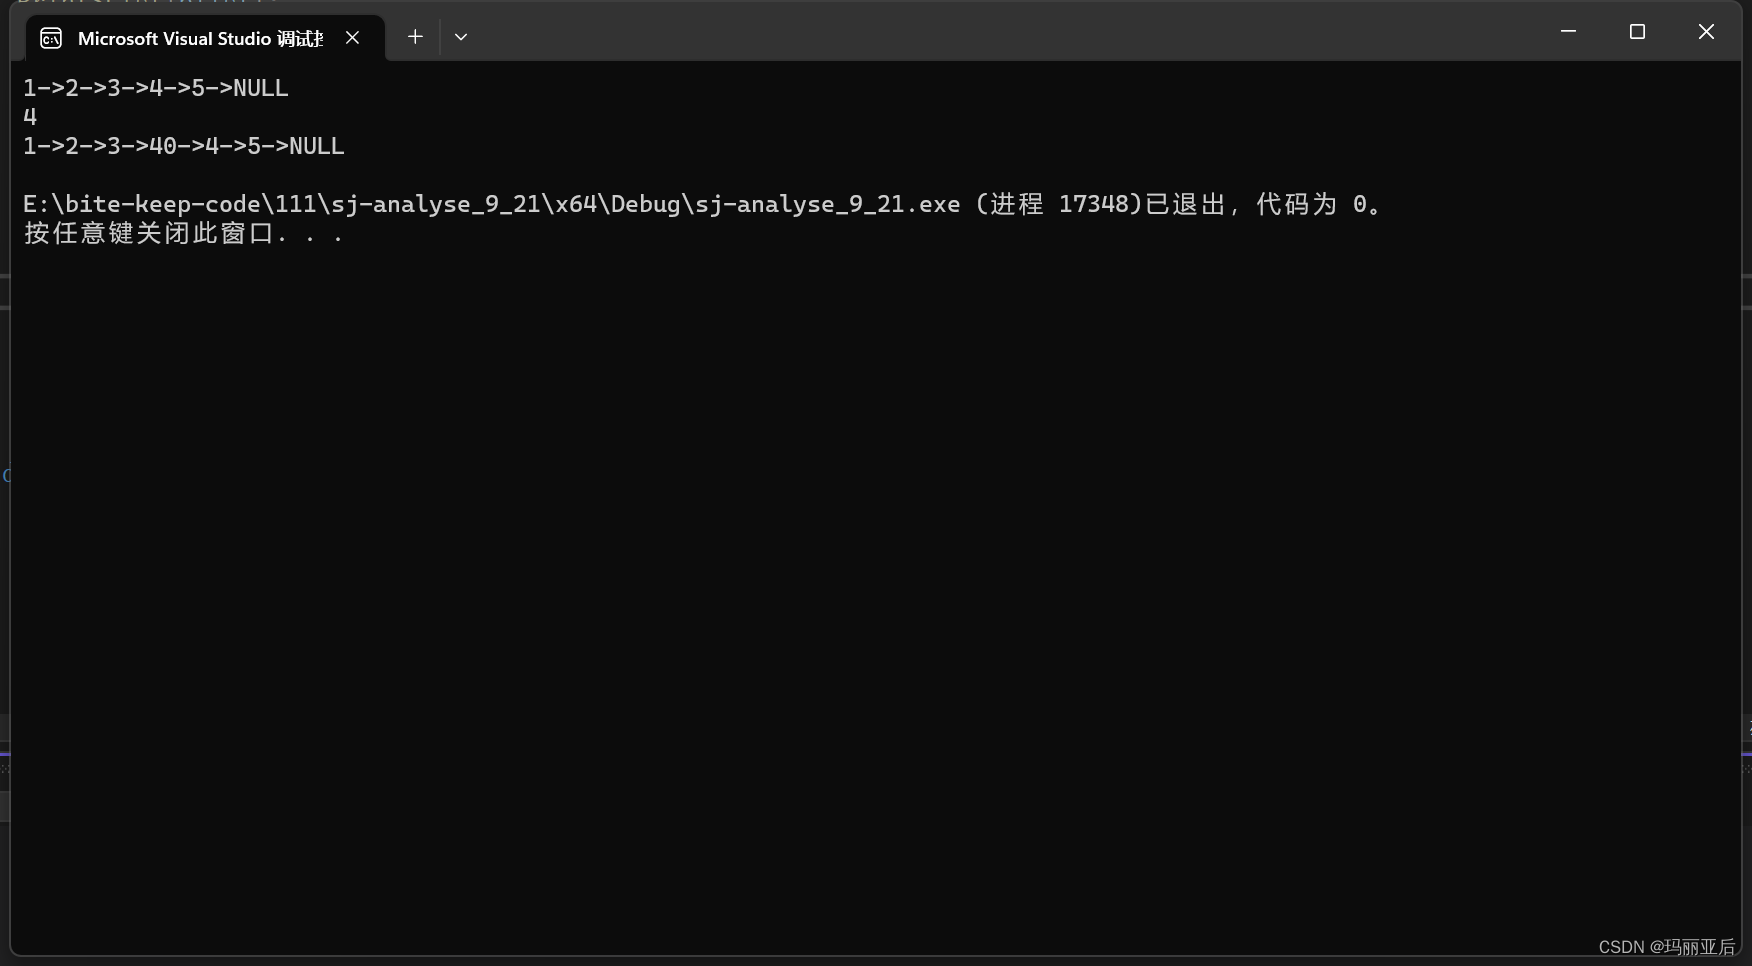
1.10 在pos之前插入x函数
首先暴力断言,避免链表为空的情况。其次,当我们想要在链表的首个节点之前插入时,可以用到头插函数的复用。那么这时候需要往头插函数里面传递什么呢?由图可知我们最终头插要修改的是plist的指向,所以需要把plist的地址给传过去,而pphead恰好指向plist的地址,所以这里可以传pphead。
至于在其他位置插入我们只能找到pos之前的指针了~
我们这里只需要注意让删除节点的前后节点相连就行了。其实这里和指定插入是一样的操作都是通过prev和pos来进行连接。后面就随便改就行了,这里反而不用在意顺序。
//在pos之前插入x
void SLTInsert(SLTNode** pphead, SLTNode* pos, SLTDataType x)
{assert(pphead);assert(pos);if (pos == *pphead){SLTPushFront(pphead, x);}else{SLTNode* prev = *pphead;while (prev->next != pos){prev = prev->next;}SLTNode* newnode = BuySlistNode(x);prev->next = newnode;newnode->next = pos;}}
测试一下:
void TestSList5()
{SLTNode* plist = NULL;SLTPushBack(&plist, 1);SLTPushBack(&plist, 2);SLTPushBack(&plist, 3);SLTPushBack(&plist, 4);SLTPushBack(&plist, 5);PrintSList(plist);int x = 0;scanf("%d", &x);SLTNode* pos = SLTFind(plist, x);if (pos){SLTInsert(&plist, pos, 40);}PrintSList(plist);}
1.12 在pos之后插入x函数
由于该函数不可能实现头插(不可能改变plist),所以就不用传递头指针给该函数接收了。

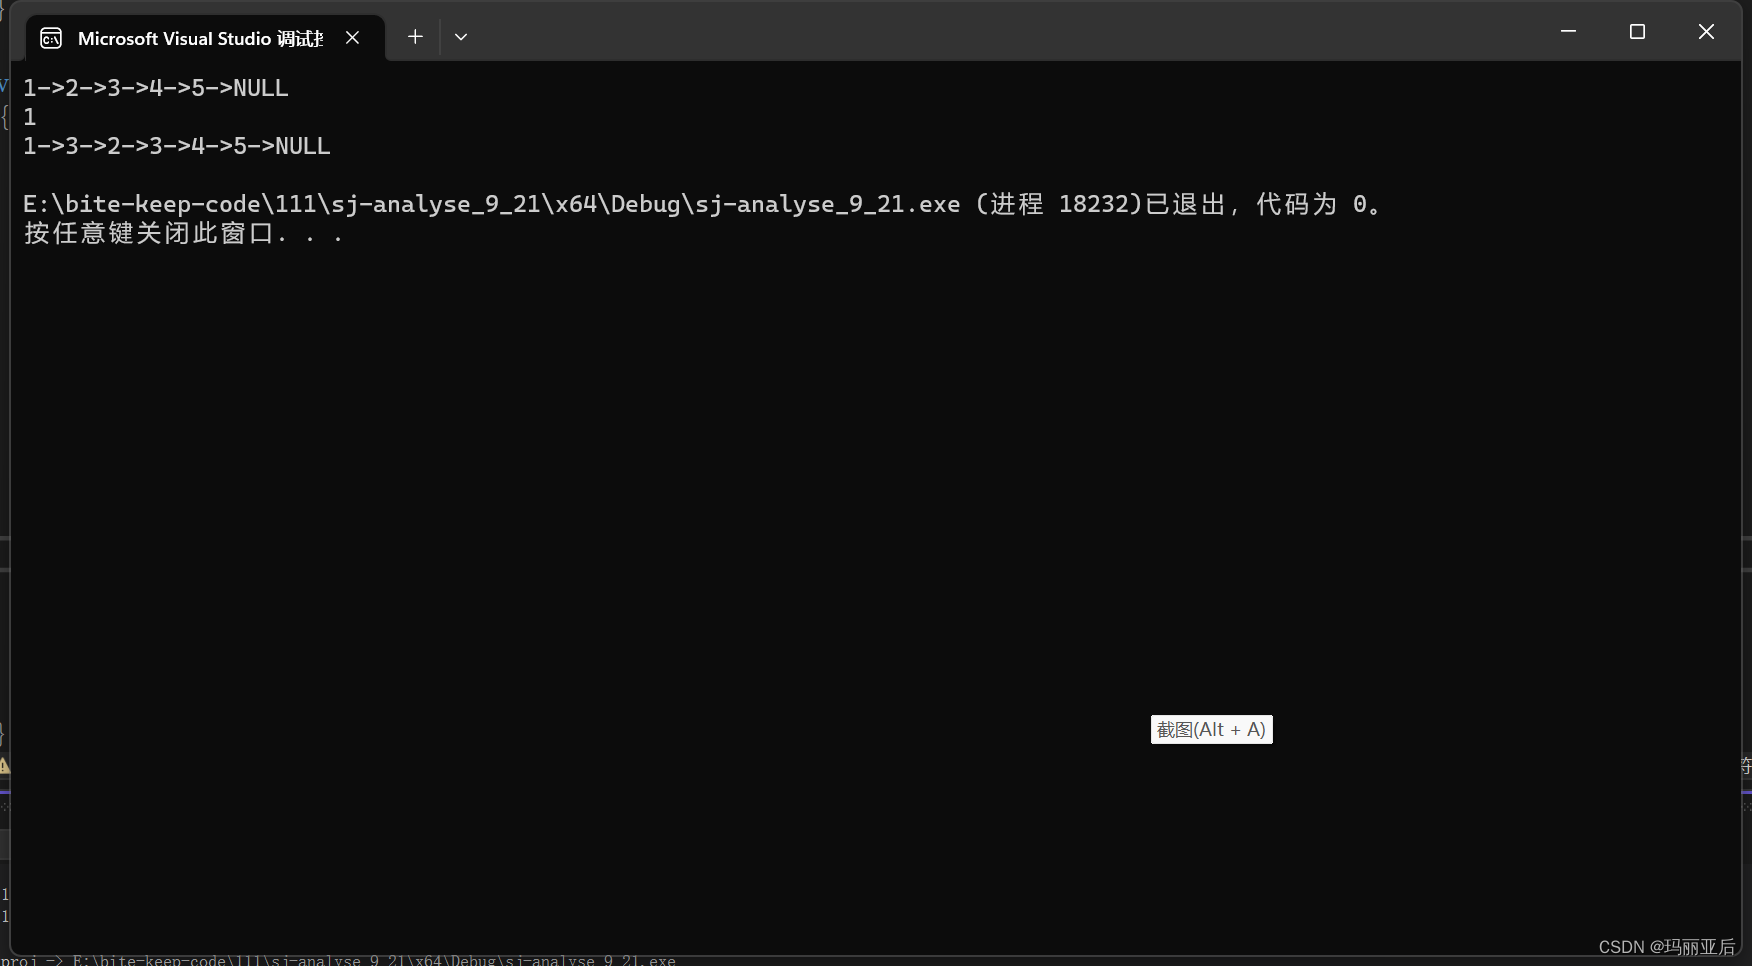
该函数只需要注意一点,不要先在pos—>next存入newnode的地址,这样会丢失原本d3的地址,导致newnode—>next指向自己造成死循环。
//在pos之后插入x
void SLTInsertAfter(SLTNode* pos, SLTDataType x)
{assert(pos);SLTNode* newnode = BuySlistNode(x);newnode->next = pos->next;pos->next = newnode;}
测试一下:
void TestSList6()
{SLTNode* plist = NULL;SLTPushBack(&plist, 1);SLTPushBack(&plist, 2);SLTPushBack(&plist, 3);SLTPushBack(&plist, 4);SLTPushBack(&plist, 5);PrintSList(plist);int x = 0;scanf("%d", &x);SLTNode* pos = SLTFind(plist, x);if (pos){SLTInsertAfter(pos, 3);}PrintSList(plist);}
1.13 删除pos位置函数
该函数有两点需要注意:
- 需要记录pos之前的指针
- 头删需要单独处理,直接复用头删函数(这时候就需要接收plist来改变它的指向了)

//删除pos位置
void SLTErase(SLTNode** pphead, SLTNode* pos)
{assert(pphead);assert(pos);if (pos == *pphead){SLTPopFront(pphead);}else{SLTNode* prev = *pphead;{while (prev->next != pos){prev = prev->next;}prev->next = pos->next;free(pos);}}
}
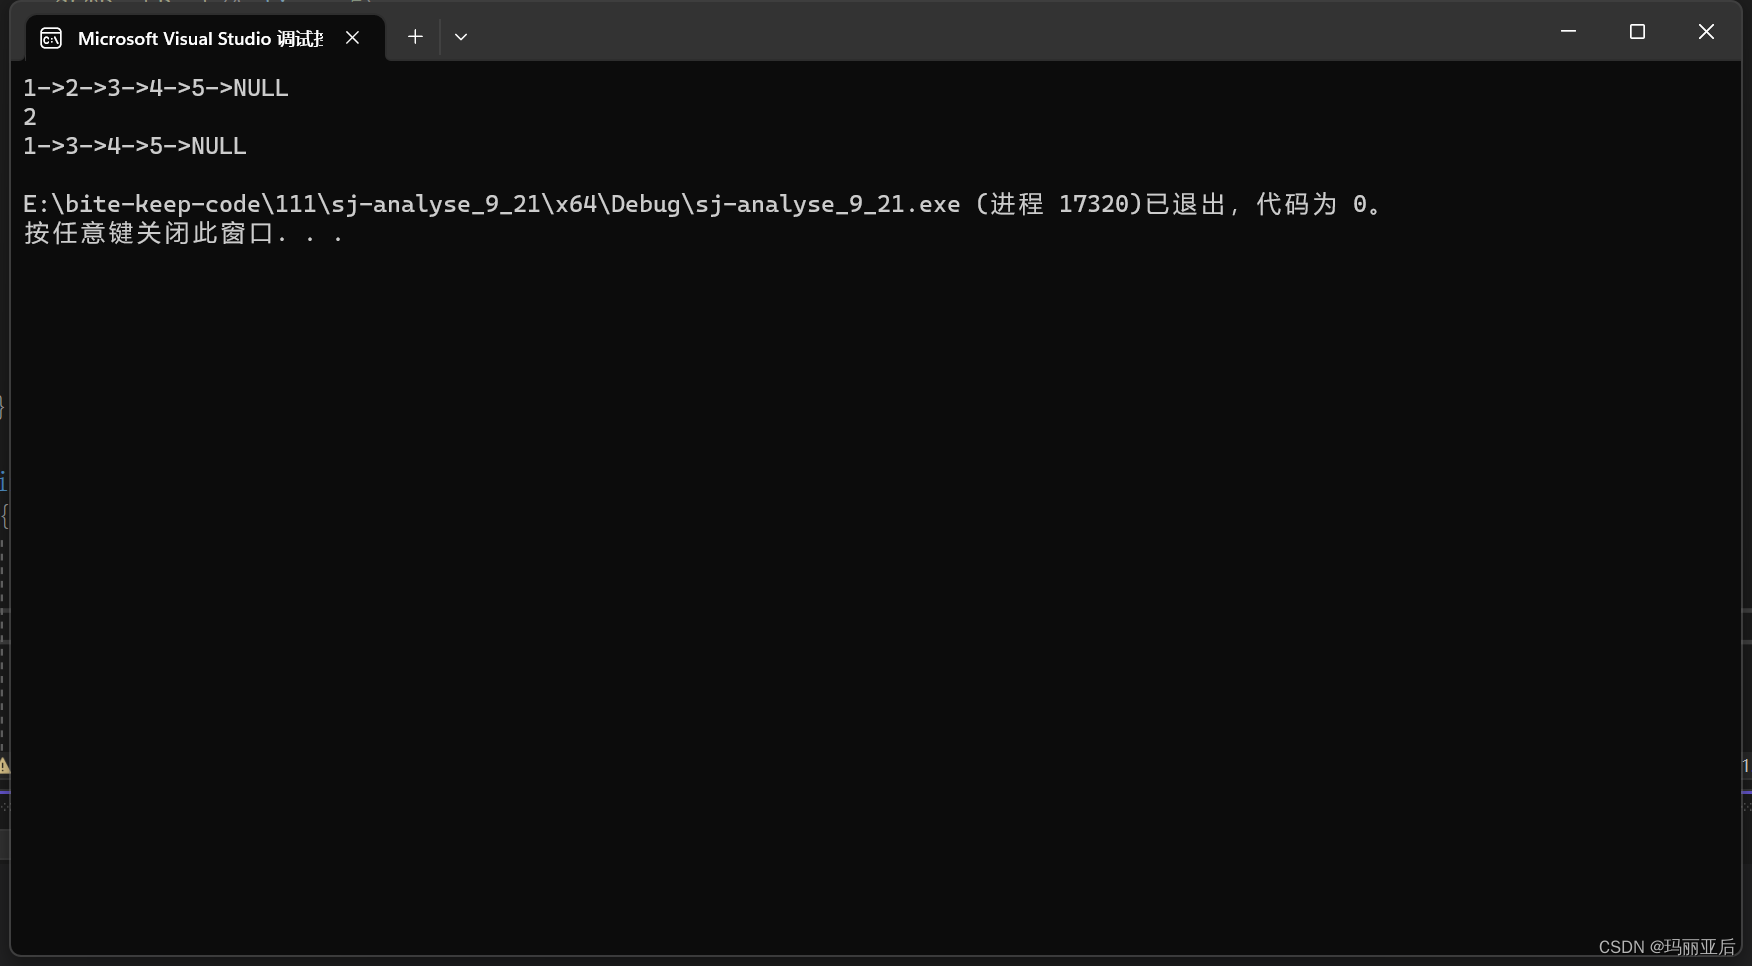
测试一下:
void TestSList7()
{SLTNode* plist = NULL;SLTPushBack(&plist, 1);SLTPushBack(&plist, 2);SLTPushBack(&plist, 3);SLTPushBack(&plist, 4);SLTPushBack(&plist, 5);PrintSList(plist);int x = 0;scanf("%d", &x);SLTNode* pos = SLTFind(plist, x);if (pos){SLTErase(&plist,pos);pos = NULL;//用完pos记得置空,不然它还是会一直指向原位置}PrintSList(plist);}
1.14 删除pos的后一个位置函数

//删除pos的后一个位置
void SLTInsertErase(SLTNode* pos)
{assert(pos);assert(pos->next);//如果pos指向尾节点,那是没有意义的SLTNode* posNext = pos->next;pos->next = posNext->next;free(posNext);
}
测试一下:
void TestSList8()
{SLTNode* plist = NULL;SLTPushBack(&plist, 1);SLTPushBack(&plist, 2);SLTPushBack(&plist, 3);SLTPushBack(&plist, 4);SLTPushBack(&plist, 5);PrintSList(plist);int x = 0;scanf("%d", &x);SLTNode* pos = SLTFind(plist, x);if (pos){SLTEraseAfter(pos);pos = NULL;}PrintSList(plist);}
1.15 小测试
如图所示,在不给头指针的情况下我们是没办法找到pos前面的指针的,这样起不到链接pos后面节点的作用。
我们可以把d2的值给到前面的d1,然后让pos->next指向d2地址后面节点的地址,再free掉d2就好了,不过这样有一个缺陷,就是当pos指向尾节点时,后面没有值可以跟它换。
三.全部代码
#pragma once
//Slist.h
#include <stdio.h>
#include <stdlib.h>
#include <assert.h>typedef int SLTDataType;
typedef struct SListNode
{SLTDataType data;struct SListNode* next;
}SLTNode;//打印函数
void PrintSList(SLTNode* phead);//空间函数
SLTNode* BuySlistNode(SLTDataType x);//尾插函数
void  SLTPushBack(SLTNode** pphead, SLTDataType x);//头插函数
void  SLTPushFront(SLTNode** pphead, SLTDataType x);//尾删函数
void  SLTPopBack(SLTNode** pphead);//头删函数
void  SLTPopFront(SLTNode** pphead);//查找函数
SLTNode* SLTFind(SLTNode* phead, SLTDataType x);//在pos之前插入x
void SLTInsert(SLTNode** pphead, SLTNode* pos, SLTDataType x);//在pos之后插入x
void SLTInsertAfter(SLTNode* pos, SLTDataType x);//删除pos位置
void SLTErase(SLTNode** pphead, SLTNode* pos);//删除pos的后一个位置
void SLTEraseAfter(SLTNode* pos);
———————————————————————————————————————————
#define _CRT_SECURE_NO_WARNINGS 1
//Slist.c
#include "Slist.h"//打印函数
void PrintSList(SLTNode* phead)
{SLTNode* cur = phead;while (cur != NULL){printf("%d->", cur->data);cur = cur->next;}printf("NULL\n");
}//空间函数
SLTNode* BuySlistNode(SLTDataType x)
{SLTNode* newnode = (SLTNode*)malloc(sizeof(SLTNode));if (newnode == NULL){perror("malloc fail");exit(-1);}newnode->data = x;newnode->next = NULL;return newnode;}尾插函数
//SLTNode* SLTPushBack(SLTNode* phead, SLTDataType x)
//{
//	SLTNode* newnode = BuySlistNode(x);
//	SLTNode* tail = phead;
//	while (tail->next != NULL)
//	{
//		tail = tail->next;
//	}
//	tail->next = newnode;
//}//修改后的尾插函数
void SLTPushBack(SLTNode** pphead, SLTDataType x)
{SLTNode* newnode = BuySlistNode(x);if (*pphead == NULL){*pphead = newnode;}else{SLTNode* tail = *pphead;while (tail->next != NULL){tail = tail->next;}tail->next = newnode;}
}//头插函数
void SLTPushFront(SLTNode** pphead, SLTDataType x)
{assert(pphead);SLTNode* newnode = BuySlistNode(x);newnode->next = *pphead;*pphead = newnode;
}//尾删函数
void SLTPopBack(SLTNode** pphead)
{assert(pphead);//这里断言的目的是因为pphead指向的是plist的地址,而plist永远有所指向//要么指向NULL,要么指向链表,所以pphead是不能为空的。//空assert(*pphead);//一个节点if ((*pphead)->next == NULL){free(*pphead);*pphead = NULL;}//一个节点以上else{SLTNode* tailpre = NULL;SLTNode* tail = *pphead;while (tail->next != NULL){tailpre = tail;tail = tail->next;}free(tail);tailpre->next = NULL;}
}尾删函数
//SLTNode* SLTPopBack(SLTNode** pphead)
//{
//	//空
//	assert(*pphead);
//	//一个节点
//	if ((*pphead)->next != NULL)
//	{
//		free(*pphead);
//		*pphead = NULL;
//	}
//	//一个节点以上
//	else
//	{
//		SLTNode* tail = *pphead;
//		while (tail->next->next)
//		{
//
//			tail = tail->next;
//		}
//		free(tail->next);
//		tail->next = NULL;
//	}
//	//头删函数
void  SLTPopFront(SLTNode** pphead)
{assert(pphead);//空assert(*pphead);//非空SLTNode* newhead = (*pphead)->next;free(*pphead);*pphead = newhead;}//查找函数
SLTNode* SLTFind(SLTNode* phead, SLTDataType x)
{SLTNode* cur = phead;while (cur){if (cur->data == x){return cur;}cur = cur->next;}return NULL;
}//在pos之前插入x
void SLTInsert(SLTNode** pphead, SLTNode* pos, SLTDataType x)
{assert(pphead);assert(pos);if (pos == *pphead){SLTPushFront(pphead, x);}else{SLTNode* prev = *pphead;while (prev->next != pos){prev = prev->next;}SLTNode* newnode = BuySlistNode(x);prev->next = newnode;newnode->next = pos;}}在pos之后删除x
//void SLTInsertAfter(SLTNode** pphead, SLTNode* pos, SLTDataType x)
//{
//	assert(pos);
//	SLTNode* after = pos->next;
//	while (after->data != x)
//	{
//		after = after->next;
//	}
//	pos->next = after->next;
//	free(after);
//	pos->next = after;
//
//}//在pos之后插入x
void SLTInsertAfter(SLTNode* pos, SLTDataType x)
{assert(pos);SLTNode* newnode = BuySlistNode(x);newnode->next = pos->next;pos->next = newnode;}//删除pos位置
void SLTErase(SLTNode** pphead, SLTNode* pos)
{assert(pphead);assert(pos);if (pos == *pphead){SLTPopFront(pphead);}else{SLTNode* prev = *pphead;{while (prev->next != pos){prev = prev->next;}prev->next = pos->next;free(pos);}}
}//删除pos的后一个位置
void SLTEraseAfter(SLTNode* pos)
{assert(pos);assert(pos->next);//如果pos指向尾节点,那是没有意义的SLTNode* posNext = pos->next;pos->next = posNext->next;free(posNext);
}
——————————————————————————————————————————
#define _CRT_SECURE_NO_WARNINGS 1
//Test.c
#include "Slist.h"
#include <stdio.h>
#include <stdlib.h>void TestSList1()
{int n = 0;printf("请输入链表的长度:");scanf("%d", &n);printf("\n请依次输入每个节点的值:\n");SLTNode* plist = NULL;for (int i = 0; i < n; i++){int val = 0;scanf("%d", &val);SLTNode* newnode = BuySlistNode(val);newnode->next = plist;plist = newnode;PrintSList(plist);}SLTPushBack(plist, 1000);PrintSList(plist);}//void Swap1(int* p1, int* p2)
//{
//	int tmp = *p1;
//	*p1 = *p2;
//	*p2 = tmp;
//}
//
//void Swap2(int** p1, int** p2)
//{
//	int* tmp = **p1;
//	**p1 = **p2;
//	**p2 = tmp;
//}void TestSList2()
{SLTNode* plist = NULL;SLTPushBack(&plist, 1);SLTPushBack(&plist, 2);SLTPushBack(&plist, 3);SLTPushBack(&plist, 4);SLTPushBack(&plist, 5);PrintSList(plist);SLTPushFront(&plist, 10);SLTPushFront(&plist, 20);SLTPushFront(&plist, 30);SLTPushFront(&plist, 40);PrintSList(plist);
}
void TestSList3()
{SLTNode* plist = NULL;SLTPushBack(&plist, 1);SLTPushBack(&plist, 2);SLTPushBack(&plist, 3);SLTPushBack(&plist, 4);SLTPushBack(&plist, 5);PrintSList(plist);SLTPopBack(&plist);PrintSList(plist);SLTPopBack(&plist);PrintSList(plist);}
void TestSList4()
{SLTNode* plist = NULL;SLTPushBack(&plist, 1);SLTPushBack(&plist, 2);SLTPushBack(&plist, 3);SLTPushBack(&plist, 4);SLTPushBack(&plist, 5);PrintSList(plist);SLTPopFront(&plist);PrintSList(plist);SLTPopFront(&plist);PrintSList(plist);SLTPopFront(&plist);PrintSList(plist);}void TestSList5()
{SLTNode* plist = NULL;SLTPushBack(&plist, 1);SLTPushBack(&plist, 2);SLTPushBack(&plist, 3);SLTPushBack(&plist, 4);SLTPushBack(&plist, 5);PrintSList(plist);int x = 0;scanf("%d", &x);SLTNode* pos = SLTFind(plist, x);if (pos){SLTInsert(&plist, pos, 40);}PrintSList(plist);}void TestSList6()
{SLTNode* plist = NULL;SLTPushBack(&plist, 1);SLTPushBack(&plist, 2);SLTPushBack(&plist, 3);SLTPushBack(&plist, 4);SLTPushBack(&plist, 5);PrintSList(plist);int x = 0;scanf("%d", &x);SLTNode* pos = SLTFind(plist, x);if (pos){SLTInsertAfter(pos, 3);}PrintSList(plist);}
void TestSList7()
{SLTNode* plist = NULL;SLTPushBack(&plist, 1);SLTPushBack(&plist, 2);SLTPushBack(&plist, 3);SLTPushBack(&plist, 4);SLTPushBack(&plist, 5);PrintSList(plist);int x = 0;scanf("%d", &x);SLTNode* pos = SLTFind(plist, x);if (pos){SLTErase(&plist,pos);pos = NULL;}PrintSList(plist);}void TestSList8()
{SLTNode* plist = NULL;SLTPushBack(&plist, 1);SLTPushBack(&plist, 2);SLTPushBack(&plist, 3);SLTPushBack(&plist, 4);SLTPushBack(&plist, 5);PrintSList(plist);int x = 0;scanf("%d", &x);SLTNode* pos = SLTFind(plist, x);if (pos){SLTEraseAfter(pos);pos = NULL;}PrintSList(plist);}int main()
{//TestSList1();//TestSList2();TestSList8();//int a = 0;//int b = 1;//Swap1(&a, &b);//int* x1 = &a;//int* x2 = &b;//Swap1(x1, x2);return 0;
}
四.结语
四.结语
虽然单链表用起来挺矬的哈哈,但是我们平时的oj题大部分都是用单链表举例子,正是因为有自身缺陷才方便出题嘛~单链表也会对后面的哈希图理解起到辅助效果。最后感谢大家的观看,友友们能够学习到新的知识是额滴荣幸,期待我们下次相见~





![[Go疑难杂症]为什么nil不等于nil](https://img-blog.csdnimg.cn/401aac56465e49d68d21cd0d598c5cdc.png)


