关键点检测 HRNet网络详解笔记
- 0、COCO数据集百度云下载地址
- 1、背景介绍
- 2、HRNet网络结构
- 3、预测结果(heatmap)的可视化
- 3、COCO数据集中标注的17个关键点
- 4、损失的计算
- 5、评价准则
- 6、数据增强
- 7、模型训练
论文名称: Deep High-Resolution Representation Learning for Human Pose Estimation
论文下载地址:https://arxiv.org/abs/1902.09212
0、COCO数据集百度云下载地址
百度云链接: https://pan.baidu.com/s/1U3pPJ5nDluGdCtYi0njejg
提取码: x3qk 复制这段内容后打开百度网盘手机App,操作更方便哦
1、背景介绍
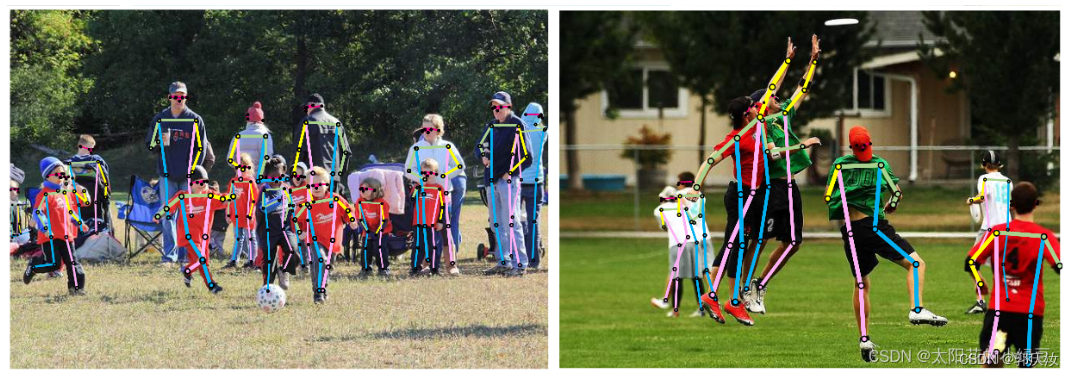
这篇文章是由中国科学技术大学和亚洲微软研究院在2019年共同发表的。这篇文章中的HRNet(High-Resolution Net)是针对2D人体姿态估计(Human Pose Estimation或Keypoint Detection)任务提出的,并且该网络主要是针对单一个体的姿态评估(即输入网络的图像中应该只有一个人体目标)。人体姿态估计在现今的应用场景也比较多,比如说人体行为动作识别,人机交互(比如人作出某种动作可以触发系统执行某些任务),动画制作(比如根据人体的关键点信息生成对应卡通人物的动作)等等。

2、HRNet网络结构


# Stage1
downsample = nn.Sequential(nn.Conv2d(64, 256, kernel_size=1, stride=1, bias=False),nn.BatchNorm2d(256, momentum=BN_MOMENTUM)
)
self.layer1 = nn.Sequential(Bottleneck(64, 64, downsample=downsample),Bottleneck(256, 64),Bottleneck(256, 64),Bottleneck(256, 64)
)
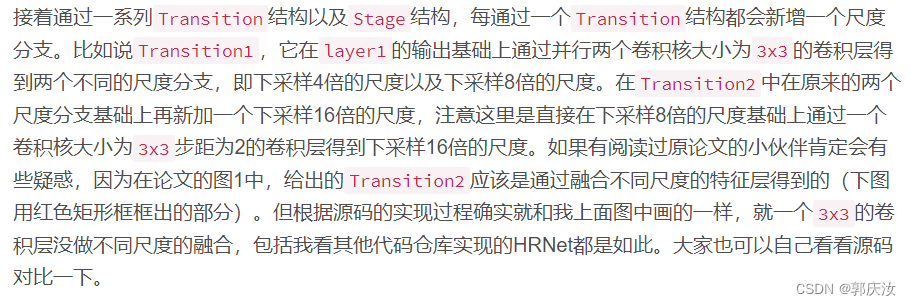


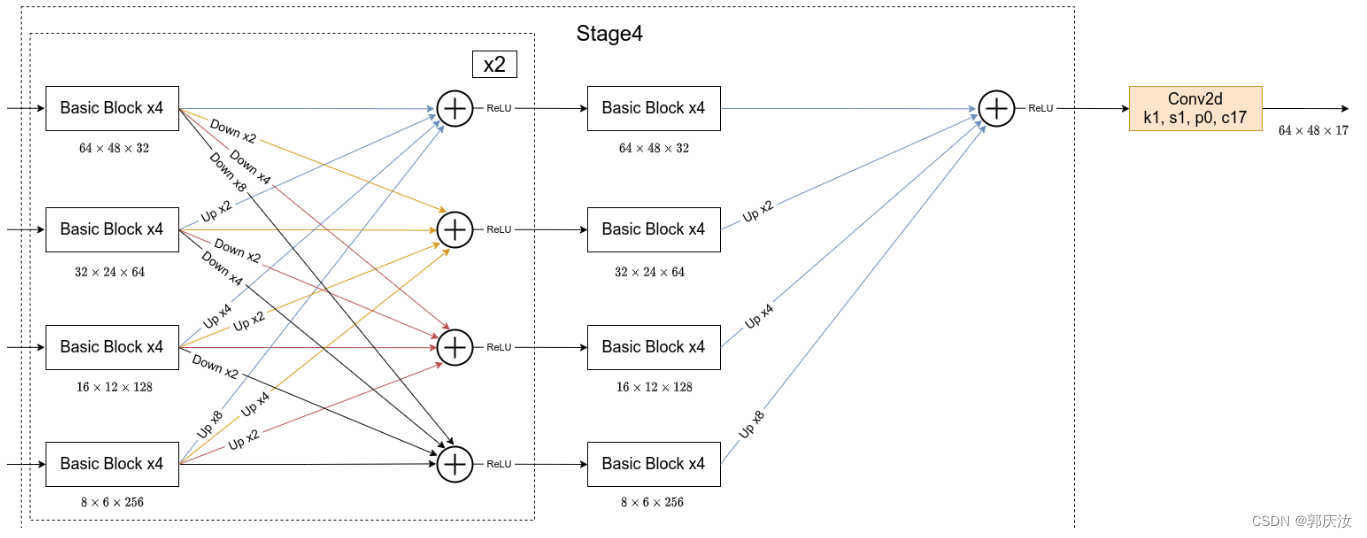
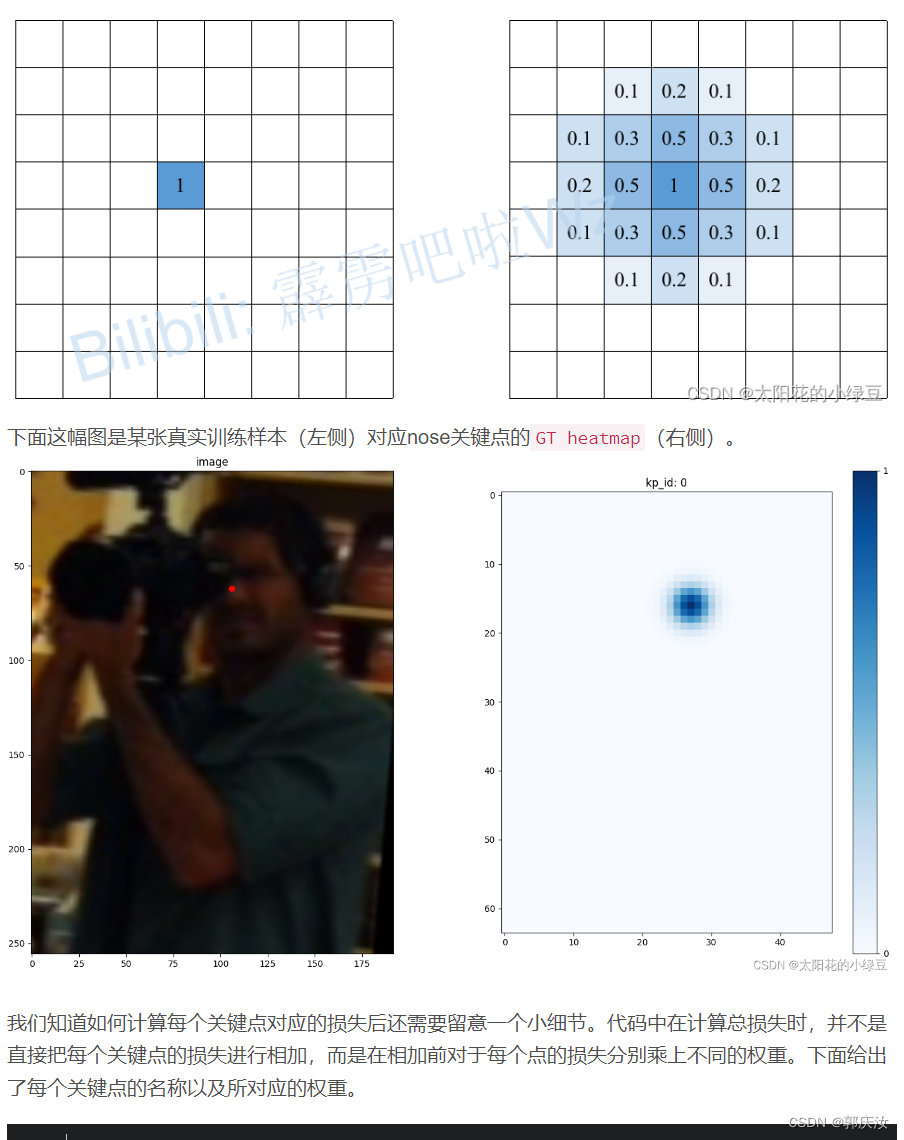
3、预测结果(heatmap)的可视化

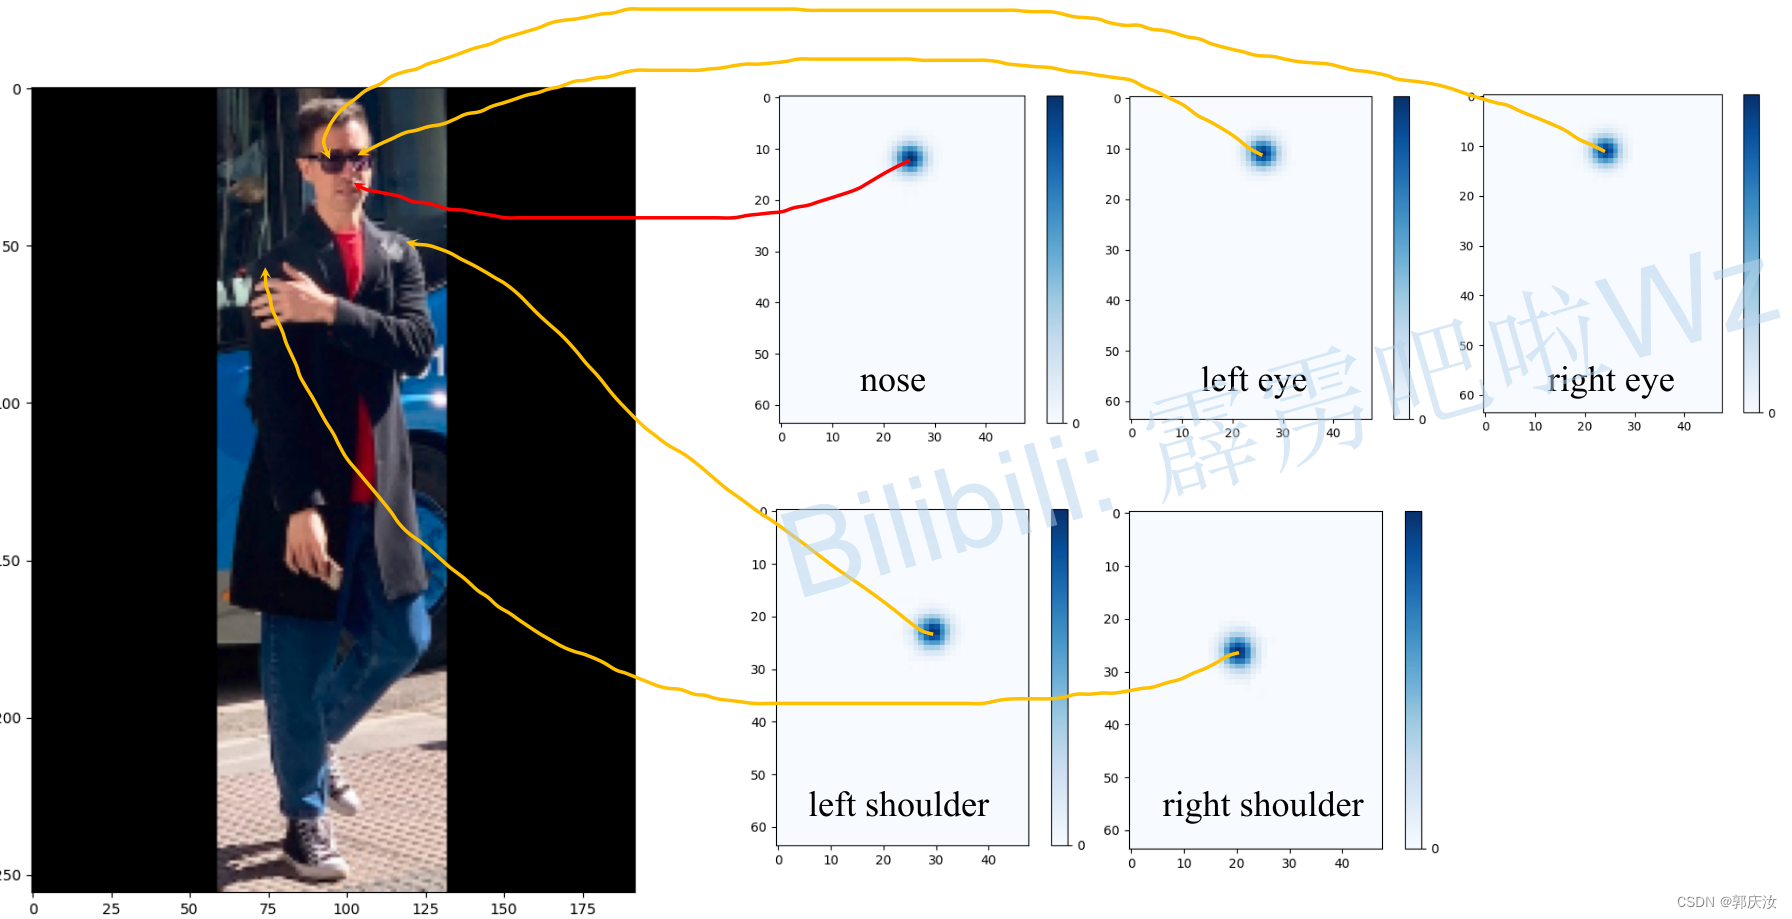
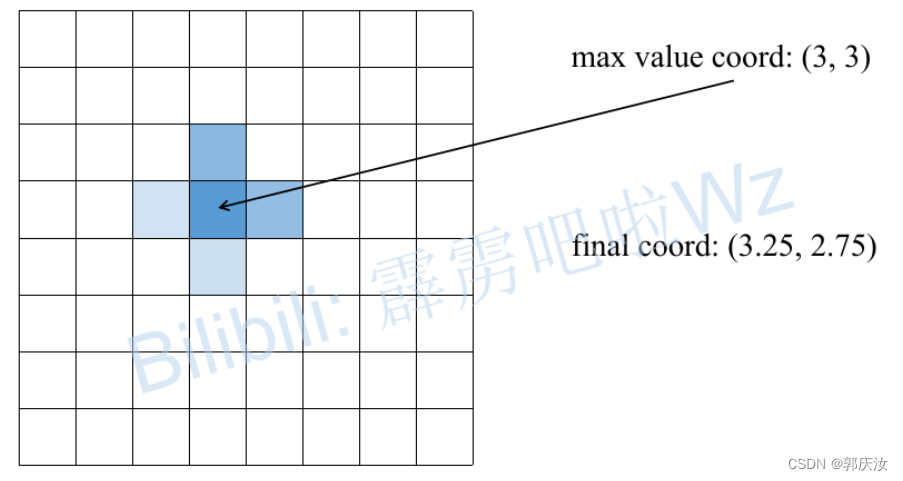
但在原论文中,对于每个关键点并不是直接取score最大的位置(如果为了方便直接取其实也没太大影响)。在原论文的4.1章节中有提到:
光看文字其实还是不太明白,下面是源码中对应的实现,其中coords是每个关键点对应预测score最大的位置:
for n in range(coords.shape[0]):for p in range(coords.shape[1]):hm = batch_heatmaps[n][p]px = int(math.floor(coords[n][p][0] + 0.5))py = int(math.floor(coords[n][p][1] + 0.5))if 1 < px < heatmap_width-1 and 1 < py < heatmap_height-1:diff = np.array([hm[py][px+1] - hm[py][px-1],hm[py+1][px]-hm[py-1][px]])coords[n][p] += np.sign(diff) * .25

3、COCO数据集中标注的17个关键点
"kps": ["nose","left_eye","right_eye","left_ear","right_ear","left_shoulder","right_shoulder","left_elbow","right_elbow","left_wrist","right_wrist","left_hip","right_hip","left_knee","right_knee","left_ankle","right_ankle"]
最后把每个关键点绘制在原图上,就得到如下图所示的结果。

4、损失的计算
在论文第3章Heatmap estimation中作者说训练采用的损失就是均方误差Mean Squared Error
"kps": ["nose","left_eye","right_eye","left_ear","right_ear","left_shoulder","right_shoulder","left_elbow","right_elbow","left_wrist","right_wrist","left_hip","right_hip","left_knee","right_knee","left_ankle","right_ankle"]
"kps_weights": [1.0, 1.0, 1.0, 1.0, 1.0, 1.0, 1.0, 1.2, 1.2, 1.5, 1.5, 1.0, 1.0, 1.2, 1.2, 1.5, 1.5]
5、评价准则


6、数据增强

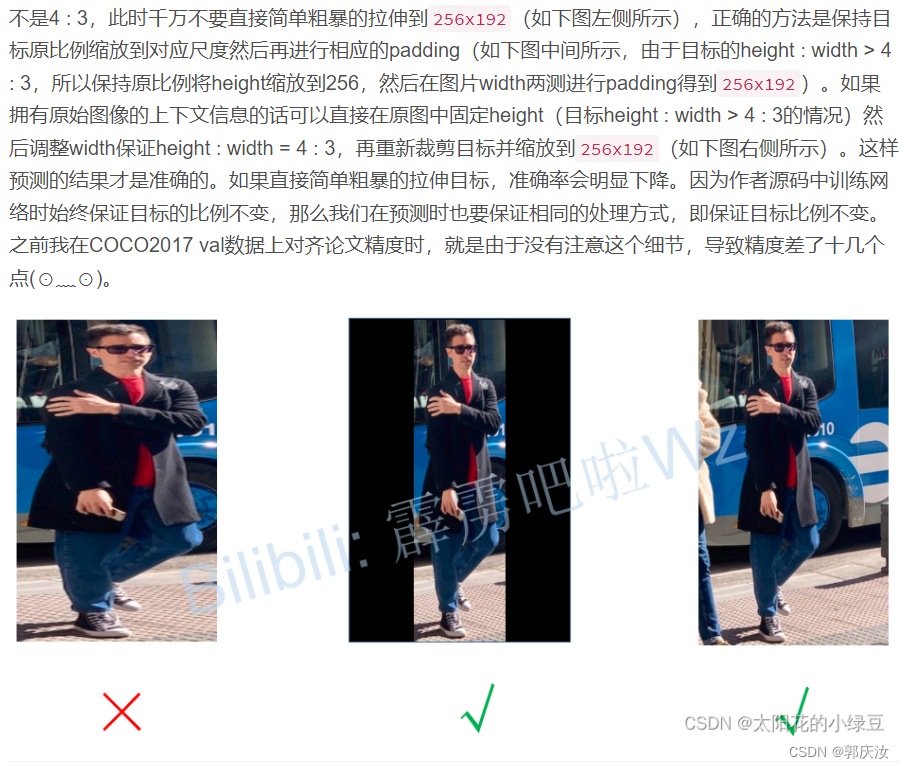
注意输入图片比例
7、模型训练
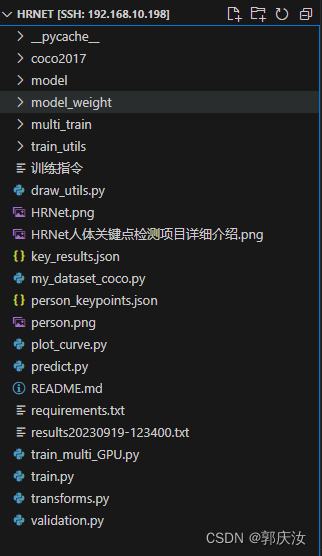
多GPU训练指令:
CUDA_VISIBLE_DEVICES=0,1 python -m torch.distributed.launch --nproc_per_node=2 --use_env train_multi_GPU.py

