在本博客中,你将学习创建一个 LangChain 应用程序,以使用 ChatGPT API 和 Huggingface 语言模型与多个 PDF 文件聊天。
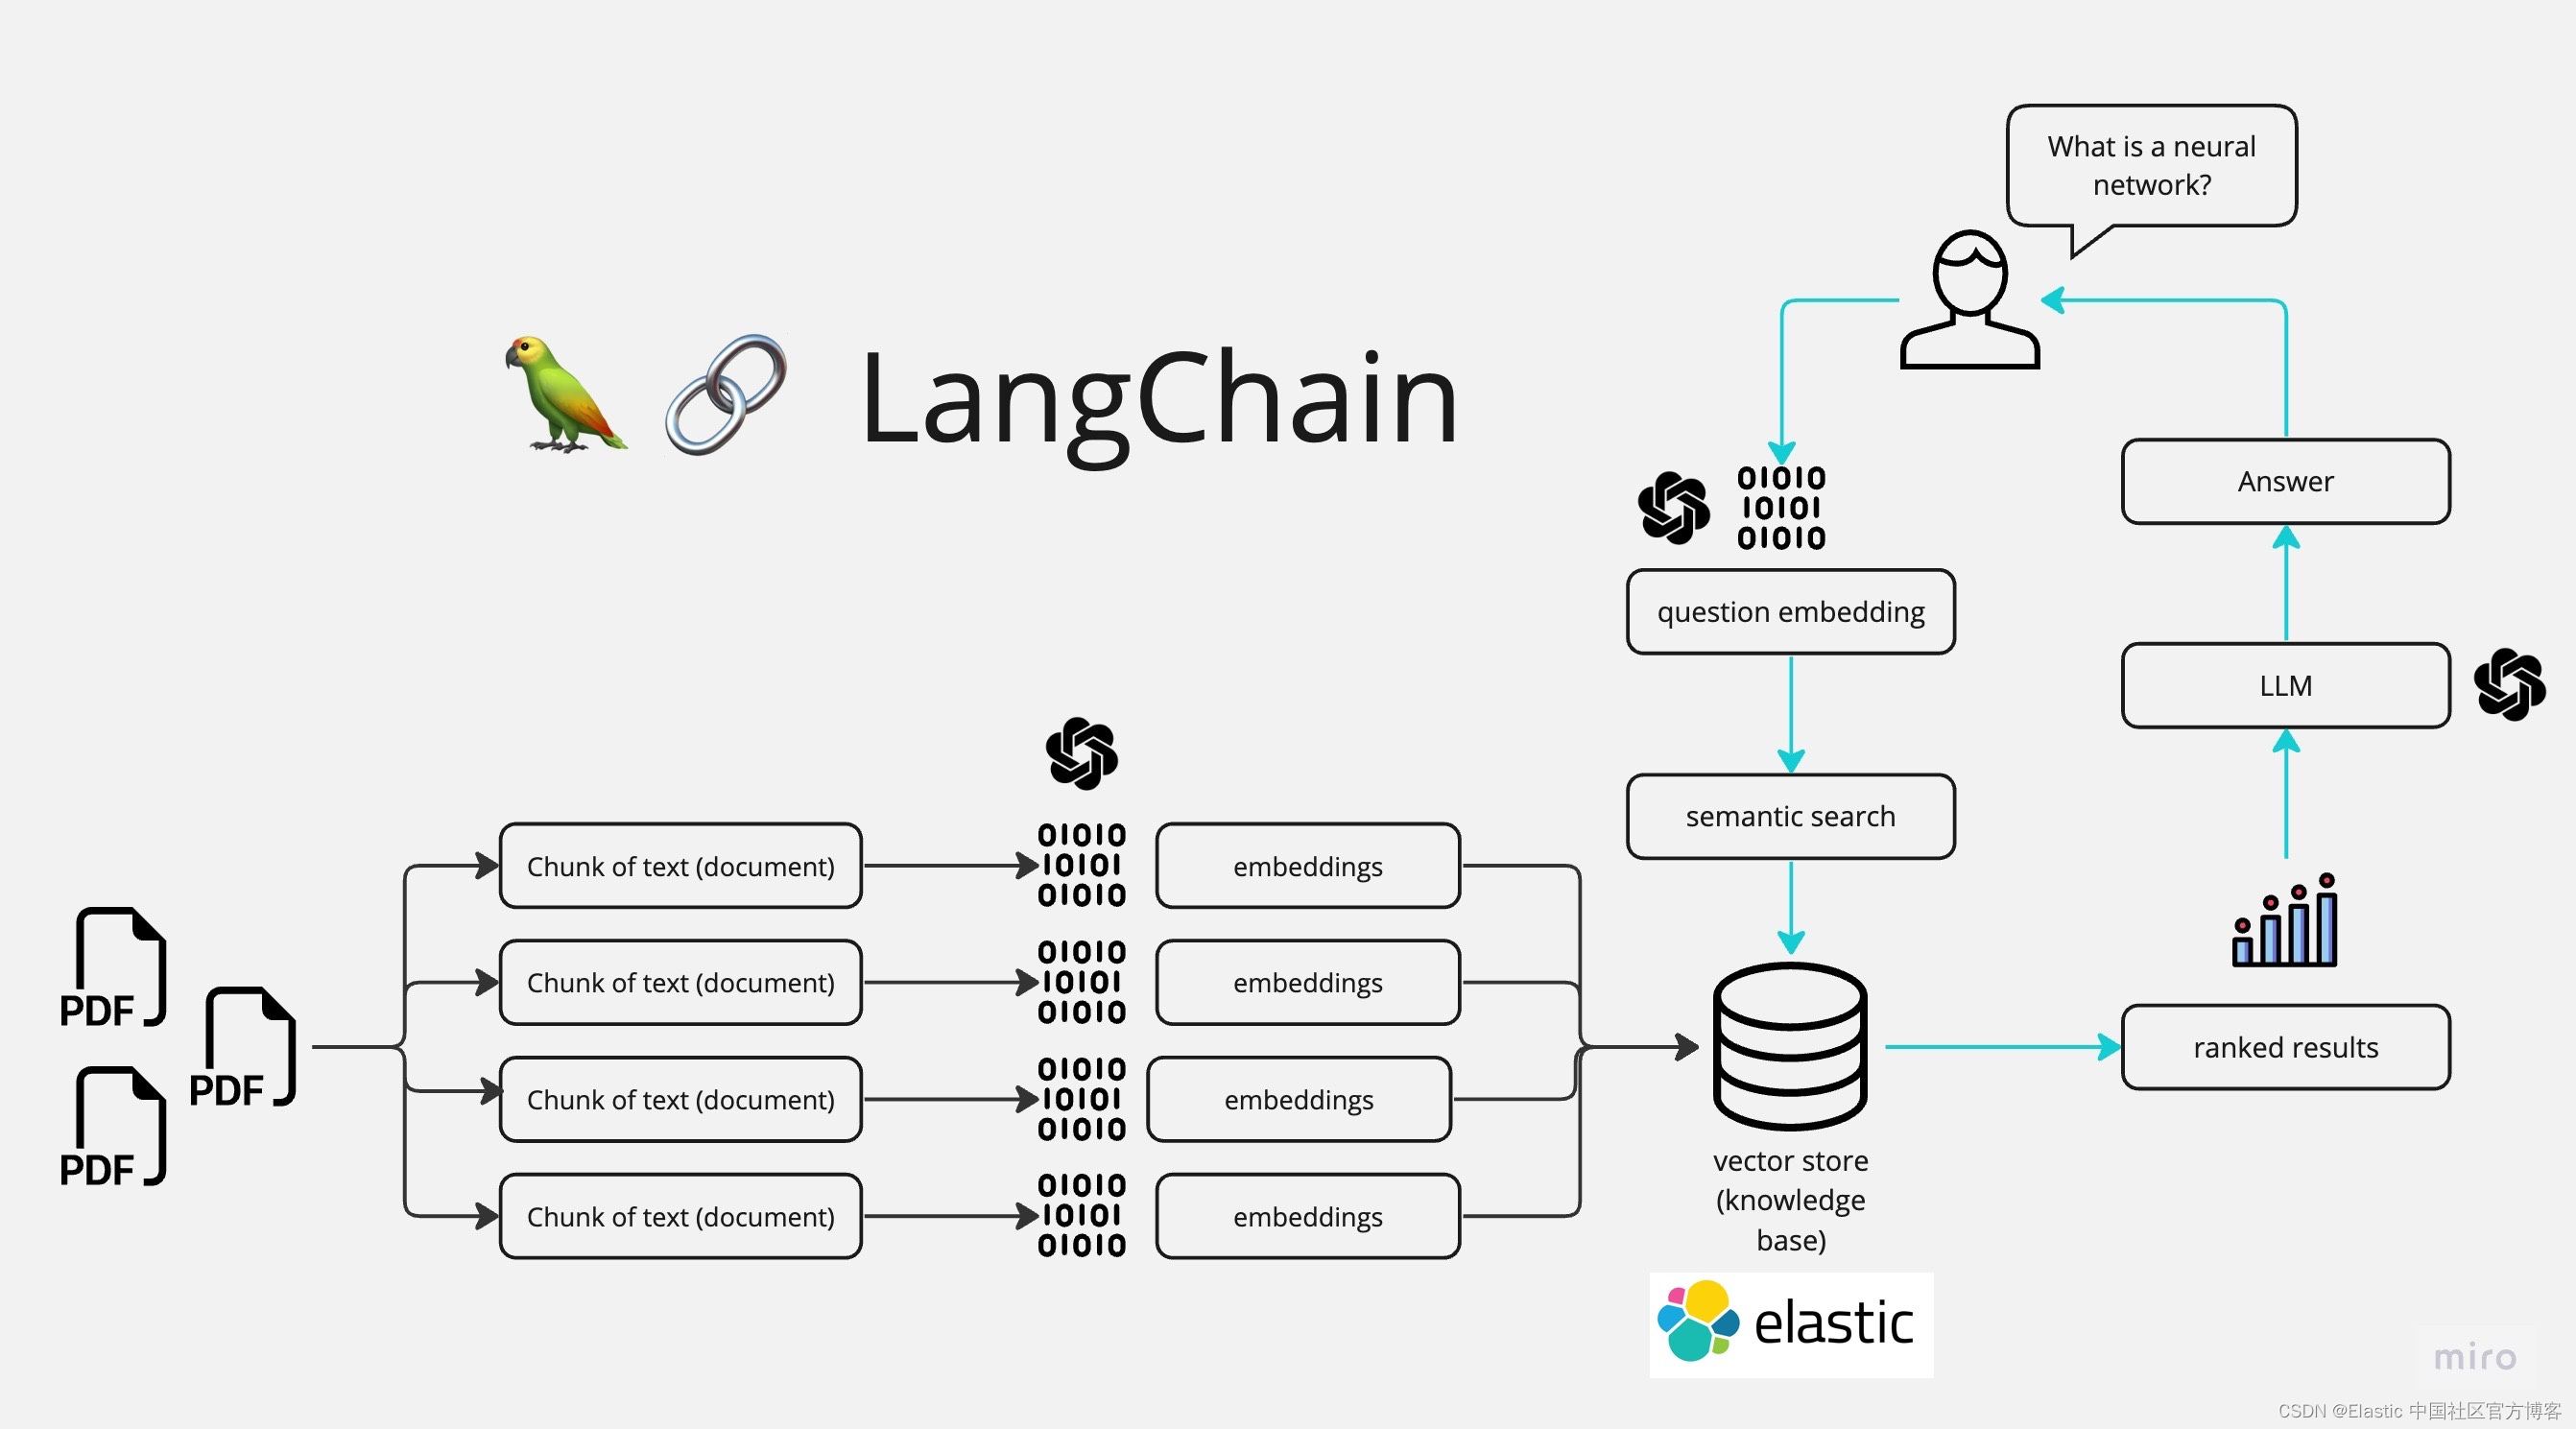
如上所示,我们在最最左边摄入 PDF 文件,并它们连成一起,并分为不同的 chunks。我们可以通过使用 huggingface 来对 chunks 进行处理并形成 embeddings。我们把 embeddings 写入到 Elasticsearch 向量数据库中,并保存。在搜索的时候,我们通过 LangChain 来进行向量化,并使用 Elasticsearch 进行向量搜索。在最后,我们通过大模型的使用,针对提出的问题来进行提问。我们最终的界面如下:
如上所示,它可以针对我们的问题进行回答。进一步阅读
- 使用 LangChain 和 Elasticsearch 对私人数据进行人工智能搜索
-
使用 LangChain 和 Elasticsearch 的隐私优先 AI 搜索
所有的源码可以在地址 GitHub - liu-xiao-guo/ask-multiple-pdfs: A Langchain app that allows you to chat with multiple PDFs 进行下载。
安装
如果你还没有安装好自己的 Elasticsearch 及 Kibana 的话,那么请参考如下的链接:
-
如何在 Linux,MacOS 及 Windows 上进行安装 Elasticsearch
-
Kibana:如何在 Linux,MacOS 及 Windows 上安装 Elastic 栈中的 Kibana
在安装的时候,我们选择 Elastic Stack 9.x 的安装指南来进行安装。在默认的情况下,Elasticsearch 集群的访问具有 HTTPS 的安全访问。
在安装时,我们可以在 Elasticsearch 的如下地址找到相应的证书文件 http_ca.crt:
$ pwd
/Users/liuxg/elastic/elasticsearch-8.10.0/config/certs
$ ls
http.p12      http_ca.crt   transport.p12
我们需要把该证书拷贝到项目文件的根目录下:
$ tree -L 3
.
├── app.py
├── docs
│   └── PDF-LangChain.jpg
├── htmlTemplates.py
├── http_ca.crt
├── lib_embeddings.py
├── lib_indexer.py
├── lib_llm.py
├── lib_vectordb.py
├── myapp.py
├── pdf_files
│   ├── sample1.pdf
│   └── sample2.pdf
├── readme.md
├── requirements.txt
└── simple.cfg
如上所示,我们把 http_ca.crt 拷贝到应用的根目录下。我们在 pdf_files 里放了两个用于测试的 PDF 文件。你可以使用自己的 PDF 文件来进行测试。我们在 simple.cfg 做如下的配置:
ES_SERVER: "localhost"
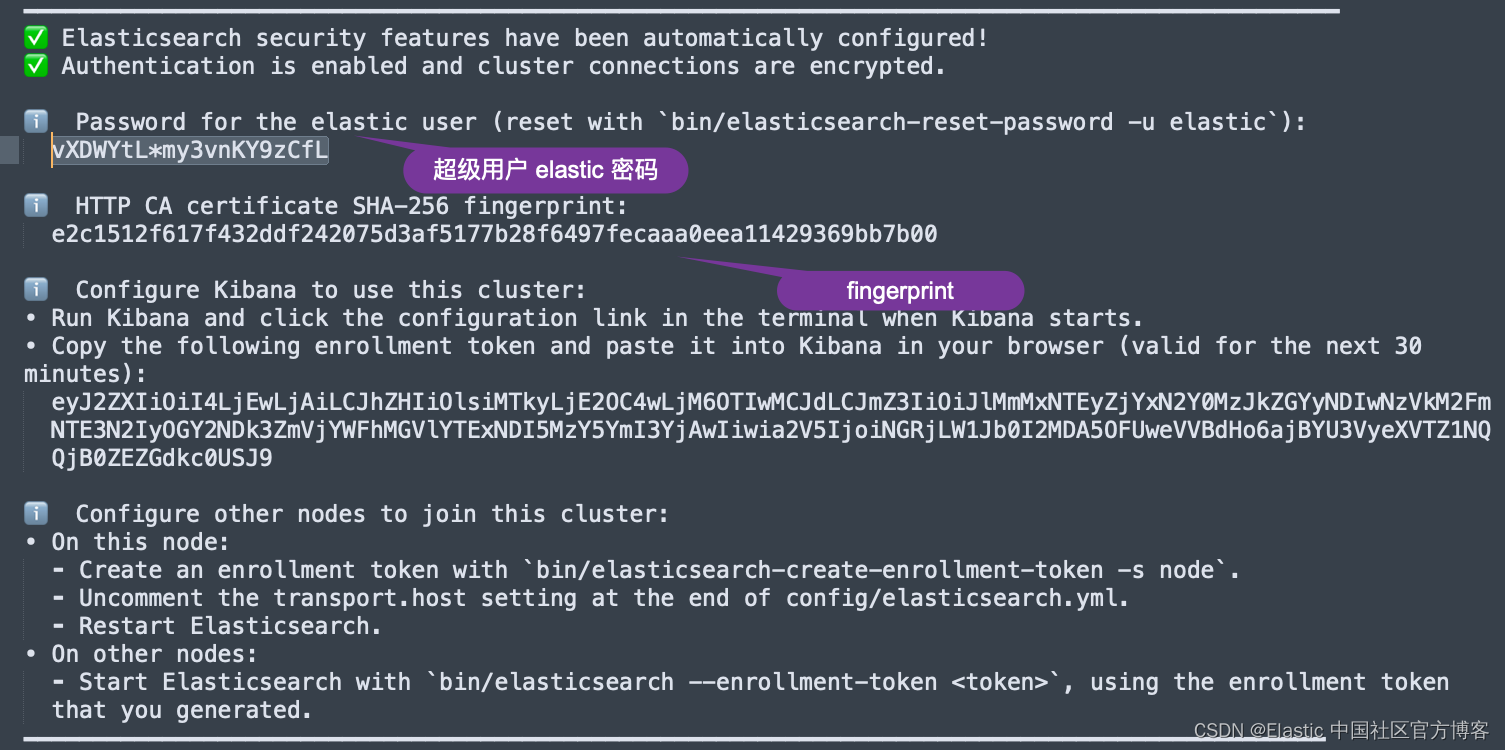
ES_PASSWORD: "vXDWYtL*my3vnKY9zCfL"
ES_FINGERPRINT: "e2c1512f617f432ddf242075d3af5177b28f6497fecaaa0eea11429369bb7b00"在上面,我们需要配置 ES_SERVER。这个是 Elasticsearch 集群的地址。这里的 ES_PASSWORD 是 Elasticsearch 的超级用户 elastic 的密码。我们可以在 Elasticsearch 第一次启动的画面中找到这个 ES_FINGERPRINT:
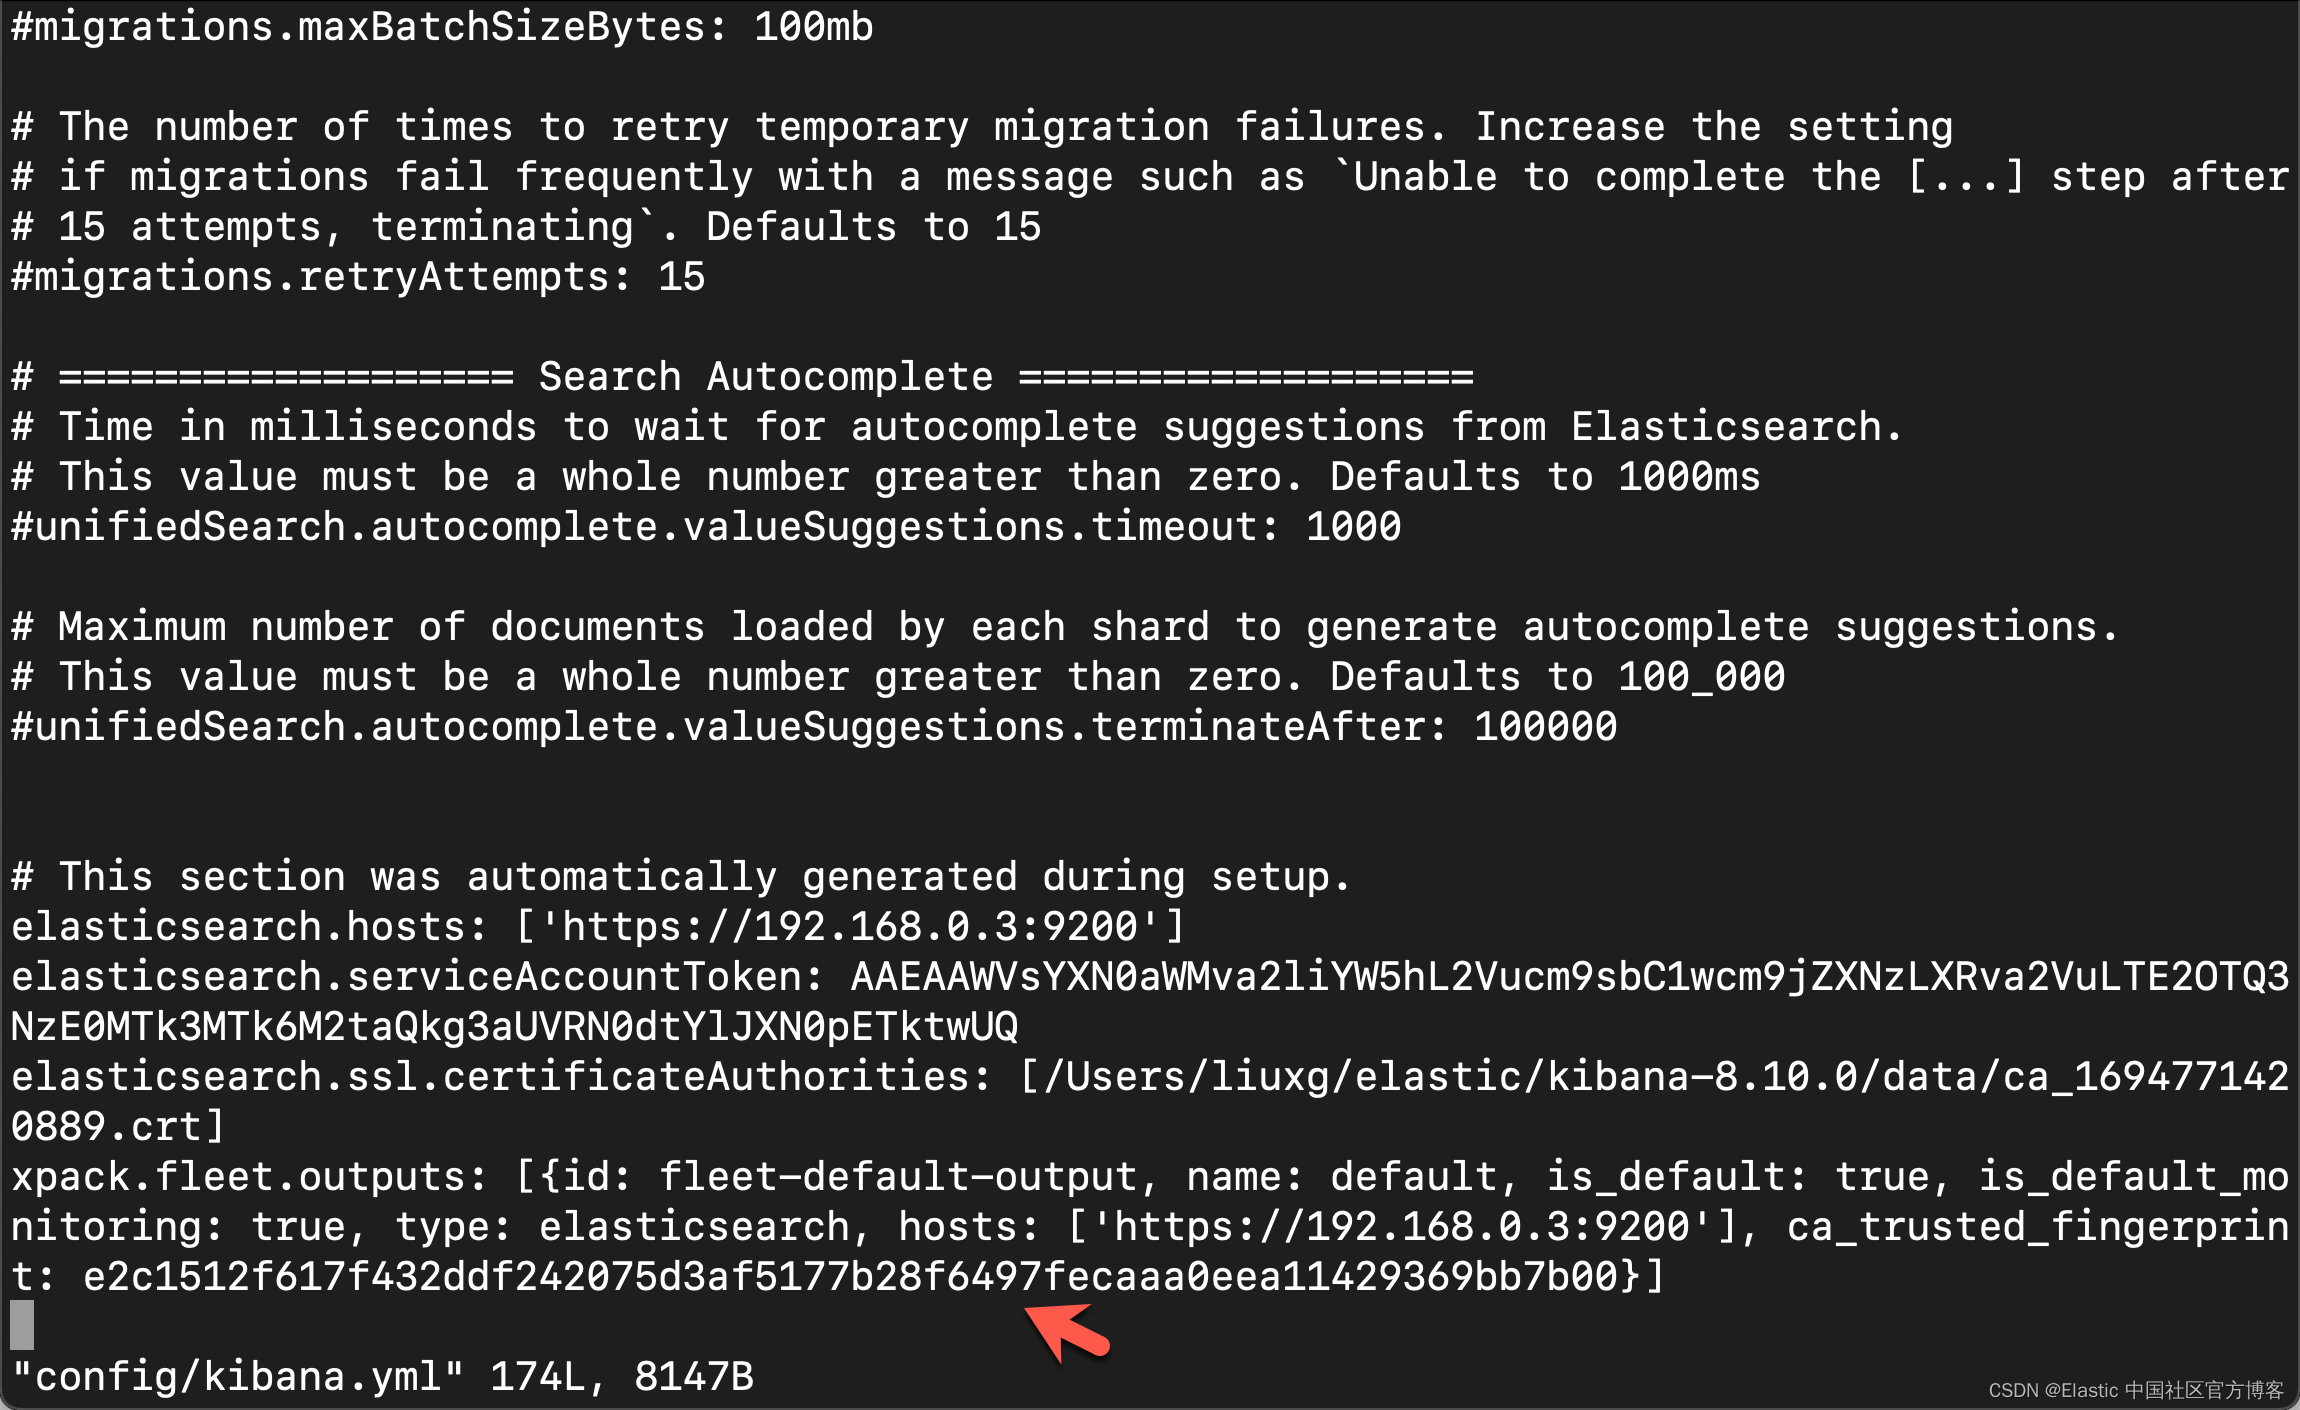
你还可以在 Kibana 的配置文件 confgi/kibana.yml 文件中获得 fingerprint 的配置:
在项目的目录中,我们还可以看到一个叫做 .env-example 的文件。我们可以使用如下的命令把它重新命名为 .env:
mv .env.example .env在 .env 中,我们输入 huggingface.co 网站得到的 token:
$ cat .env
OPENAI_API_KEY=your_openai_key
HUGGINGFACEHUB_API_TOKEN=your_huggingface_key
在本例中,我们将使用 huggingface 来进行测试。如果你需要使用到 OpenAI,那么你需要配置它的 key。有关 huggingface 的开发者 key,你可以在地址获得。
运行项目
在运行项目之前,你需要做一下安装的动作:
python3 -m venv env
source env/bin/activate
python3 -m pip install --upgrade pip
pip install -r requirements.txt
创建界面
本应用的界面,我们采用是 streamlit 来创建的。它的创建也是非常地简单。我们可以在 myapp.py 中看到如下的代码:
myapp.py
import streamlit as st
from dotenv import load_dotenv
from PyPDF2 import PdfReader
from htmlTemplates import css, bot_template, user_templatedef get_pdf_texts(pdf_docs):text = ""for pdf in pdf_docs:pdf_reader = PdfReader(pdf)for page in pdf_reader.pages:text += page.extract_text()return textdef main():load_dotenv()st.set_page_config(page_title="Chat with multiple PDFs", page_icon=":books:")st.write(css, unsafe_allow_html=True)st.header("Chat with multiple PDFs :books:")user_question = st.text_input("Ask a question about your documents")if user_question:passst.write(user_template.replace("{{MSG}}", "Hello, human").replace("{{MSG1}}", " "), unsafe_allow_html=True)st.write(bot_template.replace("{{MSG}}", "Hello, robot").replace("{{MSG1}}", " "), unsafe_allow_html=True)# Add a side barwith st.sidebar:st.subheader("Your documents")pdf_docs = st.file_uploader("Upload your PDFs here and press on click on Process", accept_multiple_files=True)print(pdf_docs)if st.button("Process"):with st.spinner("Processing"):# Get pdf text fromraw_text = get_pdf_texts(pdf_docs)st.write(raw_text)if __name__ == "__main__":main()
在上面的代码中,我创建了一个 sidebar 用来选择需要的 PDF 文件。我们可以点击 Process 按钮来显示已经提取的 PDF 文本。我们可以使用如下的命令来运行应用:
(venv) $ streamlit run myapp.pyvenv) $ streamlit run myapp.pyYou can now view your Streamlit app in your browser.Local URL: http://localhost:8502Network URL: http://198.18.1.13:8502运行完上面的命令后,我们可以在浏览器中打开应用:
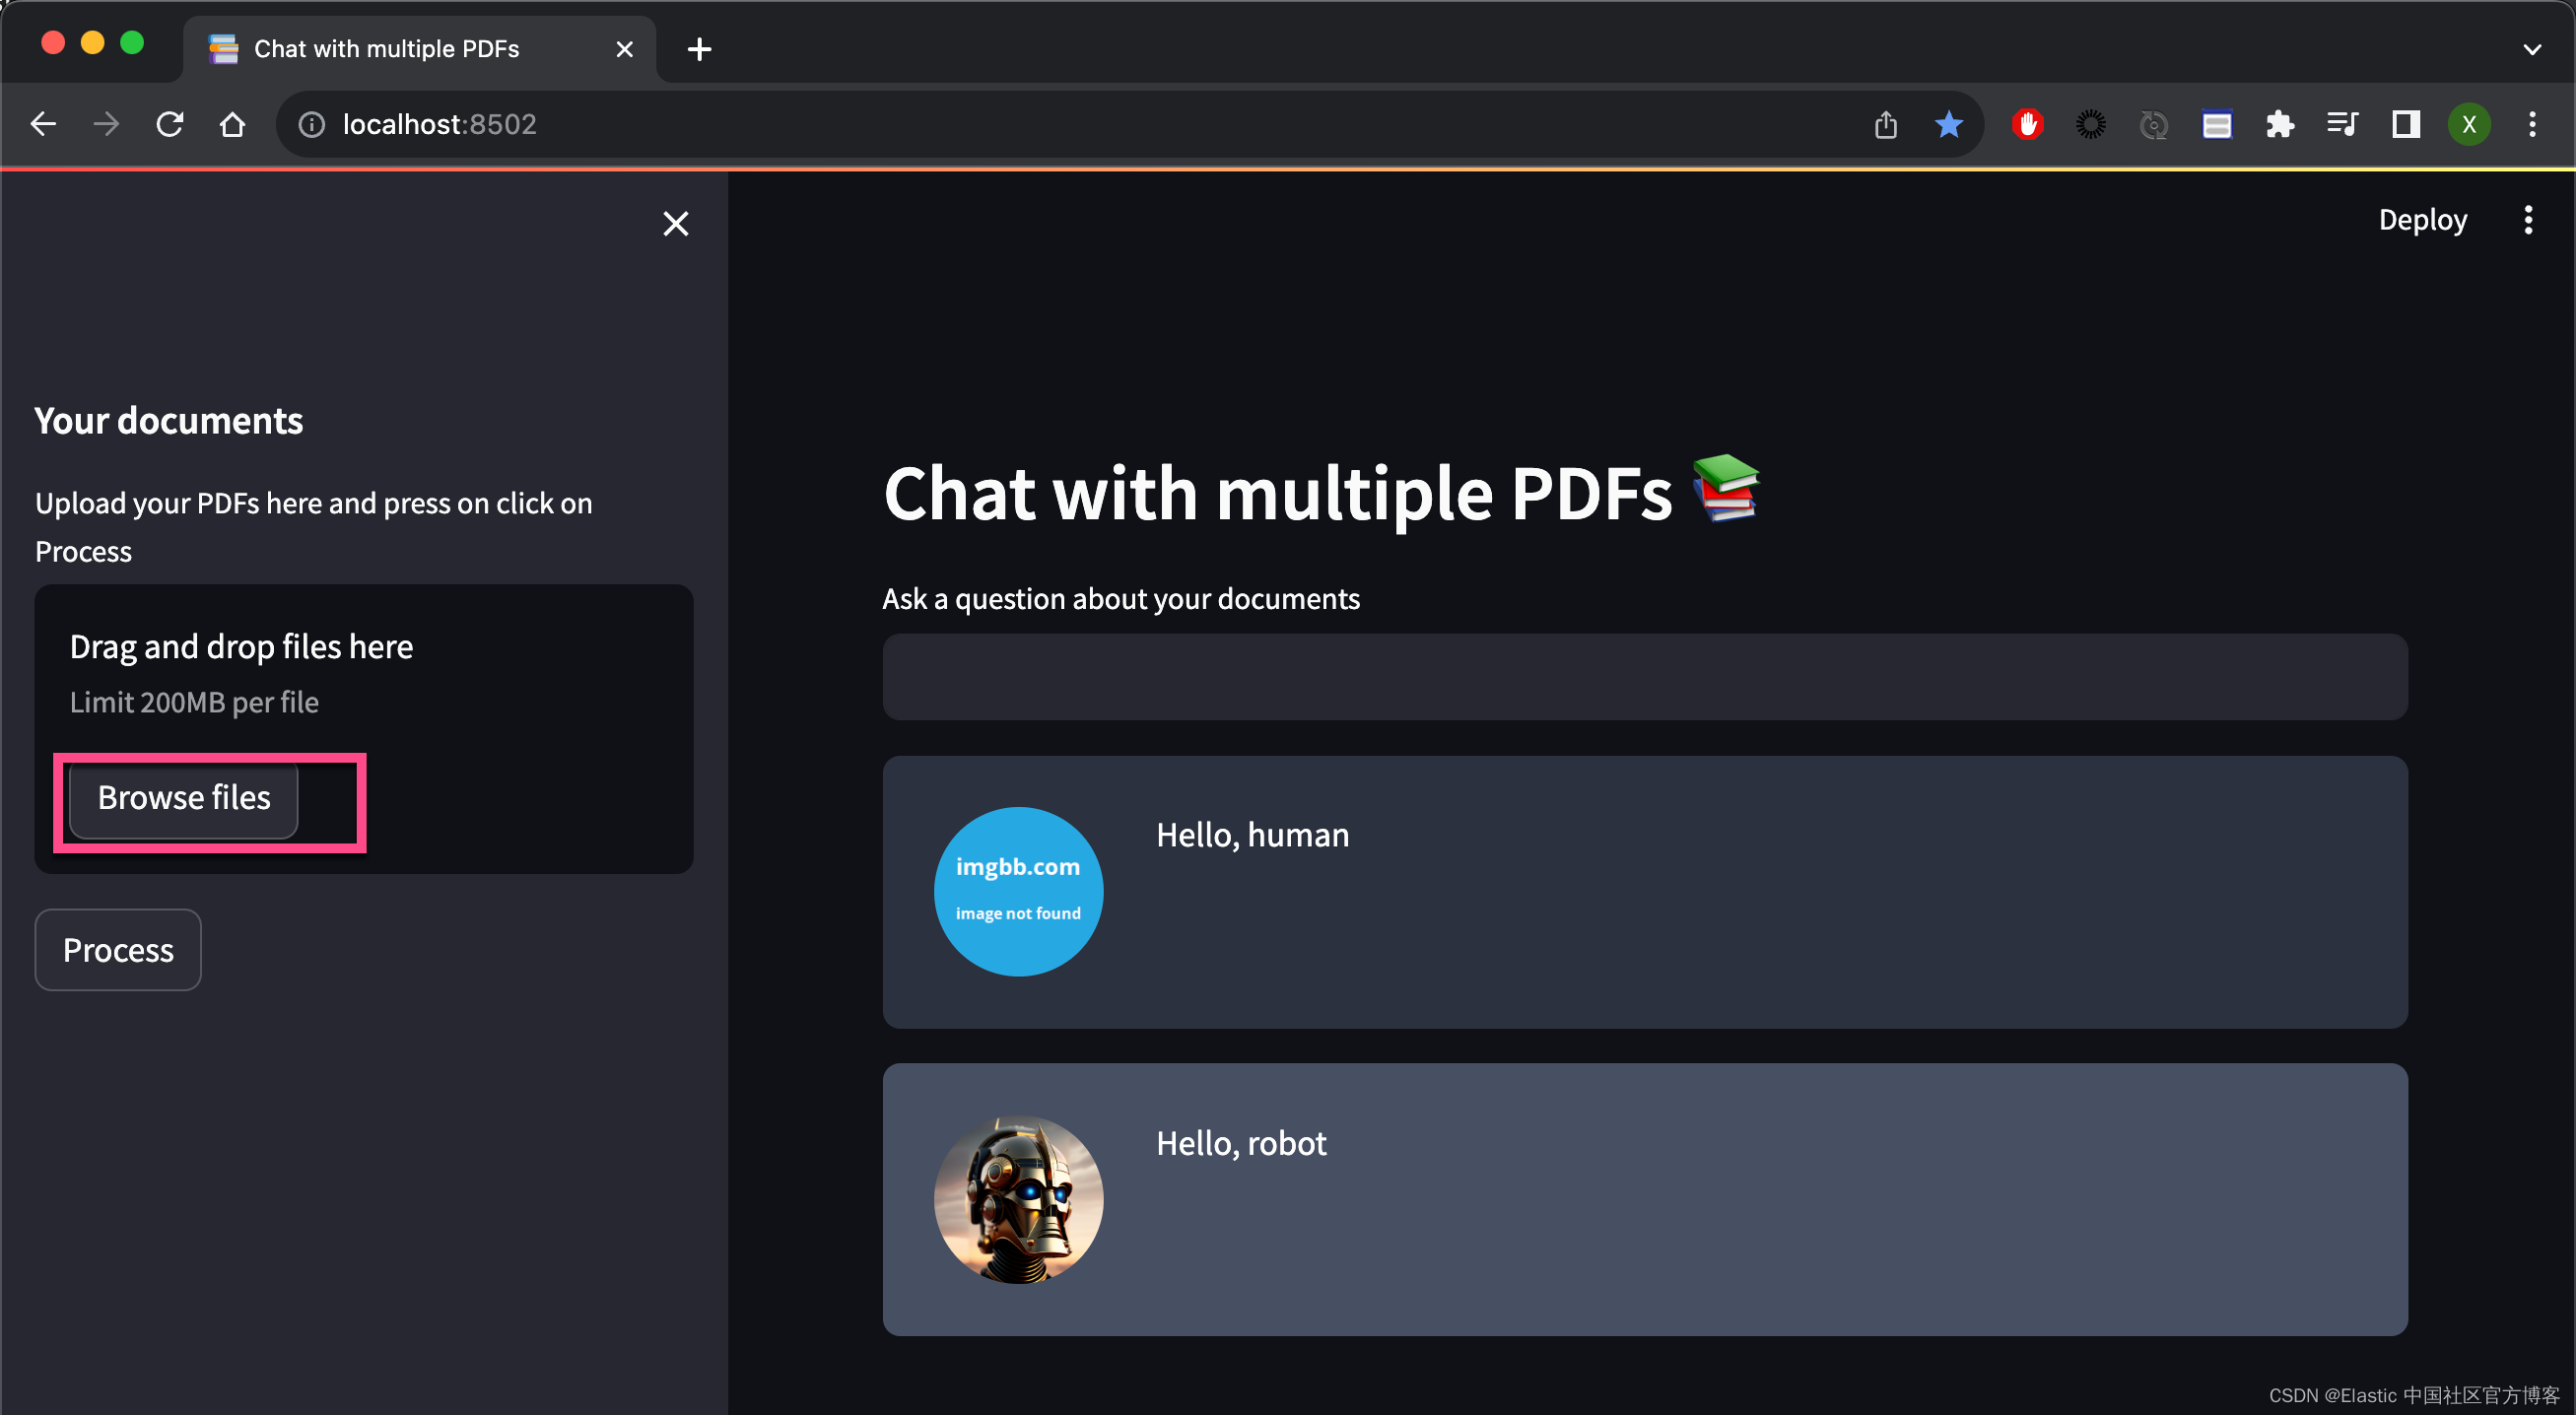
我们点击 Browse files,并选中 PDF 文件:

点击上面的 Process,我们可以看到:

在上面,我们为了显示的方便,我使用 st.write 直接把结果写到浏览器的页面里。我们接下来需要针对这个长的文字进行切分为一个一个的 chunks。我们需要按照模型的需要,不能超过模型允许的最大值。
上面我简单地叙述了 UI 的构造。最终完整的 myapp.py 的设计如下:
myapp.py
import streamlit as st
from dotenv import load_dotenv
from PyPDF2 import PdfReader
from langchain.text_splitter import CharacterTextSplitter
from langchain.text_splitter import RecursiveCharacterTextSplitter
from langchain.embeddings import OpenAIEmbeddings
from htmlTemplates import css, bot_template, user_templateimport lib_indexer
import lib_llm
import lib_embeddings
import lib_vectordbindex_name = "pdf_docs"def get_pdf_text(pdf):text = ""pdf_reader = PdfReader(pdf)for page in pdf_reader.pages:text += page.extract_text()return textdef get_pdf_texts(pdf_docs):text = ""for pdf in pdf_docs:pdf_reader = PdfReader(pdf)for page in pdf_reader.pages:text += page.extract_text()return textdef get_text_chunks(text):text_splitter = CharacterTextSplitter(separator="\n", chunk_size=1000,chunk_overlap=200,length_function=len)chunks = text_splitter.split_text(text)# chunks = text_splitter.split_documents(text)return chunksdef get_text_chunks1(text):text_splitter = RecursiveCharacterTextSplitter(chunk_size=384, chunk_overlap=0)chunks = text_splitter.split_text(text)return chunksdef handle_userinput(db, llm_chain_informed, user_question):similar_docs = db.similarity_search(user_question)print(f'The most relevant passage: \n\t{similar_docs[0].page_content}')## 4. Ask Local LLM context informed prompt# print(">> 4. Asking The Book ... and its response is: ")informed_context= similar_docs[0].page_contentresponse = llm_chain_informed.run(context=informed_context,question=user_question)st.write(user_template.replace("{{MSG}}", user_question).replace("{{MSG1}}", " "), unsafe_allow_html=True)st.write(bot_template.replace("{{MSG}}", response).replace("{{MSG1}}", similar_docs[0].page_content),unsafe_allow_html=True)def main():# # Huggingface embedding setuphf = lib_embeddings.setup_embeddings()# # # ## Elasticsearch as a vector dbdb, url = lib_vectordb.setup_vectordb(hf, index_name)# # # ## set up the conversational LLMllm_chain_informed= lib_llm.make_the_llm()load_dotenv()st.set_page_config(page_title="Chat with multiple PDFs", page_icon=":books:")st.write(css, unsafe_allow_html=True)st.header("Chat with multiple PDFs :books:")user_question = st.text_input("Ask a question about your documents")if user_question:handle_userinput(db, llm_chain_informed, user_question)st.write(user_template.replace("{{MSG}}", "Hello, human").replace("{{MSG1}}", " "), unsafe_allow_html=True)st.write(bot_template.replace("{{MSG}}", "Hello, robot").replace("{{MSG1}}", " "), unsafe_allow_html=True)# Add a side barwith st.sidebar:st.subheader("Your documents")pdf_docs = st.file_uploader("Upload your PDFs here and press on click on Process", accept_multiple_files=True)print(pdf_docs)if st.button("Process"):with st.spinner("Processing"):# Get pdf text from# raw_text = get_pdf_text(pdf_docs[0])raw_text = get_pdf_texts(pdf_docs)# st.write(raw_text)print(raw_text)# Get the text chunkstext_chunks = get_text_chunks(raw_text)# st.write(text_chunks)# Create vector storelib_indexer.loadPdfChunks(text_chunks, url, hf, db, index_name)if __name__ == "__main__":main()
创建嵌入模型
lib_embedding.py
## for embeddings
from langchain.embeddings import HuggingFaceEmbeddingsdef setup_embeddings():# Huggingface embedding setupprint(">> Prep. Huggingface embedding setup")model_name = "sentence-transformers/all-mpnet-base-v2"return HuggingFaceEmbeddings(model_name=model_name)
创建向量存储
lib_vectordb.py
import os
from config import Config## for vector store
from langchain.vectorstores import ElasticVectorSearchdef setup_vectordb(hf,index_name):# Elasticsearch URL setupprint(">> Prep. Elasticsearch config setup")with open('simple.cfg') as f:cfg = Config(f)endpoint = cfg['ES_SERVER']username = "elastic"password = cfg['ES_PASSWORD']ssl_verify = {"verify_certs": True,"basic_auth": (username, password),"ca_certs": "./http_ca.crt",}url = f"https://{username}:{password}@{endpoint}:9200"return ElasticVectorSearch( embedding = hf, elasticsearch_url = url, index_name = index_name, ssl_verify = ssl_verify), url
创建使用带有上下文和问题变量的提示模板的离线 LLM
lib_llm.py
## for conversation LLM
from langchain import PromptTemplate, HuggingFaceHub, LLMChain
from langchain.llms import HuggingFacePipeline
import torch
from transformers import AutoTokenizer, AutoModelForCausalLM, pipeline, AutoModelForSeq2SeqLMdef make_the_llm():# Get Offline flan-t5-large ready to go, in CPU modeprint(">> Prep. Get Offline flan-t5-large ready to go, in CPU mode")model_id = 'google/flan-t5-large'# go for a smaller model if you dont have the VRAMtokenizer = AutoTokenizer.from_pretrained(model_id) model = AutoModelForSeq2SeqLM.from_pretrained(model_id) #load_in_8bit=True, device_map='auto'pipe = pipeline("text2text-generation",model=model, tokenizer=tokenizer, max_length=100)local_llm = HuggingFacePipeline(pipeline=pipe)# template_informed = """# I know the following: {context}# Question: {question}# Answer: """template_informed = """I know: {context}when asked: {question}my response is: """prompt_informed = PromptTemplate(template=template_informed, input_variables=["context", "question"])return LLMChain(prompt=prompt_informed, llm=local_llm)
写入以向量表示的 PDF 文件
以下是我的分块和向量存储代码。 它需要在 Elasticsearch 中准备好组成的 Elasticsearch url、huggingface 嵌入模型、向量数据库和目标索引名称
lib_indexer.py
from langchain.text_splitter import RecursiveCharacterTextSplitter
from langchain.document_loaders import TextLoader## for vector store
from langchain.vectorstores import ElasticVectorSearch
from elasticsearch import Elasticsearch
from config import Configwith open('simple.cfg') as f:cfg = Config(f)fingerprint = cfg['ES_FINGERPRINT']
endpoint = cfg['ES_SERVER']
username = "elastic"
password = cfg['ES_PASSWORD']
ssl_verify = {"verify_certs": True,"basic_auth": (username, password),"ca_certs": "./http_ca.crt"
}url = f"https://{username}:{password}@{endpoint}:9200"def parse_book(filepath):loader = TextLoader(filepath)documents = loader.load()text_splitter = RecursiveCharacterTextSplitter(chunk_size=384, chunk_overlap=0)docs = text_splitter.split_documents(documents)return docsdef parse_triplets(filepath):docs = parse_book(filepath)result = []for i in range(len(docs) - 2):concat_str = docs[i].page_content + " " + docs[i+1].page_content + " " + docs[i+2].page_contentresult.append(concat_str)return result#db.from_texts(docs, embedding=hf, elasticsearch_url=url, index_name=index_name)## load book utility
## params
##  filepath: where to get the book txt ... should be utf-8
##  url: the full Elasticsearch url with username password and port embedded
##  hf: hugging face transformer for sentences
##  db: the VectorStore Langcahin object ready to go with embedding thing already set up
##  index_name: name of index to use in ES
##
##  will check if the index_name exists already in ES url before attempting split and load
def loadBookTriplets(filepath, url, hf, db, index_name):with open('simple.cfg') as f:cfg = Config(f)fingerprint = cfg['ES_FINGERPRINT']es = Elasticsearch( [ url ], basic_auth = ("elastic", cfg['ES_PASSWORD']), ssl_assert_fingerprint = fingerprint, http_compress = True  )## Parse the book if necessaryif not es.indices.exists(index=index_name):print(f'\tThe index: {index_name} does not exist')print(">> 1. Chunk up the Source document")results = parse_triplets(filepath)print(">> 2. Index the chunks into Elasticsearch")elastic_vector_search= ElasticVectorSearch.from_documents( docs,embedding = hf, elasticsearch_url = url, index_name = index_name, ssl_verify = ssl_verify)else:print("\tLooks like the pdfs are already loaded, let's move on")def loadBookBig(filepath, url, hf, db, index_name):es = Elasticsearch( [ url ], basic_auth = ("elastic", cfg['ES_PASSWORD']), ssl_assert_fingerprint = fingerprint, http_compress = True  )## Parse the book if necessaryif not es.indices.exists(index=index_name):print(f'\tThe index: {index_name} does not exist')print(">> 1. Chunk up the Source document")docs = parse_book(filepath)# print(docs)print(">> 2. Index the chunks into Elasticsearch")elastic_vector_search= ElasticVectorSearch.from_documents( docs,embedding = hf, elasticsearch_url = url, index_name = index_name, ssl_verify = ssl_verify)   else:print("\tLooks like the pdfs are already loaded, let's move on")def loadPdfChunks(chunks, url, hf, db, index_name):    es = Elasticsearch( [ url ], basic_auth = ("elastic", cfg['ES_PASSWORD']), ssl_assert_fingerprint = fingerprint, http_compress = True  )## Parse the book if necessaryif not es.indices.exists(index=index_name):print(f'\tThe index: {index_name} does not exist')        print(">> 2. Index the chunks into Elasticsearch")print("url: ", url)print("index_name", index_name)elastic_vector_search = db.from_texts( chunks,embedding = hf, elasticsearch_url = url, index_name = index_name, ssl_verify = ssl_verify)   else:print("\tLooks like the pdfs are already loaded, let's move on")
提问
我们使用 streamlit 的 input 来进行提问:
user_question = st.text_input("Ask a question about your documents")if user_question:handle_userinput(db, llm_chain_informed, user_question)当我们打入 ENTER 键后,上面的代码调用 handle_userinput(db, llm_chain_informed, user_question):
def handle_userinput(db, llm_chain_informed, user_question):similar_docs = db.similarity_search(user_question)print(f'The most relevant passage: \n\t{similar_docs[0].page_content}')## 4. Ask Local LLM context informed prompt# print(">> 4. Asking The Book ... and its response is: ")informed_context= similar_docs[0].page_contentresponse = llm_chain_informed.run(context=informed_context,question=user_question)st.write(user_template.replace("{{MSG}}", user_question).replace("{{MSG1}}", " "), unsafe_allow_html=True)st.write(bot_template.replace("{{MSG}}", response).replace("{{MSG1}}", similar_docs[0].page_content),unsafe_allow_html=True)首先它使用 db 进行相似性搜索,然后我们再使用大模型来得到我们想要的答案。
运行结果
我们使用命令来运行代码:
streamlit run myapp.py我们在浏览器中选择在 pdf_files 中的两个 PDF 文件:

在上面,我们输入想要的问题:
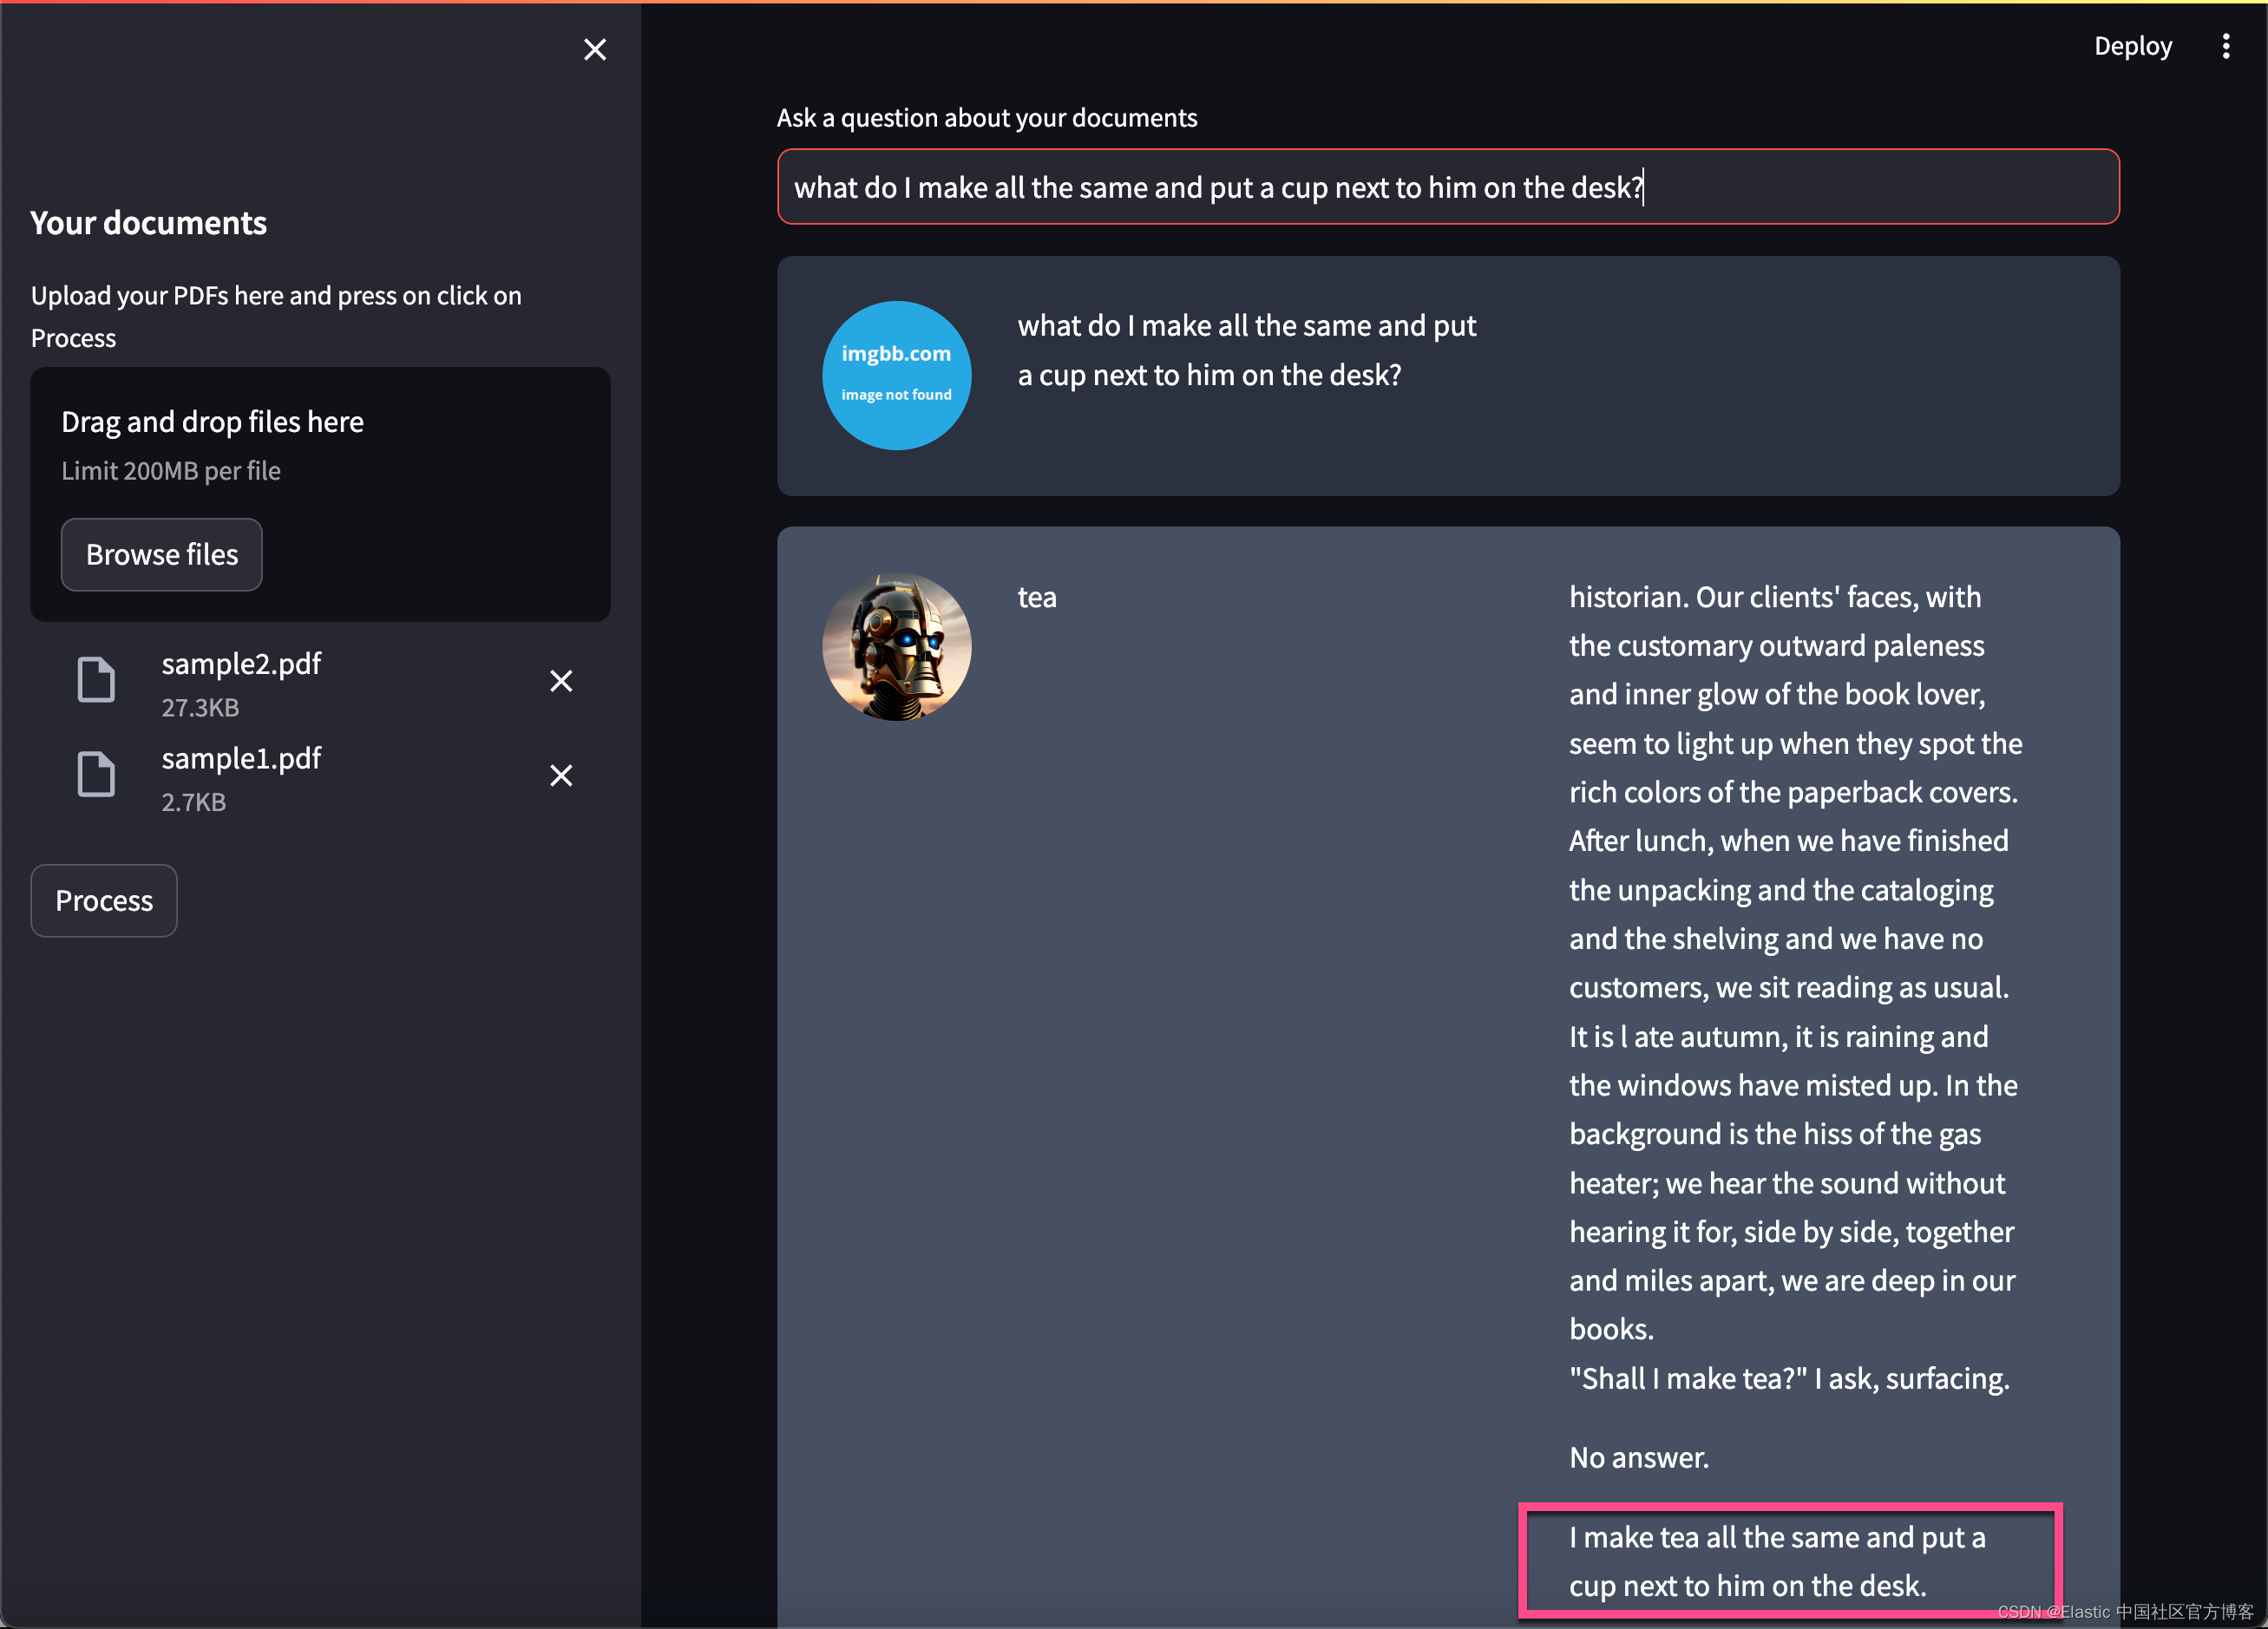
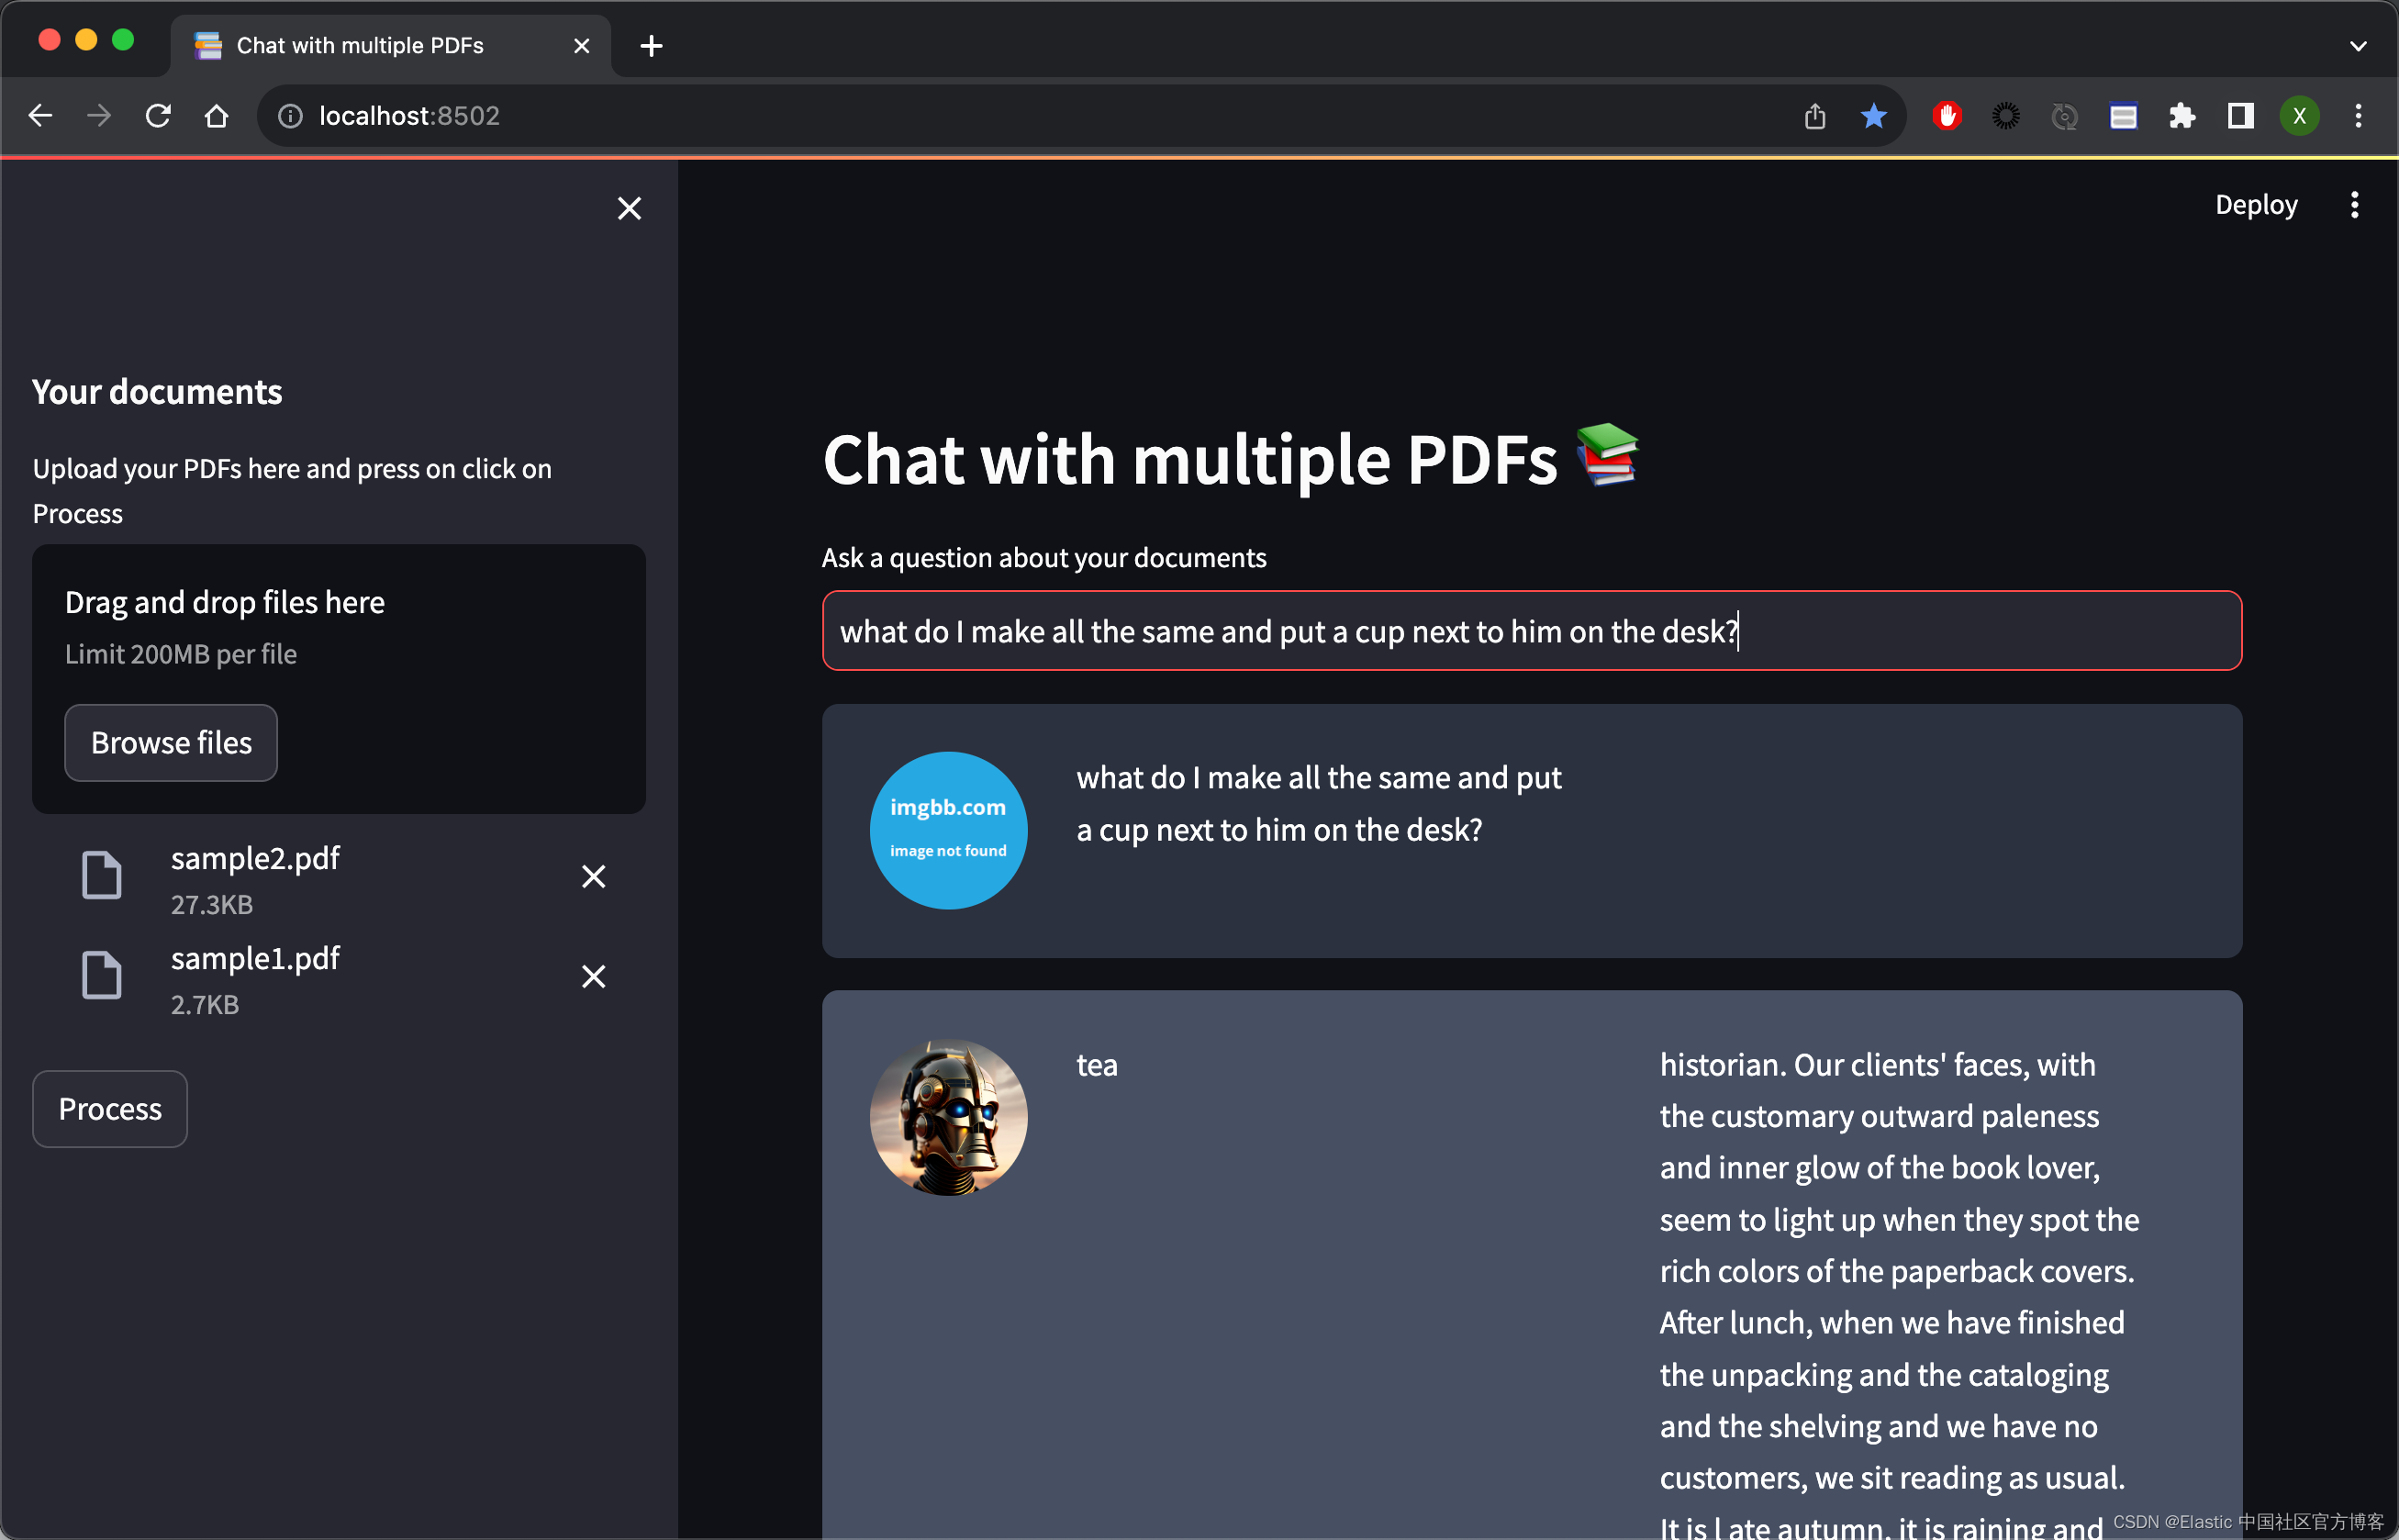
上面的问题是:
what do I make all the same and put a cup next to him on the desk?再进行提问:
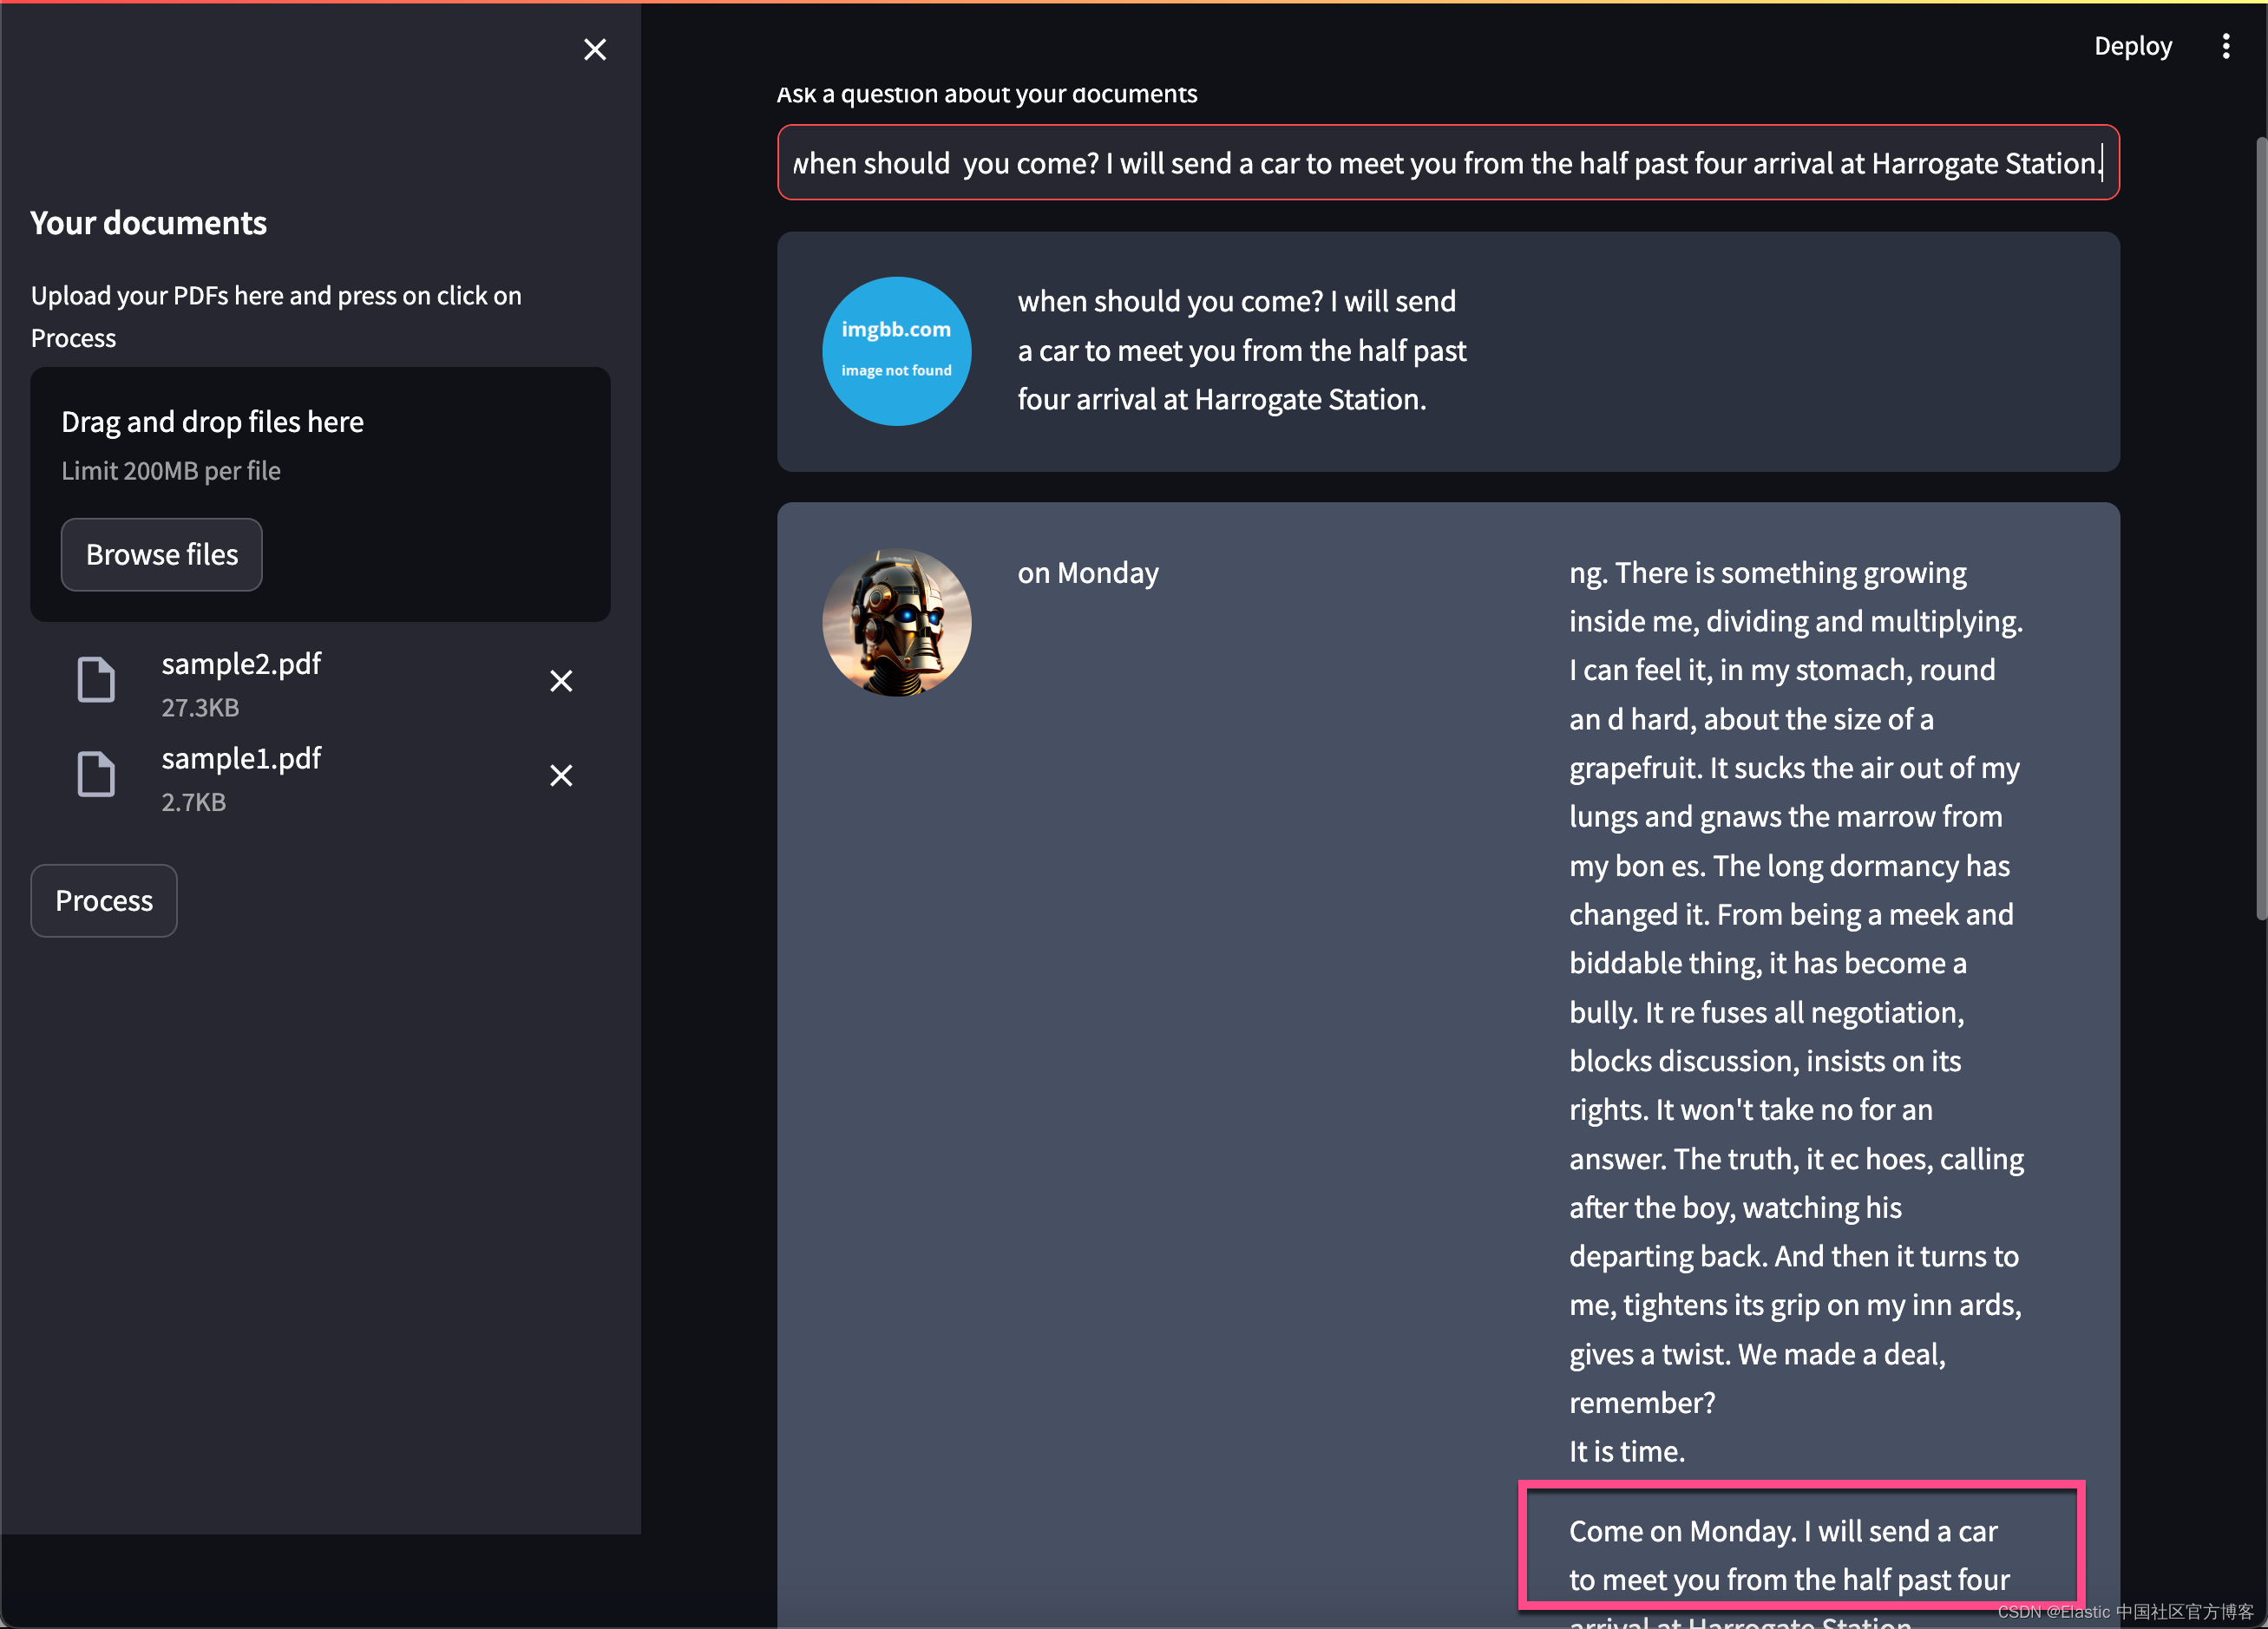
上面的问题是:
when should you come? I will send a car to meet you from the half past four arrival at Harrogate Station.
上面的问题是:
what will I send to meet you from the half past four arrival at Harrogate Station?你进行多次尝试其它的问题。Happy journery :)
有关 ChatGPT 的使用也是基本相同的。你需要使用 ChatGPT 的模型及其相应的 key 即可。在这里就不赘述了。