目录
一、效果图
二、qtDesigner
三、ui文件如下:
四、代码
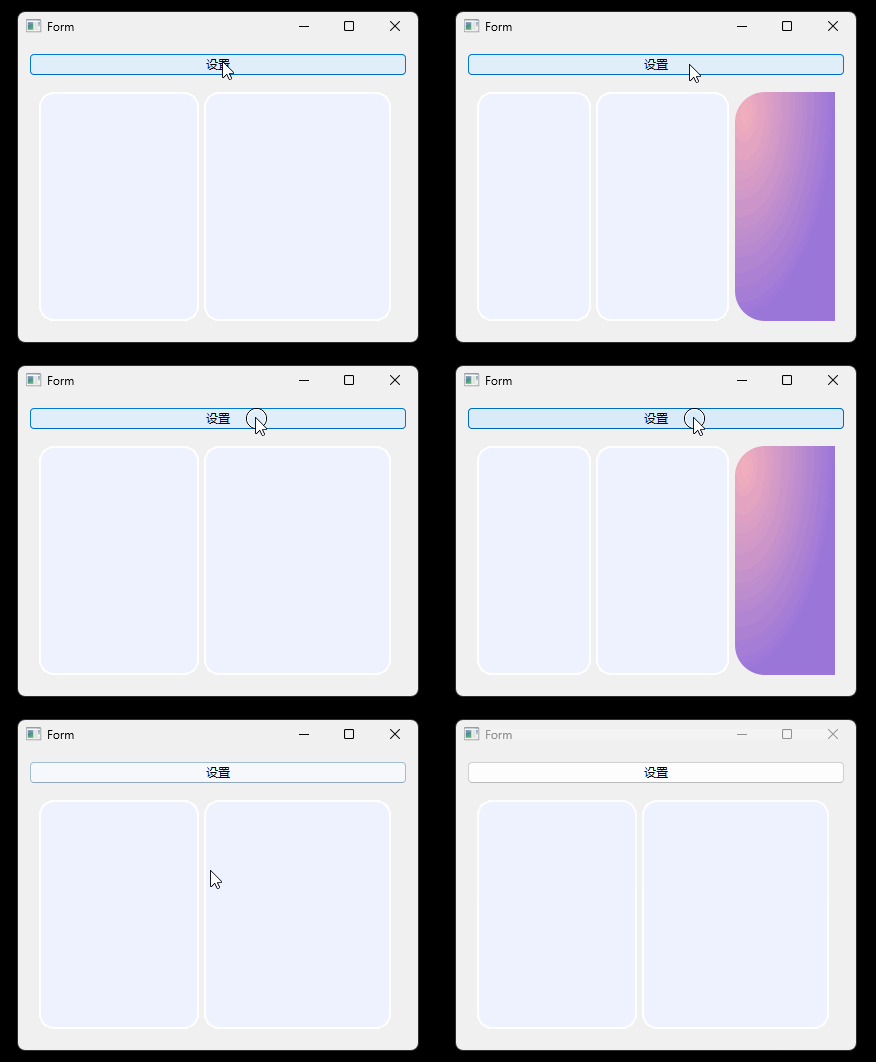
一、效果图
二、qtDesigner
原理是利用属性动画来控制QFrame的minimumWidth属性。
①先拖出相应的控件
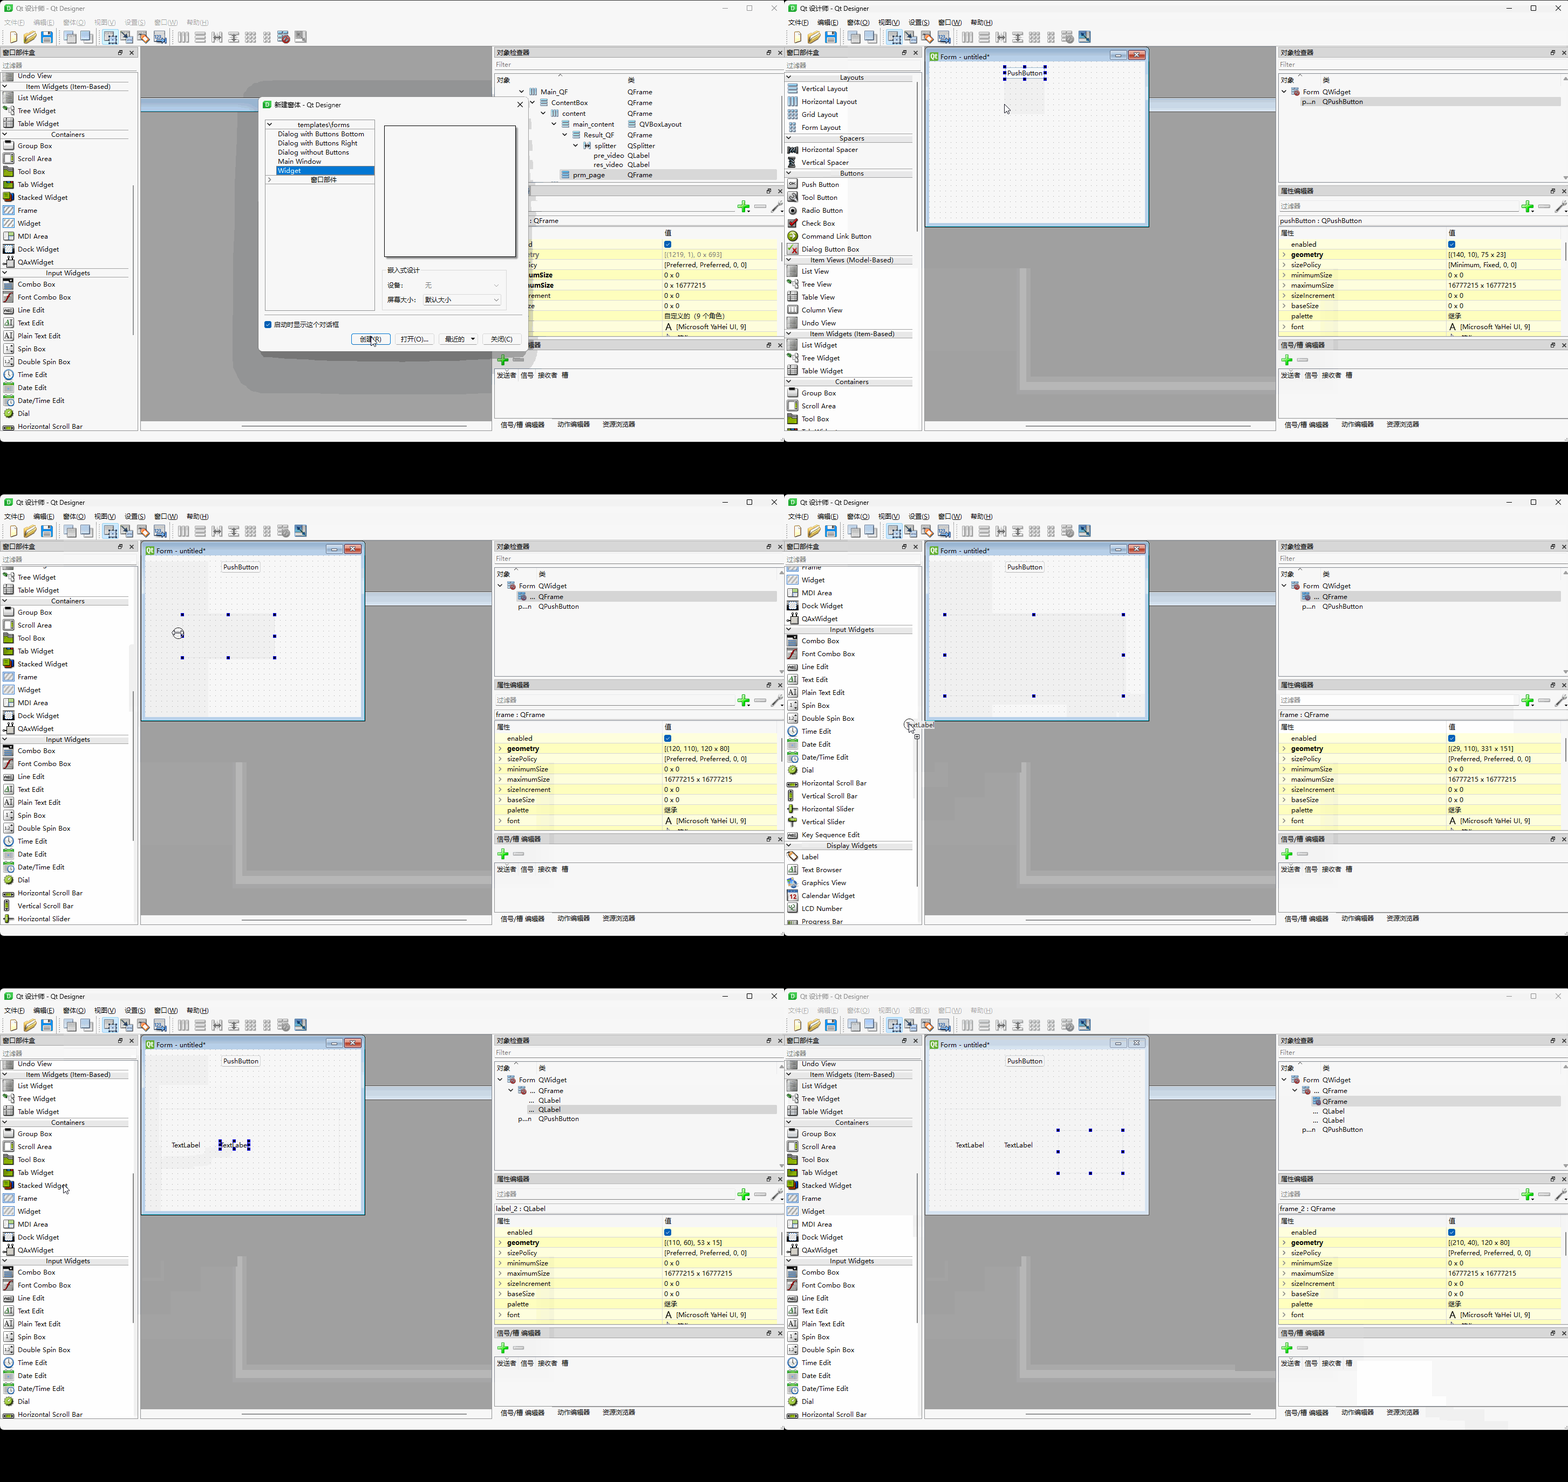
②布局一下
 ③填上一些样式
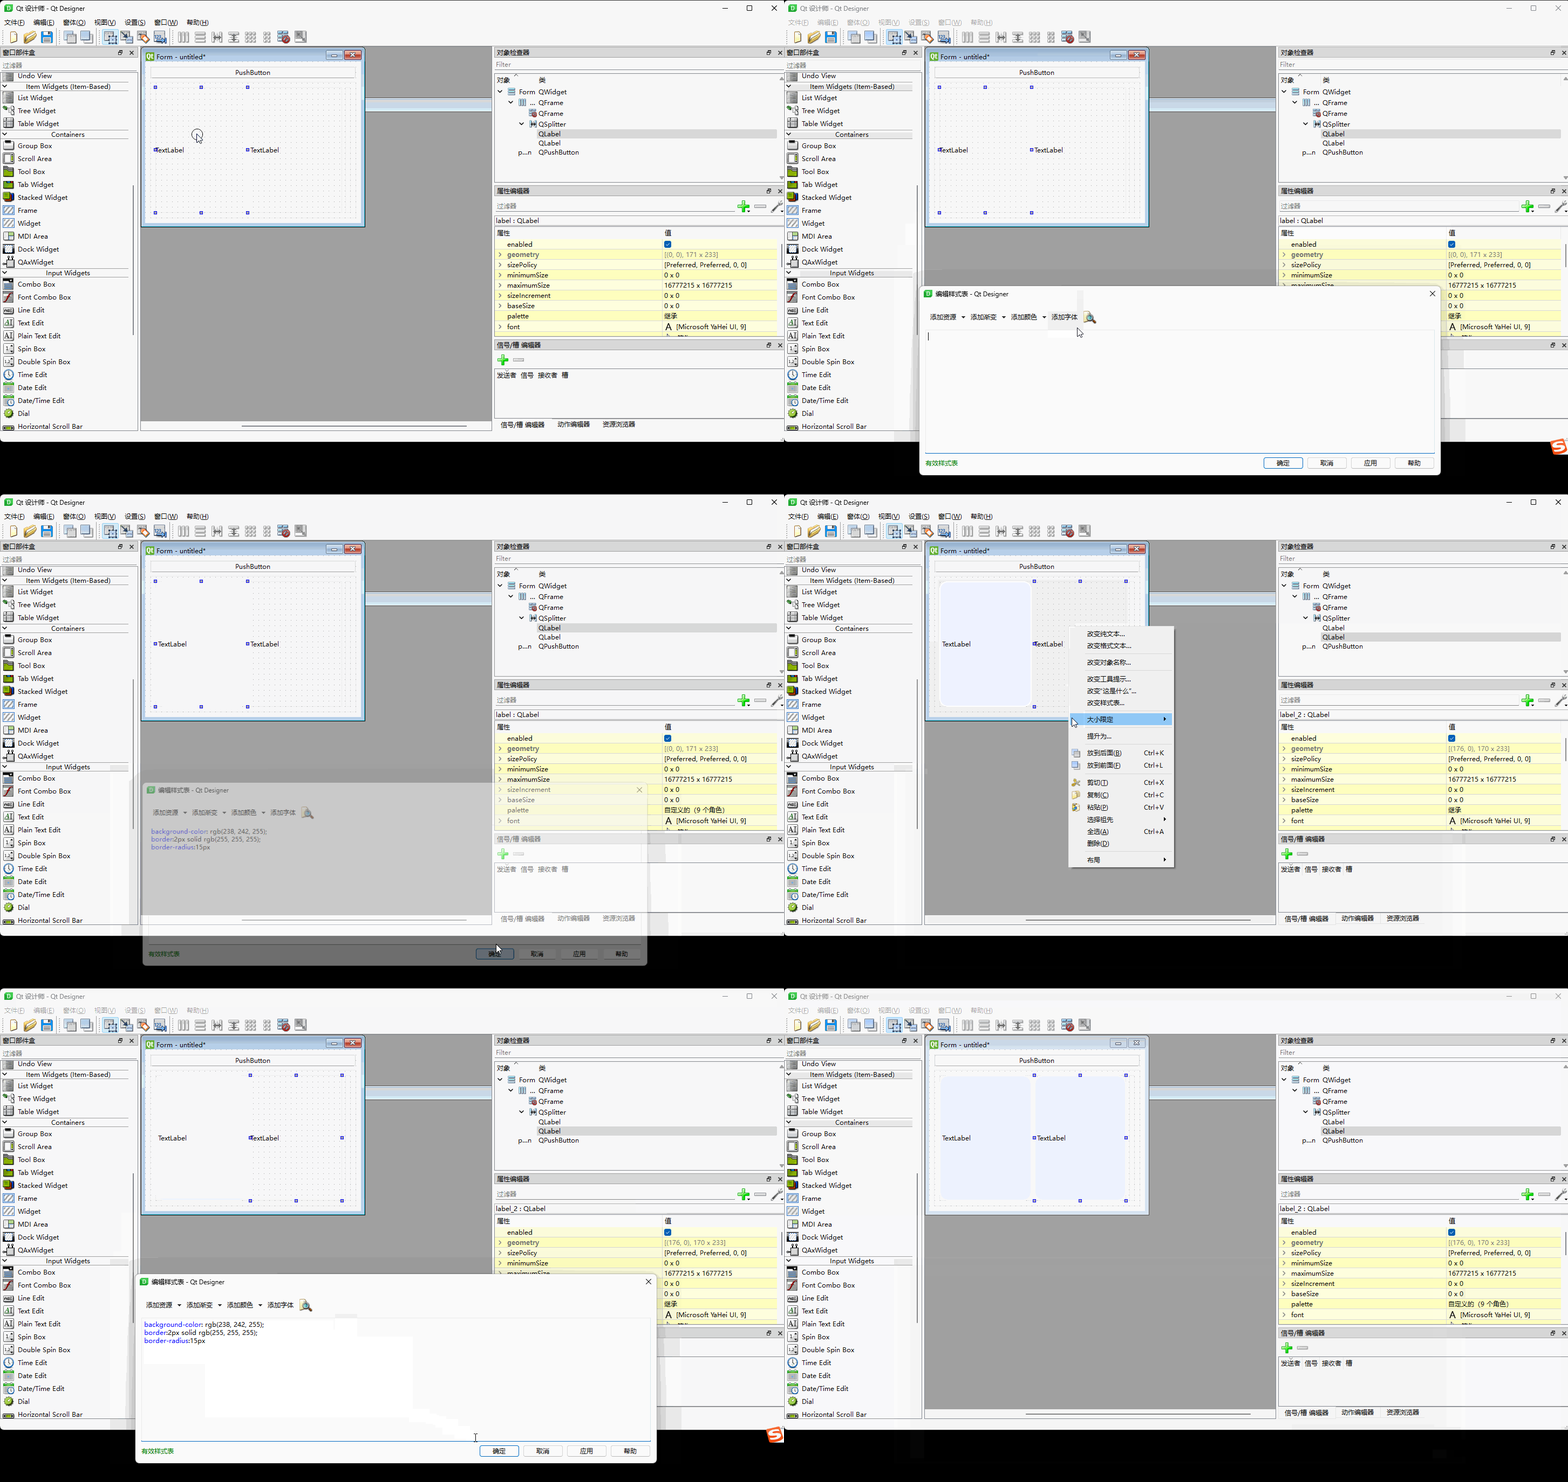
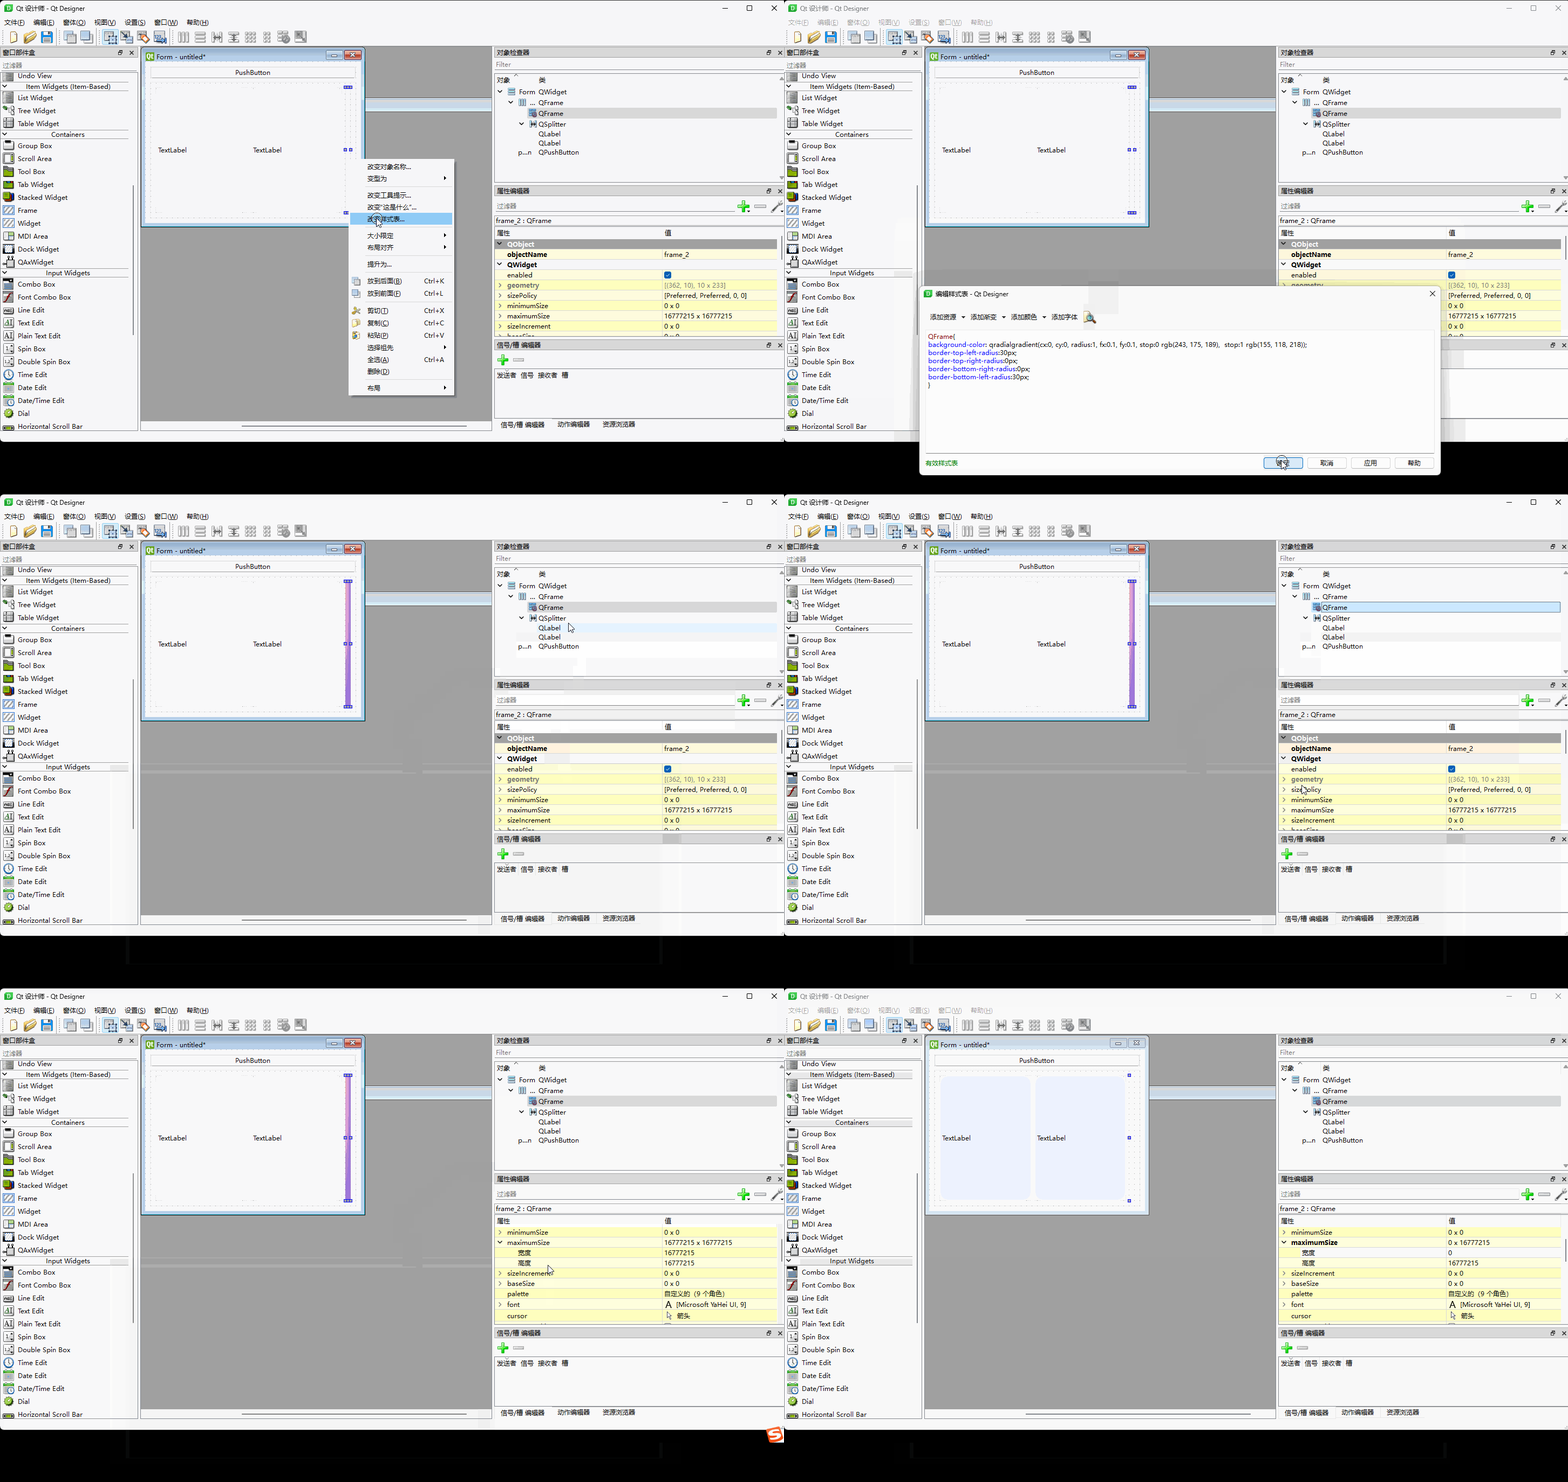
相关QSS
background-color: rgb(238, 242, 255);
border:2px solid rgb(255, 255, 255);
border-radius:15px
QFrame{
background-color: qradialgradient(cx:0, cy:0, radius:1, fx:0.1, fy:0.1, stop:0 rgb(243, 175, 189), stop:1 rgb(155, 118, 218));
border-top-left-radius:30px;
border-top-right-radius:0px;
border-bottom-right-radius:0px;
border-bottom-left-radius:30px;
}三、ui文件如下:
<?xml version="1.0" encoding="UTF-8"?>
<ui version="4.0"><class>Form</class><widget class="QWidget" name="Form"><property name="geometry"><rect><x>0</x><y>0</y><width>400</width><height>300</height></rect></property><property name="windowTitle"><string>Form</string></property><layout class="QVBoxLayout" name="verticalLayout"><item><widget class="QPushButton" name="pushButton"><property name="text"><string>PushButton</string></property></widget></item><item><widget class="QFrame" name="frame"><property name="frameShape"><enum>QFrame::StyledPanel</enum></property><property name="frameShadow"><enum>QFrame::Raised</enum></property><layout class="QHBoxLayout" name="horizontalLayout"><item><widget class="QSplitter" name="splitter"><property name="orientation"><enum>Qt::Horizontal</enum></property><widget class="QLabel" name="label"><property name="styleSheet"><string notr="true">background-color: rgb(238, 242, 255);
border:2px solid rgb(255, 255, 255);
border-radius:15px</string></property><property name="text"><string>TextLabel</string></property></widget><widget class="QLabel" name="label_2"><property name="styleSheet"><string notr="true">background-color: rgb(238, 242, 255);
border:2px solid rgb(255, 255, 255);
border-radius:15px</string></property><property name="text"><string>TextLabel</string></property></widget></widget></item><item><widget class="QFrame" name="frame_2"><property name="maximumSize"><size><width>0</width><height>16777215</height></size></property><property name="styleSheet"><string notr="true">QFrame{
background-color: qradialgradient(cx:0, cy:0, radius:1, fx:0.1, fy:0.1, stop:0 rgb(243, 175, 189),  stop:1 rgb(155, 118, 218));
border-top-left-radius:30px;
border-top-right-radius:0px;
border-bottom-right-radius:0px;
border-bottom-left-radius:30px;
}</string></property><property name="frameShape"><enum>QFrame::StyledPanel</enum></property><property name="frameShadow"><enum>QFrame::Raised</enum></property></widget></item></layout></widget></item></layout></widget><resources/><connections/>
</ui>
四、代码
使用uic工具将ui文件转成py文件
import sysfrom PySide6.QtCore import QPropertyAnimation, QEasingCurve, QParallelAnimationGroup
from PySide6.QtWidgets import *from zzz.ui_home_03 import Ui_Form# 继承UI类
class MainWindow(QWidget, Ui_Form):def __init__(self, parent=None):super(MainWindow, self).__init__(parent)self.setupUi(self)self.pushButton.clicked.connect(self.settingBox)def settingBox(self):widthRightBox = self.frame_2.width()maxExtend = 100standard = 0if widthRightBox == 0:widthExtended = maxExtendelse:widthExtended = standard# 创建属性动画self.right_box = QPropertyAnimation(self.frame_2, b"minimumWidth")self.right_box.setDuration(500)self.right_box.setStartValue(widthRightBox)self.right_box.setEndValue(widthExtended)self.right_box.setEasingCurve(QEasingCurve.InOutQuart)self.right_box.start()# 动画组 如果是多个动画同时执行,则创建动画组。# self.group = QParallelAnimationGroup()# self.group.addAnimation(self.right_box)# self.group.start()if __name__ == '__main__':app = QApplication()window = MainWindow()window.show()sys.exit(app.exec())



![[ 云计算 | AWS 实践 ] Java 如何重命名 Amazon S3 中的文件和文件夹](https://img-blog.csdnimg.cn/9fc075c7fff2412b9508229e0ef4129b.png)



![buuctf[极客大挑战 2019]Havefun 1](https://img-blog.csdnimg.cn/img_convert/e37820d9feb822682dd1f04a7a7edced.png)

