1 Apache的基本介绍
1.1 Apache的作用
curl -I www.qq.com # 可以查看使用的服务器类型

以上服务器都是提供超文本传输协议的软件。常用的服务器类型:Apache、nginx、stgw、Tengine
1.2 Apache的安装
dnf install httpd.x86_64 -y
1.3 Apache的启用
systemctl enable --now httpd ##开启服务并设定服务位开机启动
firewall-cmd --list-all ##查看火墙信息
firewall-cmd --permanent --add-service=http ##在火墙中永久开启http访问
firewall-cmd --permanent --add-service=https ##在火墙中永久开启https访问
firewall-cmd --reload ##刷新火墙使设定生效


1.4 Apache的基本信息
- 服务名称:
httpd - 配置文件:
/etc/httpd/conf/httpd.conf主配置文件
/etc/httpd/conf.d/*.conf子配置文件 - 默认发布目录:
/var/www/html
默认发布文件:index.html
默认端口:80http
443https(加密的http) - 用户:
apache - 日志:
/etc/httpd/logs
2 Apache的基本配置
2.1 端口的修改
vim /etc/httpd/conf/httpd.conf
Listen 8080
firewall-cmd --permanent --add-port=8080/tcp
firewall-cmd --reload
systemctl restart httpd

2.2 默认发布文件修改
vim /etc/httpd/conf/httpd.conf # 在这里面修改发布默认文件
systemctl restart httpd


2.3 默认发布目录修改
/etc/httpd/conf/httpd.conf # 在配置文件中修改下面的内容


3 Apache的访问控制
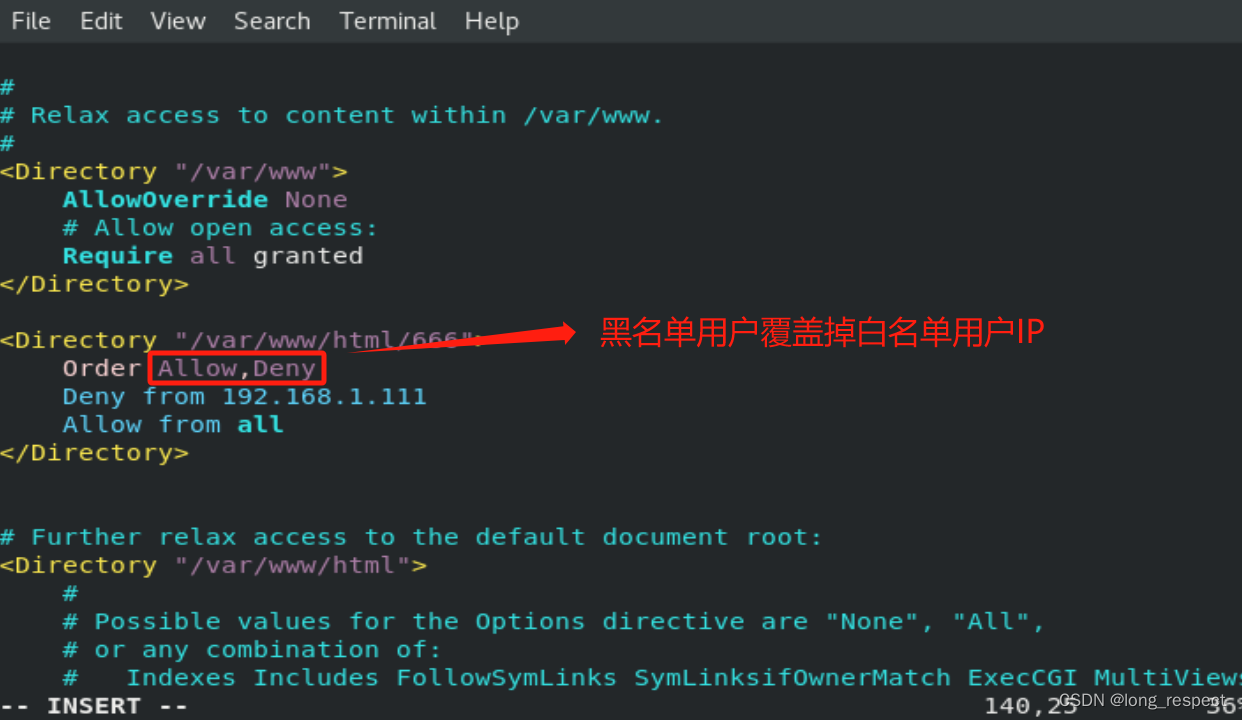
3.1 基于客户端ip的访问控制
/etc/httpd/conf/httpd.conf
3.1.1 白名单
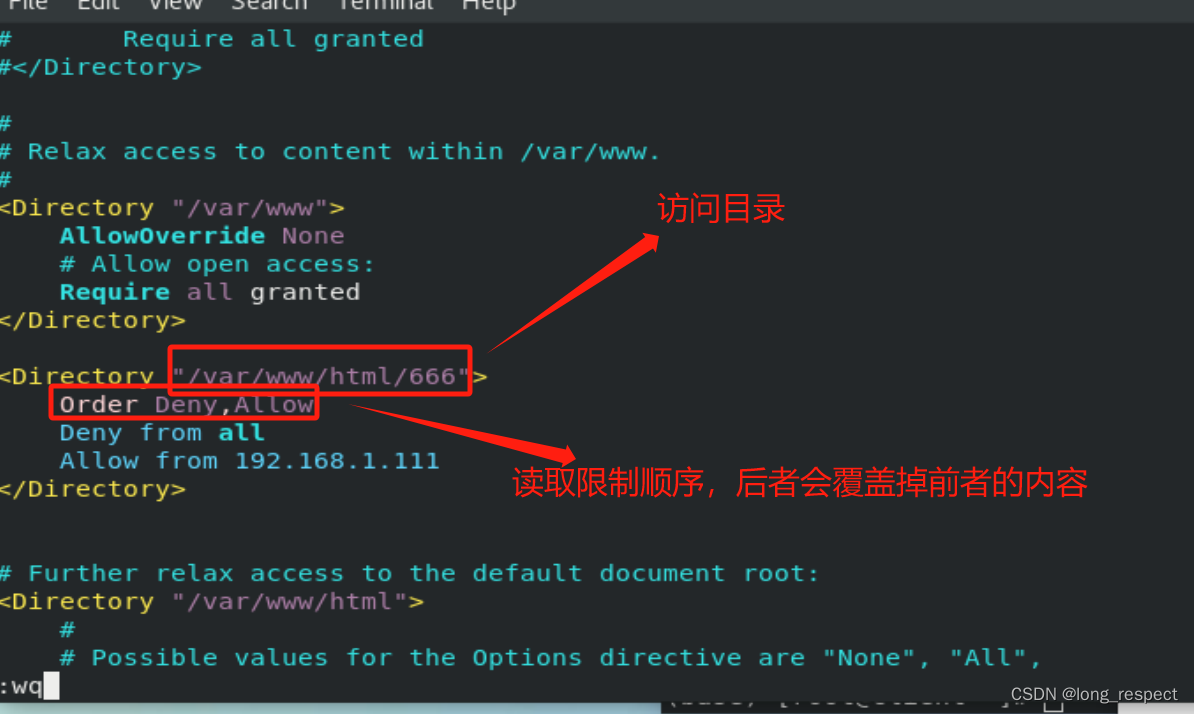


3.1.2 黑名单

3.2 基于用户认证
htpasswd -cm /etc/httpd/.htpasswd admin # 创建用户认证名单
htpasswd -m /etc/httpd/.htpasswd sxl    # 增加认证用户


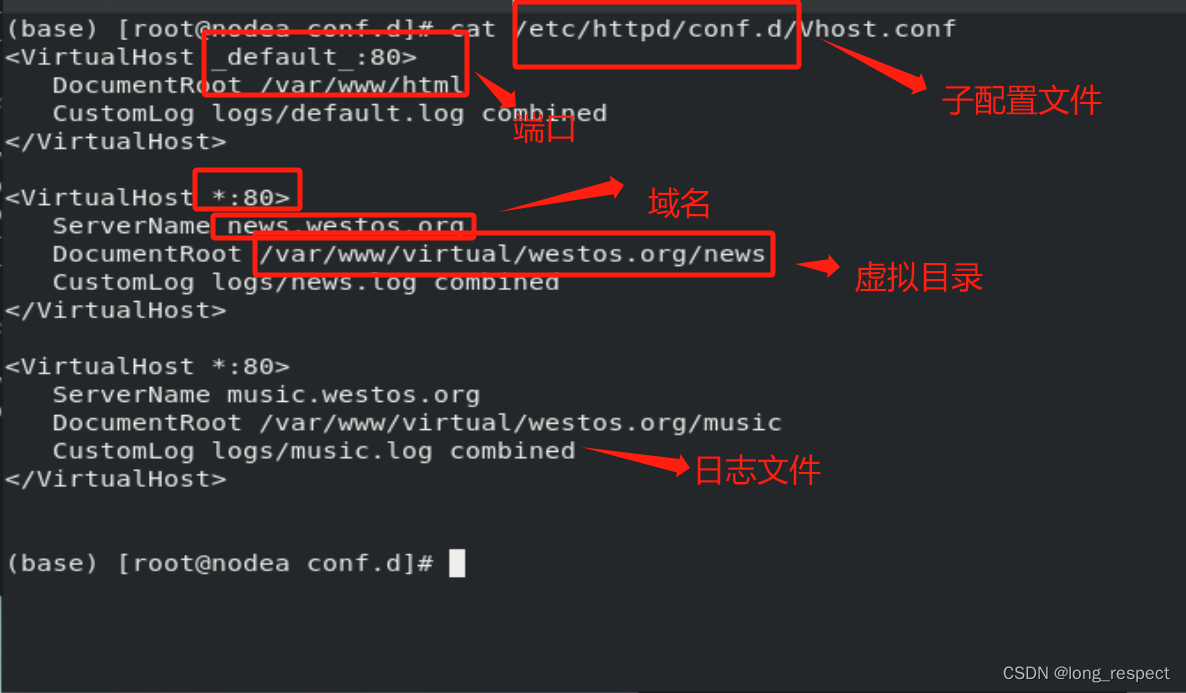
4 Apache的虚拟主机
4.1 创建虚拟目录

4.2 修改配置文件
/etc/httpd/conf.d/Vhost.conf # Vhost.conf是自定义,后缀不变
4.3 指定域名解析


5 Apache的语言支持
dnf install httpd-manual -y # 安装Apache使用说明书

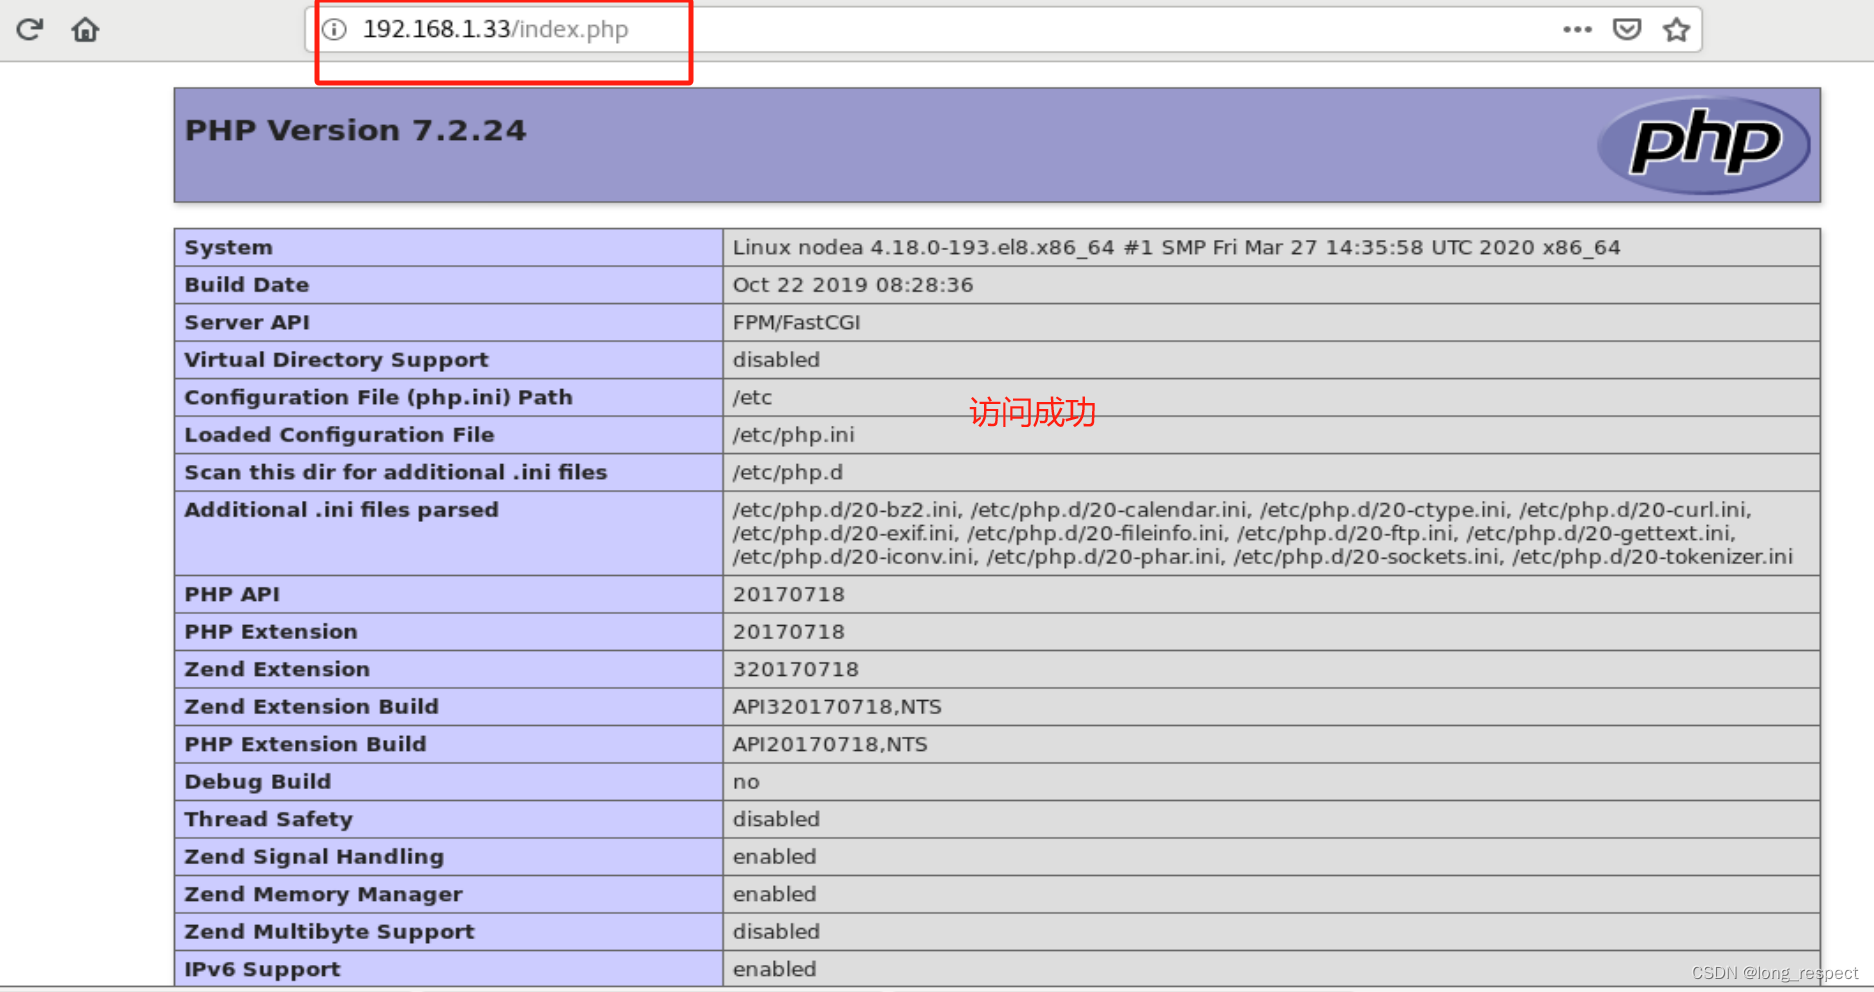
5.1 php
dnf install php -y # 安装php插件

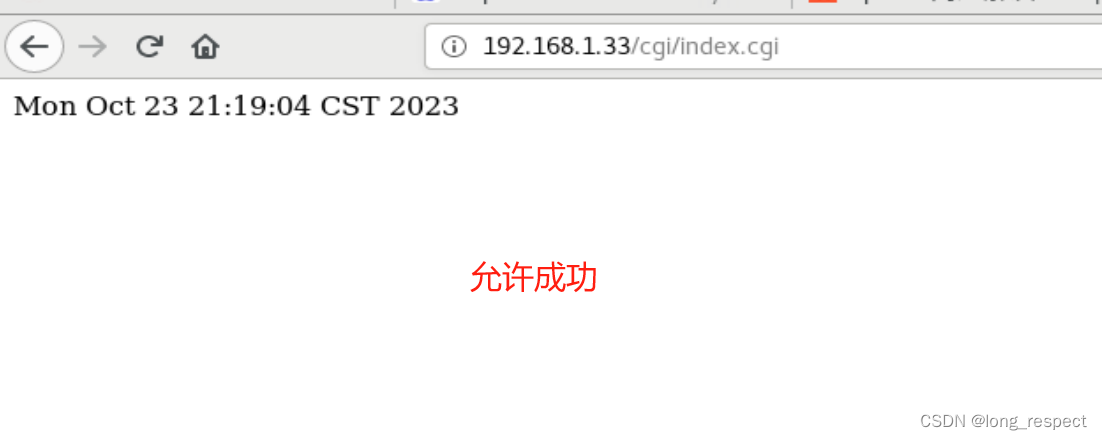
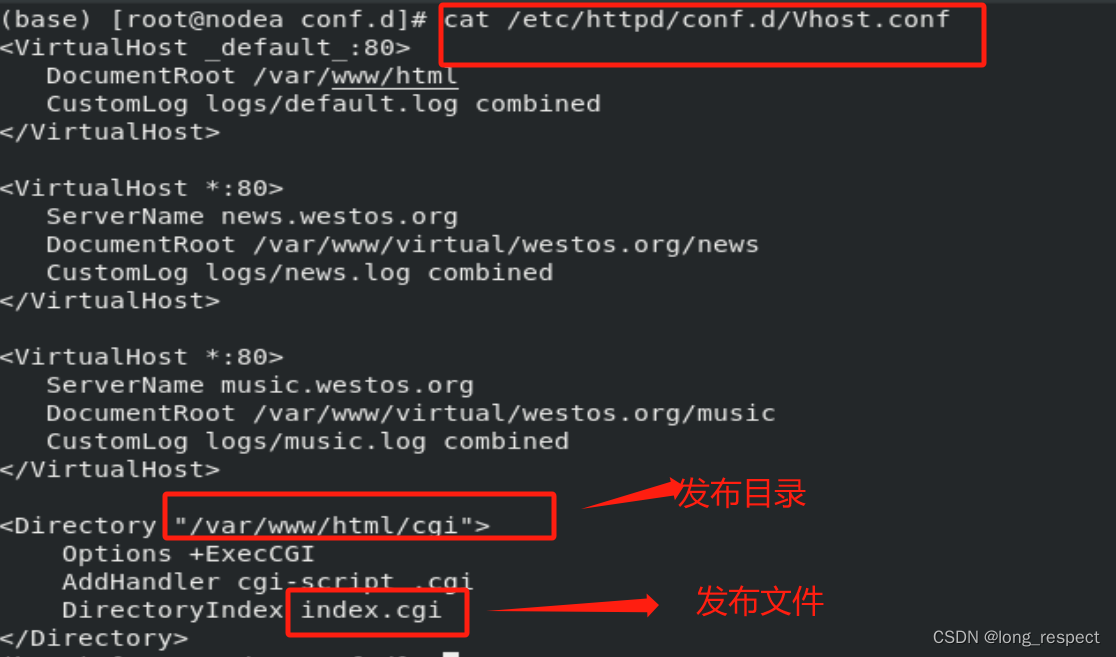
5.2 cgi
chmod +x /var/www/html/cgi/index.cgi # 添加可执行权限
/etc/httpd/conf.d/Vhost.conf

5.3 wsgi
dnf install python3-mod_wsgi # 安装wsgi工具


6 Apache的加密访问
6.1 加密插件安装
dnf install mod_ssl -y # 安装加密插件
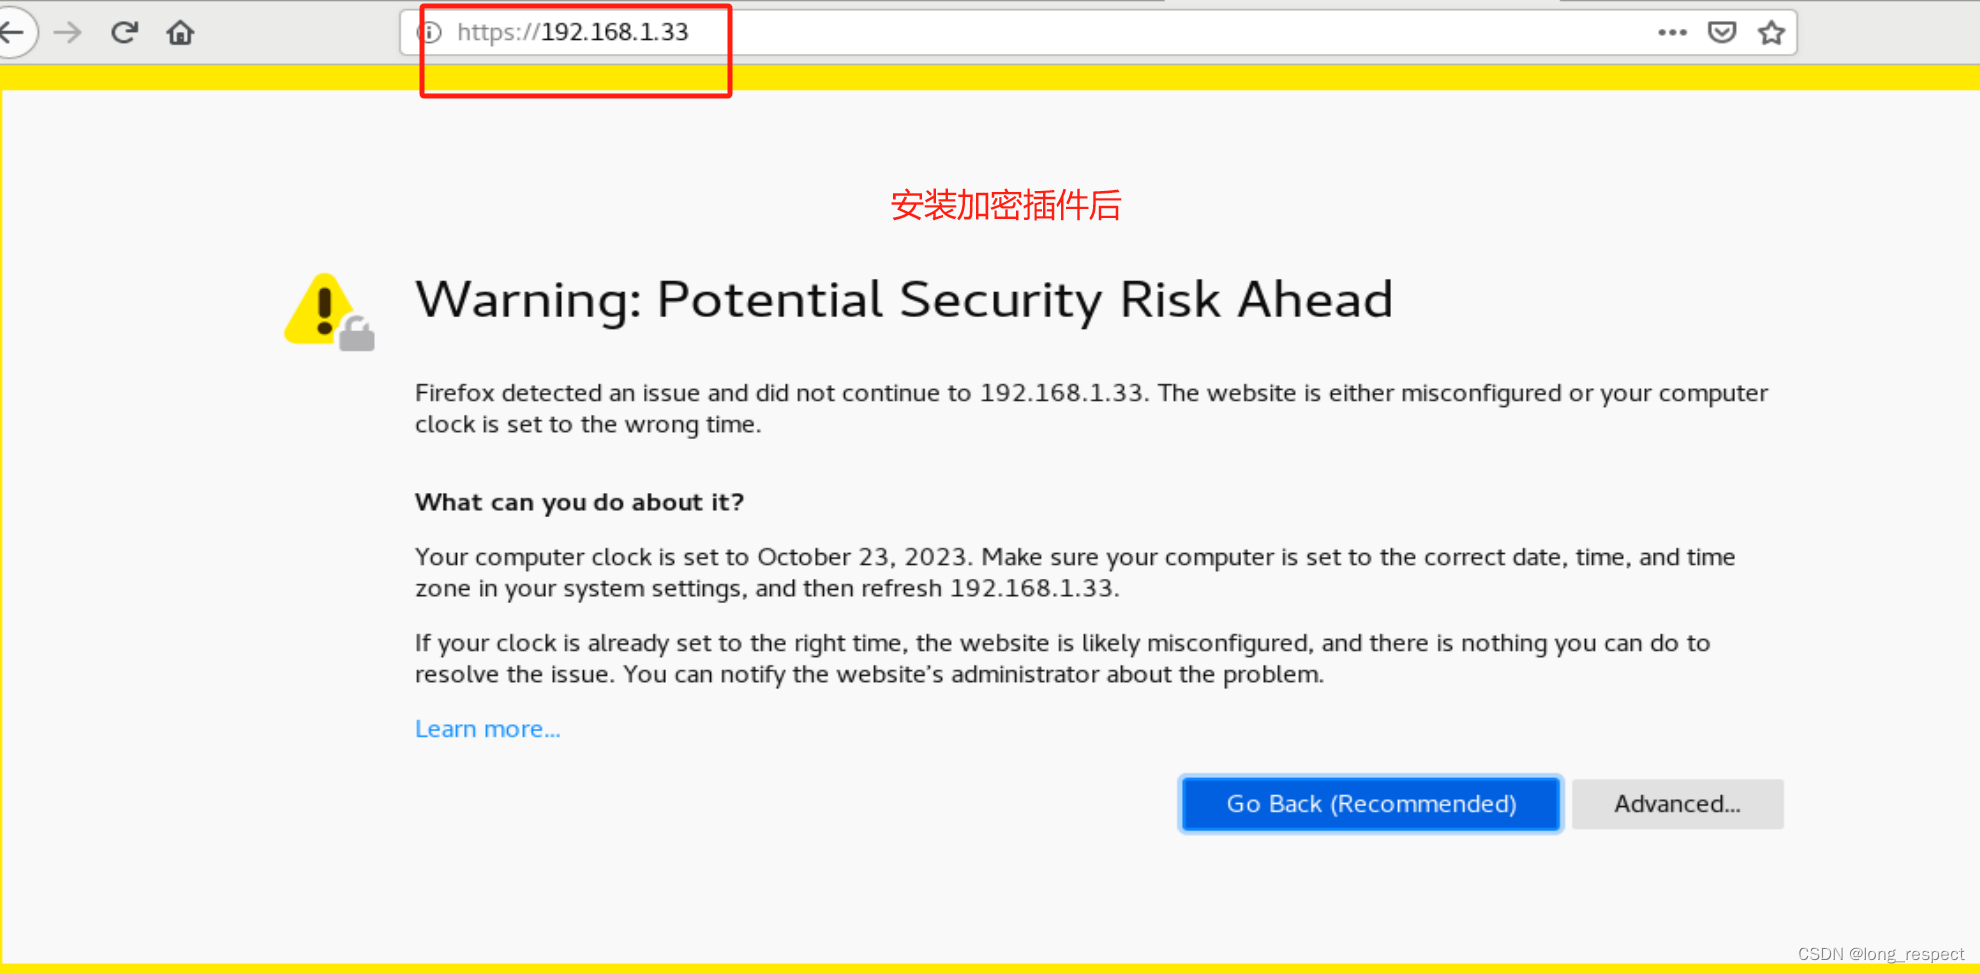
openssl req --newkey rsa:2048 -nodes -sha256 -keyout /etc/httpd/certs/westos.org.key -x509 -days 365 -out /etc/httpd/certs/westos.org.crt

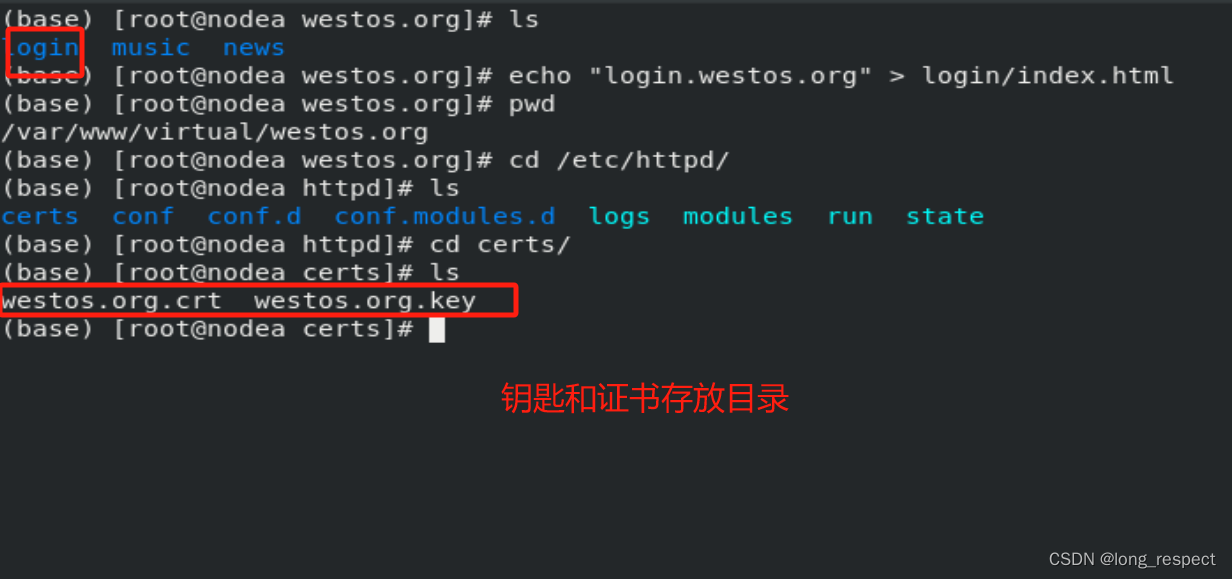
6.2 指定证书存放位置
/etc/httpd/conf.d/ssl.conf # 指定证书位置


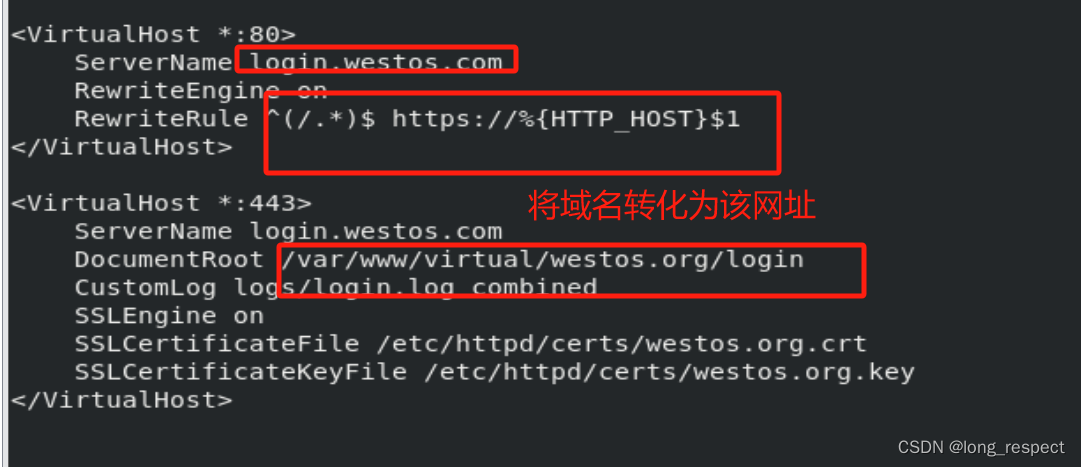
6.3 指定跳转指定域名到https
/etc/httpd/conf.d/Vhost.conf # 指定访问跳转

7 Squid代理加速访问Apache
squid反向代理
实验环境:
172.25.254.100 ##Apache服务器
172.25.254.200 ##squid,没有数据负责缓存
vim /etc/squid/squid.conf
http_port 80 vhost vport ##vhost 支持虚拟域名 vport 支持虚拟端口
#当172.25.254.30的80端口被访问会从172.25.254.20的80端口缓存数据
cache_peer 172.25.254.20 parent 80 0 proxy-only
systemctl restart squid


测试:


