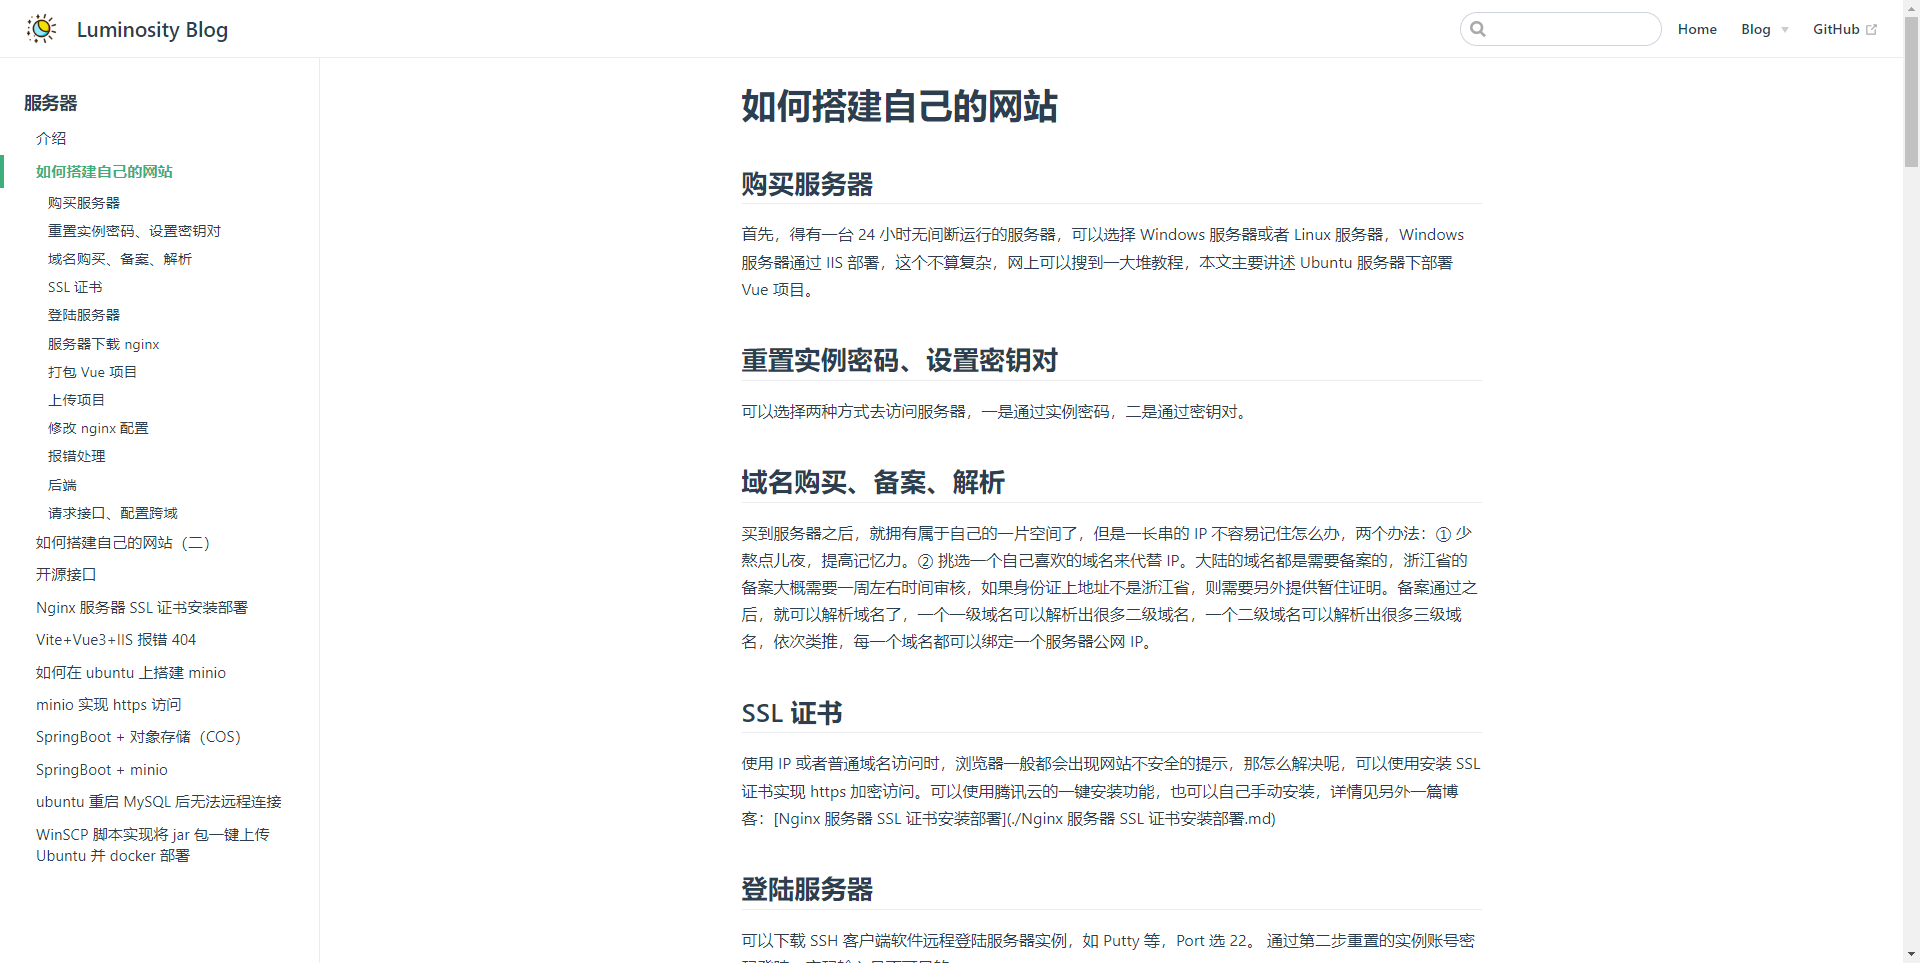
先来看一下网站截图:
快速上手
1.创建并进入一个新目录
mkdir vuepress-starter && cd vuepress-starter
2.使用你喜欢的包管理器进行初始化
yarn init # npm init
3.将 VuePress 安装为本地依赖
yarn add -D vuepress # npm install -D vuepress
4.创建你的第一篇文档
mkdir docs && echo '# Hello VuePress' > docs/README.md
5.在 package.json 中添加一些 scripts
{"scripts": {"docs:dev": "vuepress dev docs","docs:build": "vuepress build docs"}
}
6.在本地启动服务器
yarn docs:dev # npm run docs:dev
VuePress 会在 http://localhost:8080 (opens new window)启动一个热重载的开发服务器。
目录结构
以下是我个人博客目前的目录结构,主题为默认主题,类似 Vue 以及 VuePress 官网。
.
├── docs
│   ├── .vuepress
|   |   ├── public (静态资源目录)
│   │   └── config.js (配置文件)
│   │
│   ├── README.md (首页)
|   └── blog
|       ├── css (介绍css相关)
|       ├── micro (介绍微前端相关)
|       ├── server (介绍服务器相关)
|       └── vxmp (介绍微信小程序相关)
│
└── package.json
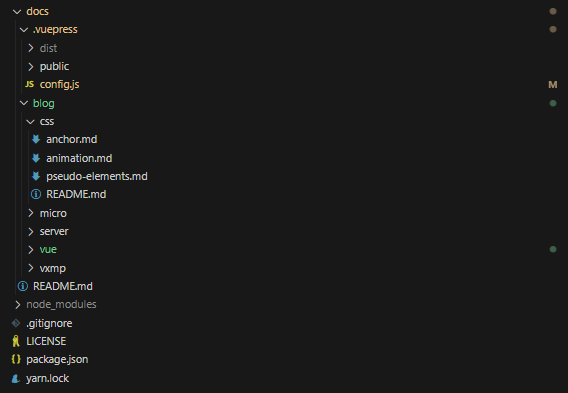
config.js (配置文件)
下面我们来详细看一下 config.js 配置文件。
module.exports = {title: "Luminosity Blog",description: "An awesome documentation website built with VuePress.",base: process.env.BASE_URL || "/vuepress/",plugins: [["@vuepress/back-to-top"],["@vuepress/medium-zoom"],["@vuepress/last-updated",{transformer: (timestamp, lang) => {const moment = require("moment");moment.locale(lang);return moment(timestamp).fromNow();},},],],head: [["link", { rel: "icon", href: "/favicon.ico" }]],themeConfig: {logo: "/ming.png",smoothScroll: true,lastUpdated: "上次更新",nav: [{ text: "Home", link: "/" },{text: "Blog",items: [{ text: "CSS", link: "/blog/css/" },{ text: "VUE", link: "/blog/vue/" },{ text: "微前端", link: "/blog/micro/" },{ text: "服务器", link: "/blog/server/" },{ text: "小程序", link: "/blog/vxmp/" },],},{ text: "GitHub", link: "https://github.com/fadeache" },],sidebar: {"/blog/css/": [{title: "CSS",collapsable: false,sidebarDepth: 2,children: ["","animation"...],},],...},},
};-
base 部署时的基本地址。比如我们部署到一个服务器上,这个服务器的域名是 zhang.beer,并通过 nginx 转发到指定路径 vuepress,这时就需要同时将此处的 base 也设置为 vuepress,就可以通过访问 zhang.beer/vuepress 来访问博客了。
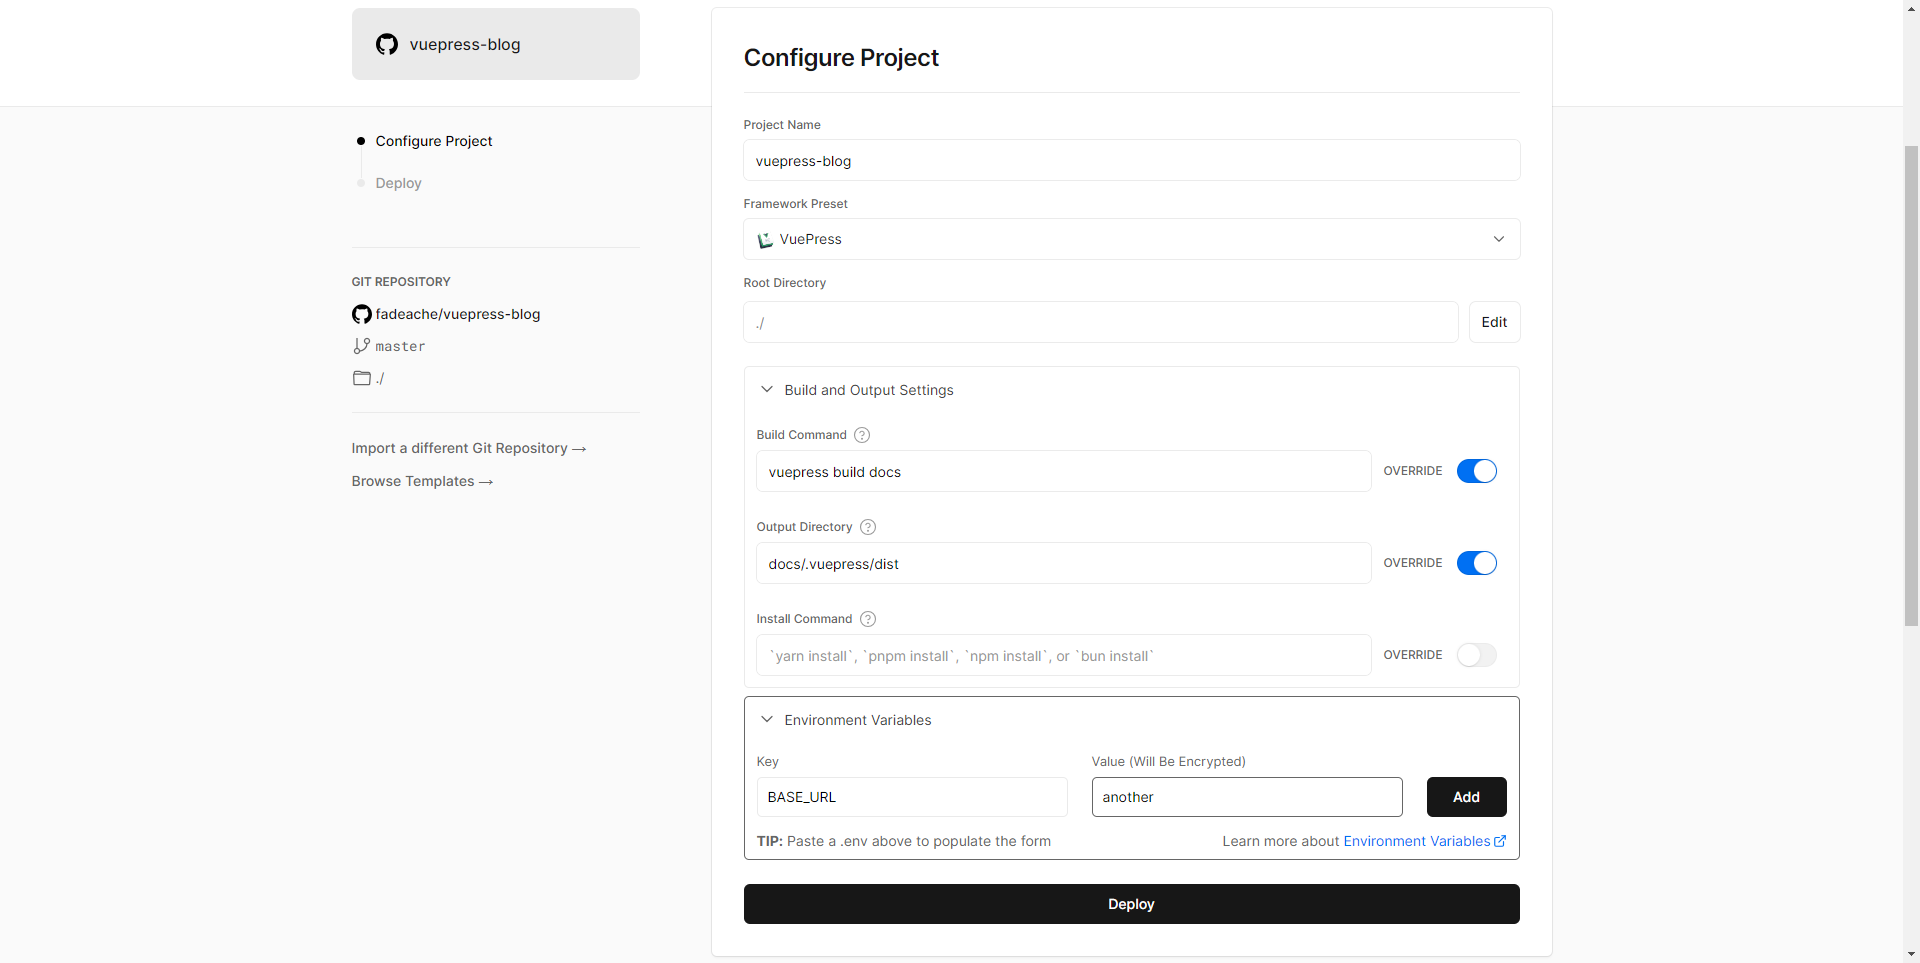
- process.env.BASE_URL 用于动态修改基本地址的环境变量。例如当部署时传入环境变量 BASE_URL = /another 时,便可以通过访问 zhang.beer/another 来访问博客。
-
plugins 插件。有些插件属于官方自带,有些插件需要自行下载,详情见官网。这里选用了三个插件。
- @vuepress/back-to-top 该插件会给你的站点添加一个 返回顶部 按钮。当页面向下滚动时,该按钮会显示在页面的右下角,点击它就会滚动到页面顶部。该插件已经集成到默认主题中。
- @vuepress/medium-zoom 为图片提供可缩放的功能。该插件已经集成到默认主题中。
- @vuepress/last-updated 上次更新时间。默认情况下,该插件为每个页面生成一个 13 位的时间戳,你可以传入一个 transformer 将其转换为你想要的任何格式。该插件已经集成到默认主题中。同时,使用 themeConfig.lastUpdated 选项可以设置提示文本,例如我个人博客设置的为“上次更新”,会根据远程存储库的更新时间,显示在每篇博客的最下面。
-
smoothScroll 平滑滚动。设置为 true 时,当点击侧边栏二级标题,将会平滑滚动到该标题下,否则直接跳转。
-
nav 顶部导航栏设置。这里我们设置了三个标题,分别为 Home、Blog、GitHub。其中点击 Home 和 GitHub 是直接跳转的,而点击 Blog 将会出现 5 个下拉选项:CSS、VUE、微前端、服务器、小程序。
-
sidebar 侧边栏设置。根据导航栏设置的地址,配置侧边栏。
- title 侧边栏顶部大标题。
- collapsable 顶部大标题是否显示折叠箭头。
- sidebarDepth 侧边栏深度。设置 2 即表示显示博客的二级标题至侧边栏。
- children 该大标题下的博客。其中“”代表 README 文件。其余跟博客文件的名称对应。
Vercel 部署
Vercel 提供了一个强大的、可扩展的平台,可以让开发者在不同的平台和环境中部署和管理他们的代码,简单易用且免费。
所以我们选择 Vercel 将我们的博客网站进行部署。
1.首先将项目同步 github ,然后在 Vercel 上关联该 github 账号。
2.在 Vercel 上点击 Add New Project。
3.点击 import,导入该博客项目。
4.按照如下添加部署配置,完成后点击 Deploy。其中 Environment Variables 和上文中 process.env.BASE_URL 对应,选填。
5.部署成功后点击 Add Domain,可以看到仅有 Vercel 给你预分配的一个域名,由于 DNS 污染,Vercel 的站点国内可能无法访问,不过我们可以绑定自定义域名。
去代理商官网购买自己的专属域名,例如我是在腾讯云购买的 zhang.beer 域名,但是只免费提供了一级域名的证书。所以之前我只能通过部署到 zhang.beer/vuepress 上,才能蹭到证书。
不过现在,可以解析出一个二级域名,例如 blog.zhang.beer,尽管没有证书,但是可以通过 Vercel 实现 HTTPS。
回到正题,我们将 blog.zhang.beer 填入,点 ADD 即可,这时提示我们添加 CNAME 的解析记录,一般为“cname.vercel-dns.com.”。
然后去腾讯云的域名控制台,将此条解析记录添加进去,即可将该博客部署到此域名,同时给与免费的证书且无需手动安装。


