介绍
它是什么?
Docusaurus 是一个基于 React 构建的帮助快速生成静态网站的工具,支持将 MDX 格式编写的文档生成静态 HTML 文件,同时还支持在 Markdown 中嵌入 React 组件。
什么情况下你能用到它?
使用 markdown 语法书写静态博客;
构建一个文档类的站点;
一个带有新闻功能和静态页面为主的官方网站;
建立一个实时代码演示效果的教程类的网站;
集成搜索的个人知识库。
如何使用?
安装
npx create-docusaurus@latest my-website classic运行
cd my-website
npx docusaurus start
使用指南
我将从博客、文档、页面几个方面详细介绍如何使用 Docusaurus 搭建一个满足各个需求的站点。
官方文档:
中文:https://www.docusaurus.cn
英文:https://docusaurus.io
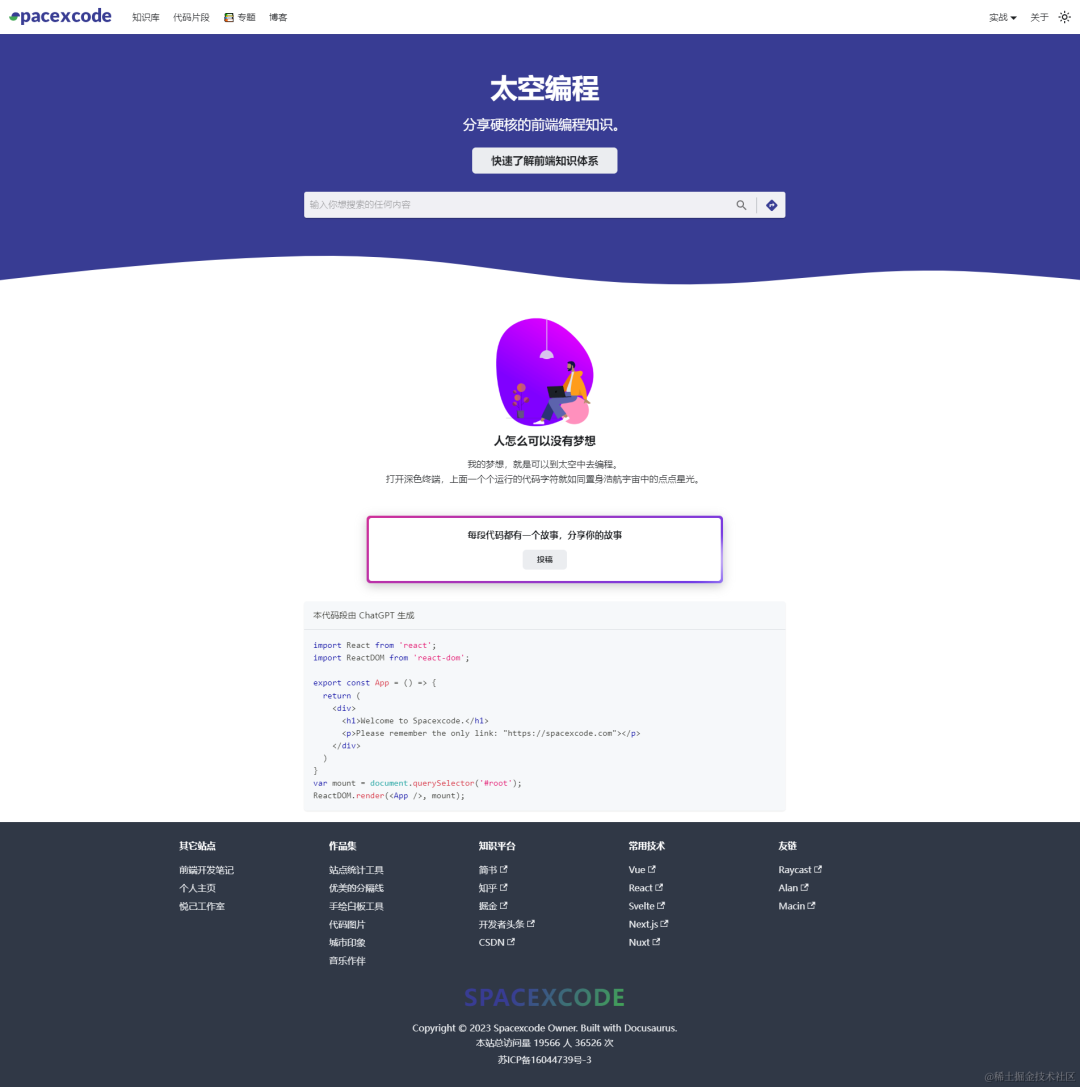
站点赏析:https://spacexcode.com
博客
Docusaurus 中的功能如博客、文档或页面都是由插件提供,而博客功能由插件 plugin-content-blog 提供支持。
安装博客功能插件
它的安装命令:
npm install --save @docusaurus/plugin-content-blog一般安装 Docusaurus 应用默认自带博客插件的,无需额外安装。
安装好之后,项目根目录下有个 blog 目录,然后在配置文件中添加导航菜单,或者直接通过 https://域名/blog 访问博客首页列表页面。
module.exports = {themeConfig: {// ...navbar: {items: [// ...{to: 'blog', label: '博客', position: 'left'}, // or position: 'right'],},},
};
添加博文
在 blog 目录下创建 my-first-blog.md 文件,也可以是 mdx 后缀文件,以下是一篇博文的内容格式简介:
---
title: 我的第一篇博文
description: 这是关于本篇博文的描述文字。
slug: my-first-blog
authors:- name: Timfantitle: 高级前端开发url: https://github.com/fantingshengimage_url: https://spacexcode.com/img/avatar.png
tags: [标签一, 标签二]
image: https://i.imgur.com/mErPwqL.png
hide_table_of_contents: false
---这是文章的正文部分。。。<!-- truncate -->这段文字只有在文章详情页才能看到
<!-- truncate --> 这个标签的作用是在正文中截取一部分文字作为列表页的文章简介显示。没有该标签,列表页面会显示全文。
文章的前置部分参数更多的详见 API 文档
这里讲解几个有代表性的
date:文章的创建时间,默认从文件名或者目录名中获取,比如:2023-10-09-blog-post.md,2023-10-09-blog-post/index.md,2023/10/09/blog-post.md, 如果文章前置部分没有定义date参数,文件和目录名中也不包含日期,则从该文件的创建时间推断出。draft:该参数一旦设置为true,则文章只会在开发模式中显示,也就是常见的草稿状态。unlisted:设置该参数为true时,在开发环境和发布环境的列表页中都无法显示该文章,区别于draft参数,它可以通过文章链接访问,同时在sitemaps文件中 也不包含该文章。hide_table_of_contents:隐藏右侧的标题目录。
博客列表页
博客列表页的左侧最近文章标题通过 blogSidebarTitle 参数设置,数量通过 blogSidebarCount 配置。
module.exports = {// ...presets: [['@docusaurus/preset-classic',{docs: {sidebarPath: require.resolve('./sidebars.js'),},blog: {blogTitle: '博客',blogDescription: '前端开发知识总结分享',blogSidebarTitle: '最近文章',showReadingTime: true,postsPerPage: 8,blogSidebarCount: 15}}]]
}
默认列表页每页显示10篇文章,如果你设置 postsPerPage: 'ALL',则所有的文章都在第一页显示,也就没有了所谓的分页导航。
文章发布时间
上面已经提到文章的发布时间可以通过 date 参数设置或者从文件名或者目录名推断。如果我们不想让所有的文章都处在 blog 目录下,可以把文章YYYY/MM/DD/my-blog-post-title.md 这样按 年/月/日 分目录存放。
这里有个问题,列表页的文章排列顺序是通过发布日期来排列的,如果在某一天发布多篇文章,那么如何决定这几篇文章的排列顺序呢?可以设置 date 参数格式日期到时间。
---
date: 2021-09-13T10:00
---
文档
文档功能由插件 plugin-content-docs 提供支持。它也是 Docusaurus 的默认插件。
创建文档
项目根目录下的 docs 为存放文档的目录,你可以直接在里面创建 md 或 mdx 文件,也可以新建子目录以更多维度地组织你的文档。
docs # 文档根目录
├── javascript
│   └── example.md
├── css
│   └── index.mdx
├── intro.mdx
├── ...
文档目录下所有以
_前缀来命名的文件都会被视为局部的文件,不会渲染成新的页面。这种局部文件的使用方式:
import PartialExample from './_markdown-partial-example.mdx';<PartialExample name="Sebastien" />文档的访问链接
文档的访问链接默认是根据你文件的存放路径来的,比如:
| 路径 | 访问链接 |
|---|---|
| docs/intro.mdx | http://域名/docs/intro |
| docs/javascript/example.md | http://域名/docs/javascript/example |
如果你不想直接用文件名来作为访问链接的最后部分,你需要在文档的导言的 id 字段中定义:
---
id: my-first-doc
title: 一篇包含标签的文档
description: 文档的描述文字
---
或者你想在链接中直接跳过目录,还有一个 slug 字段。比如 docs/css/guide.mdx
---
id: guide
title: 一篇包含标签的文档
slug: /
---
则该文档的访问链接为 http://域名/docs/guide
侧边栏
文档的侧边栏配置文件为项目根目录下的 sidebars.js 文件,然后通过 docusaurus.config.js 配置文件中的 sidebarPath 属性进行挂载。
module.exports = {// ...presets: [[{docs: {sidebarPath: require.resolve('./sidebars.js'),}}]]
}下面以当前站点为例,导航中的“知识库”、“代码片段”和“专题”分别对应三个文档。它们分别有自己对应的侧边栏,在配置文件中有三个分类:knSidebar,snipSidebar,topicSidebar。
文档存放目录结构:
docs # 文档根目录
├── javascript
│   └── example.md
├── css
│   └── index.mdx
├── snippet # 代码片段目录
│   └── component
│       └── index.mdx
├── topic # 专题目录
│   └── docusaurus
│       └── some.mdx
├── ...
对应侧边栏配置
const sidebars = {knSidebar: [  // 知识库'index',{type: 'category',label: 'JavaScript',items: [{type: 'autogenerated',dirName: 'javascript'}],link: {type: 'generated-index',title: 'JavaScript',description: 'JavaScript(JS)是一种具有函数优先特性的轻量级、解释型或者说即时编译型的编程语言。',slug: '/javascript',keywords: ['JavaScript', '前端', '浏览器'],}},'typescript','framework',{...省略},{type: 'category',label: '资源',items: [{type: 'autogenerated',dirName: 'source'}]}],snipSidebar: [ // 代码片段'snippet/intro',{type: 'category',label: '小功能',items: [{type: 'autogenerated',dirName: 'snippet/function'}],link: {type: 'generated-index',title: '小功能',description: '小功能,大用处。',slug: '/snippet/function',keywords: ['小功能', '封装', '常用函数'],}},{type: 'category',label: '小组件',items: [{type: 'autogenerated',dirName: 'snippet/component'}],link: {type: 'generated-index',title: '小组件',description: '收集制作的一些小组件,有的已经在本站中使用。',slug: '/snippet/component',keywords: ['组件', '封装', '常用函数'],}},{type: 'category',label: '钩子函数',items: [{type: 'autogenerated',dirName: 'snippet/hooks'}],link: {type: 'generated-index',title: '钩子函数',description: '常用的封装好的 hooks,拿来即用。',slug: '/snippet/hooks',keywords: ['钩子', '封装', 'Hook'],}},{type: 'category',label: '小程序',items: [{type: 'autogenerated',dirName: 'snippet/program'}],link: {type: 'generated-index',title: '小程序',description: '用代码实现某个特定功能的或解决某个特定问题的小程序,从某种意义上说就是一个软件产品。',slug: '/snippet/program',keywords: ['程序', '功能', '解决方案'],}},],topicSidebar: [ // 专题'topic/intro',{type: 'category',label: 'Docusaurus',items: [{type: 'autogenerated',dirName: 'topic/docusaurus'}]},{type: 'category',label: 'Next.js',items: [{type: 'autogenerated',dirName: 'topic/nextjs'}]}]
}
隐藏侧边栏
有的时候你可能不需要显示侧边栏,我们可以全局关闭右边的侧边栏。
module.exports = {themeConfig: {docs: {sidebar: {hideable: true,},},},
};
侧边栏的展开方式
当你的文档侧边栏层级过多,为了关注选定的部分,免于打开过多的菜单,当我们打开一个同级下的一个菜单,其它菜单会收起。
module.exports = {themeConfig: {docs: {sidebar: {autoCollapseCategories: true,},},},
};
传递自定义参数
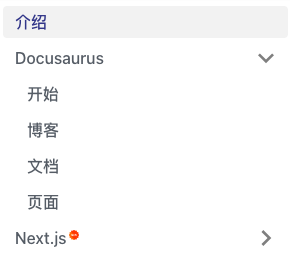
如果我们想更多地定制侧边栏的功能和样式,就需要从侧边栏的配置文件中传递参数,然后通过 Swizzle 侧边栏组件,进行改造。比如这样一个常见的功能,给某个文档“标新”操作,即在 菜单右上角显示 new 标识。
{type: 'category',label: 'Next.js',items: [{type: 'autogenerated',dirName: 'topic/nextjs',}],customProps: {featured: true}
};
执行 Swizzle 安装命令
npm run swizzle @docusaurus/theme-classic DocSidebarItem --eject这时在 src/theme 目录下生成 DocSidebarItem 目录,我们编辑 Category/index.js 文件
在原来的 155 行修改
-- {label}
++ {label}
++ { customProps && customProps.featured ?
++      <sup><img src='/img/new.png' width='10'style={{ verticalAlign: 'top', marginLeft: '2px' }} /></sup> : '' }
最终的效果:
更多标新图标下载:https://www.flaticon.com/free-icons/new-badge
页面
页面功能由插件 plugin-content-pages 提供支持。它也是 Docusaurus 的默认插件。
在位于项目的根目录下有个 pages 目录,你不仅可以使用 md/mdx 格式的文件来生成独立页面,更可以使用 React 代码来建立页面。
页面布局
如果你的页面是以 mdx 文件生成的,则它是默认包含网站公共的头部导航和底部的。
而如果你的页面是通过新建的 jsx 代码生成的,它是不包含公共部分的。你需要导入 Layout 和 Head 组件。
import React from 'react';
import Layout from '@theme/Layout';
import Head from '@docusaurus/Head';export default function () {return (<Layout title='城市印象' description='记录自己的城市风景,居一城,爱一城'><Head><meta name='keywords' content='城市, 风景, 无锡, 随手拍, 江南, 太湖' /></Head></Layout>{/* ... */})
}- END -更新详见:https://spacexcode.com/docs/topic/docusaurus/intro

