一、创建父模块
File --> New --> Project ,选择 “ Spring Initalizr ” ,点击 Next
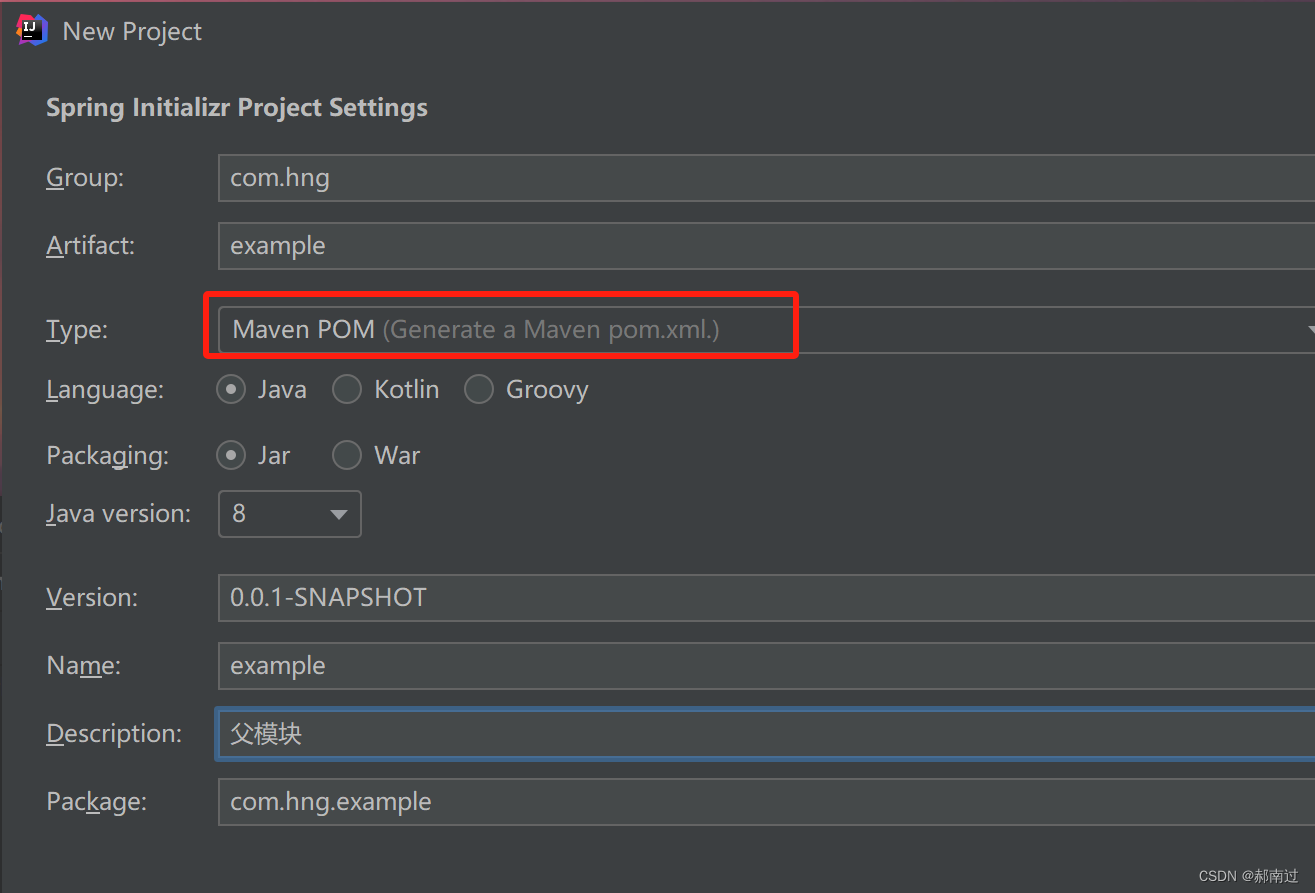
Next
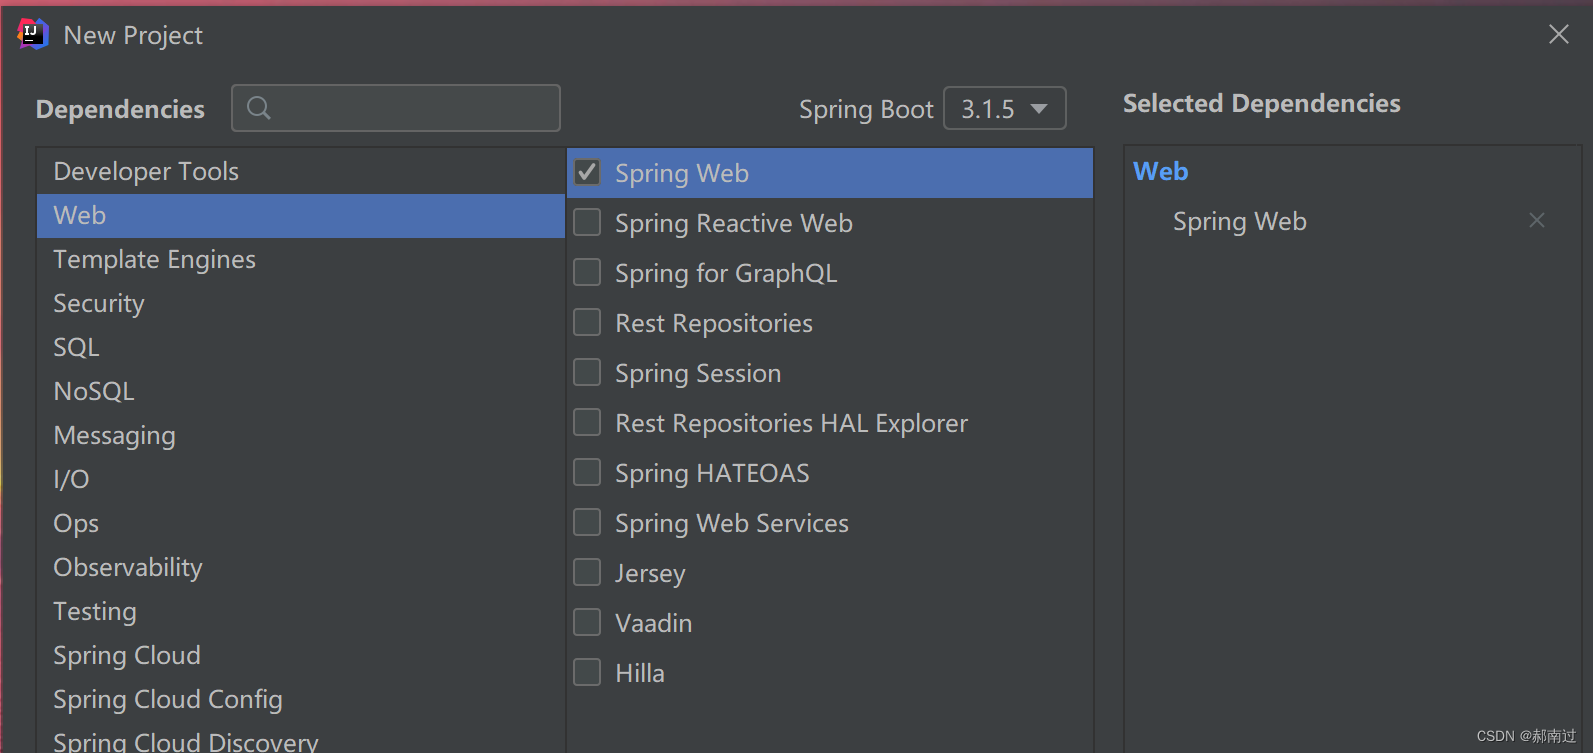
Next --> Finish

二、创建子模块
右键根目录,New --> Module
 选择 “ Spring Initializr ”,点击Next

此处注意Type选择Maven,Artifact根据自己的分模块的标准进行命名,可以按功能分模块(比如:订单、支付、登陆等模块分,就可以命名为order、pay、login等),此处我按照公共模块,业务模块、工具模块等模块进行划分的。
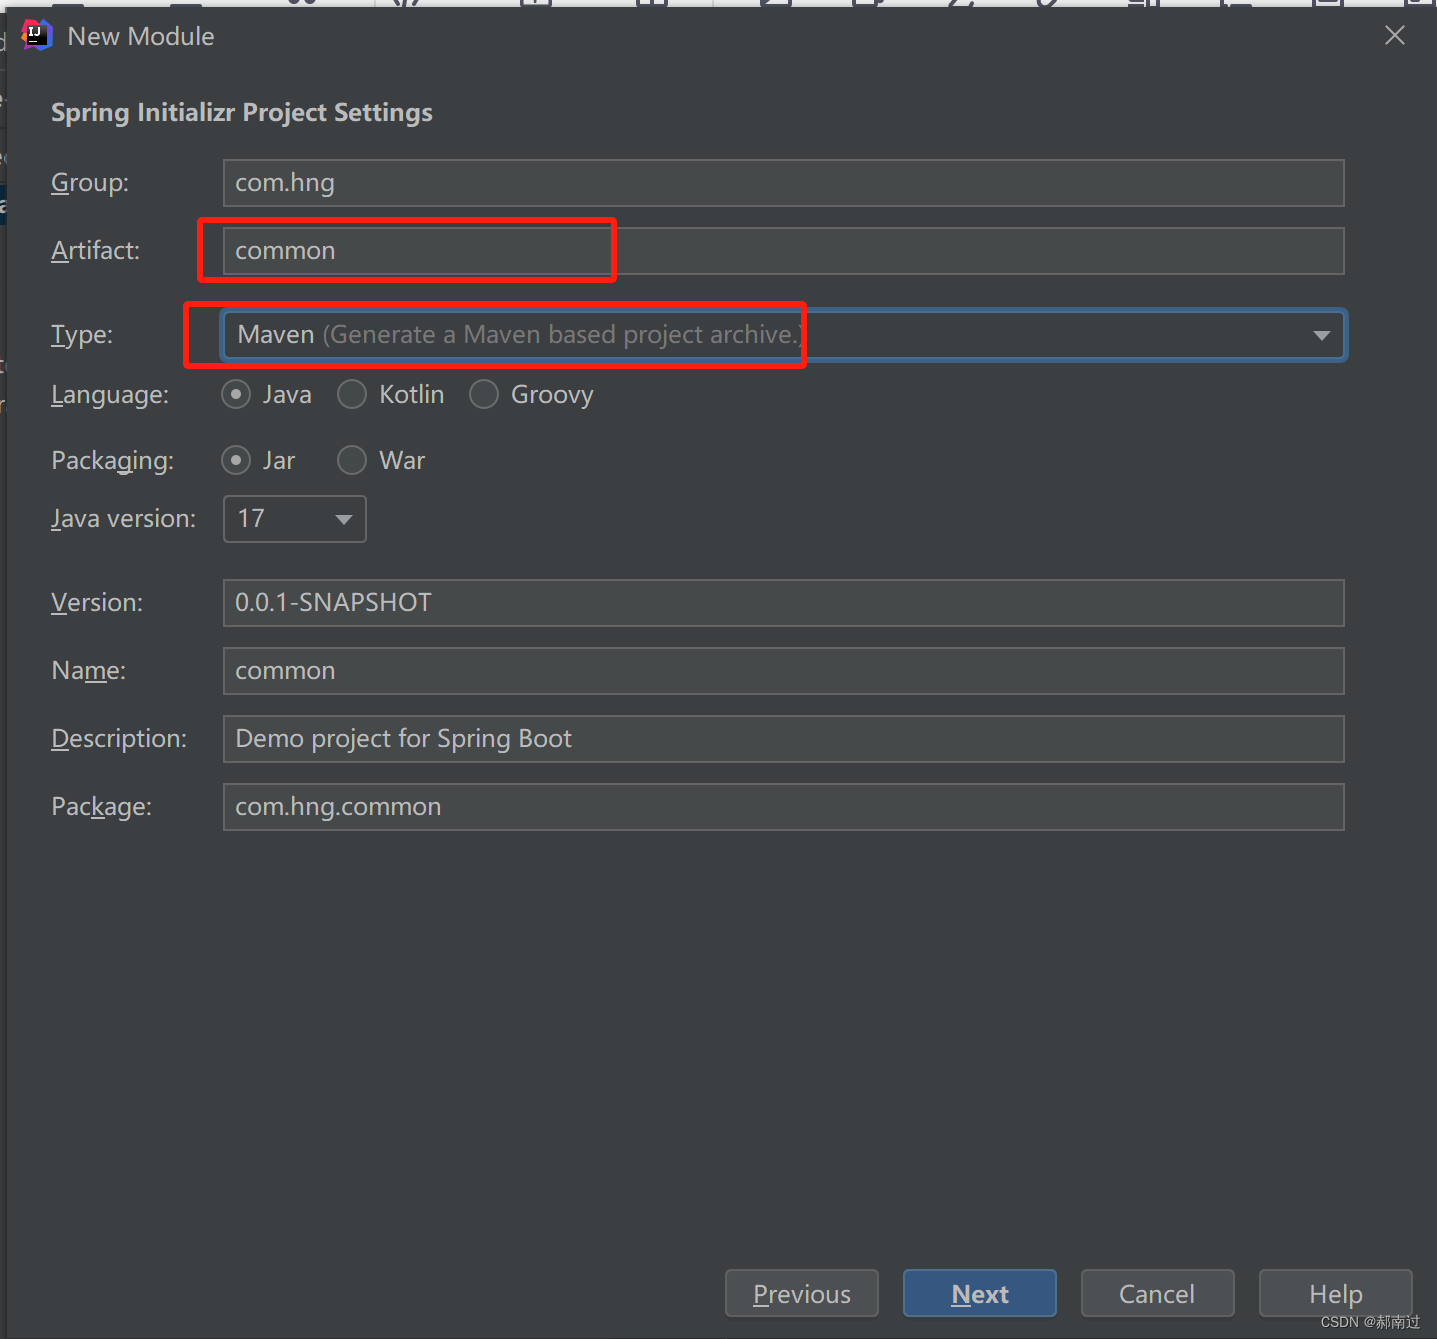
Next
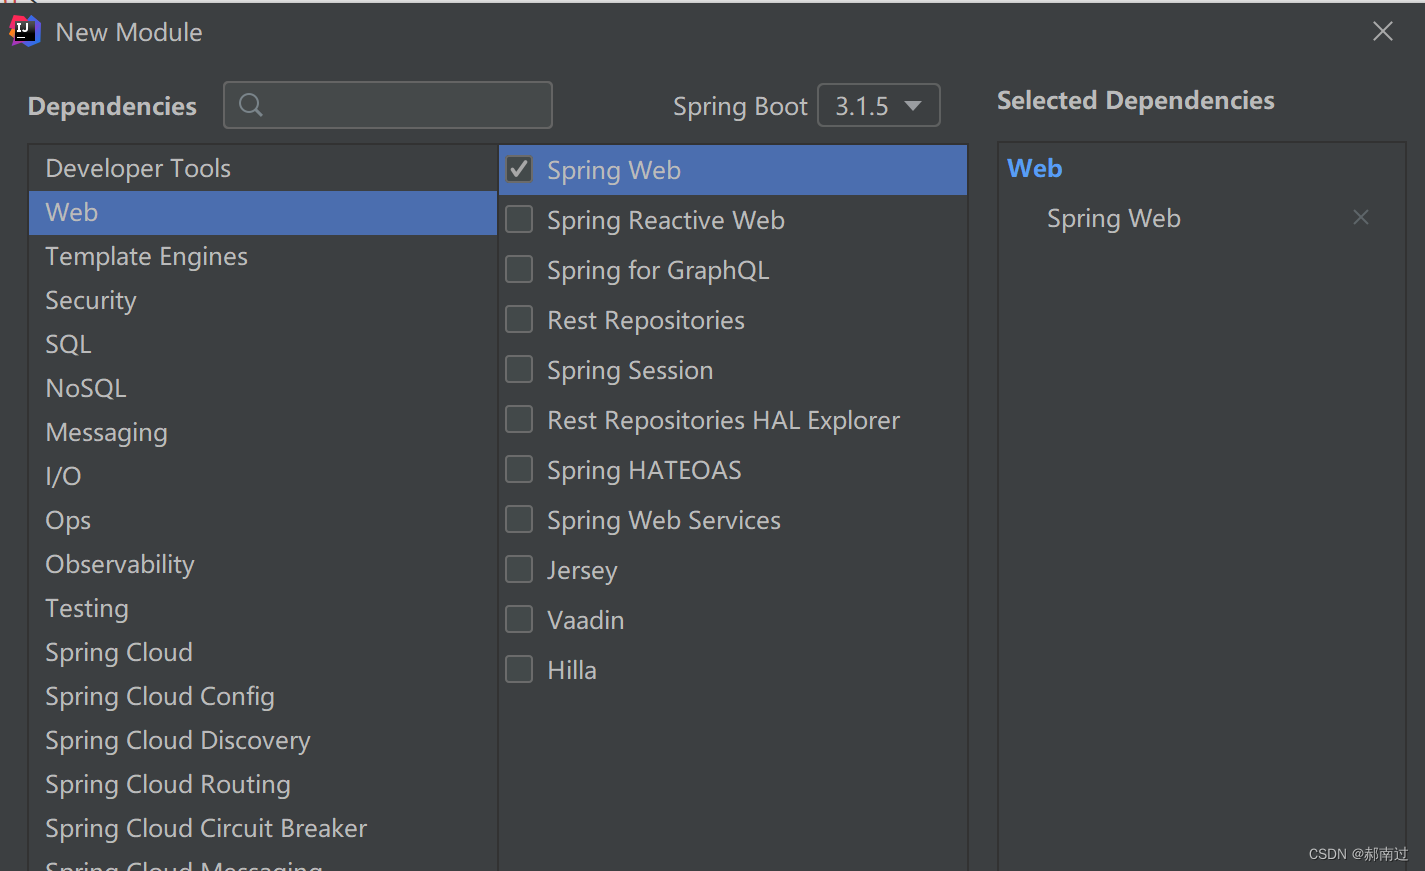
Next --> Finish
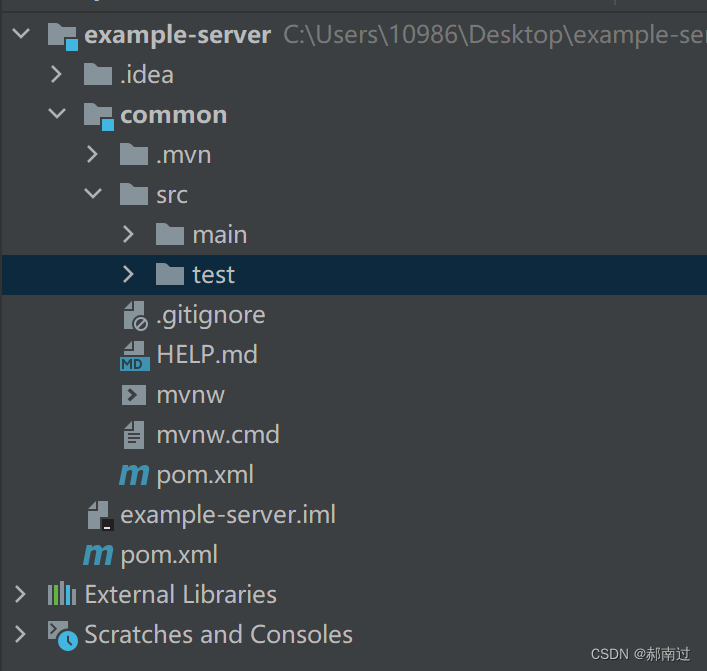
重复上述步骤,根据自身需要再创建其他子模块

三、修改pom文件
子模块
<?xml version="1.0" encoding="UTF-8"?>
<project xmlns="http://maven.apache.org/POM/4.0.0" xmlns:xsi="http://www.w3.org/2001/XMLSchema-instance"xsi:schemaLocation="http://maven.apache.org/POM/4.0.0 https://maven.apache.org/xsd/maven-4.0.0.xsd"><modelVersion>4.0.0</modelVersion><parent><groupId>org.springframework.boot</groupId><artifactId>spring-boot-starter-parent</artifactId><version>2.7.5</version><relativePath/> <!-- lookup parent from repository --></parent><groupId>com.hng</groupId><artifactId>business</artifactId><version>0.0.1-SNAPSHOT</version><name>business</name><description>业务模块</description><properties><java.version>8</java.version></properties><dependencies><dependency><groupId>org.springframework.boot</groupId><artifactId>spring-boot-starter-web</artifactId></dependency><dependency><groupId>org.springframework.boot</groupId><artifactId>spring-boot-starter-test</artifactId><scope>test</scope></dependency></dependencies><build><plugins><plugin><groupId>org.springframework.boot</groupId><artifactId>spring-boot-maven-plugin</artifactId></plugin></plugins></build></project>
父模块
<?xml version="1.0" encoding="UTF-8"?>
<project xmlns="http://maven.apache.org/POM/4.0.0" xmlns:xsi="http://www.w3.org/2001/XMLSchema-instance"xsi:schemaLocation="http://maven.apache.org/POM/4.0.0 https://maven.apache.org/xsd/maven-4.0.0.xsd"><modelVersion>4.0.0</modelVersion><groupId>com.hng</groupId><artifactId>server</artifactId><version>0.0.1-SNAPSHOT</version><name>server</name><description>父模块</description><packaging>pom</packaging><parent><groupId>org.springframework.boot</groupId><artifactId>spring-boot-starter-parent</artifactId><version>2.7.5</version><relativePath/> <!-- lookup parent from repository --></parent><properties><java.version>8</java.version></properties><!--引入子模块--><modules><module>common</module><module>business</module><module>system</module><module>tools</module></modules><dependencies><dependency><groupId>org.springframework.boot</groupId><artifactId>spring-boot-starter-web</artifactId></dependency><dependency><groupId>org.springframework.boot</groupId><artifactId>spring-boot-starter-test</artifactId><scope>test</scope></dependency></dependencies><build><plugins><plugin><groupId>org.springframework.boot</groupId><artifactId>spring-boot-maven-plugin</artifactId></plugin></plugins></build></project>
四、删除多余不必要的文件及目录
1.删除所有子模块的 mvnw、mvnw.cmd、xxx.iml 文件及 .mvn 文件夹
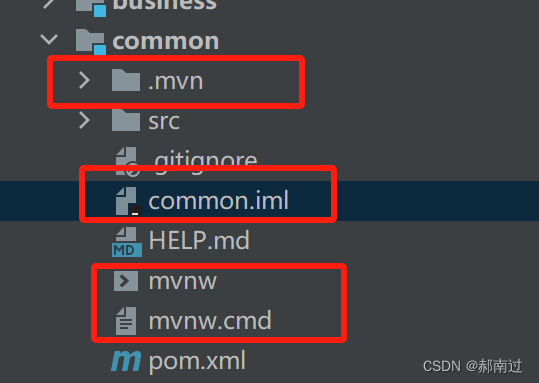
2.删除所有子模块resources文件夹

3.删除所有子模块的的启动类

五、在主模块中添加测试代码,启动项目测试
在主模块business中创建对应的包controller、service等,在controller创建测试代码
package com.hng.business.controller;import org.springframework.web.bind.annotation.RequestMapping;
import org.springframework.web.bind.annotation.RestController;/*** @Author 郝南过* @Date 2023/11/3 12:21* @Version 1.0*/
@RestController
public class TestController {@RequestMapping("/test")public String hello(){return "Hello";}
}
使用主模块business的启动文件启动项目,访问localhost:8080/test,可以正常看到响应(默认端口为8080,如需要修改可在主模块business下的resources下的application.properties文件中进行配置修改)





![[2016-2018]phpstudy的exp制作](https://img-blog.csdnimg.cn/0123eab1c02d4467981d827b0ebd3658.png)
