RabbitMQ集群配置以及负载均衡配置
- 环境配置
- 集群配置
- 安装rabbitmq
- 启动rabbitmq
- 开启远程登录
- 添加用户并且授权用户
- 添加数据存放目录和日志存放目录
- 查看端口
- 拷⻉erlang.cookie
- 将mq-2、mq-3作为内存节点加⼊mq-1节点集群中
- 查看集群状态
- 添加一个新的队列
- RabbitMq负载均衡配置-HAProxy
- 安装HAProxy
- 修改配置文件
- 登录haproxy
- mysql授权root用户远程登录
环境配置
| 服务器 | ip地址 |
|---|---|
| rabbitmq-1 | 192.168.10.128 |
| rabbitmq-2 | 192.168.10.129 |
| rabbitmq-3 | 192.168.10.130 |
集群配置
安装rabbitmq
-
三台机子都配置对应得hosts文件
[root@localhost ~]# cat /etc/hosts 127.0.0.1 localhost localhost.localdomain localhost4 localhost4.localdomain4 ::1 localhost localhost.localdomain localhost6 localhost6.localdomain6 192.168.10.128 rabbitmq-1 192.168.10.129 rabbitmq-2 192.168.10.130 rabbitmq-3 -
三台机子都得安排rabbitmq
目前三台机子都上传了对应得安装包[root@localhost ~]# ls anaconda-ks.cfg rabbitmq-server-3.7.10-1.el7.noarch.rpm erlang-21.3.8.21-1.el7.x86_64.rpm [root@localhost ~]# yum install -y erlang-21.3.8.21-1.el7.x86_64.rpm [root@localhost ~]# yum install -y rabbitmq-server-3.7.10-1.el7.noarch.rpm
启动rabbitmq
[root@localhost ~]#  systemctl daemon-reload
[root@localhost ~]# systemctl start rabbitmq-server
开启远程登录
[root@localhost ~]# cd /usr/share/doc/rabbitmq-server-3.7.10/
[root@localhost rabbitmq-server-3.7.10]# cp rabbitmq.config.example /etc/rabbitmq
[root@localhost rabbitmq-server-3.7.10]# cd /etc/rabbitmq/
[root@localhost rabbitmq]# ls
enabled_plugins  rabbitmq.config.example
[root@localhost rabbitmq]# mv rabbitmq.config.example  rabbitmq.config
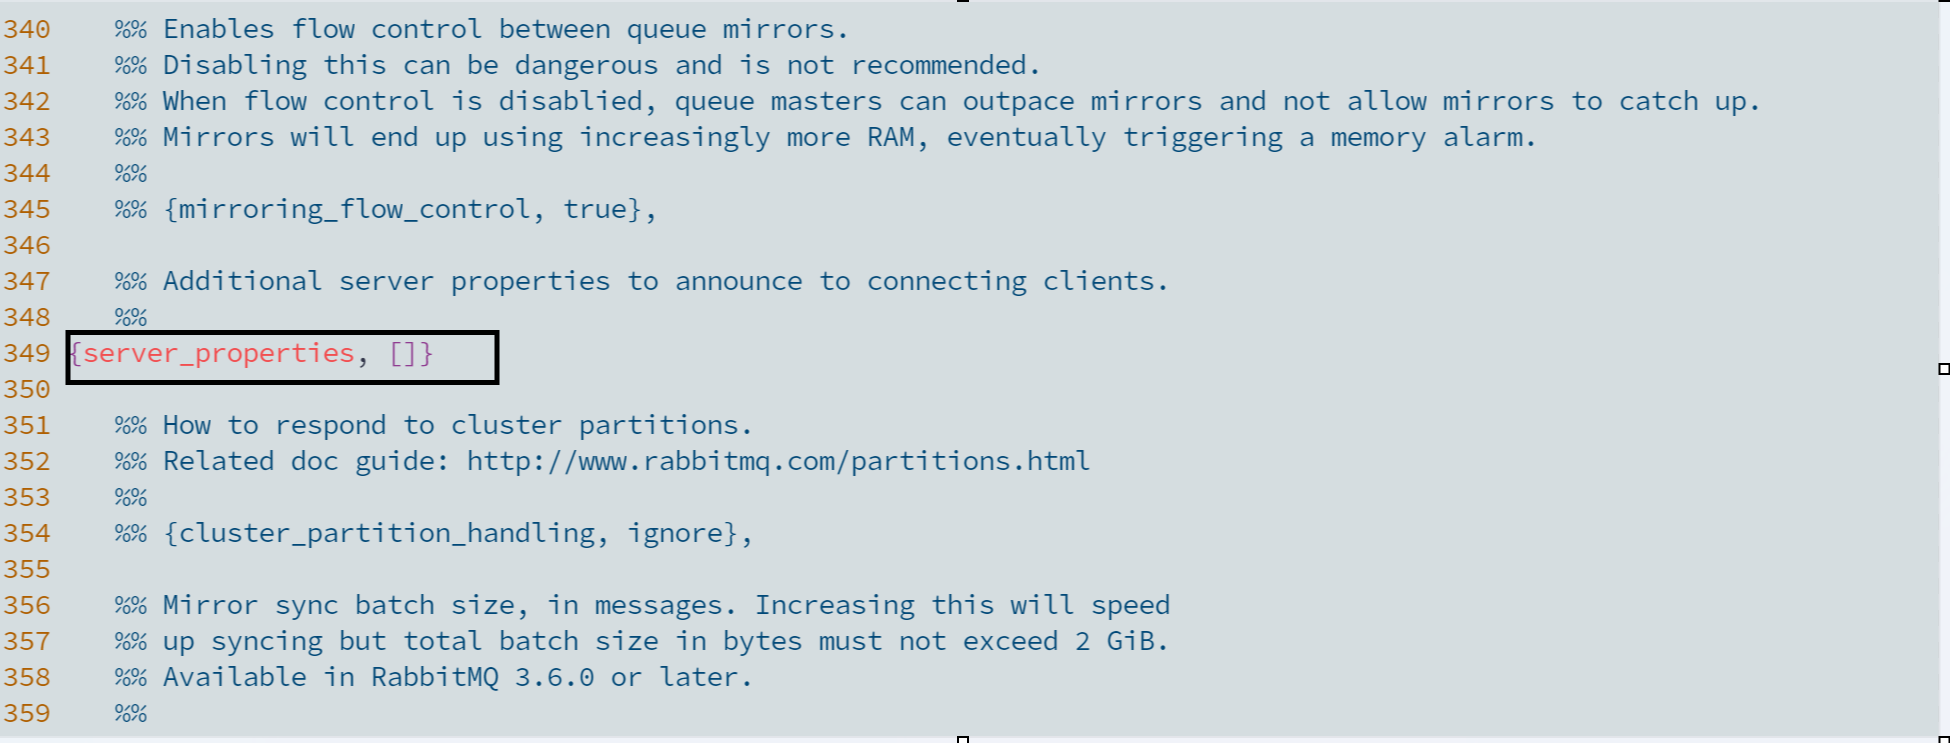
[root@localhost rabbitmq]# vim rabbitmq.config
修改下面配置文件的内容 第349行
# 开启rabbitmq的web访问界面:
[root@localhost ~]# rabbitmq-plugins enable rabbitmq_management
-
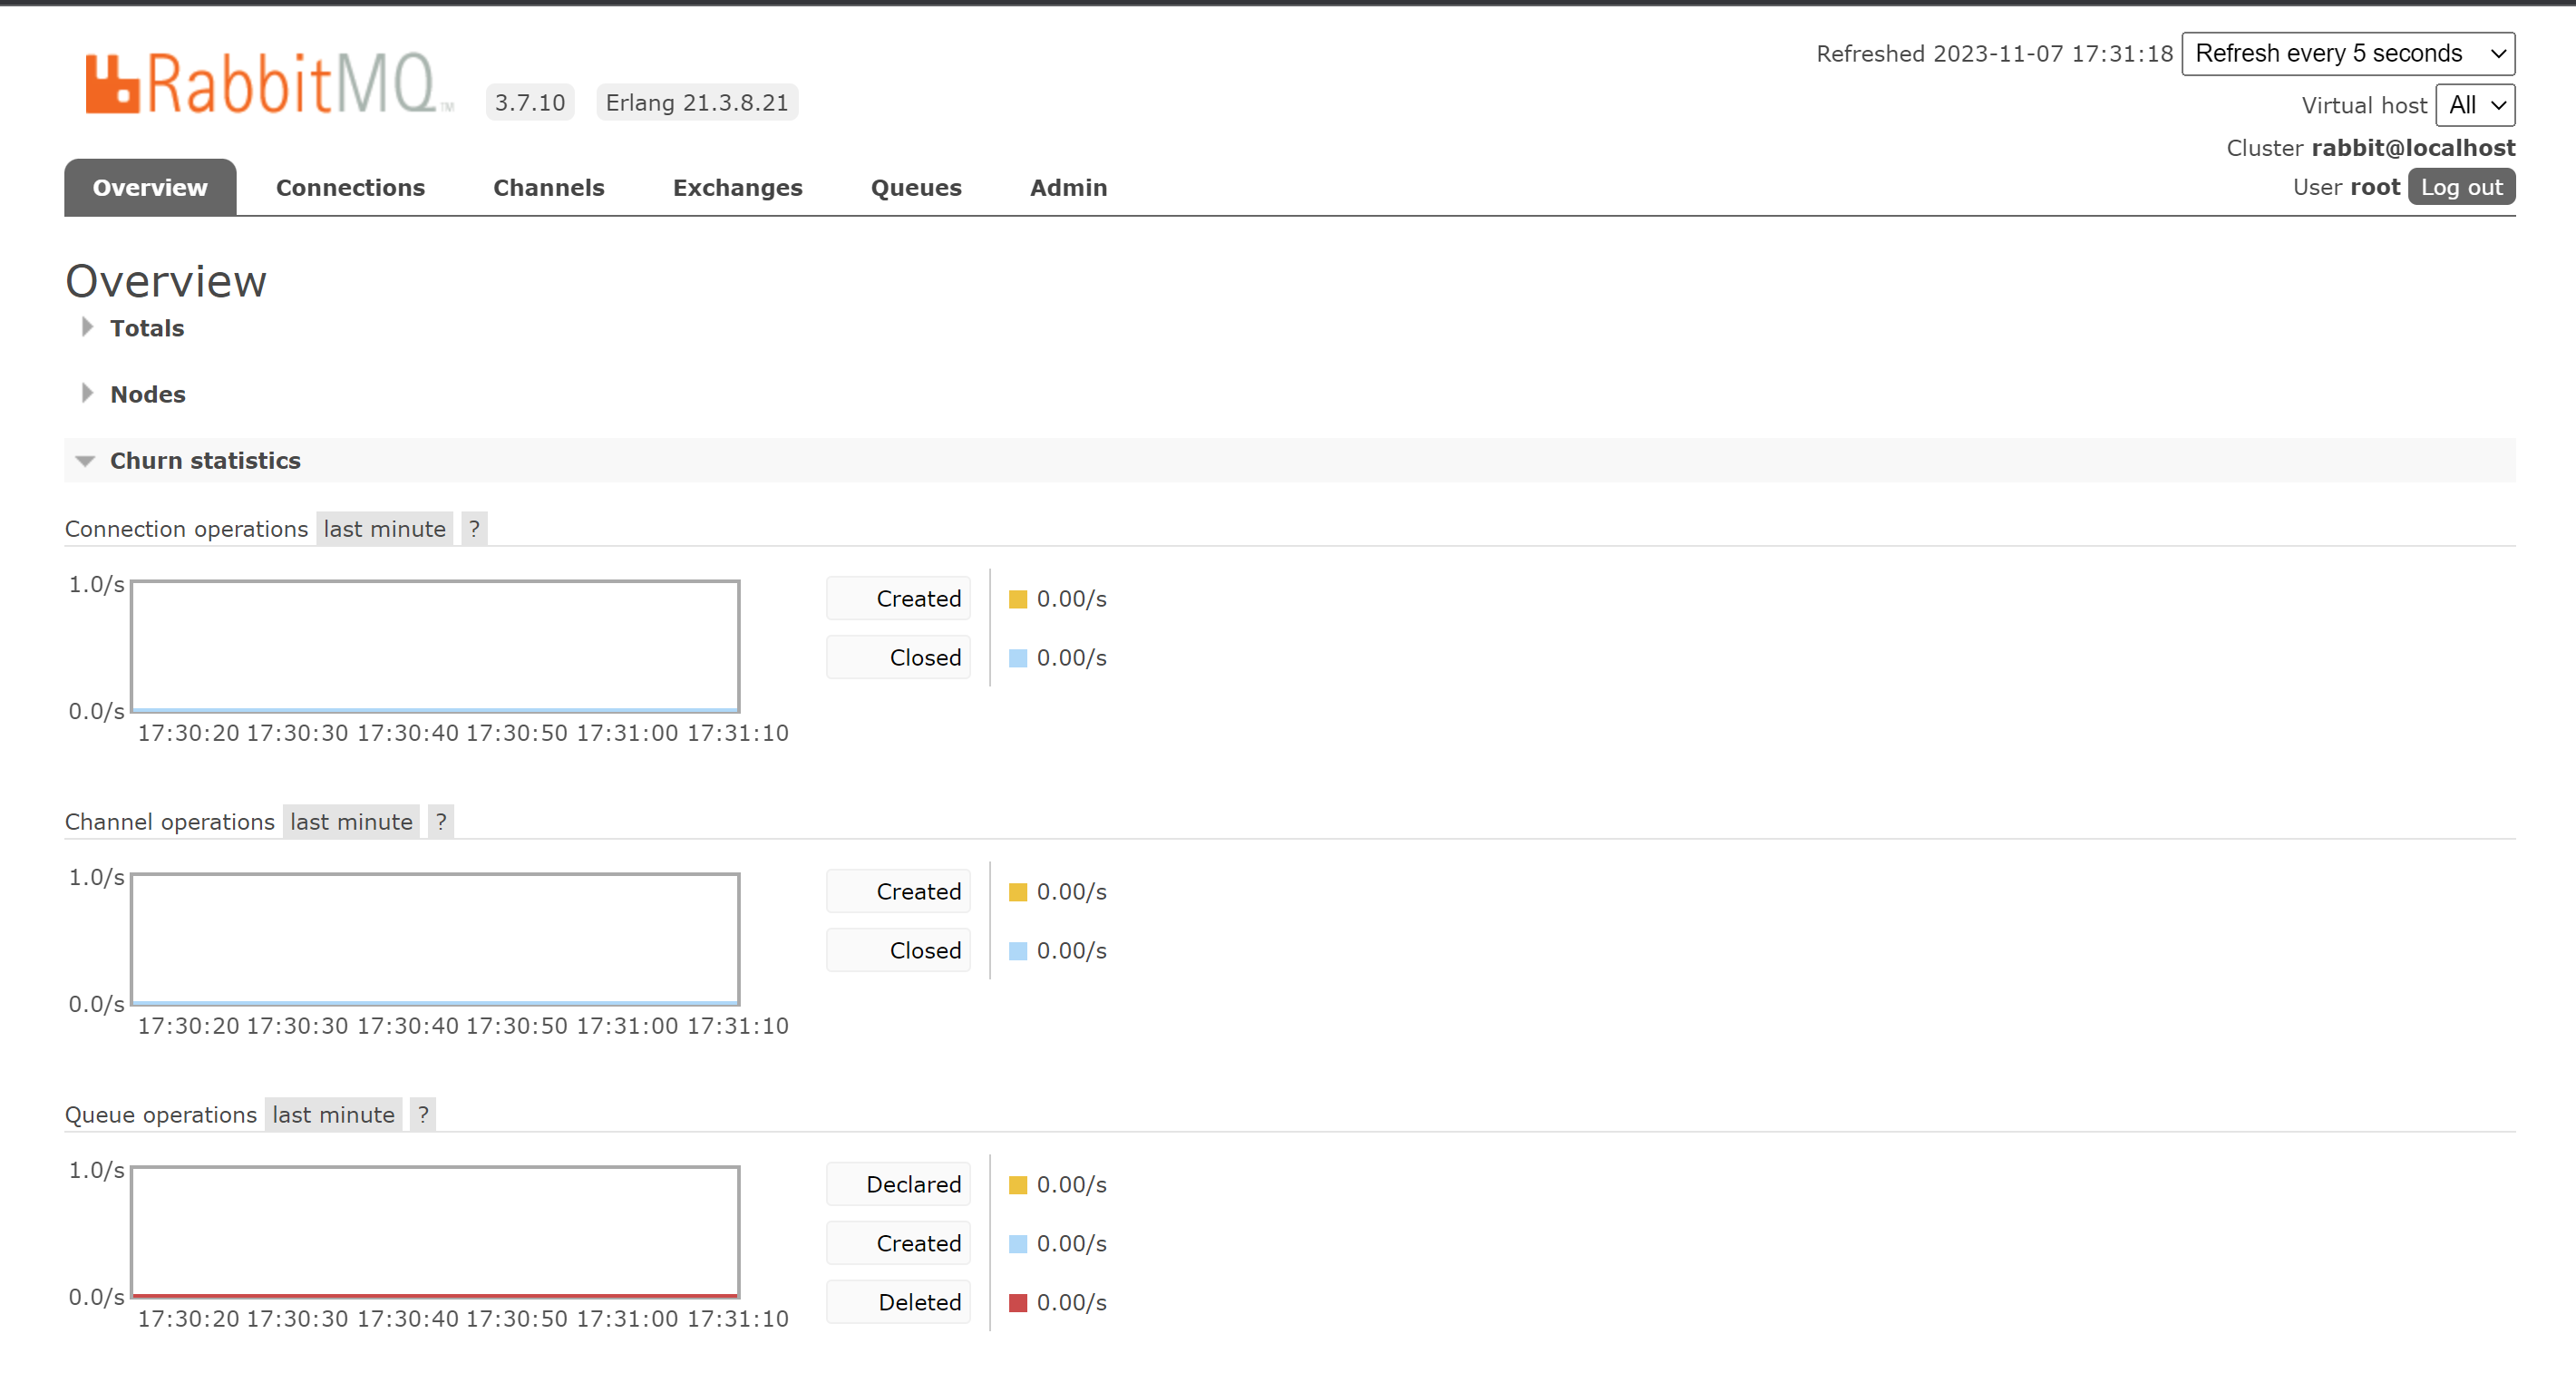
输入对应的ip即可以登录
有默认用户guest 密码也是guest
添加用户并且授权用户
[root@localhost ~]# rabbitmqctl add_user root 1
Adding user "root" ...
[root@localhost ~]# rabbitmqctl set_user_tags root administrator
Setting tags for user "root" to [administrator] ...
[root@localhost ~]# rabbitmqctl list_users
Listing users ...
user    tags
guest   [administrator]
root    [administrator]
[root@localhost ~]# rabbitmqctl set_permissions -p "/" root ".*" ".*" ".*"
Setting permissions for user "root" in vhost "/" ...
添加数据存放目录和日志存放目录
[root@localhost ~]# mkdir -p /data/rabbitmq/data
[root@localhost ~]# mkdir -p /data/rabbitmq/logs
[root@localhost ~]# chmod 777 -R /data/rabbitmq
[root@localhost ~]# chown rabbitmq.rabbitmq /data/ -R
创建配置文件:
[root@localhost ~]# vim /etc/rabbitmq/rabbitmq-env.conf
[root@localhost ~]# cat /etc/rabbitmq/rabbitmq-env.conf
RABBITMQ_MNESIA_BASE=/data/rabbitmq/data
RABBITMQ_LOG_BASE=/data/rabbitmq/logs
重启服务
[root@localhost ~]# systemctl restart rabbitmq-server
查看端口
[root@localhost ~]# ss -ntlp

4369 – erlang发现端口
5672 --程序连接端口
15672 – 管理界面ui端口
25672 – server间内部通信口
拷⻉erlang.cookie
[root@localhost ~]# cd /var/lib/rabbitmq/
# ⽤scp的⽅式将rabbitmq-1节点的.erlang.cookie的值复制到其他两个节点中。
[root@localhost rabbitmq]# scp .erlang.cookie 192.168.10.129:/var/lib/rabbitmq/
root@192.168.10.129's password:
.erlang.cookie                                                                                                       100%   20    14.6KB/s   00:00
[root@localhost rabbitmq]# scp .erlang.cookie 192.168.10.130:/var/lib/rabbitmq/
root@192.168.10.130's password:
.erlang.cookie
各节点是经由过程⼀个magic cookie来实现的,这个cookie存放在/var/lib/rabbitmq/.erlang.cookie中,⽂件是400的权限。所以必须保证各节点cookie⼀致,不然节点之间就⽆法通信.
(官方在介绍集群的文档中提到过.erlang.cookie 一般会存在这两个地址:第一个是home/.erlang.cookie;第二个地方就是/var/lib/rabbitmq/.erlang.cookie。如果我们使用解压缩方式安装部署的rabbitmq,那么这个文件会在{home}目录下,也就是$home/.erlang.cookie。如果我们使用rpm等安装包方式进行安装的,那么这个文件会在/var/lib/rabbitmq目录下。)
将mq-2、mq-3作为内存节点加⼊mq-1节点集群中
在mq-2、mq-3执⾏如下命令:
[root@localhost ~]# systemctl restart rabbitmq-server
[root@localhost ~]# rabbitmqctl stop_app  #停止节点
[root@localhost ~]# rabbitmqctl reset   #如果有数据需要重置,没有则不用
[root@localhost ~]# rabbitmqctl join_cluster --ram rabbit@rabbitmq-1  #添加到磁盘节点
Clustering node 'rabbit@rabbitmq-2' with 'rabbit@rabbitmq-1' ...
[root@localhost ~]# rabbitmqctl start_app  #启动节点
Starting node 'rabbit@rabbitmq-2' ...
======================================================================
[root@localhost ~]# systemctl restart rabbitmq-server
[root@localhost ~]# rabbitmqctl stop_app
[root@localhost ~]# rabbitmqctl reset
[root@localhost ~]# rabbitmqctl join_cluster --ram rabbit@rabbitmq-1
Clustering node 'rabbit@rabbitmq-3' with 'rabbit@rabbitmq-1' ...
[root@localhost ~]# rabbitmqctl start_app
Starting node 'rabbit@rabbitmq-3' ...(1)默认rabbitmq启动后是磁盘节点,在这个cluster命令下,mq-2和mq-3是内存节点,
mq-1是磁盘节点。
(2)如果要使mq-2、mq-3都是磁盘节点,去掉--ram参数即可。
(3)如果想要更改节点类型,可以使⽤命令rabbitmqctl change_cluster_node_type
disc(ram),前提是必须停掉rabbit应⽤
注:
#如果有需要使用磁盘节点加入集群[root@rabbitmq-2 ~]# rabbitmqctl join_cluster  rabbit@rabbitmq-1[root@rabbitmq-3 ~]# rabbitmqctl join_cluster  rabbit@rabbitmq-1
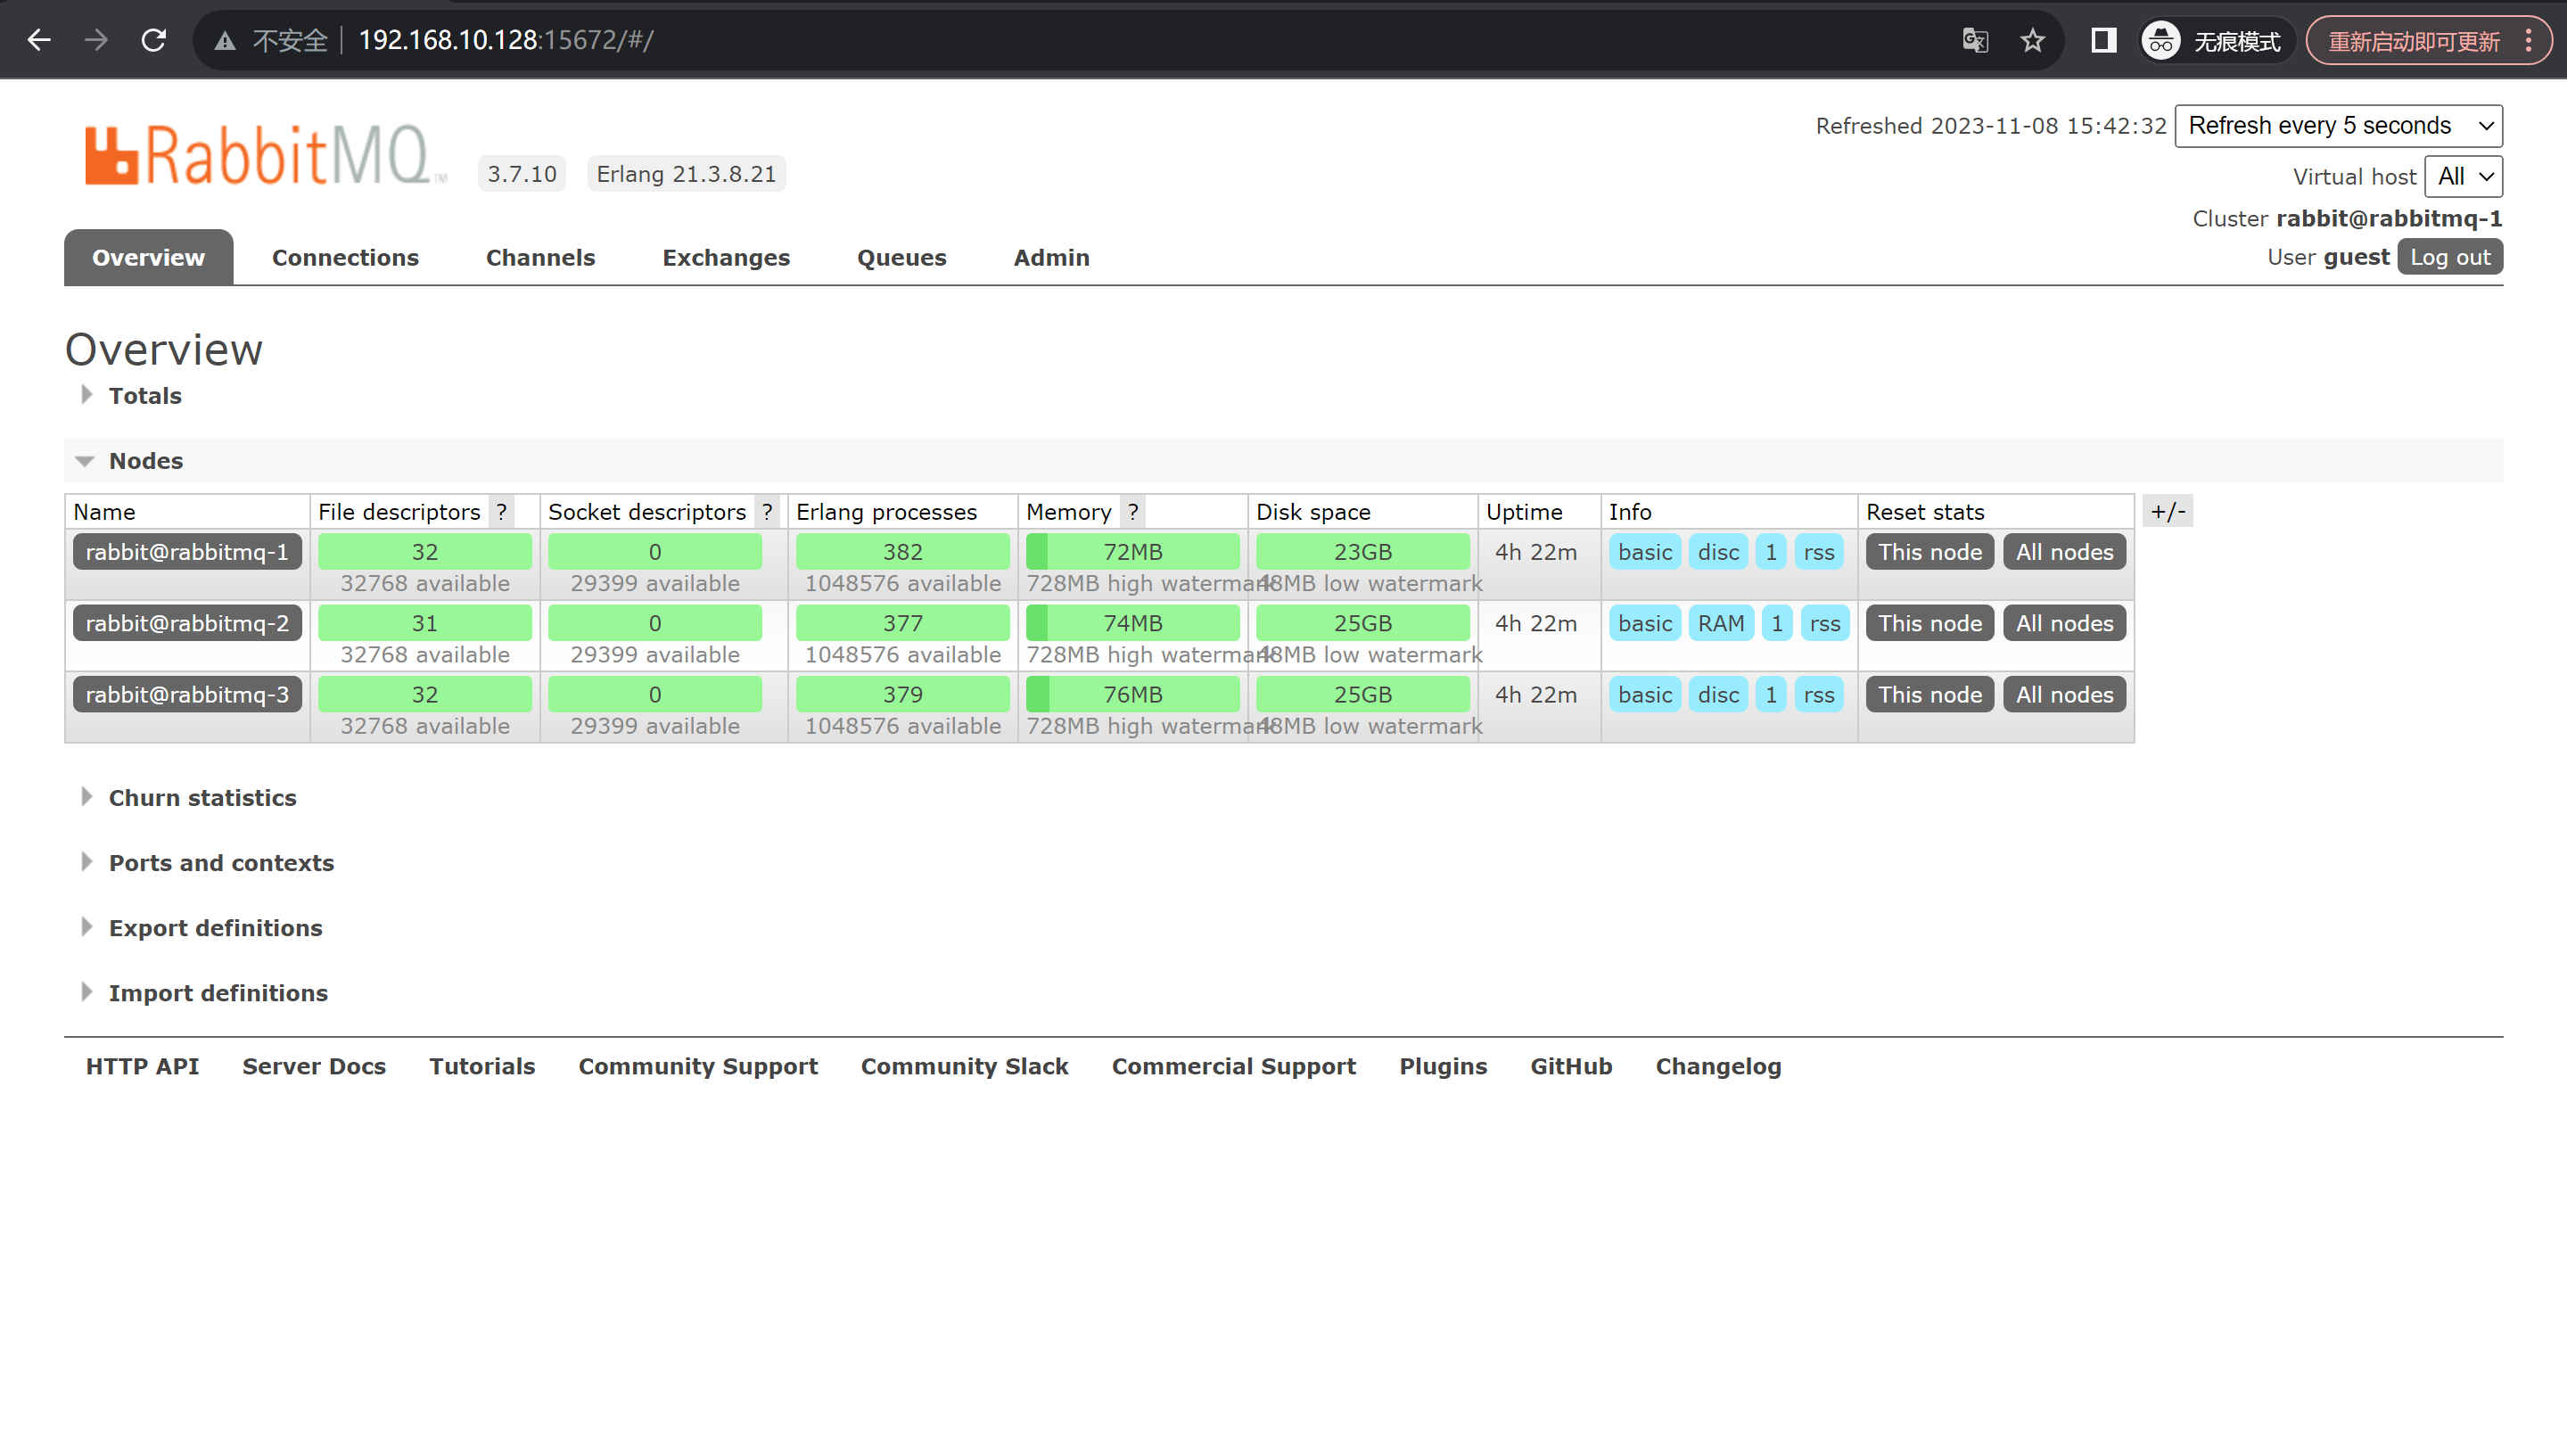
登录上去有上面这几个即就是添加成功了
查看集群状态
# 在任意一个上面即可查看
在 RabbitMQ 集群任意节点上执行 rabbitmqctl cluster_status来查看是否集群配置成功。
在mq-1磁盘节点上面查看
[root@localhost ~]# rabbitmqctl cluster_status

添加一个新的队列
- 添加队列
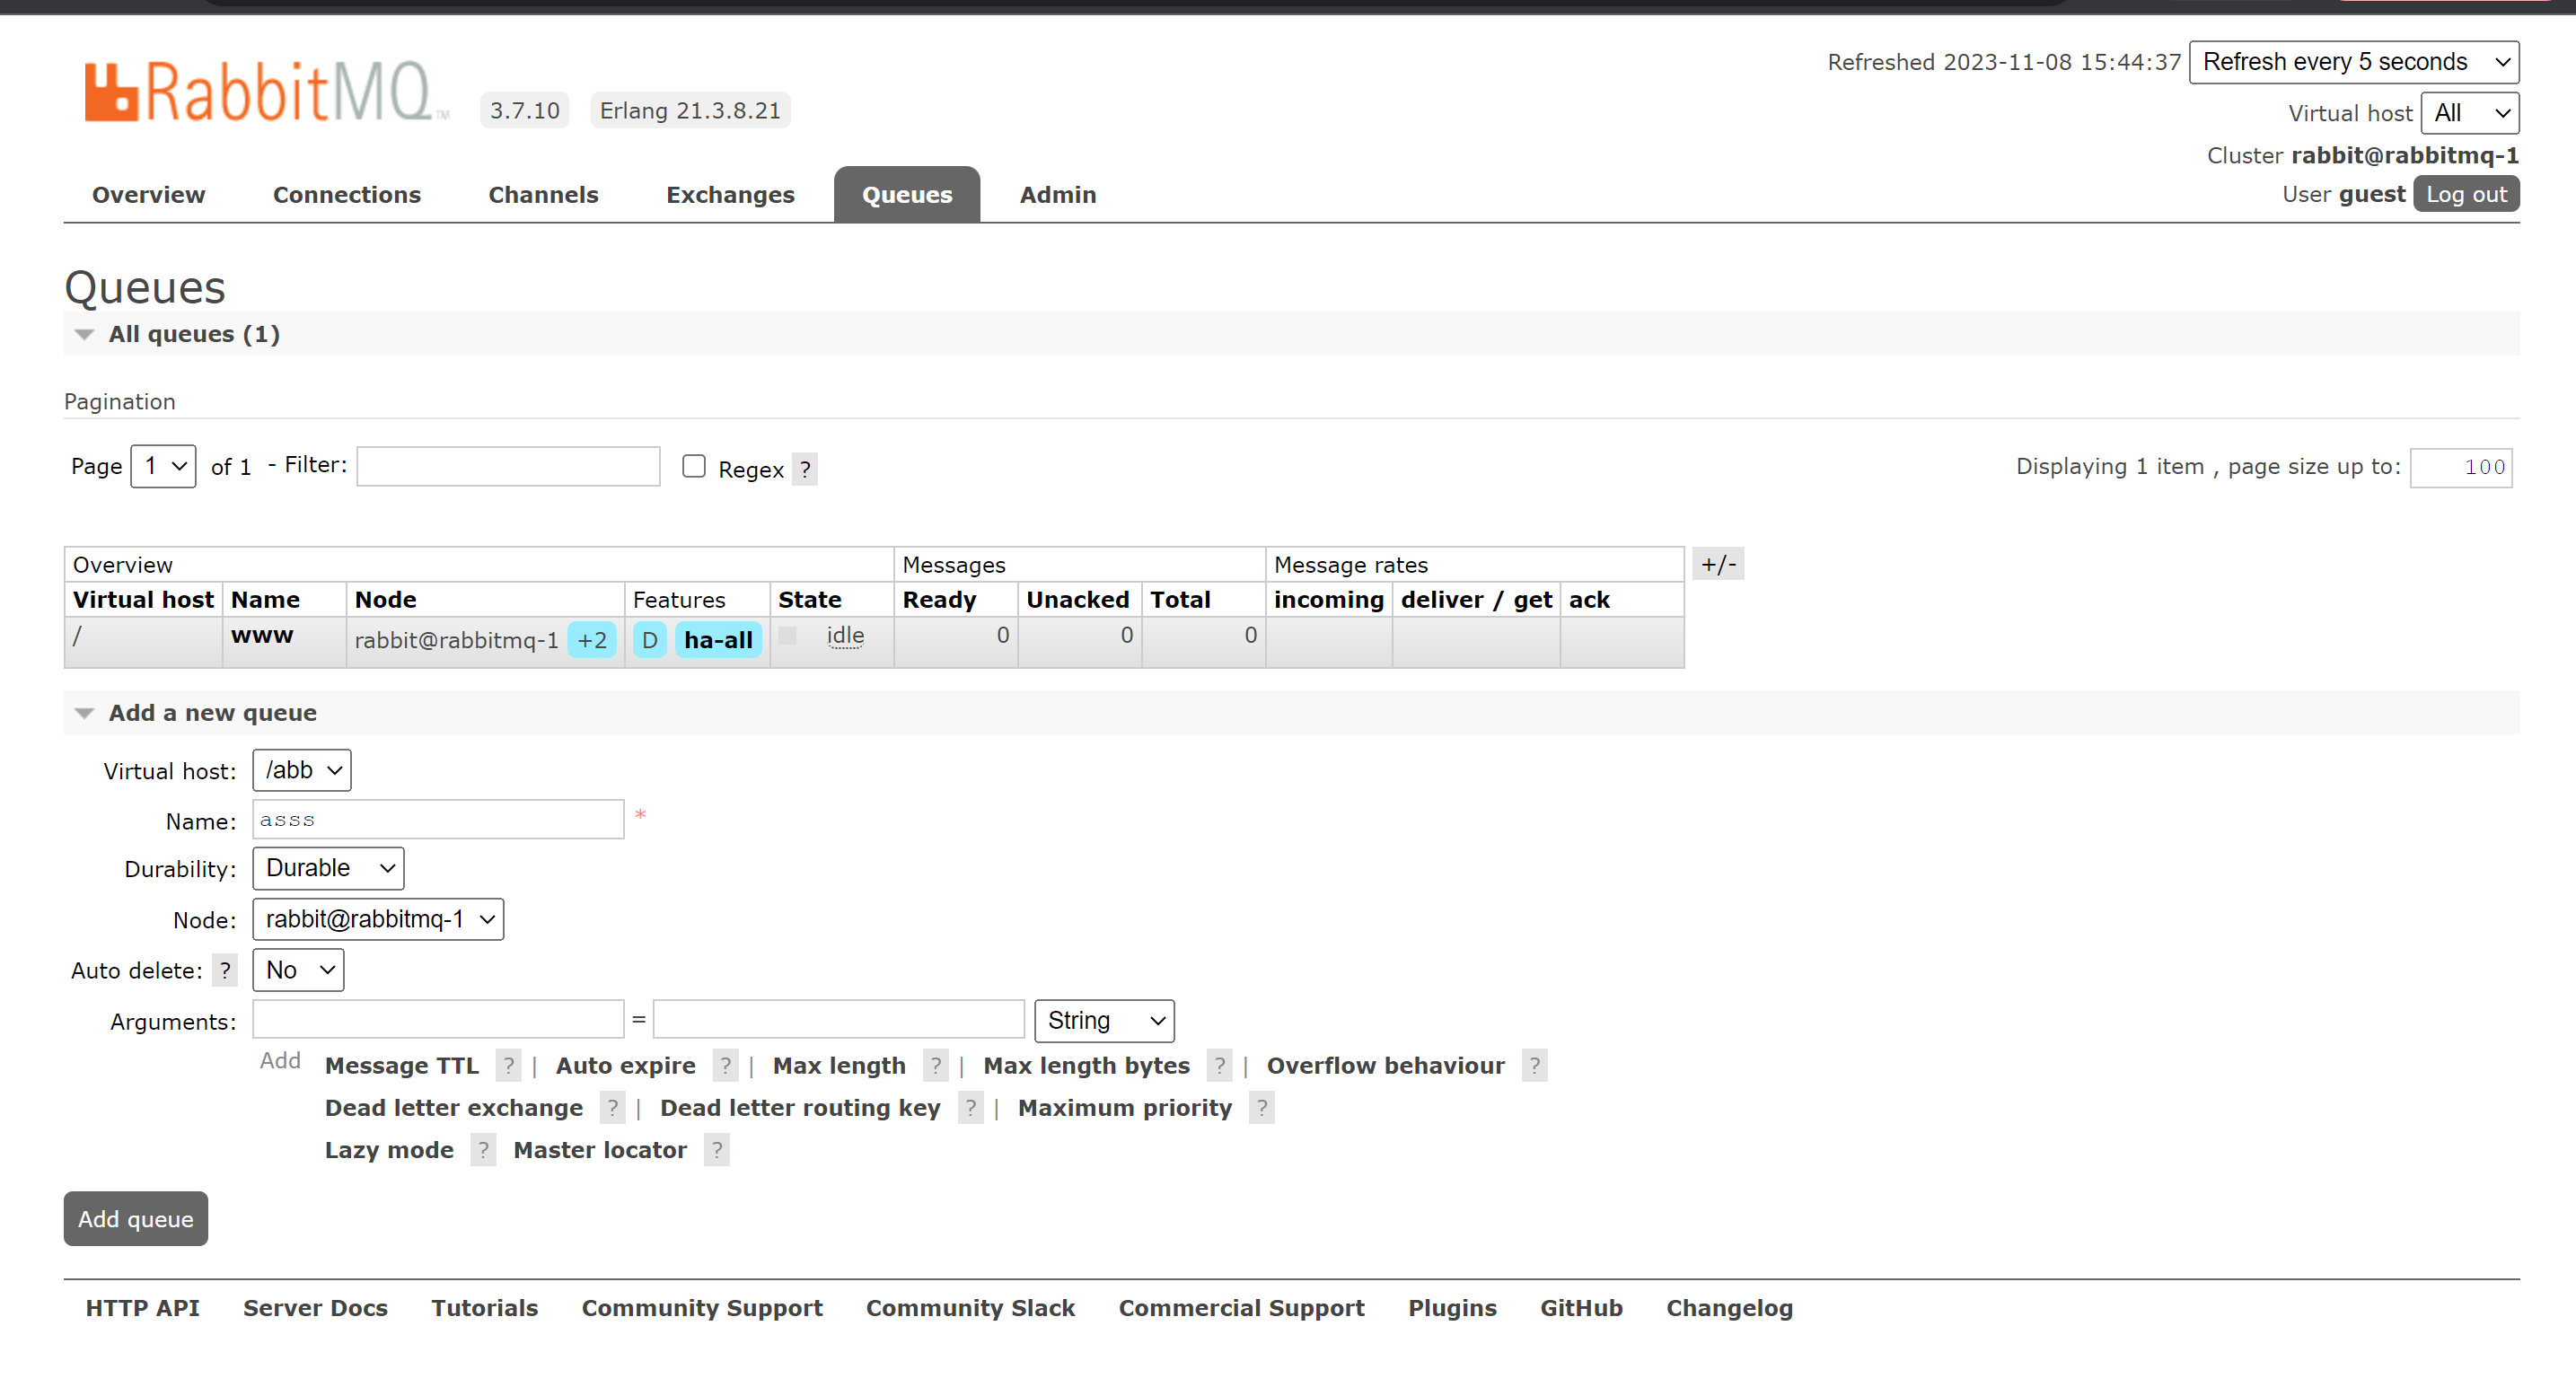
-
更改为集群可看
当前这个只有mq-1可用
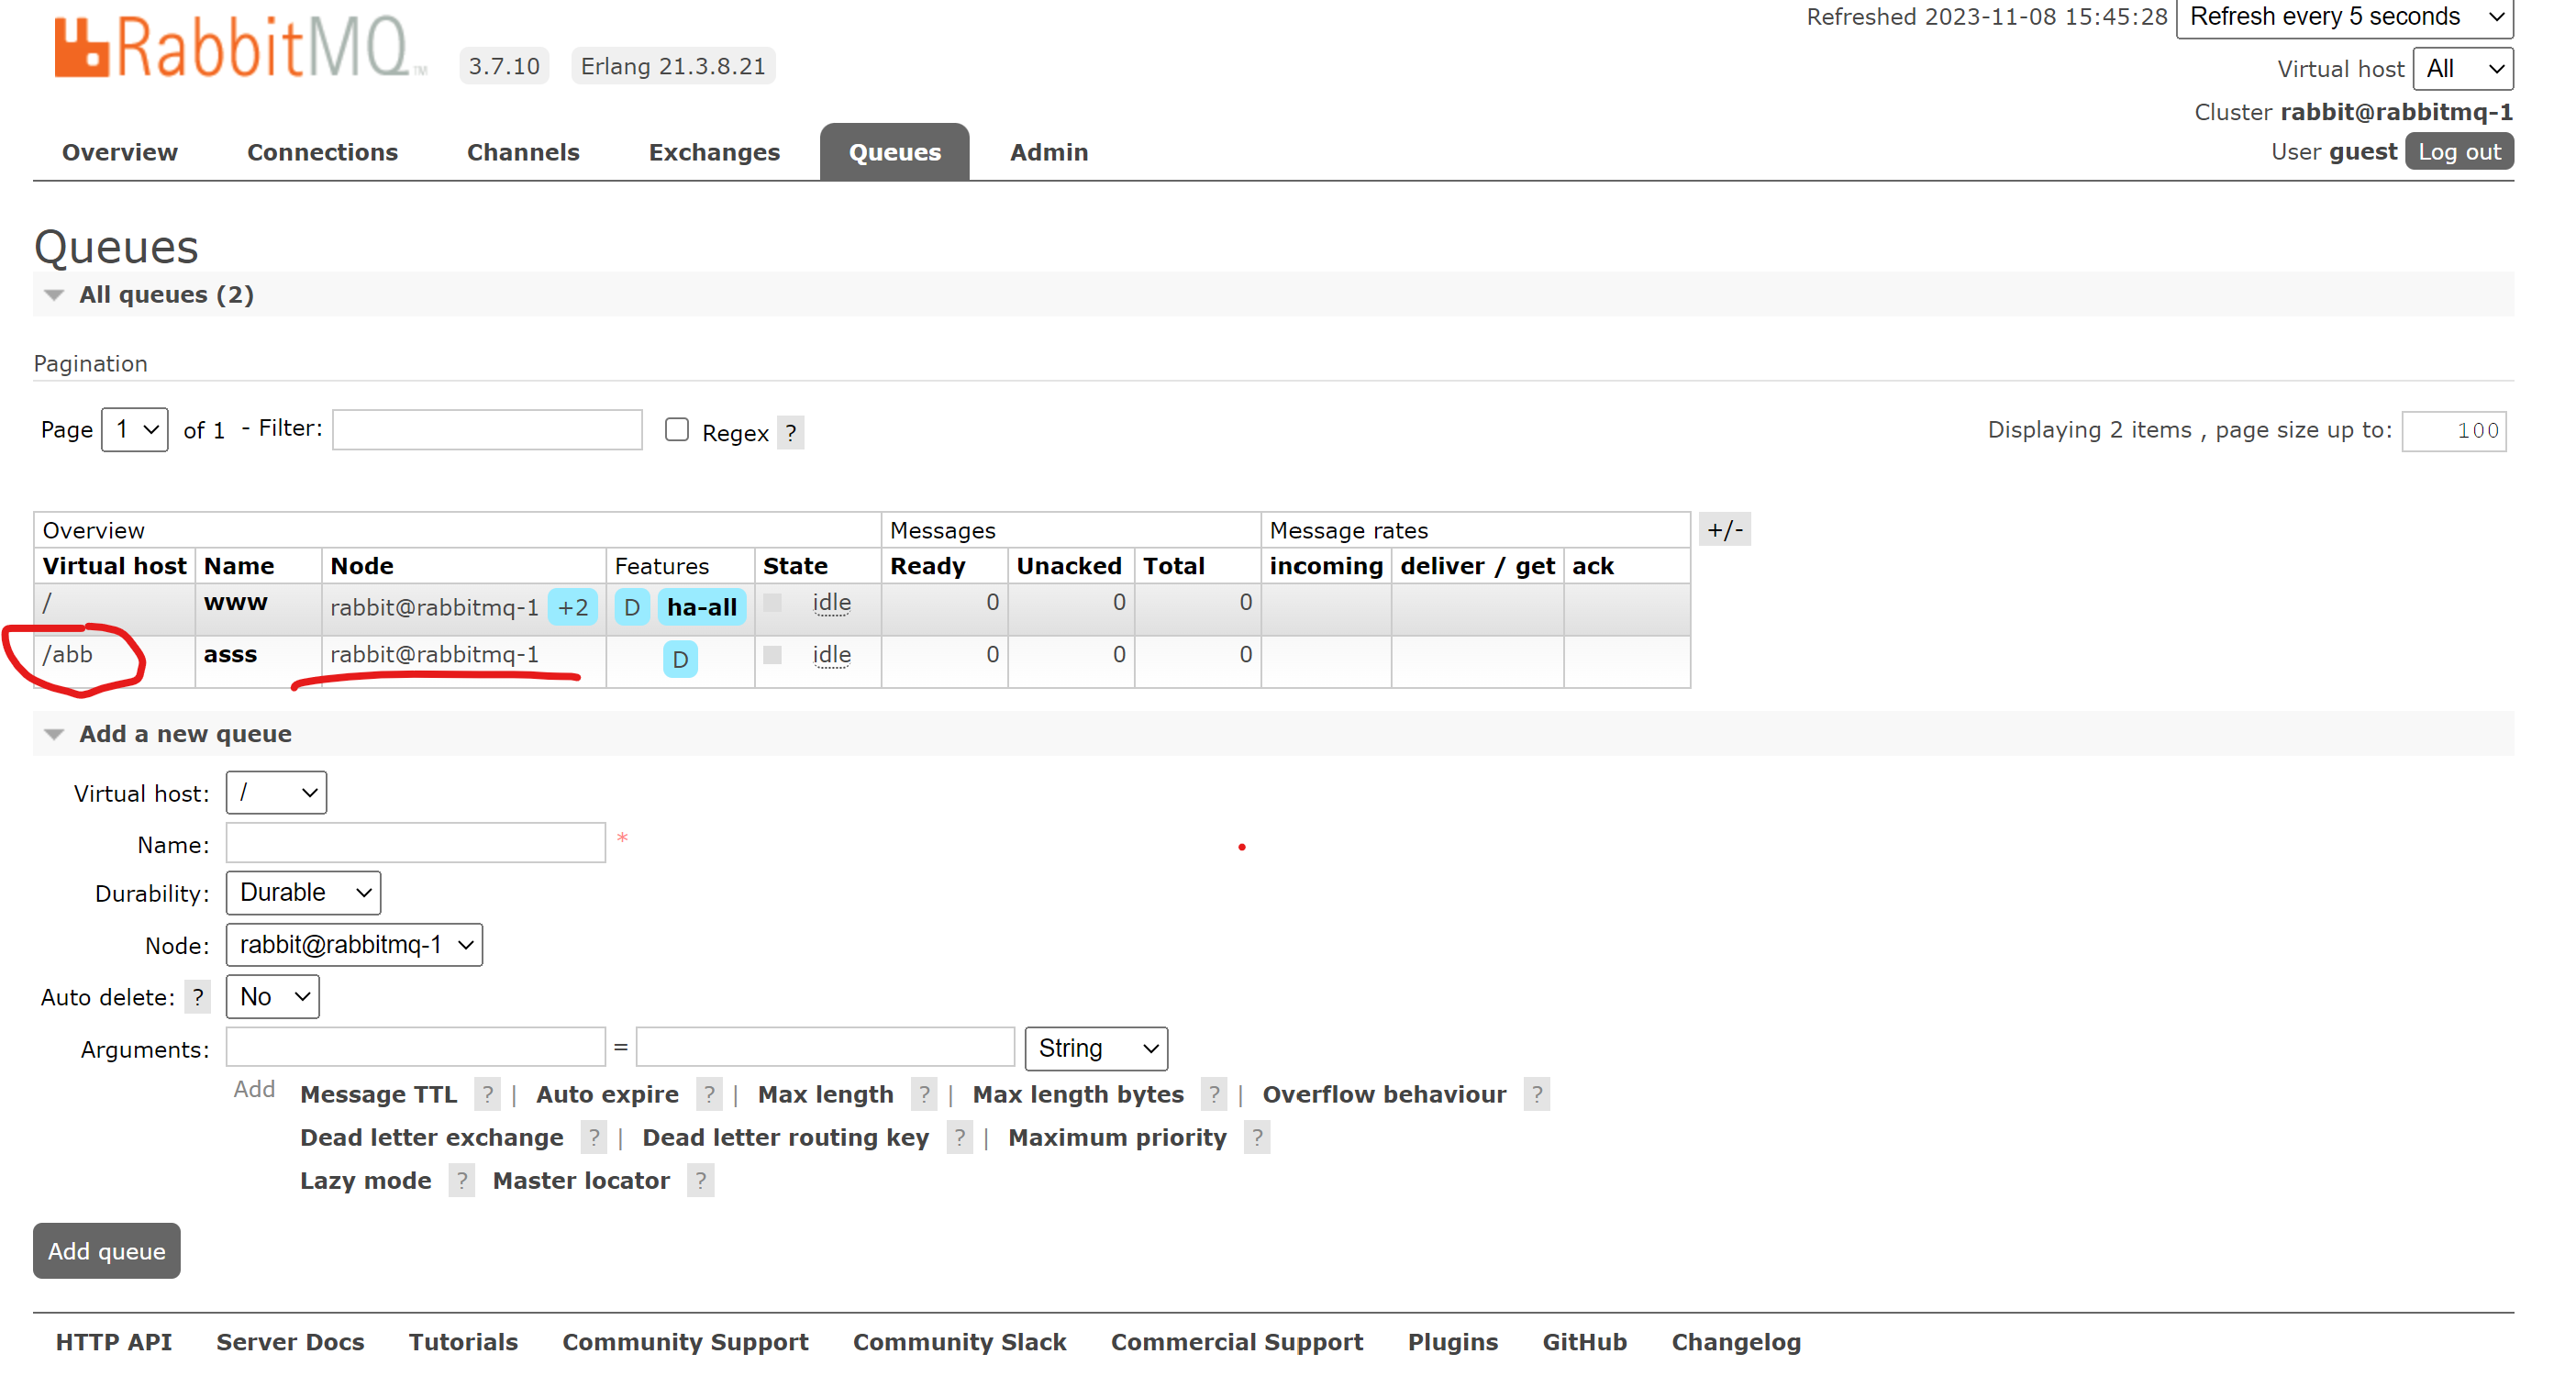
修改 修改完之后就跟上面得一样了
[root@localhost ~]# rabbitmqctl set_policy ha-all "^" '{"ha-mode":"all"}'
RabbitMq负载均衡配置-HAProxy
安装HAProxy
[root@localhost ~]# yum install haproxy
修改配置文件
[root@localhost ~]# vim /etc/haproxy/haproxy.cfg
ballog         127.0.0.1 local2chroot      /var/lib/haproxypidfile     /var/run/haproxy.pidmaxconn     4000user        haproxygroup       haproxynbproc      4daemon# turn on stats unix socketstats socket /var/lib/haproxy/stats
#---------------------------------------------------------------------
defaultsmode                    httplog                     globalretries                 3timeout connect         10stimeout client          1mtimeout server          1mtimeout check           10smaxconn                 2048
#---------------------------------------------------------------------
##监控查看本地状态#####
listen admin_statsbind *:88mode httpoption httplogoption httpcloselog 127.0.0.1 local0 errstats uri  /haproxystats auth root:1stats refresh 30s
####################################
###反代监控
frontend serverbind *:5670log globalmode tcp#option forwardfordefault_backend rabbitmqmaxconn 3
backend rabbitmqmode        tcplog         globalbalance     roundrobinserver      rabbitmq1 192.168.10.128:5672 check inter 2000s rise 2 fall 3server      rabbitmq2 192.168.10.129:5672 check inter 2000s rise 2 fall 3server      rabbitmq3 192.168.10.130:5672 check inter 2000s rise 2 fall 3[root@localhost ~]# systemctl start haproxy
[root@localhost ~]# ss -ntlp | grep 88
LISTEN     0      128          *:88                       *:*                   users:(("haproxy",pid=17070,fd=5),("haproxy",pid=17069,fd=5),("haproxy",pid=17068,fd=5),("haproxy",pid=17067,fd=5))
登录haproxy
192.168.10.128:88/haproxy
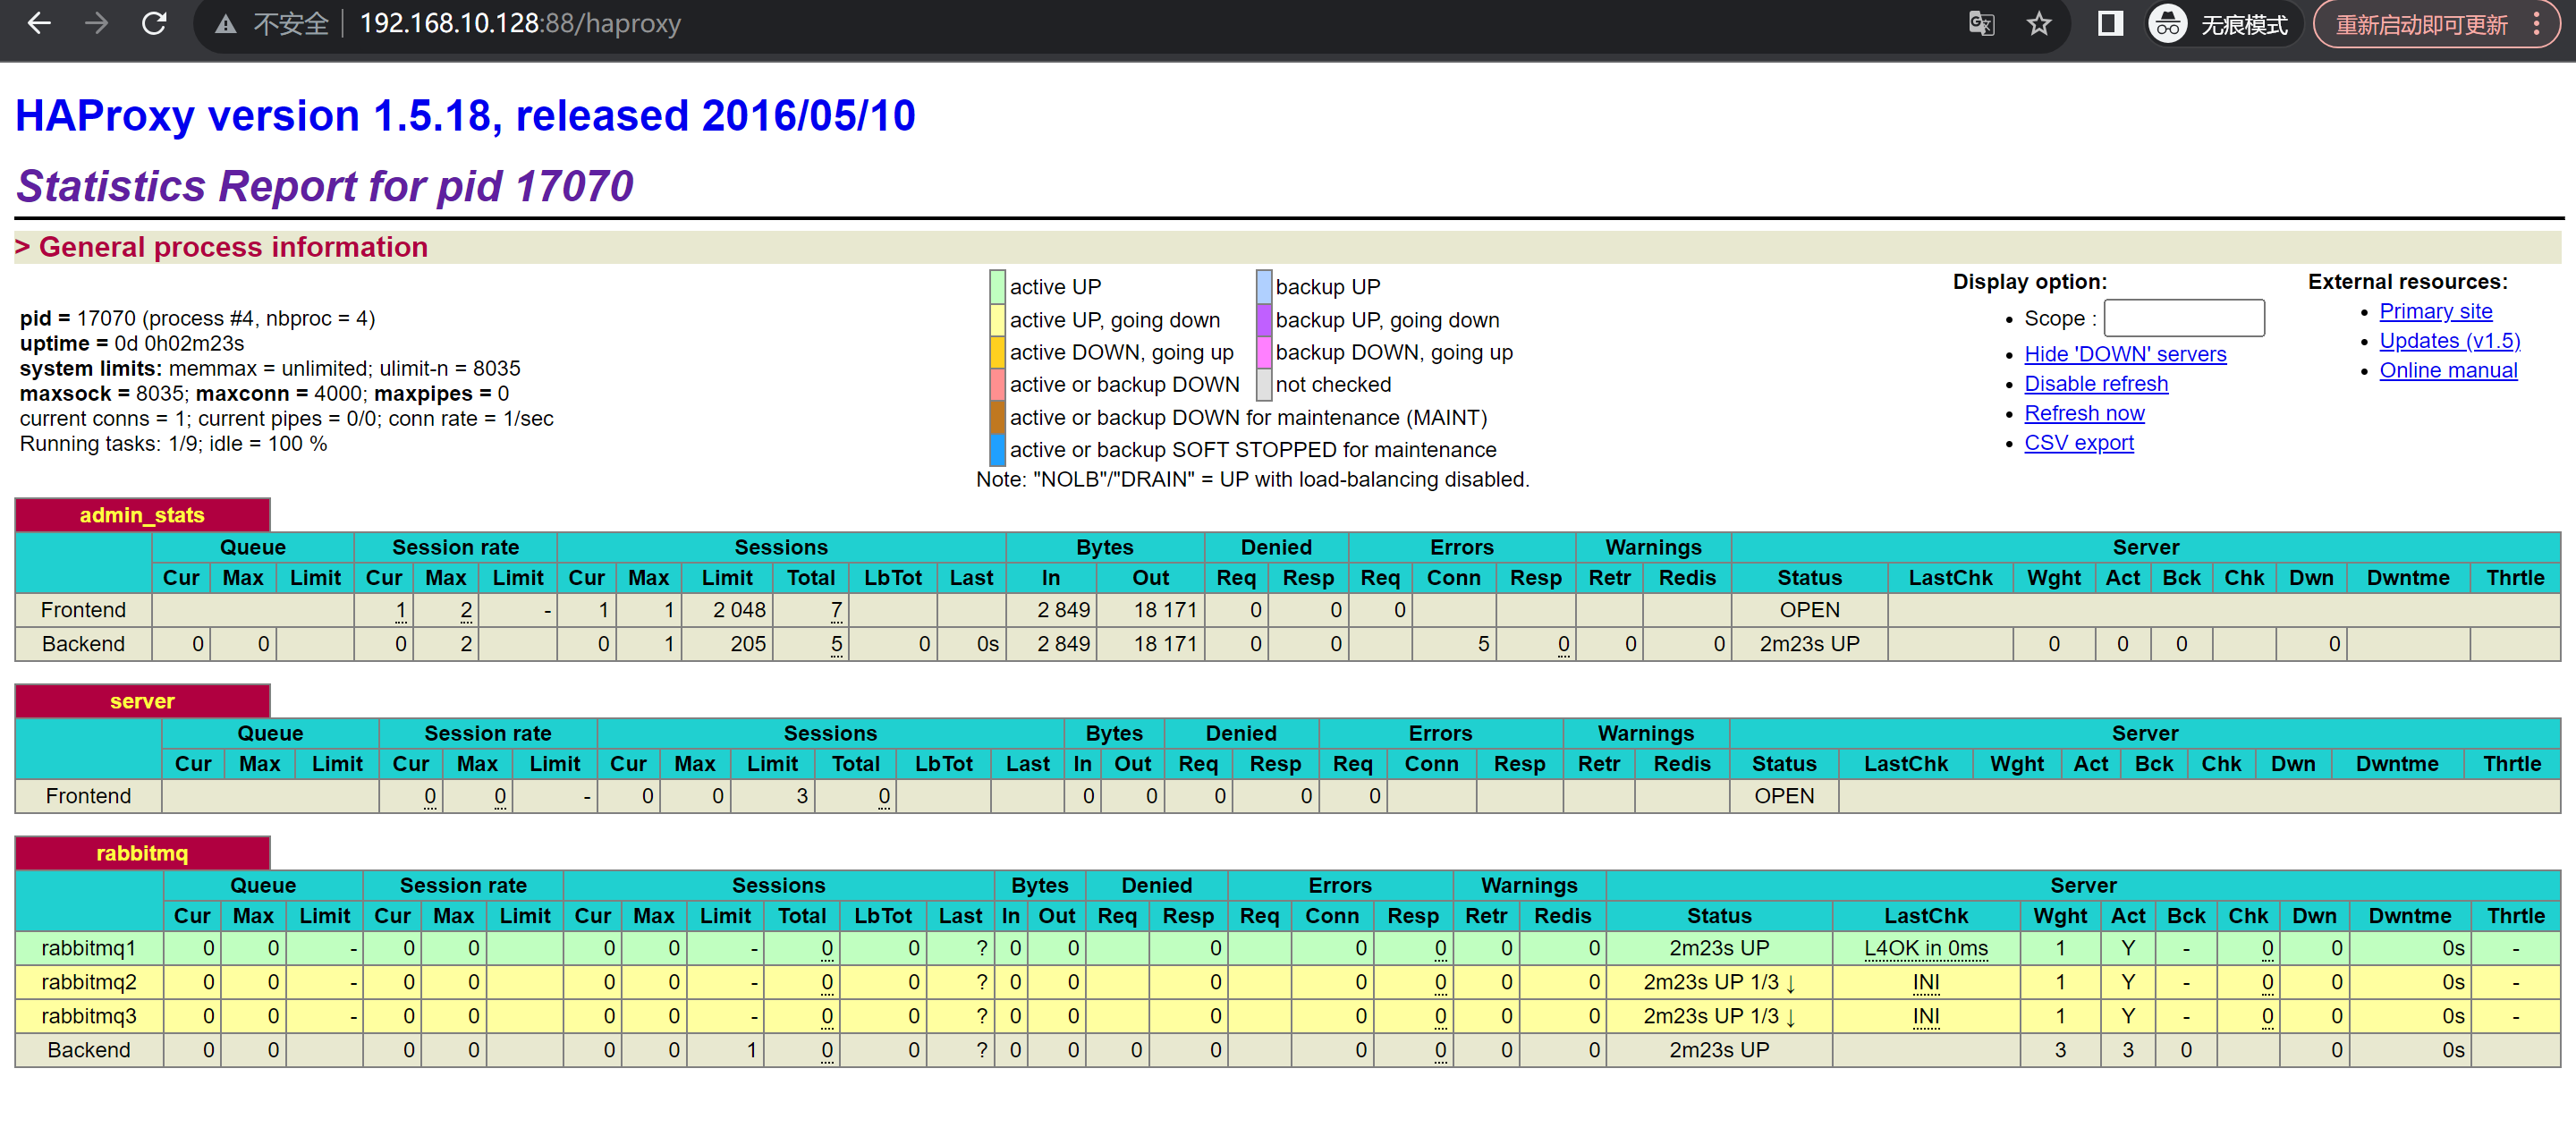
mysql授权root用户远程登录
[root@localhost ~]# mysql -uroot -p'Cjb@1234'
mysql: [Warning] Using a password on the command line interface can be insecure.
Welcome to the MySQL monitor.  Commands end with ; or \g.
Your MySQL connection id is 5
Server version: 5.7.42 MySQL Community Server (GPL)Copyright (c) 2000, 2023, Oracle and/or its affiliates.Oracle is a registered trademark of Oracle Corporation and/or its
affiliates. Other names may be trademarks of their respective
owners.Type 'help;' or '\h' for help. Type '\c' to clear the current input statement.mysql> grant all on *.* to 'root'@'%' identified by 'Cjb@1234';
Query OK, 0 rows affected, 1 warning (0.00 sec)mysql> \q
Bye


