第1关:直线光栅化-DDA画线算法
任务描述
1.本关任务
(1)根据直线DDA算法补全line函数,其中直线斜率0<k<1; (2)当直线方程恰好经过P(x,y)和T(x,y+1)的中点M时,统一选取直线上方的T点为显示的像素点。
2.输入
(1)直线两端点坐标:(13, 20)和(180,140); (2)直线颜色为白色。
3.输出
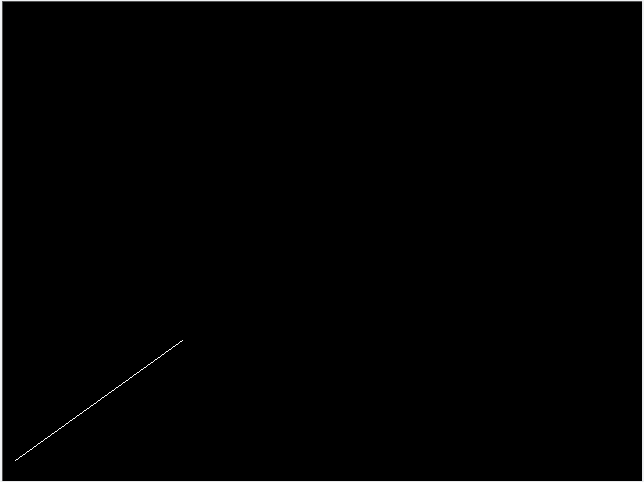
程序运行结果为一条直线,具体结果如下图所示:
整体代码如下:
#include "tgaimage.h"const TGAColor white = TGAColor(255, 255, 255, 255);
const TGAColor red = TGAColor(255, 0, 0, 255);void line(int x0, int y0, int x1, int y1, TGAImage &image, TGAColor color)
{// Please add the code here/********** Begin ********/int x;float y, k;k = (float)(y1 - y0) / (float)(x1 - x0);y = y0;for (x = x0;x <= x1;x++){image.set(x, int(y + 0.5f),color);y = y + k;}/********** End *********/
}int main(int argc, char** argv)
{TGAImage image(640,480, TGAImage::RGB);line(13, 20, 180, 140, image, white);image.flip_vertically(); // i want to have the origin at the left bottom corner of the imageimage.write_tga_file("../img_step1/test.tga");return 0;
}
为防止一些刘亦菲和吴彦祖们看不出来,那小Mo就把更加简洁的代码放到下面啦
(有木有很贴心,还不给小Mo点个关注鼓励一下🥰)
(begin和end之间的代码):
代码段一:
/********** Begin ********/
int x;
float y, k;
k = (float)(y1 - y0) / (float)(x1 - x0);
y = y0;
for (x = x0;x <= x1;x++)
{
image.set(x, int(y + 0.5f),color);
y = y + k;
}
/********** End *********/
第2关:直线光栅化-中点画线算法
任务描述
1.本关任务
(1)根据直线中点画线算法补全line函数,其中直线斜率0<k<1,并将main函数中的line函数参数补充完整; (2)当直线方程恰好经过P(x,y)和T(x,y+1)的中点M时,统一选取直线上方的T点为显示的像素点。
2.输入
(1)直线两端点坐标:(100, 100)和(520,300); (2)直线颜色为红色。
3.输出
程序运行结果为一条直线,具体结果如下图所示

整体代码如下:
#include "tgaimage.h"const TGAColor white = TGAColor(255, 255, 255, 255);
const TGAColor red = TGAColor(255, 0, 0, 255);void line(int x1, int y1, int xn, int yn, TGAImage &image, TGAColor color)
{// Please add the code here/********** Begin ********/int dx,dy,dt,db,d,x,y;dx = xn - x1;dy = yn - y1;d = dx - 2*dy;dt = 2*dx - 2*dy;db = -2*dy;x = x1;y = y1;image.set(x,y,color);while (x < xn){if (d <= 0){    x++;y++;d += dt;}else{x++;d += db;}image.set(x,y,color);}/********** End *********/
}int main(int argc, char** argv)
{TGAImage image(640,480, TGAImage::RGB);// Please add the code here/********** Begin ********/line( 100, 100 , 520 , 300 , image, red );/********** End *********/image.flip_vertically(); // i want to have the origin at the left bottom corner of the imageimage.write_tga_file("../img_step4/test.tga");return 0;
}
按照小Mo惯例,还是把需要填写的代码段po出来喽~
代码段一:
/********** Begin ********/
int dx,dy,dt,db,d,x,y;
dx = xn - x1;
dy = yn - y1;
d = dx - 2*dy;
dt = 2*dx - 2*dy;
db = -2*dy;
x = x1;y = y1;
image.set(x,y,color);
while (x < xn)
{
if (d <= 0)
{ x++;
y++;
d += dt;
}
else
{
x++;
d += db;
}
image.set(x,y,color);
}
/********** End *********/
代码段二:
/********** Begin ********/
line( 100, 100 , 520 , 300 , image, red );
/********** End *********/
第3关:直线光栅化-Bresenham画线算法
任务描述:
1.本关任务
(1)根据直线Bresenham算法补全line函数,其中直线斜率0<k<1,并将main函数中的line函数参数补充完整; (2)当直线方程恰好经过P(x,y)和T(x,y+1)的中点M时,统一选取直线上方的T点为显示的像素点。
2.输入
(1)直线两端点坐标:(20, 20)和(180,140); (2)直线颜色为白色。
3.输出
程序运行结果为一条直线,具体结果如下图所示:
整体代码如下:
#include "tgaimage.h"const TGAColor white = TGAColor(255, 255, 255, 255);
const TGAColor red = TGAColor(255, 0, 0, 255);void line(int x0, int y0, int x1, int y1, TGAImage &image, TGAColor color)
{// Please add the code here/********** Begin ********/int dx = x1 - x0;int dy = y1 - y0;int y = y0;int d = -dx;for(int x = x0;x <=x1;x++){image.set(x,y,color);d = d + 2*dy;if(d >= 0){y++;d = d - 2*dx;}}/********** End *********/
}int main(int argc, char** argv)
{TGAImage image(640,480, TGAImage::RGB);// Please add the code here/********** Begin ********/line( 20, 20 , 180 , 140 , image, white  );/********** End *********/image.flip_vertically(); // i want to have the origin at the left bottom corner of the imageimage.write_tga_file("../img_step2/test.tga");return 0;
}
同样,小Mo还是会把需要填写的代码段po出来哒~
代码段一:
/********** Begin ********/
int dx = x1 - x0;
int dy = y1 - y0;
int y = y0;
int d = -dx;
for(int x = x0;x <=x1;x++)
{
image.set(x,y,color);
d = d + 2*dy;
if(d >= 0)
{
y++;
d = d - 2*dx;
}
}
/********** End *********/
代码段二:
/********** Begin ********/
line( 20, 20 , 180 , 140 , image, white );
/********** End **********/
第4关:直线光栅化-任意斜率的Bresenham画线算法
任务描述:
1.本关任务
(1)根据直线Bresenham算法补全line函数以绘制白色直线,其中直线斜率为任意情况。 (2)当直线方程恰好经过P(x,y)和T(x,y+1)的中点M时,统一选取直线上方的T点为显示的像素点。
2.输入
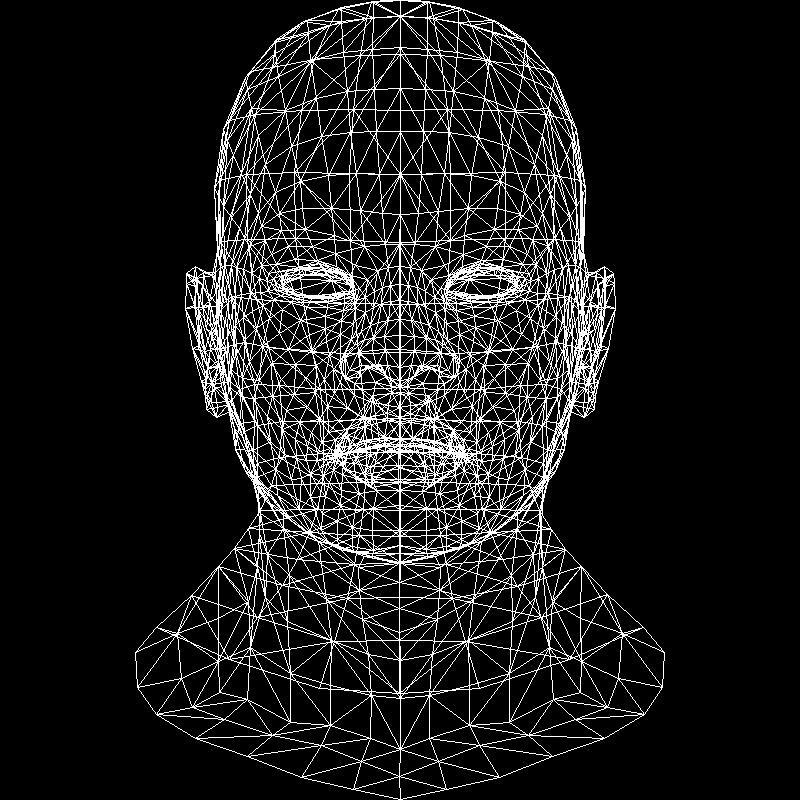
代码将自动输入一个OBJ三维人头模型,具体模型如下图:

3.输出
若编写的任意斜率的Bresenham画线算法代码正确,则程序会将模型转换为线条图片,具体结果如下图所示:
整体代码如下:
#include "tgaimage.h"
#include <stdio.h>
#include <stdlib.h>
#include <vector>
#include "model.h"
#include "geometry.h"const TGAColor white = TGAColor(255, 255, 255, 255);
const TGAColor red = TGAColor(255, 0, 0, 255);
Model *model = NULL;
const int width = 800;
const int height = 800;void line(int x0, int y0, int x1, int y1, TGAImage& image, TGAColor color)
{// Please add the code here/********** Begin ********/bool steep = false;if (abs(x0 - x1) < abs(y0 - y1)){std::swap(x0,y0);std::swap(x1,y1);steep = true;}if (x0 > x1){std::swap(x0,x1);std::swap(y0,y1);}int dx = x1 - x0;int dy = abs(y1 - y0);int y = y0;int d = -dx;for(int x = x0;x <= x1;x++){if(steep)image.set(y,x,color);elseimage.set(x,y,color);d = d + 2*dy;if(d >= 0){y += (y1 > y0 ? 1:-1);d = d - 2*dx;}}/********** End *********/
}int main(int argc, char** argv)
{model = new Model("african_head.obj");TGAImage image(width, height, TGAImage::RGB);for (int i = 0; i < model->nfaces(); i++) {std::vector<int> face = model->face(i);for (int j = 0; j < 3; j++) {Vec3f v0 = model->vert(face[j]);Vec3f v1 = model->vert(face[(j + 1) % 3]);int x0 = (v0.x + 1.)*width / 2.;int y0 = (v0.y + 1.)*height / 2.;int x1 = (v1.x + 1.)*width / 2.;int y1 = (v1.y + 1.)*height / 2.;line(x0, y0, x1, y1, image, white);}}image.flip_vertically(); // i want to have the origin at the left bottom corner of the imageimage.write_tga_file("../img_step3/test.tga");delete model;return 0;
}
同样,小Mo还是会把需要填写的代码段po出来哒~
代码段一:
/********** Begin ********/
bool steep = false;
if (abs(x0 - x1) < abs(y0 - y1))
{
std::swap(x0,y0);
std::swap(x1,y1);
steep = true;
}
if (x0 > x1)
{
std::swap(x0,x1);
std::swap(y0,y1);
}
int dx = x1 - x0;
int dy = abs(y1 - y0);
int y = y0;
int d = -dx;
for(int x = x0;x <= x1;x++)
{
if(steep)
image.set(y,x,color);
else
image.set(x,y,color);
d = d + 2*dy;
if(d >= 0)
{
y += (y1 > y0 ? 1:-1);
d = d - 2*dx;
}
}
/********** End *********/